
While Gilgamesh may have upstaged Nero for this year’s Festival, the Exhibition Quests are still here and are going strong.
This will be a guide of sorts for 2018’s Gilfest Exhibiton, in which I will detail the Servant boss and his/her gimmicks for that fight, plus Servant/CE recommendations to make the quest easier to handle.
General Tips/Reminders:

1: Have the damage CE (for this year, it’s Return Match featuring Nero), equipped on your best damage dealer. Preferably this is already max Limit Broken for maximum efficiency, but a single copy can suffice.


2: Bring or borrow a support Servant that helps boost your party and/or your damage dealer, usual go-to targets are Merlin, Waver, Skadi or Tamamo. Conversely, you can also opt to borrow a damage dealer (with the damage CE of course!), if you have enough supports.
3: Make sure that your damage dealer(s) have level 10 skills and fully Fou’d because your skill cooldowns WILL matter with these quests. Having the shortest amount of downtime will help in the long run.
4: These quests do not allow duplicate Servants to be used, so make sure to plan accordingly. Try to compensate the loss of duplicate Servant’s skills with CEs.
5: Command seals cannot be used for reviving the whole party BUT can be used to heal yourself or charge your NP, so feel free to use them just in case!
And with that, let’s tackle the actual exhibition quests!
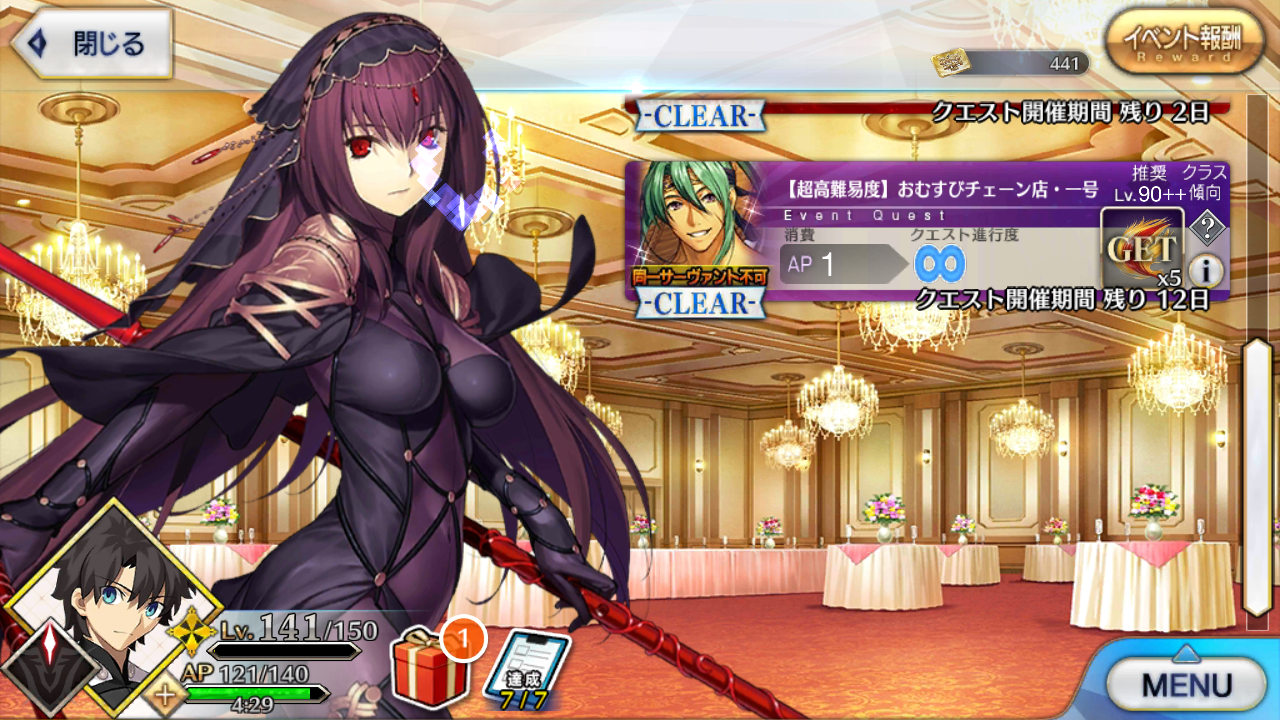
1st Exhibition Quest: Tawara Touta and his Rice Bag of Doom
Personally, I was hoping that it would be another Berserker so that they could continue the trend from the past two years, but this is fine.
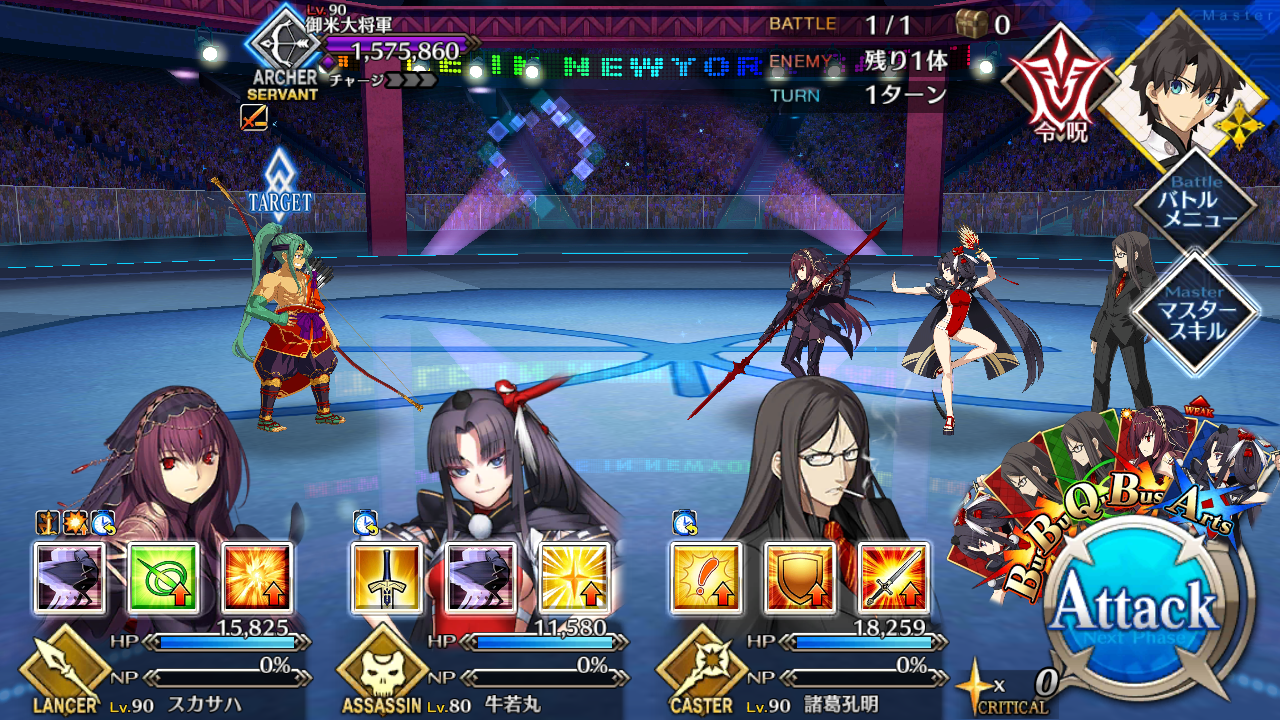
Tawara Touta is an Archer, so immediately field your Lancers!
As seen in the picture, he starts with 1.5 million HP, with a single break bar. On break, he will have 3 million HP and have a permanent Buster Up and Debuff Resist.
Being an Archer, he has a quick NP timer, and he’s AOE so you’re running on a bit of a short leash here.
However, the bigger issue is his gimmick. Touta’s gimmick is a pain to deal with: He is capable of locking a certain type of card at the start of his turn and when he attacks. It varies per turn, so you’ll have a Quick lock on one turn, and a Buster at the next. This causes a great deal of frustration because this gives him two chances to lock your whole party. However, when he locks via attack, he increases your max HP in exchange. A bad trade off, in my opinion, but you’ll have to live with it.
I stared down a few turns of doing nothing because he managed to lock down my whole party, so be prepared to cuss at RNG when he locks the EXACT card type you need.
On his 2nd bar, there seems to be a debuff that continuously reduces your max HP, but it was hard to confirm the specific activation for it. Just take note of this!
To counter the card lock debuff, you have to make the sealed Servant attack that turn or wait the buff expires (which lasts 3 turns). There is some feedback that it follows a Buster – Arts – Quick – Buster pattern, that using the preceding card will cancel a buff (i.e. use Buster to clear Quick locks) but it’s kind of unconfirmed. The problem that arises that it’s pretty likely you’ve been locked a bit so it takes quite a bit of luck to counter it. But, in exchange it will give you a 20 turn buff that lasts for a turn. These buffs kind of vary per turn, but it ranges from increasing your max HP, getting ATK or NP ups, or debuff resists.
Another confirmed buff is that if your Servant(s) reach 10% or less HP, your NP gauge will be filled. Depending on the timing this is a lifesaver!
Recommendations:
Because of his tendency to lock you down, it is imperative to attempt to burst him down as fast as possible. Single target Lancers are preferable, especially the hard hitting ones like Scathach or Enkidu. Raikou (Lancer) would be a good alternative as she is capable of cleansing debuffs.
You can also opt to use Ereshkigal for 2 reasons: Concealed Great Crown and Protection of the Underworld. Crown grants Ereshkigal a 1 turn debuff resist, giving you a reprieve on his locks. Underworld gives you a variety of buffs but the most important one is the increased HP capacity, making it a somewhat hard counter on Touta’s HP decreases on the 2nd bar. You can also abuse it early on to make your party extra tanky, considering he can fire his NP at a fast pace, you’d want the extra HP if your stuns or dodges are on cooldown.
Tamamo (Lancer) and Brynhildr are also good options because of their NP multipliers.
If you’re running Scathach, it would be best to pair her with Skadi, plus Waver or Helena for fast NP charging (which is really important since Scathach can’t charge NP worth a damn), and the additional buffs won’t hurt as well. Skadi’s NP also gives you a dodge, so it helps if Scathach’s dodge is down or if Waver can’t fire his NP.
For the Buster lancers, you can just swap Merlin for Skadi, and mostly follow the same pattern.
Mashu is always a must, but her Shield of Rousing Resolution will be extremely helpful here, as it makes it possible for her to tank the locks, leaving you free to deal the hurt for the next turn.
Jeanne (Ruler) will also be a good contender, because her upgraded NP can also cleanse, and the party wide invulnerability will also protect you from Touta’s NP. True Name Discernment paired with the HP buffs from Eresh’s Underworld buff can probably help you tank the ult, but there’s always Revelation for that one turn breather.
I would not recommend using Berserkers in this map, because of the risk of dying increases when you get stunlocked for a few turns, but it’s certainly worth a shot if you’re using Heracles or Cu Chullain Alter but I’d rather have the class advantage just so I can cheese.
Your last resort (or probably best resort) is using your Command Seals to charge your NP and/or heal your damage dealer. Do tread carefully though, as mistimed usage means having to wait 1-3 days for them, and we still have a few more exhibitions to worry about.
Honestly, this quest is too luck reliant to have a surefire strategy, because you can’t predict what card type gets locked or which Servant gets locked.
2nd Exhibition Quest: Leonidas and the 300 Spartans
Welcome to the Battle of Thermopylae, FGO style!
In this exhibition quest, we’re facing against Leonidas and his complete battalion of 300 Spartans, so be ready for a long fight.
While Leonidas may be surrounded by soldiers, the goal is to just defeat him to win the quest, however there’s a catch: Leonidas has a shield that reduces your damage for each Spartan soldier alive.
Sounds familiar? This is the exact same mechanic that King Hassan’s fight had last year. Though, at least now there’s no insta kill nonsense, so this is significantly less frustrating.
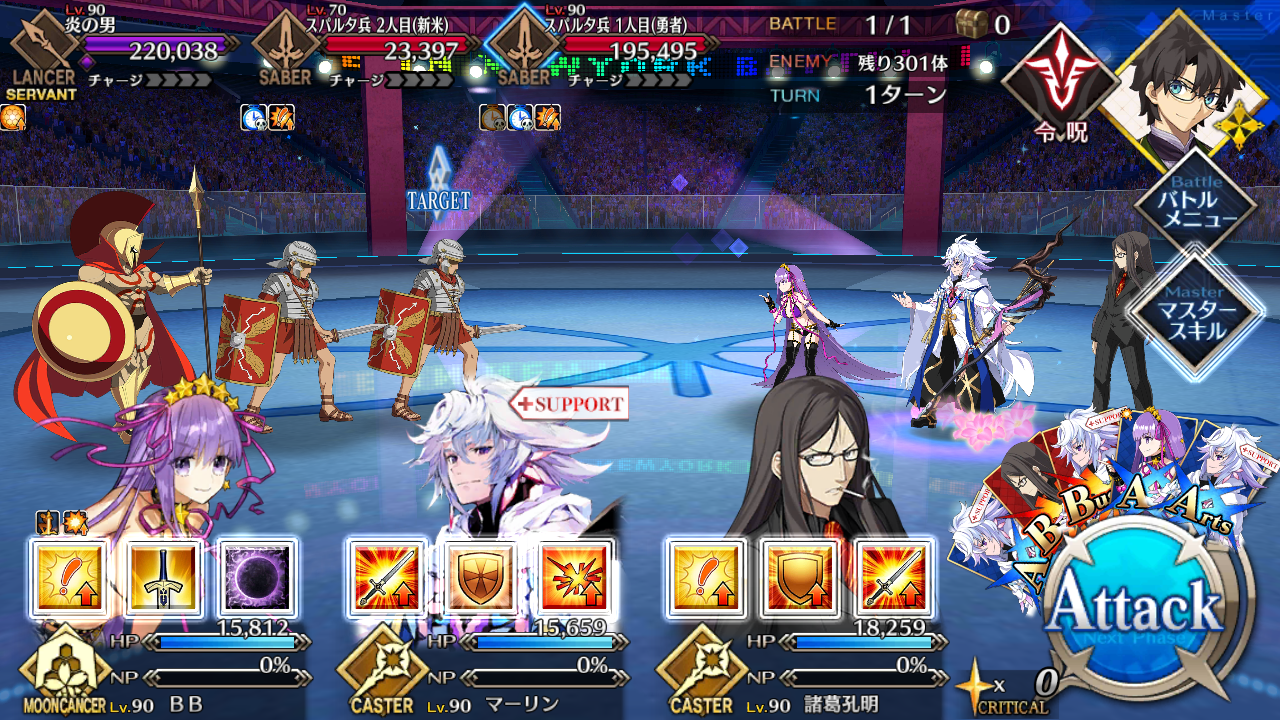
The fight starts with Leonidas having 220k HP with a single Break bar, and the starting soldiers are both Sabers and have 195k and 15k HP respectively.
The overall gimmick of the fight revolves around the soldiers, which are Saber and Archer classes. Aside from being the lynchpin to Leonidas’s shield, they also get permanent attack and crit buffs, making them very deadly. They can potentially one shot a Servant (even Rulers), so they are always a priority target (especially the high HP ones).
You need to take down at least 15 soldiers to deal normal damage to Leonidas. The issue is that Leonidas WILL tank those hits with continuous taunt activations from his own skill and his NP, so AOE Servants are highly recommended to get the soldiers out of the way and slowly ping Leonidas. This also reduces the risk of your Servants getting one shotted if the soldiers with crit buffs are dead.
Once he reaches his 2nd bar, his HP then becomes 700k, and the soldiers then get deathrattle effects, targeting the one who dealt the last hit (which is usually your AOE Servant). These deathrattle debuffs range from buff blocks, Atk downs, def downs or Skill seals. These debuffs cannot be dispelled but they only last a turn.
Recommendations:

This fight demands an equal amount of sustained burst and healing because there will be turns that you can’t finish off the soldiers in time because you can’t fire your NPs or Leonidas has casted taunt so you can’t pick off the low HP ones.
BB (Summer) gets my full backing as your ideal damage dealer because her entire kit presents a whole myriad of advantages that help you survive long enough to take down Leonidas. Self Modification allows you to ramp up your Brave Chains, making them hit for insane damage once Leonidas is mellow enough to hit, or finishing off the high HP soldiers while also allowing you to get your NP back up with Art card crits. Golden Pig Cup gives you an emergency NP refill, gives you a significant heal, and a 1-hit dodge that lasts 3 turns. The Buster and NP buffs also last 3 turns so you’re free to activate it for protection rather than bursting. Faceless Moon is hands down your best friend for this encounter because of the card locking and critical star generation. You can easily lock yourself into continuous NPAA chains, or Art chains with your supports in order to keep ramping up the NPs that will help you mitigate the insane damage the soldiers will dish out. BB’s NP, Cursed Cutting Crater, also helps you stop Leonidas from casting his taunt from NP because of the guaranteed NP drain.
Katsushika Hokusai is also a good choice because of Pseudonym – Alien Octopus, and Hokusai’s NP,Fugaku Sanjuu Rokei, is an Arts NP that allows you to keep spamming it and stacking the Def downs. All of Creation is an emergency dodge + NP fill that will also help you tank damage if necessary.
Mordred or Shiki (Saber) can also be decent choices, even against the Archer soldiers thanks to Mordred’s good damage and Shiki’s Mystic Eyes for instant kills. Both can also get their NPs back up thanks to Mordred’s Secret of Pedigree and Shiki’s NP being Arts.
Okita Souji is a dark horse choice, but not entirely a bad one, thanks to Mumyou Sadanzuki being able to ignore defenses, and this also applies to Leonidas’ shield. However this strategy demands having access to BB (to lock NPQQ chains) and Skadi (for emergency NP charging and to up Quick damage).
Jeanne (Ruler) is helpful because of her Ruler typing that lets her somewhat tank the crit damage from the soldiers. Revelation also gives you free stars for more crits. Jeanne will wind up being played as a Ruler version of Hans Christian Andersen though, firing off Luminosite Eternelle for the heals rather than the invul.
Hans himself, of course, is recommended because of Marchen Meines Lebens. High Speed Incantation lets him fire it off at least once. The issue is that Hans has low HP, and Innocent Monster will make him more squishy, so there’s a bit of risk of getting him killed for him to ramp up the NPs. However, if you manage to ramp up the NPs, you’ll be able to tank a few of the soldier’s hits.
Mashu’s kit and NP can also help your sustain game, with having multiple Def ups from Honorable Wall of Snowflakes and Lord Camelot will greatly mitigate the damage from the soldiers for a few turns. Obscurant Wall of Chalk combined with Shield of Rousing Resolution will give Leonidas a taste of his own medicine, with you redirecting all attacks to Mashu, and thereby giving your damage dealer some breathing room while helping Mashu get Lord Camelot up (again).
Merlin is good because Dreamlike Charisma gets you a free NP charge, with Illusion helping keep everyone safe for a turn, and Hero Creation can work as a pseudo heal for your damage dealer. And of course, Garden of Avalon gives you sustained healing and NP charges, which is a must.
Waver’s entire kit is helpful due to the innate NP charges that each gives, but Tactician’s Advice Def up and Damage cuts will be indispensable, especially if paired with Mashu’s Honorable Wall of Snowflakes and Lord Camelot. Stone Sentinel Maze will also help in delaying Leonidas’s NP with the bonuses the wave’s Def and potentially stunning them for a turn.
Tamamo no Mae’s Eightfold Blessing of Amaterasu will be helpful because of the cooldown reduction, healing and NP charges. Transformation will help her tank some hits, and in the worst case you can use Fox Wedding on her for the heal.
Prisma Cosmos is a highly recommended CE, preferably equipped to a Servant whom you want them to fire their NPs successively.
2030 also works just for the floating Critical Stars. Those stars will be helpful on your burst turns.
For your Mystic Code, either the Atlas Uniform or the Chaldea Combat Uniform are recommended. Atlas’s cooldown reduction can help get those needed buffs up, and the invulnerability for survival. The Combat Uniform’s stun works anywhere, so you can stun a soldier so there’s a lesser chance of you getting one shotted, and the Servant swap can help you pull in a Merlin or Mashu for emergency tanking.
While the 2nd Exhibition Quest isn’t as RNG prone compared to Tawara’s, a safe clear demands having at least one decent support Servant and a good damage dealer. It’s unfriendly to accounts who still rely on borrowing supports, but it’s certainly not unclearable.
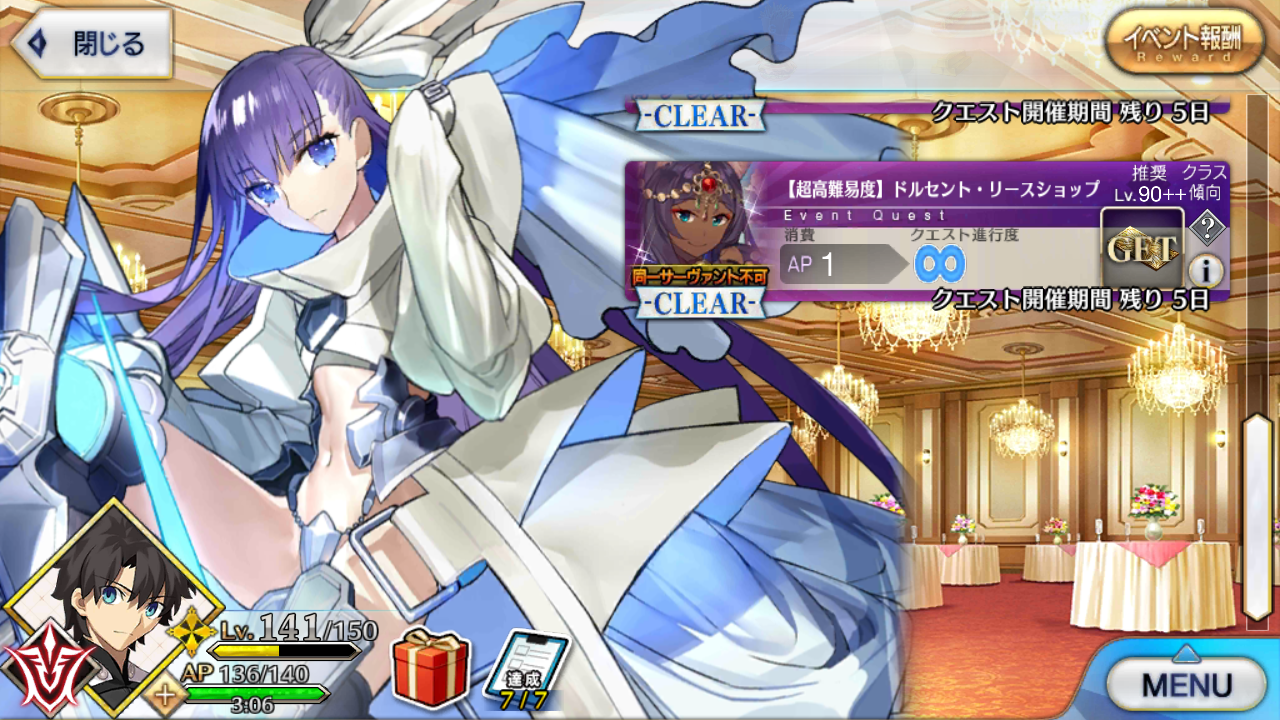
3rd Exhibition Quest: Samurai Crimson – Okada Izou
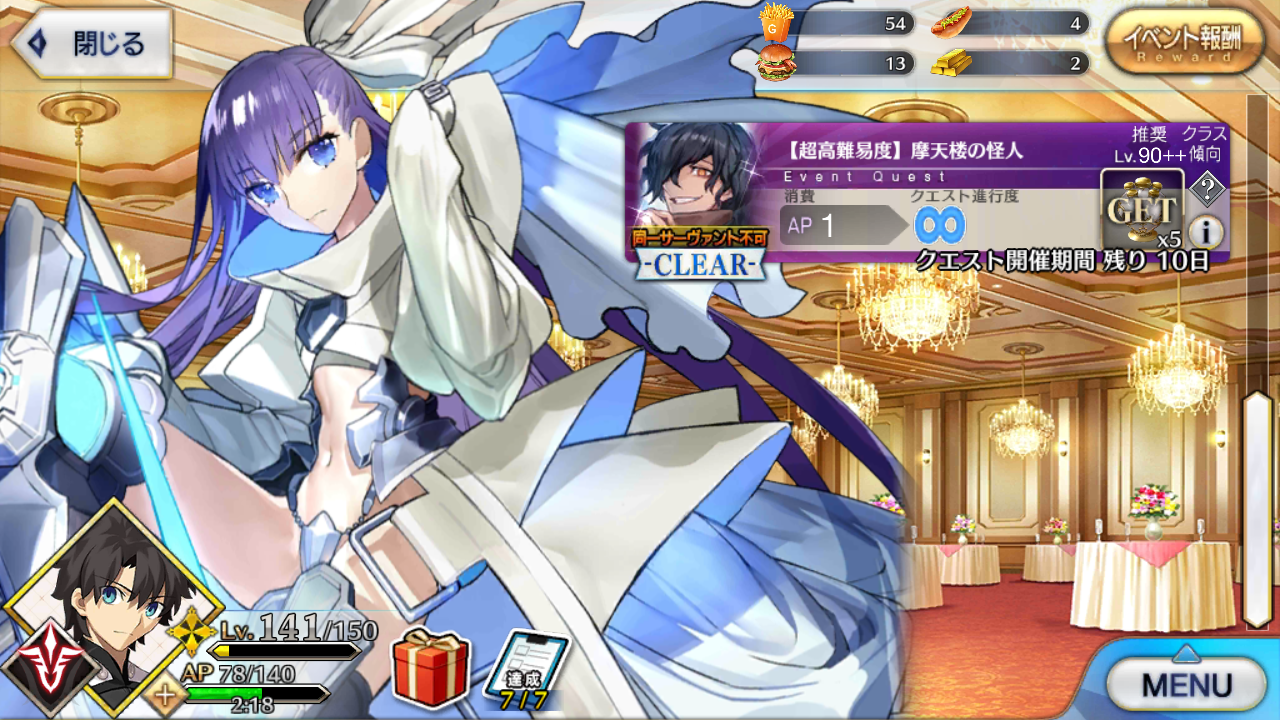 The third bout is finally a solo duel with Okada Izou, the Manslayer.
Since Izou is an Assassin, it’s time for Casters and Alter Egos to shine.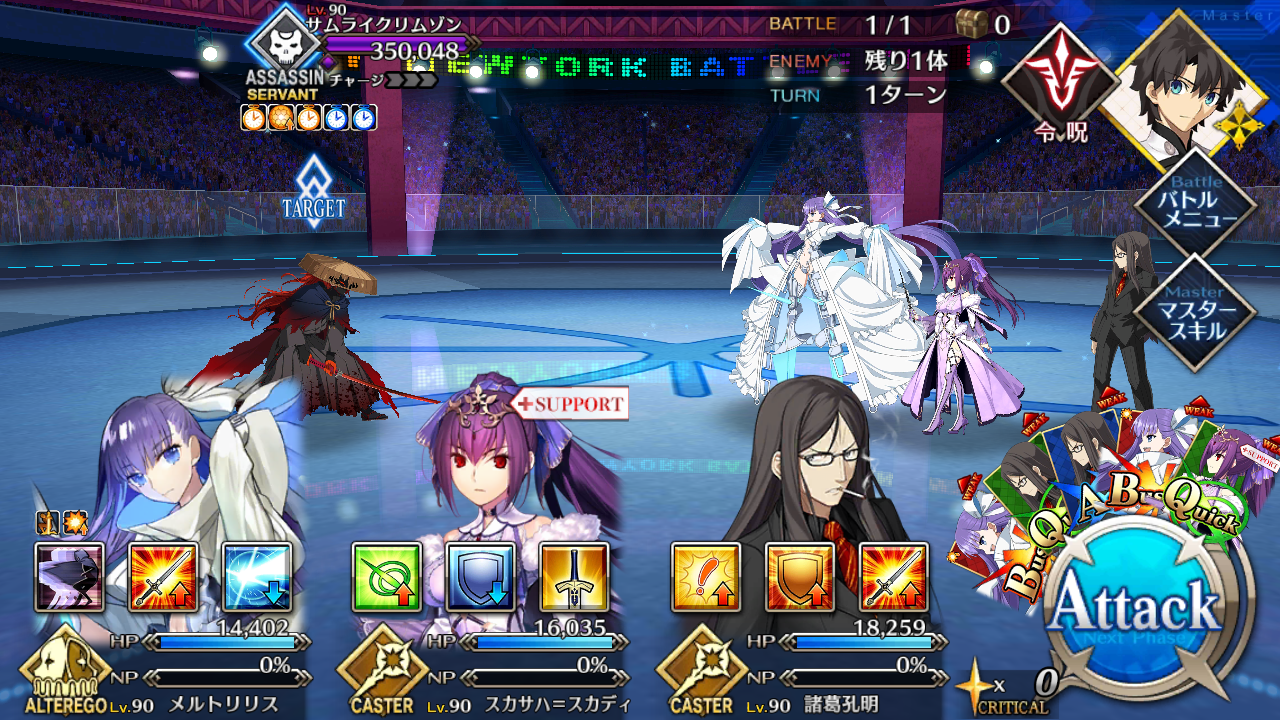
Okada Izou starts out with 320k HP with a single Break Bar. He starts the battle immediately with a floating shield, and several pending buffs.
His quest gimmick is revolves around his permanent shields. One shield activates when he is attacked, automatically giving him a huge damage resistance to the card type that attacked him (for example, if you attacked with a Buster card, he gets a Buster shield), and he can only get one type of shield (ex. a BQA chain will get him an Arts chain by the end of the attack). However he can stack two shields of a single card type, so card chaining is not recommended on burst turns. Another shield gives him a permanent damage reduction to NPs, so you’re going to want to rely on mixed card Brave Chains to whittle him down.
Also, Izou has several skills once his turn starts depending on the shield he has up: The Arts shield lets him eat all the critical stars you’ve generated for that turn. The Quick shield gives him a crit buff at the start of that turn. The Buster shield lets him randomly stun one of your Servants.
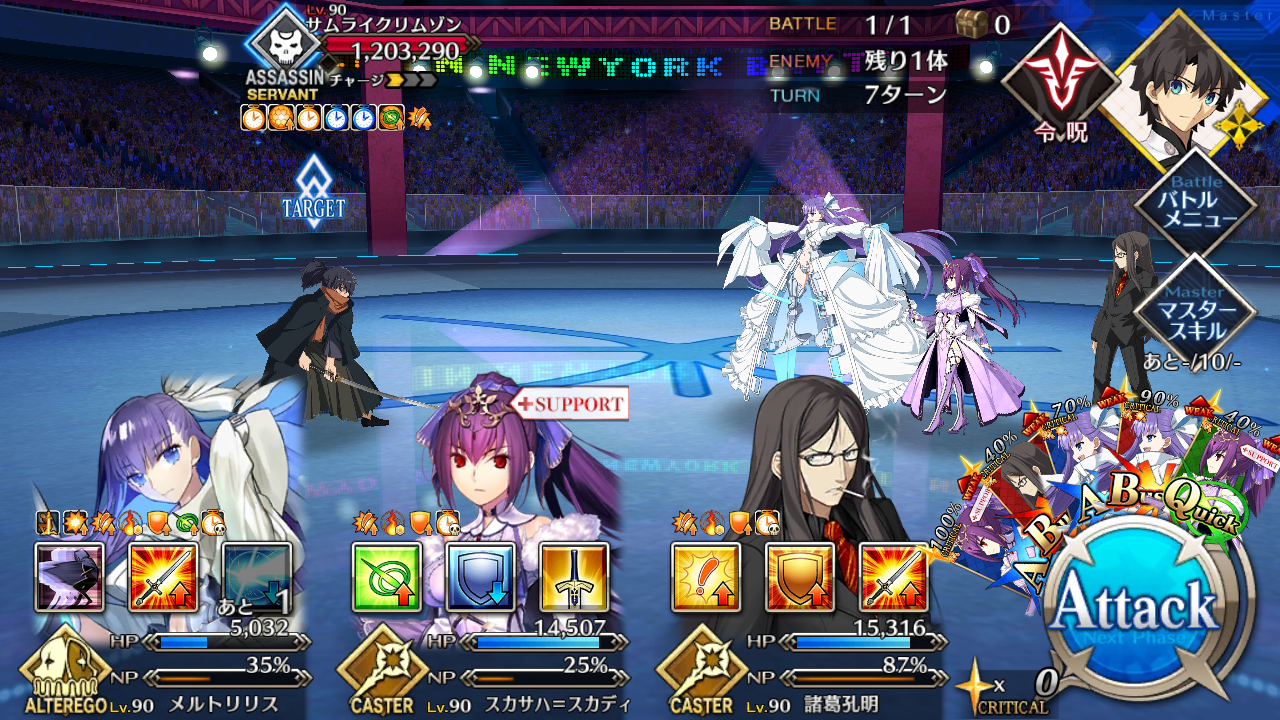 On break, Izou gets 1.2m HP, and he gets a buff that increases his Humanoid damage per turn (all Servants are Humanoids, so this effectively means he will deal more damage to everyone as time passes), and a deathrattle buff on your Servants that resets the Humanoid damage he has accumulated.
Recommendations:

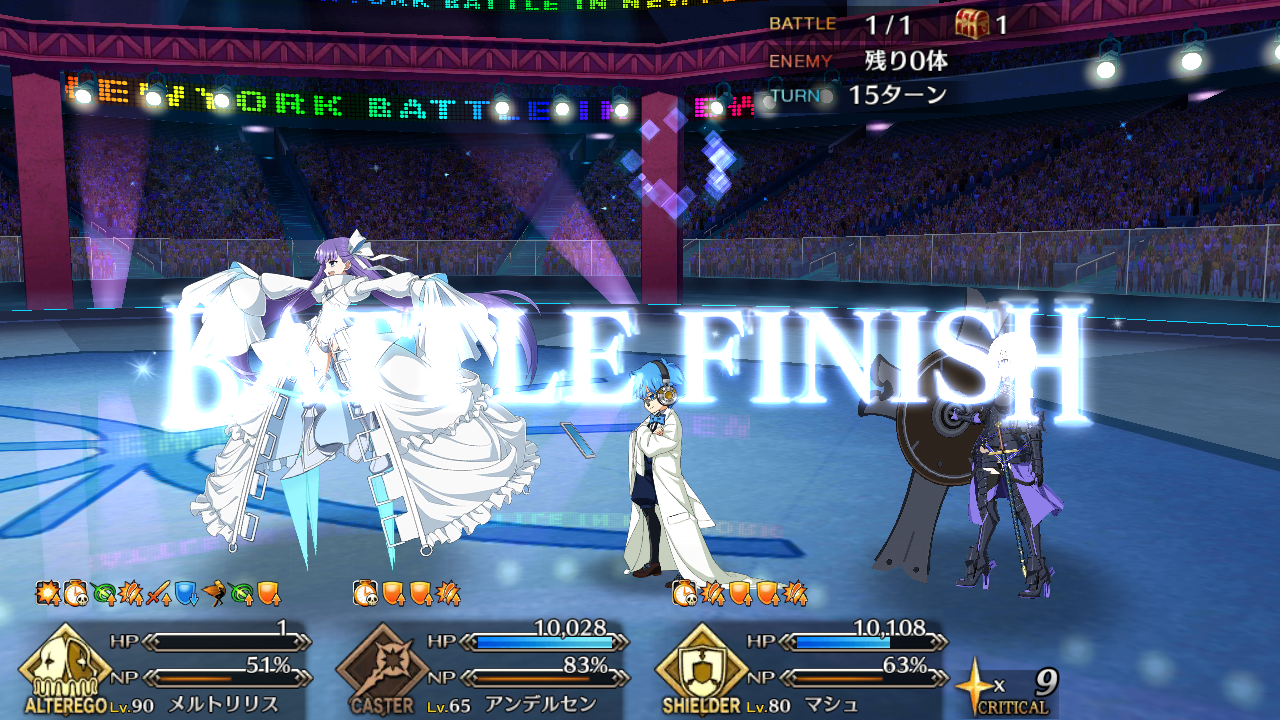
Compared to the first two exhibitions, this isn’t as stressful as before since it’s all a matter of cycling through the shields on your bursts. The only thing to note is that since Izou is an Assassin, he takes less time to fire his NP.
Any offensive Caster or any of the Alteregos can fill the role of damage dealer here, as long as you don’t use a mono type Brave chain in order to maximize your damage.
Meltililith, Mecha Eli-chan or Medea can be helpful because their respective NPs can clear buffs, getting rid of Jizou’s activated Humanoid damage and Crits.
Nero (Summer) and Scheherazade can grant Guts to your Servants, in the off chance that Jizou got lucky with his crits.
The other Alteregos are capable of charging their NPs and/or protecting themselves, so they’re also good choices for damage dealer.
Mashu’s combo with Obscurant Wall of Chalk and Shield of Rousing Resolution can help in tanking one of Izou’s NP turns.
Your support of choice honestly depends on what your damage dealer, but since all of the go-tos are Casters, any one will be a good choice thanks to class advantage.
I’d say this was a breather exhibition, since the first two needed a lot of brain cells to clear. Izou’s quest was challenging enough, but it’s pretty easy to clear once you’ve gotten the pattern down pat.
4th Exhibition Quest: Welcome to Youkosou Jaguar Park!
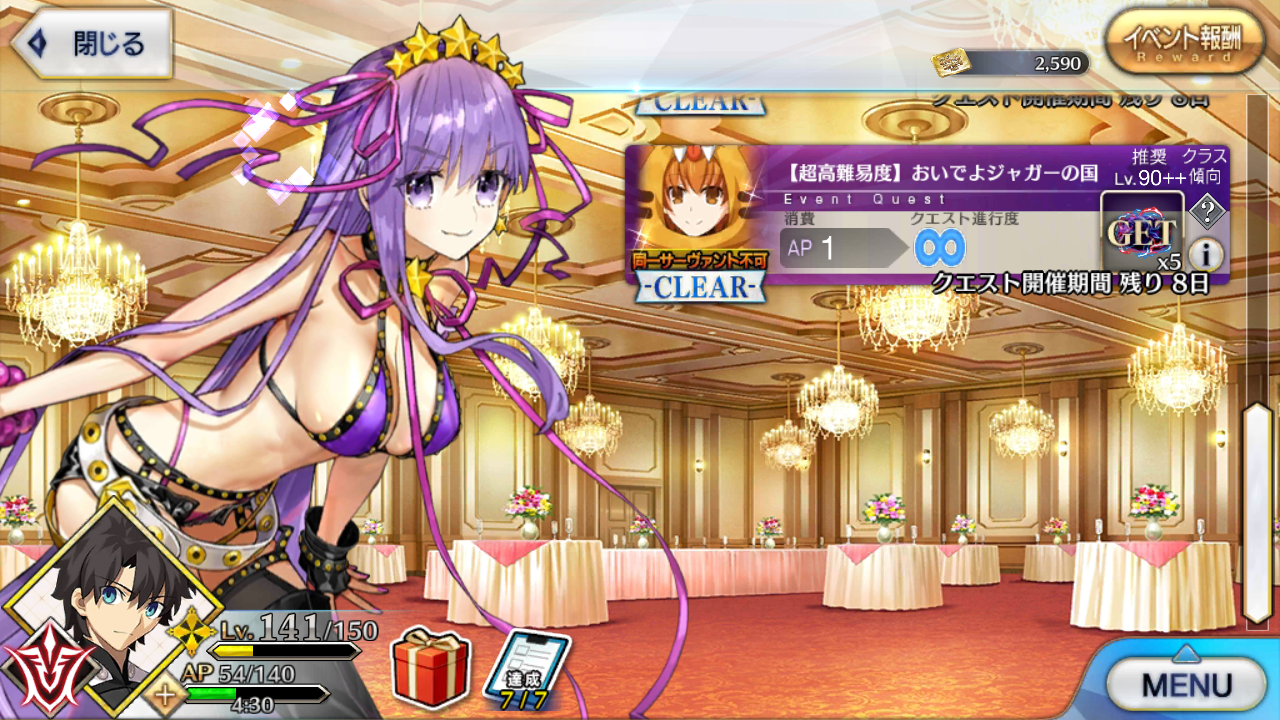
It seems that DW is starting to ramp up the exhibition quests from this point onwards, as we’re getting a 3 man brawl this time around.
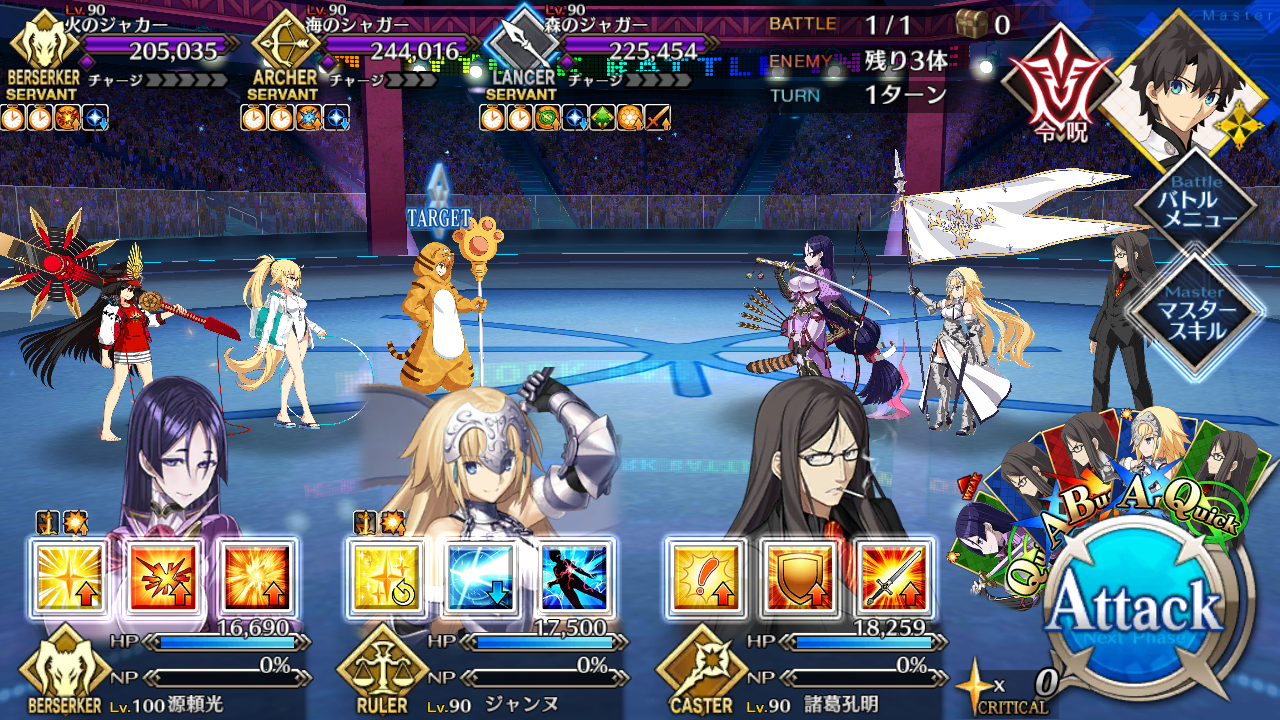
For this fight, we have Jaguarman, Jeanne (Summer) and Oda Nobunaga (Summer), each with a single Break bar and 225k HP, 244k HP and 205k HP respectively.
This exhibition has an interesting gimmick, and admittedly this has been my favorite exhibiton so far.
All 3 have permanent buffs: a NP damage down, a shield for a certain card type (Jaguarman resists Quick, Jeanne resists Arts, Oda resists Buster), and another shield that activates whenever they are attacked.
Once a Servant is attacked, this activates the shield that sets a Field on themselves (feels like a YGO Trap card activation if you think about it) that bestows a terrain depending on which Servant was targeted. To elaborate, whenever Jaguarman is attacked, she activates a Forest field. Jeanne gives the Beach field, and Oda gives the Volcano field. The type of field only matters insofar as who benefits from them, but all of them give the same effects: reduced damage taken (which also stacks with their permanent card shields), an Attack up and a NP damage up (which negates their NP damage down buff).
On paper, this makes it easy to work around with. Move the field to someone who’s not going to fire their NP, so you can take the one who is, and enjoy how minimal their damage is. You can also move around the shield so that you can pick a Servant to whittle down first.
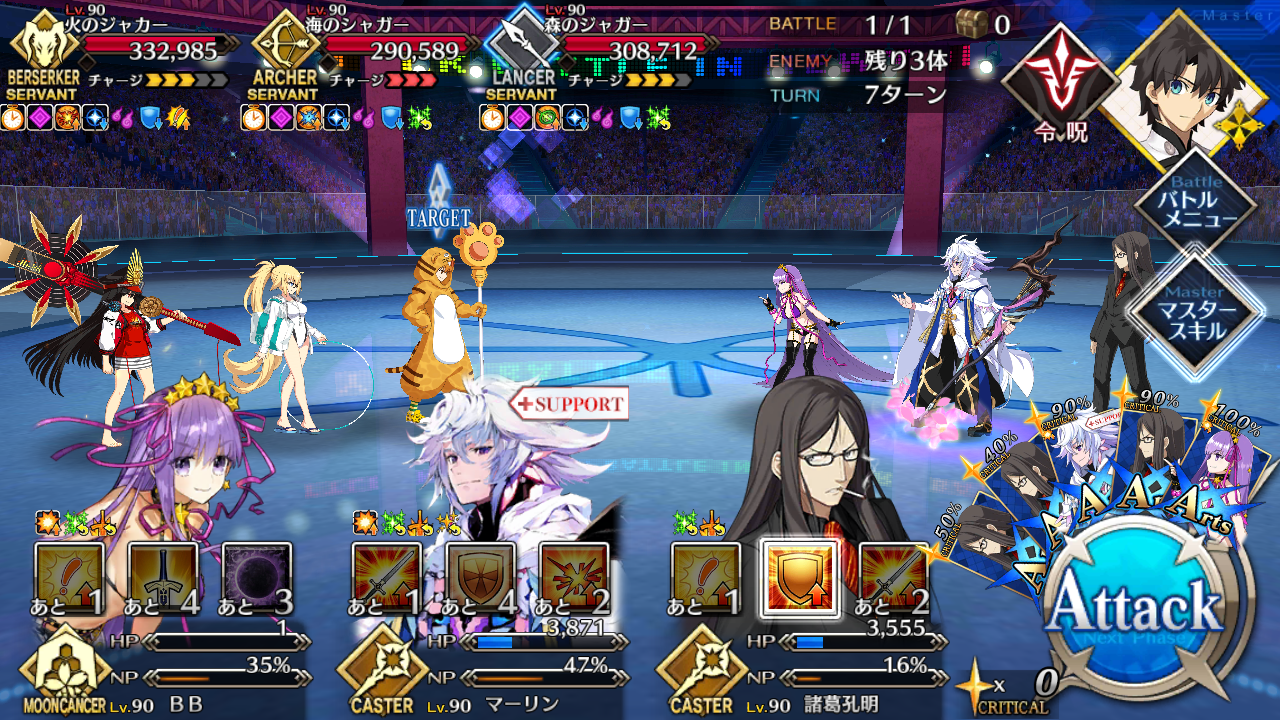
On break, Jaguarman gets 309k HP, Jeanne gets 292k HP, and Oda gets 365k HP. This also where their Fields get more annoying, because this time they activate 2 terrains when attacked, meaning there will be only Servant that’s shieldless at any given time.
So post break, Jaguarman activates Forest and Beach, Jeanne activates Beach and Volcano, and Oda activates Volcano and Forest. Basically, Jaguarman will leave Oda shieldless, Jeanne will leave Jaguarman shieldess, and Oda will leave Jeanne shieldless.
The main concern here is if you focus fire a Servant and break another that makes transferring shields impossible. For example, you killed Oda first then broke Jaguarman’s bar, that leaves you unshiftable Forest and Beach fields.
Recommendations:
I’ve noticed there’s two strategies that you can do for this encounter.
There’s the “kill everyone at the same time” strategy, where you’re free to break them all (at the same time if you can pull it off), as long as you whittle each down that one NP burst can do them away.
Alternatively, it’s possible to just focus fire on one Servant, and pick off the survivors. As long as the other two Servants haven’t reached their 2nd bar, this is doable. Rinse and repeat, until there’s only one servant left.
Also, I have noticed that for this “pick off” strategy, that there will be turns that the Field will disappear temporarily if there’s only one Servant left, from my observations it disappears after 2 turns or so, but I have not confirmed this detail and I have not seen any information corroborating this. However, as I cleared this exhibition using this strategy, I can at least say that this is doable.
BB (Summer) once again gets my recommendation for ideal damage dealer, for the same reasons I detailed in Leonidas’s exhibition. Though this time, Faceless Moon will now be used in a more offensive manner, as you can use it lock your Brave Chains to go against the shield of the Servant you want to focus fire on.
Katsushika Hokusai’s typing will help against Oda, who’s the biggest threat to everyone because she’s a Berserker, and with Hokusai’s utility and good hitcounts she’ll be able to do significant damage to everyone.
Likewise, Karna’s typing will help him cleave through Oda and Jeanne, and Vasavi Shakti’s anti-Divine trait will let him deal significant damage to Jaguarman. Knowledge of the Deprived is a guaranteed NP seal, so you can delay a lethal NP for a turn.
Amakusa Shirou’s NP, Twin Arm Big Crunch, applies buff removal before damage, so he’s also ideal because all 3 are capable of protecting themselves with dodges or invulnerabilities. Jaguarman has a tendency to stack crit buffs, and Oda can charge NPs and heal so getting rid of those would be ideal when it’s time to shift around the shields. His Ruler typing will also help tank Jaguarman and Jeanne.
Minamoto-no-Raikou is somewhat of a risky choice, however, Mystic Slayer combined with Vengeful Lightning of the Ox King is a guaranteed cleave to everyone bar Oda. If you can manage to keep Raikou alive, this can be a fast fight.
For your supports, anyone of the go-tos are your best bet, combined with Mashu for maximum defenses.
For Mystic Codes, Atlas is the safest choice since you want your skills up as fast as possible.
The key to the whole encounter is to keep moving around the shields to whittle down those who are defenseless. It’s very important to keep in mind what Fields are up and who benefits from these Fields. As long as that point is kept in mind, the Jaguars should fold with minimal problems.
5th Exhibition Quest: The Loan Shark Queen
Round 5 features Queen of Sheba and a pretty interesting gimmick.

For this round, Sheba starts off with HP, and has 2 break bars. She also gains 15 damage reduction shields (called Money Walls). The naming of the shields is related to this encounter’s gimmick.
Sheba roleplays as a loan shark for this fight (which is pretty appropriate considering her in game character), and she will randomly “loan” any of your Servants buffs; The catch is you have to “pay” back the loan by attacking her while having that buff on you in order to remove one of her Money Walls. Failure to do that will have Sheba gain a buff and a subsequent debuff on anyone who didn’t manage to “pay.”
The following buffs for the first bar, with the consequence of not paying listed are:
– Critical Damage (increases Sheba’s Art performance and decreases your NP damage)
– Star Generation (heals Sheba for 10k HP, and decreases your HP by 1k)
– NP Gain (increases Sheba’s Critical damage, and decreases your Critical damage)
The loaned buffs only last for 1 turn, while the debuffs that Sheba gives you last for 5 turns and are unclearable.
And of course, any loan shark worth their money will not go out without any muscle and Sheba is no exception. After the inital turn on the fight’s start, and every time you break her bar, she summons two Assassin goons with HP and HP respectively (and thereby bamboozling anyone who went in with Rider damage dealers). The muscle and Sheba interact in very interesting ways. Both of the mooks have a deathrattle buff, the one in black will cast an unclearable taunt on the one that killed it and it lasts 10 turns. The one in white will cast an unclearable buff block on its killer, and also lasts 10 turns. In addition, they can use one of their turn actions to charge Sheba’s NP bar. Both mooks are capable of dodge ignore when their bar gets full.
Now this interaction gives you two distinct solutions which in turn presents its immediate drawbacks. If you opt to get rid of Sheba’s muscle before going straight to Sheba, you’re facing an unclearable taunt and buff block, both are deadly as the fight progresses, depending on which Servant lands which deathrattle effect. Though having a taunt/buff block on your damage dealer or support will be lethal in its own right. Opting to ignore the muscle to focus on Sheba will have you facing an accelerated NP bar for Sheba, which means she can fire her NP faster than your cooldowns will come up. Sheba can also invulnerability break on herself and if she combines with her NP, well it won’t be pretty. In addition, Sheba can buff the muscle, which means they WILL deal more damage as time passes.
When Sheba breaks, she gets HP on the first break and HP on the 2nd break. Every time she breaks, she gains 3 more Money Walls and her list of loans also increases.
For the first break, her additional loans and consequences are:
– Quick Up (increases Sheba’s Arts performance and decreases your Arts performance)
– Arts Up (increases Sheba’s Buster performance and decreases your Buster performance)
– Buster Up (increases Sheba’s Quick performance and decreases your Quick performance)
On the 2nd break, these loans and consequences are added:
– Attack Up (increases Sheba’s defense and decrease your defense)
– Defense Up (increases Sheba’s attack and decreases your attack)
Sheba’s list of loans slowly gets to be a problem the more you progress, so keeping track of what loan you have is important so you can get rid of the pesky debuff that comes after.
Recommendations:

I’ve noted that there are 2 options for you to take for this encounter and each will have a problem to face. Since there’s no way you can circumvent them, you’ll just have to take the option that you easily deal with.
However, in general:
Bringing any of the Alteregos will be helpful because of their typing.
If you’re planning to go after Sheba only, Meltililth is highly recommended because Crime Ballet lets her protect herself.
If you plan to cleave, Passionlip or Kiara are recommended but Passionlip has more benefits thanks to Breast Valley gives debuff immunity.
Alternatively, Leonardo Da Vinci is able to do the same thing, with the additional bonus of being able to self charge her NP and heal at the same time. The Caster vs Caster typing can be mitigated with Return Match.
Jeanne’s Ruler typing can make her the best sacrifice in tanking the taunt debuff.
Tamamo no Mae’s cooldown reduction with Eightfold Blessings will help in getting your defense skills up if you plan to ignore the Assassins.
Merlin and Skadi give party wide evades, and Mashu can redirect attacks so they are also good options.
With the randomized way of getting a loan, it’s hard to gauge how the fight goes. Because if you’re lucky the damage downs goes to the supports, but then the opposite can also happen. You’ll need a healthy dose of luck and adaptability to clear this.
6th Exhibition Quest: Sweets Master Ecchan
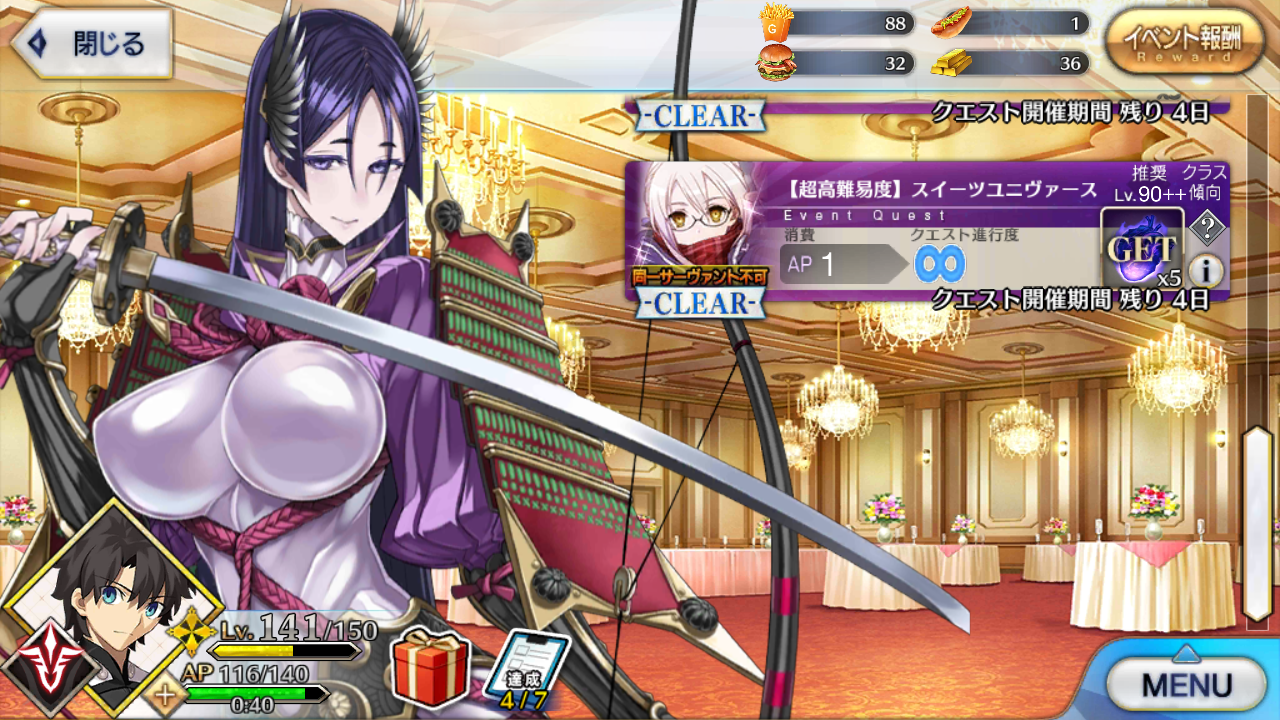
Finally, we’ve reached the second to the last exhibition quest for Gilfest. The prelude to the finale certainly did not pull its punches.
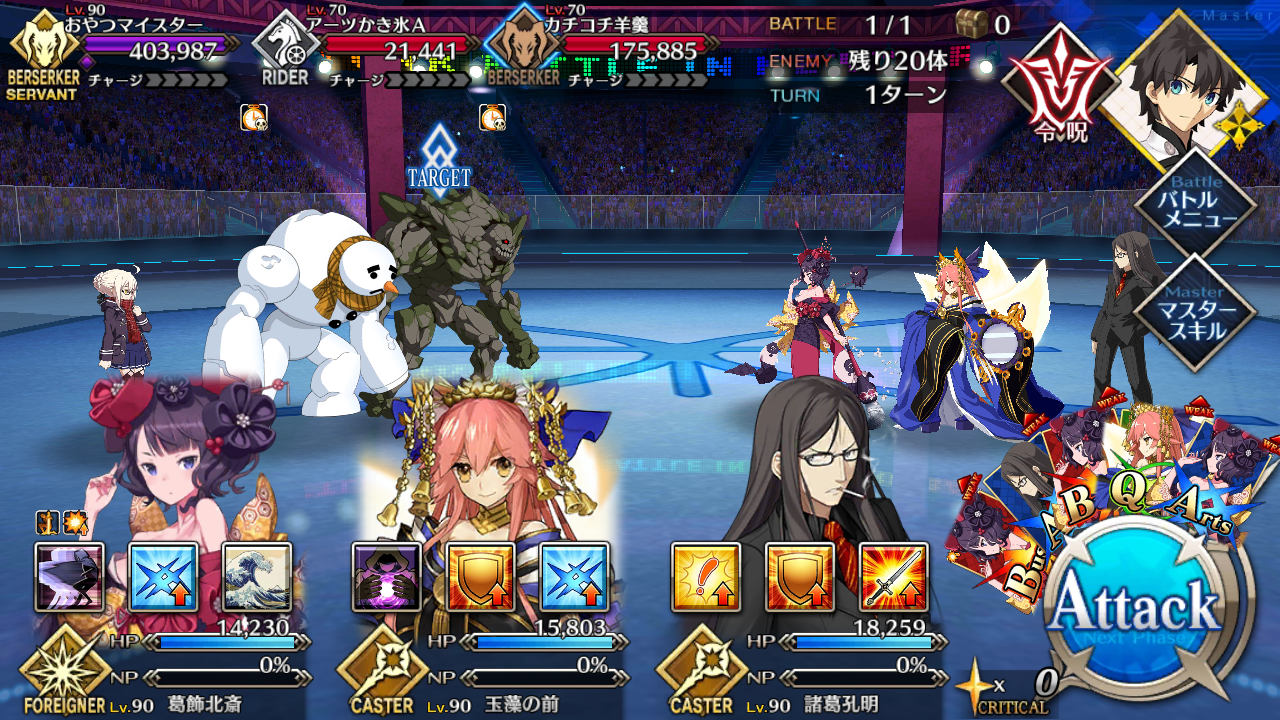
The fight features Mysterious Heroine X Alter (whom will now be called MHXA) with 403k HP and a single Break bar, and 19 additional mooks of varying HP levels and classes.
The theme for this fight is MHXA being a Sweets Master, and the mooks are the sweets. MHXA’s main gimmick is that she eats the mooks once per turn (another callback to King Hassan’s Exhibition last year). The mooks have a deathrattle effect, and there are two types of clocks. The gold clock is usually a beneficial buff, and the blue clock is a harmful buff. There’s a bit of variance as some mooks have different deathrattles depending if you kill them yourself or if MHXA eats them. MXHA’s eat rate is always the leftmost or the older spawned mook. Also note that MXHA eating a mook is a turn action, so that’s one potential attack down if she’s alone.
On break, MHXA gets 10 million HP and a permanent increase to Critical Damage and Star Generation but gains a countdown that activates when all the mooks are dead or when she is broken before all the enemies are killed. The minimum turns needed are 8. After at least 8 turns, she effectively starves and loses 2 million HP per turn. Her HP will tick down to 1 if her HP is reduced via her hunger timer.
The overlying theory for this encounter is simple, kill the gold clock mooks yourself and enjoy the benefits and have MHXA eat the ones with bad buffs, while slowly starving her to death.
The mooks, with effects and classes are as follows (in order of apperance):
Snowman (Rider) : Increase Art Performance for 5 turns.
Golem (Berseker): Increase Defense for 5 turns.
Helter Skelter (Saber): Inflicts Skill Seal for 2 turns.
Autonomous Defense Unit (Archer): Increase Buster Performance for 5 turns.
Gazer (Archer): Fully charges NP gauge.
Spriggan (Berserker): If you kill it, HP is permanently reduced to 1 (Also counts as a death and thus activates Return Match’s guts). If MXHA eats it, gets a buff removal on attack (only removes one buff on attack).
Mushussu (Lancer): Increases Attack for 5 turns.
Door (Berserker): Increases Critical Damage, Obtain Star Generation per turn for 5 turns, and heal 10k HP.
Book (Caster): Increases Quick Performance for 5 turns.
Soul Eater (Assassin): Automatically kills the attacker. If MXHA eats it, Attack and Critical Rate down for 5 turns.
Snowman (Rider) : Increase Art Performance for 5 turns.
Homunculus (Lancer): Get HP recovery per turn and Defense down for 5 turns.
Door (Berserker): Increases Critical Damage, Obtain Star Generation per turn for 5 turns, and heal 10k HP.
Gazer (Archer): Heals 10 million HP but stuns you. This particularly doesn’t matter to MHXA pre-Break.
Boar (Berserker): Inflicts Poison (5k damage), but gain NP charge for 5 turns.
Hand (Caster): Cleanses debuffs but Charms you for 2 turns.
Book (Caster): Increases Quick Performance for 5 turns.
Efreet (Caster): Increases Attack but inflicts Burn for 5 turns.
Mushussu (Lancer): Increases Attack for 5 turns.
It is also important to note that these debuffs can be cleansed so you don’t exactly have to sacrifice a Servant to the debuffs.
Recommendations:
Remembering what mooks give what buffs/debuffs is what’s most important in this fight. As long as you manage that, the fight just honestly boils down to a battle of attrition.
The only problem the fight has is that MHXA is a Berserker, and thus deals a lot of damage to everyone bar Foreigners, and even then a stray crit can still kill them regardless of class advantage.
Katsushika Hokusai is arguably the best choice for damage dealer, because of her Foreigner typing, the ability to protect herself, and having an Arts AOE ult. Being capable of spamming AOEs is a godsend on a multiple mook fight.
Minamoto no Raikou is a good secondary choice because having a Buster AOE ult on top of ridiculous multipliers helps in bursting down priority must-kill mooks.
Tamamo no Mae gives you some extra versatility because of Eightfold Blessings, and Curse can guarantee you an additional turn reprieve for MHXA’s NP.
Waver’s Stone Sentinel Maze gets more use because of the stun chance, potentially stopping MHXA from eating a good buff for a turn.
Speaking of stuns, Jeanne (Ruler)’s Divine Judgement spits an almost guaranteed stun for more buff eating delays. Of course, Luminosite Eternelle helps because of the invulnerability and cleanse to get rid of some of the debuffs.
And as usual, Merlin/Skadi/Mashu are good additions for survival.
Heracles with his bond 10 CE and Cu (Alter) are extremely important once the hunger timer activates, since both are extremely tuned to survival, and you only need to wait for MHXA’s HP to drop to 1 to win. Heracles is probably the safer choice because the bond 10 CE guts is unclearable (in the event that MXHA ate the Spriggan). Although if your Cu has Return Match, you have some significant leeway.
The Chaldea Combat Uniform is highly recommended for Gandr. A 2 turn continuous stun lock will help for stalling an MHXA eat or a 2 turn breather while waiting for the hunger timer to wind down.
This encounter is another type of fight that needs specific combinations for optimal performance and quite a bit of luck. But as long as you can control when the mooks appear, you’ll have a decent chance.
Final Exhibition Quest: The Wise King and his Entourage
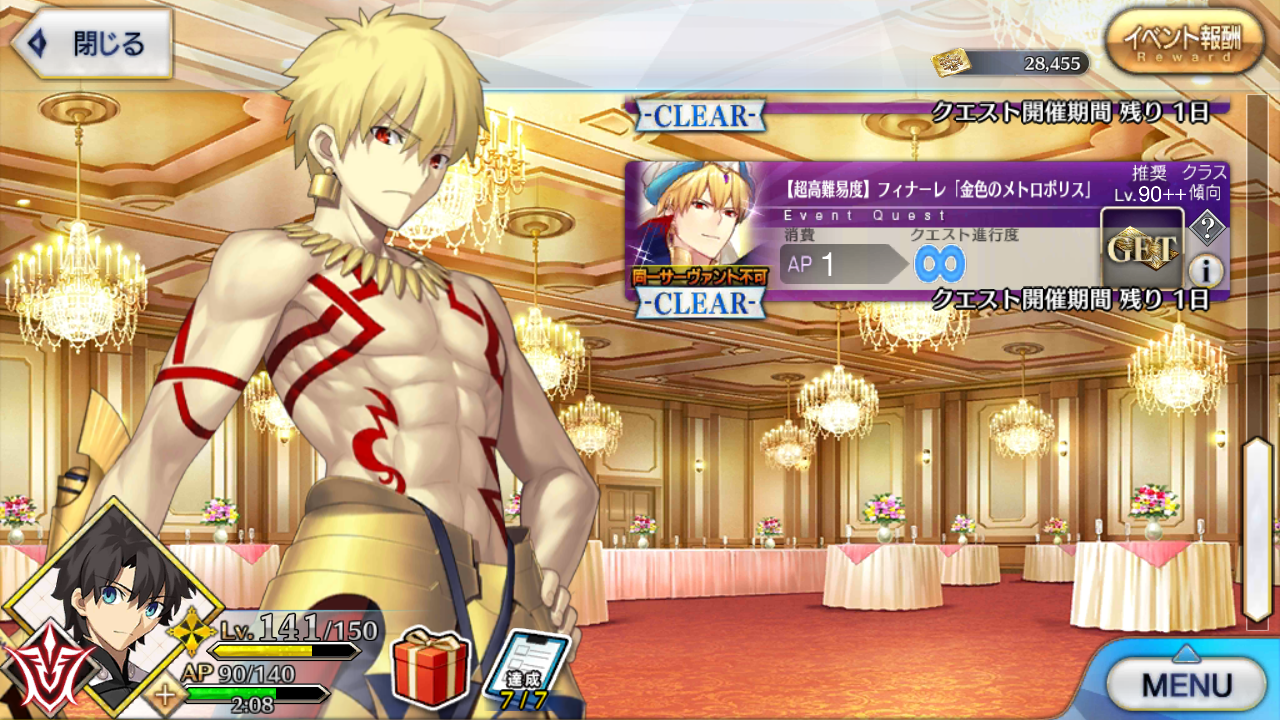
The Finale has arrived! As is with previous Finales, the cover Servant is always the last boss but I’m surprised that we got Gorgeous P instead of AUO. Not that I’m complaining, the Caster version is easier to deal with compared to the Archer one.
The yearly seven Servant brawl is back and each of the 7 have death clock timers, and floating buffs when alive. Thankfully, the 7 do not have Break bars.
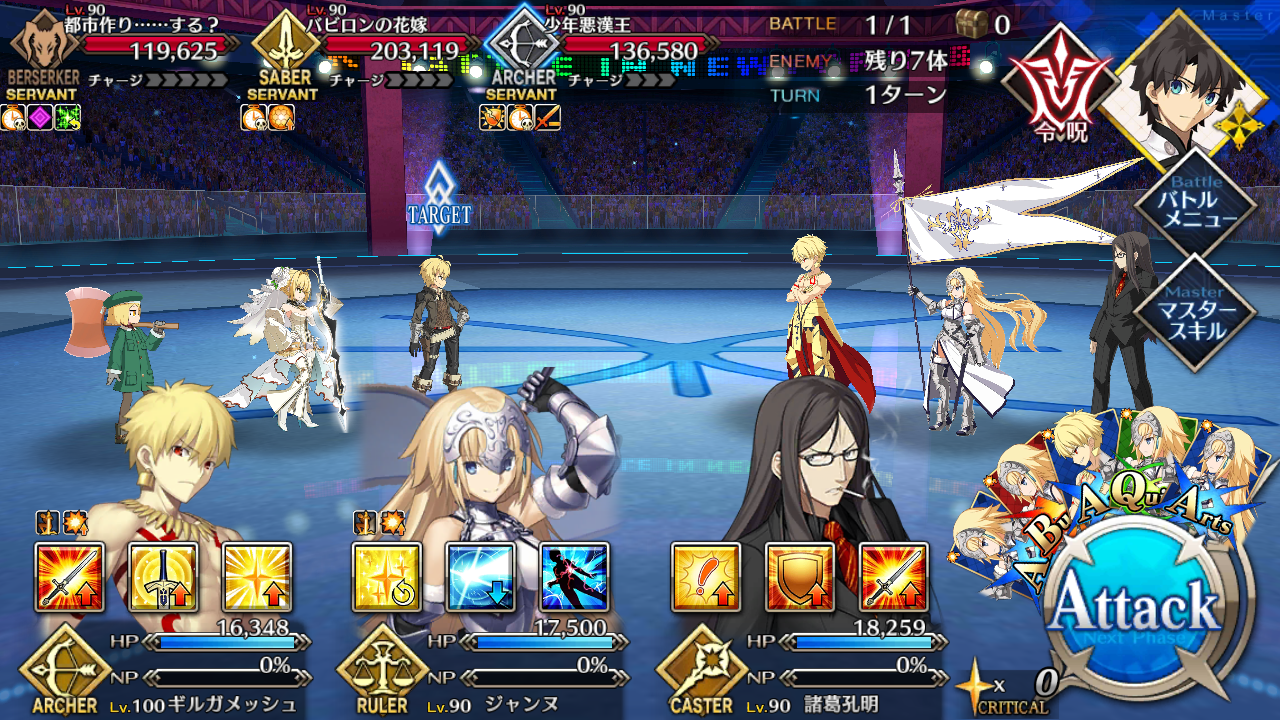
In order of appearance, the Servant and gimmicks are:
– Paul Bunyan [HP: 119k]
While alive, she blocks any Attack buffs your party has and regenerates her HP per turn.
On death, she removes all your Defense buffs.
– Nero Claudius (Bride) [HP: 203k]
While alive, gives a damage reduction aura to Noble Phantasms.
When another Servant is killed, immediately charges her NP gauge to full and gets a NP damage up.
On death, gives the remaining Servants Guts for 3 instances.
– Billy the Kid [HP: 120k]
While alive, gives everyone DEF ignore and all his attacks inflict Burn.
On death, gives the remaining Servants Dodge ignore.
– Anne Bonny and Mary Read [HP: 144k]
While alive, gets an Attack up depending on how low the current roster of Servant’s HP is and has Critical damage up.
On death, inflicts Defense down on the killer and reduces their maximum HP.
– Henry Jekyll [HP: 139k]
While alive, before transforming, charges everyone’s NP gauge at the end of turn. He also gets a Buster up.
On death, if he is transformed, gives Attack down (5 turns) to everyone in your party.
– Medusa (Lily) [HP: 153k]
While alive, inflicts HP recovery rate down and inflicts Buff Block once per attack.
On death, stuns the finisher for 3 turns.
– Gilgamesh [Caster] [HP: 203k]
Once he enters the fight, he removes all the remaining Servant’s “while alive” buffs.
While alive, gives Critical Rate up to his party while inflicting Critical Damage down to your party. Additionally, gives an Attack up to himself and Nero.
On death, fully heals everyone in combat.
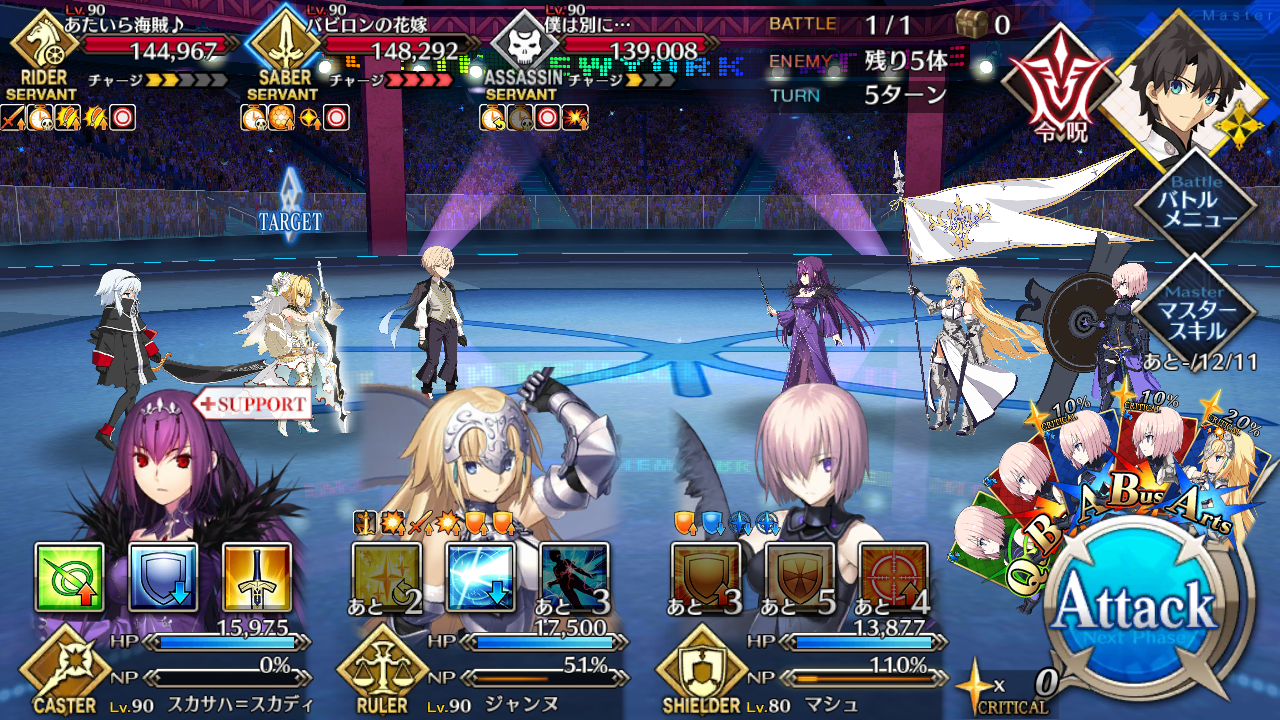
Recommendations:
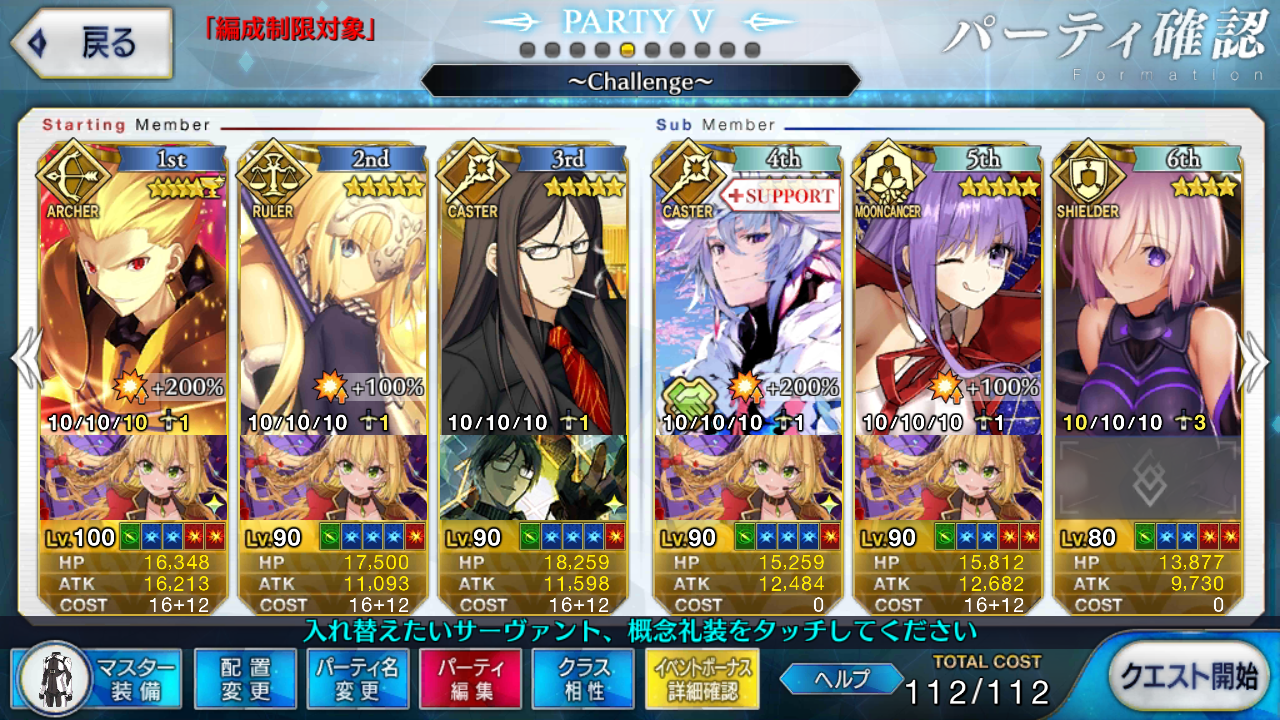
Kill order is extremely important for this encounter (which is par of the course) but compared to the past 2 Finales, once you have a good curve going, this is easier to deal with.
You also have two options for this fight: Pick off the Servants one by one until Gilgamesh comes out, or make Nero priority and just deal with the Guts and the constant NP firing.
It’s extremely important to kill Bunyan within the first two turns, because the floating buff block will slowly cripple you. Ideally, you should activate a stun once you kill Bunyan because Nero will immediately Fax Caelestis your ass, and Bunyan’s deathrattle will remove your defenses.
For the pick off strategy, my recommended kill order would be Bunyan > Billy > Anne > Jekyll > Medusa > Gil > Nero (for invul based defenses) / Bunyan> Anne > Jekyll > Medusa > Billy > Gil > Nero (if relying on dodge based defenses)
The biggest threat for this strategy is Nero and constant ulting. However, it’s easy to tank all those with the correct setup. In addition, you can just slowly reduce any of the other Servants’ HP, then attack seperate Servants in one go, just so the death activation will stack and you tank one less NP. By the moment Gilgamesh appears, you can let loose your NP and depending on your damage dealer of choice, you’ll only have to deal with one survivor or completely wiped everyone.
It’s also recommended to kill Jekyll before he transforms to avoid the Attack down debuff and because his class turns into a Berserker so that’s an additional risk.
For the fuck Nero strategy, kill order would be Bunyan > Nero > Jekyll > Billy > Anne > Medusa > Gil (for invul based defenses) / Bunyan > Nero > Anne > Jekyll > Medusa > Billy > Gil (if relying on dodge based defenses)
This strategy gives you the freedom to fire your NPs, so you can easily wipe a whole bar or a reduced Guts bar however, you’ll be staring into a few more NPs from different Servants to compensate. However, as most of these Servants are single target, you can at least designate Mashu as a meat shield in the worse case scenario. The additional risk for this strategy though, is that Medusa and Jekyll are capable of stunning a Servant so you might end up staring a few dead turns. Kill those two asap.
Most of the Servants except Gil are Single Target, so taunt baiting is viable.
Cu Chullain (Alter) is hands down your best option because of his sheer survivability and good raw damage.
Heracles is your alternative for Cu (Alter) for similar survivability.
Sakata Kintoki is a bit of a glass cannon choice, however if you can finish the fight fast enough, it won’t matter.
Jeanne (Ruler) is overall best support for this because of her cleanse capabilities, stun and Invulnerability which can’t be pierced by Billy’s on death passive.
And as usual, Merlin because Merlin.
Leonidas, Saint George, Chevalier D’eon and Mashu can serve as good meat shields to tank a surprise NP.
BB (Summer) will be good for both strategies, since the guaranteed NP drain from C.C.C. can at least delay NPs a turn. Great Pig Cup’s 1 hit dodge will be useless post Billy though, so take note of that.
Gilgamesh (Archer) was my personal choice for this exhibition, mostly for good raw damage and multiplier on Servants even with class disadvantage. As long as you can maintain your crits, even Medusa (Lilly) isn’t a problem.
If you’ve managed to get a duplicate copy(s) of Return Match, it’s recommended to equip them on one of your supports or on a backup damage dealer depending on needs.
Chaldea Combat Uniform or Atlas Uniform will be good choices depending on your playstyle. I honestly prefer the Combat Uniform more because of Gandr and Order Change gives me more breathing room.
Regardless of strategy, as long as you manage to get Gilgamesh to appear, you will be able to breathe easier because any floating buffs are gone. On death buffs will be easier handle since you can focus all your attention on incoming enemy deaths.
And with that, the Exhibition Quests have been completed. I hope that you had found this helpful as much as I enjoyed writing this guide. Hopefully this saved you a bit of trouble.
I would like to give thanks to Fate/Grand Order English Community and to my own playgroup for the additional insights.
See you next year, Heroic Difficulty!