


With Melty Blood: Type Lumina looming on the horizon, it is a good time to review the game that came before it – Melty Blood: Actress Again. Released previously in Arcades and PS2 simply as Melty Blood: Actress Again, the Current Code expansion gave us more characters while enhancing the balancing and fixing some hit box irregularities, aside from Steam Support when it got released on the platform plus proper translations. As for Under Night In-Birth, it was first released in Arcades and then the PS3 and now PS4 and Steam with different iterations while fixing the balancing, adding more characters and expanding the story. With that introduction out of the way, it’s on to the quick refresher!
When choosing a character, you’d be greeted with the choice of Crescent, Half and Full Moons. These choices offer three different play styles for a character, so choosing a favorite character and learning all three moons became an essential learning curve for players that picked it up, sort of like the Slash or Bust from Samurai Showdown or the styles from Mortal Kombat X. All the fighters in the roster have their own combo systems, which means you’d have to practice making your own bread-and-butter combos to last on matches and repetitive runs in Arcade Mode on the hardest difficulty will be a staple for those players lab-timing/practicing their chosen characters.
Let’s say we chose Aoko Aozaki, who is the main character in Mahoutsukai no Yoru and is shown in flashbacks in Tsukihime. She’s formerly a boss character in earlier entries with a solid move set for each Moon that you play using her, and some mechanics of being one still apply to her like her triple jump and double air dash. Aoko, or Miss Blue as some characters call her, is the one that gave Shiki Tohno his Mystic Eyes Killer glasses, disabling his Mystic Eyes of Direct Death, where lines appear over things and if they get traced, the target falls on the ground in pieces, destroyed.
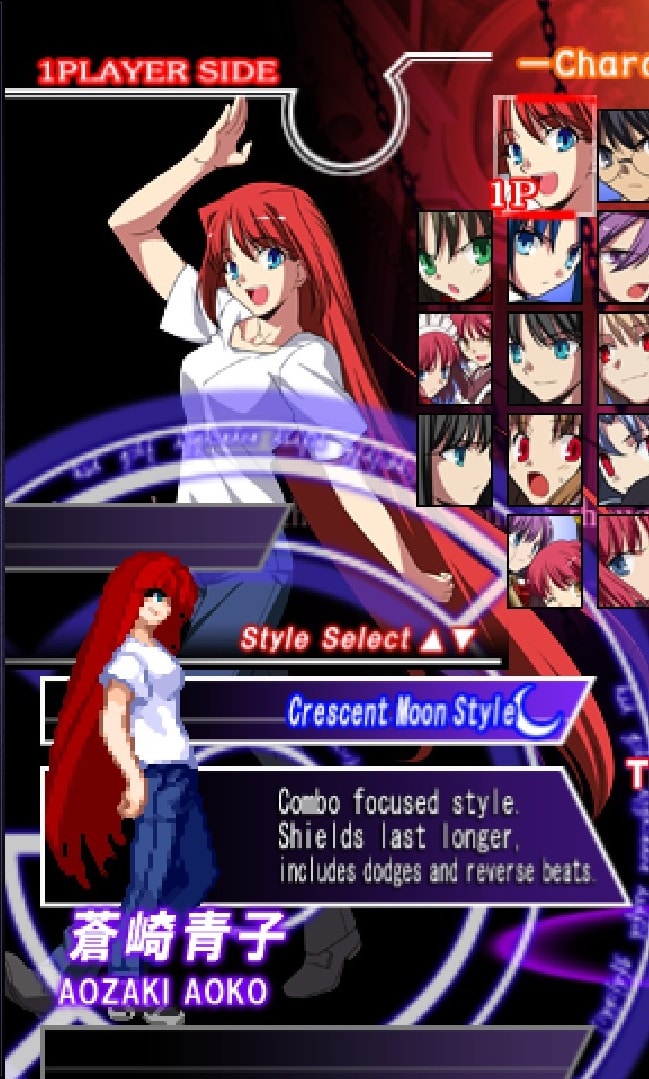
Let’s start with Crescent Moon, which is the combo-centric style. Possessing the capability to reset button presses, which allows you to hit a lower-attack button to continue into a combo. Let’s say if you pressed C as a starter attack, the attack cycle reset happens if you press A after that, which you can string along another cycle of 1-2-3 hits. You have access to a meter that goes up to 300%, where the meter’s reset activates once full. EX Specials (Input + C) just use the full meter’s timer along with the reverse-half-circle + C special. Pressing A+B+C activates the meter’s countdown mode when you have a meter that isn’t full. Using the same input when the meter is full allows you access to a powered-up state, which is the only way you can use a severely-damaging special move that is activated by pressing D and performing perfect Shield, which is using the Shield input at the exact time an enemy attacks.
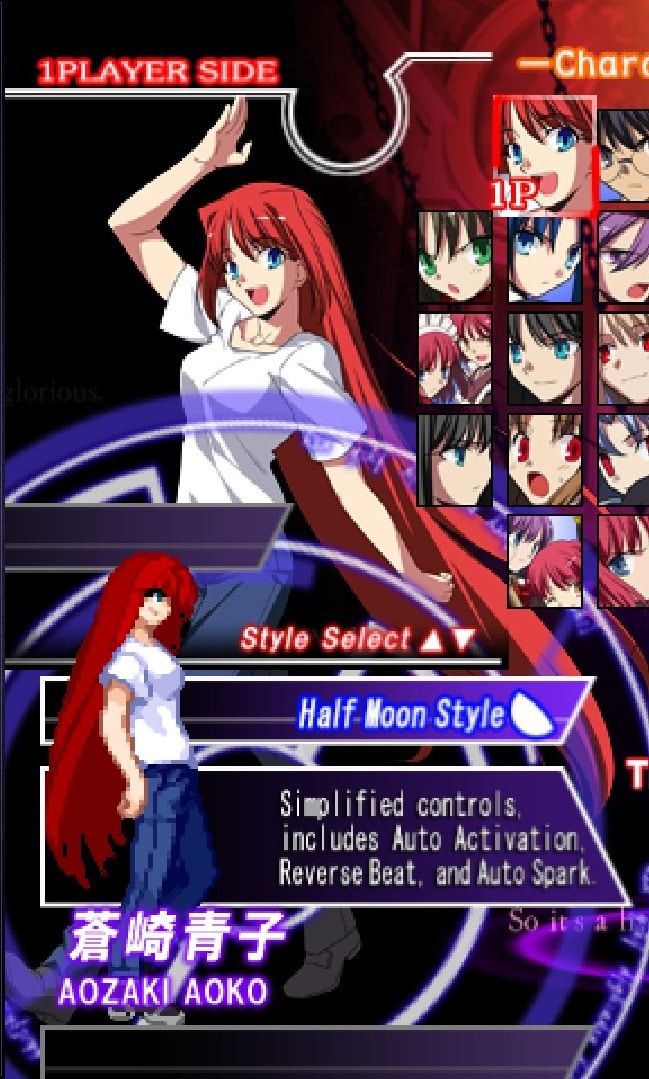
Following it is Half Moon, which is a mix of Crescent and Full Moons. It still has the button-press reset mechanic, but allows a different combo flow by introducing a Dial-A combo (Pressing A three times in succession) which ends in the start of a launch which can be continued into an air combo. You only have a meter that goes to 200% and loss of access to Crescent Moon’s super mode and the crippling finisher, but considering the automatic Burst which cancels an enemy attack the moment it hits, I’d say it’s a fair trade. Still using Aoko’s input as basis, the moment her Dial-A combo ends and the enemy is in the air, you’d notice that this is where fine differences between Crescent and Half Moons start to appear. With Half Moon, managing the air combos are lighter than using Crescent and her Dial-A replaces the Forward-ABC move of Aoko’s which is a series of punches. Experimentation is key to mastering this in-between style.
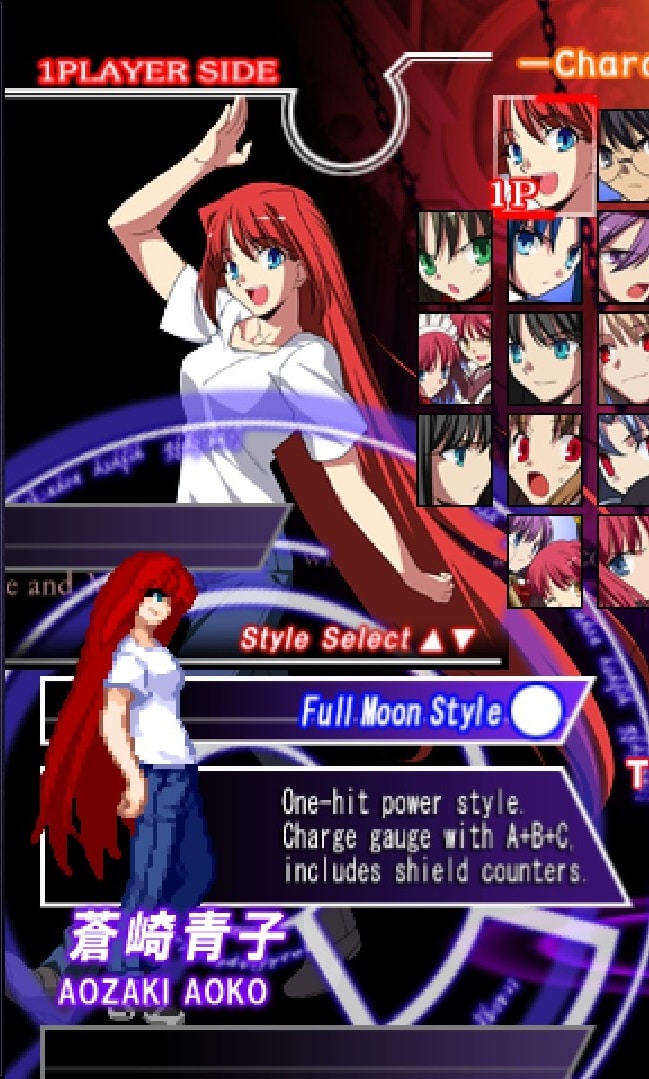
Lastly, we have Full Moon, which is linear and represents the Power Style. Losing access to the button-press reset and focusing on strengthened specials, making a combo that incorporates both normal and special attacks is key to lasting in this style. The 300% meter is back, and in place of the combo mechanic, you get the ability to charge your meter up to full, however it leaves you vulnerable, so you’d have to time your charges strategically to achieve great efficiency. The very-damaging super returns as well, and backed by the charge mechanic, you could use it with lethal efficiency if paced right in between combos. This style is a good one to start with, following Crescent.
A basic input that you can possibly apply in Melty Blood: Type Lumina is the command dash, which is performed by pressing forward or backward and A+B, keeping your pace up in combat instead of pressing either direction twice. It can also be used mid-air to give yourself either a boost forward or backward depending on your choice.
Another handy technique you should remember is the dodge, which is performed by pressing down and A+B. It requires precise timing, so full-screen attacks or projectiles can be easily avoided, like the Arc Drive of the final boss.
Shielding is performed by pressing D. Keeping it activated costs meter and drives down your guard gauge, leaving you easy to guard break and kick around. Timing it right results in an EX-Shield, which even nets you some meter gain, and if done in succession, could mean a rapid gauge gain.
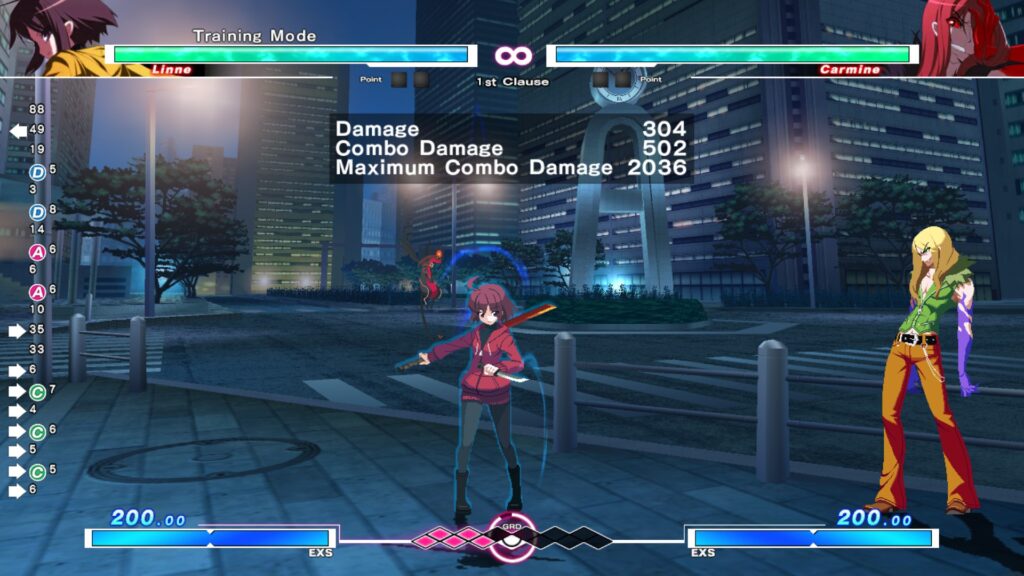
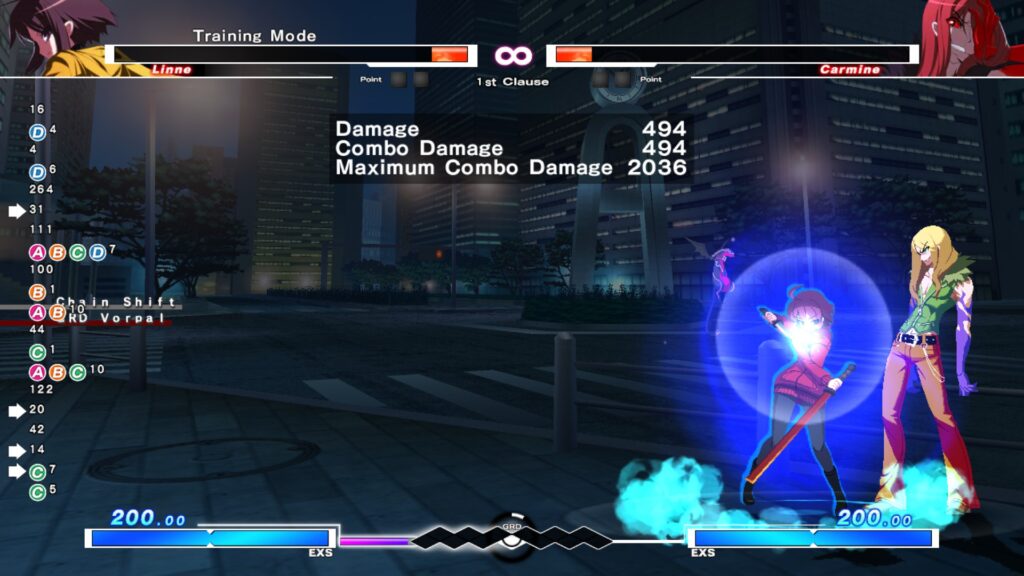

“But Ray, where does Under Night In-Birth come in?” I hear you ask. Don’t worry, dear readers, because here is where I start. If you’ve seen some teaser videos of Type Lumina and played Under Night before, you can draw parallels on several points as well. From the trailer for Type Lumina, we can see that this is where the art direction is headed, basing on the character and stage art styles. Some Melty Blood similarities are here as well, like the command dash input, the dodge, and the shielding.
However, the GRD Meter in between both P1 and P2 super meters is a new mechanic that can be used both to quickly fill up said super meter and act as a combo reset, but it only fills up if you are the dominant player and keeping your opponent on the ropes executed by pressing D twice quickly. Another nifty addition are the finishers can only be performed when your life bar is at a critical state and your meter charged to full, marked by the former changing color.
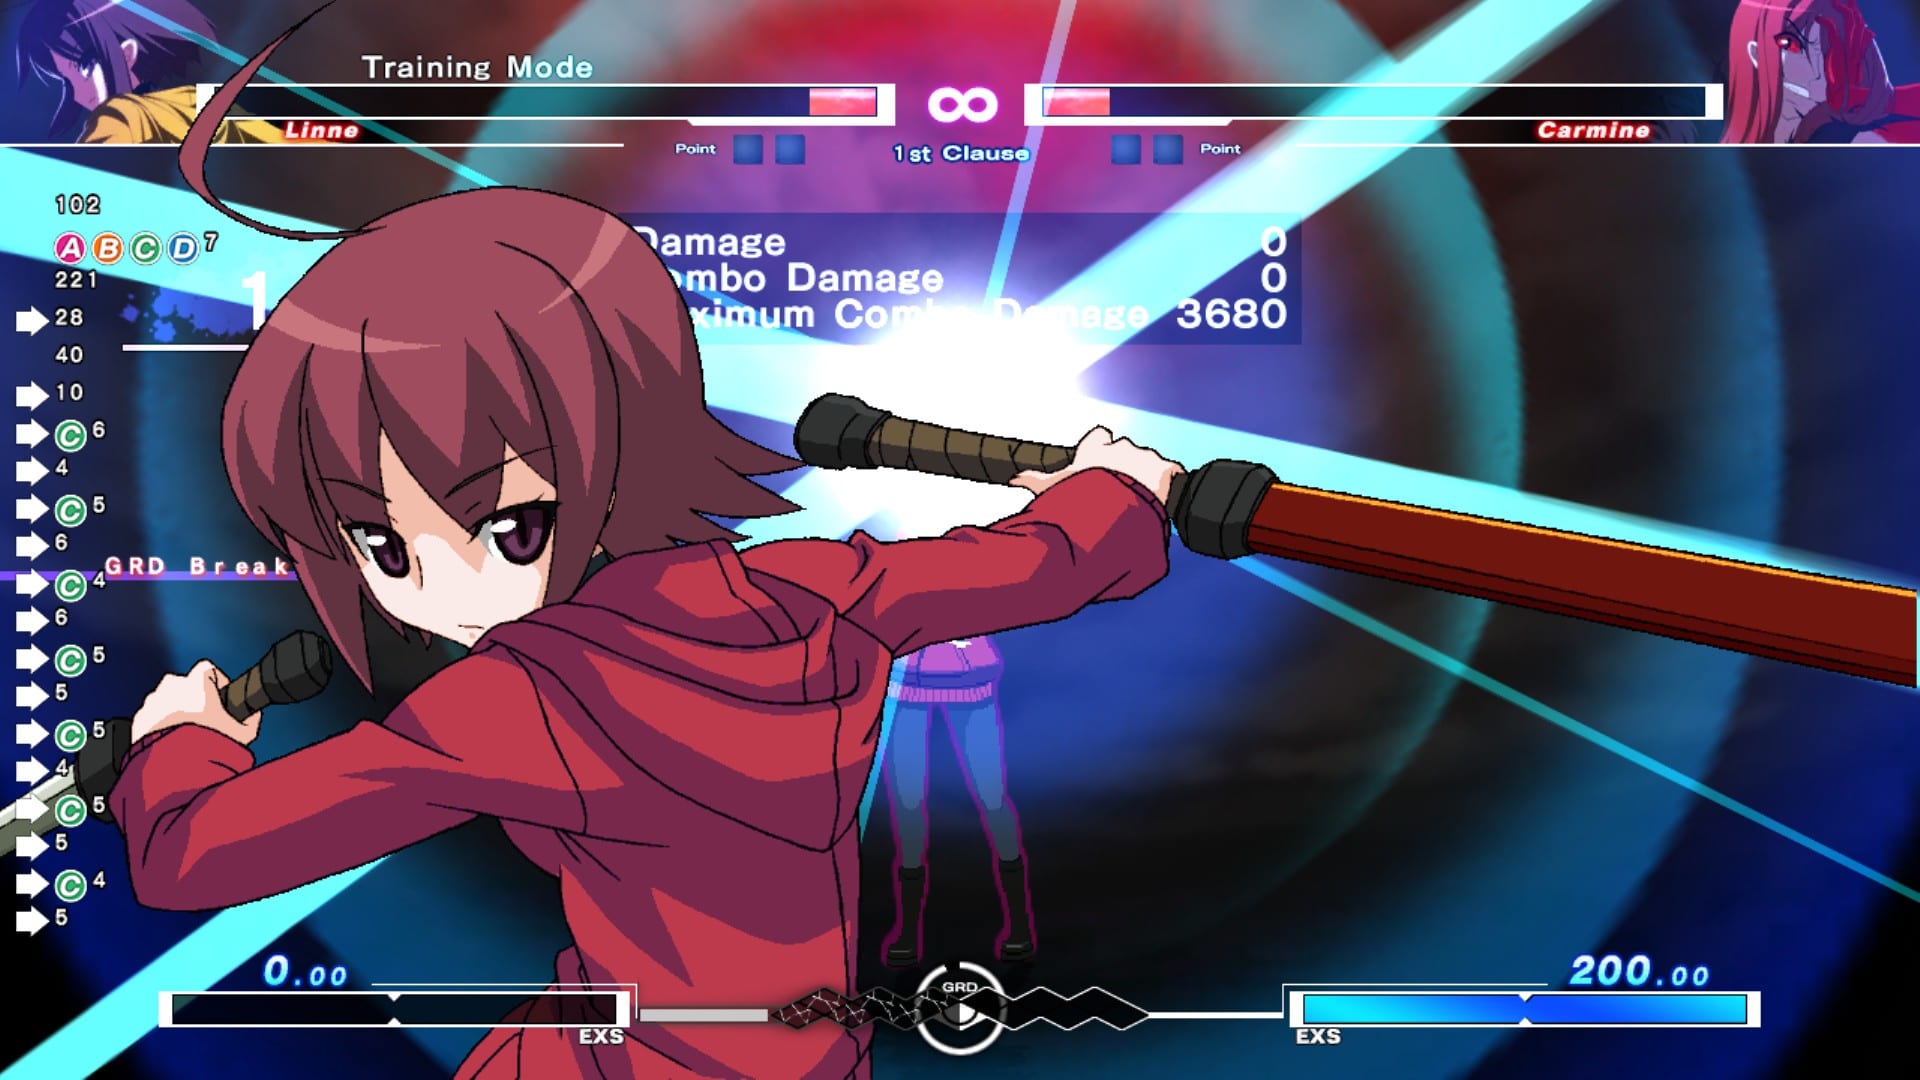
The red-life bar finisher is also incredibly flashy, like an anime cutscene in the heat of battle, and still seeing it up to this day still makes me shout “ANIMEEEEEEEEE!” whenever see the start-up for it land a hit and the animation starts, sometimes even shouting the name of the attack along with the characters. With the tight pace of Melty Blood and Under Night combined plus the direction their art is taking, I can confidently say we’re in for a wild ride.
The HUD is also remarkably similar to the ones we’ve seen so far in previews of Type Lumina, and also seemingly using the same engine. Seeing as we’re playing another French Bread (Yes, that’s the name of the company working with Type Moon on TL) working it, we’re bound to see another tight but not unforgiving Melty Blood title on the roster for fighting games as far as the Anime Fighter sub-genre is concerned. I’m sure it’s got a nice mix of both games, and I for one cannot state how hyped I am about its release. With all that done, all that’s left for us to do is wait until it releases and get to training. We wouldn’t want to be left behind by friends, rivals, and friendly rivals, right? See you next time.


