
Prior to the release of the PlayStation 5, one of Sony’s promises to its players is the capability to upgrade the console’s storage. Unfortunately, this capability has been absent since the console was first released in November 2020. With the console’s second major system software update, though, the lucky few who actually own the console can actually now take advantage of this upgrade and expand their storage by adding an additional M.2 SSD.
If you do own a PS5, here’s how you can install a new SSD to your console.
How to Install an M.2 NVMe SSD to Your PS5
Things To Remember Before Installing A New SSD
Get an M.2 SSD With A Cooling Capability
Before you go out to your nearest electronics store or go online shopping for a new SSD for your PS5, take note that the SSD should have a cooling capability. Ask your retailer for an SSD that has a heatsink, such as a Sabrent Rocket 4 Plus or a WD_Black SN850.
Other Specifications for the SSD
Below lists the required specifications for the PS5’s supported M.2 SSD, courtesy of Sony.
- Interface – PCI-Express Gen4x4 supported M.2 NVMe SSD (Key M)
- Storage – 250 GB–4 TB
- Supported sizes – 230, 2242, 2260, 2280, 22110
- Size including heat-dissipation mechanism – Width: up to 25 mm, Length: 30/40/6080/110 mm, Thickness: up to 11.25 mm (up to 8.0 mm from above the board, up to 2.45 mm from below the board)
- Sequential read speed – 5500 MB/s or faster is recommended
- Socket type – Socket 3 (Key M)
Things To Prepare
Once you have your supported M.2 SSD, there are also a couple of things you will need to get you started. If you’re a tech aficionado, chances are, you already have these items in one of your drawers. If not, be sure to get them beforehand.
- Phillips #1 Screwdriver
- Microfiber Cloth
Update Your PS5
Before you open your PS5 console, it is integral that you first download and install the software update. Fire up your console, install the update, and once that’s complete, turn it back off and remove any wires that are connected to it. We can then proceed with actually installing the SSD into the console.
Stepts to Take on How to Install a New SSD To Your PS5
First things first, safety. To make sure you don’t harm yourself and the console, touch any metal grounded object to remove any static electricity from your body. The amount of damage this can actually do to you or your console is debated by many, but hey, you can never be too safe. Let’s get started.
Position the PS5 Properly
Place your PS5 on a leveled surface. It’s also recommended that you place the console on top of a protective layer. Turn the front of the console away from you and make sure the logo is facing downwards.
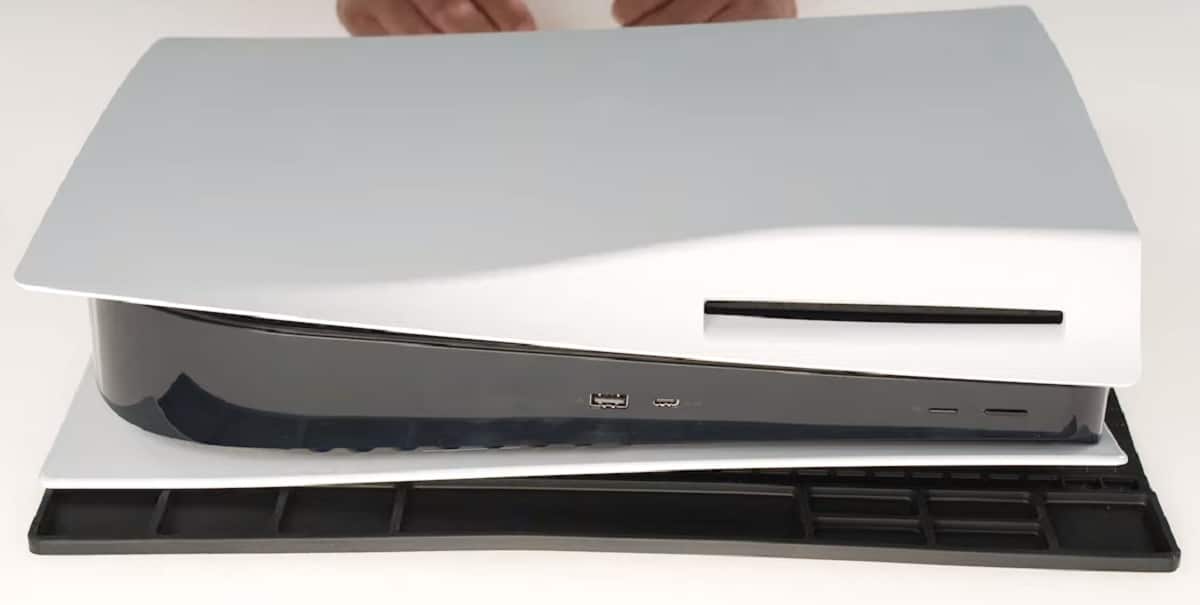
Remove the Cover
Removing the cover of the PS5 should be easy enough. However, you should still be careful to not exert too much power on it to avoid damaging the cover itself.
Simply place your right hand on the lower right corner and the left on the top right corner of the console. Gently lift the cover with your right hand, slide it towards the left, and the cover should slide right off.
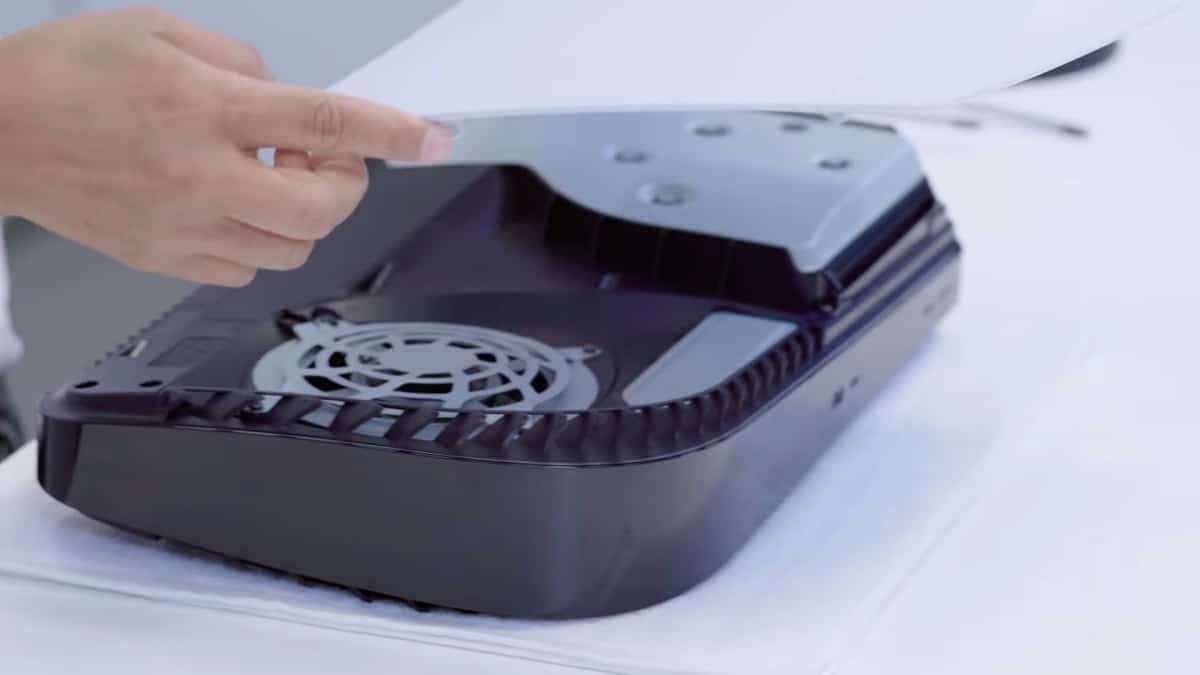
Remove The Expansion Cover
The expansion slot should be right beside the console’s fan. Unscrew the slot using your screwdriver. Make sure you have all the screws accounted for. Once unscrewed, simply lift the cover off.
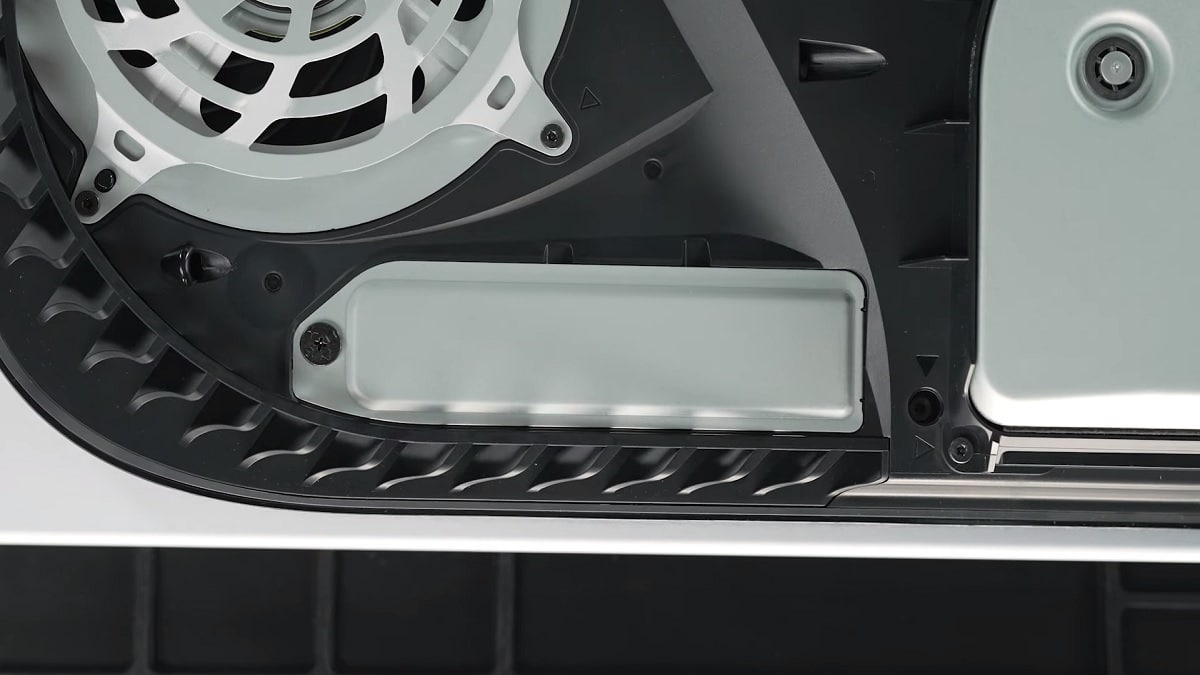
Preparing The Expansion Slot
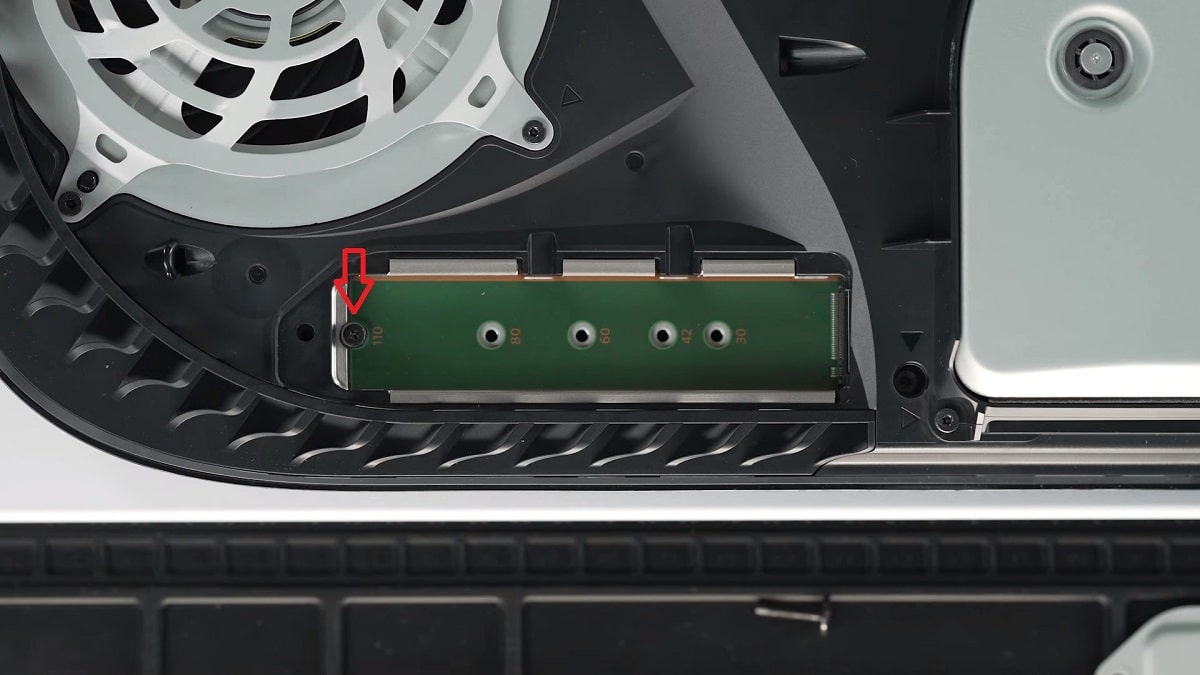
Once the expansion slot is uncovered, notice the screw above the four slots. Remove this screw and the spacer that comes along with it. Place the spacer on the slot that matches the size of your M.2 SSD.
Installing The SSD
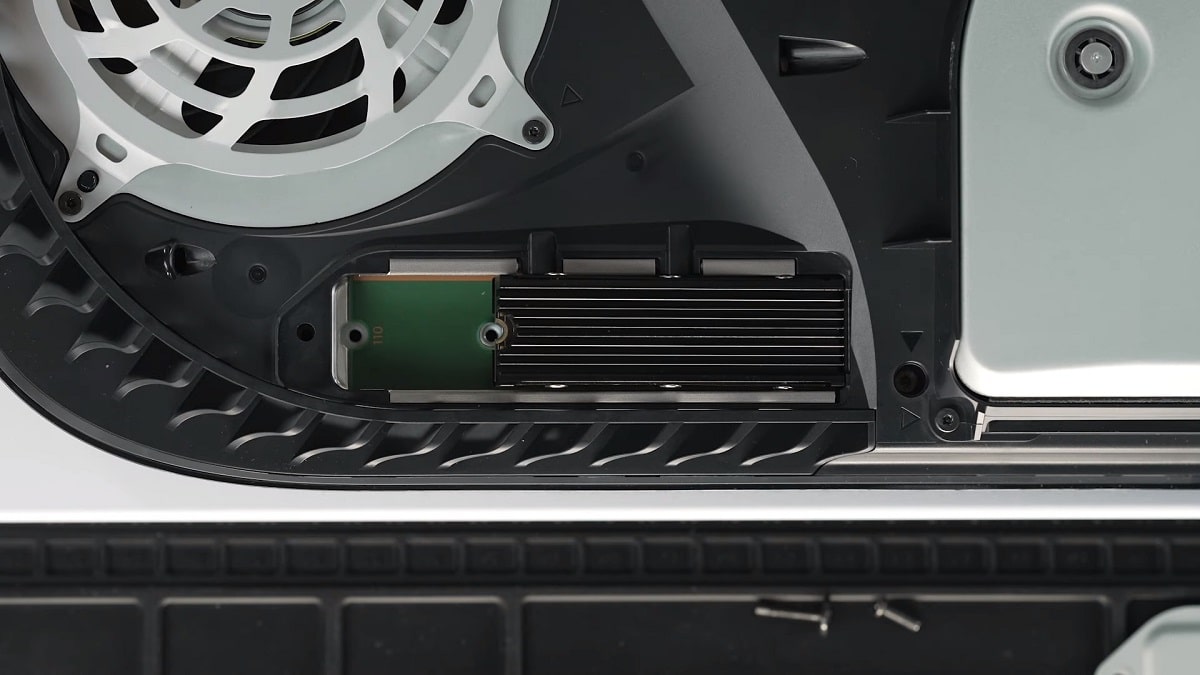
Now it’s time to finally install your SSD to your PS5! Get your SSD and insert its interface to the corresponding notch terminal on the console. This will position the SSD diagonally. While in this position, gently push the SSD towards the terminal to hold it in place.
Once done, hold the SSD down and use the screw you removed from the expansion slot to screw the SSD in place with the spacer.
Finishing Up
Once you’ve finally installed your new M.2 SSD, simply place the expansion cover and the cover of the PS5 back in their places.
Finally, boot up your PS5 and format the SSD. You should immediately see on-screen instructions on how to complete this as soon as the PS5 turns on.
That’s it! You’ve finally installed a new M.2 SSD on your console. More and more video games are becoming so much bigger in scale and size lately, a new SSD should at least negate the need to constantly delete the games you already have installed to make way for new ones. Enjoy and keep gaming!


