
Heads up, first. This list will not include all character-specific abilities. Instead this article will focus mainly on general tips and tricks covering the city map, headquarters, armory, and some in-mission tips.
There will be tips and descriptions for the 4 main starting characters and the 4 other agents I have chosen for this playthrough.
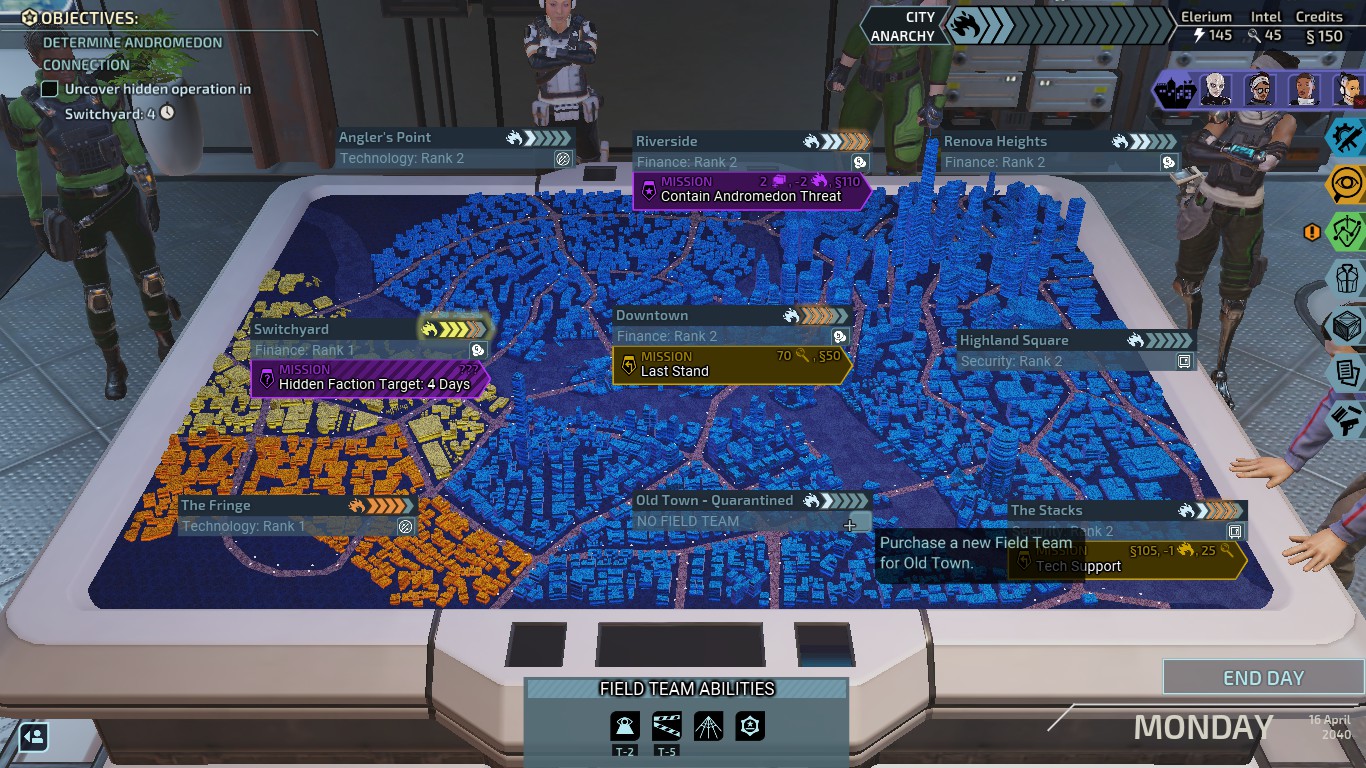
CITY MAP TIPS
- Delaying or otherwise ignoring story missions will cause unrest to rise faster within districts. Normally, the player chooses between 2 areas, having a pending story mission adds another area of unrest.
- You can afford to have a couple of districts at max unrest. City anarchy goes up 1 after each day as long as there is ONE district at max unrest.
- Having a rank 3 security field team on a district reduces unrest by 2 every Friday. The other 2 rank field teams provide higher rewards under certain conditions.
- It’s entirely possible to have ALL city district under 1 type of field team, the cost will be significantly higher compared to having a diverse line up of finance, research, and security.
- Get a feel as to when to use Field Team abilities. You can get away with using them in the early game, but that 4-5 day cooldown won’t look as forgiving in the late game.
- Among all the abilities, Dragnet is one of the more misunderstood ones. The ability allows you to collect 40% of a district’s active Situation. This ability simultaneously resolves the Situation, allowing you to go resolve a Situation at another district.
- Humanitarian Aid and Crisis Management are important end-game Spec Ops but they require a special agent and at least a rank 2 security team to run. (Crisis management only requires a senior agent or higher.)
HEADQUARTERS TIPS
- Having Rank 2 field teams unlock additional options within Spec Ops.
- Cycle Agents frequently. Insisting on keeping a core group together will cripple the advancement of other idle members. Also, only senior agents and above have access to high-level Spec Ops.
- Scars received from combat stack up. This will affect team performance in bad ways sooner or later. Get rid of them ASAP.
- Training usually goes like this: Basic conditioning -> unlock potential -> special skill. The potential and special skills are unlocked at certain ranks.
- Always have a project running in the Assembly. Having an agent there cuts research time to half.
- Of all resources, Intel is the most valuable to have on hand. Not only do you need it to buy and level up field teams, but it is also the preferred currency in the gray market. Maintaining 200 Elerium and 350 credits is enough for practically all expenses. Having lots of credits means nothing if there’s nothing to spend it on.
- Keep an eye out on your PROJECTED BREACH OPTIONS. Some will require a breaching charge for another entry. Others will require a drone or key card. Though not entirely essential, having more entry points means you can get the jump on enemies more frequently.
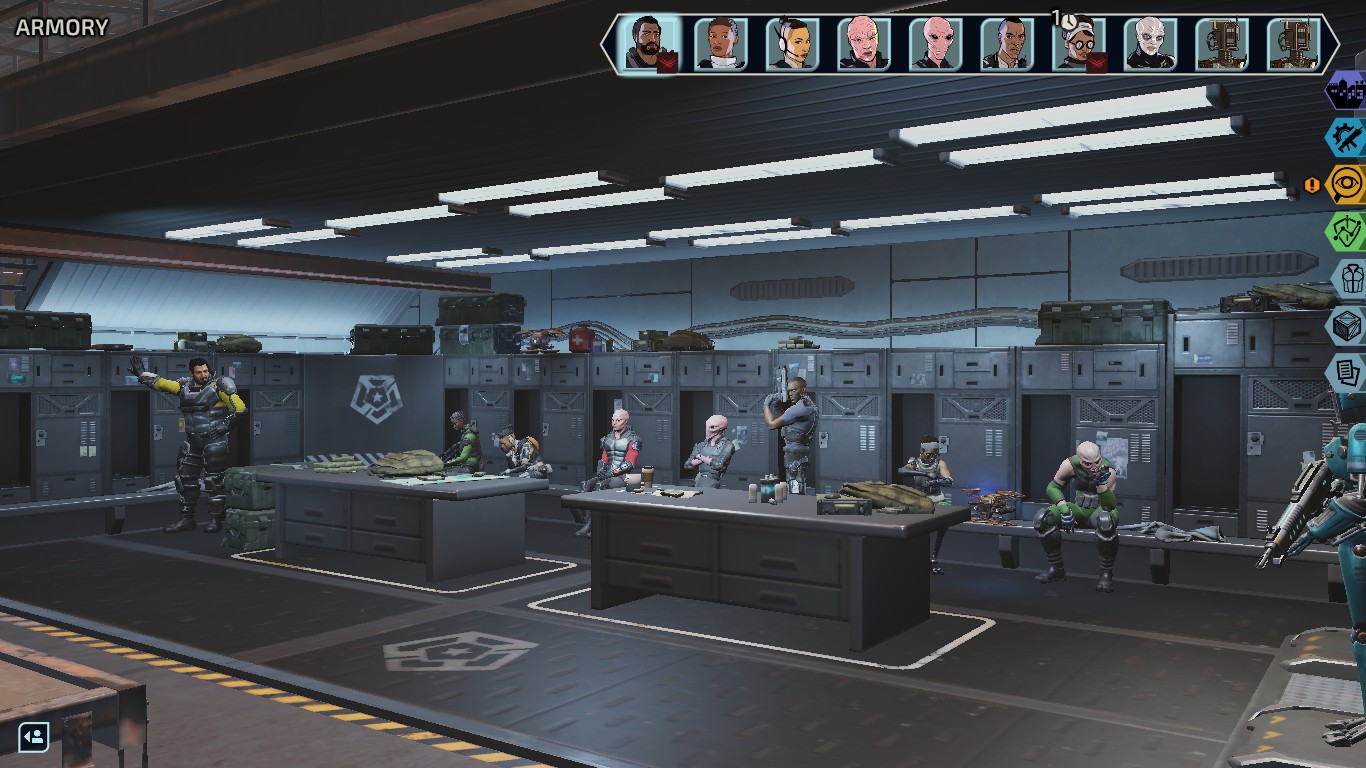
ARMORY TIPS
- For the early game, you don’t need to buy new equipment for every new agent that you bring in. You can only have 4 active agents for missions. Save that money for something more pressing, like upgrades.
- As an early game utility item, tracer rounds are rather expensive. Being smart about positioning and being aggressive on the flanks makes up for the 5% loss of accuracy.
- Tranq rounds allow you to capture assailants from a distance without killing them. They fall out of favor when armor becomes normal.
- Caustic rounds may be objectively better than dragon rounds for the sole reason that acid in general shreds armor, but the burning effect of dragon rounds temporarily disable some abilities while that unit is on fire.
- Bluescreen rounds are deadly against robotic enemies. Nearly one-shots androids when putting on an assault rifle or shotgun.
- Make it a priority to acquire armor-piercing rounds ASAP. They will save your team from the endless headache known as tanky enemies.
- Scopes work well with rifles and pistols. Having high accuracy helps secure kills faster than iffy crit machines that miss half the time.
- The red dot works well with the shotgun as it increases crit chance the closer your agent is to the enemy.
- Mach weave increases dodge by 50. Sometimes it’s better to be hard-to-hit rather than being a bullet sponge.
- Named weapons come with it a unique skill that makes agents so much deadlier. These named weapons are more than worth the asking price of acquiring them.
GENERAL MISSION TIPS
- The order in which your agents enter a breach determines their order in the timeline for the rest of the engagement. Plan accordingly.
- Full cover acts like armor, reducing 1 damage per attack, on top of the additional buffs provided by full cover. There are a few skills that allow you to destroy full cover, but in most cases, it’s better to either flank them or force them out of that cover.
- Missing a shot with an 87% chance of hitting occasionally happens. It sucks, but that’s just how it is. On the bright side, the same also applies to enemy attacks.
- Know when to use the Preparation ability. Not only does it provide additional defenses and dodge chances, and the agent in question gets a higher turn in the next round of fighting. Great for when an agent is under the thumb of 3 or more enemies.
- Do not underestimate the impact of a perfectly placed smoke grenade. All units within the smoke are practically invisible. the only way the enemy can get them is to run inside the smoke or to way for your agents to leave it.
- Enemies prioritize aim percentages. Use it to your advantage by advancing your tanky agents in front to soak some of that damage before going in. Oh, and do make use of cover. Even the tankiest of all characters die real quick under intense fire.
- Agents who rely on skills typically do not move around very much. Have the aggressive flanker secure kills. But do keep in mind that you are free to use a single skill as your first action, then follow it up with some shots.
- Most grenades take 2 to 3 turns before exploding. Not plasma grenades though. They explode on impact, destroying cover within the blast radius. You can follow up with shots on an exposed foe.
- 20% chance of district unrest for each dead civilian on a mission. That won’t reflect well on your abilities as a commander.
- Subduing an assailant during a mission results in a 20% chance of getting 20 Intel. Capturing 5 or more guarantees that 20 Intel.
CHARACTER INSIGHTS
There are a couple of junctures where builds differ. Specifically on the field agent and senior agent rank. It’s all about weighing in skills that you feel like using all the time over skills that you ‘might’ make use in some cases.
All agents who acquire the rank of principal-agent greatly swing the flow of battle in your favor. If you know how to utilize their unique skills.
All 4 starting team members are useful in practically every mission. It all boils down to equipment management. But all their skills are top-notch.
Godmother: She’s one of my most favorites agents to use. She is the closest thing to the assault class units in mainline XCOM games. Her first skill makes it so that she can hit multiple enemies within a cone at the cost of 2 ammo. Her other skill allows her to dodge the next subsequent enemy attack when she takes down an enemy.
A deadly flanker and front liner in general, Godmother is a versatile killing machine that gets around the map rather quickly while at the same time best suited for destroying cover.
Terminal: It’s so hard building a team that doesn’t have Terminal. She’s the team medic and not having her around leaves your team vulnerable for some reason. Her Gremlin heals a teammate for free on her turn. At higher ranks, her gremlin adds armor on top of the defense that it provides on an agent.
Her ultimate skill heals all allies for 4 points while at the same time removing debuffs. AND stabilizing downed allies in one fell swoop. One use per mission.
Cherub: His unique skill set allows him to draw the most fire during a breach. With him on the team, he can nullify all the damage from counter-attacks with a single skill. His barrier ability nulls damage on one attack. These, in turn, charge his shield, allowing for a powerful melee attack when fully charged. It acts more like a mobile support tank rather than a proper tank.
Verge: A physic specialist that takes control of the flow of combat. He can use berserk to force enemies hiding in the back to shoot at their friends. His stupor potential removes an enemy from play for a couple of turns. At higher ranks, the more minds that are connected in his neural network, the more effective he becomes. There is even a skill that heals him for a point for each mind connected at the end of his turn.
Claymore: Explosives specialist. He gets a shrapnel grenade every couple of turns and is really effective against groups of enemies. His sticky bomb ability forces enemies out of cover before exploding 4 tiles later. (Warning: enemy may potentially run towards civilians if said civilian is closer.) Slow and tanky, his place is truly on the frontlines soaking in damage which tossing grenades for days.
At his highest rank, he able to throw 2 shrapnel grenades without ending his turn, allowing him to finish enemies off with a more powerful sticky grenade.
Blueblood: Sharpshooter. His breaching skill allows him to ignore full cover and do direct damage to the enemy. His unique ability Deadeye allows him to take 2 shots per turn with reduced accuracy. With a good enough scope, you can potentially remove that accuracy penalty. Best used to mop up enemies as the 4th attacking member. Just really good at finishing off weakened enemies.
Patchwork: Robotics specialist. She has a gremlin that shocks enemies for 4 guaranteed damage. Does extra damage on robotic units. Patchwork’s other skill gives her a chance to hack an enemy robot. The chance rises up with her rank. She also has a skill that allows her to shock nearby enemies for 1 to 3 damage at the highest rank. The skill goes off even she is the one moving towards them.
At her highest rank, Patchwork is able to launch her gremlin to chain lightning all enemies within a certain number of squares. Stunning them in the process. One use per mission.
Zephyr: The definition of aggression. She is a close-quarter specialist who dives into enemy lines with no fear. Zephyr’s default attacks hurt a lot, but kills her opponents. At higher ranks, her base melee attack knocks enemies out instead of killing them. On top of that, there is a possibility that her attacks might stun a target. At the end of the attack, she has the option to reposition to cover or use her parry ability to completely nullify the next attack on her.
Her other skill allows her to fight all enemies within a certain number of squares. Unfortunately, it does not active her passive ability. her Reaper ultimately allows her to act again after each enemy takedown. Every subsequent attack suffers a damage reduction.
XCOM: Chimera Squad is available on PC and read our review right here.


