
Five Nights at Freddy’s Help Wanted 2 is a virtual reality game that was announced for the PS VR2. However with the game also available on Steam, you may be wondering if other VR devices like the Oculus Quest 2 can run the game.
With the first Help Wanted available for the Oculus Quest, it may not be too much of a stretch to say you can play the game on this VR hardware. On this guide, I’ll show you if you can run Five Nights at Freddy’s Help Wanted 2 on the Oculus Quest 2.
Can you run Five Nights at Freddy’s Help Wanted 2 on the Oculus Quest 2?
Five Nights at Freddy’s Help Wanted 2 isn’t officially supported on the Oculus Quest 2 as of yet. Though you can use SteamVR to play the game on Oculus Quest 2 through Steam on your PC.
The issue is when it comes to the controller key bindings. There are players who are reporting issues with getting the game’s controls to run on the Oculus Quest 2 even with the Steam Link. If this happens to you, you’ll wind up getting stuck on the EULA page without being able to move on.
According to the Steam store page for the game, developers Steel Wool Studios are working on a patch to support older VR headsets like the Quest 2 to work with Steam Link. In the meantime, you can manually set the controls for yourself via the SteamVR settings. You can either use the community published key bindings or manually set it for yourself.
Use Community Publish Key Bindings
Open the “Controller Bindings” menu from the Steam Link or SteamVR and check out the section for Community Bindings. Pick any configuration that you think fits you that’s been published there.
Manually Configure Key Bindings
These instructions game from the official Steam store page:
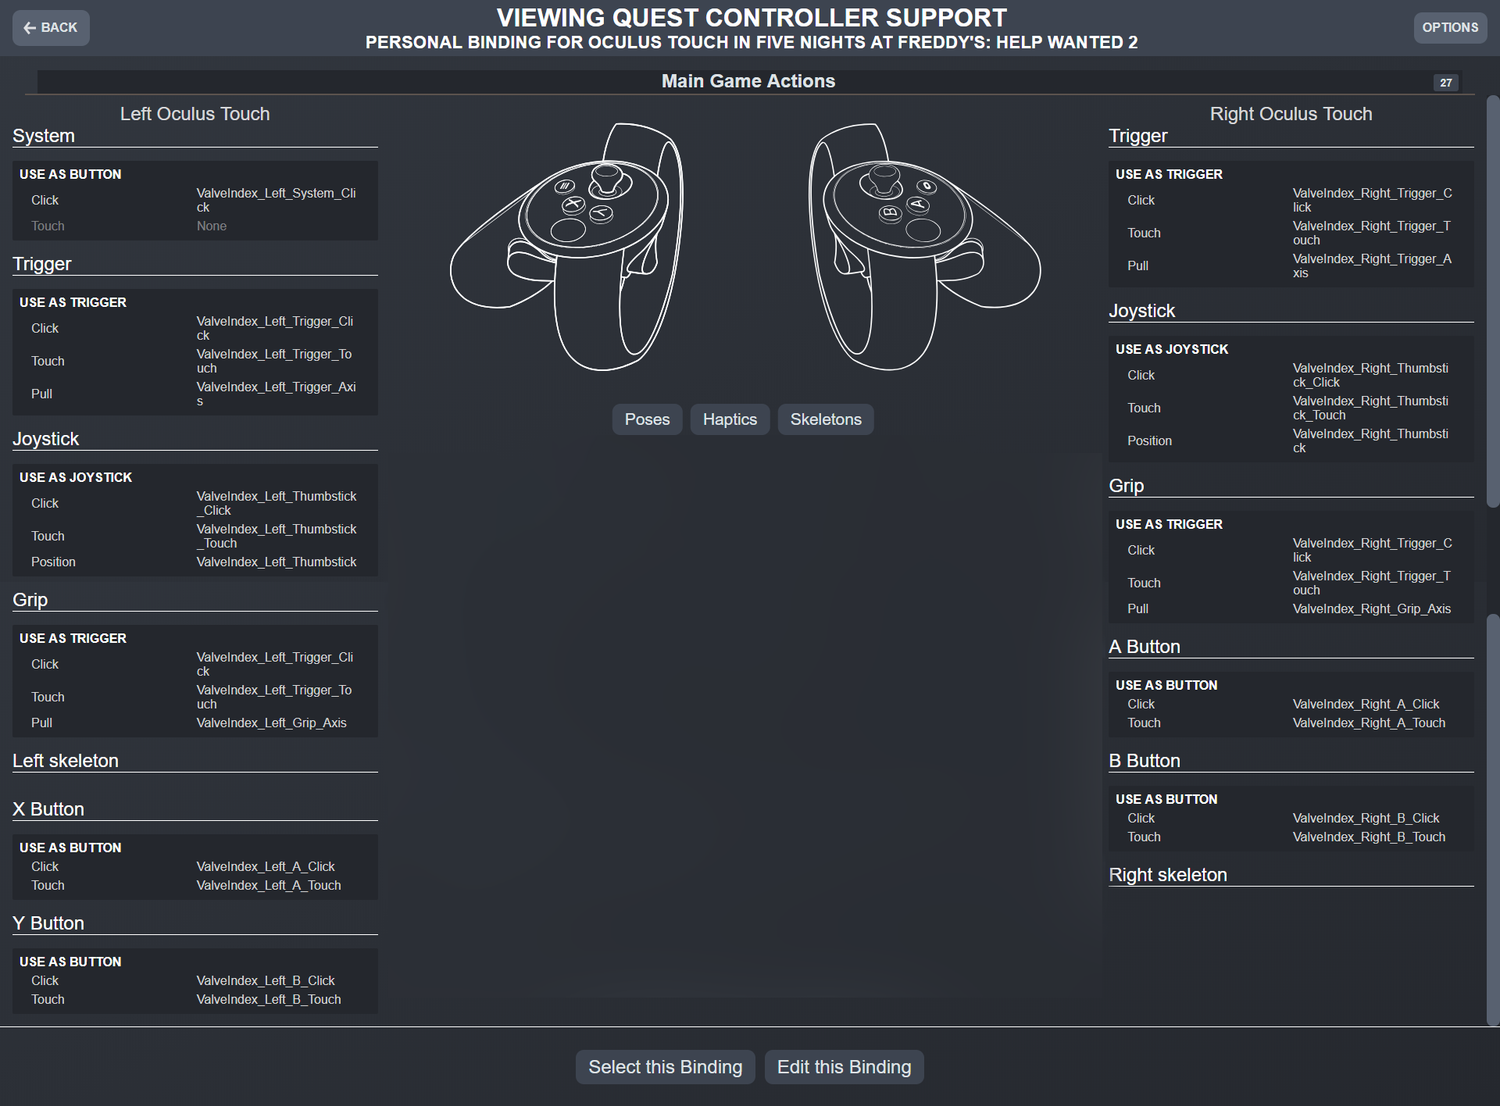
- Launch the Steam Link app through the Oculus Quest 2 headset
- Launch Five Nights at Freddy’s Help Wanted 2 from the Steam interface
- Once the game is running, press the Options button on the left controller (the one that resembles a hamburger) which will bring up the SteamVR menu
- Go to “Controller Bindings“
- Next to “Active Controller Binding” pick “Custom“
- Under “Current Binding” click on “Edit“
- Match your controller bindings to the picture above
- At the bottom of the window, hit “Save Personal Binding” once you’re done
- Give the binding a name and select “Save“
- Ensure that particular binding is selected and start playing the game


