
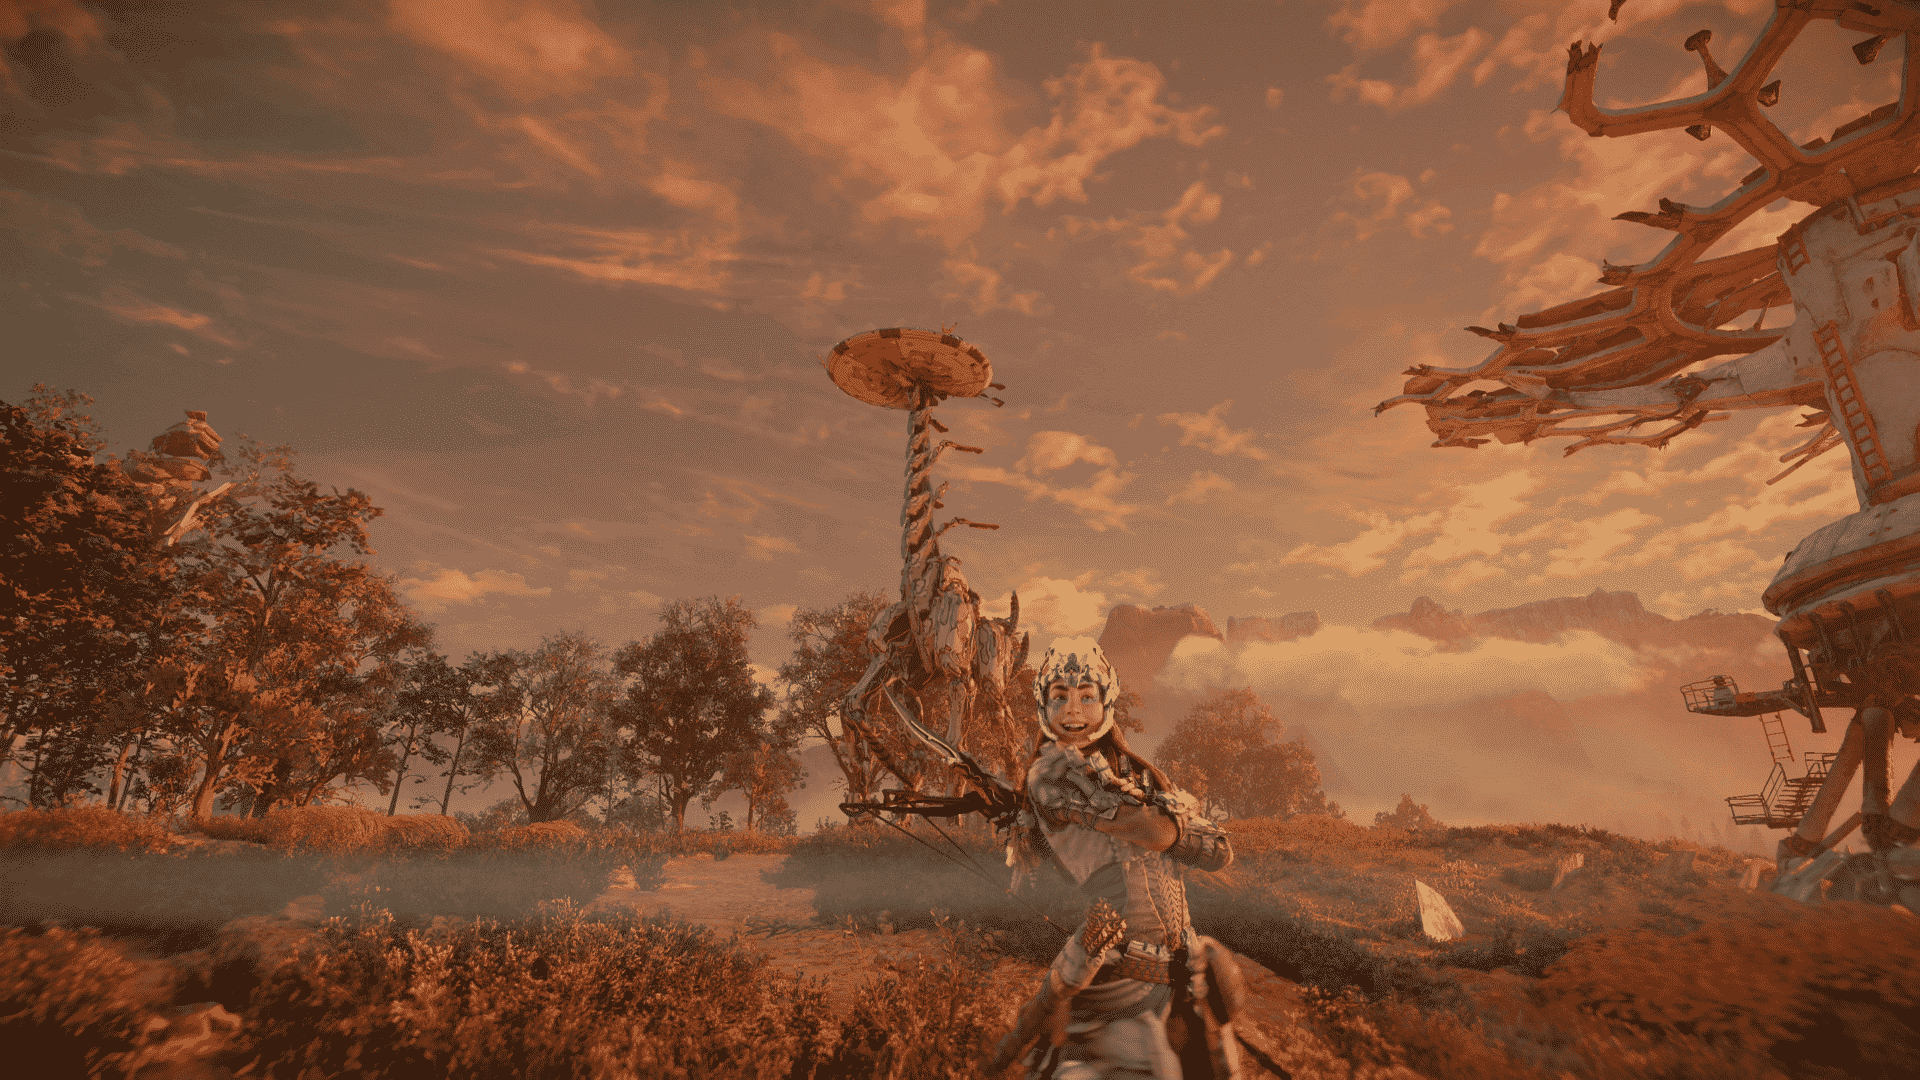
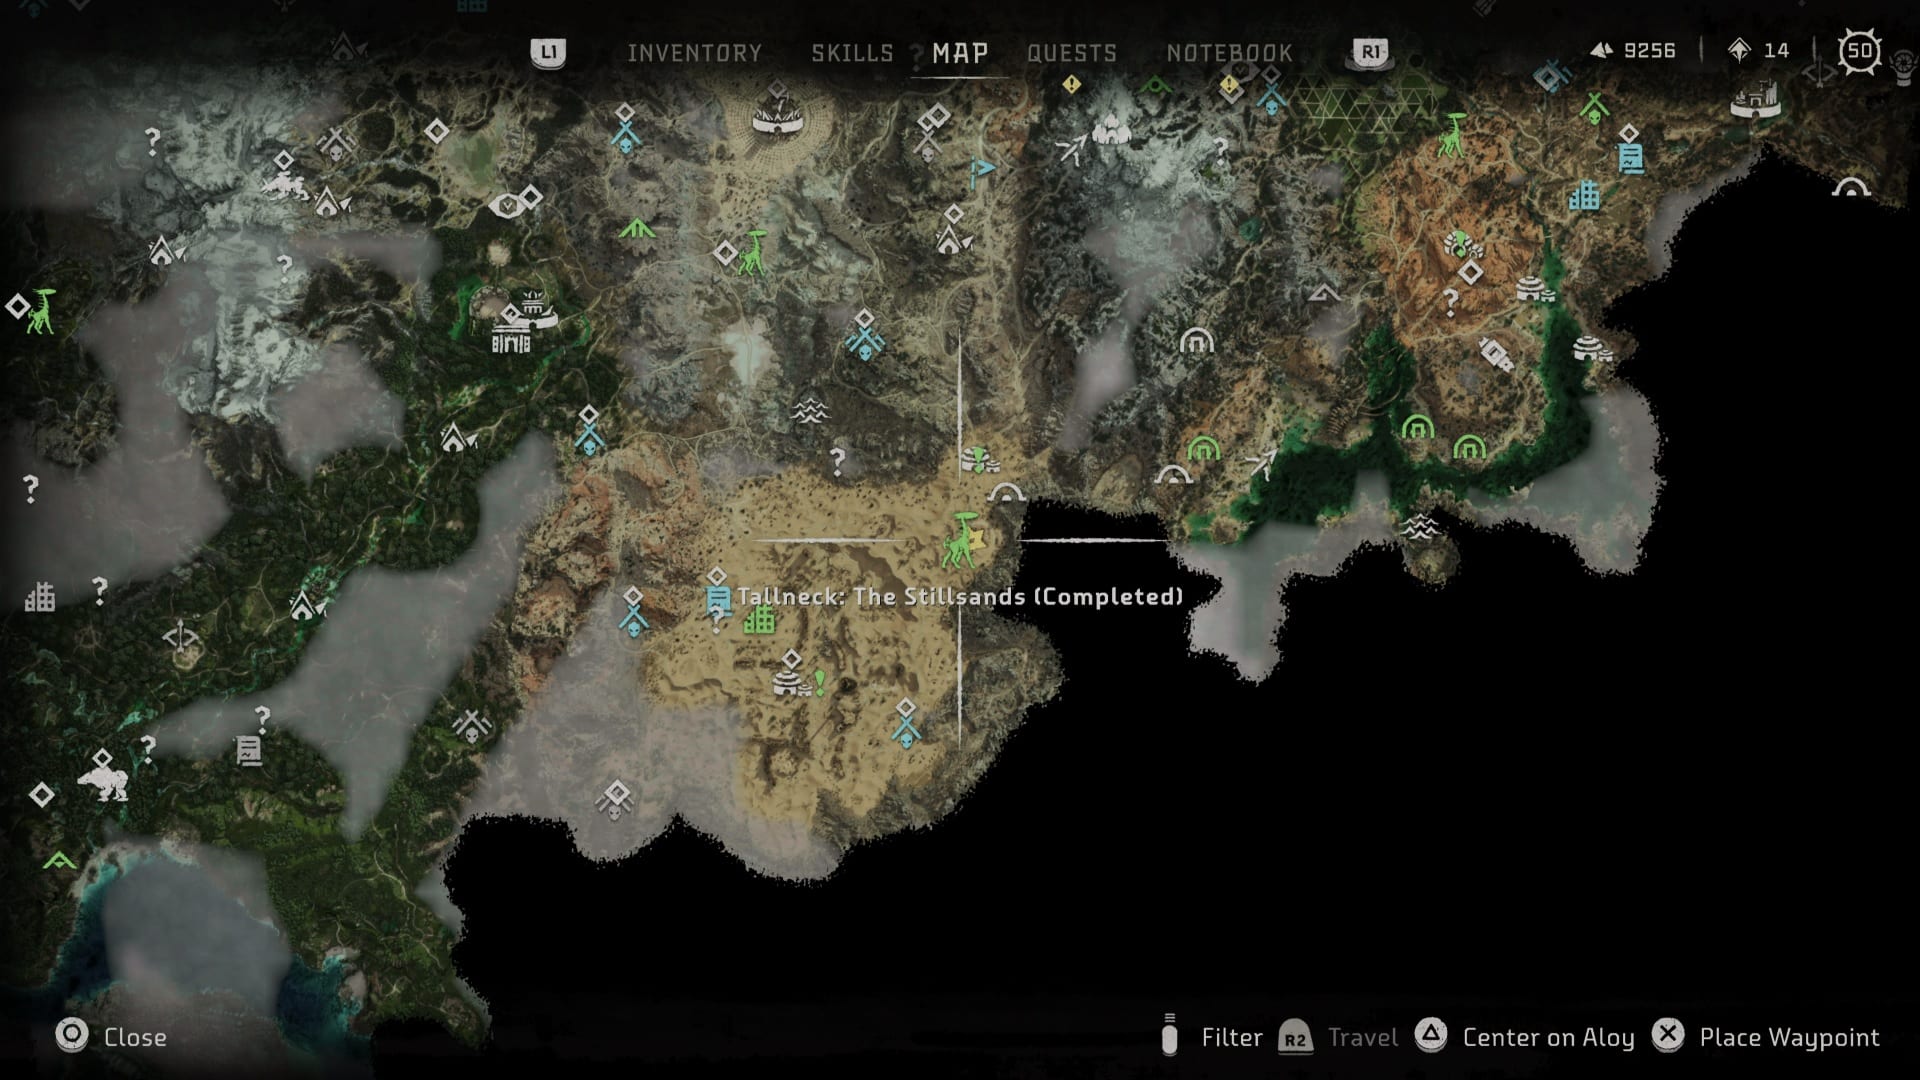
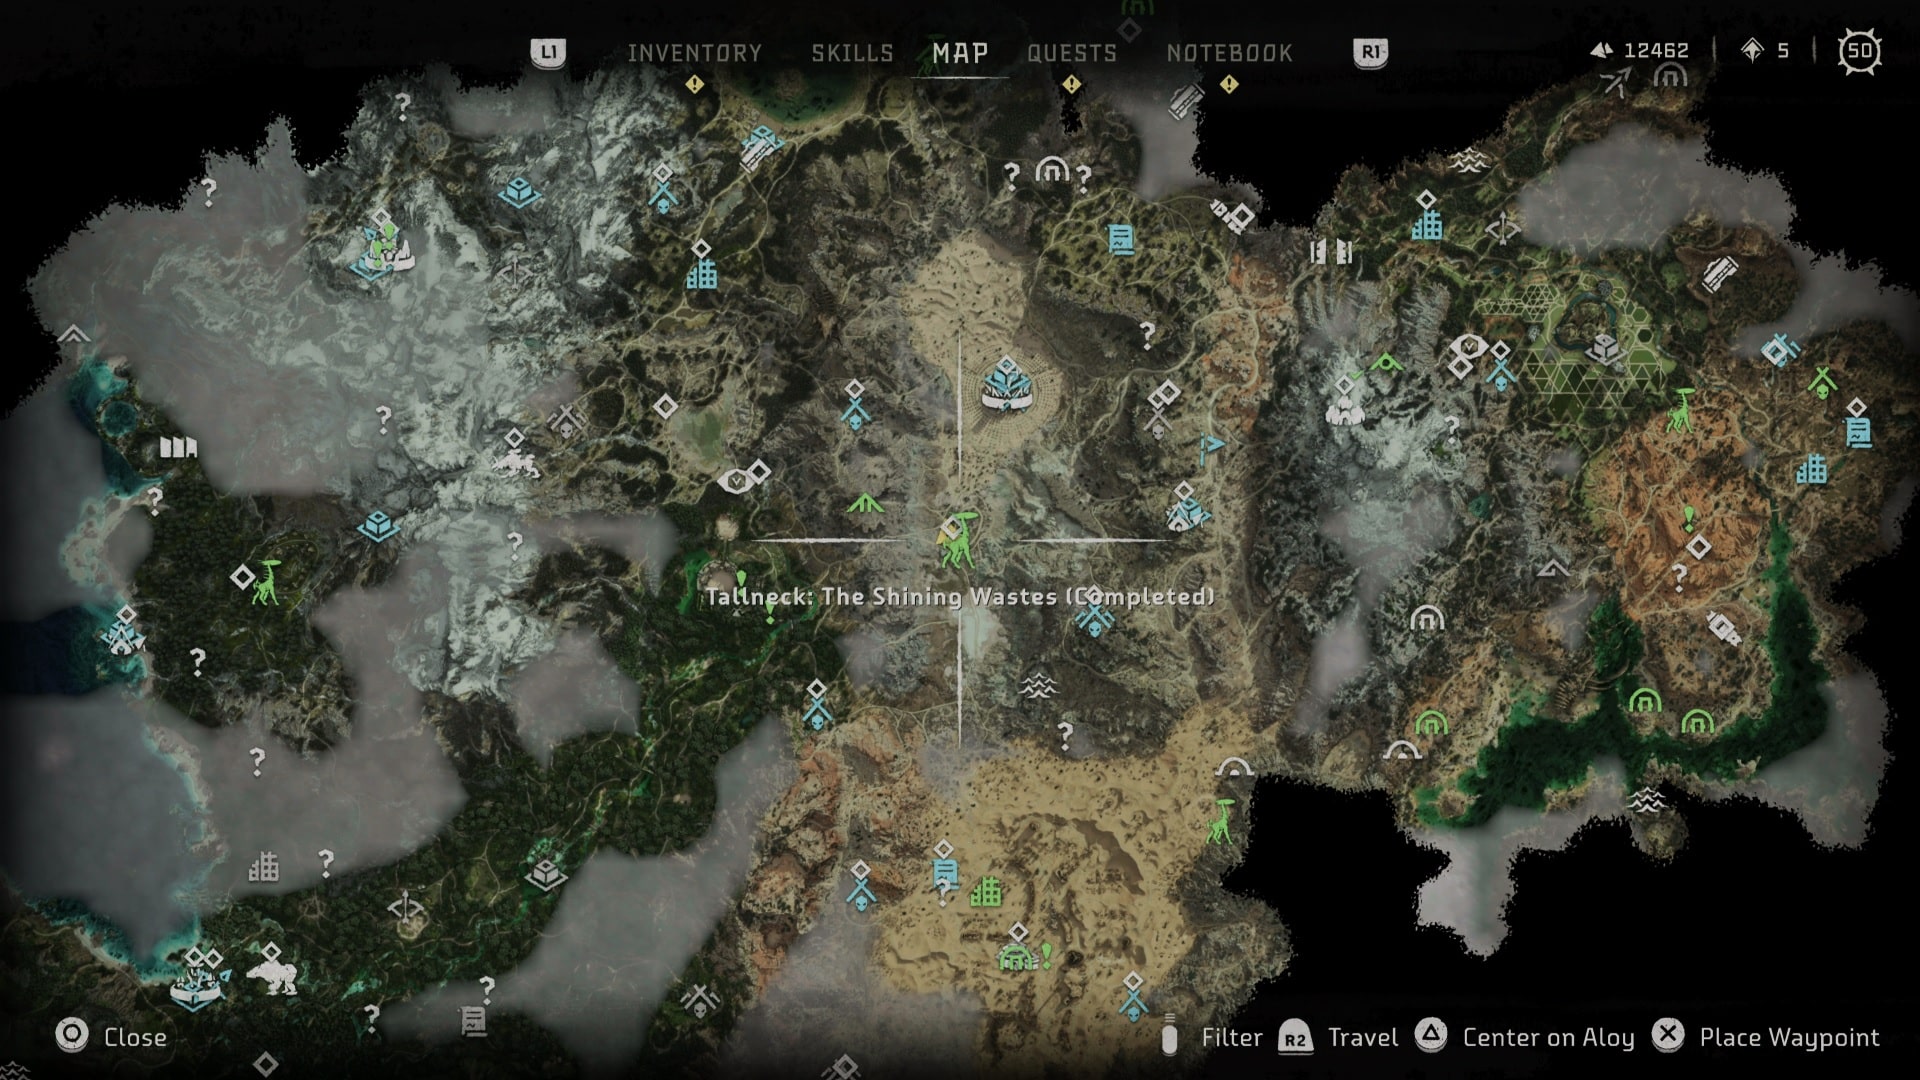
There are six Tallneck locations in Horizon Forbidden West.
In Horizon Forbidden West, Aloy will be rewarded with unveiling enormous sections of the area that were previously covered by fog if she finds and scales all Tallnecks. In the game, Tallnecks are essentially the locations where all other map icons are shown.
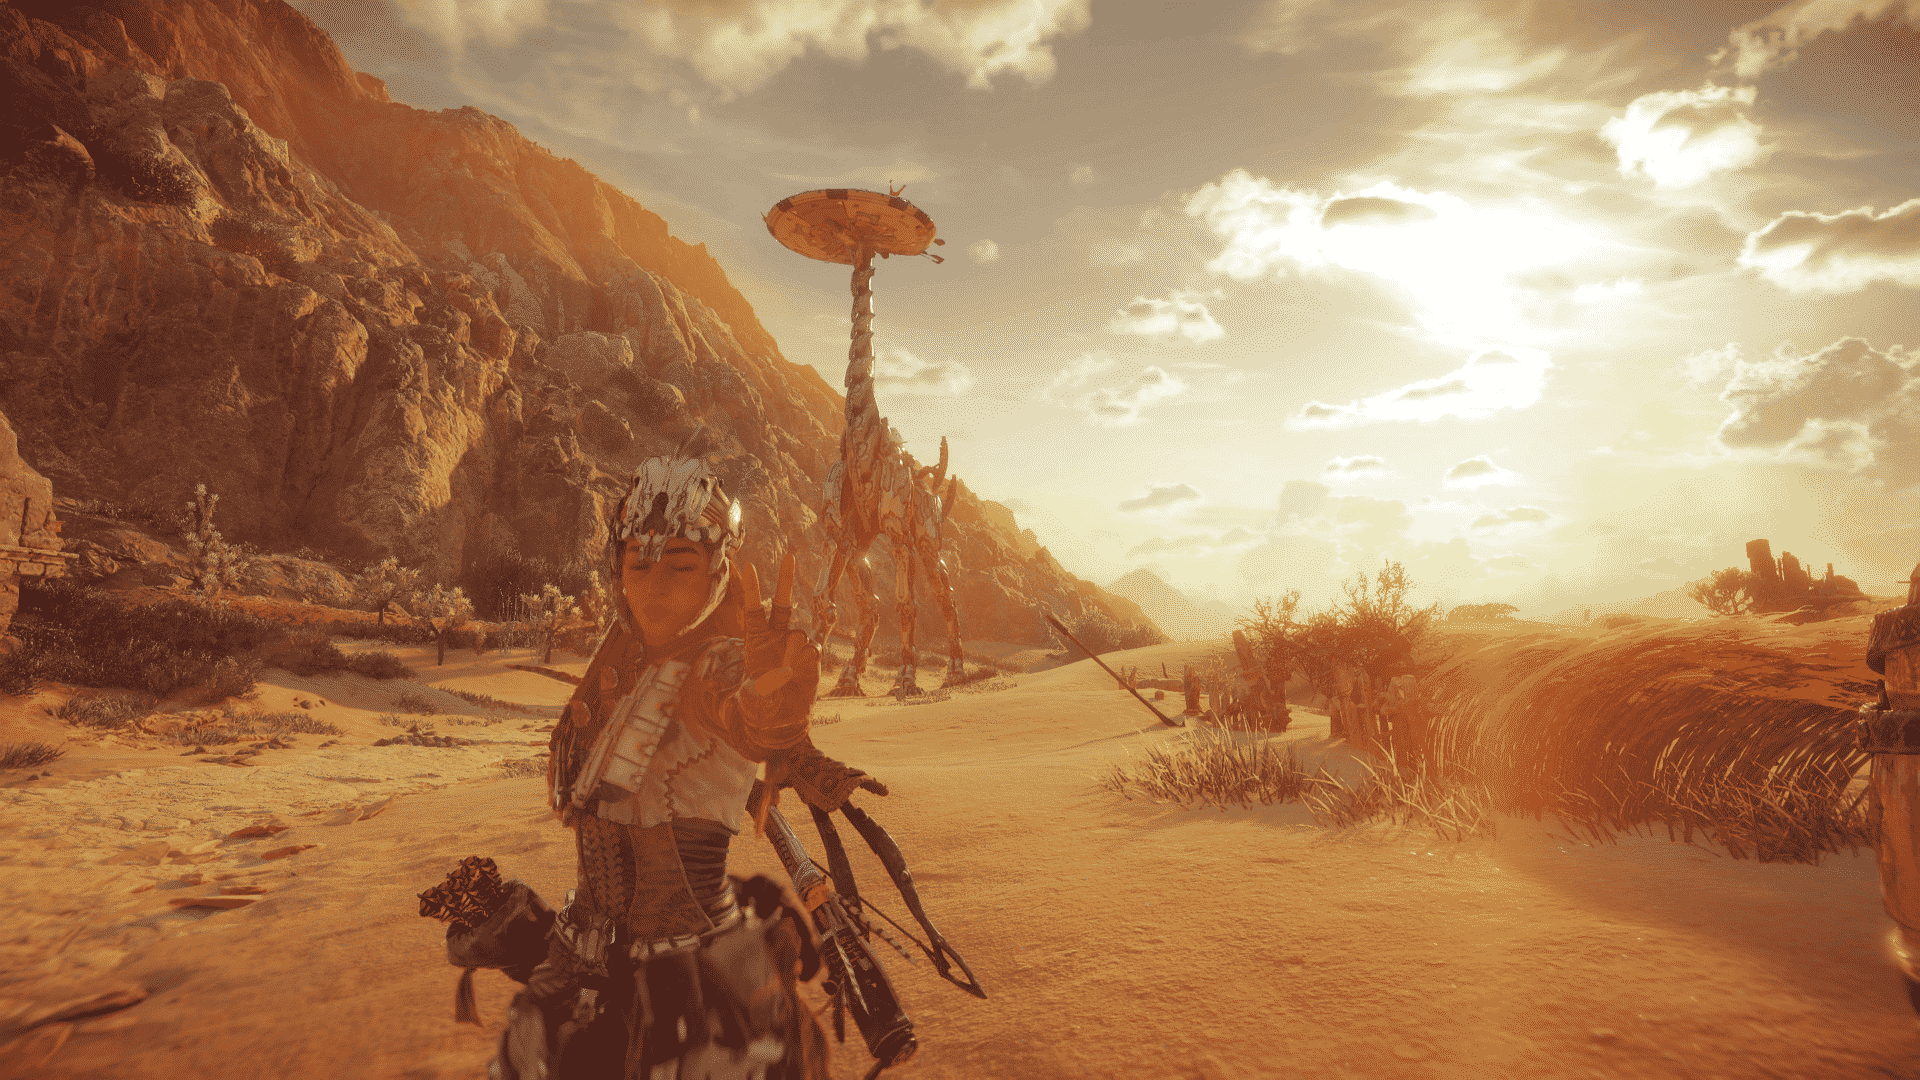
The only machines in Horizon Forbidden West that you don’t have to worry about fighting are Tallnecks. It is possible to climb Tallnecks without being seen since they move in a huge circle around a tall structure in the middle, and this guide will show you where they can be found.
These machines can be overridden so that you can simply explore the vast areas and find what you’re searching for. It’s not easy to override them, though. You’ll need to be at the very top of this Machine, and that can be tricky at times.
All 6 Tallneck Locations in Horizon Forbidden West
Here’s the list of all the 6 Tallnecks, where to find and how to climb these Tallnecks:
- Tallneck: Cinnabar Sands
- Tallneck: The Stillsands
- Tallneck: The Stand of the Sentinels
- Tallneck: Landfall
- Tallneck: Salt Bite
- Tallneck: The Shining Wastes
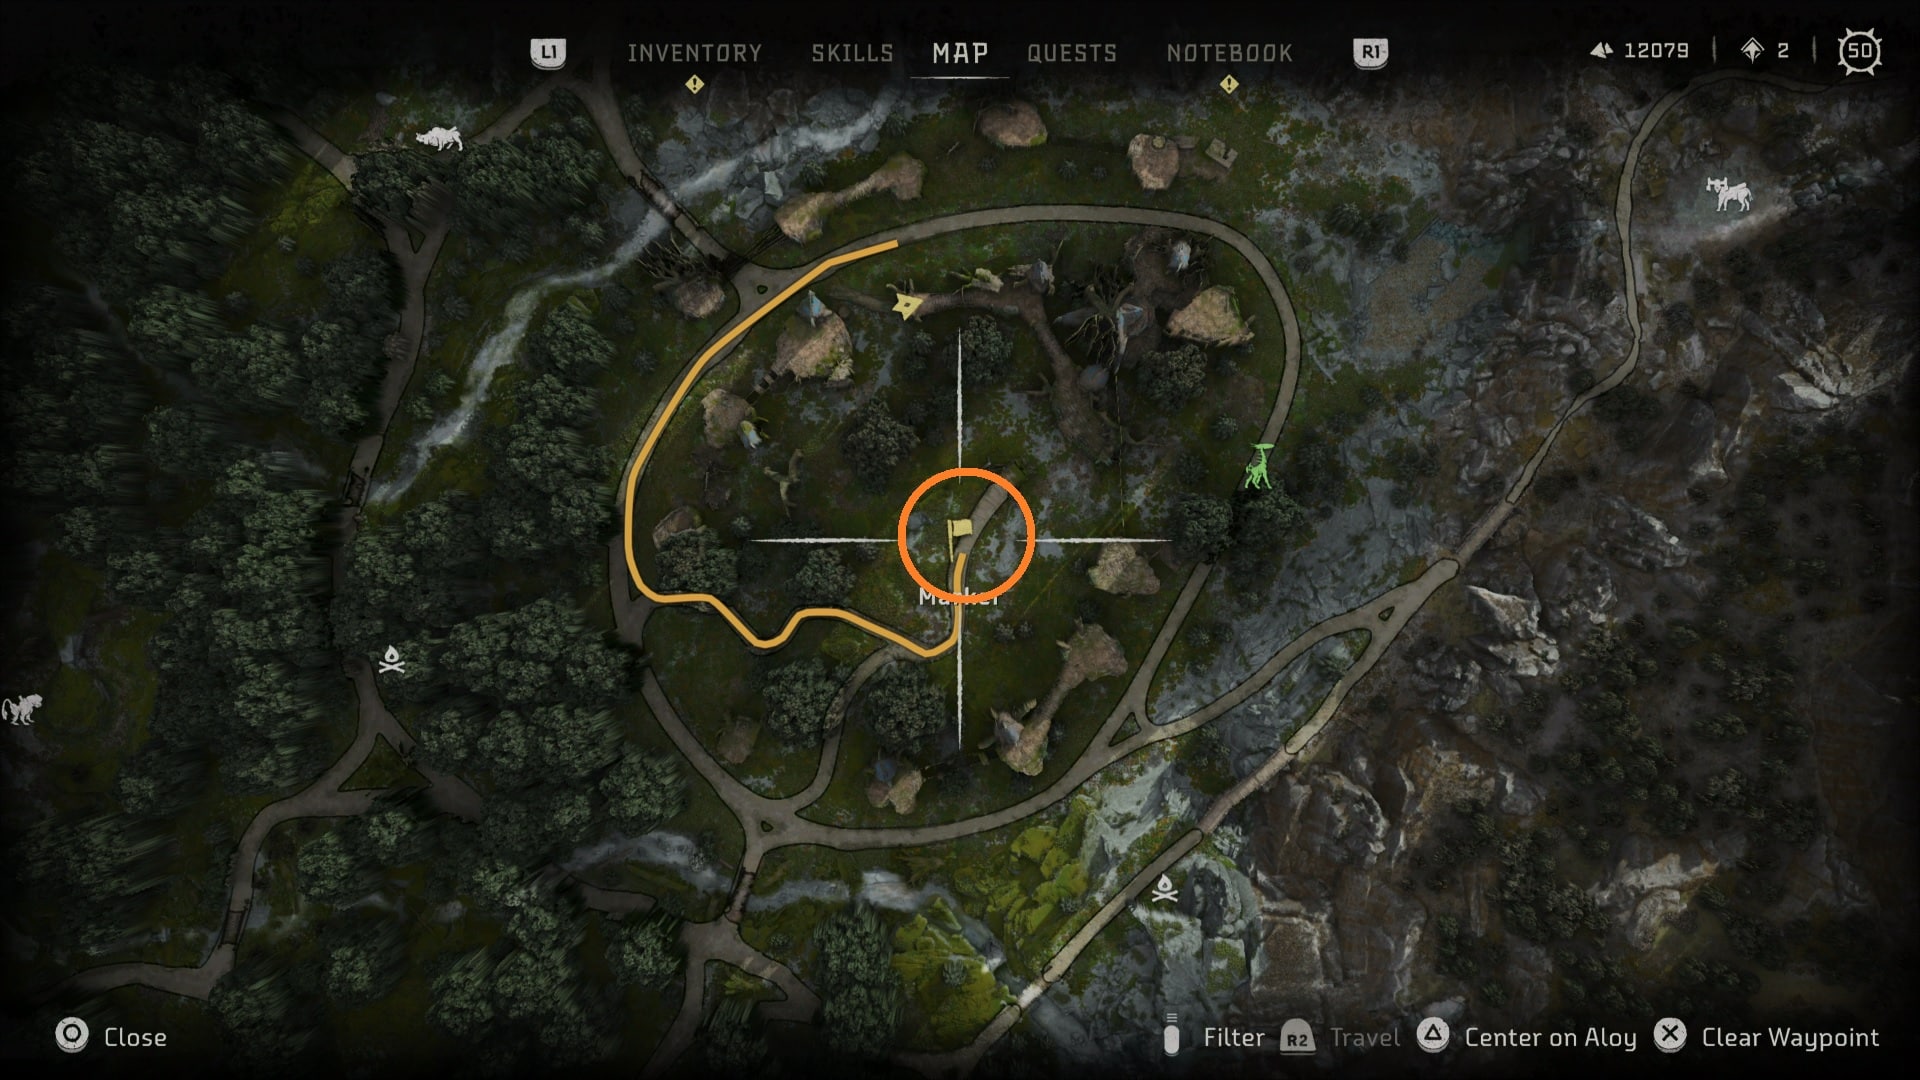
Tallneck #1: Cinnabar Sands
Map Location: Southeast, near Plainsong.

How to Climb:
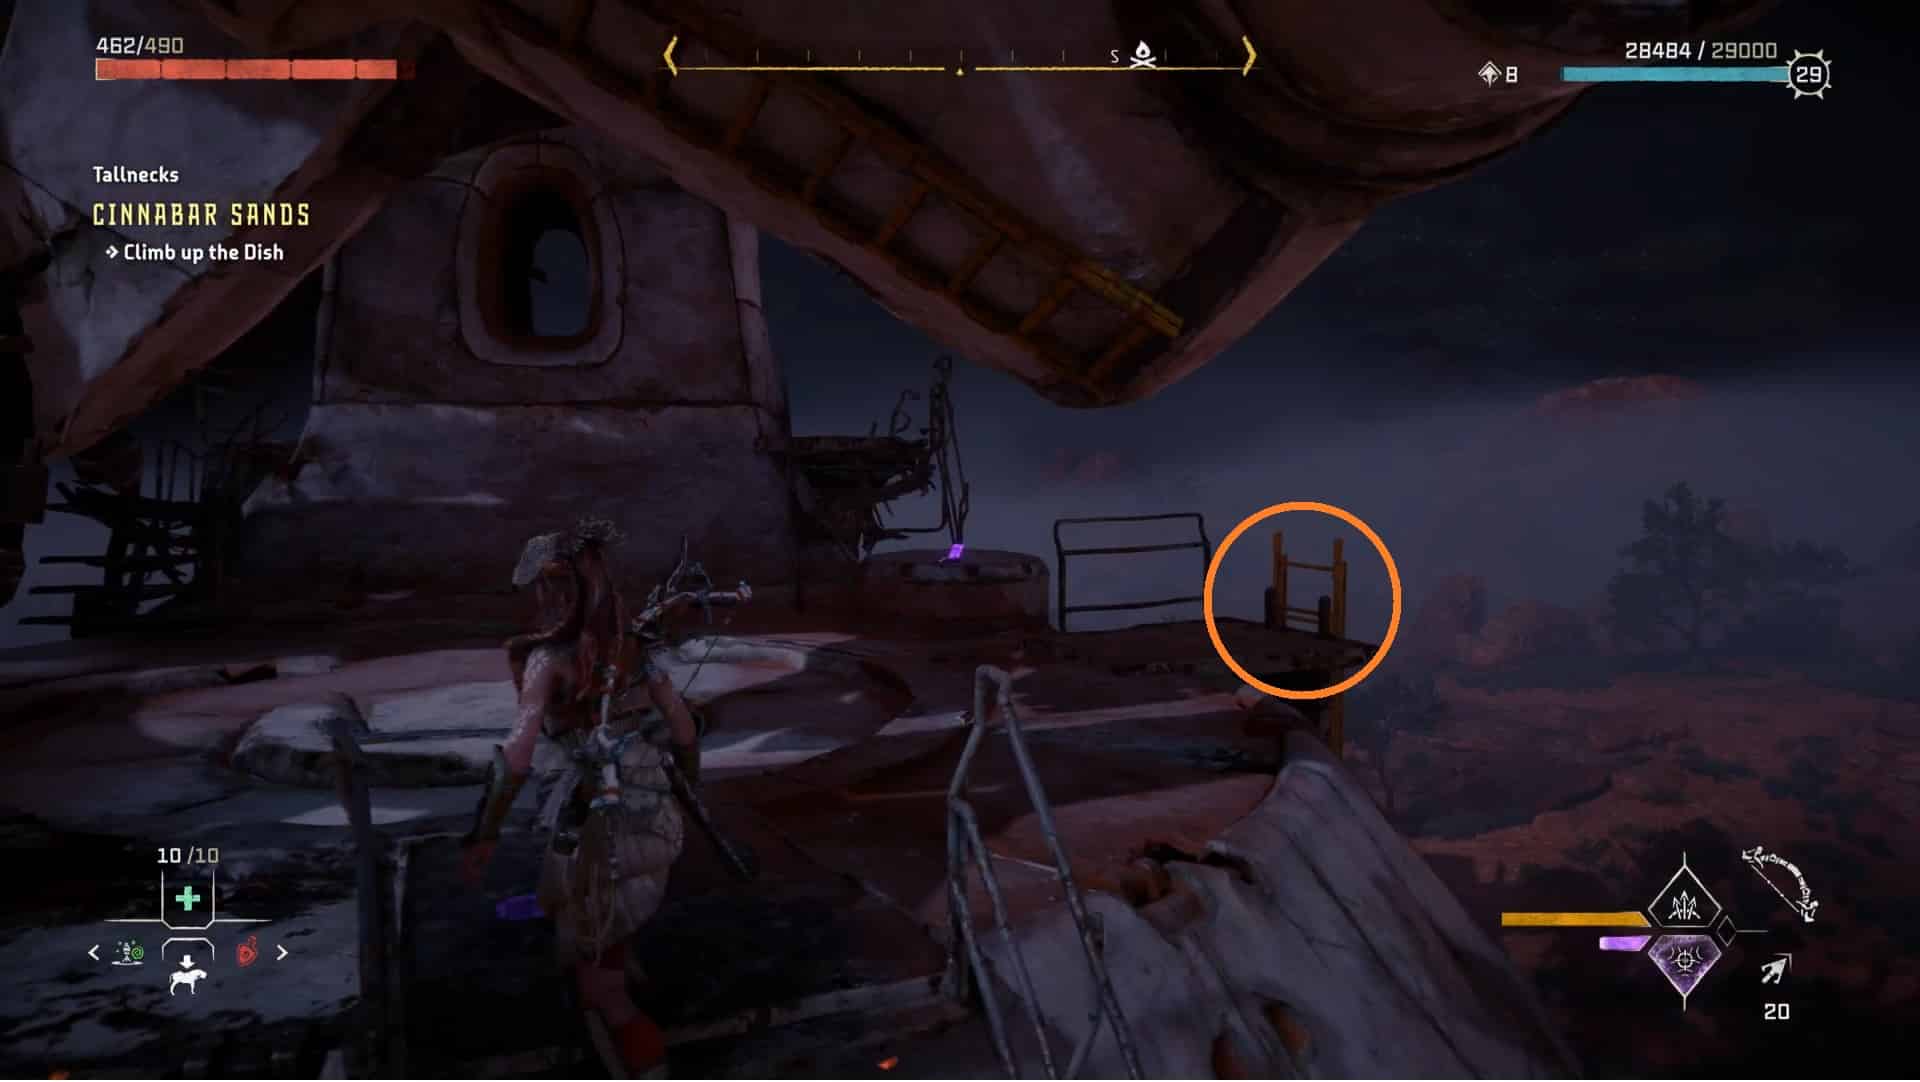
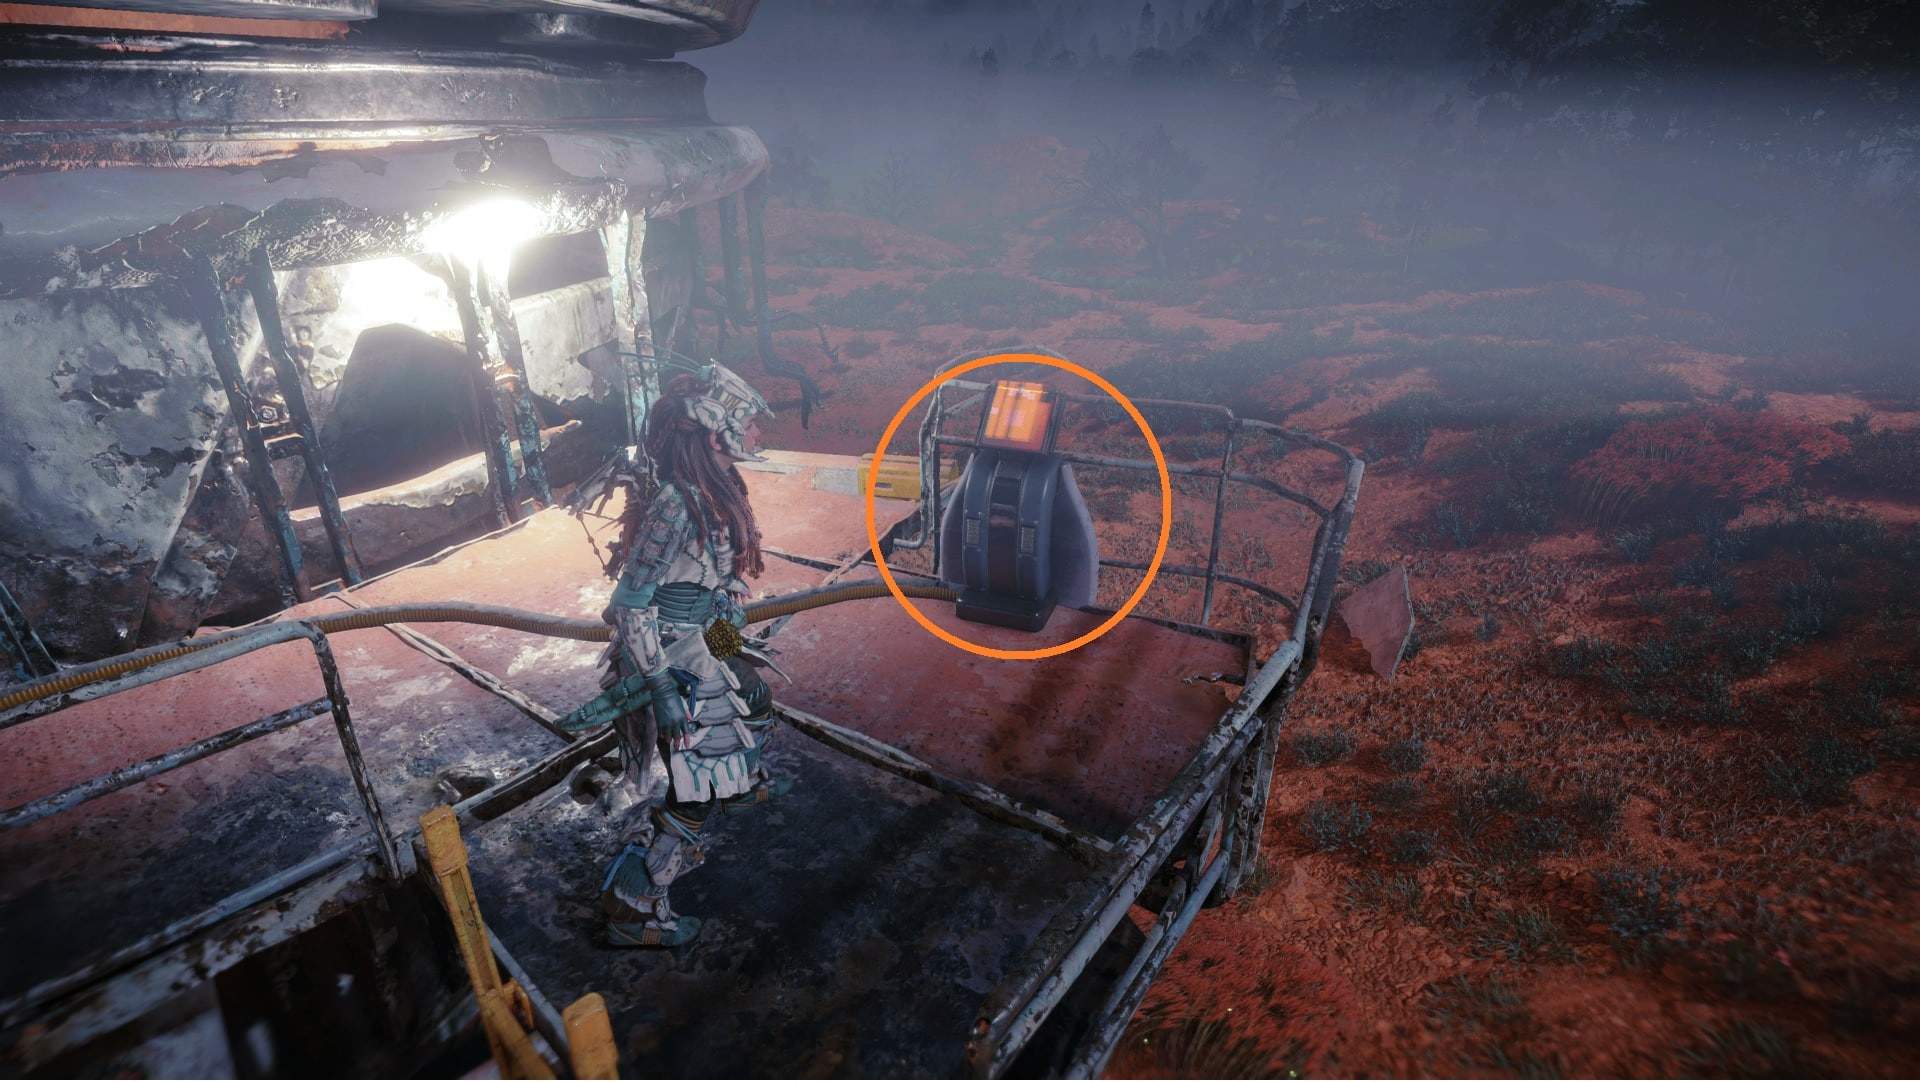
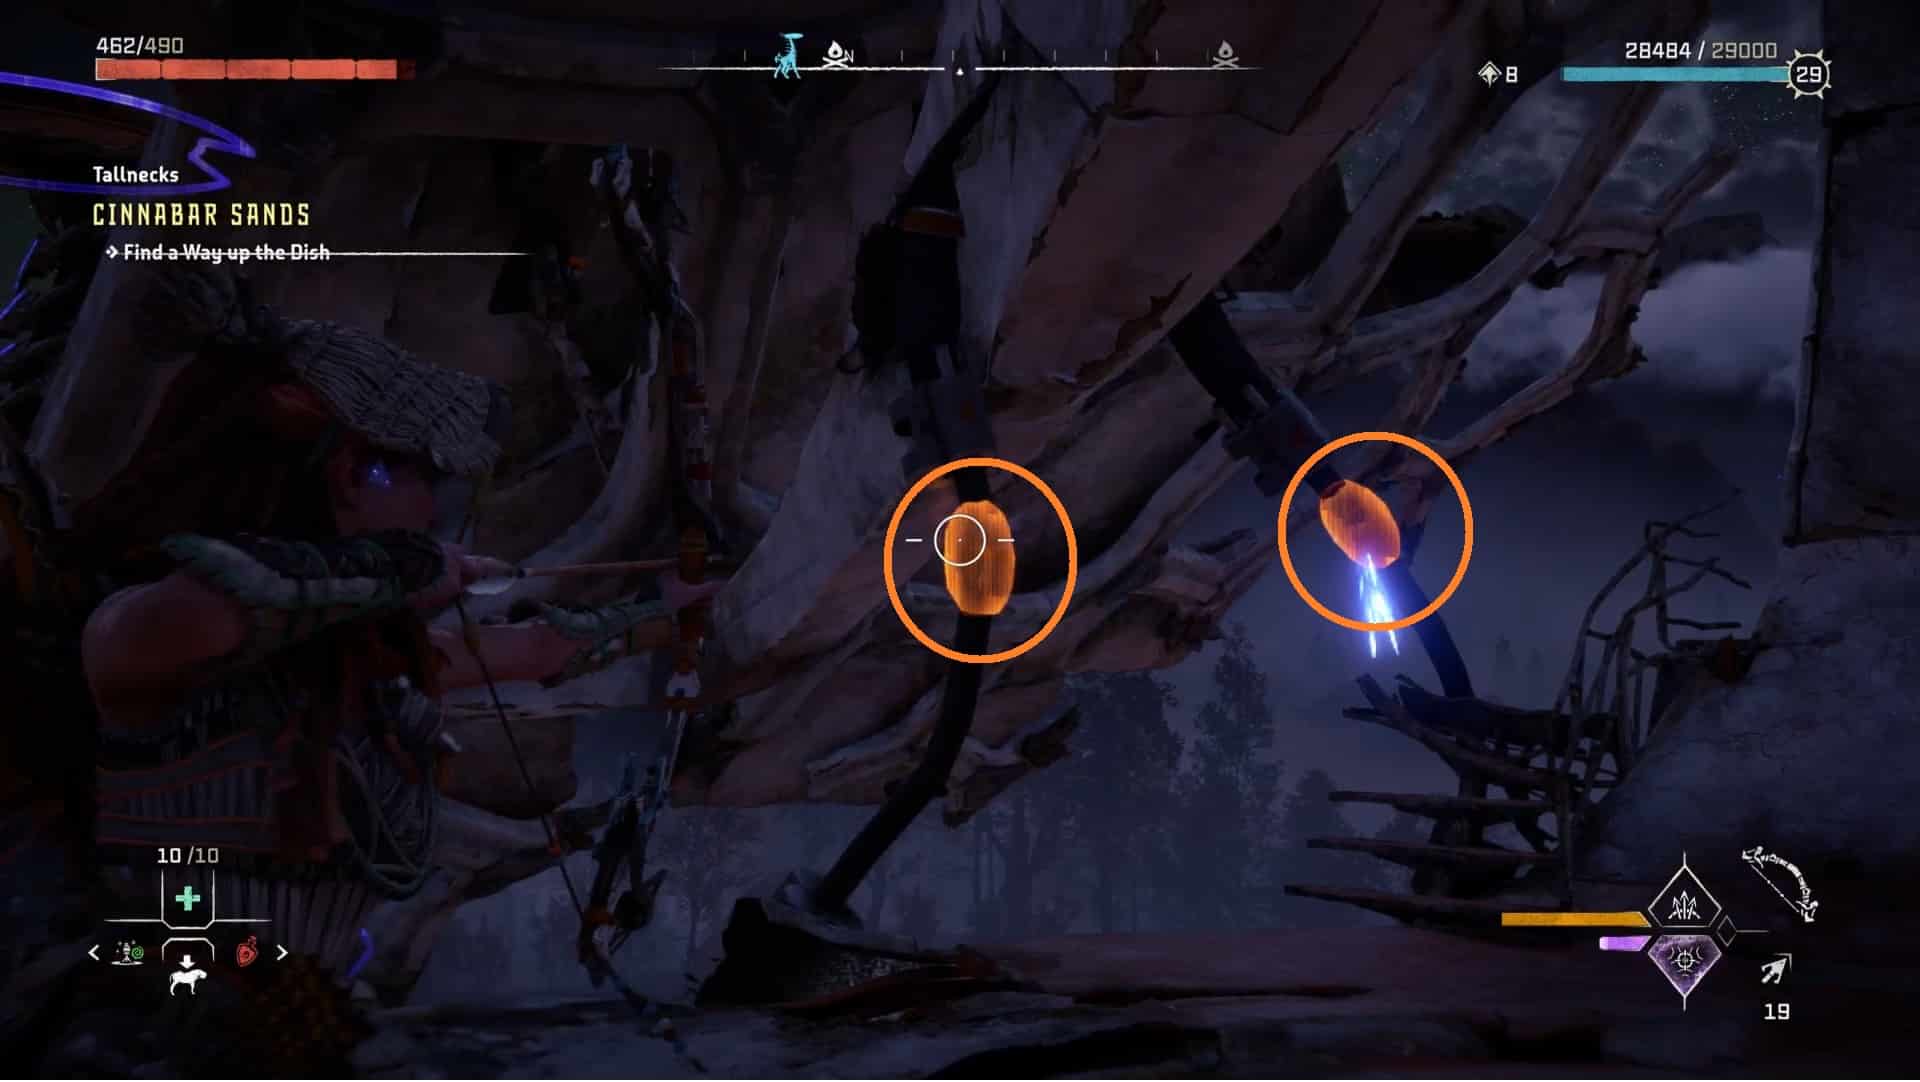
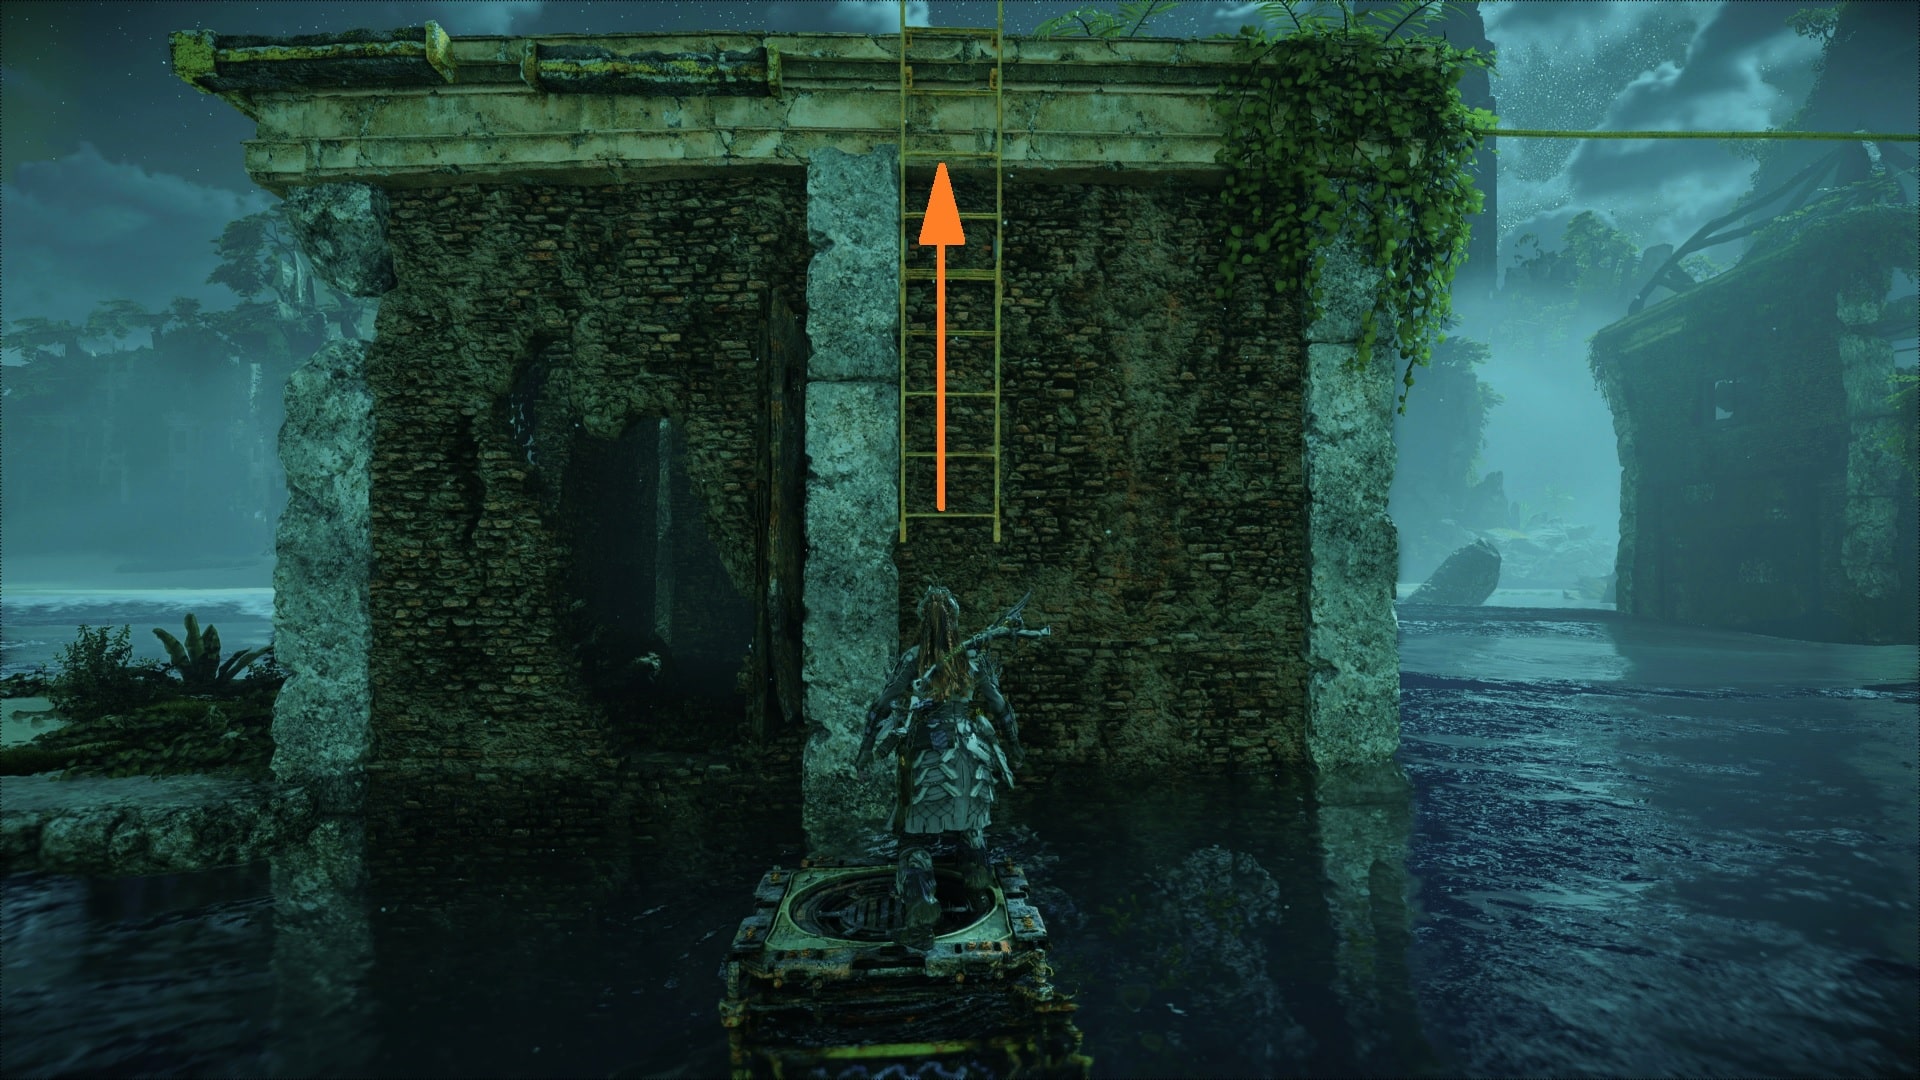
1. This Tallneck circles around an ancient satellite dish with a Generator at the bottom. There are skydrifters and scroungers all around so it’s better to clear them out first so you can focus on scaling the Tallneck uninterrupted.To begin, you must first shoot the lock on the yellow ladder located behind the satellite dish construction. This will lower the ladder, then climb up 3 ladders to the top.
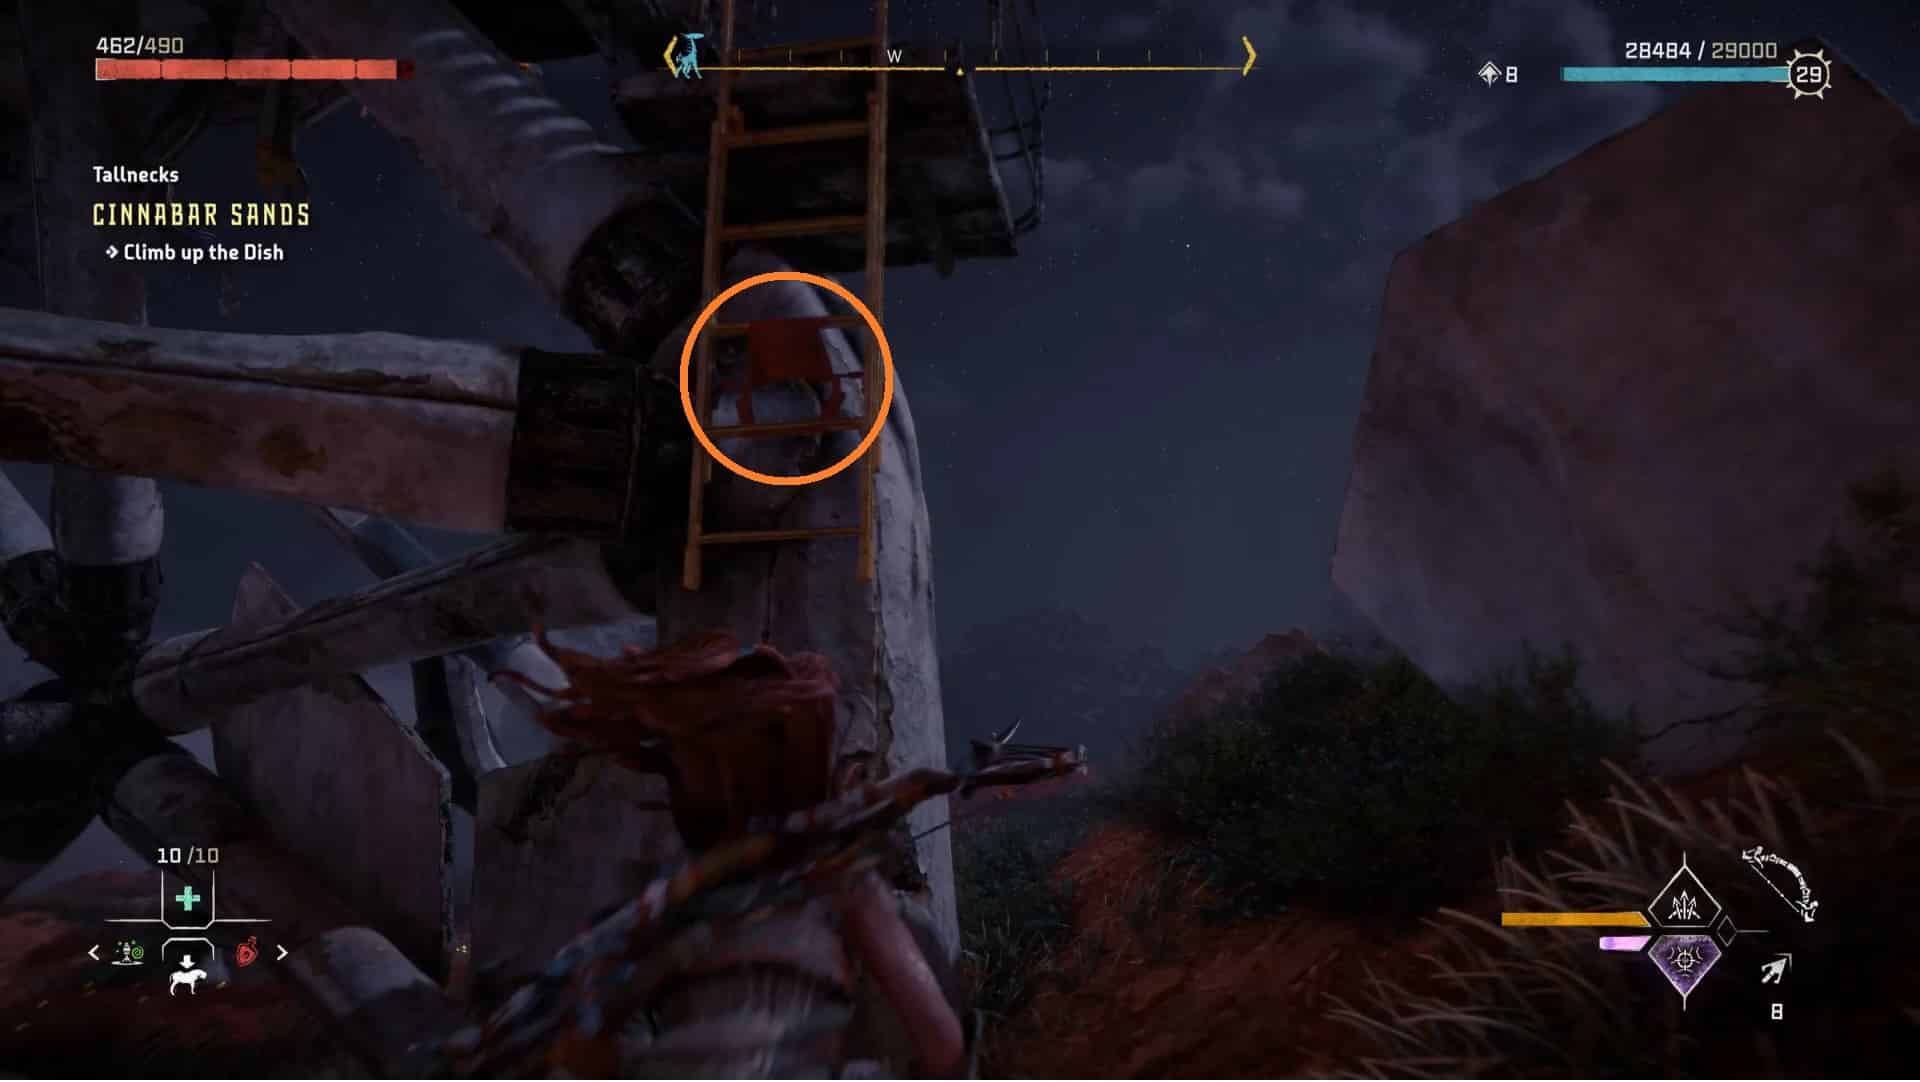
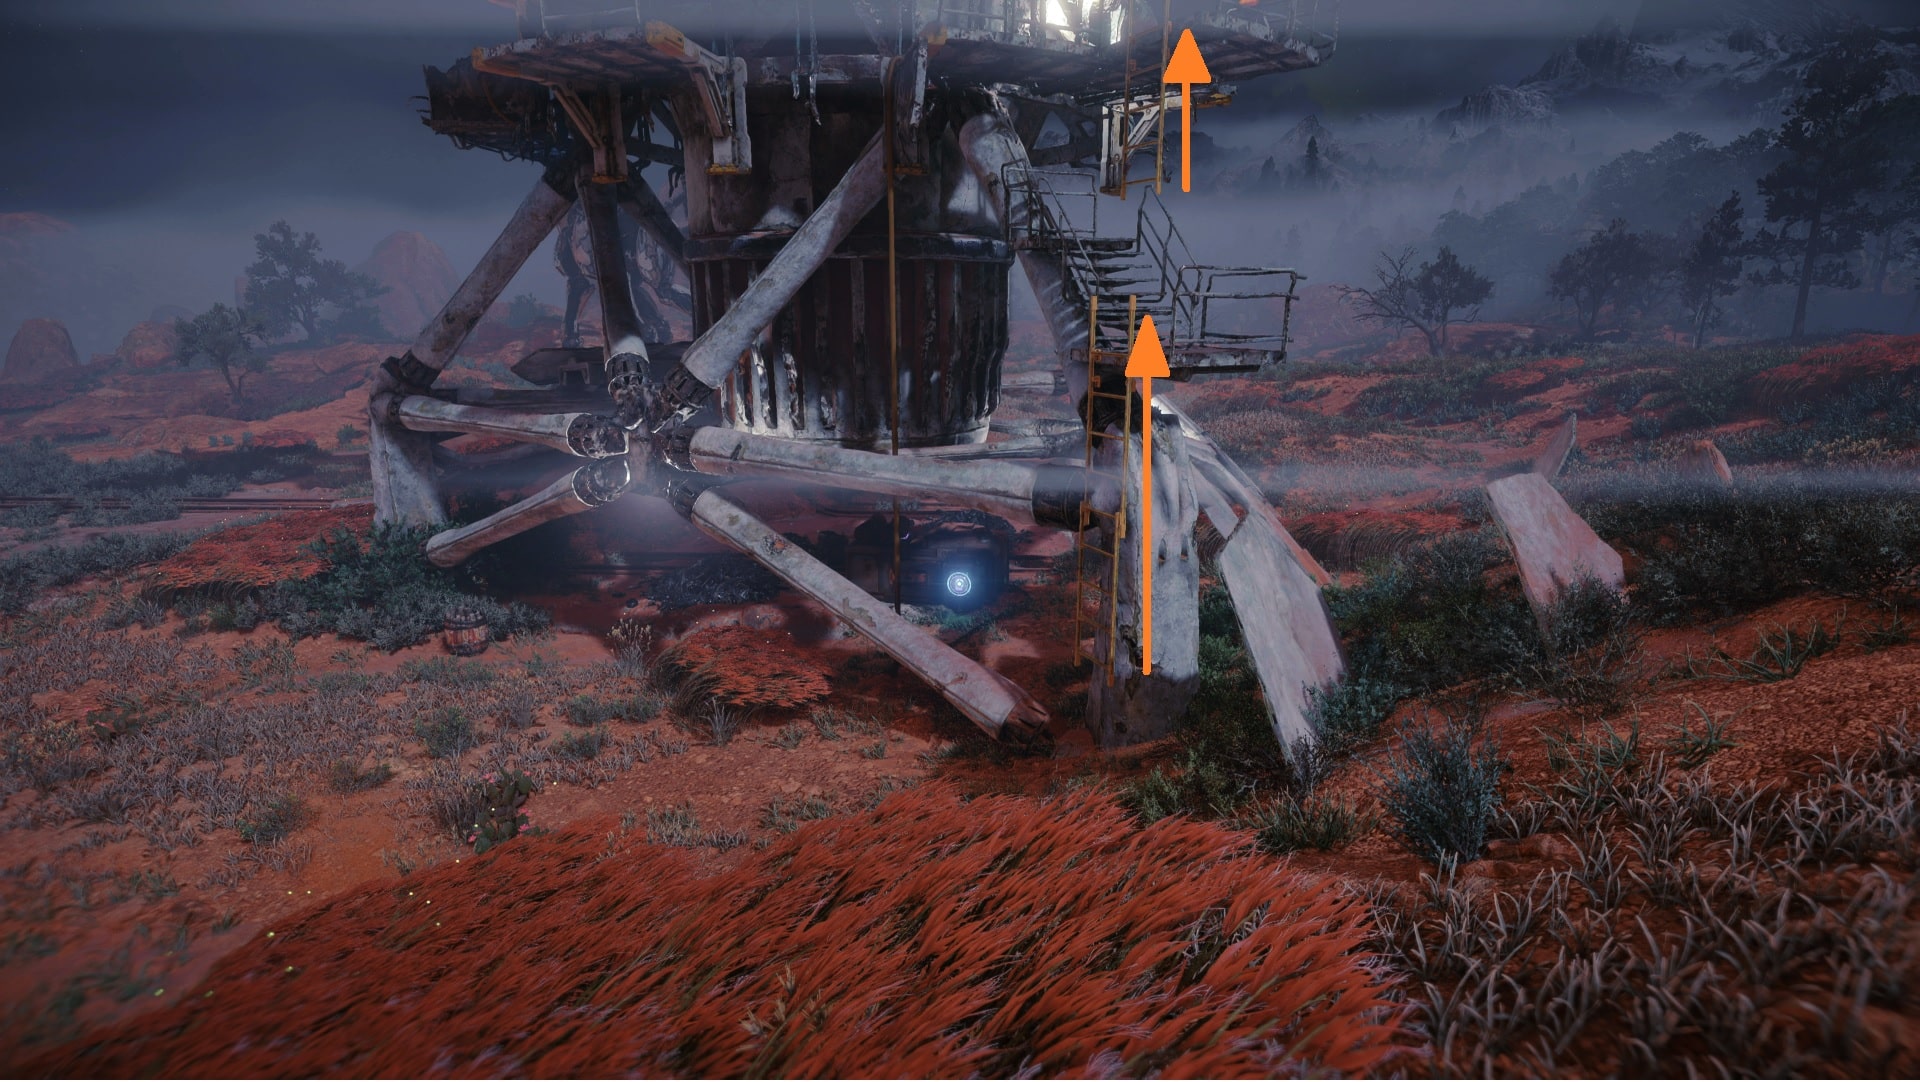
2. On top, you’ll find another ladder. From there, lower it down and Drop to the ledge (press [Square] when standing at the ledge), then climb your way to the right till you reach the power cell. Take it out.
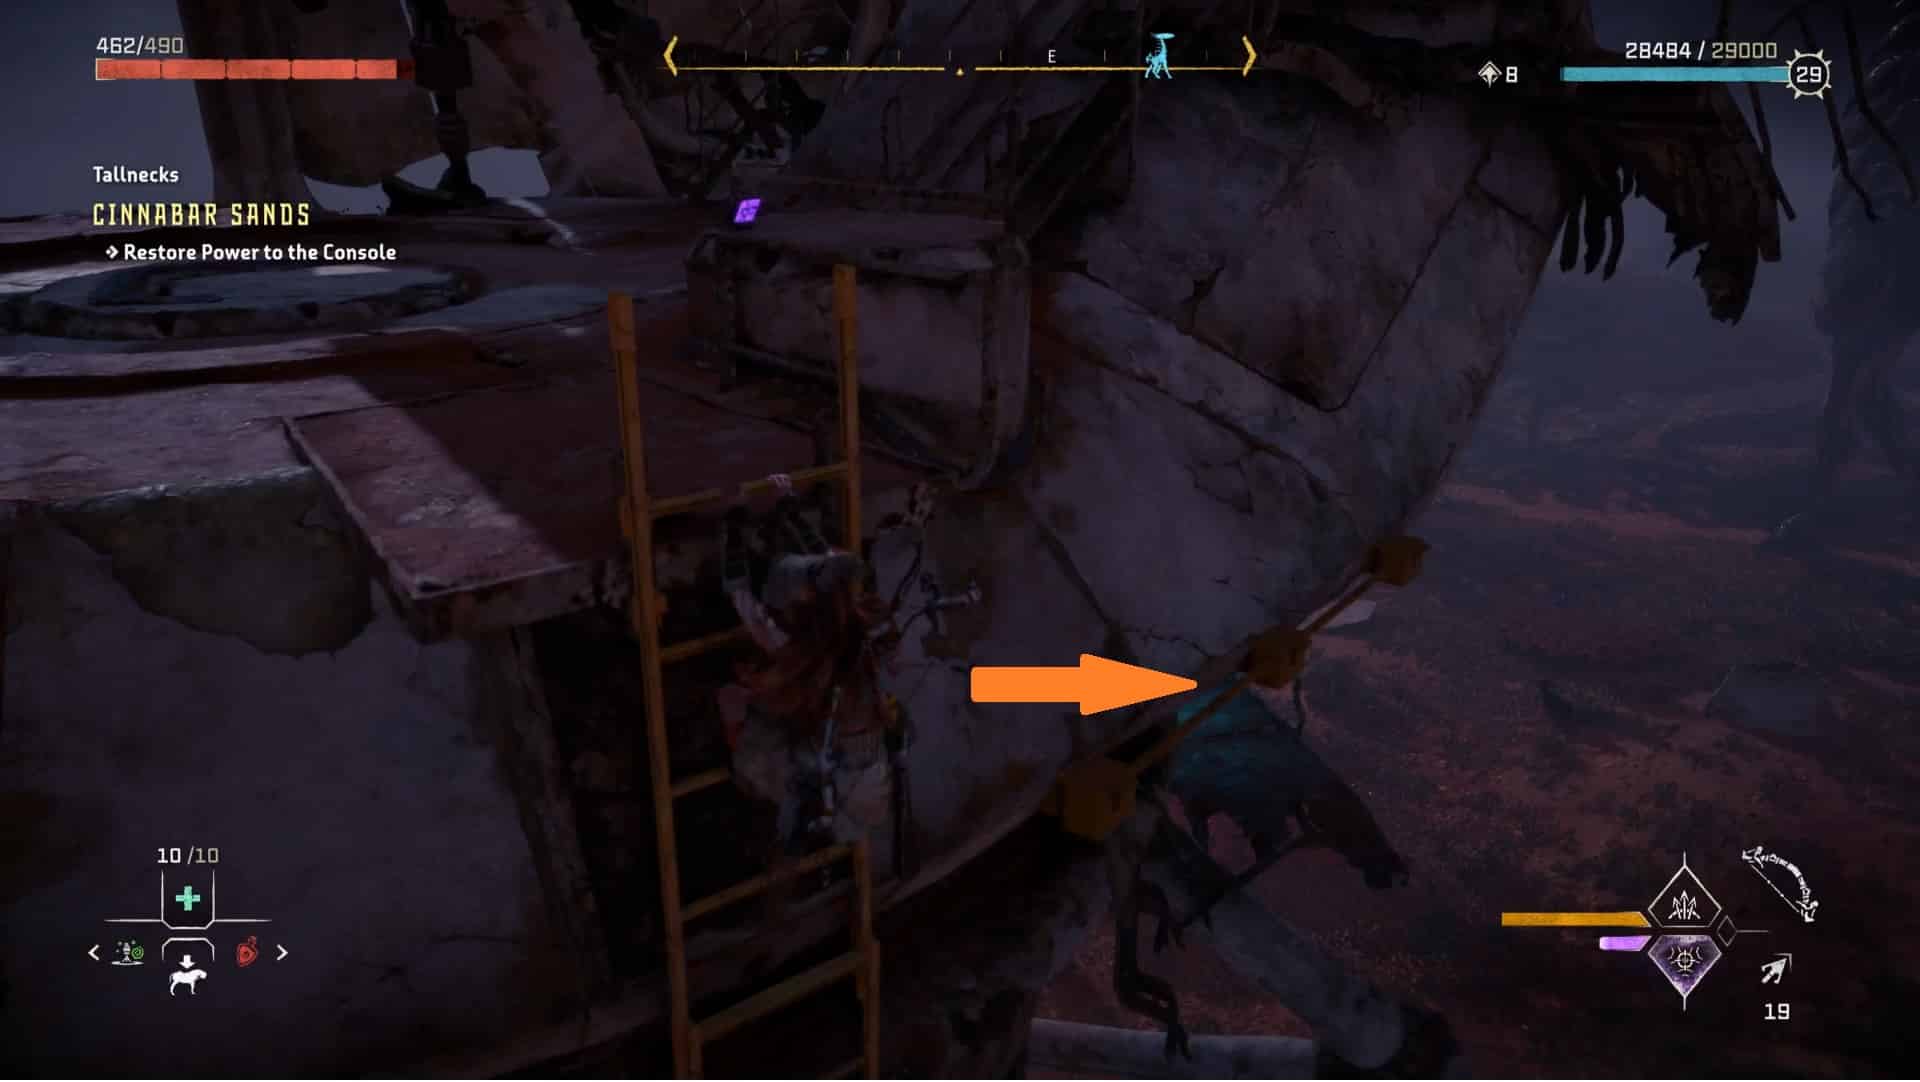
3. Insert the cell into the generator located beneath the satellite dish.
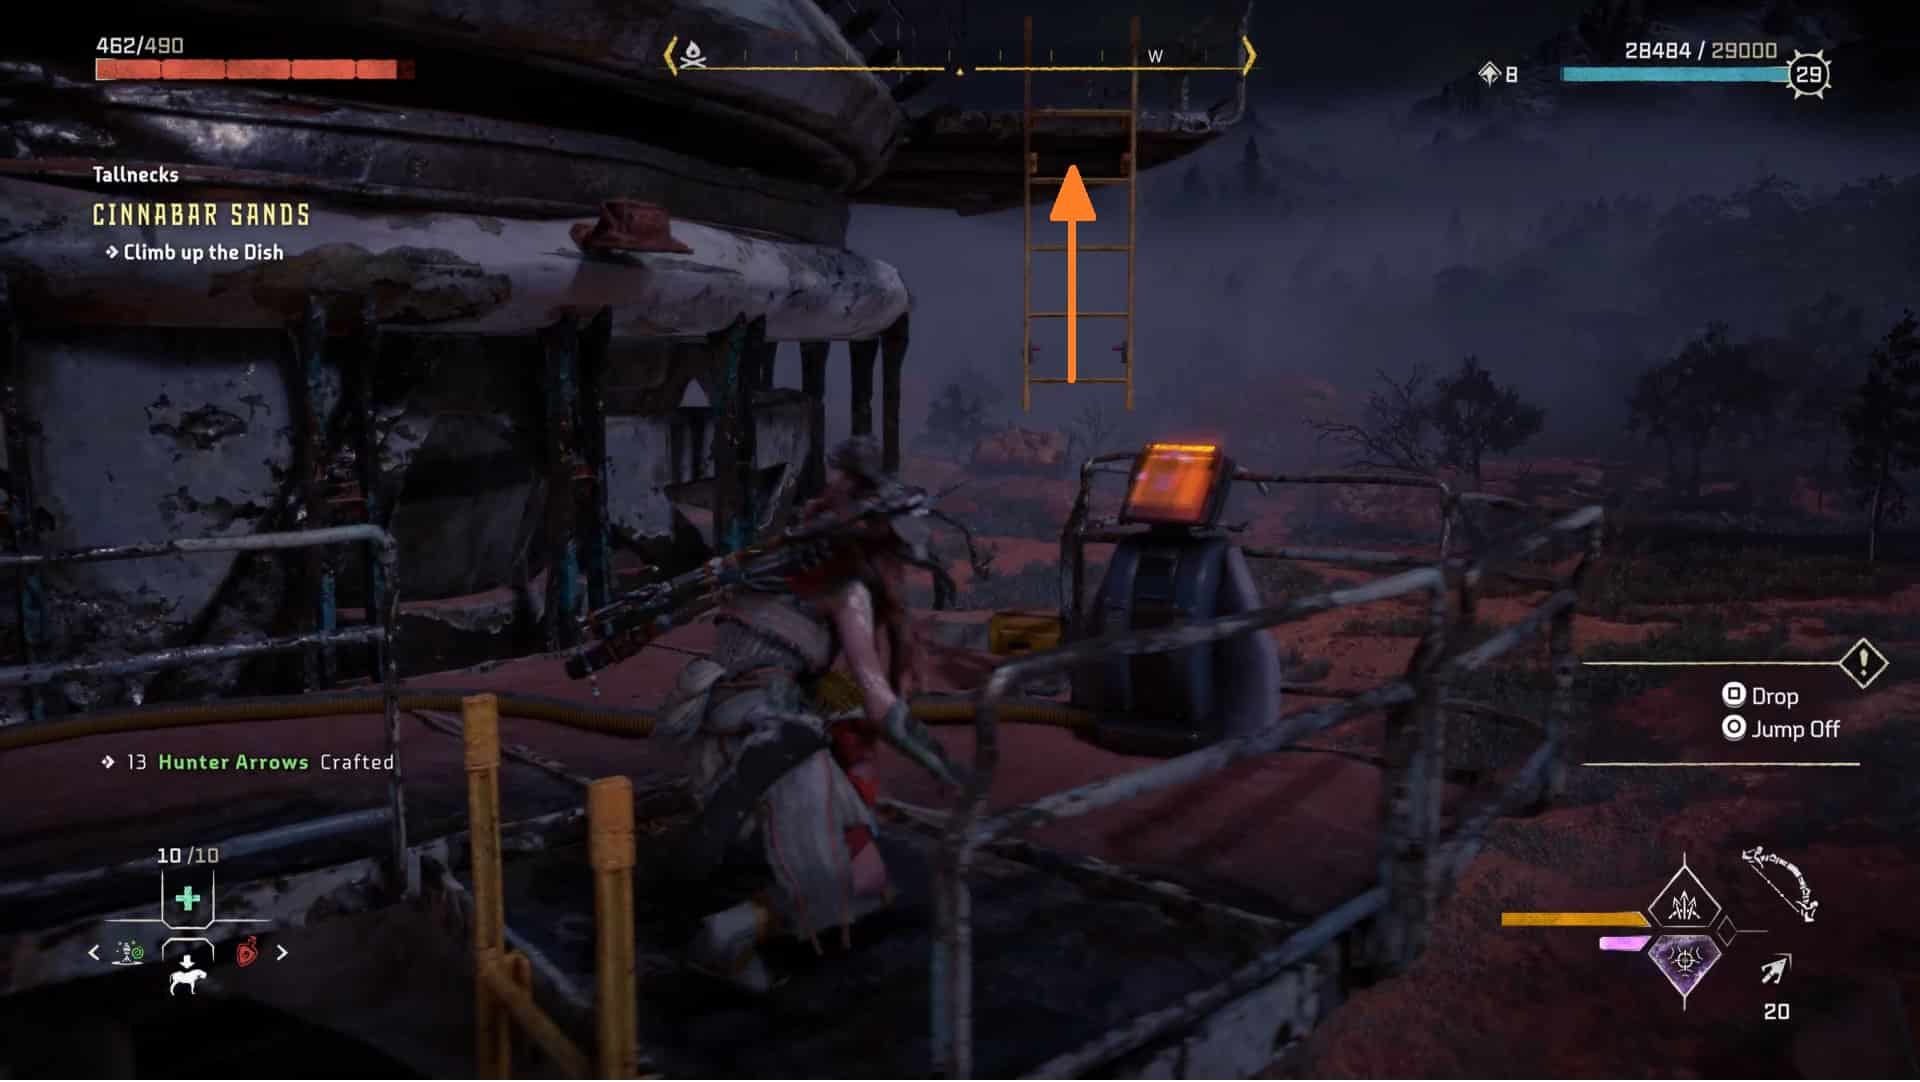
4. Return to the first ladder where you shot the lock before, climb back up and interact with the console. The power cell has turned it on.
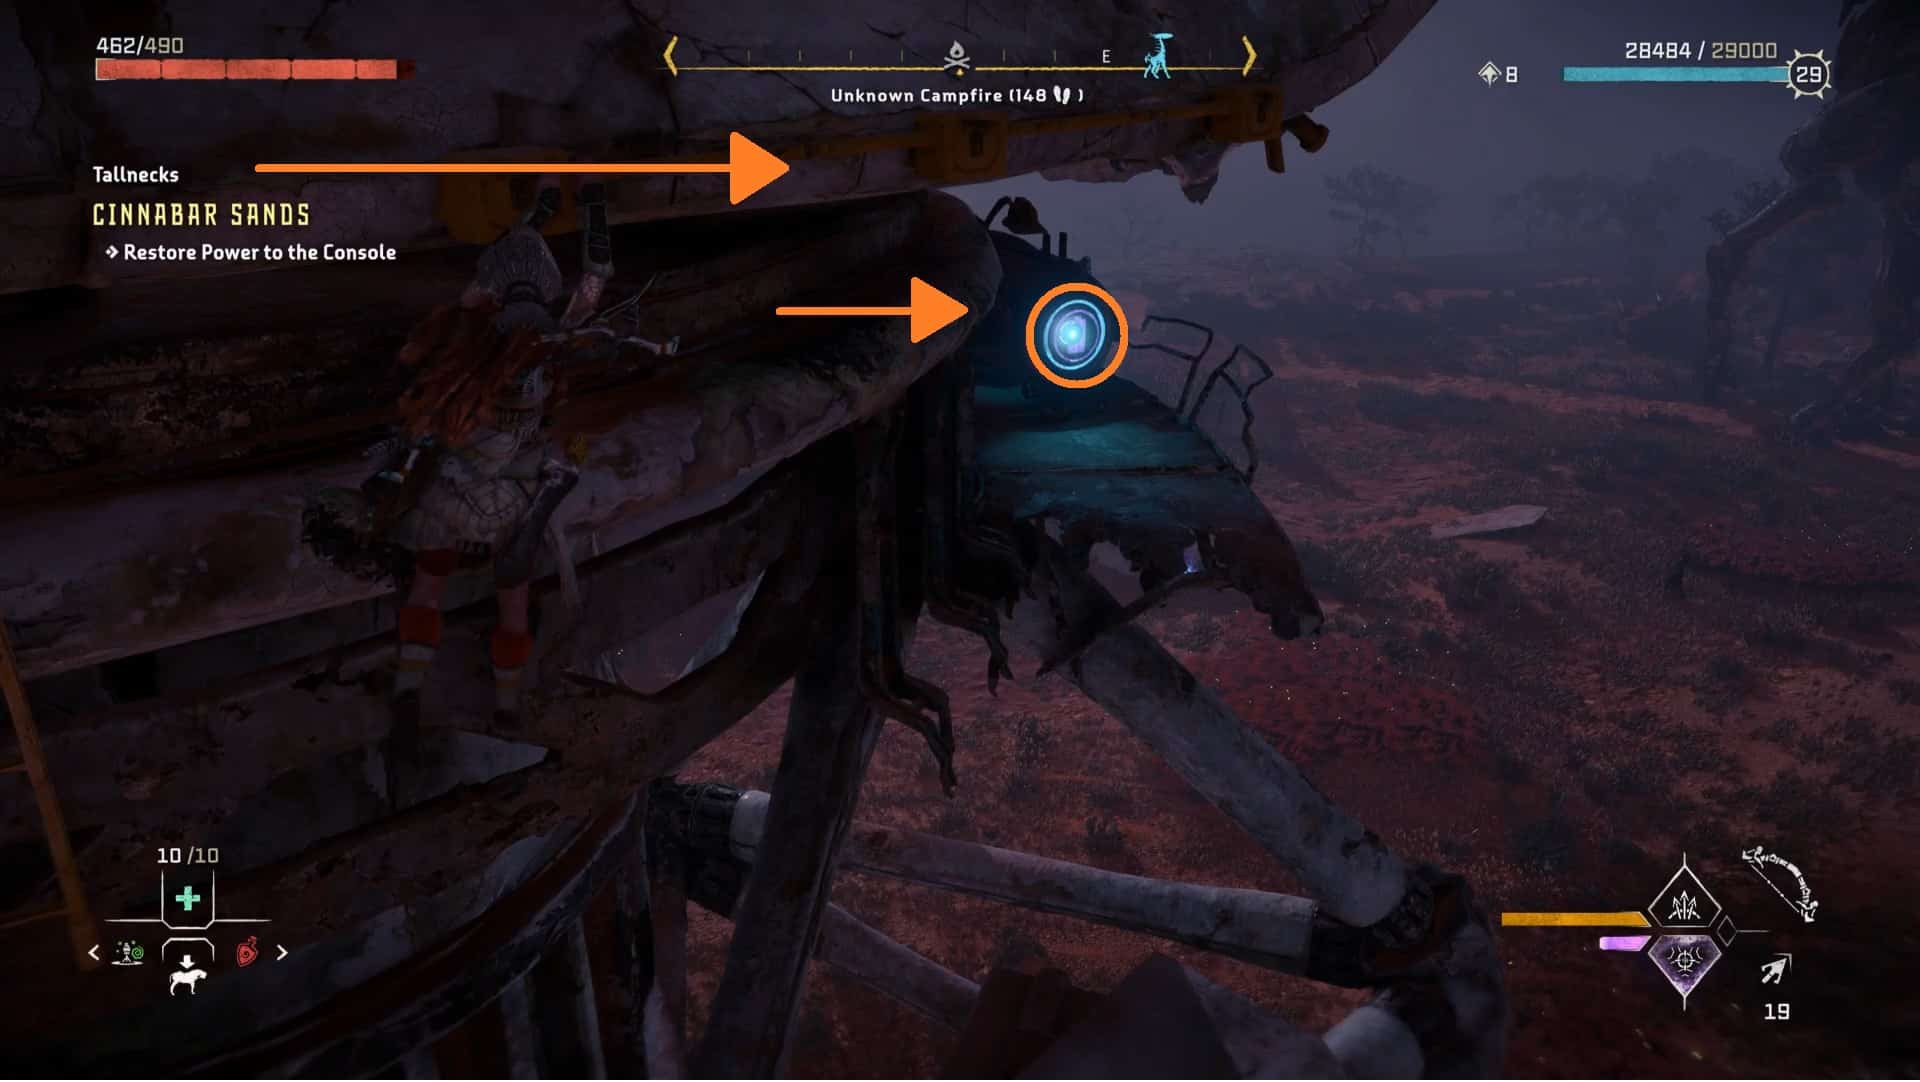
5.Take the path to the left of the console, press [R3] to highlight trails, climb around it until you reach the platform above the ladder.
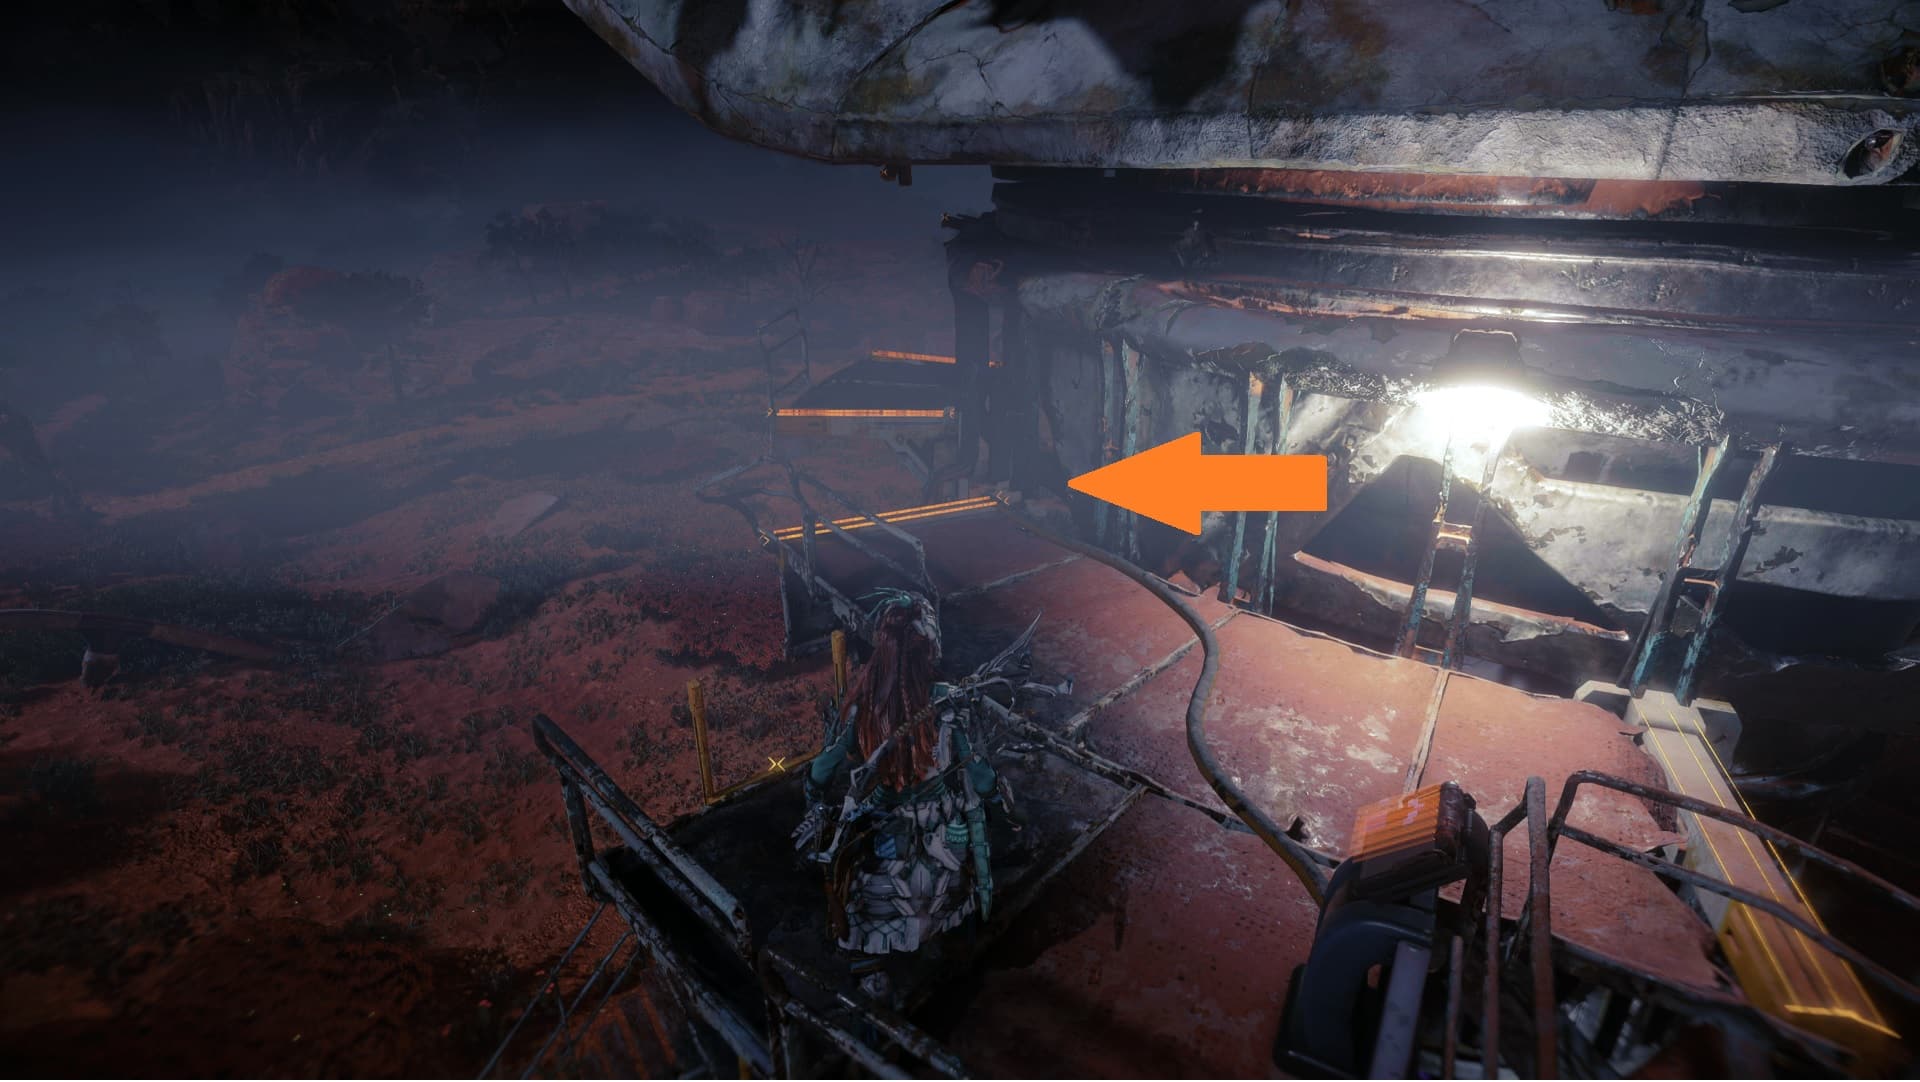
6. Shoot the satellite dish’s clamps. Press and hold [R3] t o scan and highlight them. Afterwards, you’ll be able to move up the ladder on the top of the dish.
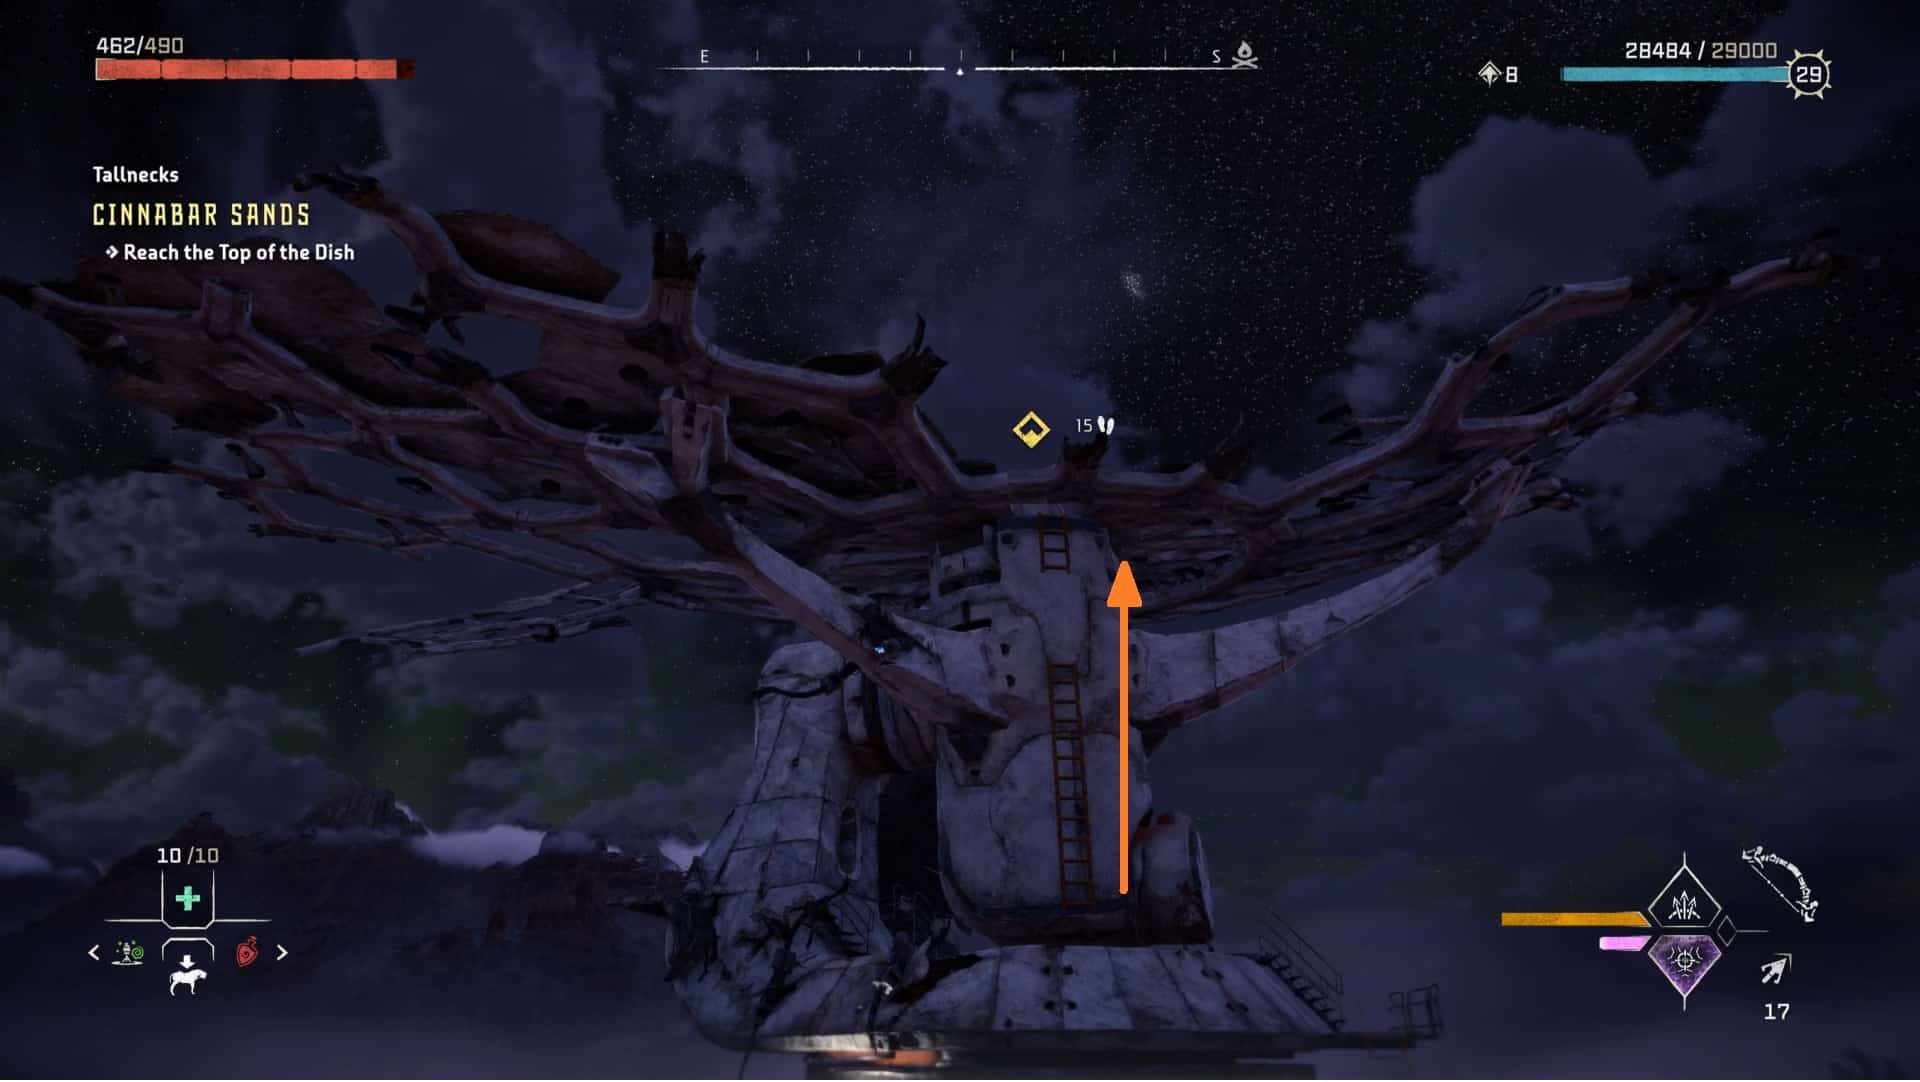
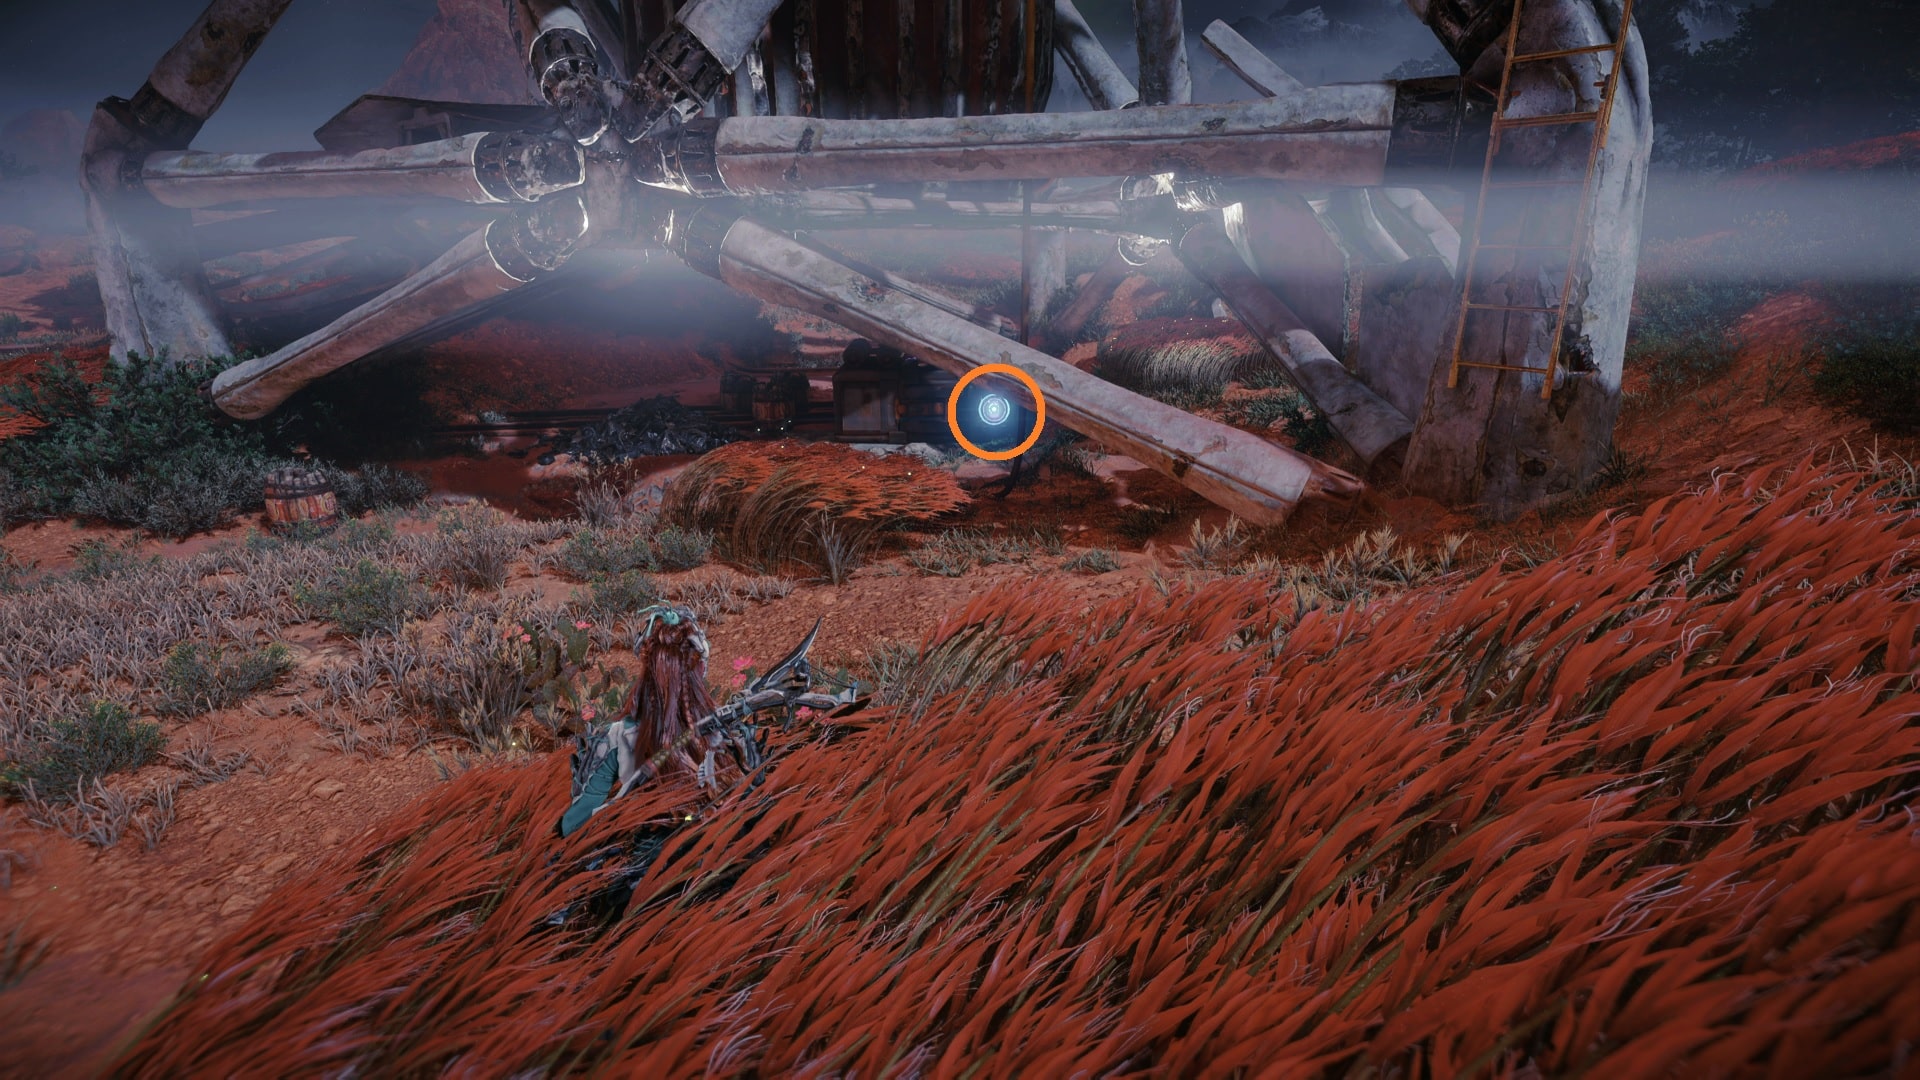
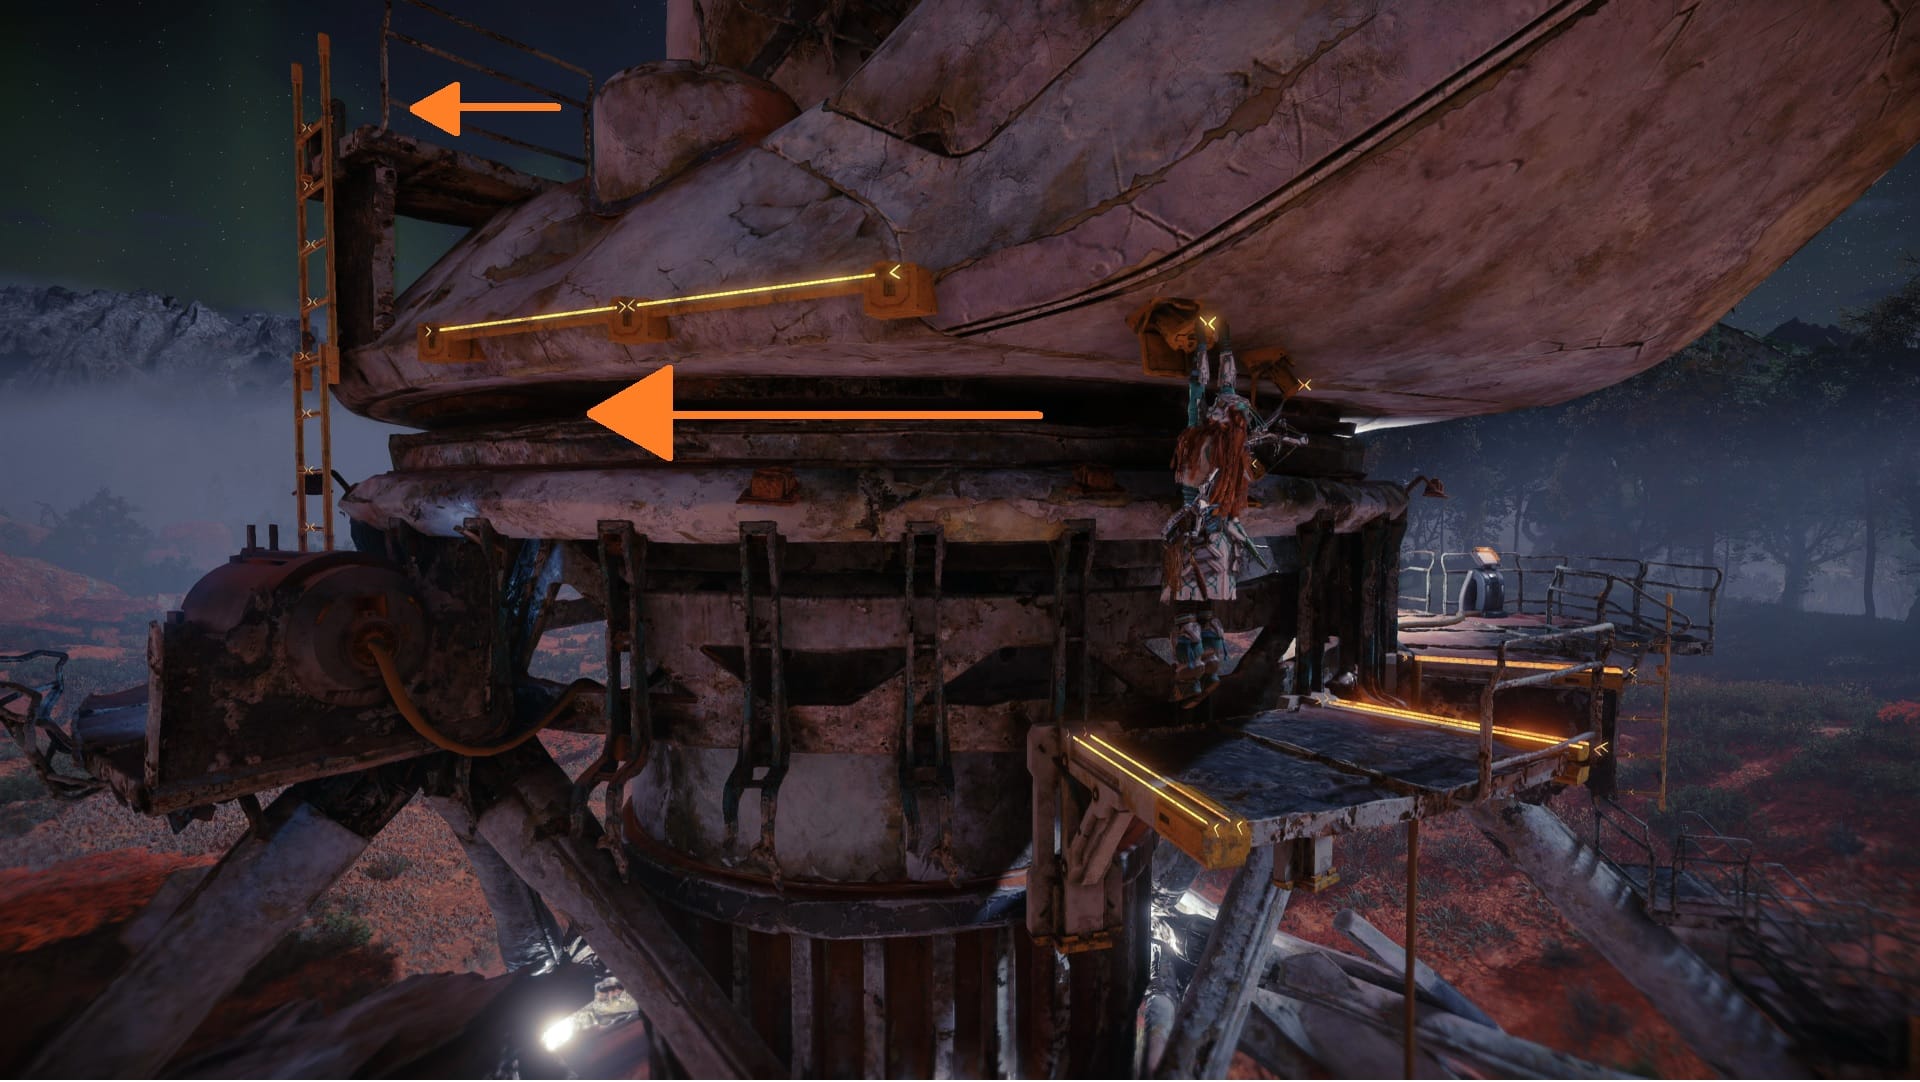
7. From the top of the dish, you can glide to the Tallneck’s head. The Glider is unlocked once you’ve completed Main Quest 4 “The Embassy,” press and hold [Square] in midair to glide. Jump off where the below image highlights. If you can’t directly land on its head, try grabbing one of its neck holds then climb to the top till you reach the head and override it.
Tallneck #2: The Stillsands
Map Location: Far South, near Camp Nowhere (Settlement).
How to Climb:
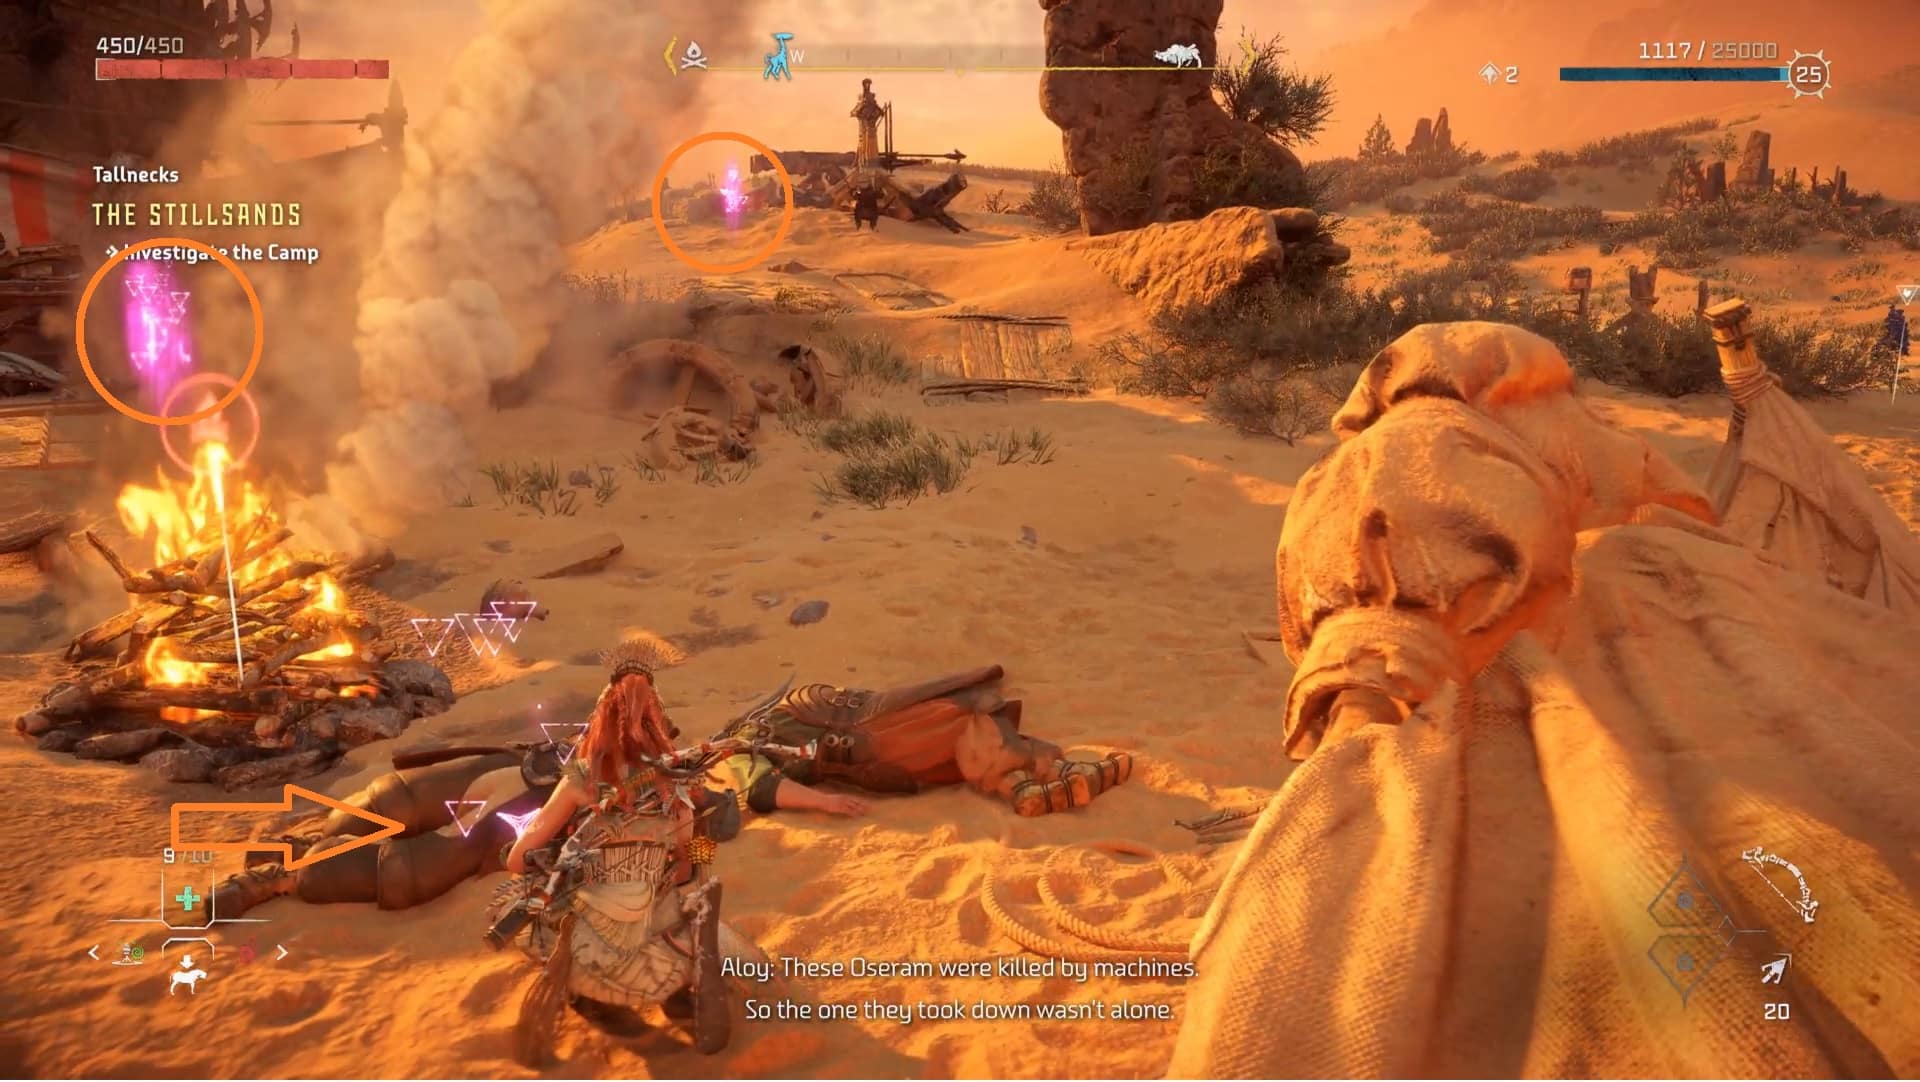
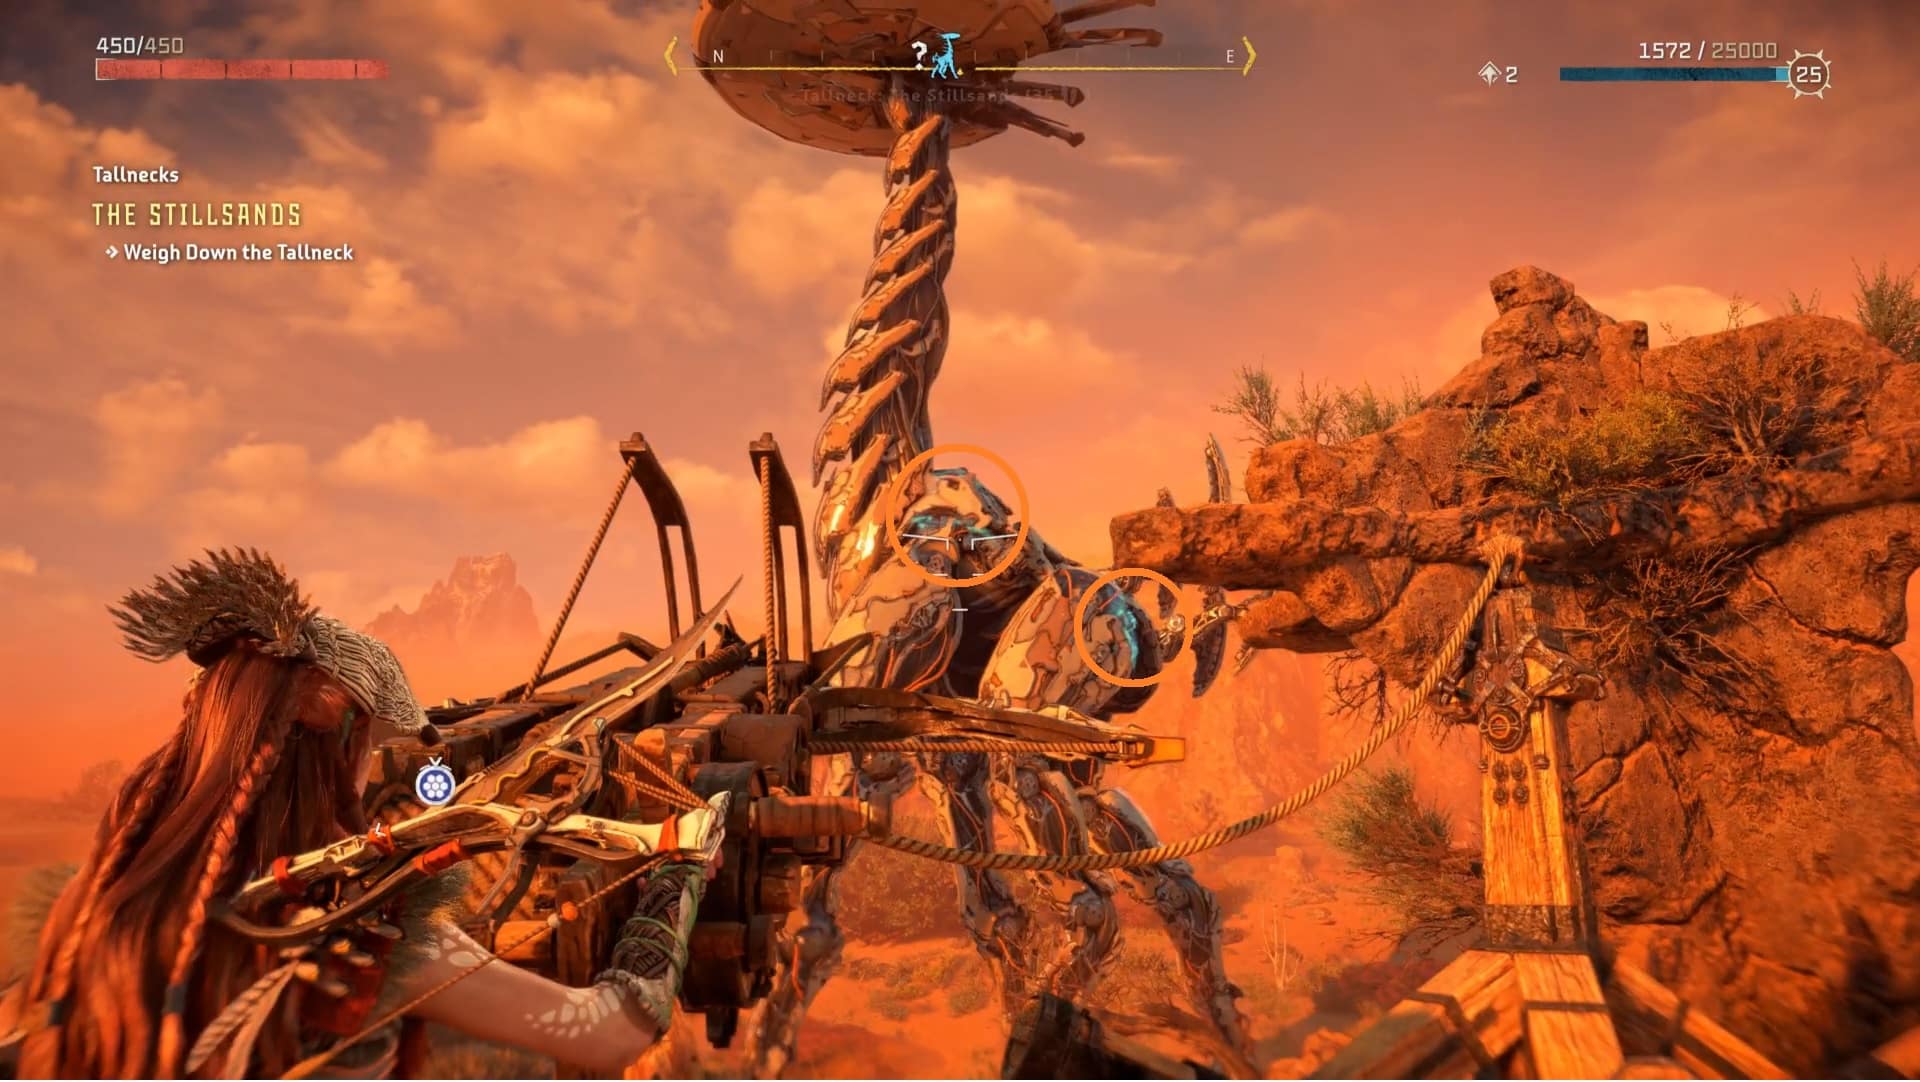
1. Examine the machine carcass in the Tallneck’s walking circle path to begin. After finding the Tallneck, you’ll be able to activate the “Stillsands” quest, which will show you where the Tallneck is located.

2. Find objects with purple glow scanning the area with [R3]. Interact with the two dead people to your right and a metal object behind them.
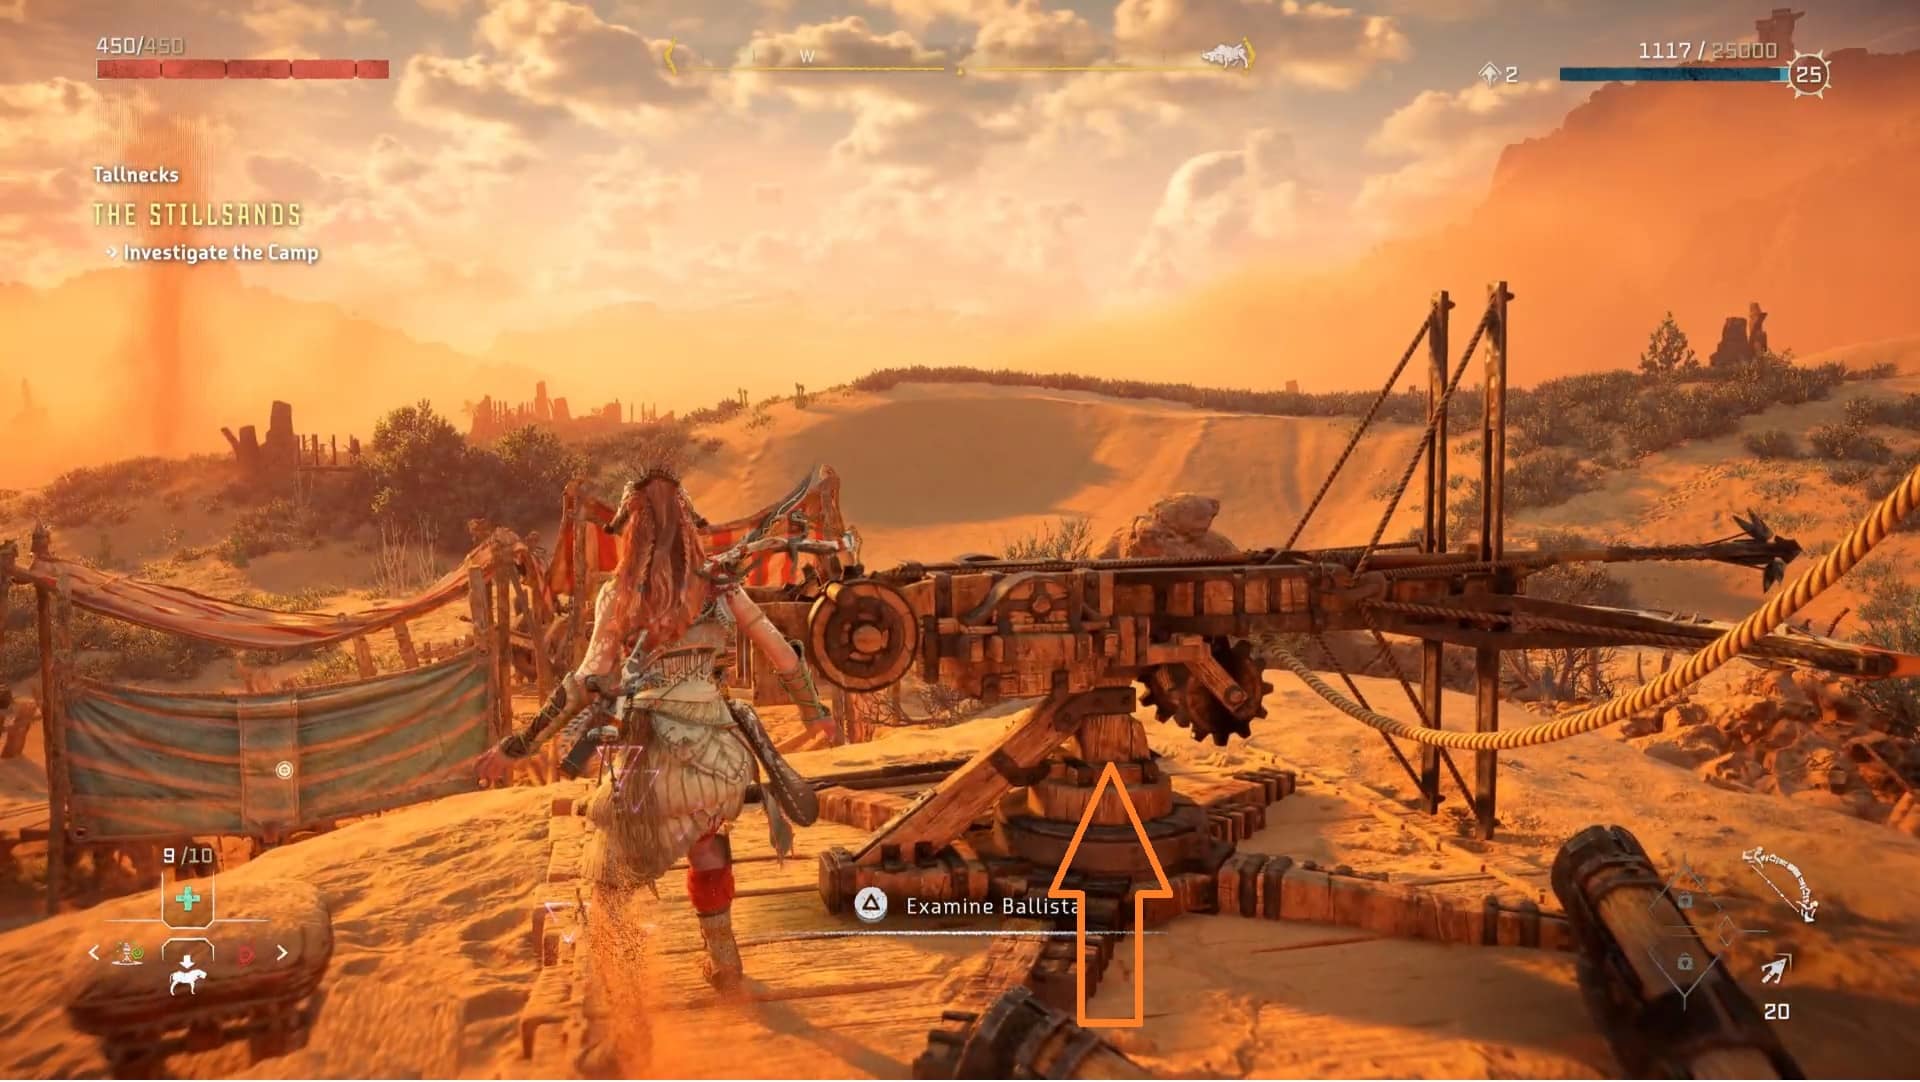
3. Follow the tracks to the right and you’ll find a Ballista. Now Scan the Tallneck to highlight its weakpoints . Then shoot using the balista to attach the weight to the Tallneck. In order to override the Tallneck, you must repeat this across three ballistas and attach three weights to each one.
4. For the 2nd ballista, turn around and head to the other side of the camp directly opposite of the 1st ballista. Shoot the Tallneck with it again and make sure the weight is attached correctly. Feel free to destroy any machines that are spawning at this time, as they may be a distraction.
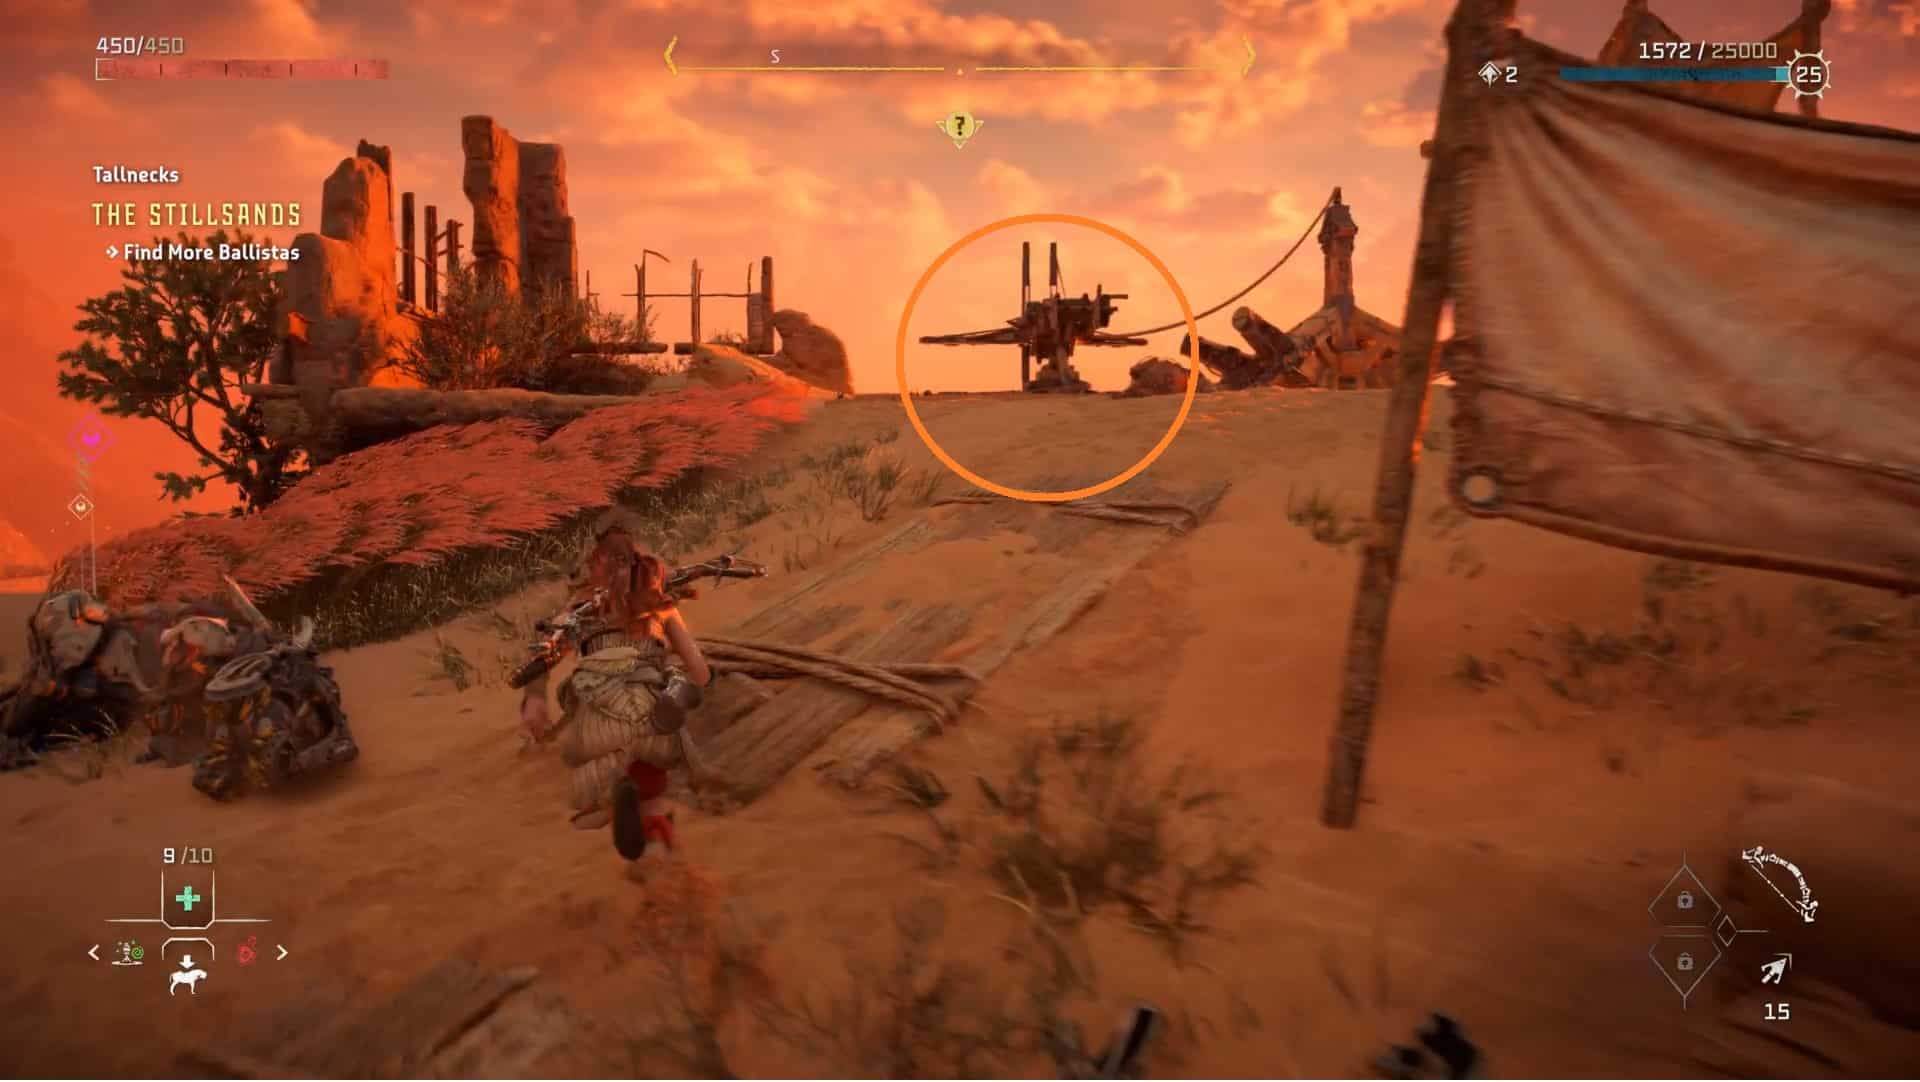
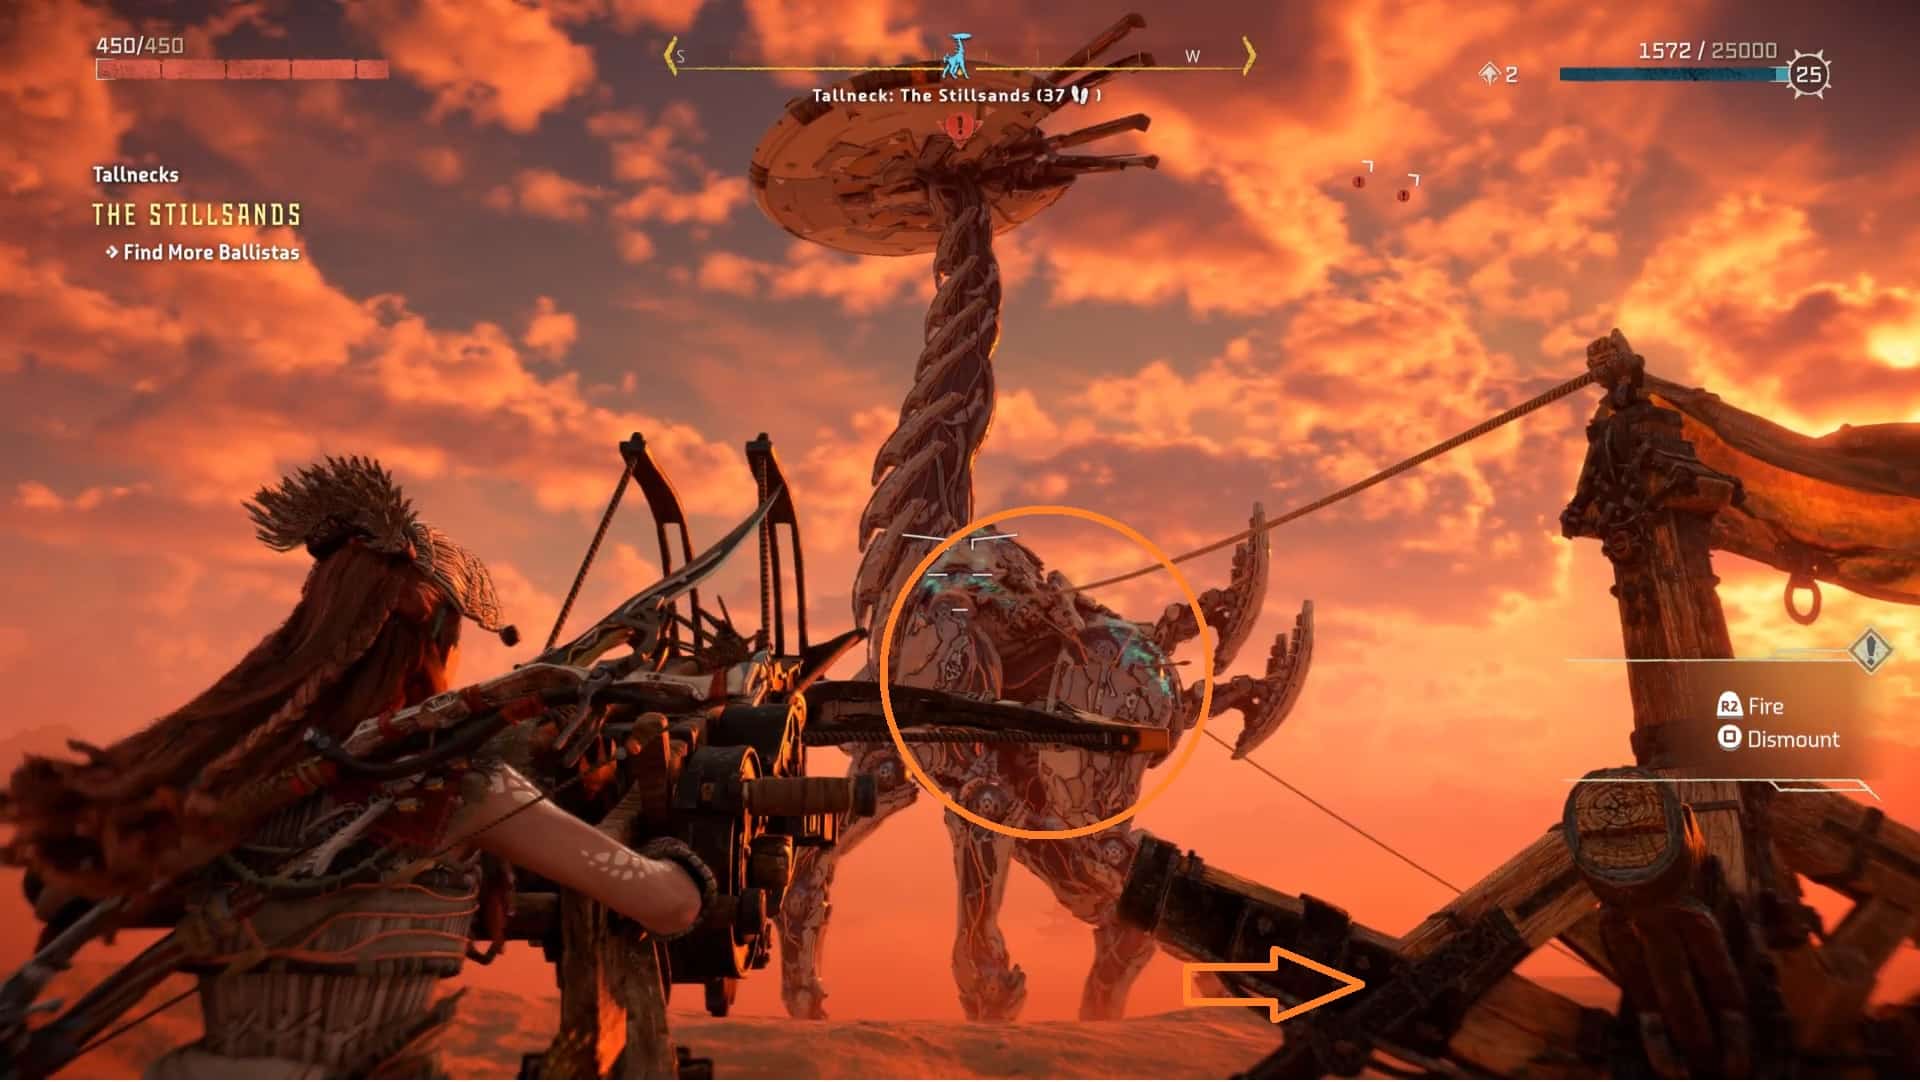
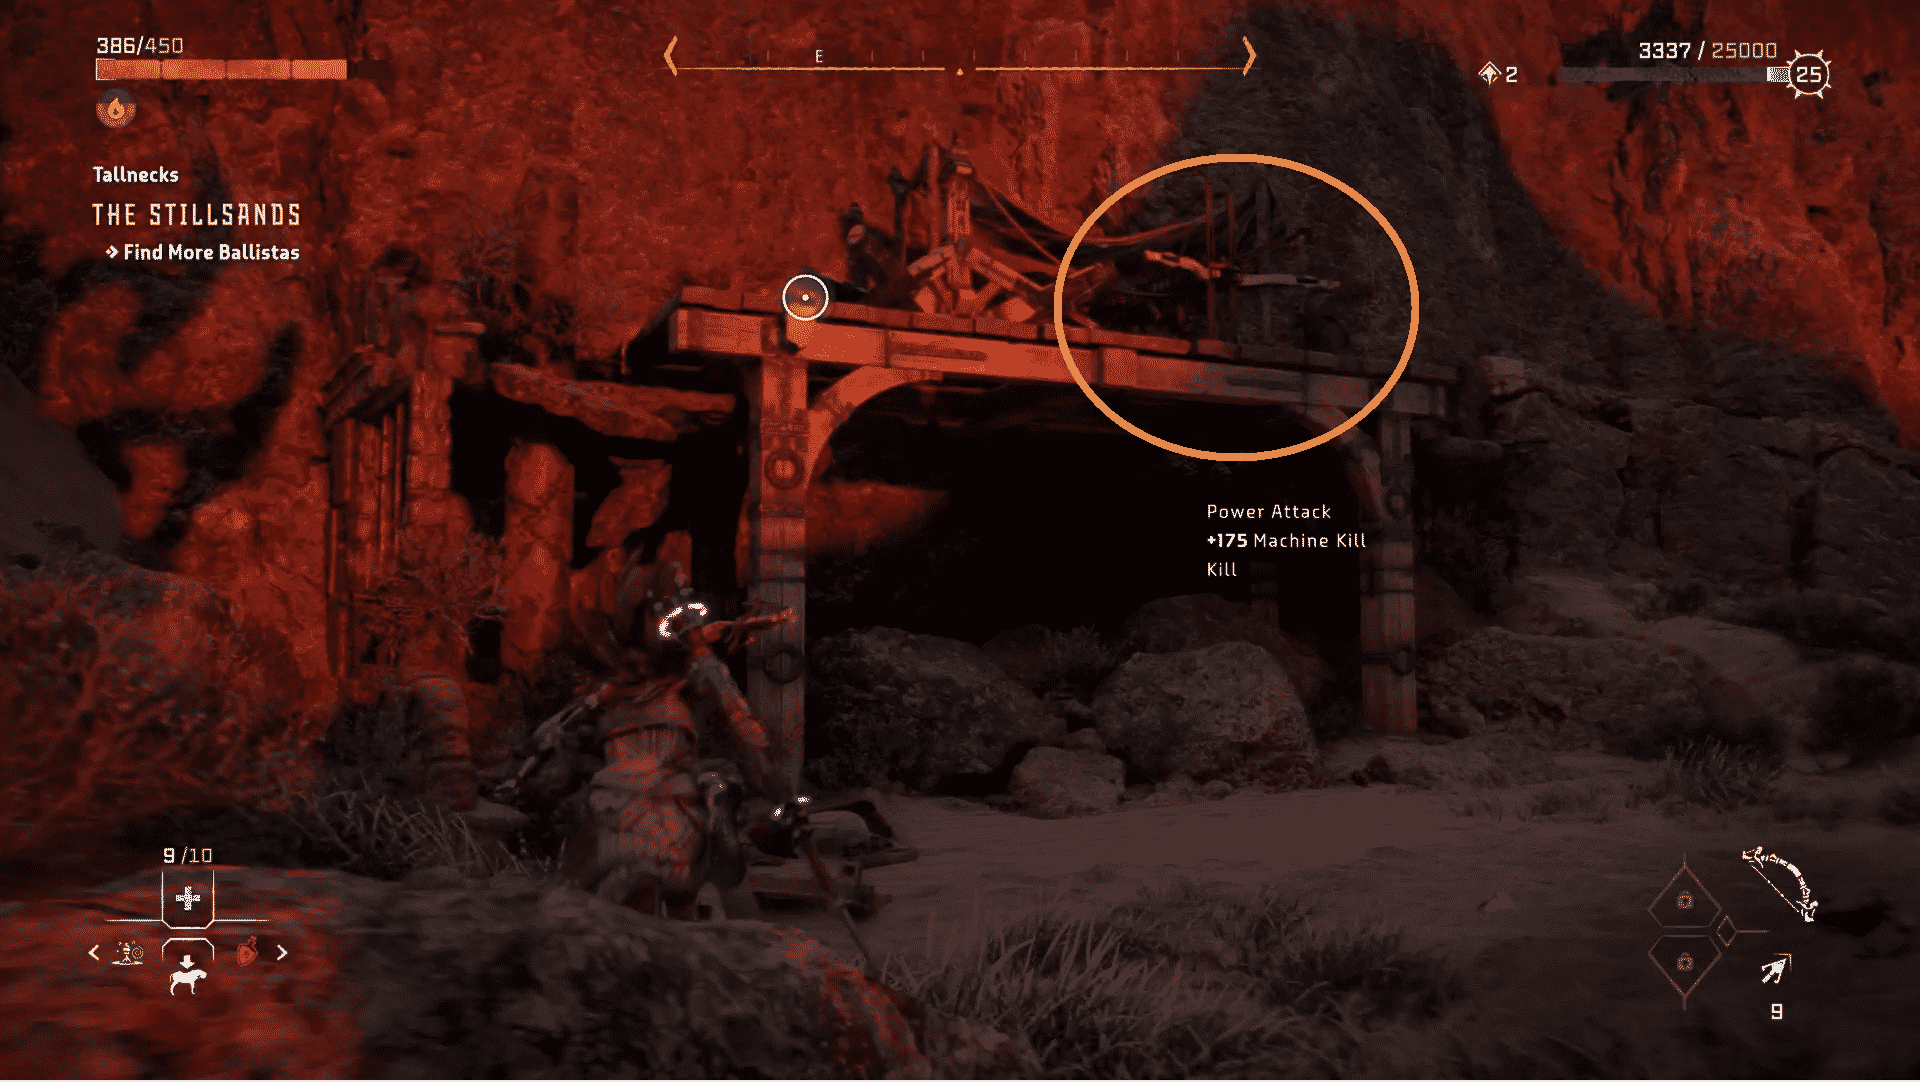
5. The 3rd ballista may be found in the eastern end of the map, where you can climb the cliffs to get there or use the grapple point. There are a few more machines in this area, but you can either destroy them or go around them. Once again, shoot the Tallneck with ballista and do the same thing again. It will now tumble to the ground if you shot it accurately with all three ballistas.
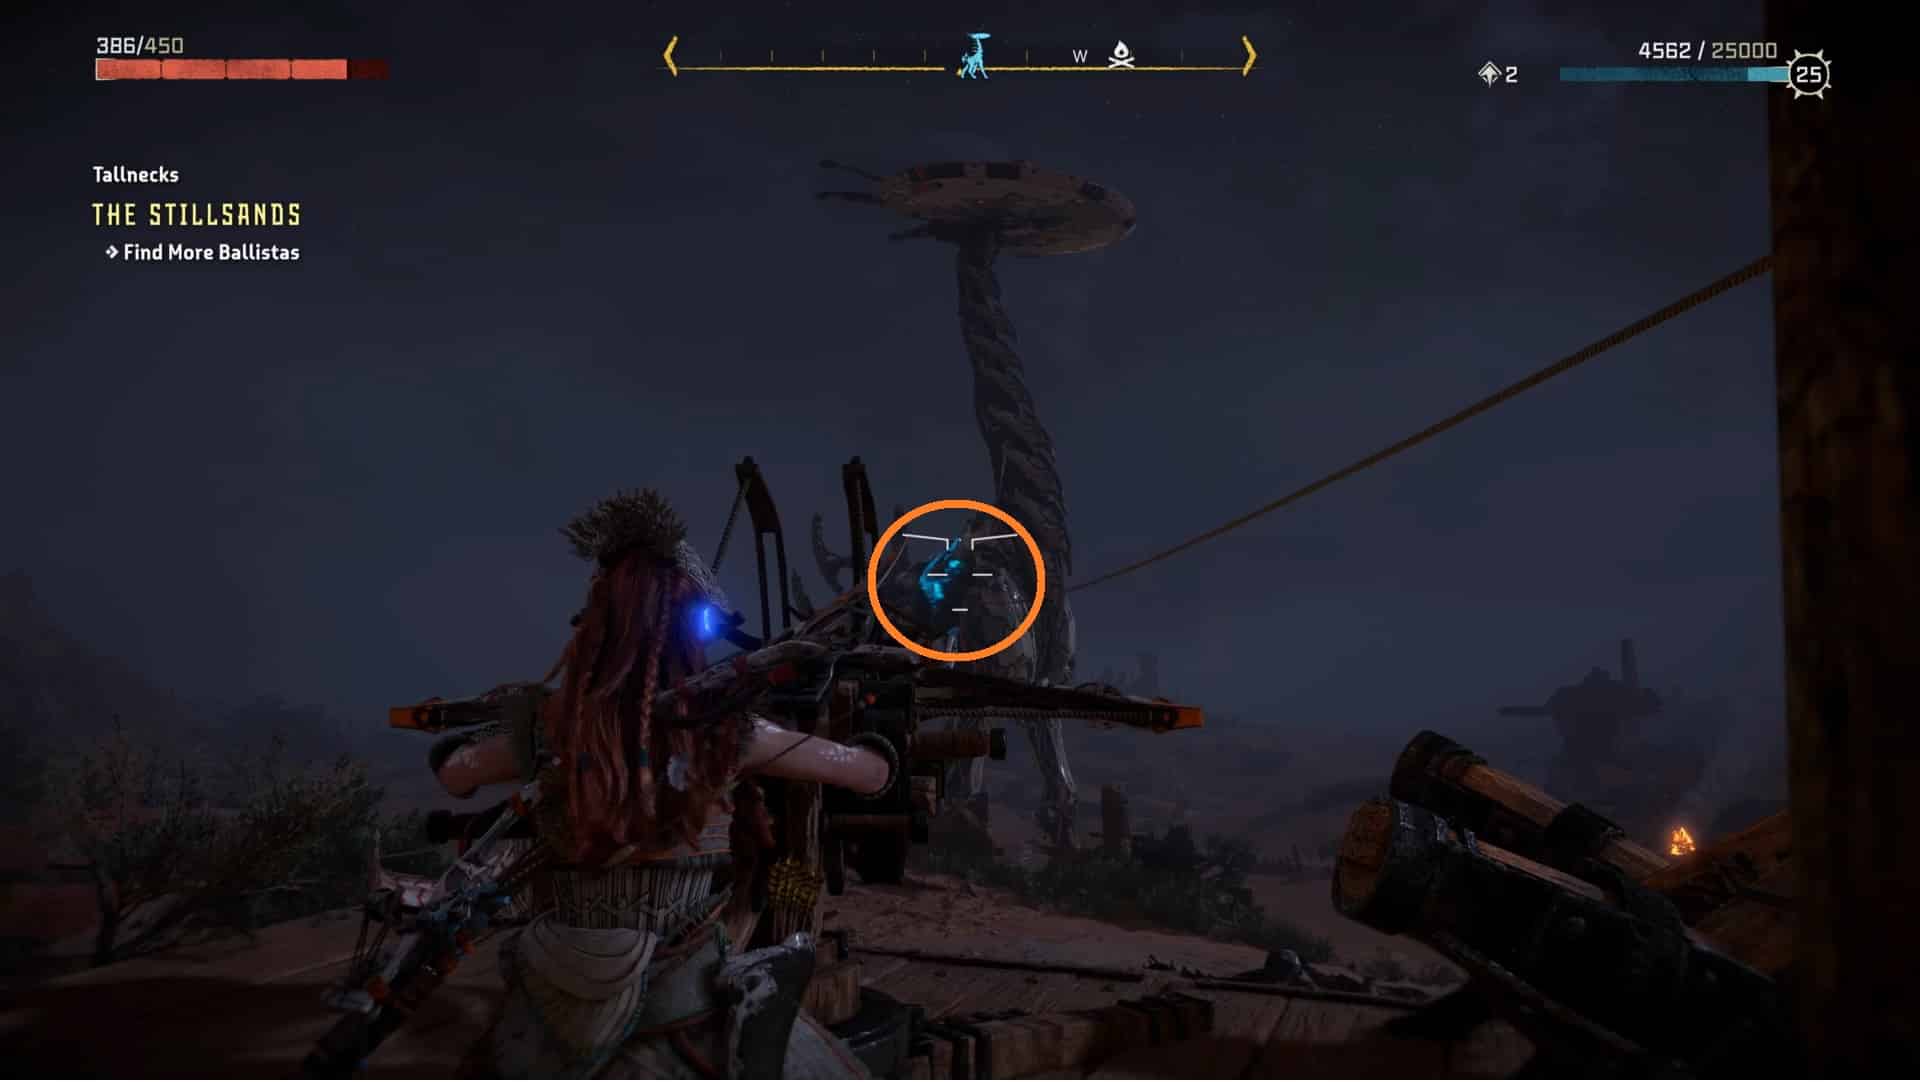
6. All you have to do now is sprint up to its head and you’re done.

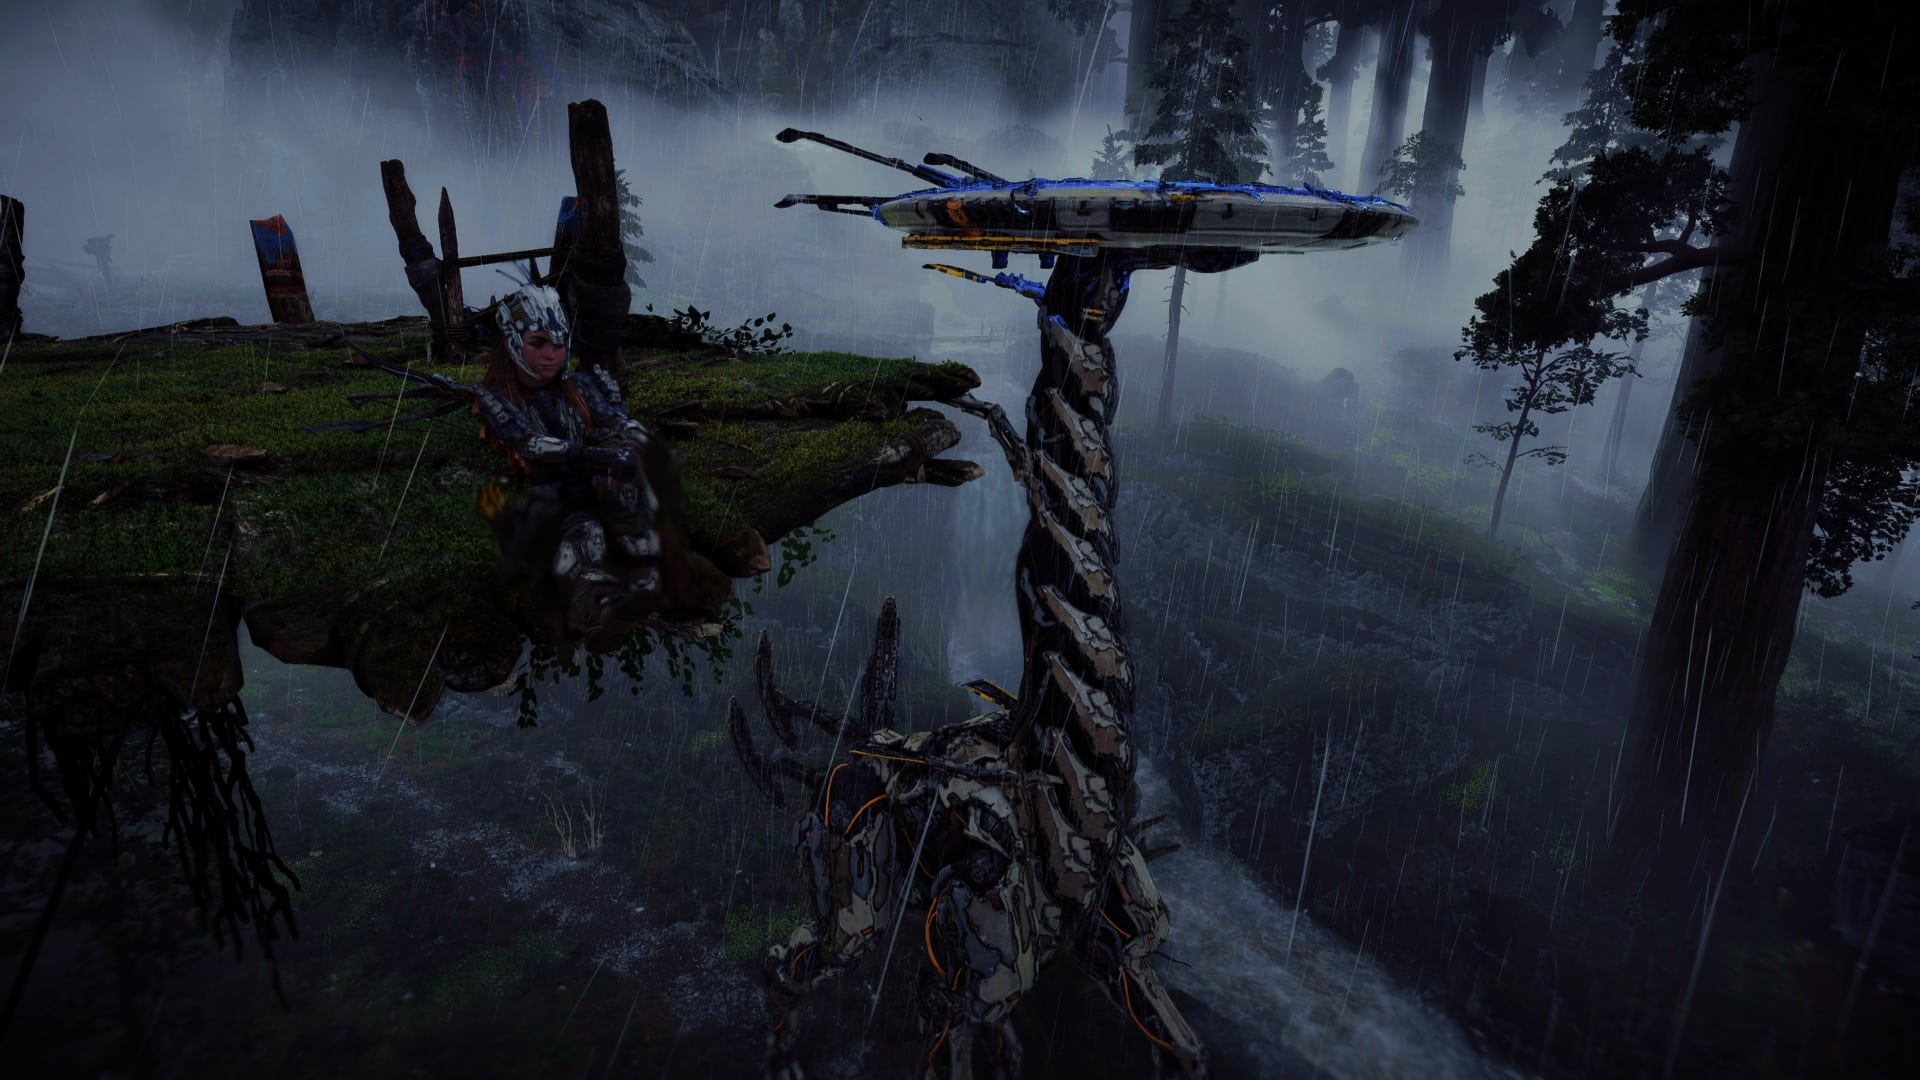
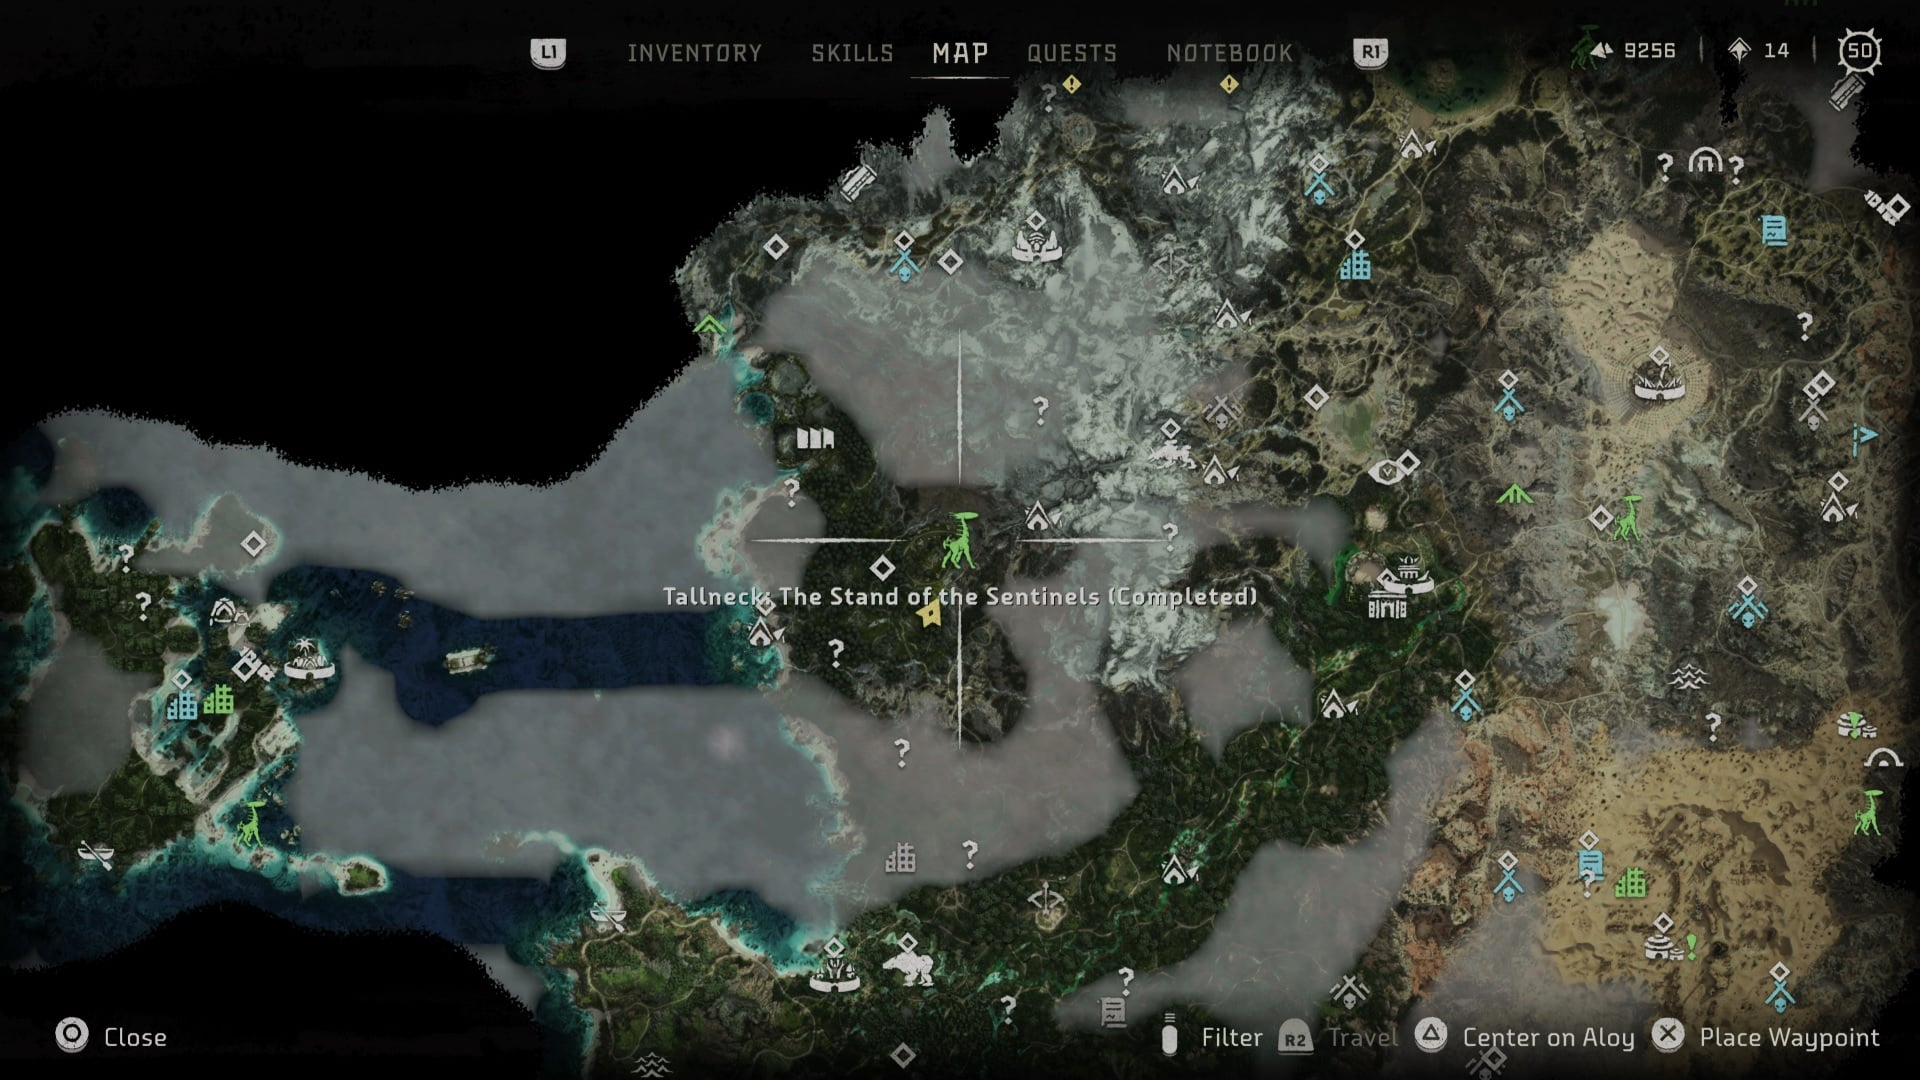
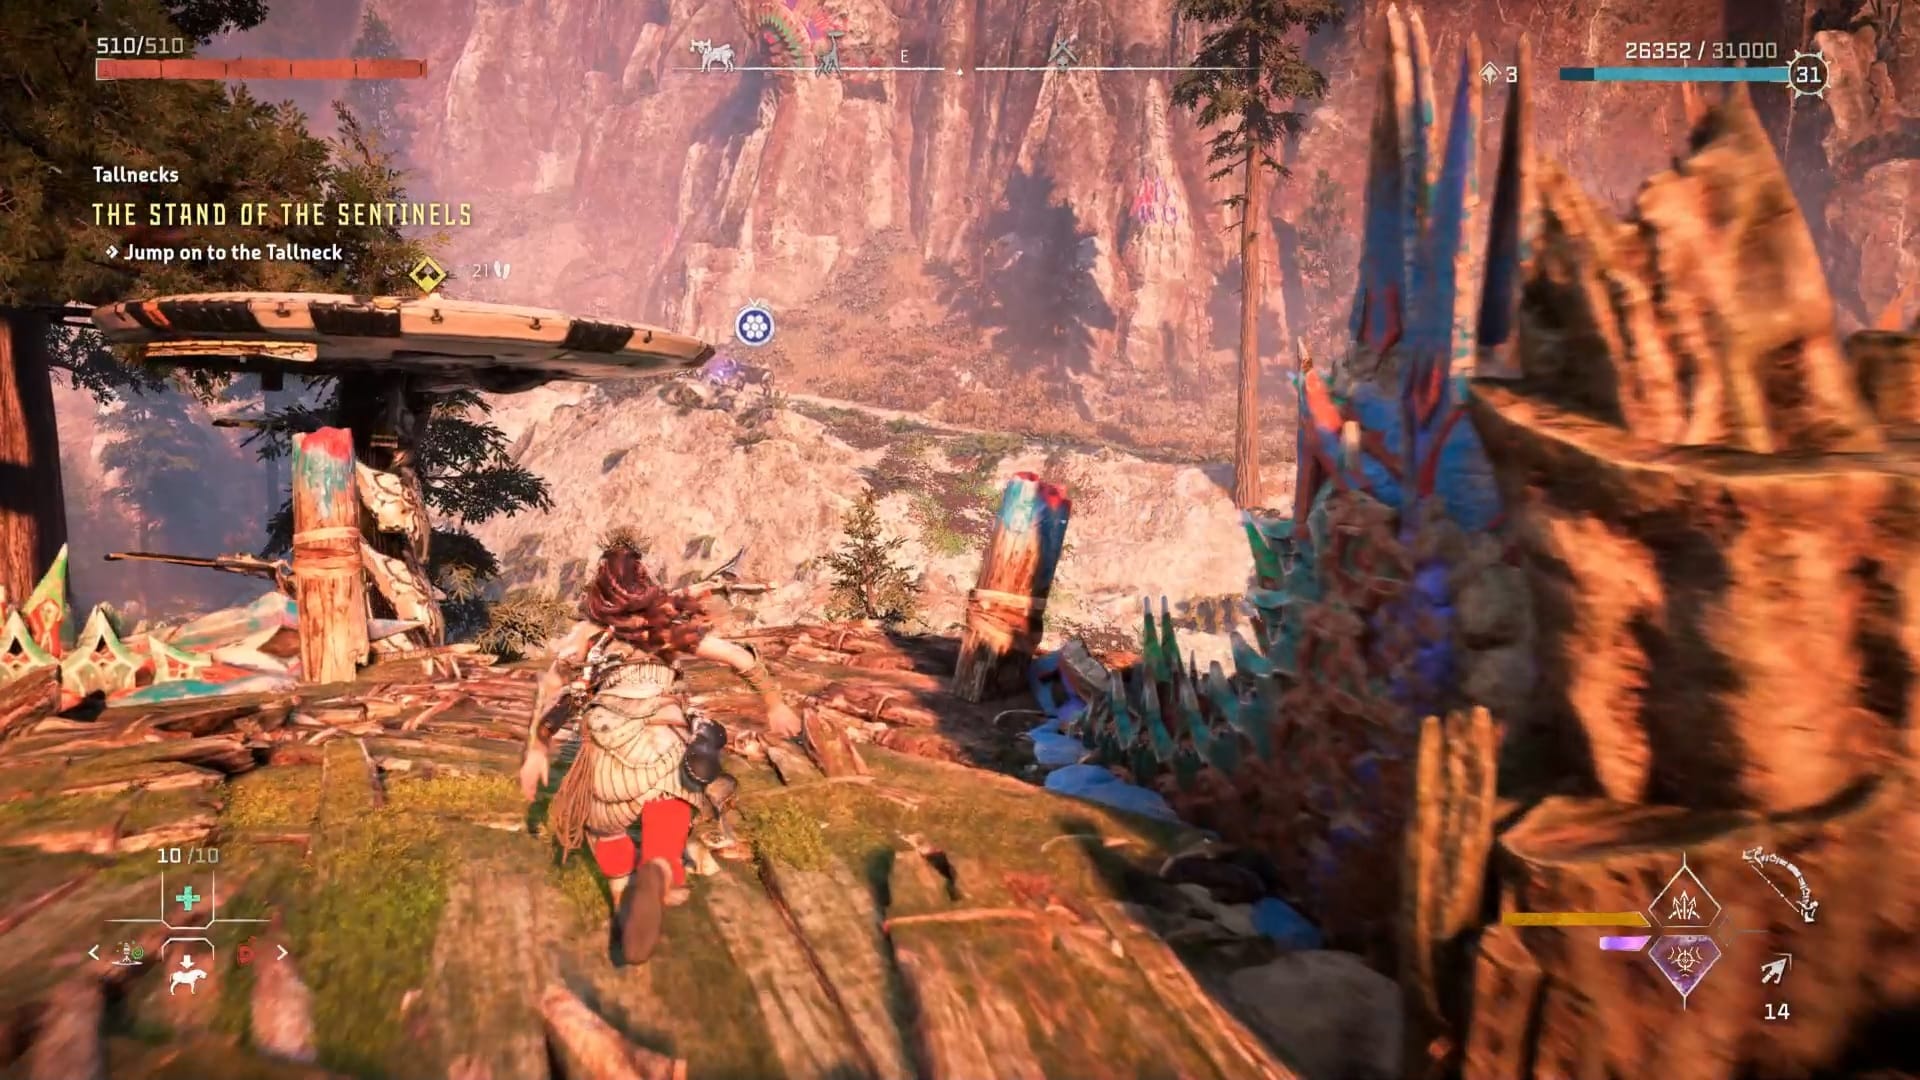
Tallneck #3: The Stand of the Sentinels
Map Location: West of Memorial Grove, near Cliffwatch.
How to Climb:
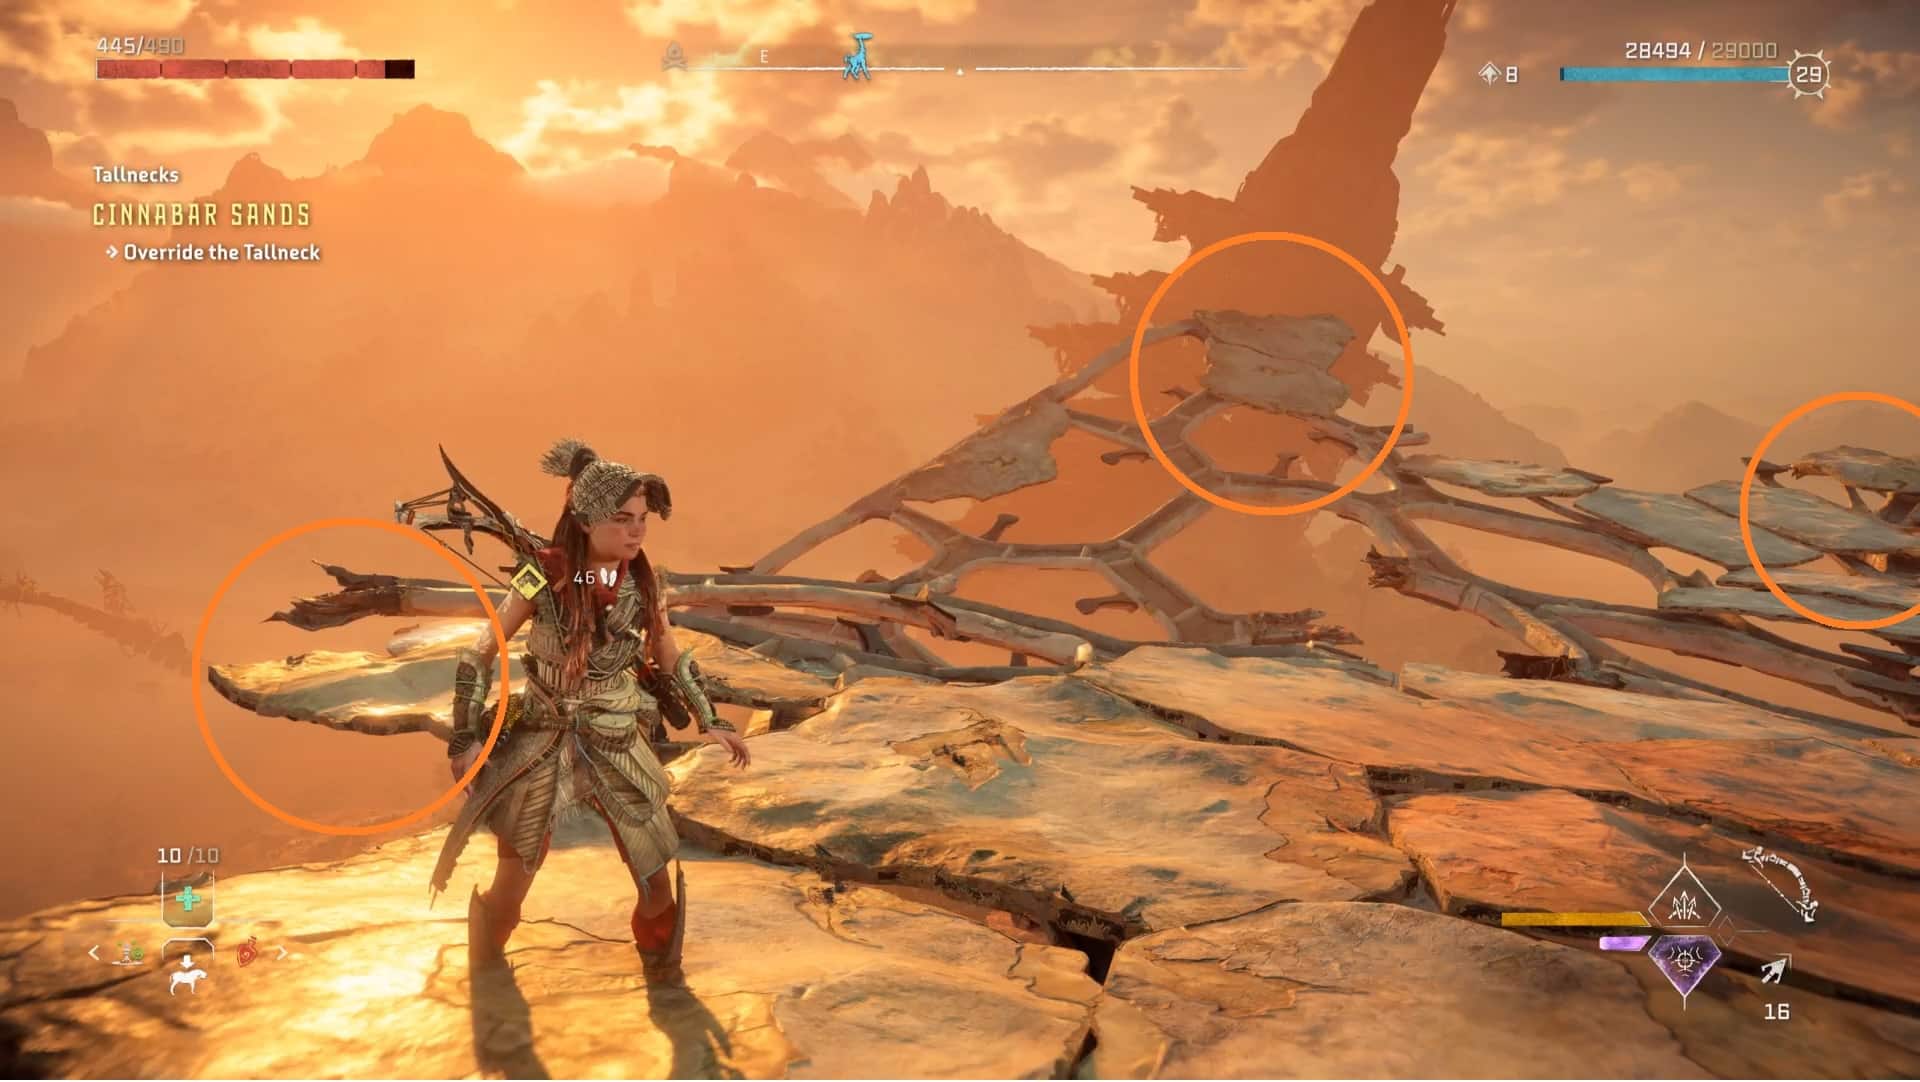
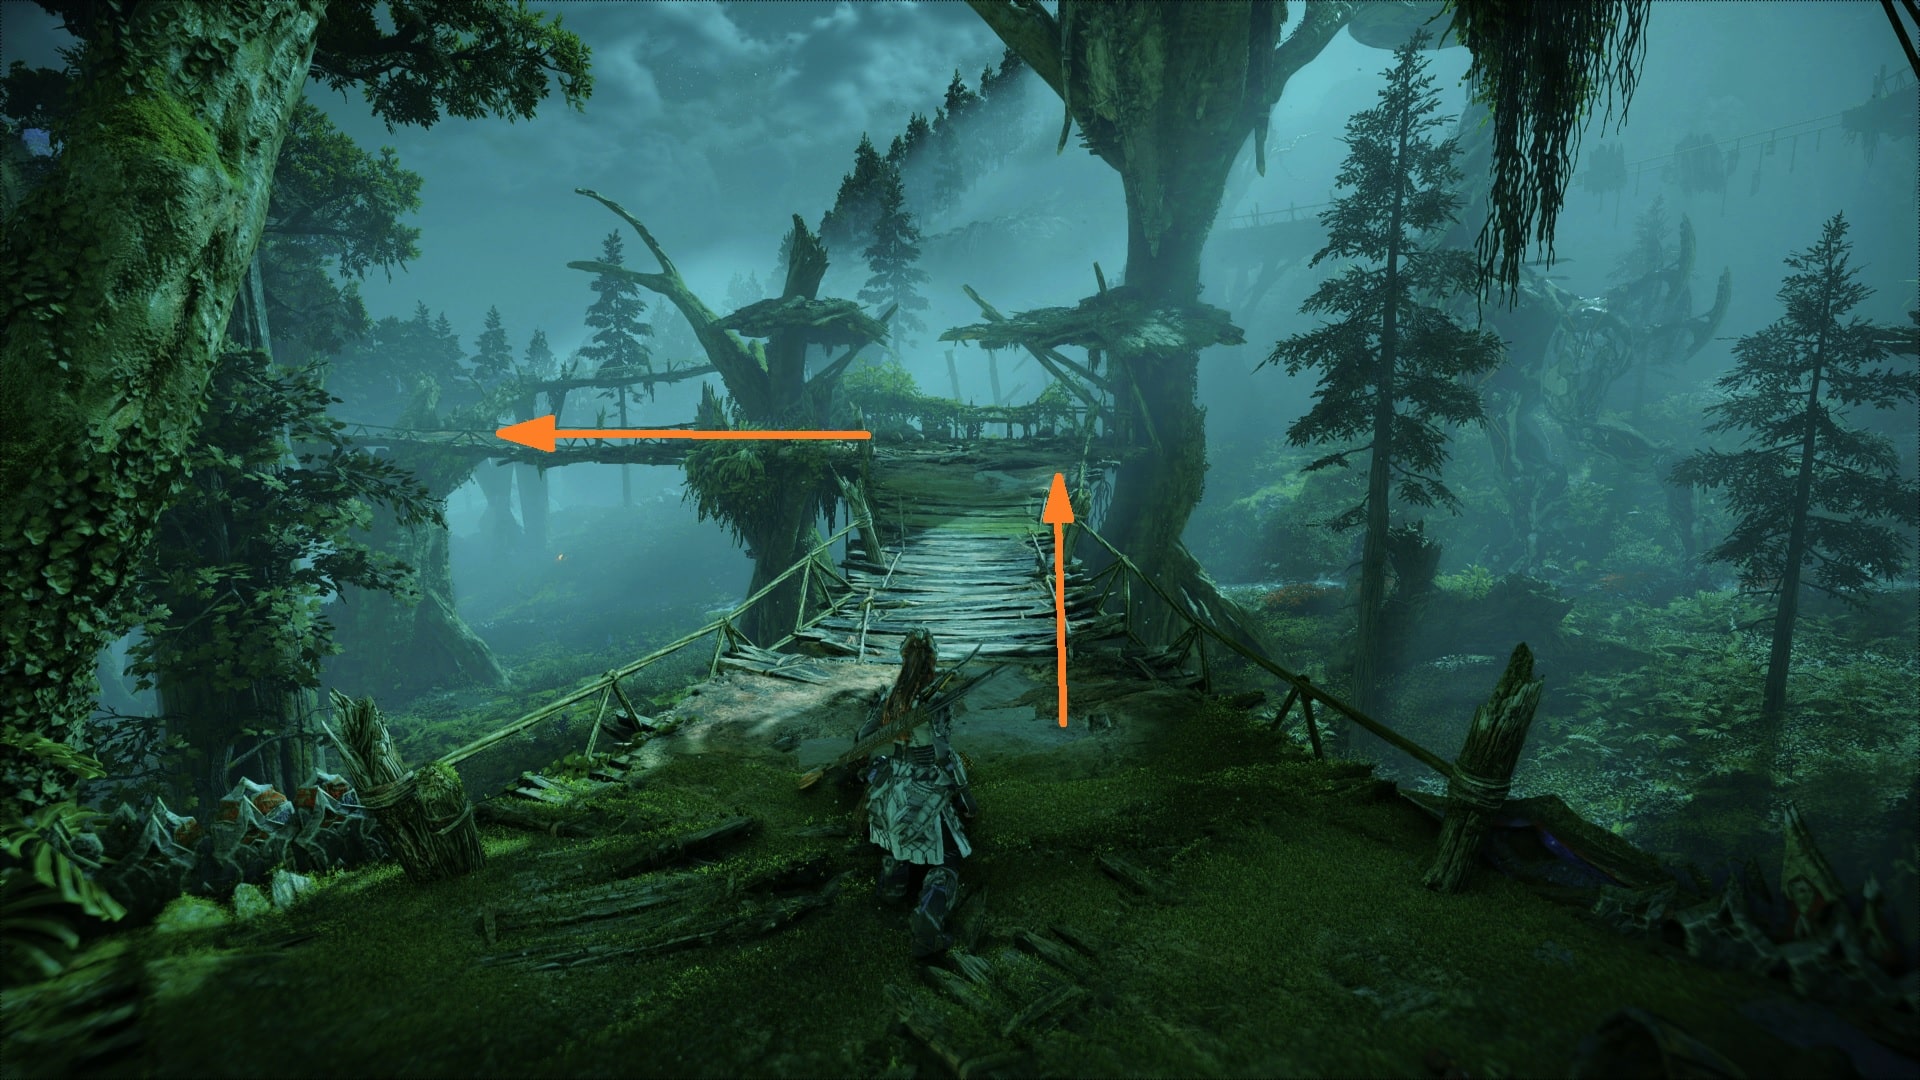
1. In order to avoid being shot while trying to find where to climb, it’s a good idea to take care of Stalkers in the vicinity before you begin. In addition, there are numerous ladders that can be dropped during the Tallneck climb, providing a fast way to go back up in case you fall. The starting climbing path begins in the middle of the search area. From there, you can jump and grapple on to those wooden pathways.
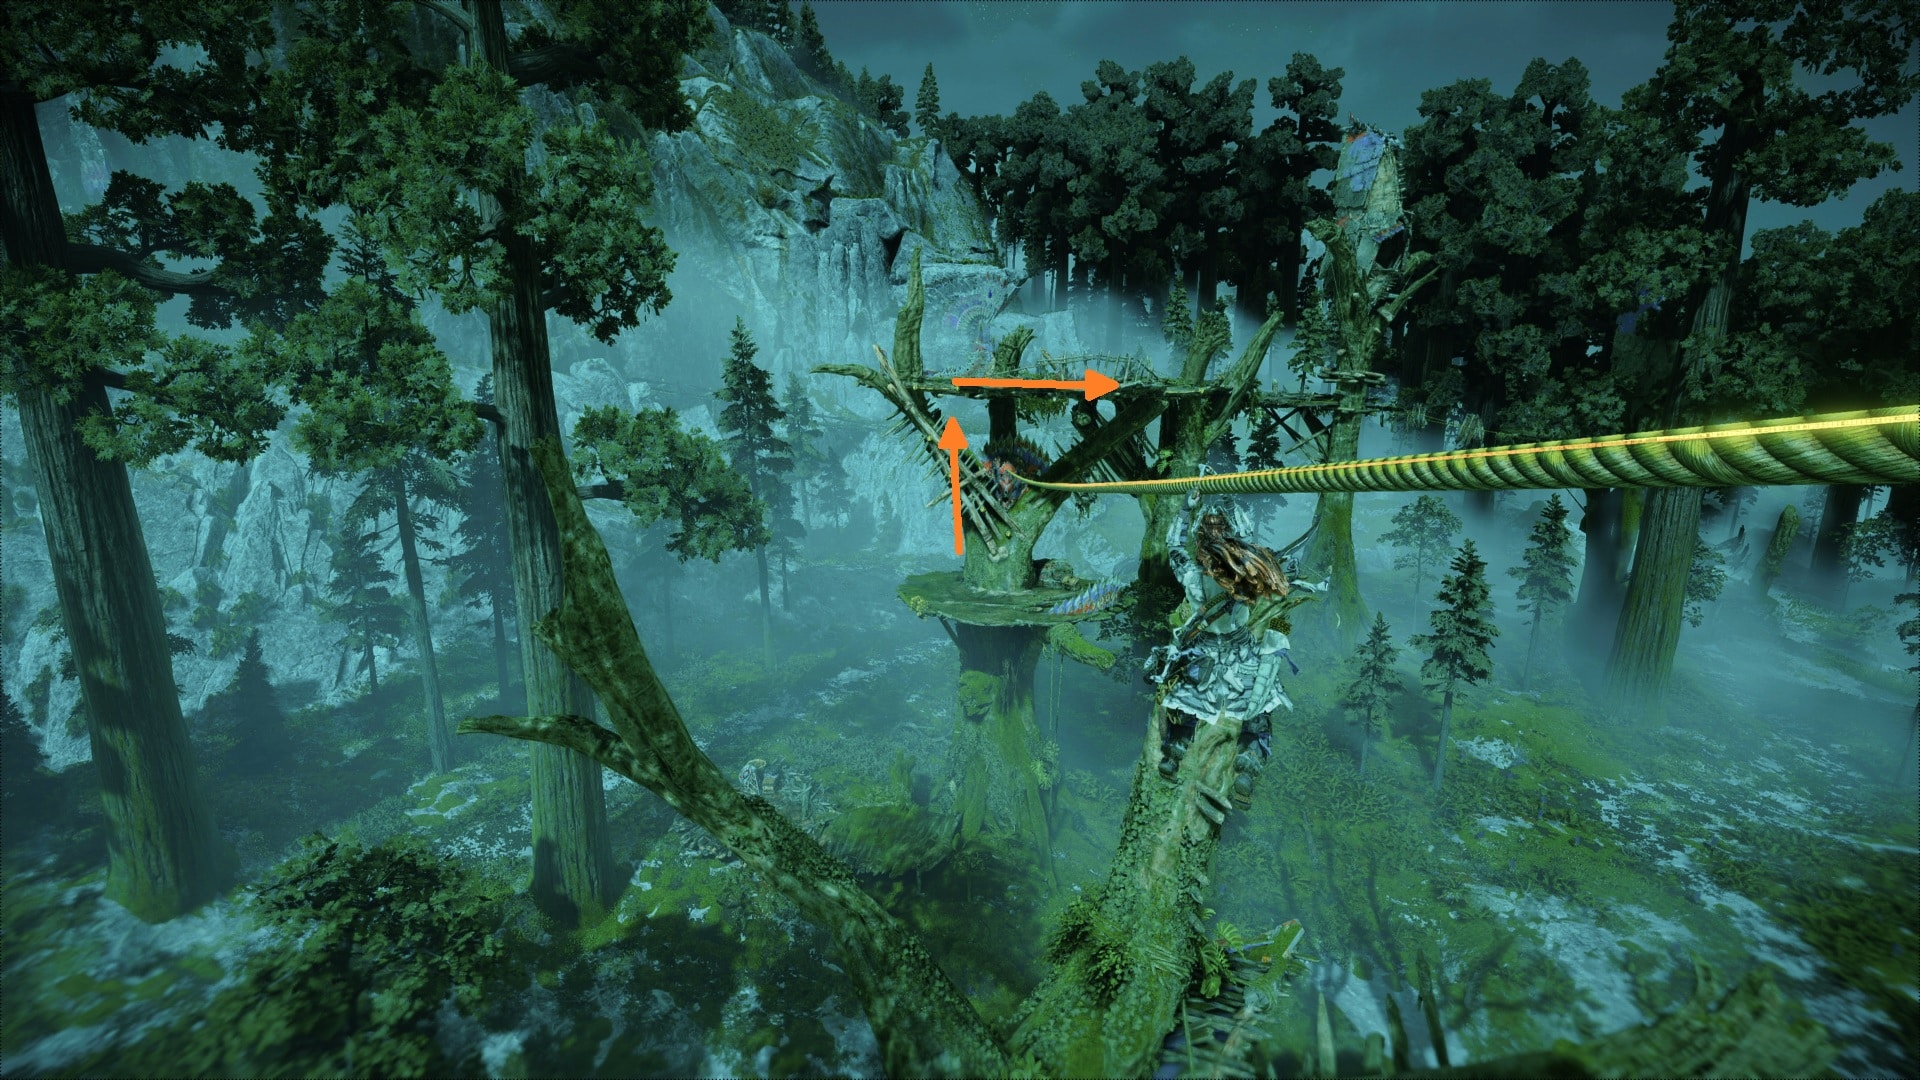
2. Follow the path, and you’ll come to a point where there are yellow ledges in the distance that you can hang on to, pressing [R3] will help you see the climbable trails. You must use your Glider [Square] to reach the other end . Then climb left onto the rope.

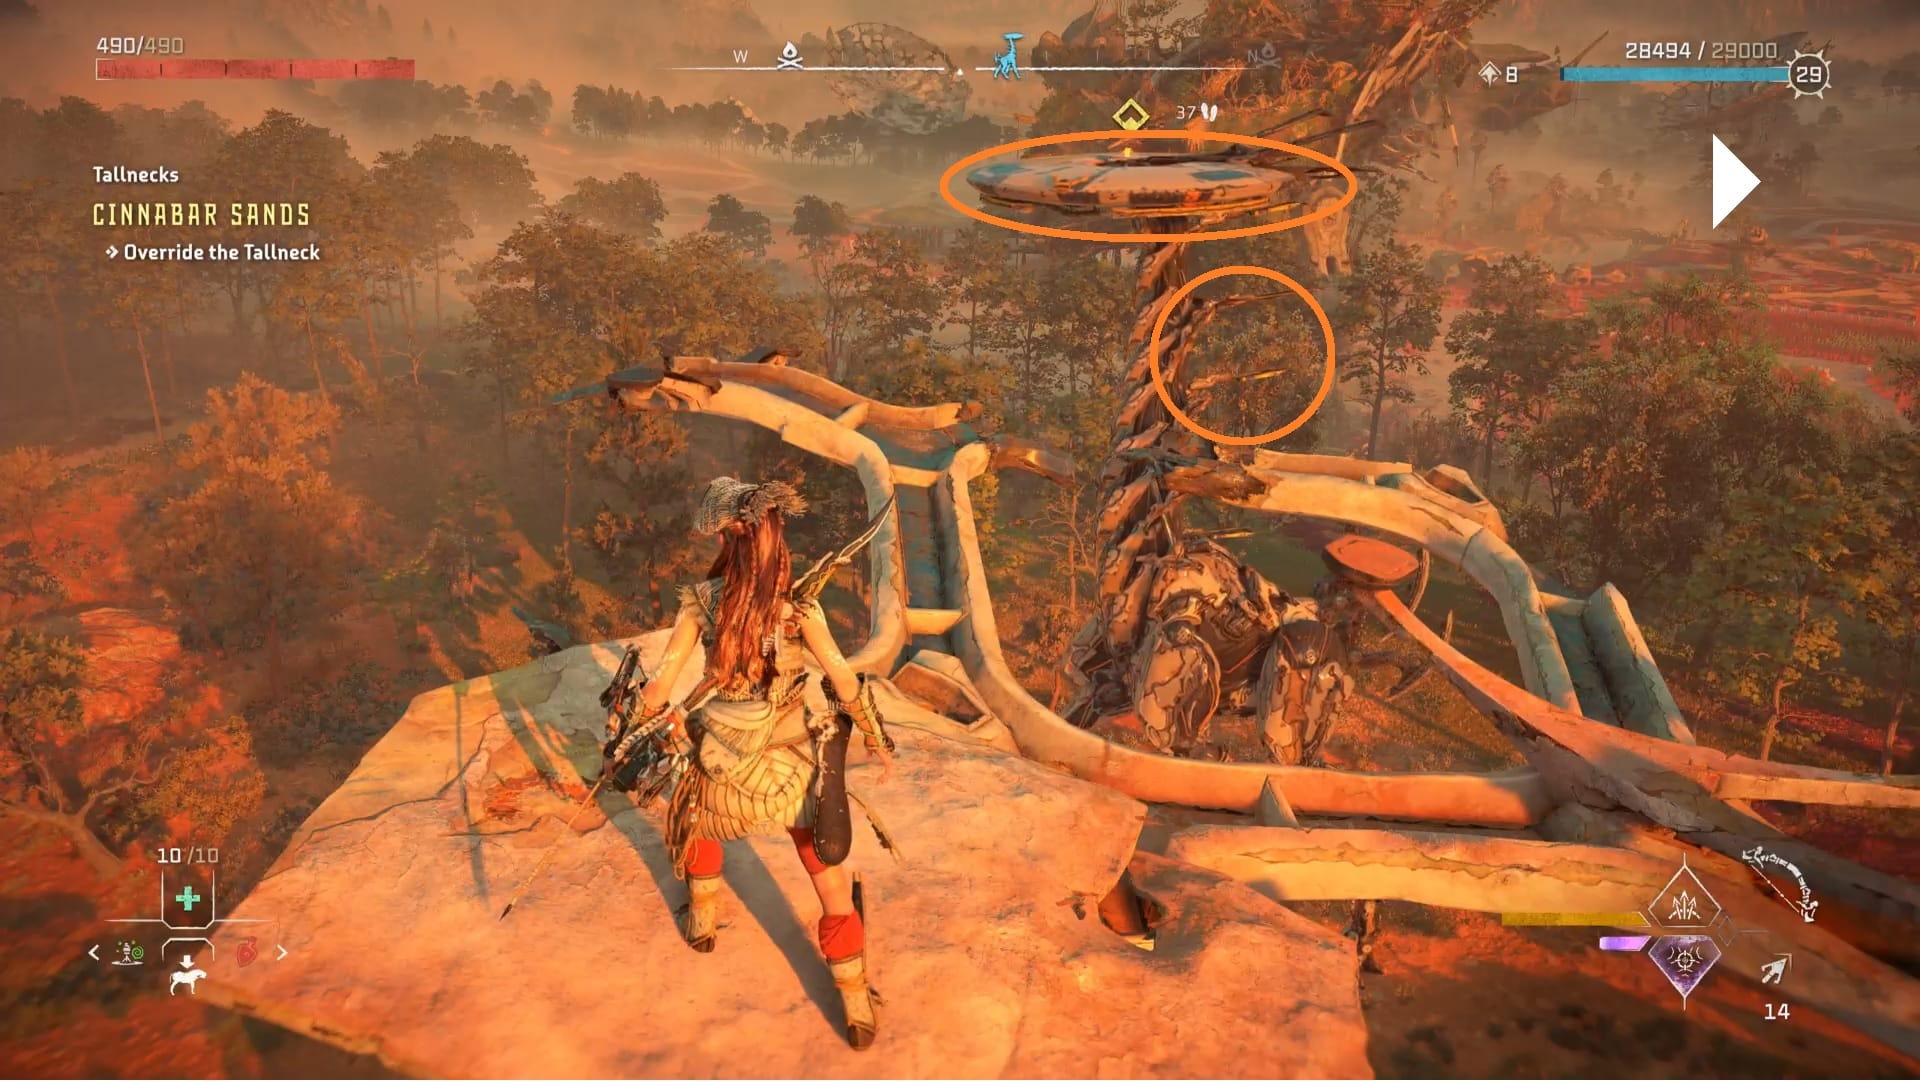
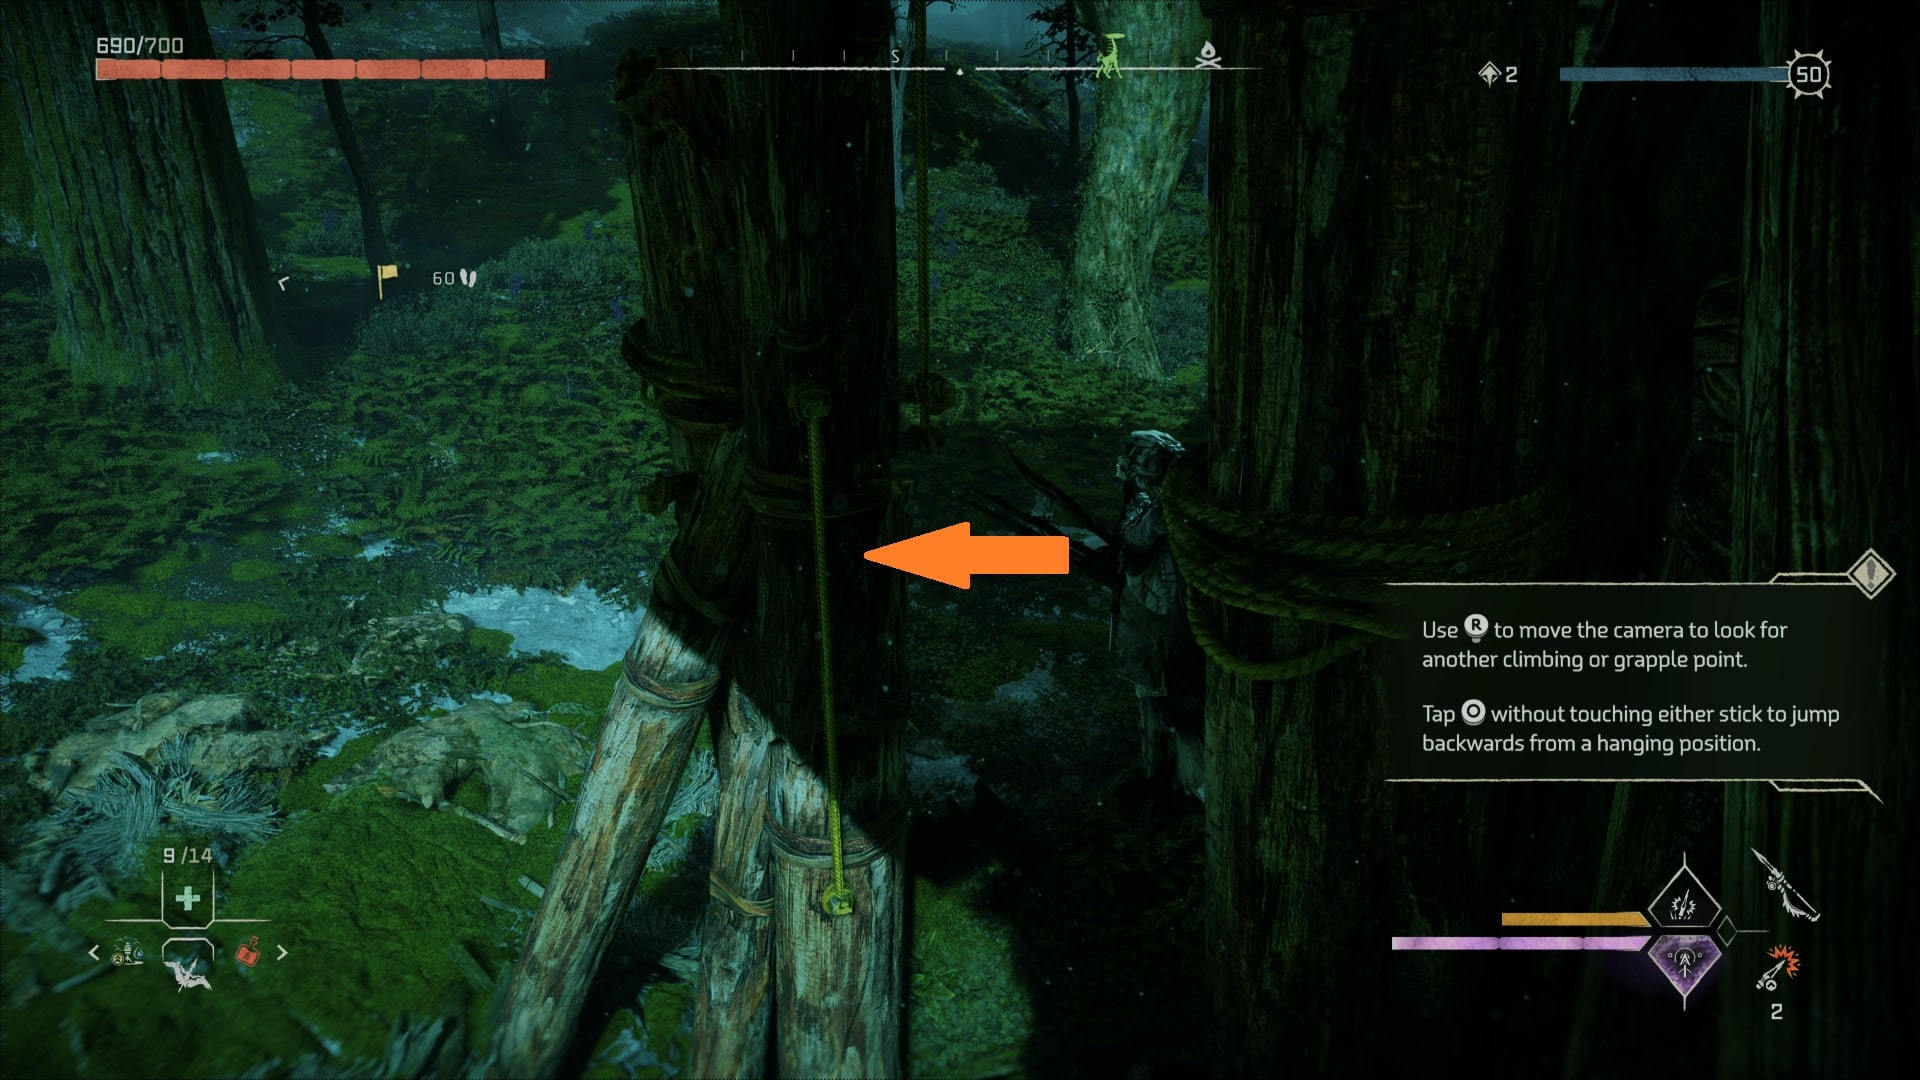
3. Climb up, Press [Circle] to jump backwards, then continue climbing up the rope.
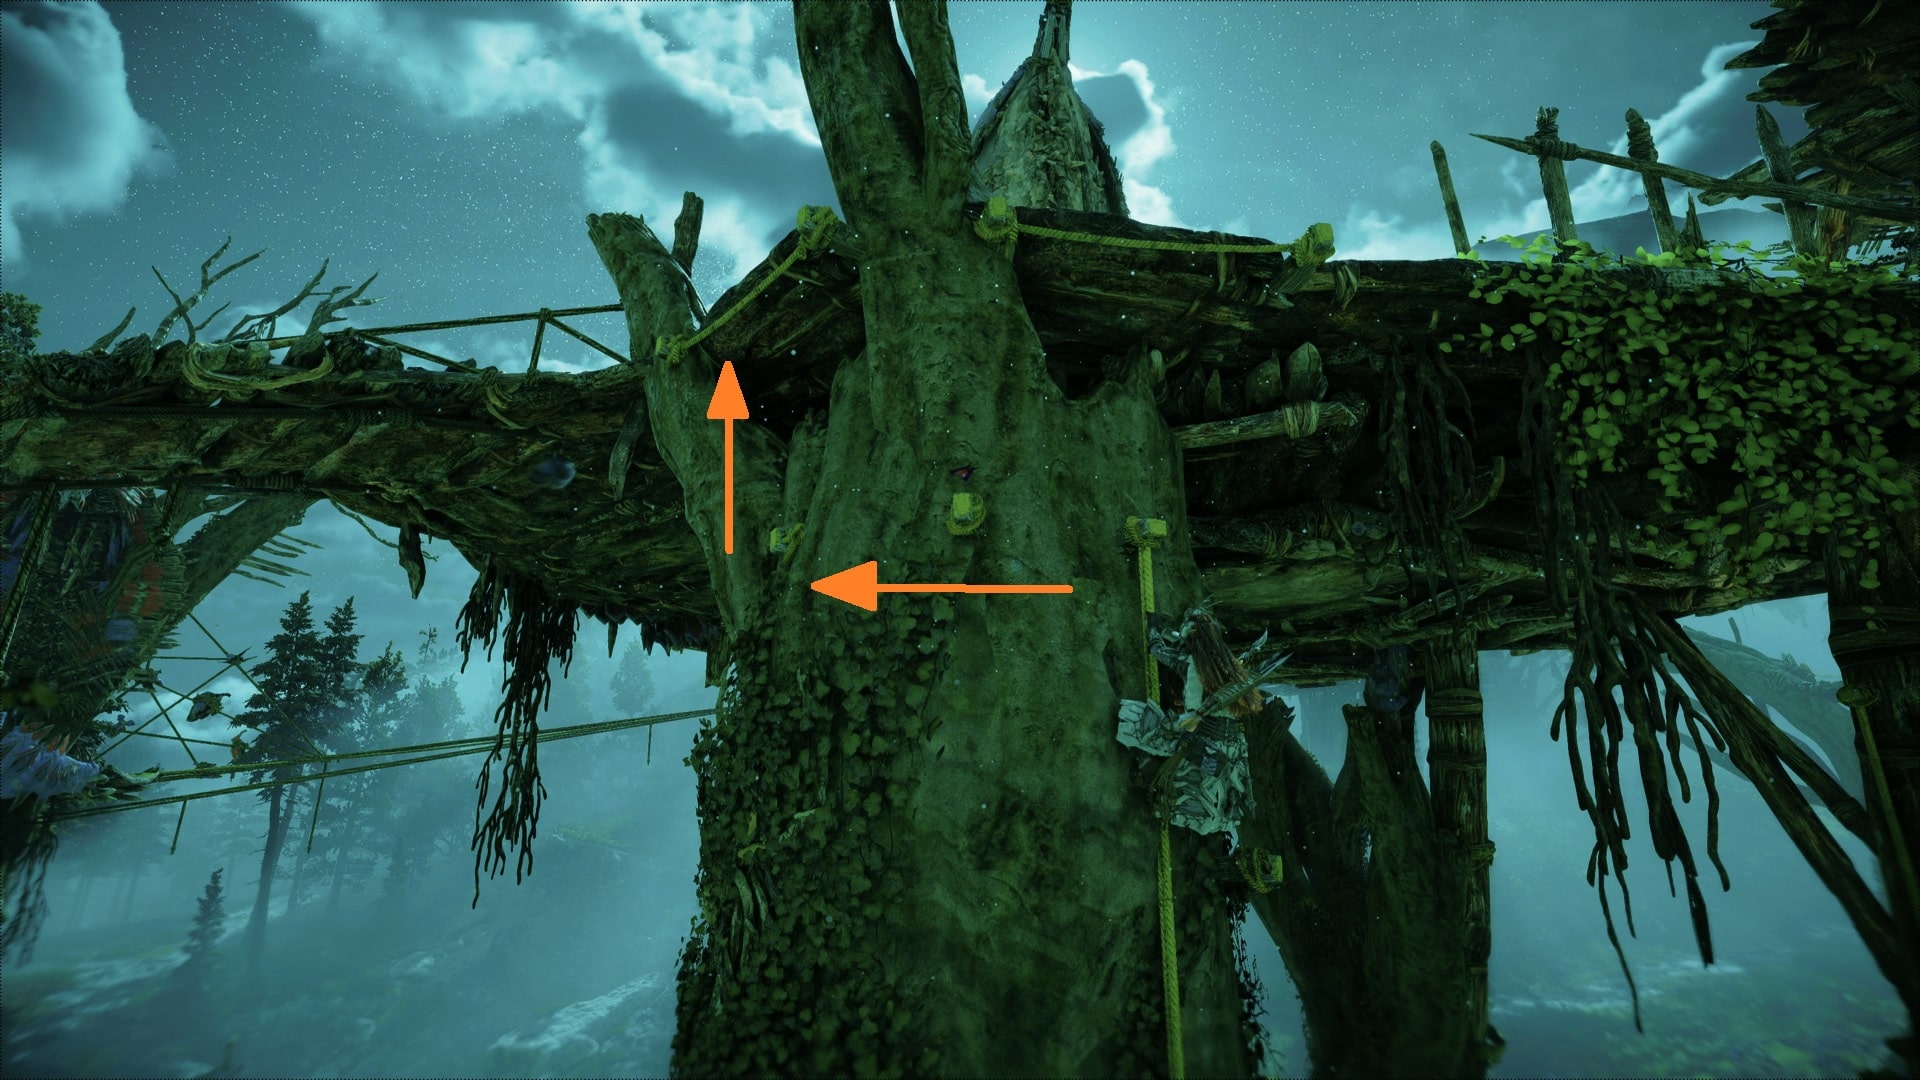
4. Turn left at the top, cross the yellow ropes, and wait for the Tallneck to come around the other way It may take a few moments to arrive, depending on where it is in its journey. Jump on the yellow ledges on the Tallneck’s back while it’s nearby. Then, hop over to the wooden platforms on the other side and ride it for a few seconds. You can’t climb to the top of the Tallneck just yet, we must first climb further those platforms.
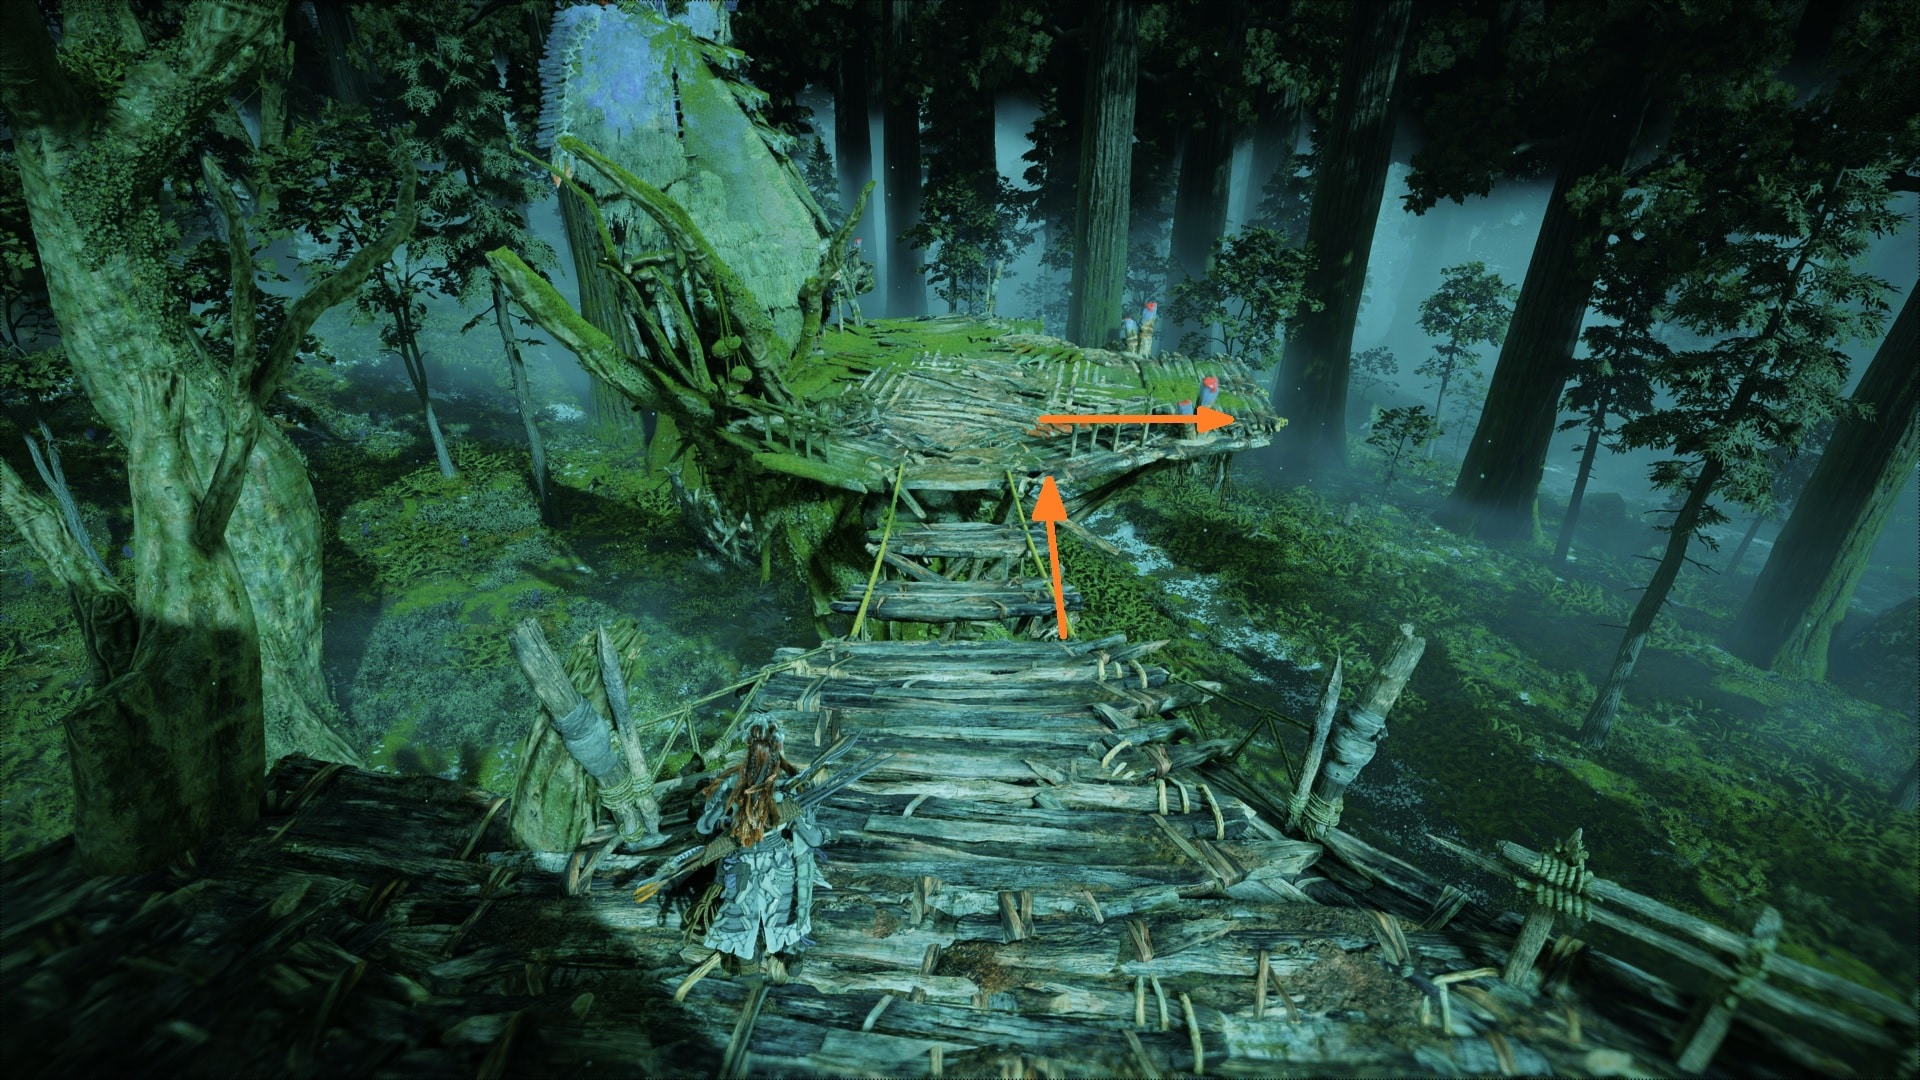
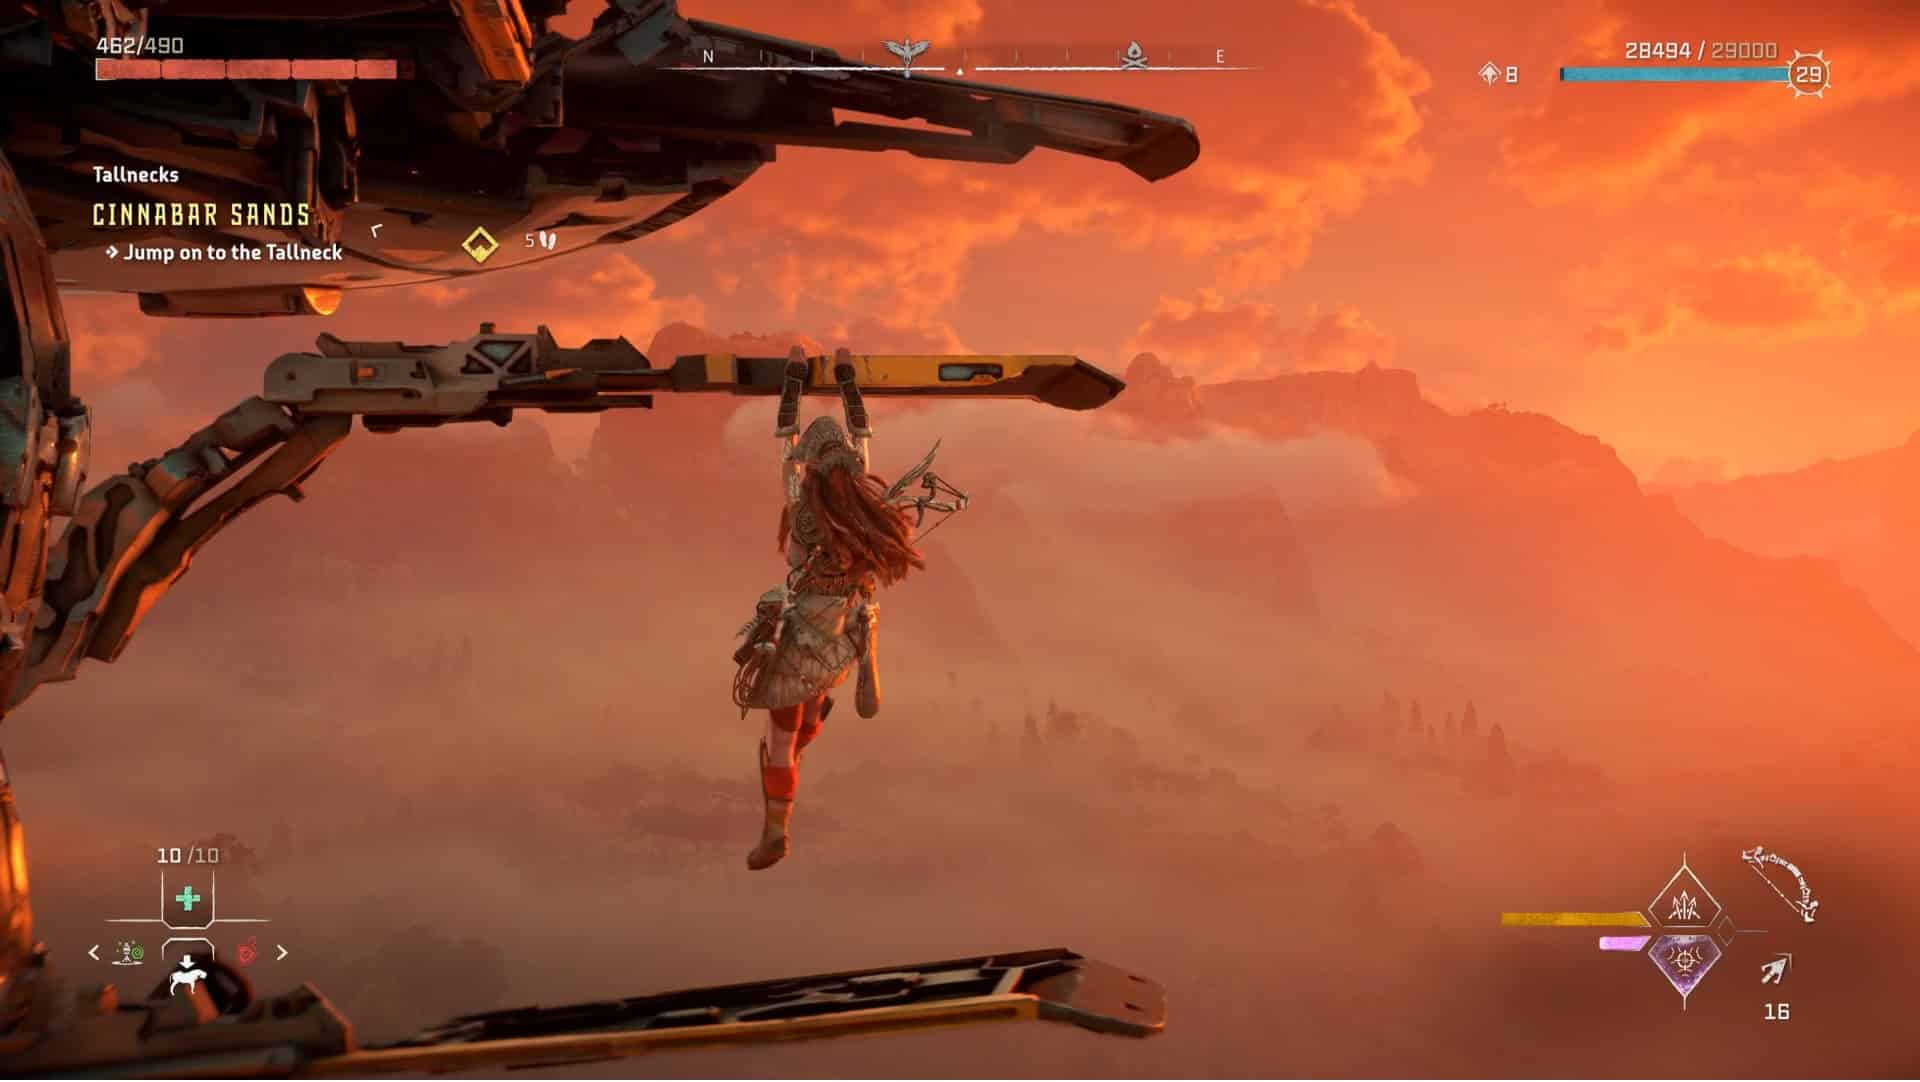
5. Follow the Tallneck’s path all the way to the end till you see an opportunity to use the grapplepoint, you’ll know that you’re in the right place when you see Clamberjaws. Shoot the red lock on the ladder leading to the platform above once the attackers have been dealt with, if you’re swift enough, it may be possible to run past them and reach the ladder without engaging in any combat.
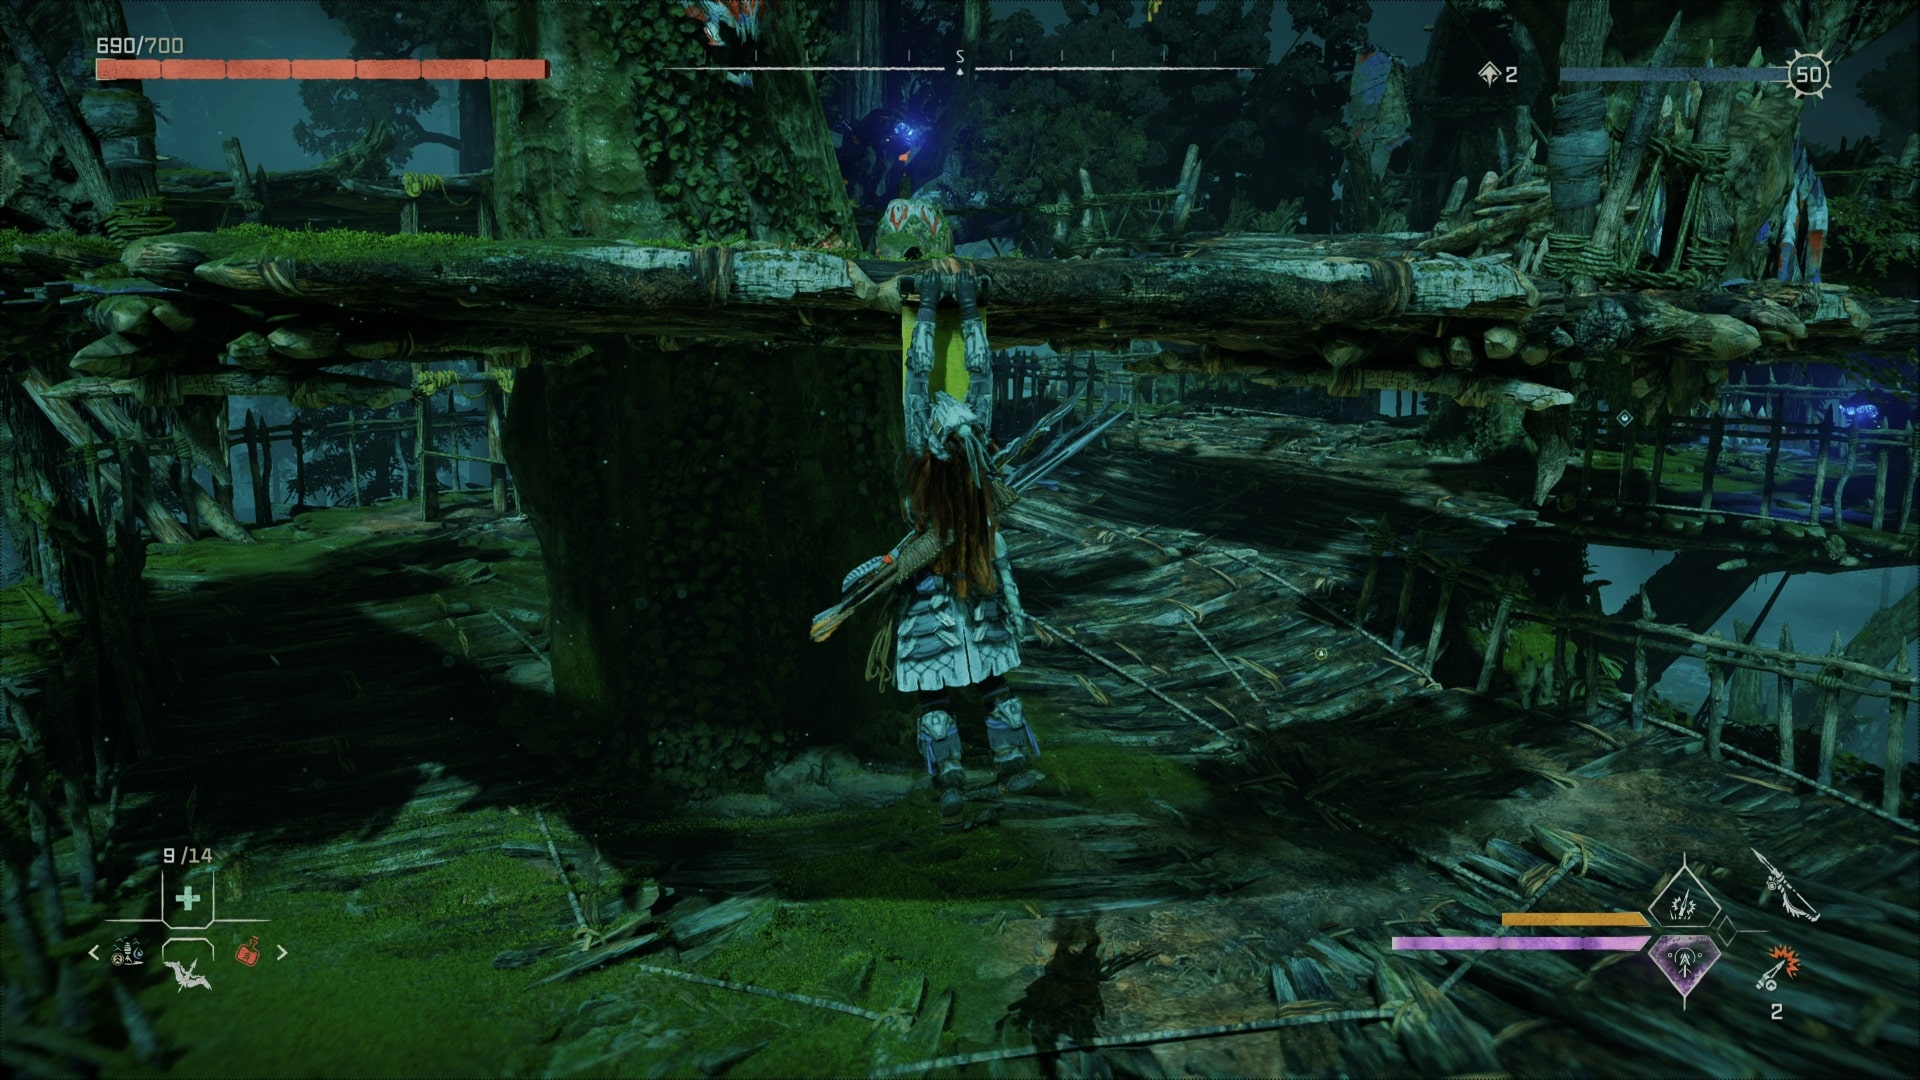

6. Slide down the rope from the platform at the top of the ladder after you’ve climbed up. The structure in front of you can be climbed from where you land. The Tallneck will make a full circuit once you climb to the top, so just sit tight till then. From here, you can jump on it. It is best to jump and climb the yellow ledges that surround its head.
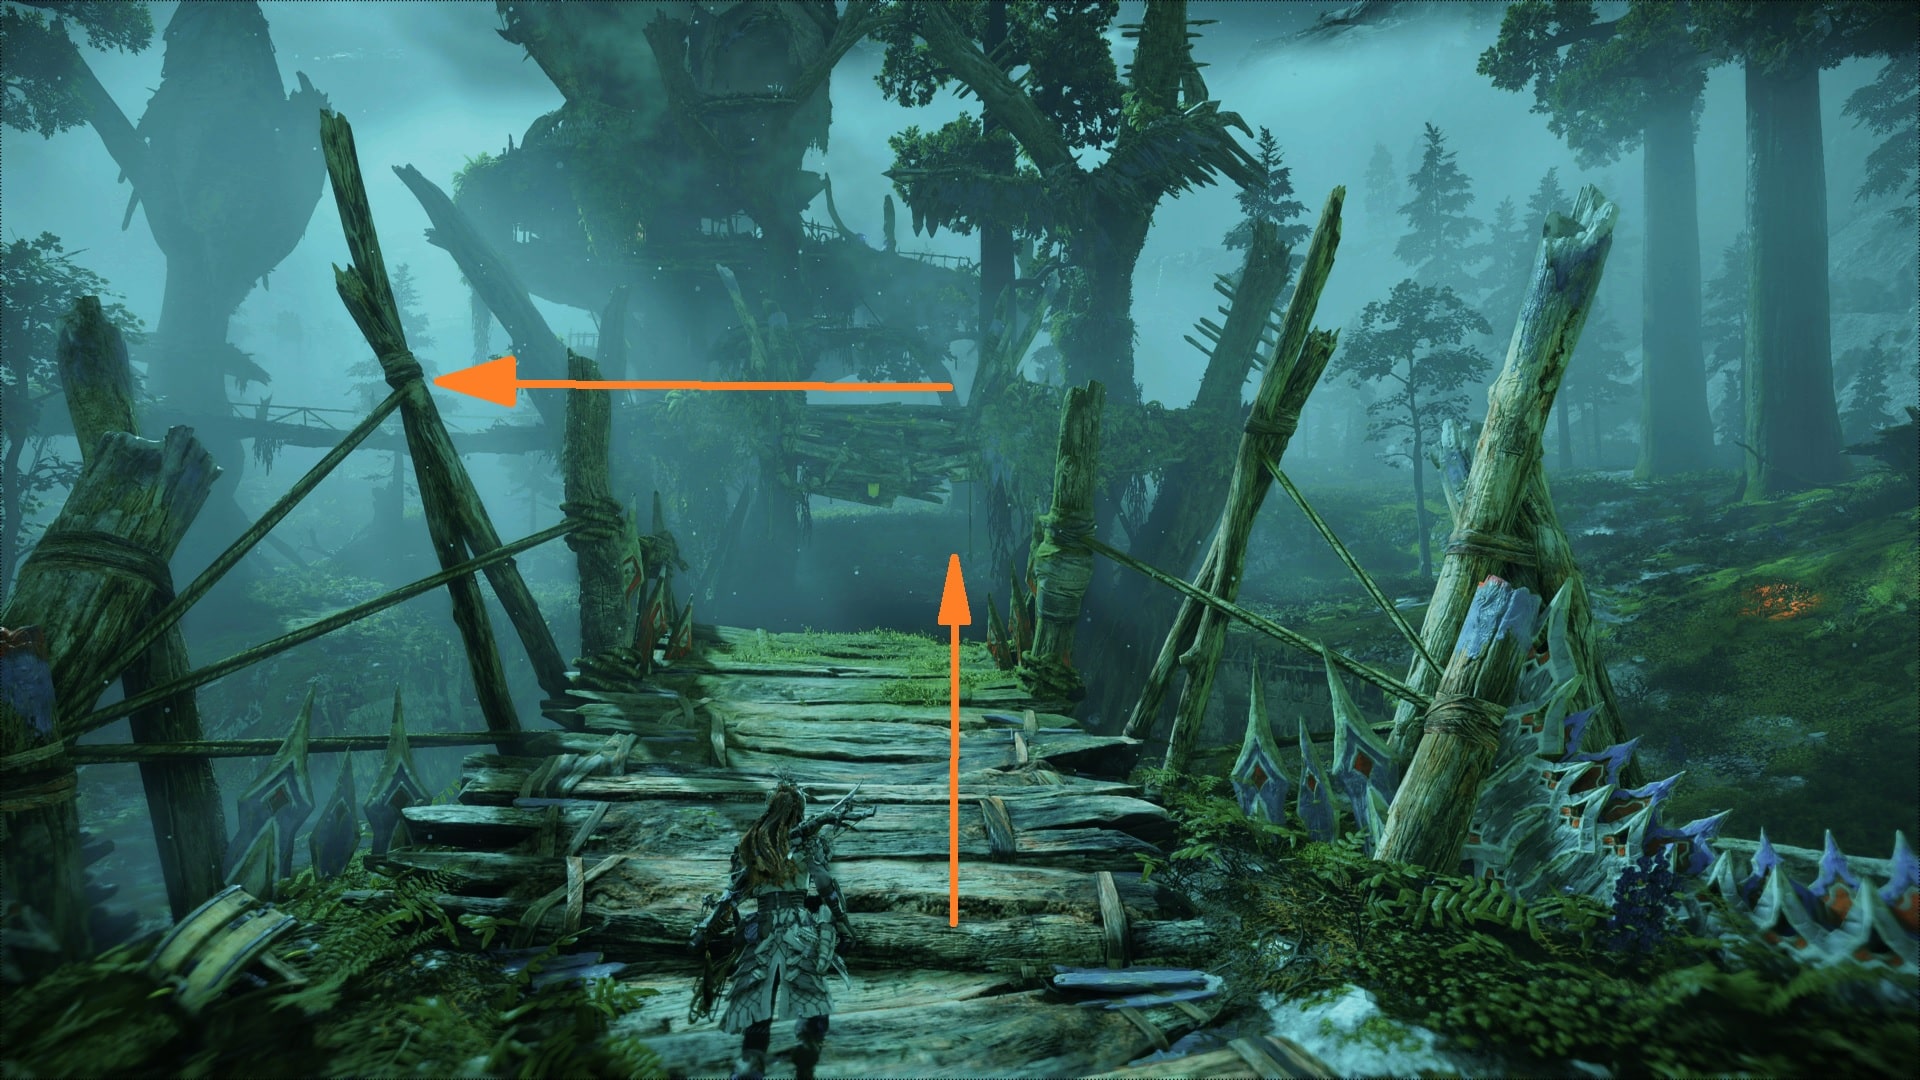
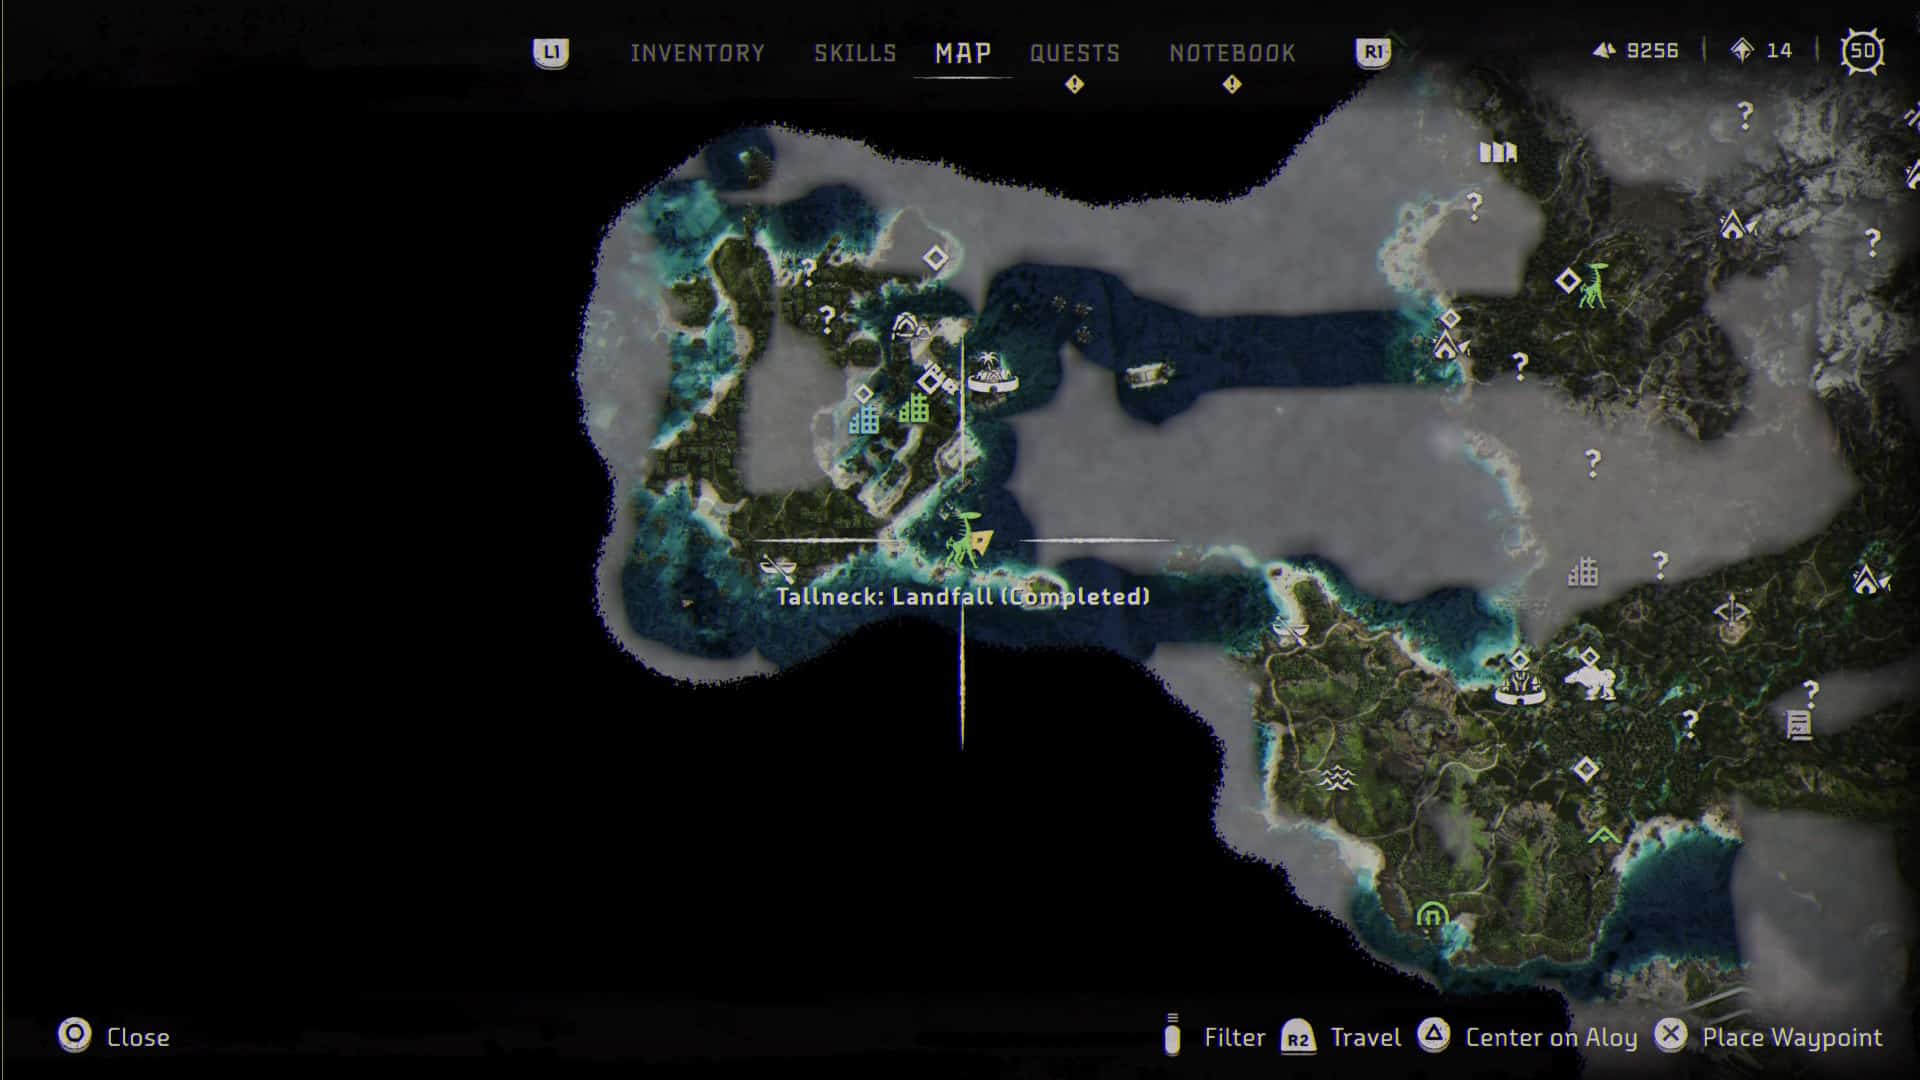
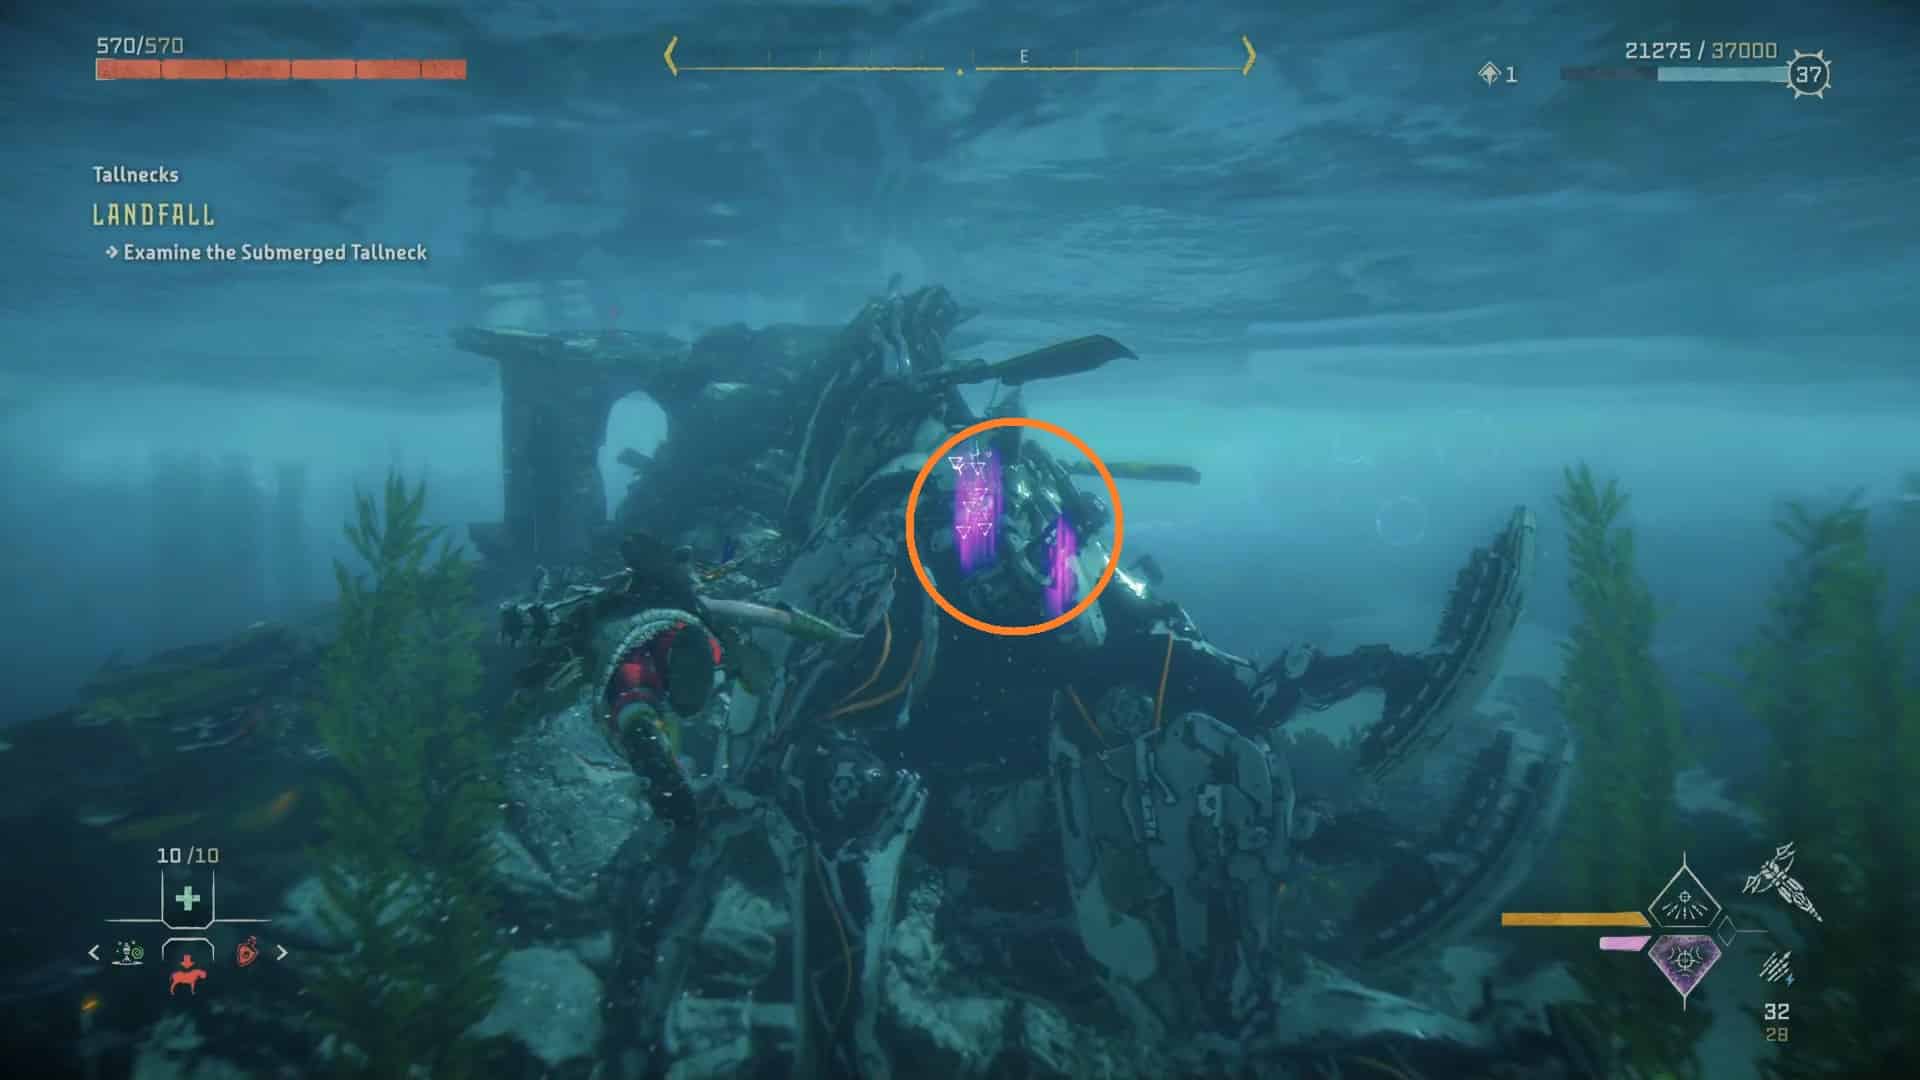
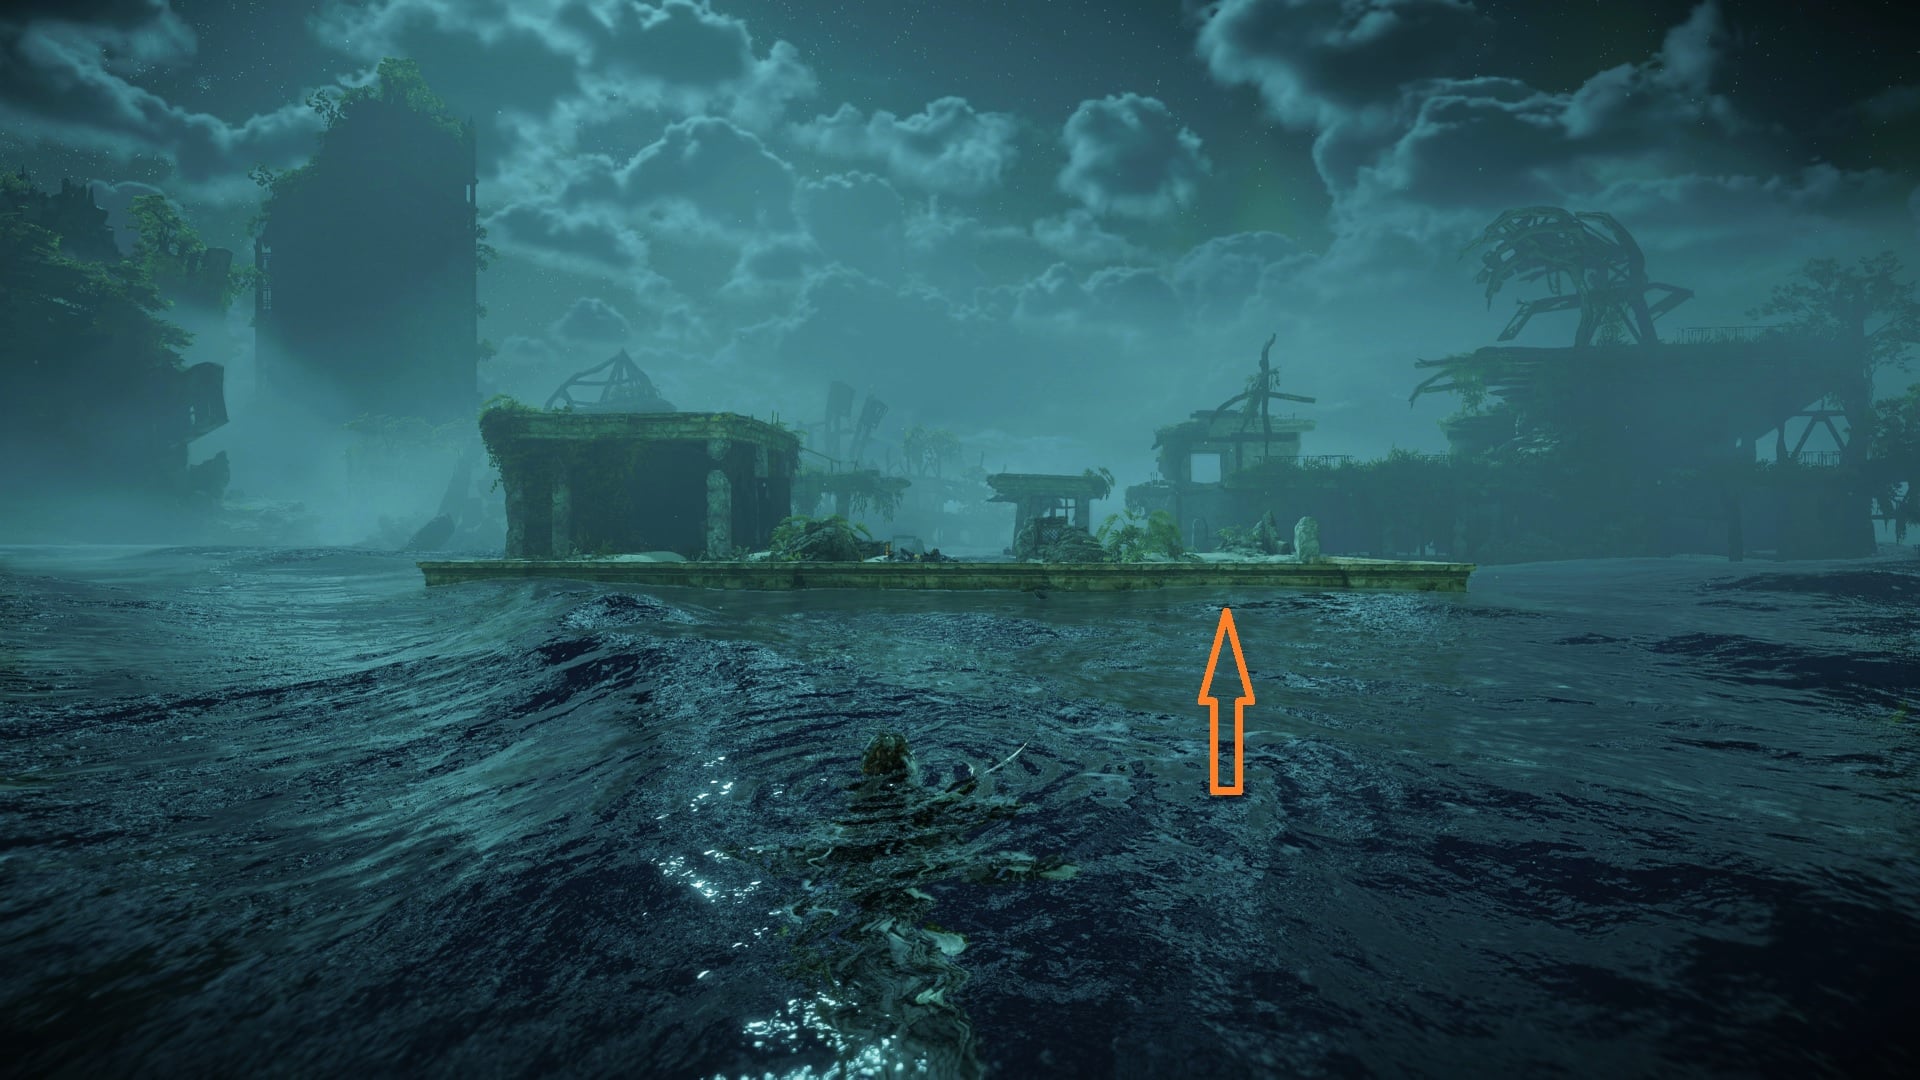
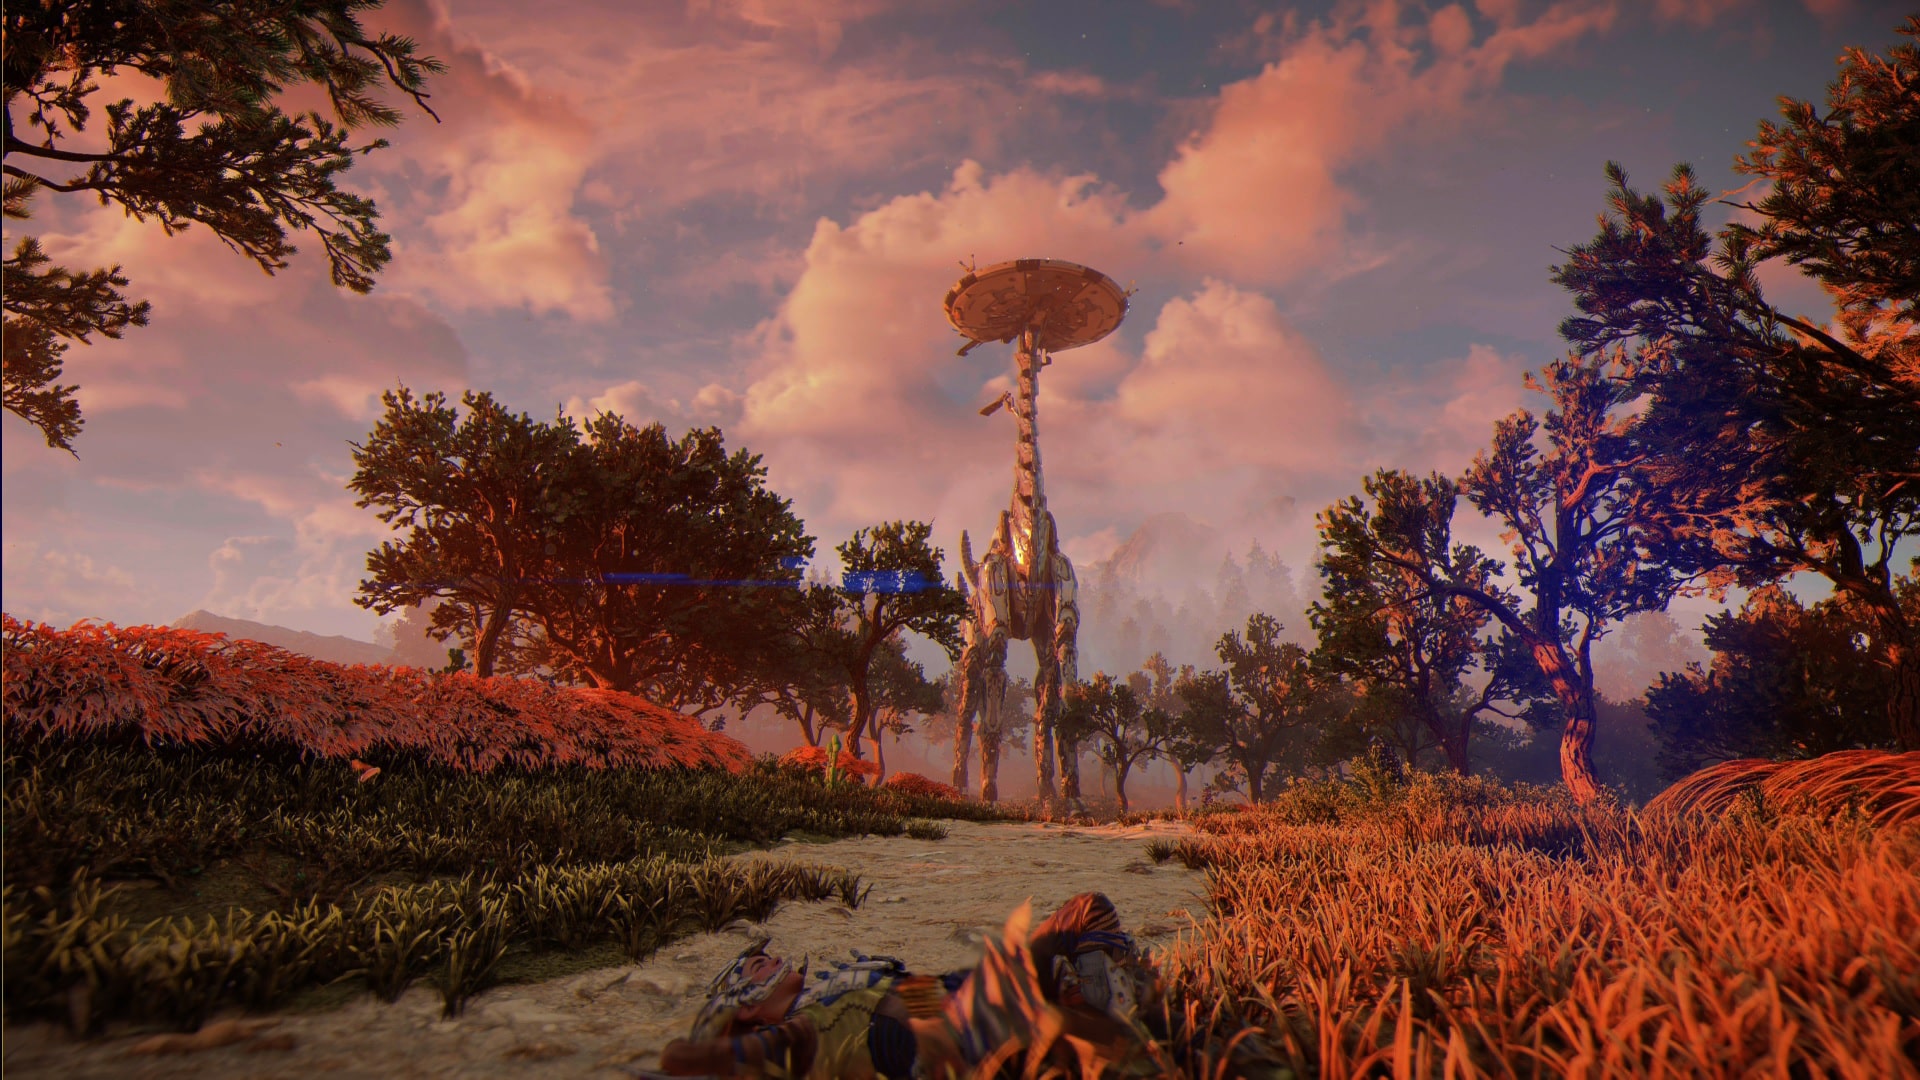
Tallneck #4: Landfall
Map Location: Far West, South of Legacy’s landfall.
How to Climb:
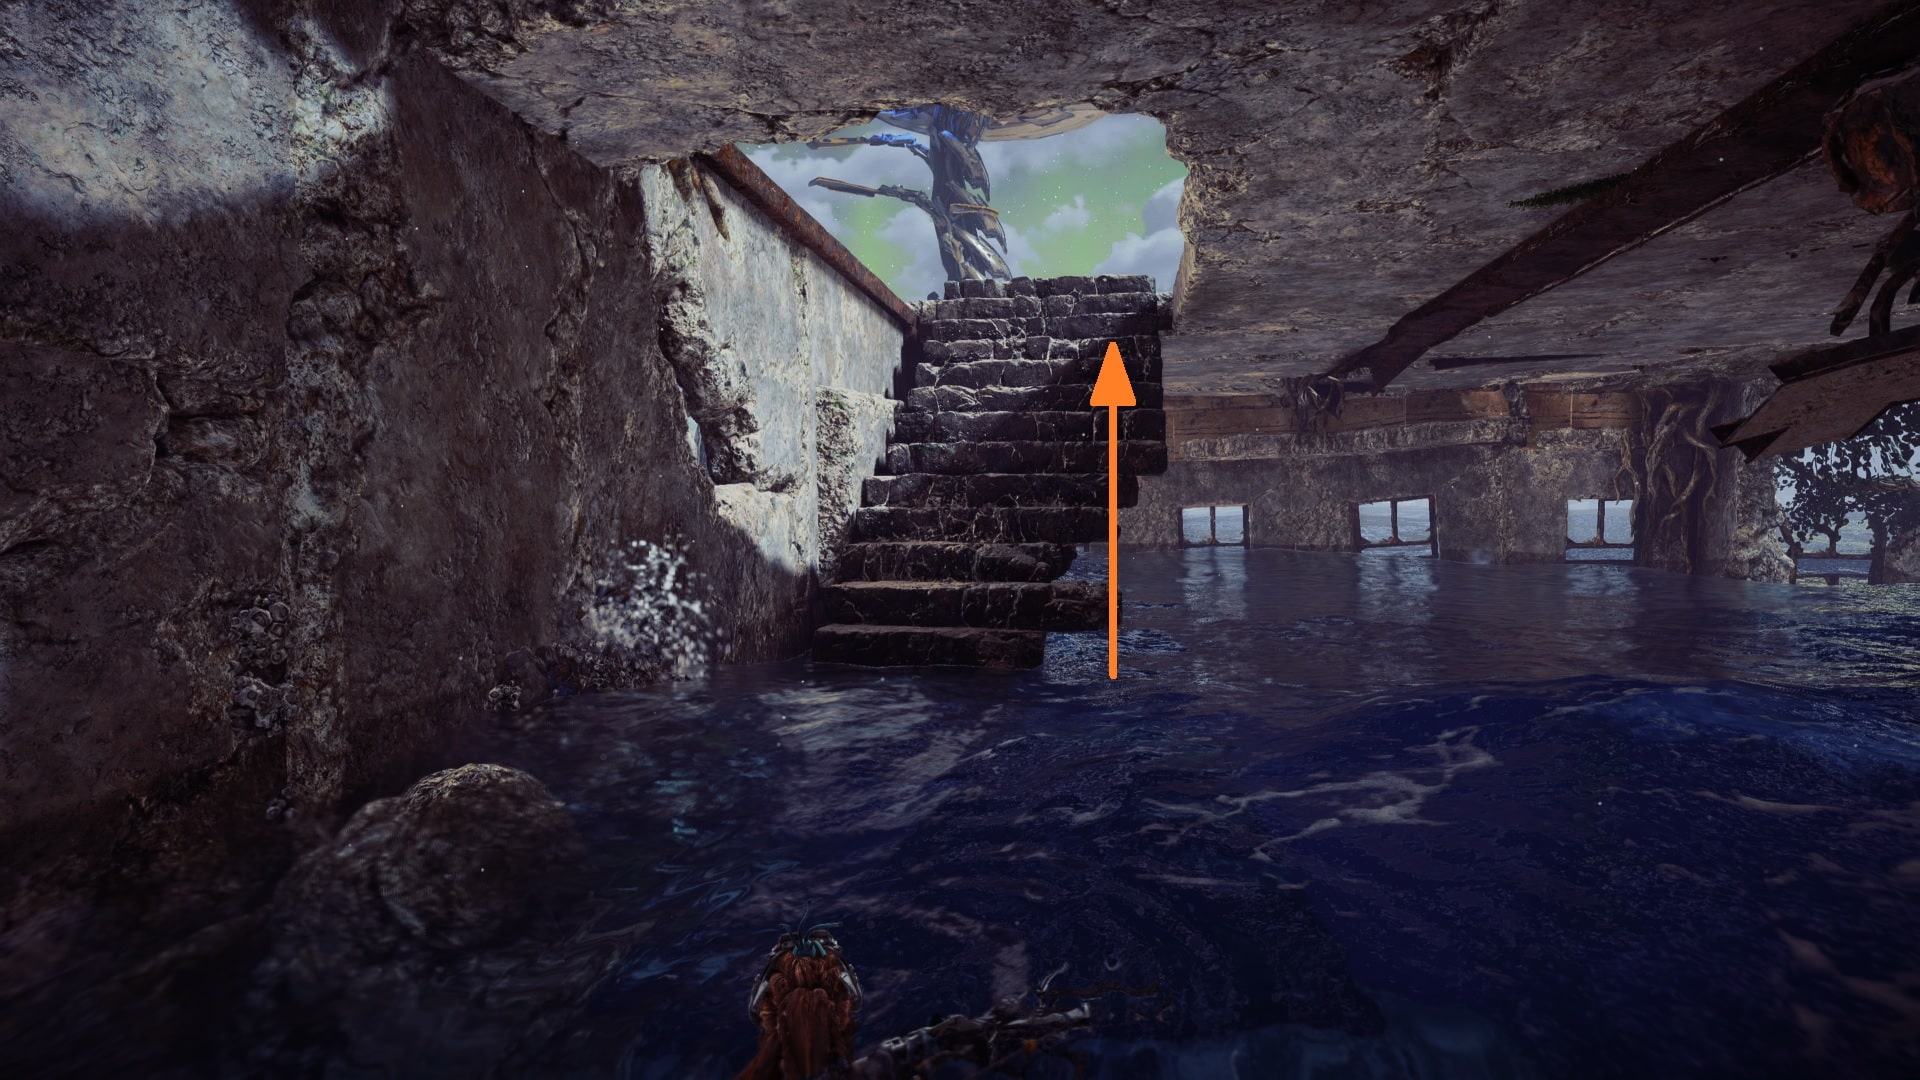
1. Press [R3] to scan the Tallneck’s purple points underwater to begin your search. The Tallneck is lacking two parts that we need to locate in order to fix it.
2. To get back to the platform, you’ll need to swim back to the surface and head in the direction of the Tallneck.
3. The red lock on the yellow ladder can be destroyed by shooting it from this platform. Afterwards, drop the box in the water.
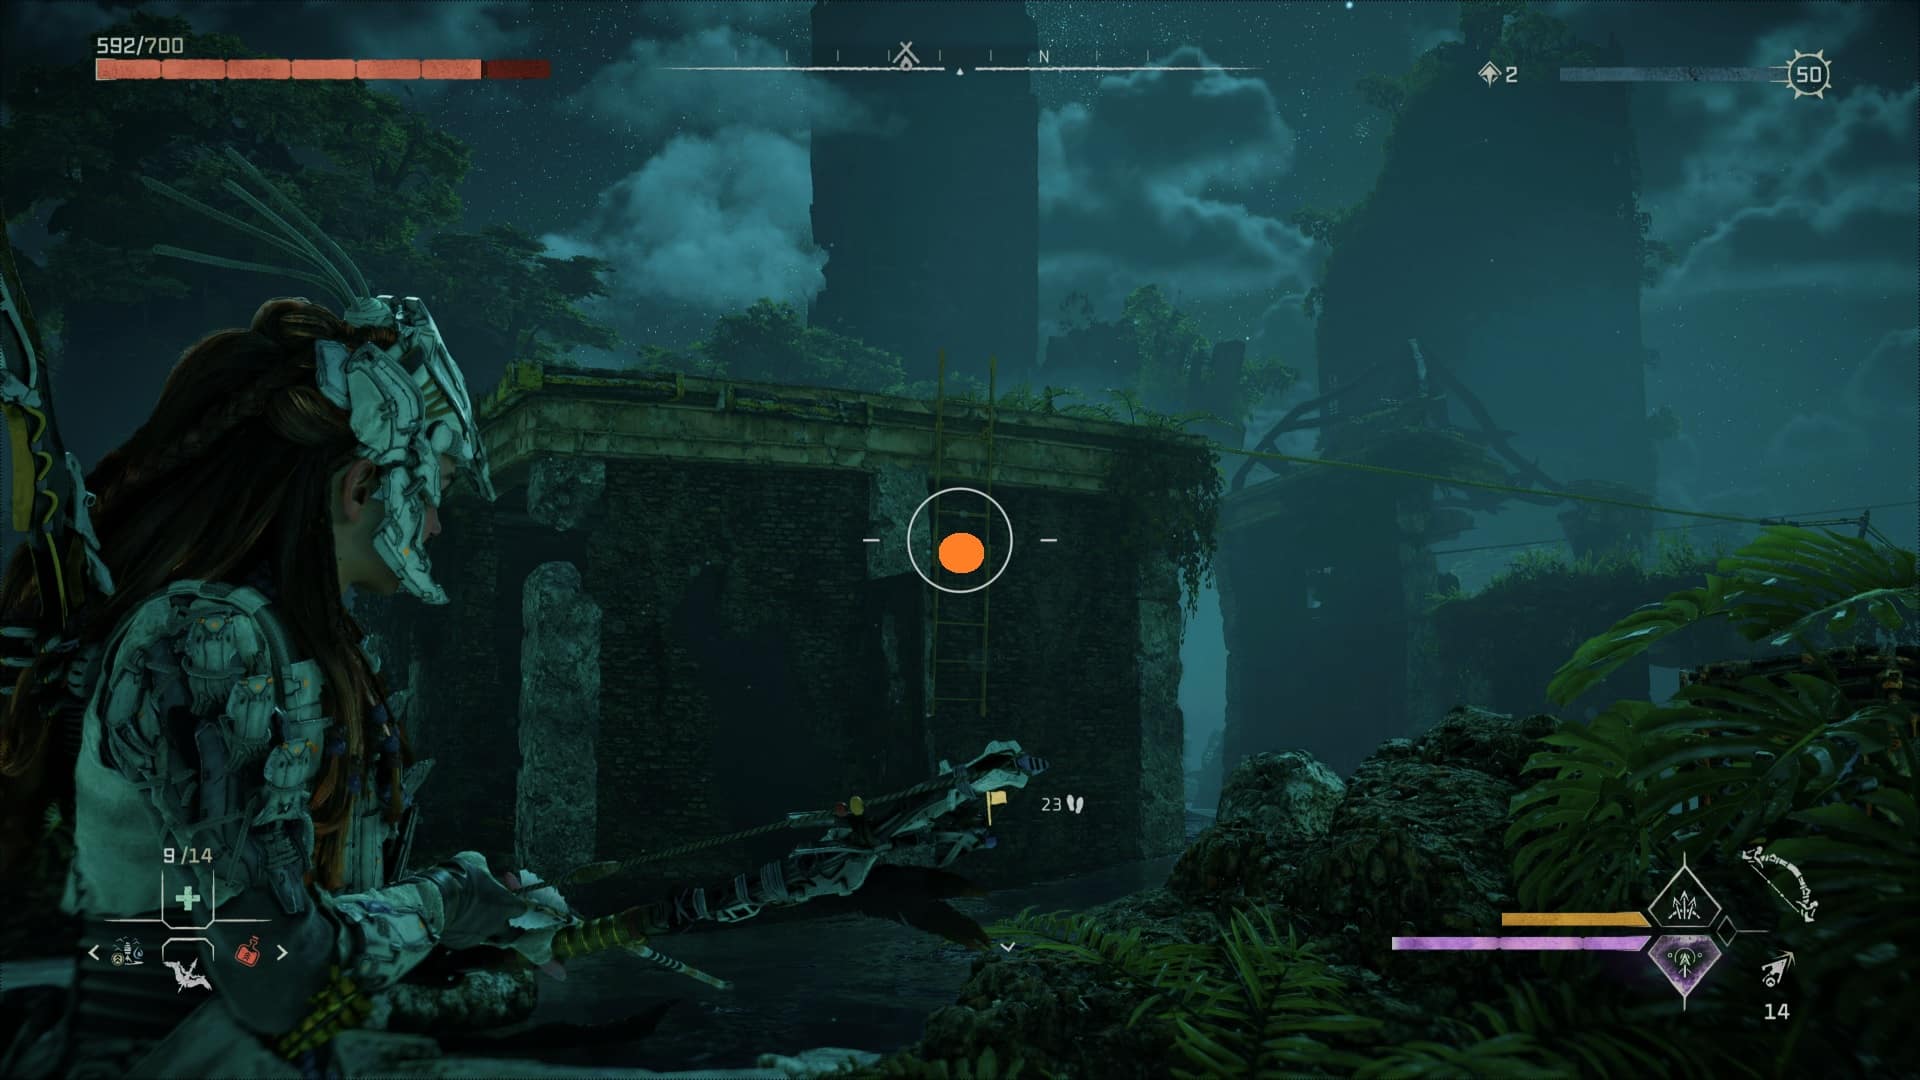
4. Use the cracked wall to go to the building with the yellow ladder. Use your Pullcaster [L2 + Triangle + R2) to pull the box towards you from the cracked wall. Stand on the box, from there, jump to the yellow ladder and climb up.
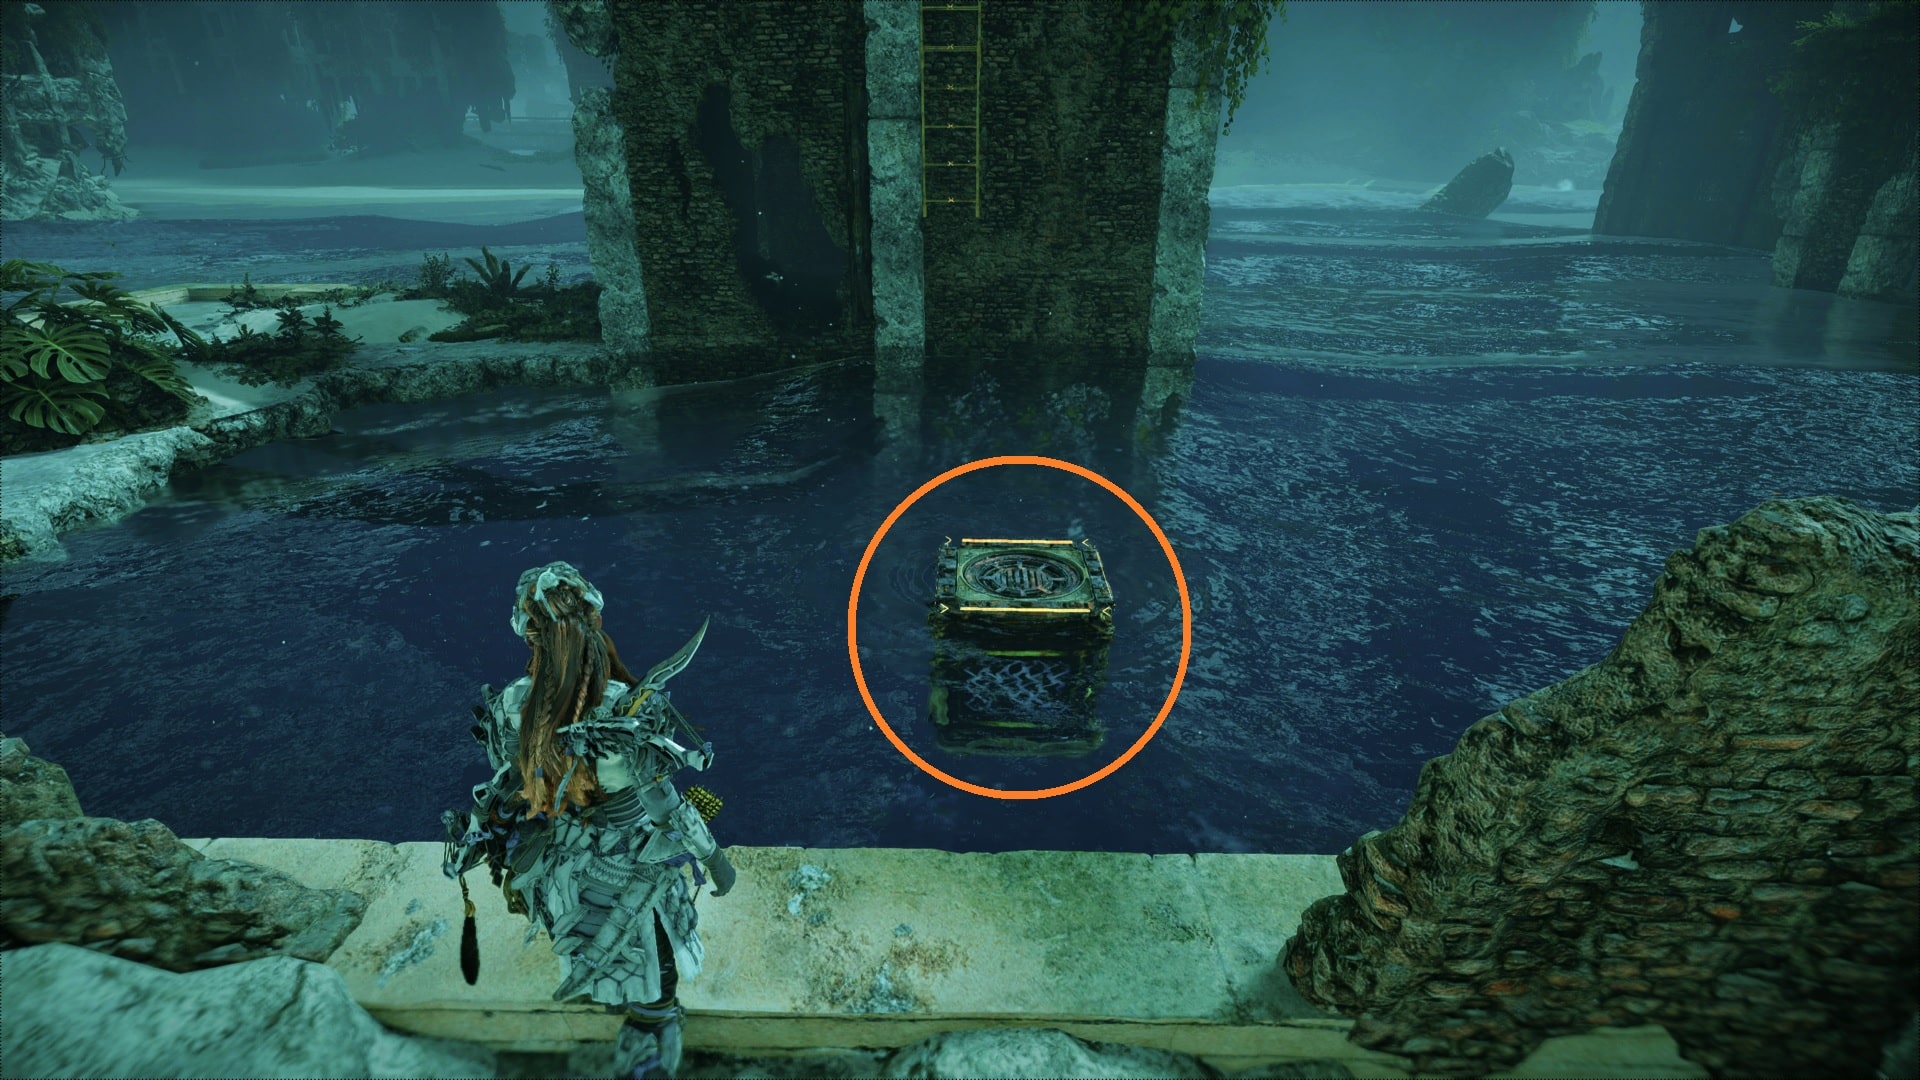
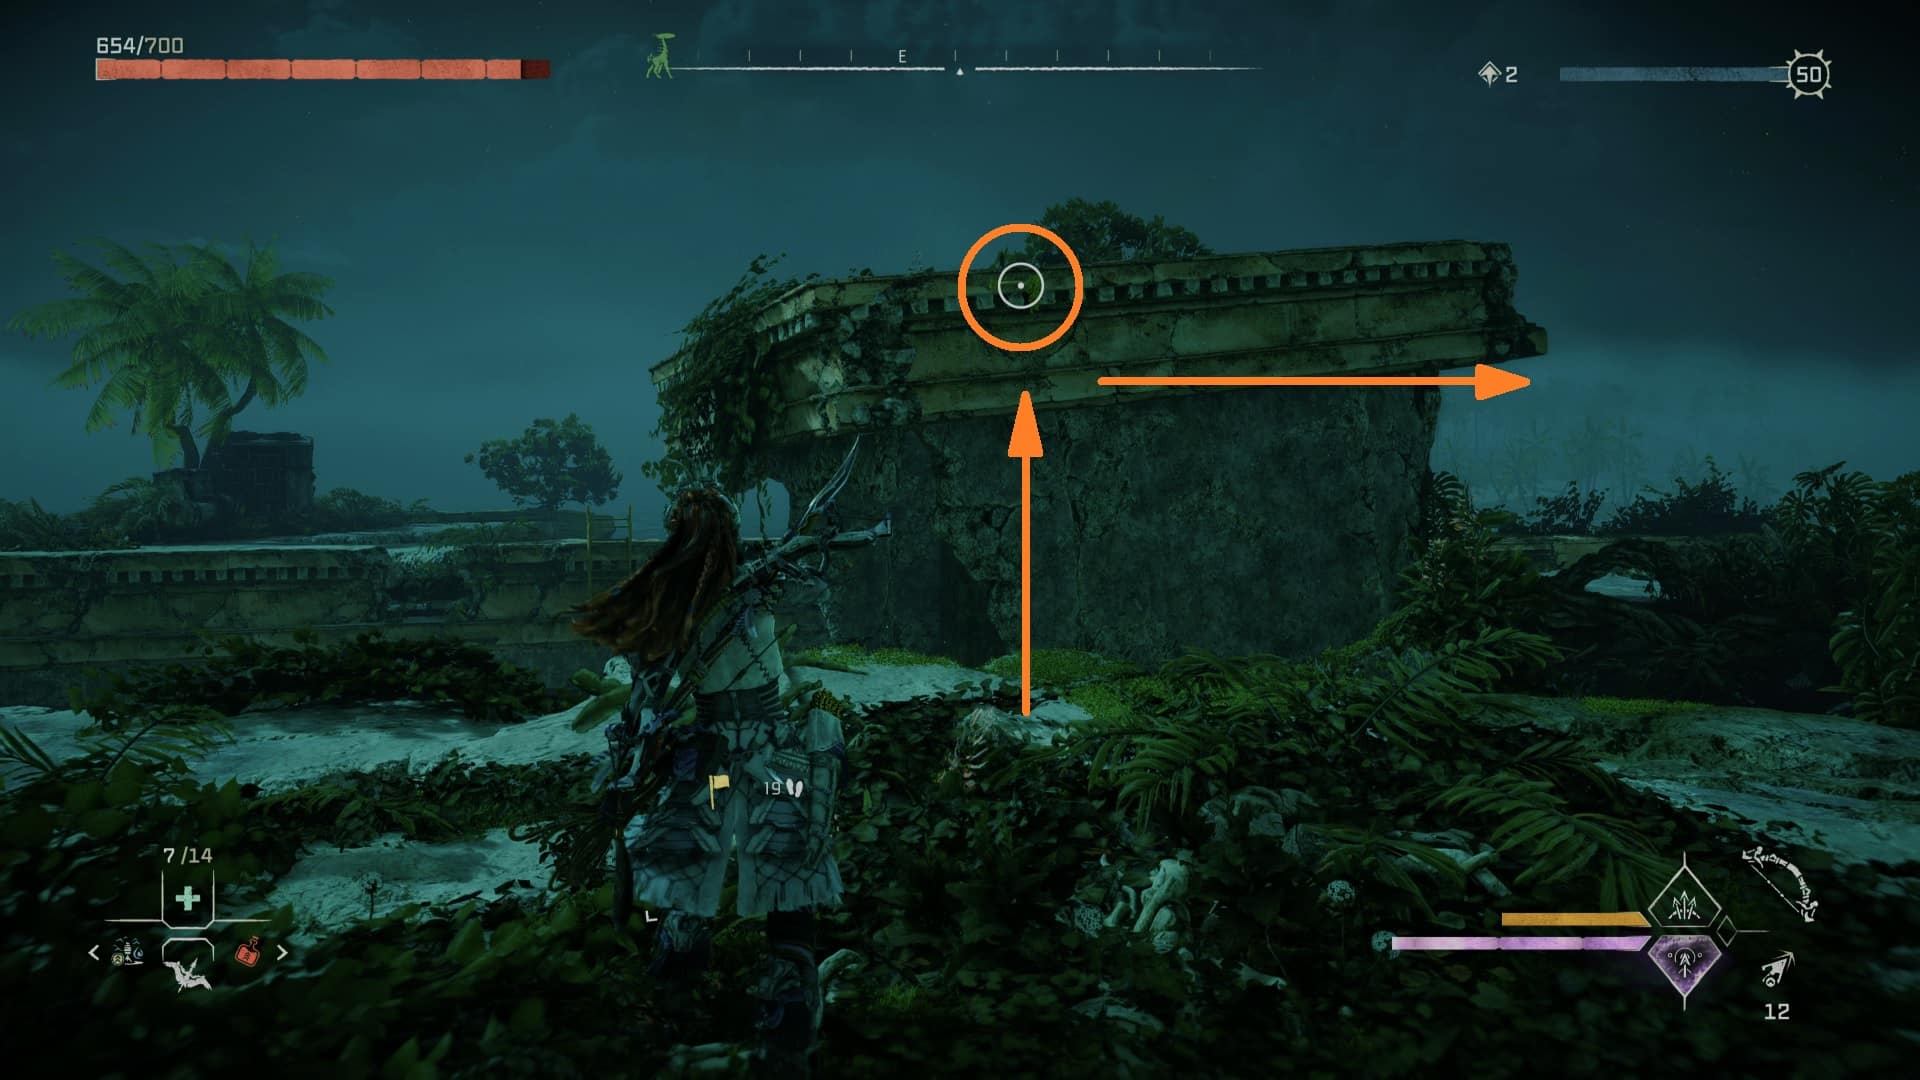
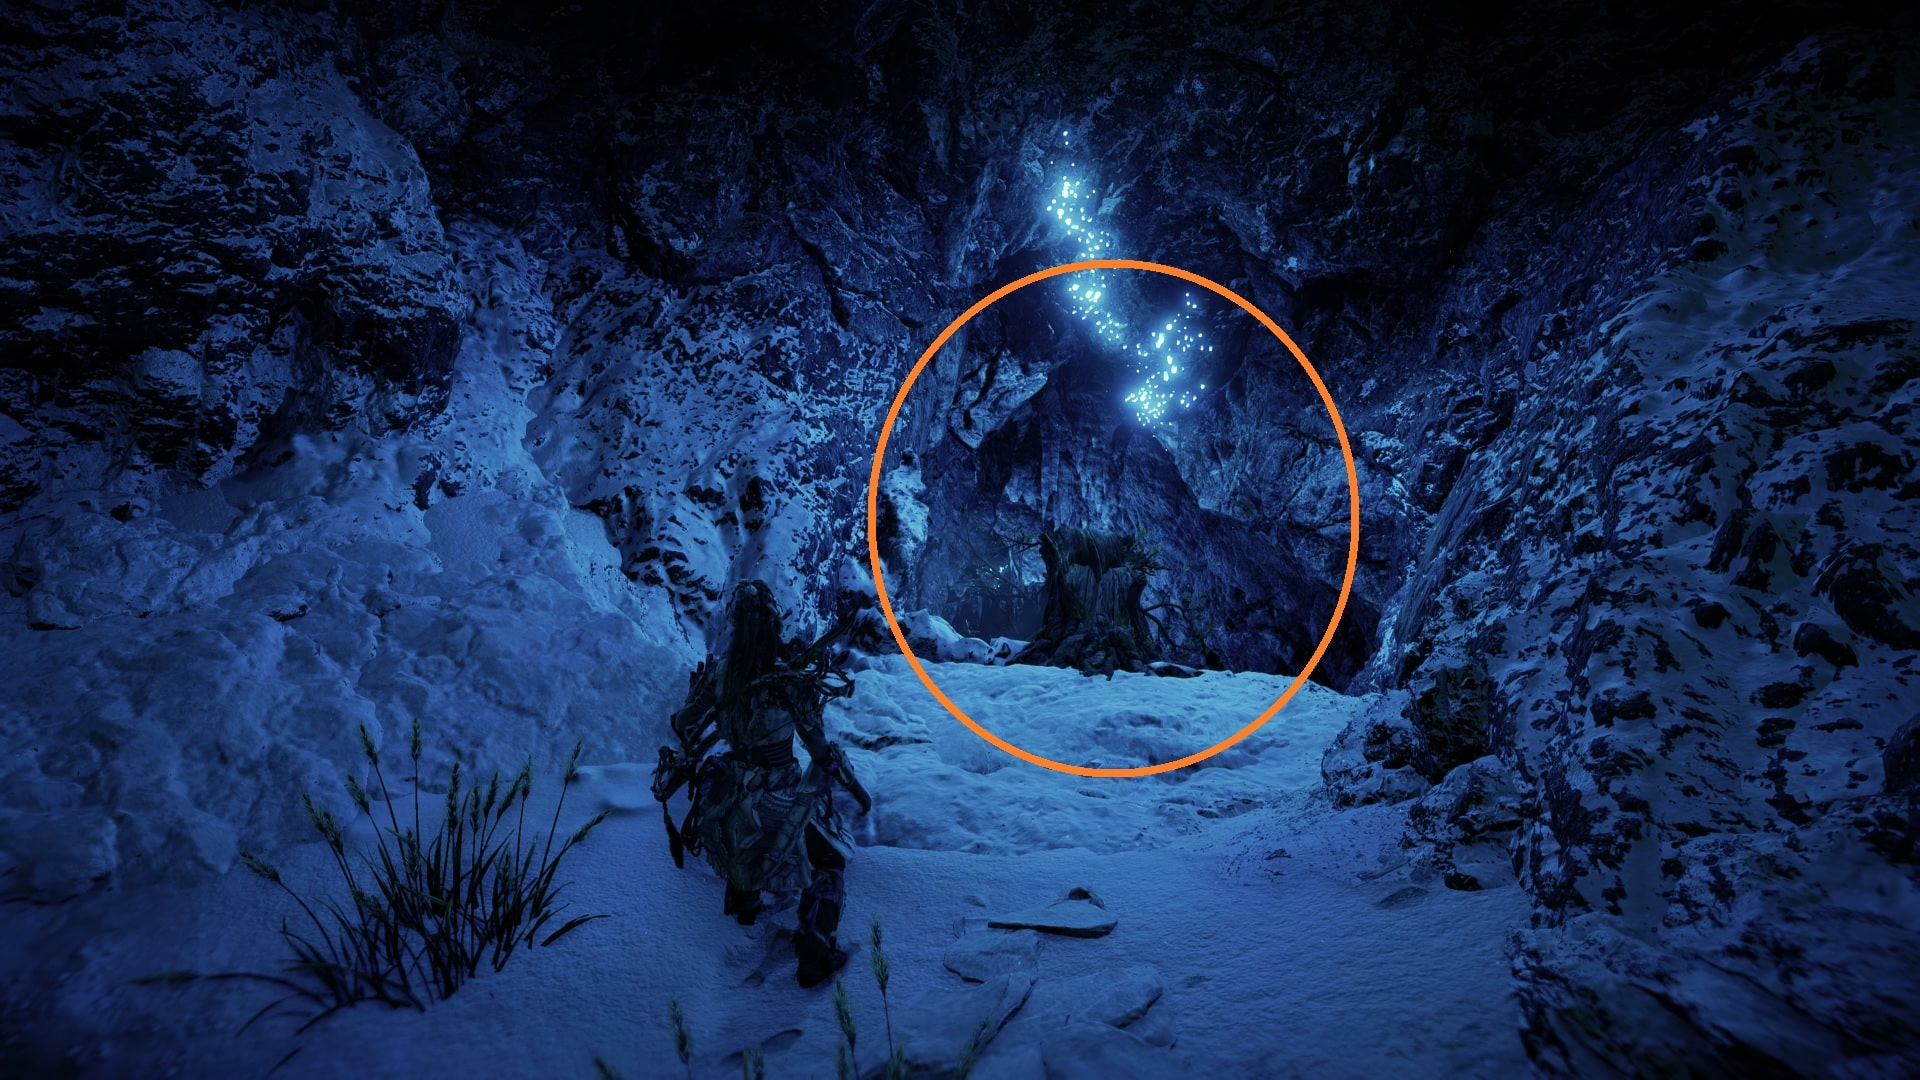
5. Continue straight ahead after crossing the yellow rope, and then take the path immediately to your right. One flying machine and its “nest” of scrap will be at the end of the trail to the right. See if you can find the first Tallneck part in the junk pile.
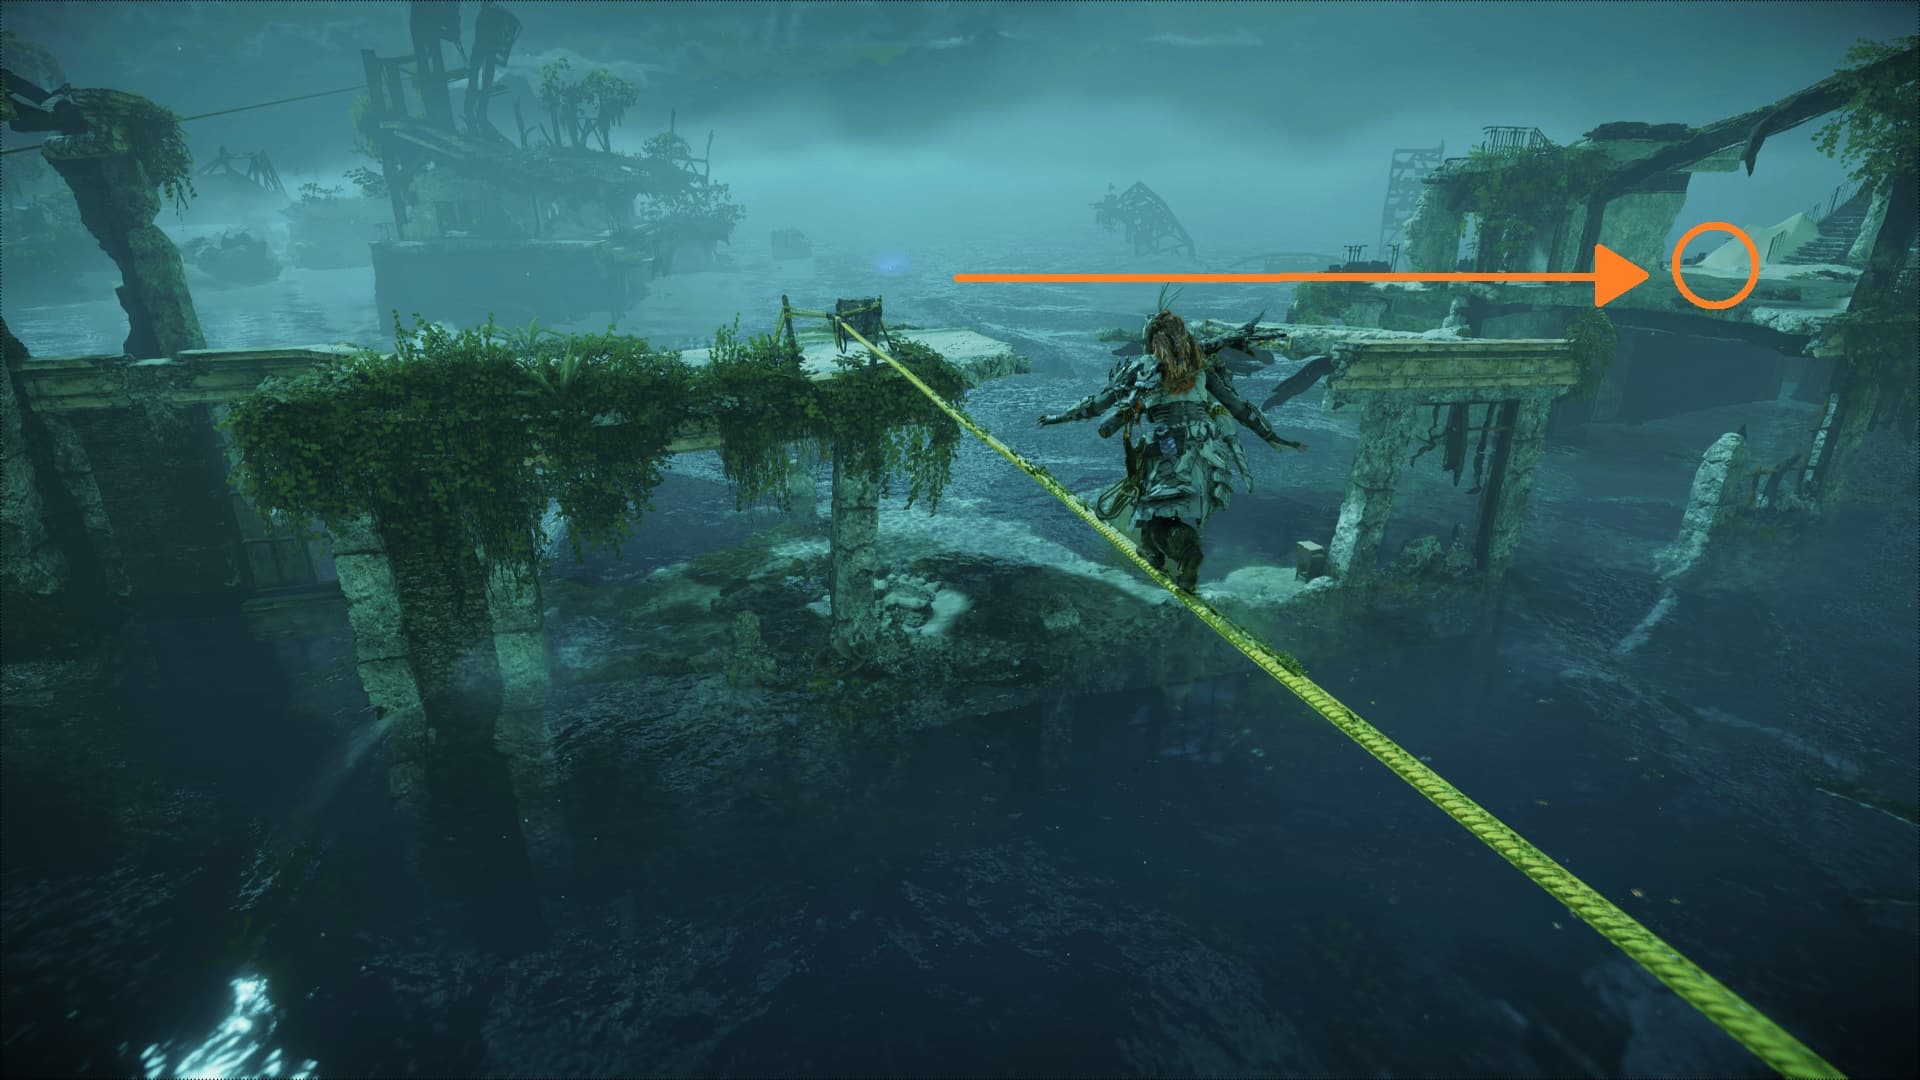
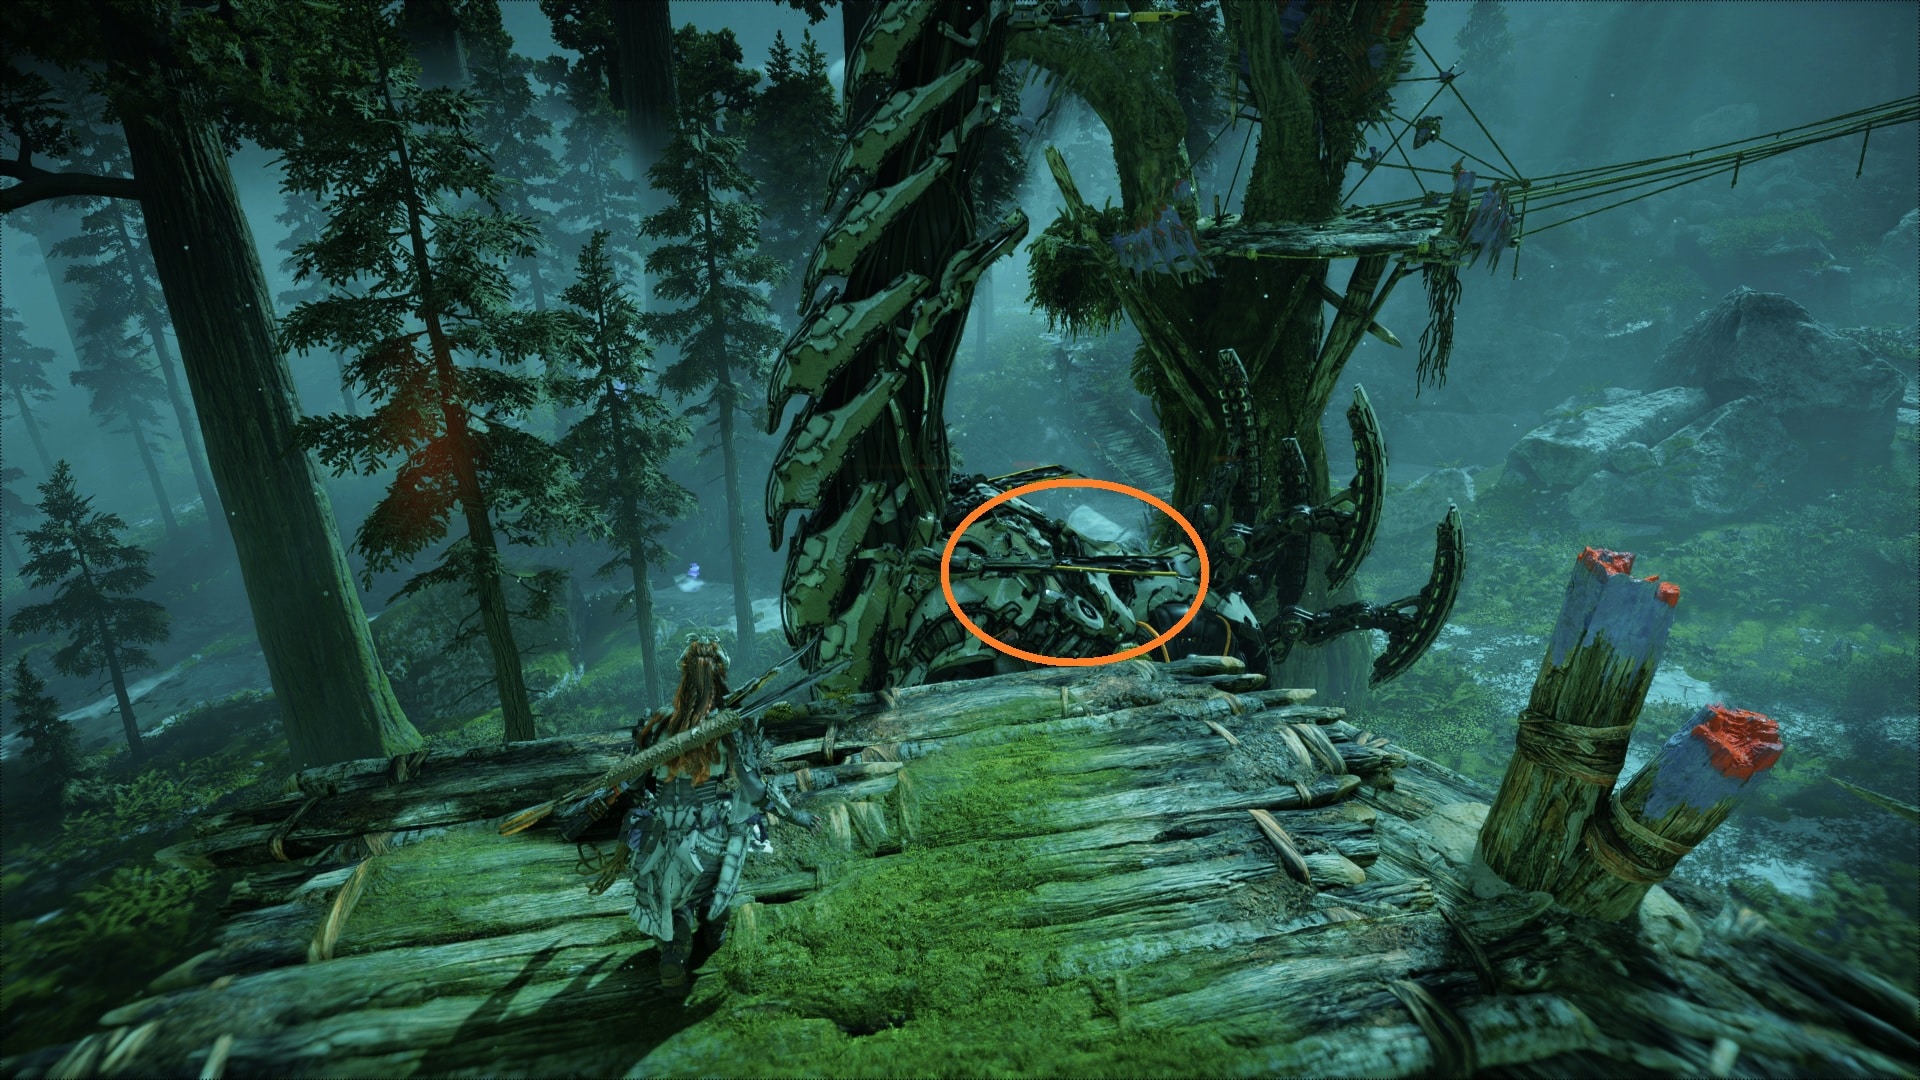
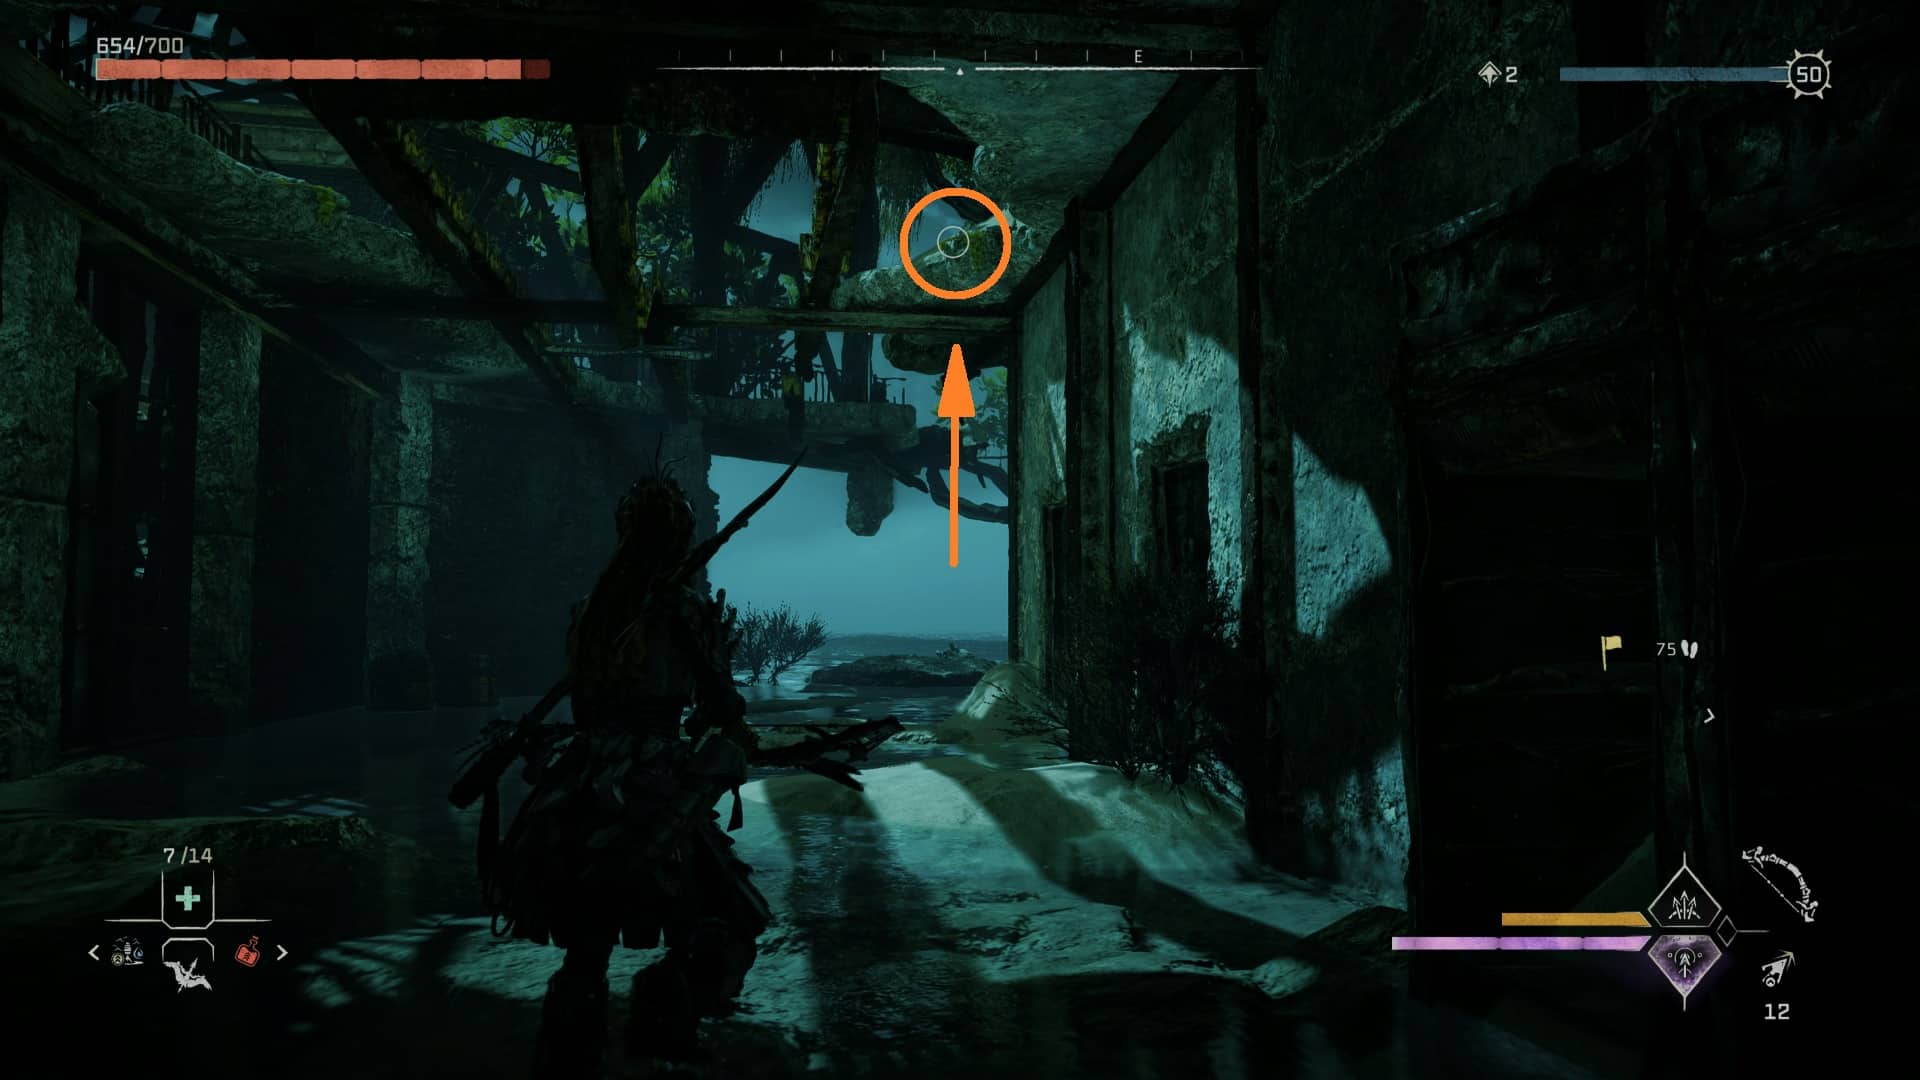
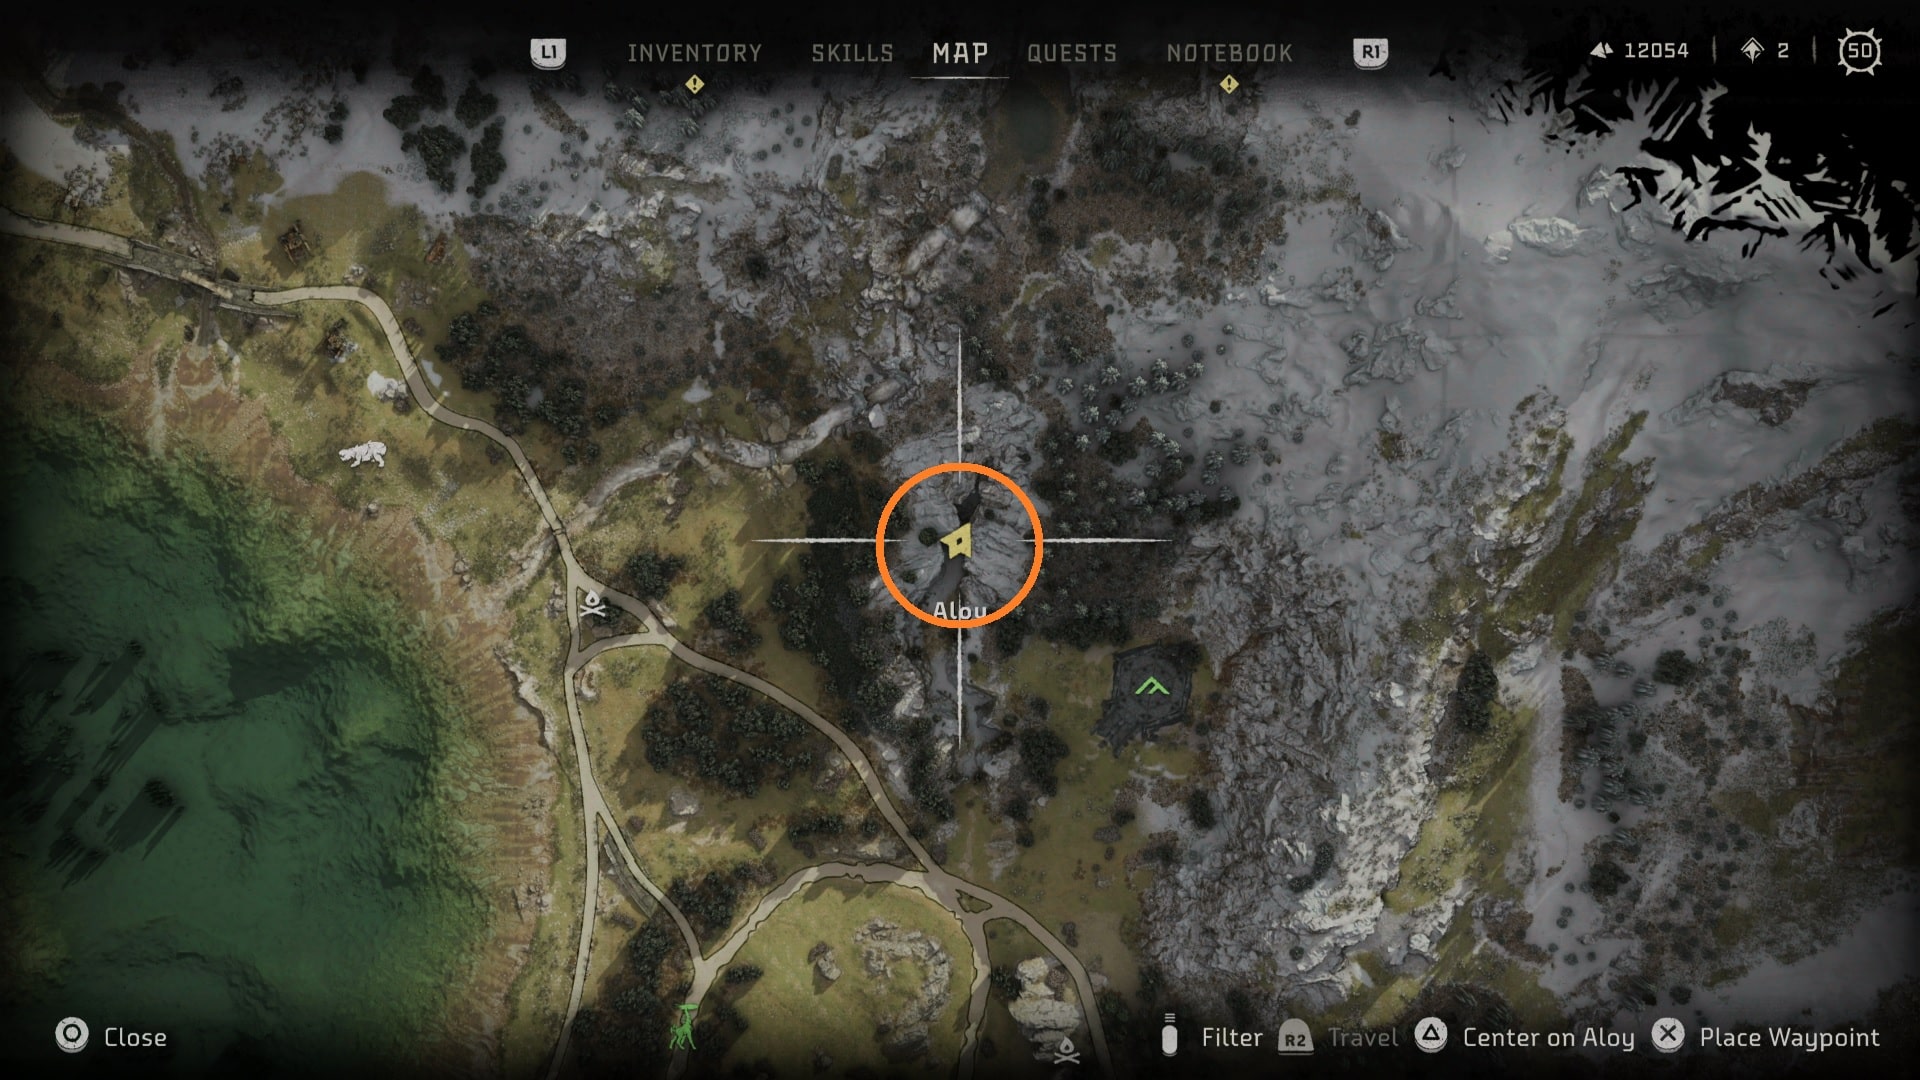
6. See the image below where the orange arrow is pointing. You must approach this building.
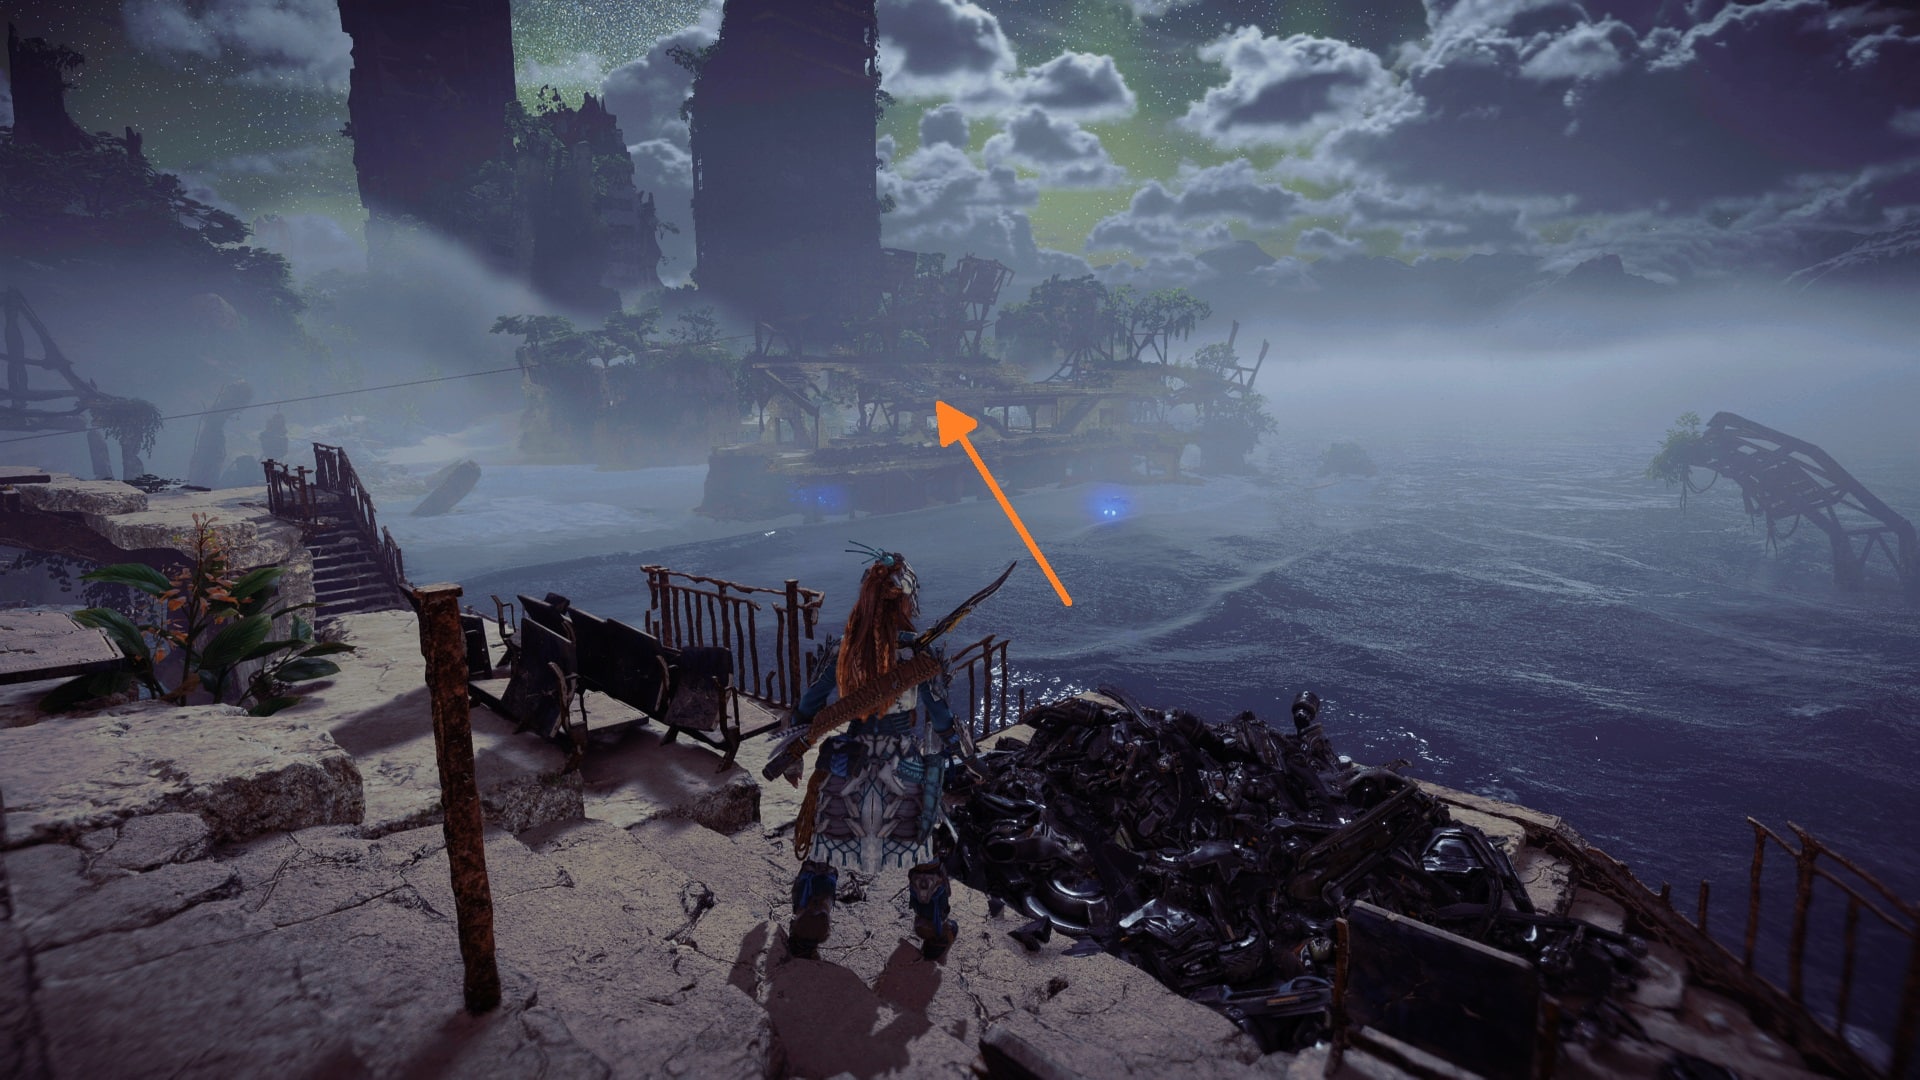
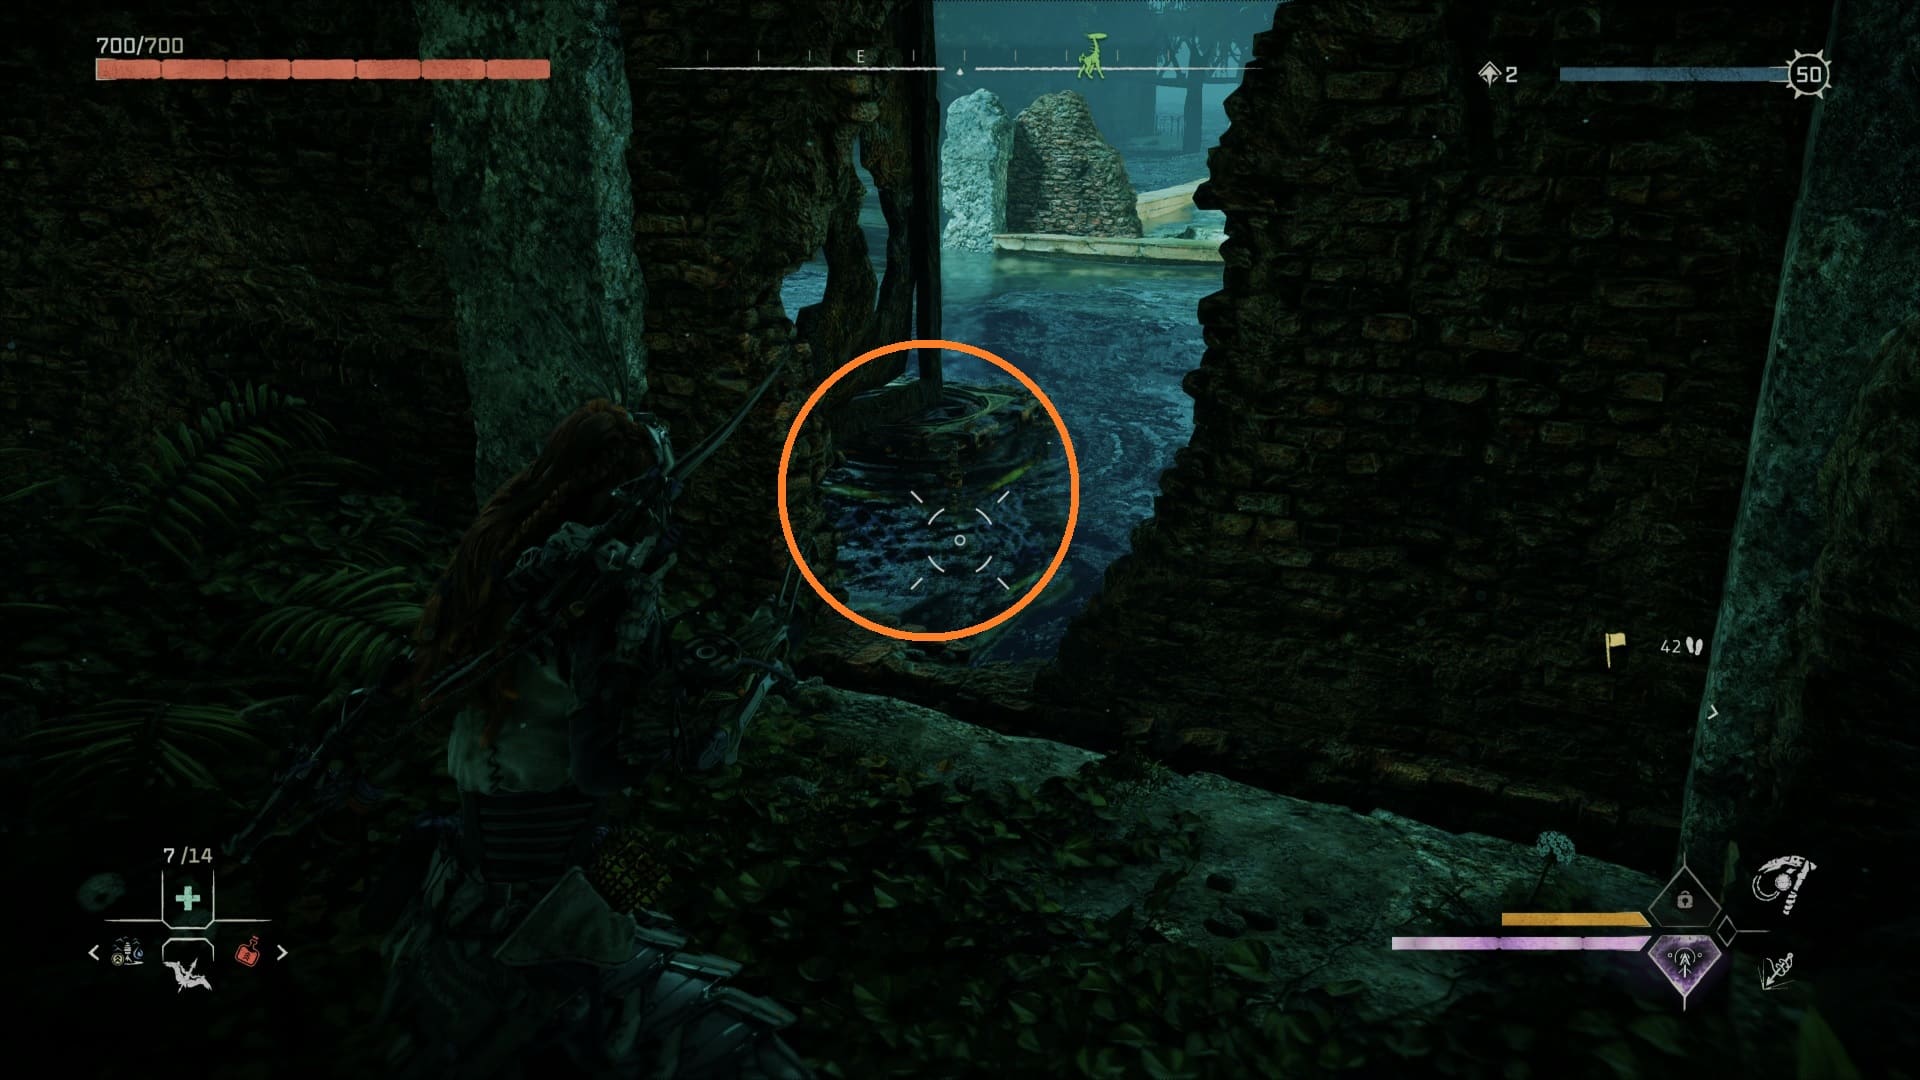
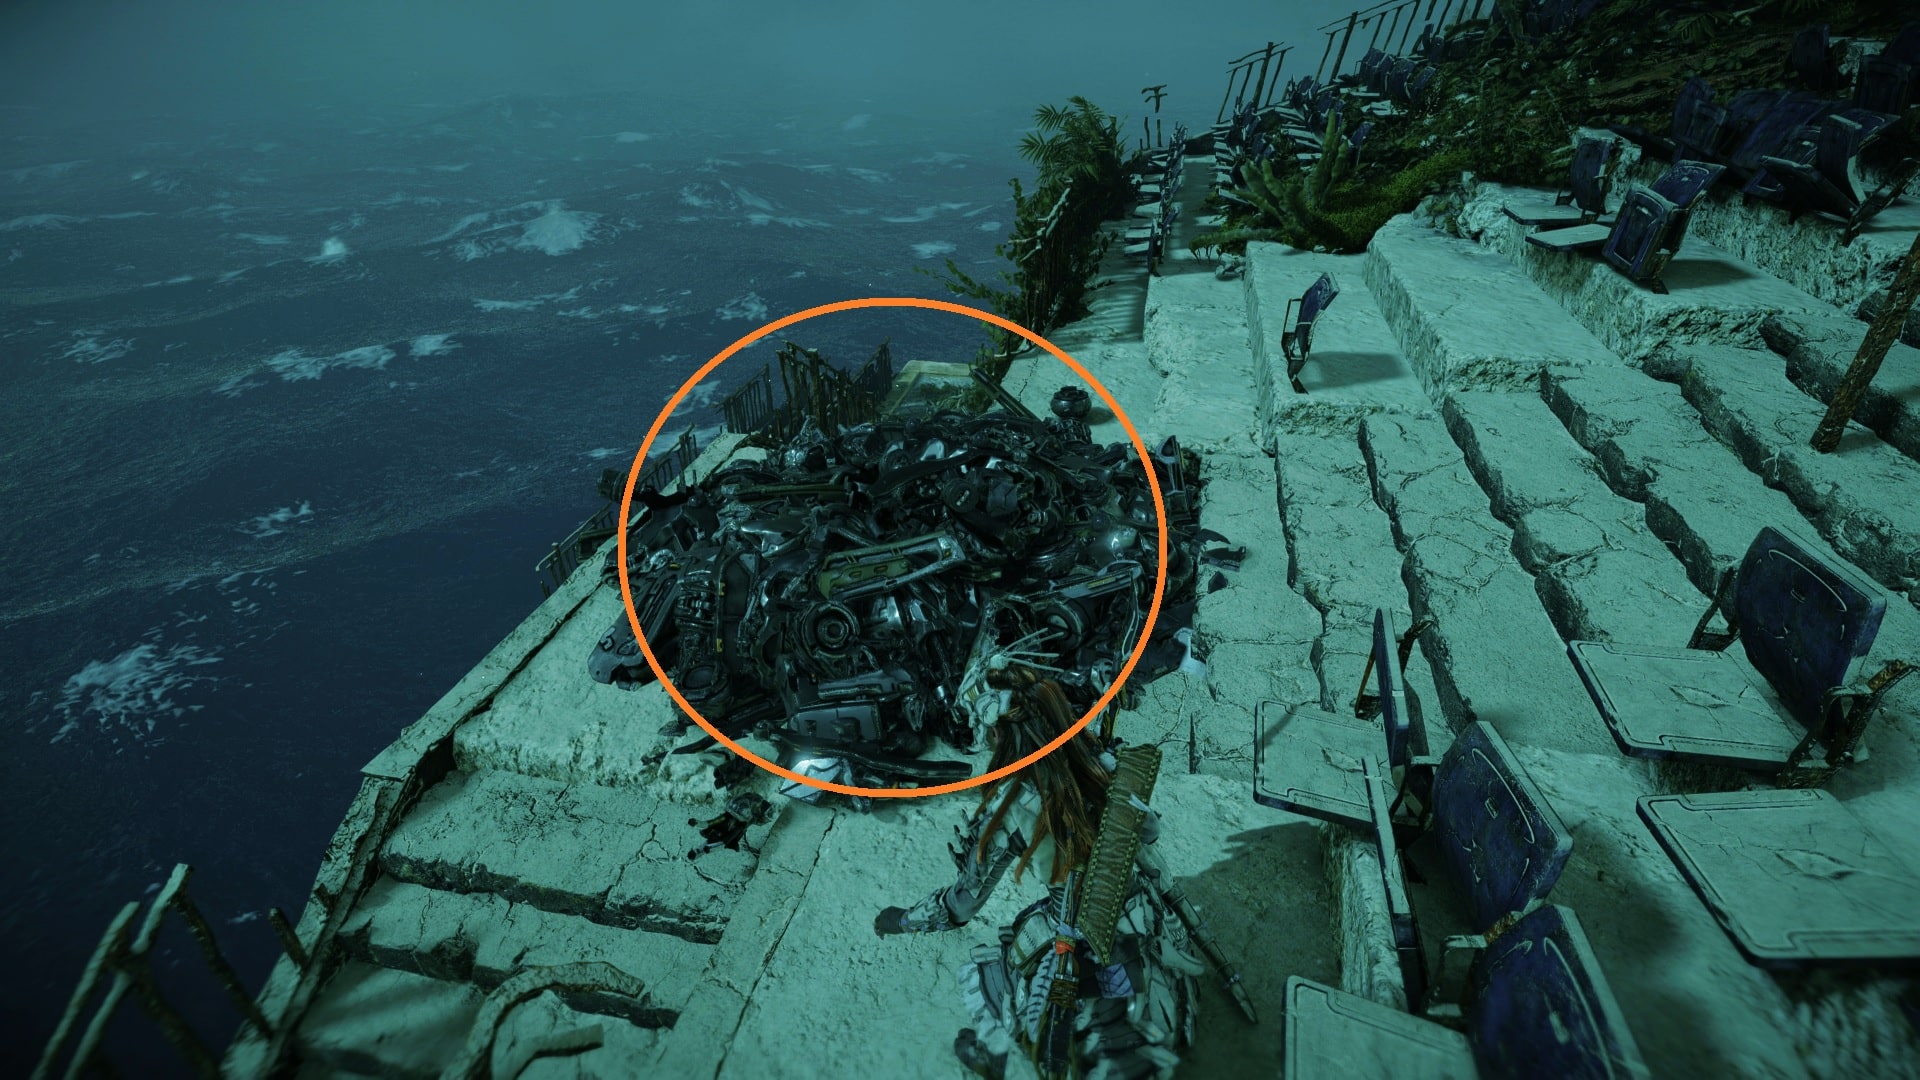
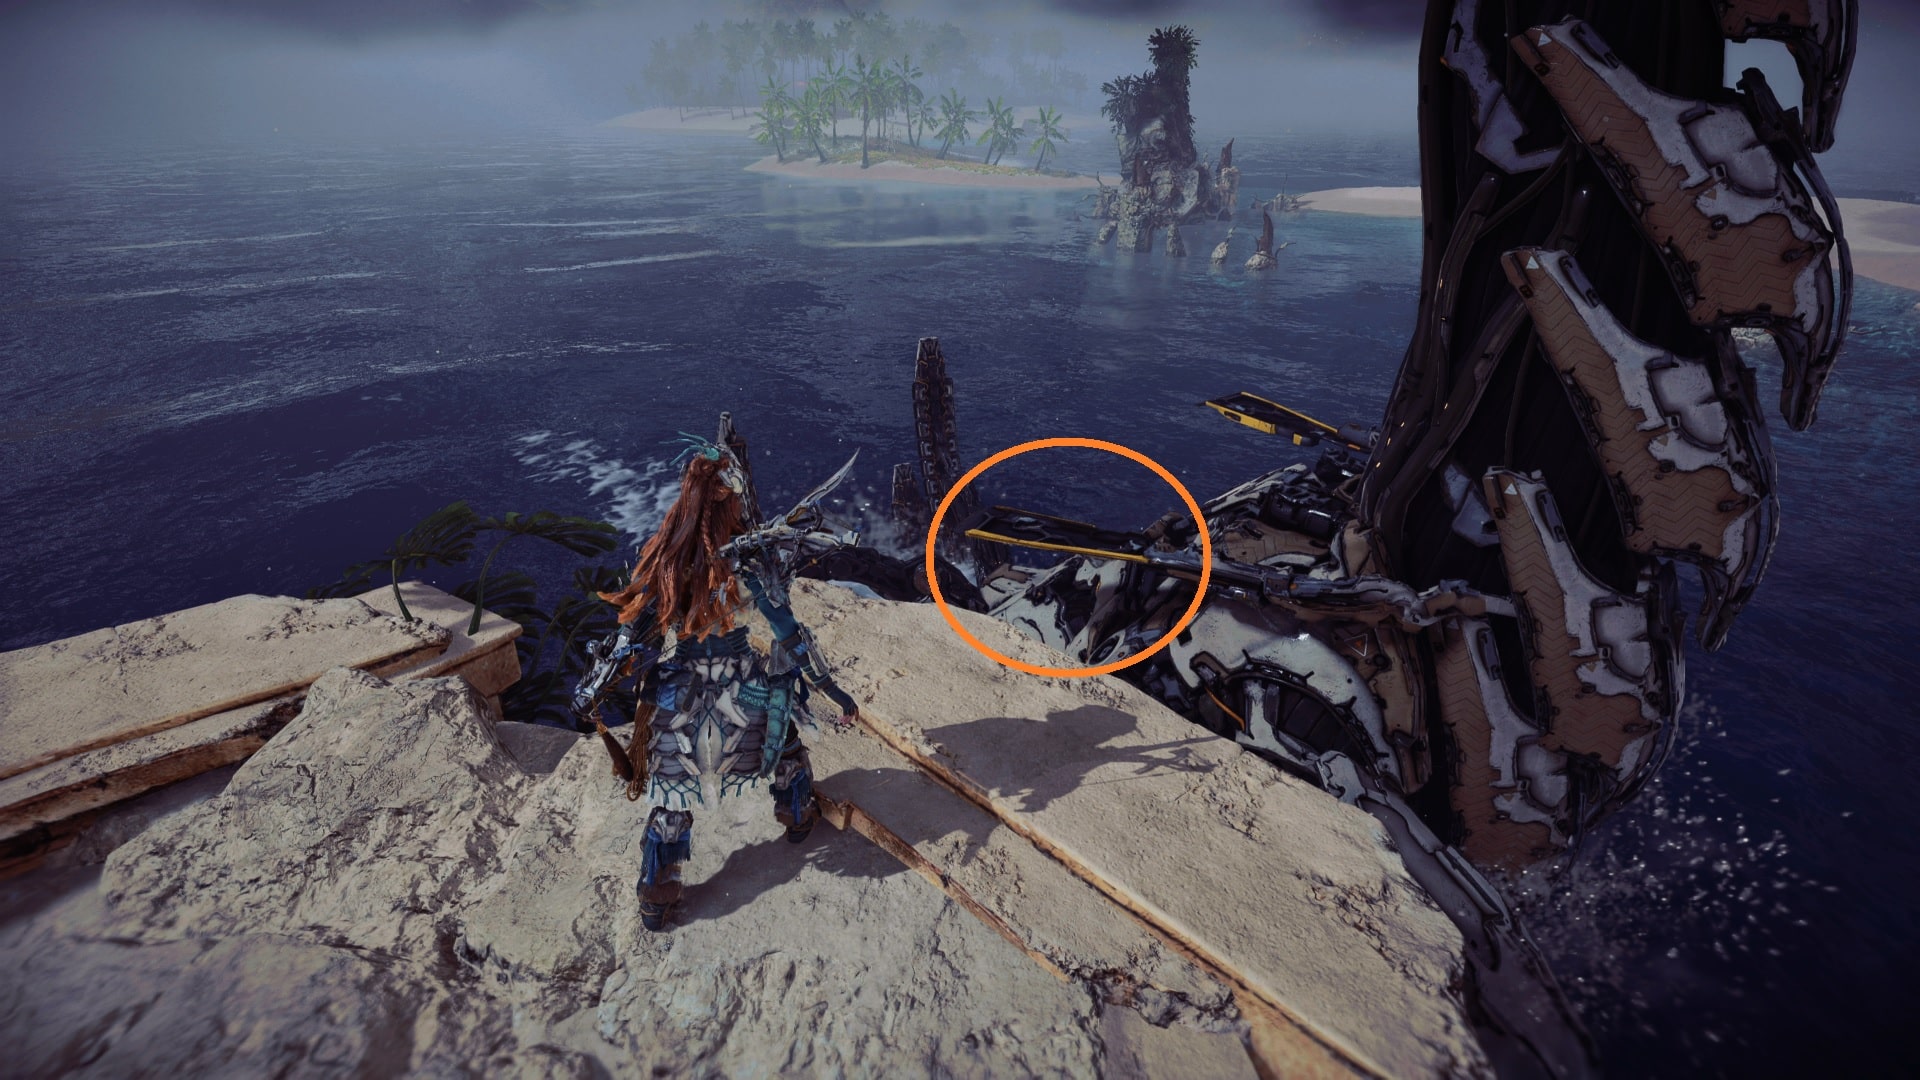
7. Press [ X + X] inside this building to propel yourself (see the grappling point circled orange below). In another “bird’s nest” on the rooftop, look for the 2nd Tallneck part in a mound of scrap. That completes the search.
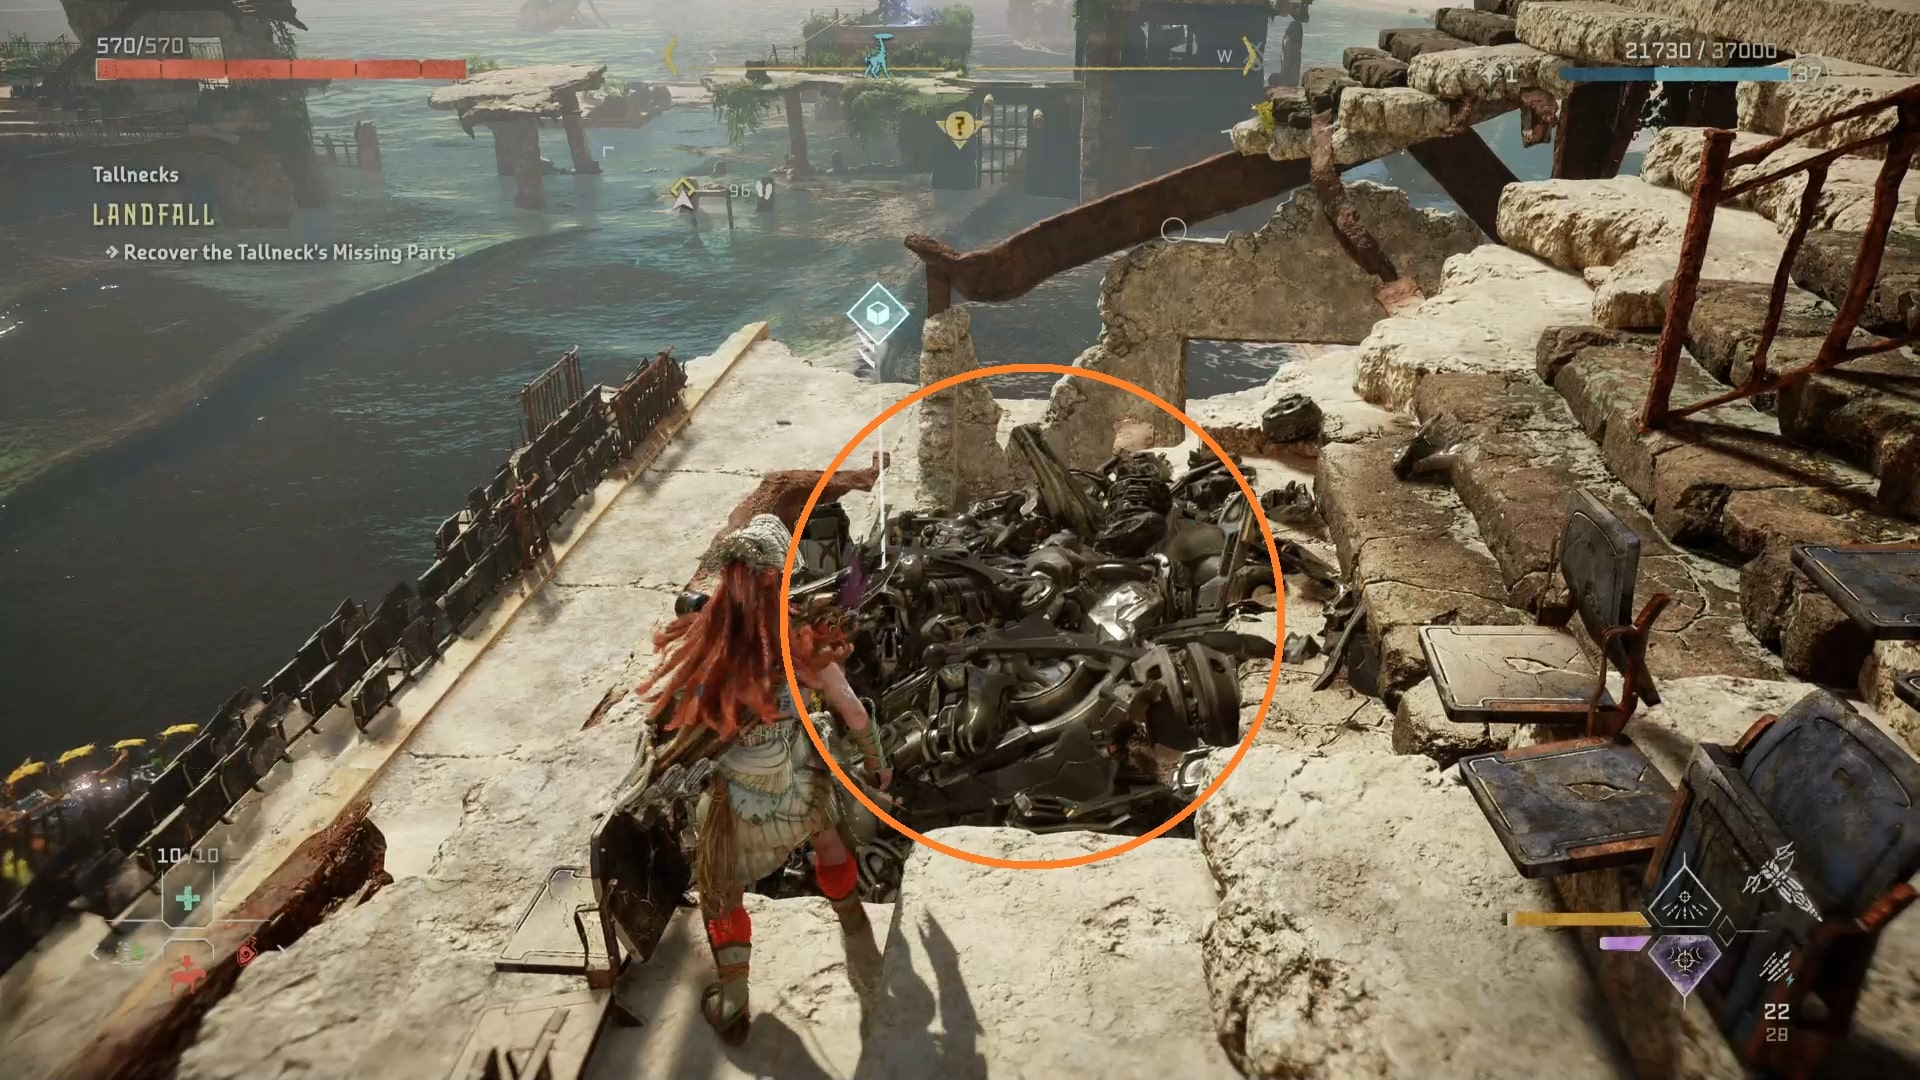
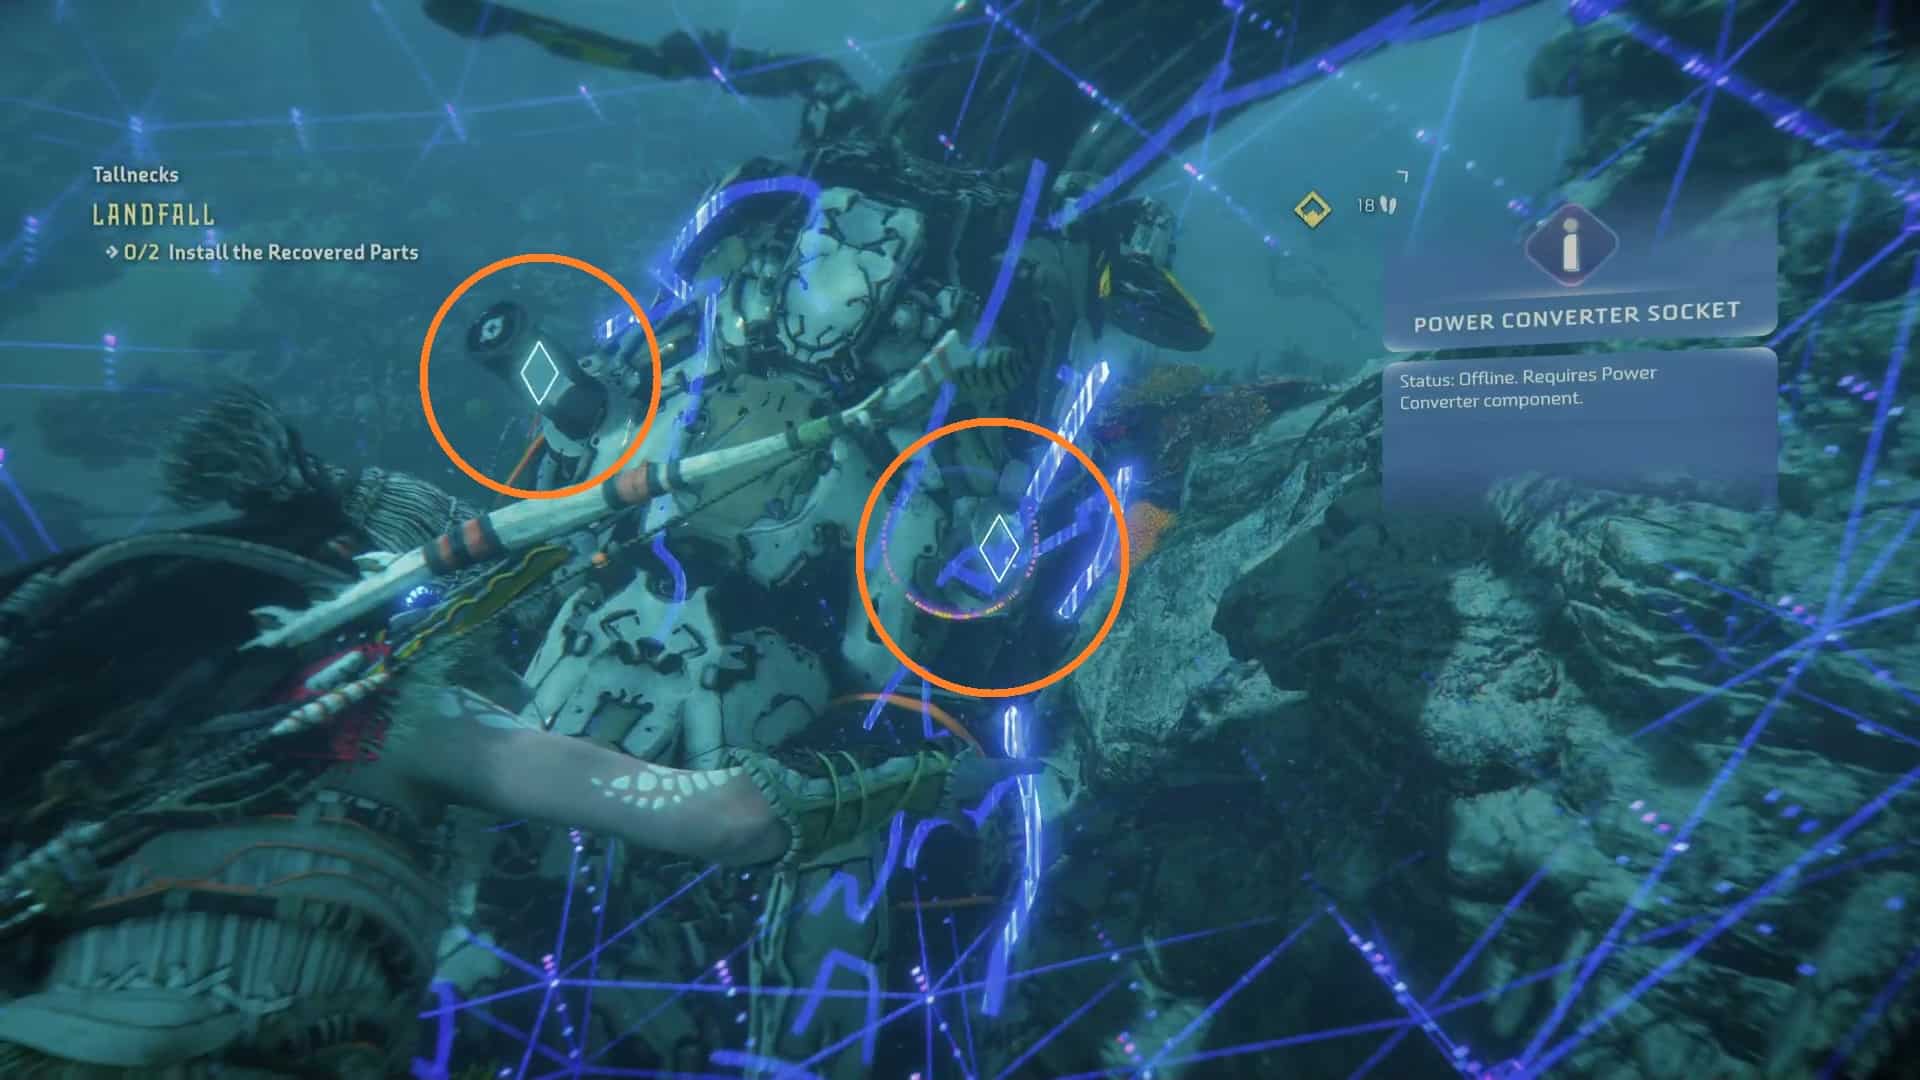
8. Upon your return to the Tallneck, attach the two parts to the power cells on its back, submerged. When this happens, the Tallneck will be activated and begin to walk toward some sunken ruins and begin to circle them. Those Ruins can be found by following the Tallneck.
9. To get inside the Ruins, identify breaches in the walls by diving underwater and entering through them. To get to the roof, you’ll need to dive into the ruins and look for staircases.
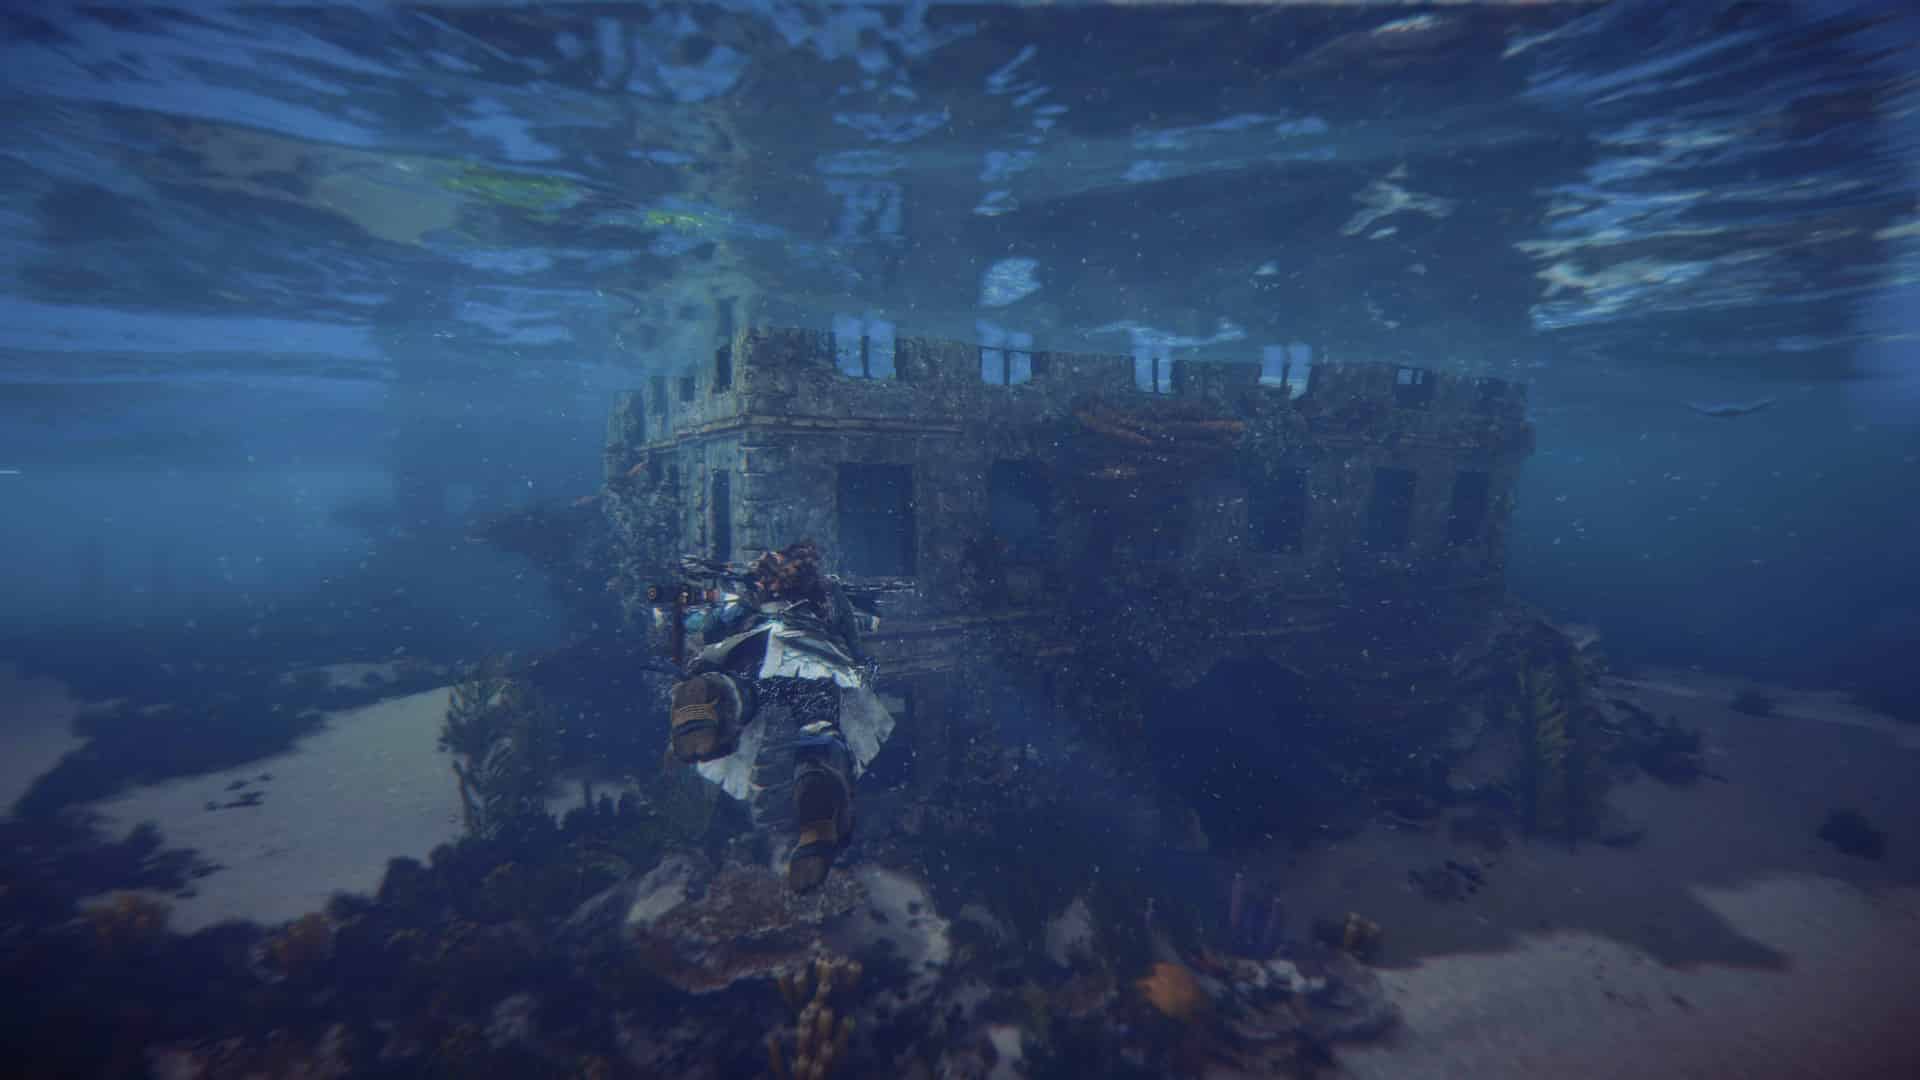
10. You can jump to a roof between the sunken ruins with [X + X] to quickly get to the ruins closest to where the Tallneck is walking. Wait for the Tallneck to pass by and then jump onto the yellow ledges on its back, climbing up to its head.
Tallneck #5: Salt Bite
Map Location: North of Scalding Spear, inside IOTA Cauldron.
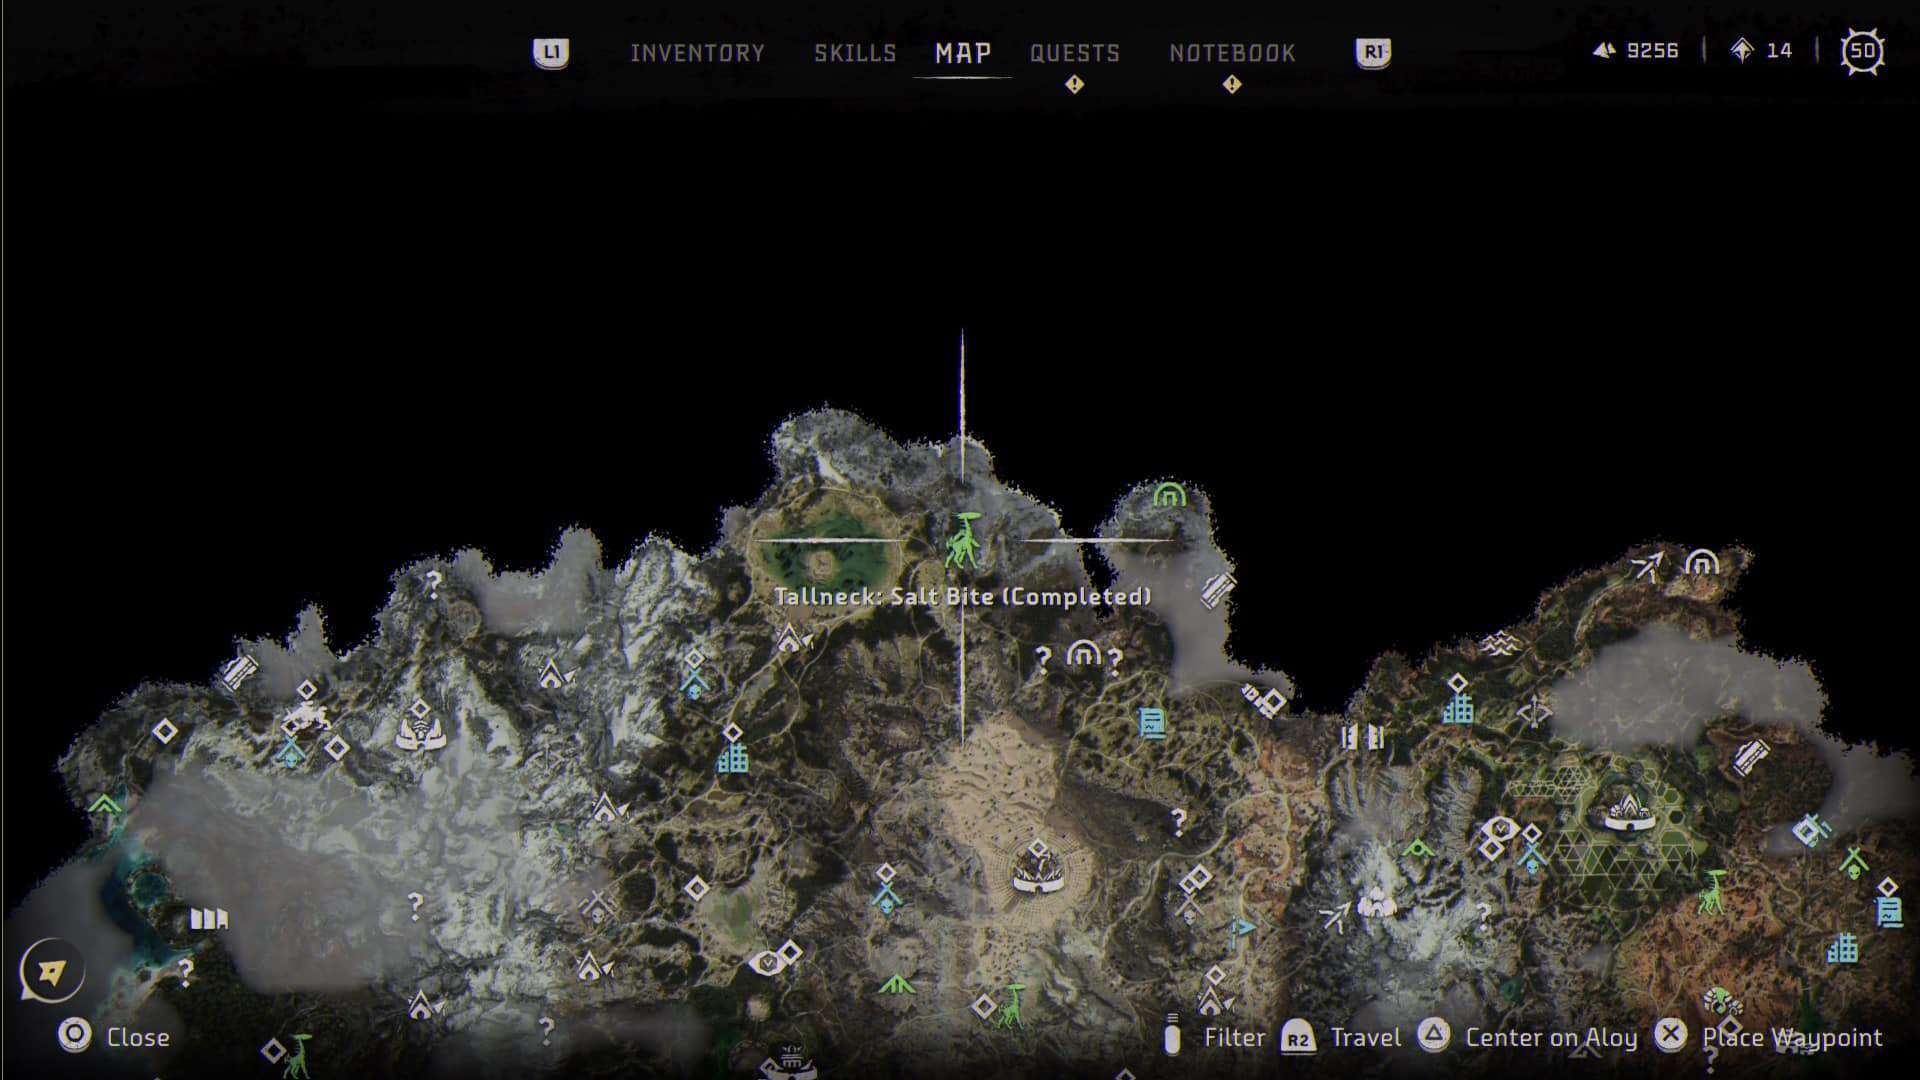
Walkthrough:
Maps don’t show the location of the IOTA Cauldron Tallneck. It’s the “missing” sixth Tallneck, a well-kept secret. The only thing left to do is finish the IOTA Cauldron, and the repair of the Tallneck will take care of itself.
After completing the Cauldron, you can repair the Tallneck and use it again. You’ll be able to get the [Silver] All Tallnecks Overridden trophy.

Tallneck #6: The Shining Wastes
Map Location: Center of the map, South of Scalding Spear.
Walkthrough:
You won’t be able to bypass this Tallneck in early game as there are no tall structures near it to climb. Once you Progress to the Main Story Quest “The Wings of the Ten,” you are tasked to craft a flying machine tool known as the Sunwing Override.
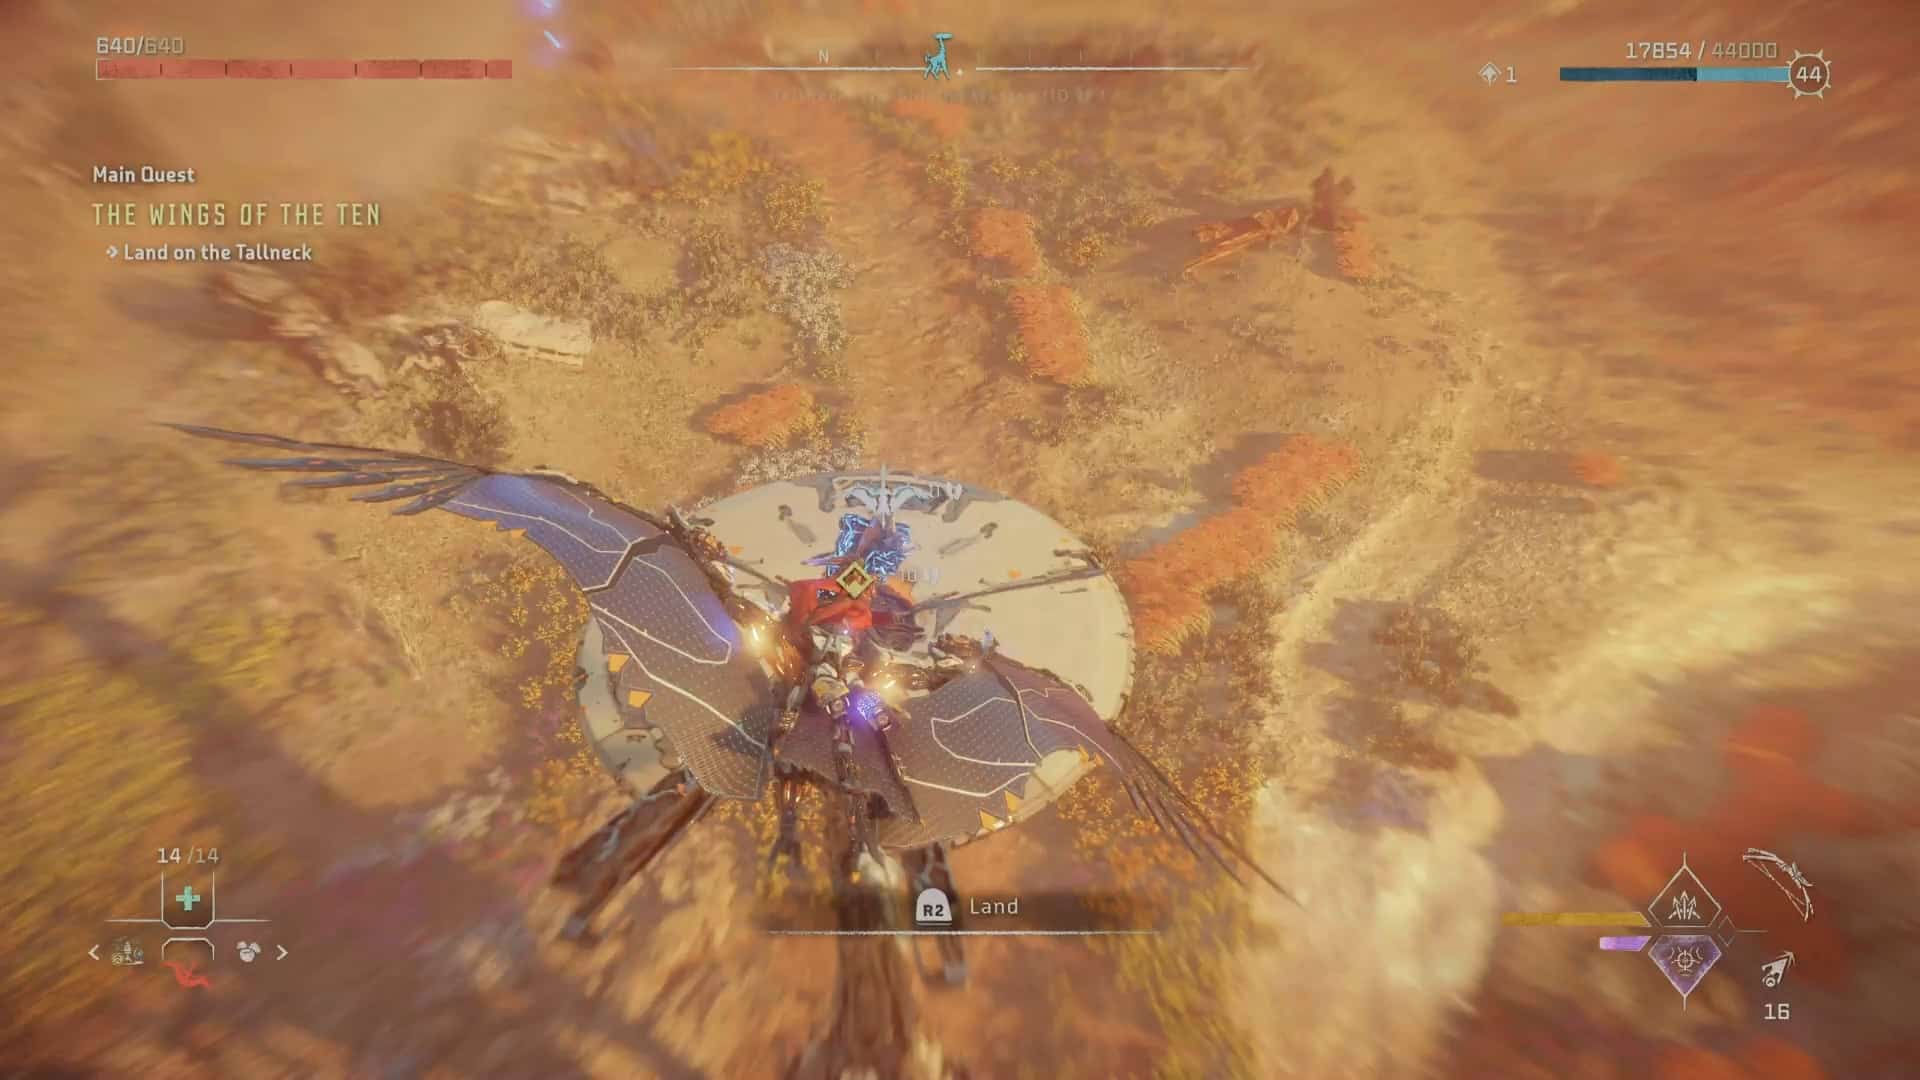
After mastering the basics of flying with your Sunwing buddy, You should be able to fly over the Tallneck and land squarely on its head by pressing R2 once you get at your specified position.
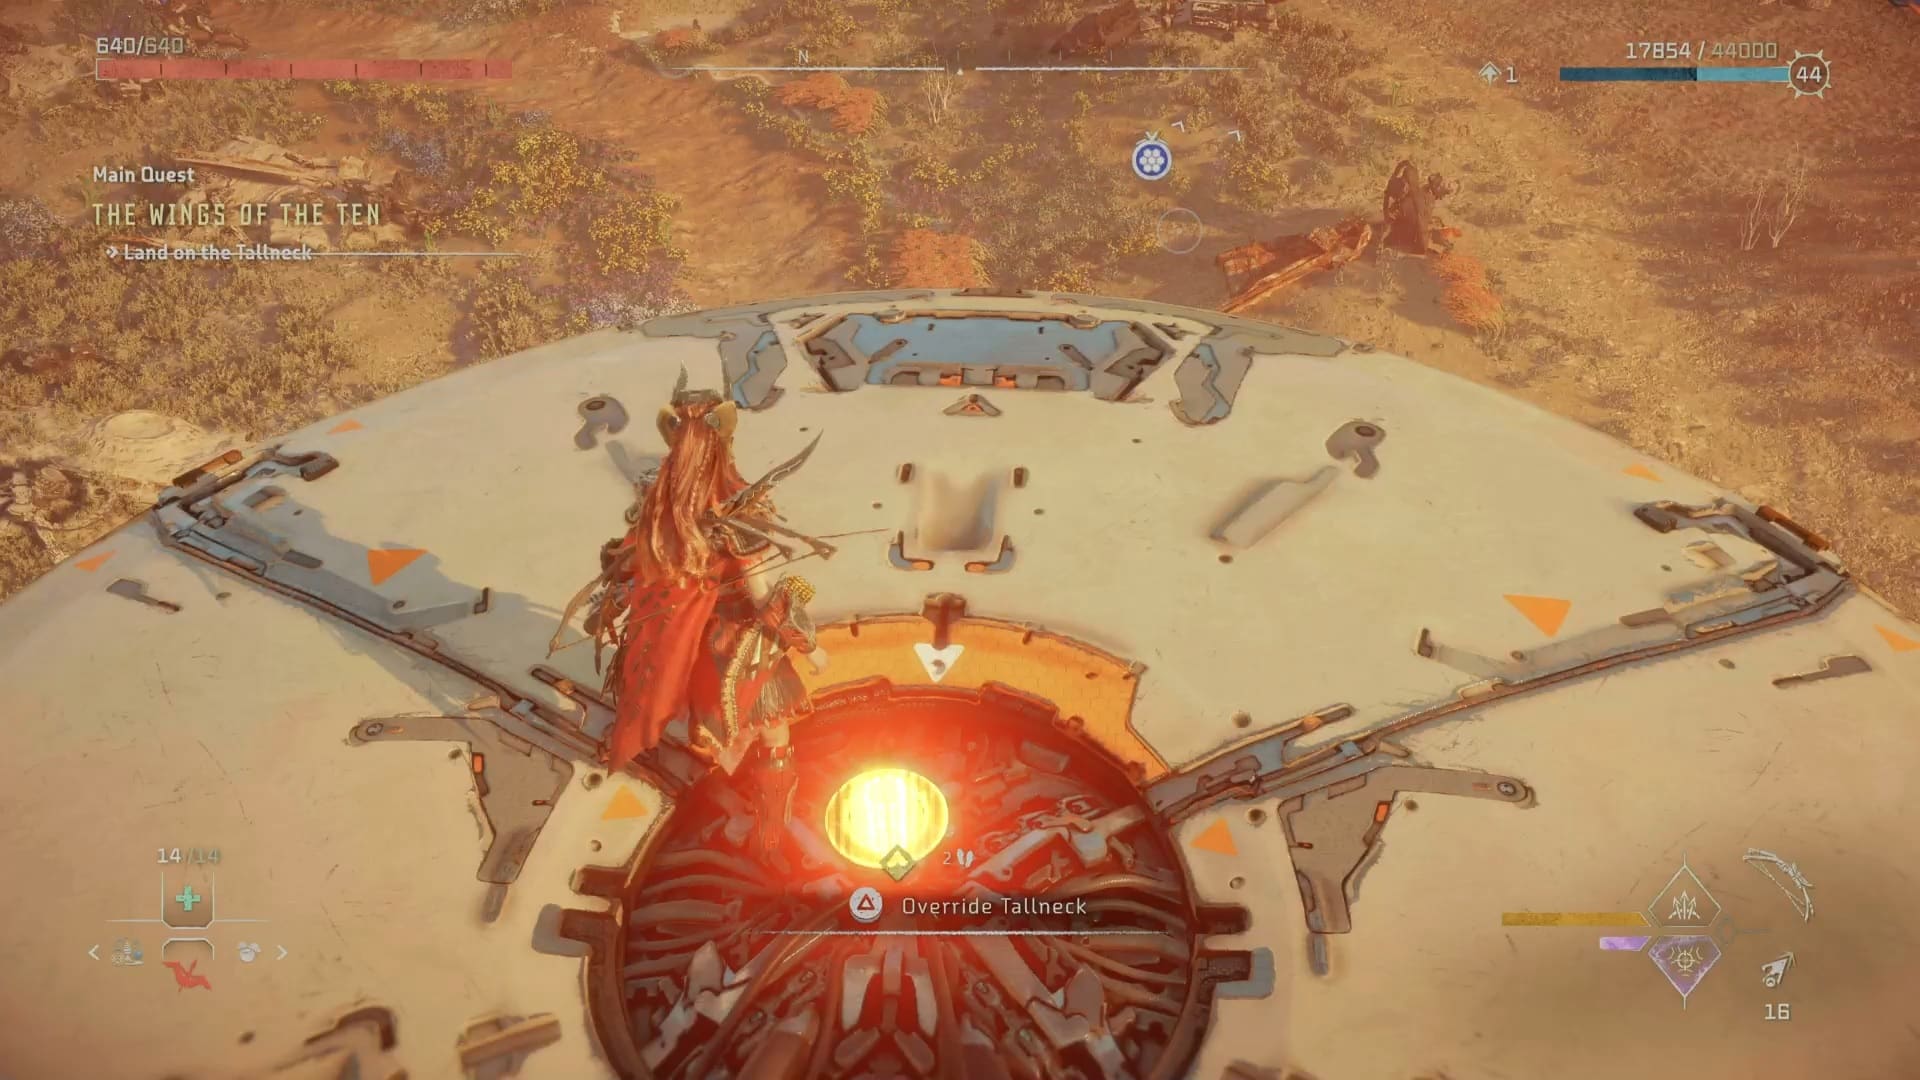
All that’s left is for you to press Triangle to override the Tallneck. It’s up to you whether or not you want to use the rappel point on the side of the machine’s head or use your Shieldwing (Special Gear) to glide down and summon your Sunwing by pressing Down Arrow on your D-pad.
This covers all Tallnecks in Horizon Forbidden West that we discovered.
Horizon Forbidden West – All Tallnecks Overridden Trophy
The All Tallnecks Overridden trophy will be awarded to you if you find and successfully climb to override all 6 Tallnecks in Horizon Forbidden West.
If you like this guide, check out our other Horizon Forbidden West articles:
- Horizon Forbidden West All Editions – Details & Comparison
- Do You Need to Play Horizon Zero Dawn Before Forbidden West?
- Horizon Forbidden West All Machines and Variants List
If you are interested, check out this video by BIGDADDYJENDE for Horizon Forbidden West – All Tallneck Locations (How to Climb & Override Every Tallneck):


