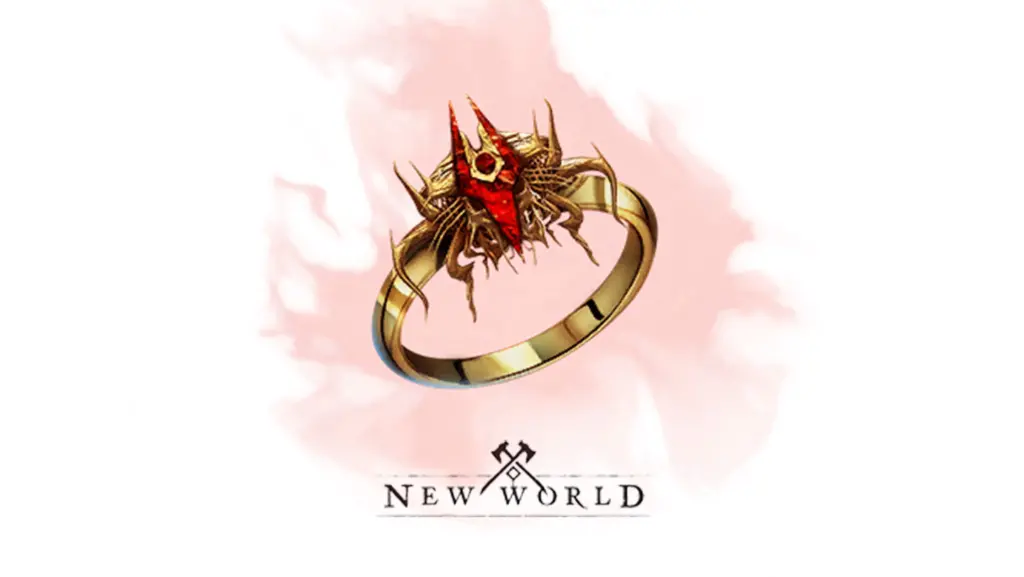
You can now farm the New World Blooddrinker Artifact through the Starstone Mutation. This ring found within the South Everfall region has its potency surpass initial expectations. This expedition features encounters with The Ancients and is recommended for players who are at least level 35 or higher. Intriguingly, acquiring the Blooddrinker Artifact could be very challenging in the world of Aeternum. For me, it felt like the ultimate treasure hunt.
In this guide, I will teach you the best way to farm the Blooddrinker Artifact, how to use it, and discuss its versatility across weapon and build choices.
In this article:
What is the Blooddrinker Artifact?
The Blooddrinker Artifact offers a unique combination of attributes that can make it a game-changer for many players:
| Perk | Description |
| +32 Magnify | (to highest attribute) |
| Ghouls Harmony | -25% damage, 25% lifesteal. |
| Hearty | +10% max Stamina. |
| Random Perk | Random Perk that can be focused through Artifact crafting |
| Gem Socket | Attach a gem to add its effect. |
| 7.1 % Life Steal (Leeching) | Heal for 7.1% of the damage you deal with every successful hit or ability. (Does not trigger off persistent damage or DoT effects). |
The Blooddrinker Artifact isn’t confined to a single playstyle or build; its versatility opens up numerous possibilities for players. The inclusion of the Hearty perk provides players with an extra stamina boost, which can be vital for maintaining high-intensity combat. The artifact also includes a gem socket, offering players the opportunity to further customize their character’s abilities and attributes. And the Ghouls Harmony perk reduces your damage taken by 25% while simultaneously granting you a 25% life steal effect. This unique combination promises increased survivability, but it comes with a significant catch.
Contrary to common belief, the damage reduction it offers isn’t merely a percentage but functions as a direct reduction in base damage. It’s crucial to understand that the -25% damage reduction from Ghoul’s Harmony is not applied to your overall damage output but rather to your base damage. The actual reduction varies significantly depending on your character’s build and equipment. This can be both an advantage and a limitation.
For instance, if you’ve invested in an Intelligence (INT) build, you likely have several base damage increases that could offset the apparent 25% damage reduction. With various base damage boosts from abilities, perks, and equipment, your effective damage reduction may be closer to 10% or 15% in practice. This means that while you won’t deal as much damage as those without the Blooddrinker Artifact, the reduction is not as severe as it first appears.
Moreover, the lifesteal effect sets it apart from conventional leeching perks, as it effectively interacts with both persistent AoE (Area of Effect) abilities and damage-over-time (DoT) effects. This unique combination makes the Blooddrinker Ring a remarkable addition to your build.
Dot-heavy builds, such as AoE Mages and users of damage-over-time abilities, benefit greatly from the artifact’s life steal effect. These builds can now sustain themselves while applying damage over time to multiple targets.
How to get the Blooddrinker Artifact?
The New World Blooddrinker Artifact ring can be acquired by defeating Greundgul the Regent in the Mutated Starstone Barrows Expedition. Embarking on this quest requires careful preparation. To make this expedition smoother, ensuring that your gear is well-prepared is crucial.
Equip your character with both Ancient Ward and Lost Ward gear as these ward types are essential for surviving the challenges within the Starstone Barrows expedition. Additionally, having Ancient Bane and Lost Bane gear can provide a significant advantage against specific enemies. I’ve opted for a Strike Ward and Slash Ward amulet to improve my odds in the boss fights.
Keep in mind that this expedition is renowned for its mutated challenges. As you progress through the expedition, you’ll encounter mobs, and clearing them requires careful coordination. Your tank should be proficient at gathering mobs, and everyone should remain vigilant, especially when dealing with ranged attackers.
Moving forward, you’ll reach the Forbidden Passage, where laser obstacles pose a challenge. Typically, one player is designated as the “runner” to reach the end of the Parkour and open the gate for the rest of the team. Ranged players can provide support to ensure the runner’s safety during this segment. For the rest of the team, there are safer shortcuts to avoid the lasers, saving time and reducing risk.
The Shattered Obelisk area introduces a notable strategy known as the “God Pull.” By throwing a hatchet at an archer, you can attract mobs, making it easier to gather and eliminate them effectively. To streamline your progress, it’s wise to focus on defeating specific bosses and skipping others during this expedition. This not only saves time but also ensures you’re on track to obtain the Blooddrinker Artifact.
As you navigate the expedition, you’ll come across the hidden boss, Limos. You can pull him towards another boss for a quicker battle, at the same time granting additional rewards.The climactic encounter awaits in the form of Greundgul the Regent, which unfolds in multiple phases and demands your best strategies.

How to beat Greundgul the Regent
In the battle against Greundgul, applying advanced tactics is essential, such as using anti-heal debuffs and headshot mechanics to make the fight more manageable and efficient. Equipping a Slash Protection Amulet can significantly improve your chances of success.
Phase 1:
Greundgul the Regent starts the battle with a primarily slash-based attack pattern. Position your group slightly to the left of the boss to avoid most of these slash attacks. The narrower attacks can be blocked or dodged with relative ease. Greundgul has one special ability in this phase: occasionally, he throws a bone that spawns additional skeletons when it lands. Your group should prioritize destroying the bone to prevent the skeleton spawns.
In phase 1, keeping your group close to the boss is crucial. The melee attackers should focus on dealing damage, while the healer ensures everyone stays healthy. If your group is organized and responsive, you can make this phase smoother.
Phase 2:
As the Greundgul the Regent transitions to Phase 2, you’ll notice that he starts jumping and slamming the ground, sending shockwaves outward. Greundgul’s jumping ability is a significant part of Phase 2. To counter this, aim for headshots when he lands from his jumps. A successful headshot will stagger Greundgul, preventing him from performing additional jumps. The life staff is particularly effective for triggering these stagger effects, but any ranged weapon can be used for this purpose.
Work together with your group to hit Greundgul in the head whenever he jumps. Effective coordination will keep him staggered, and he won’t jump repeatedly. While he’s in the stagger animation, Greundgul will revert to his regular attack pattern, allowing your group to deal damage without disruption.
By applying these tactics, you can make the Greundgul the Regent fight more manageable. Don’t forget to keep your group’s health in check, as the boss can still be quite formidable. With perseverance and a well-coordinated team, you can successfully beat Greundgul and progress further in the Starstone Barrows expedition.
Farming: Starstone Mutation Level and Rarity
The Blooddrinker Artifact’s drop rate is intended to be higher at higher levels of mutations. Therefore, make sure you are attempting to obtain the artifact at mutation level one or higher. Artifact drops are typically rare, so be prepared for multiple attempts if necessary. Keep farming Greundgul the Regent in Starstone to increase your chances of obtaining the Blooddrinker Artifact. If it doesn’t drop after 10 runs at M1, try M2 (or it could just be really bad RNG).
How good is the Blooddrinker Artifact in New World?
As an avid New World player, I was thrilled when the Blooddrinker Artifact was introduced. I soon realized the incredible potential of the Blooddrinker Artifact across various builds. One intriguing idea was integrating it into my Artillery/VG setup, thanks to the sustain and lifesteal it offered. Sacrificing some escape options seemed like a worthwhile trade-off for not dying often.
Many players were equally excited, crafting plans for an Artillery/VG/Blooddrinker build, eager to test its effectiveness. In PvP battles, the Blooddrinker Artifact paired well with bow and rapier combinations, allowing players to engage in 1v3 battles with confidence. Against tanky opponents, the damage nerf was noticeable, but the artifact’s sustain outweighed the inconvenience.
In team-based game modes like Outpost Rush and open-world PvP, the artifact can turn the tide of battle by enhancing your ability to stay alive. This survivability is especially critical when you can’t rely on coordinated team support. The Blooddrinker Artifact had a substantial impact on both player-versus-environment (PvE) and player-versus-player (PvP) gameplay. It allows damage-dealers to be more self-sustaining, potentially changing the dynamics of both PvE and PvP scenarios.
Tanks could also benefit from the Blooddrinker Artifact’s lifesteal capabilities. With its unique lifesteal mechanics, players wondered about its impact on game balance, particularly in PvP scenarios where increased healing, combined with limited anti-healing options, could disrupt the balance.
Players who rely on their own healing rather than external support will find the Blooddrinker Artifact very helpful. It offers a significant advantage in solo gameplay, allowing you to take on challenging content with greater ease.
For resource gatherers and dedicated farmers, the Blooddrinker Artifact proved invaluable, making farming a more enjoyable task. However, with the latest nerf its lifesteal no longer worked with Damage over Time (DoTs) or persistent area-of-effect (AoE) damage, requiring players to rethink their builds and playstyles.
As the Blooddrinker Artifact continues to gain popularity in New World, it’s only a matter of time before developers consider further adjustments or nerfs in future updates.


