")
Resh’an has always been an enigmatic character. He’s an unparalleled genius who possesses a creative flair that even impresses the Fleshmancer. Unfortunately for the Solstice Warriors, he doesn’t always help in the manner expected of such a powerful ally. This is the reason why even his end-game request is a roundabout chase that doesn’t make much else to anyone but the Immortal Alchemist.
In this guide, I’ll tell you how you can fulfill Resh’an’s final request and get the Hey, That’s a Reskin! Achievement for your collection.
How to Start Resh’an’s Final Request
At any point before storming the Fleshmancer’s fortress, you can set up camp and speak to your friends about any unfinished business they have. As far as we know, this does not have an impact on the final battle. It does seem like to be an opportunity to acquire Legendary gear for the party.
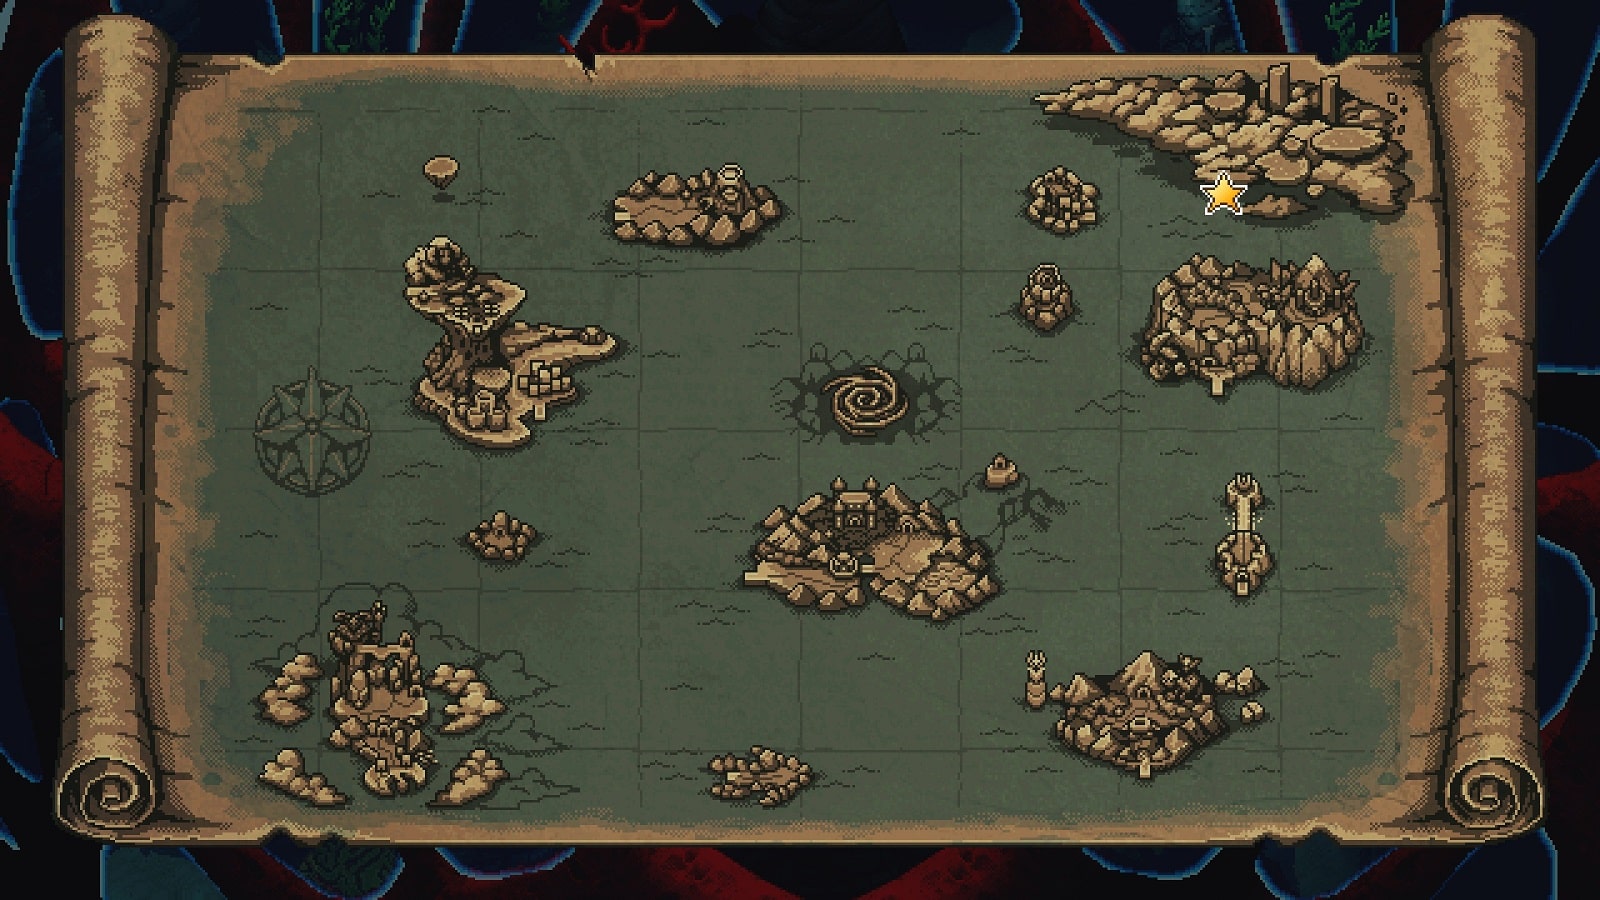
Resh’an’s puppet doesn’t have much to say about current events. But when spoken to, it will point to an unknown location Northwest of the map. This is the start of the side quest.
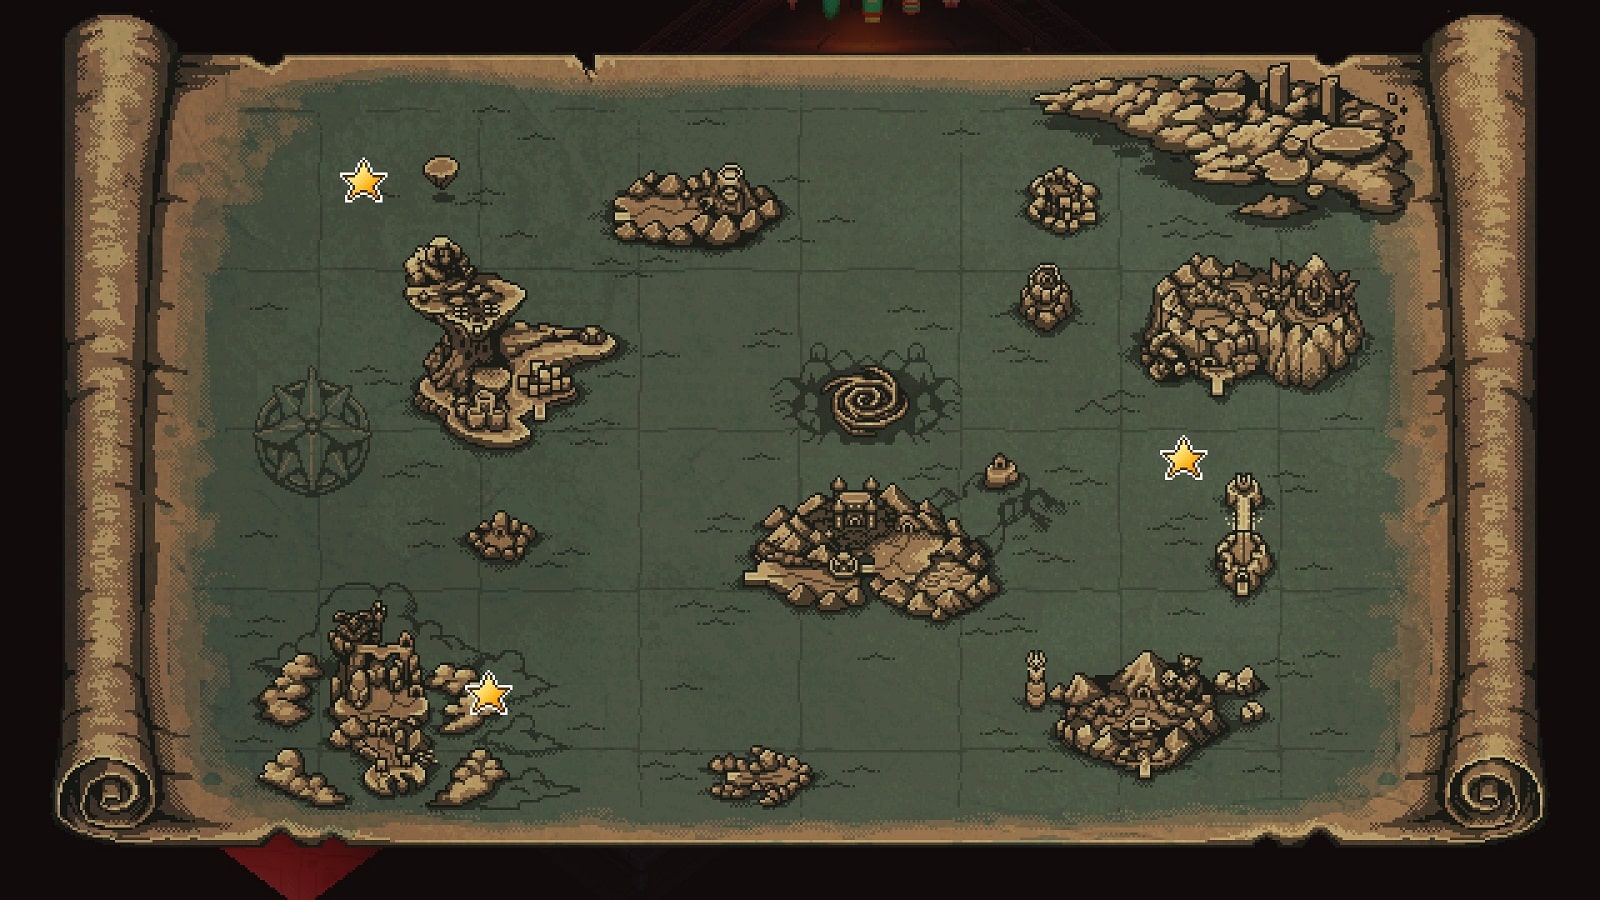
The location Resh’an’s puppet gave you is a minuscule island in the middle of nowhere. The only thing present there is a button that you can press to start a series of trials. Once you’ve pressed the button, three new locations will be made available to you. One right next to your location, another in a bay next to the starting island, and finally one next to the teleporter to the Cloud Kingdom.
Let’s begin with the one right next to the small island where you started the quest. The process remains the same for the rest of the locations. So, we’ll go directly to the descriptions of each trial after uncovering the entrance of the first one.
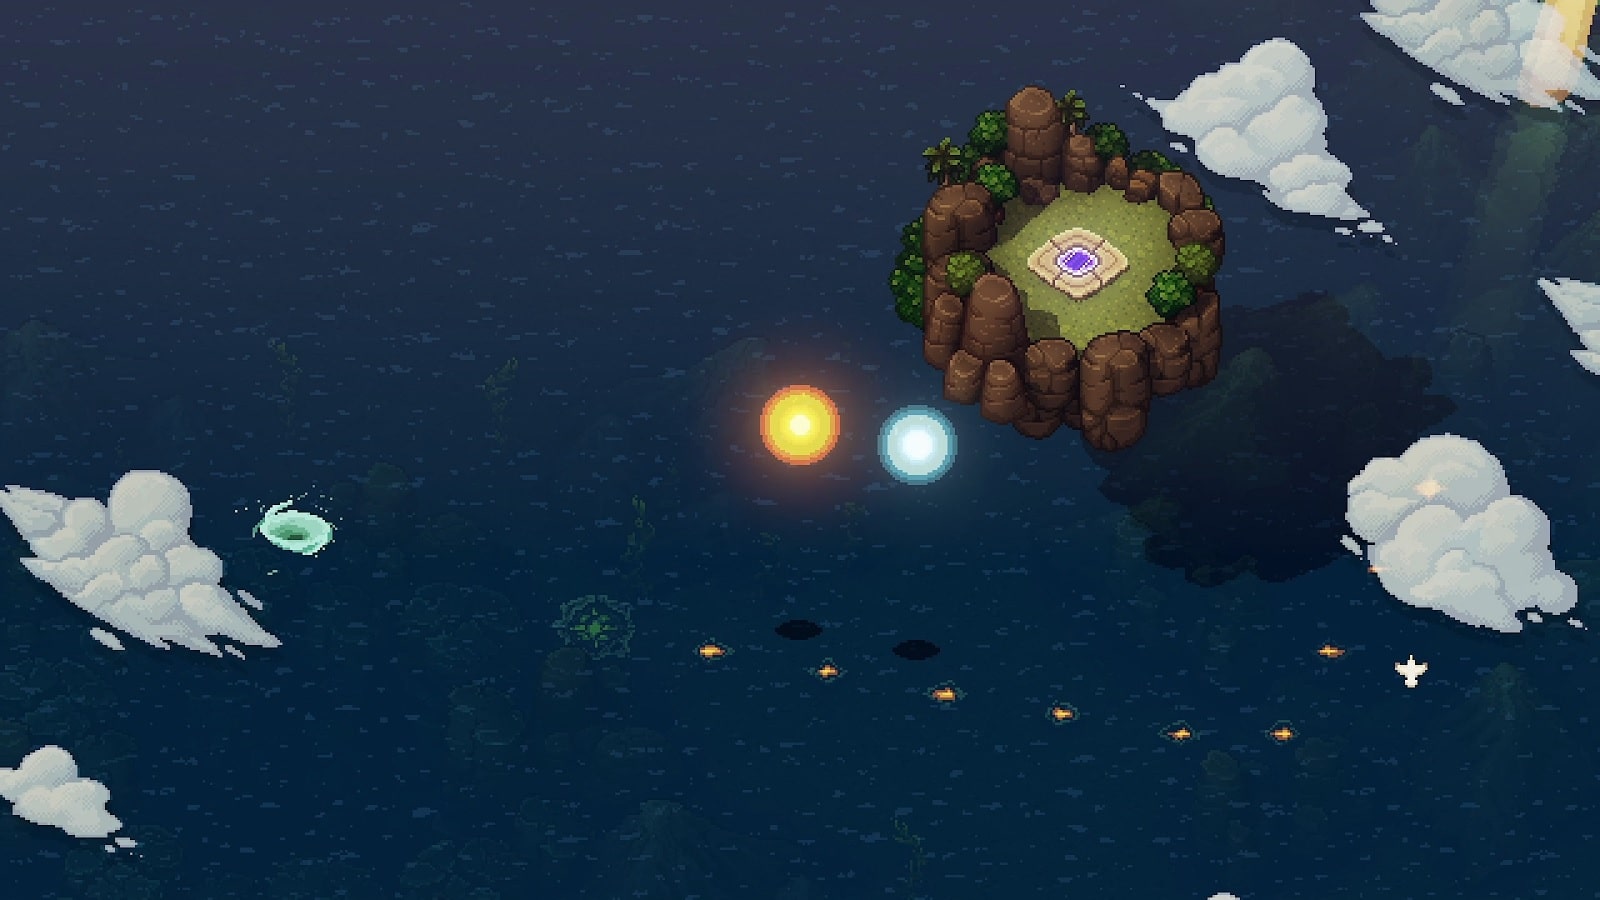
To open the entrance to each trial, you’ll need to use your Solstice powers to position the Sun or the Moon in the right position. You can do the whole process either from the Vespertine or high above the air. Once the sigil at the end is powered up, a whirlpool entrance will appear. The portal will take you to one of three Sunken Docarri Ruins.
Inside all three ruins is a bell that you are going to ring to formally start the trial.
Tip: You can always reset the puzzle room by exiting the trial chamber and then going back.
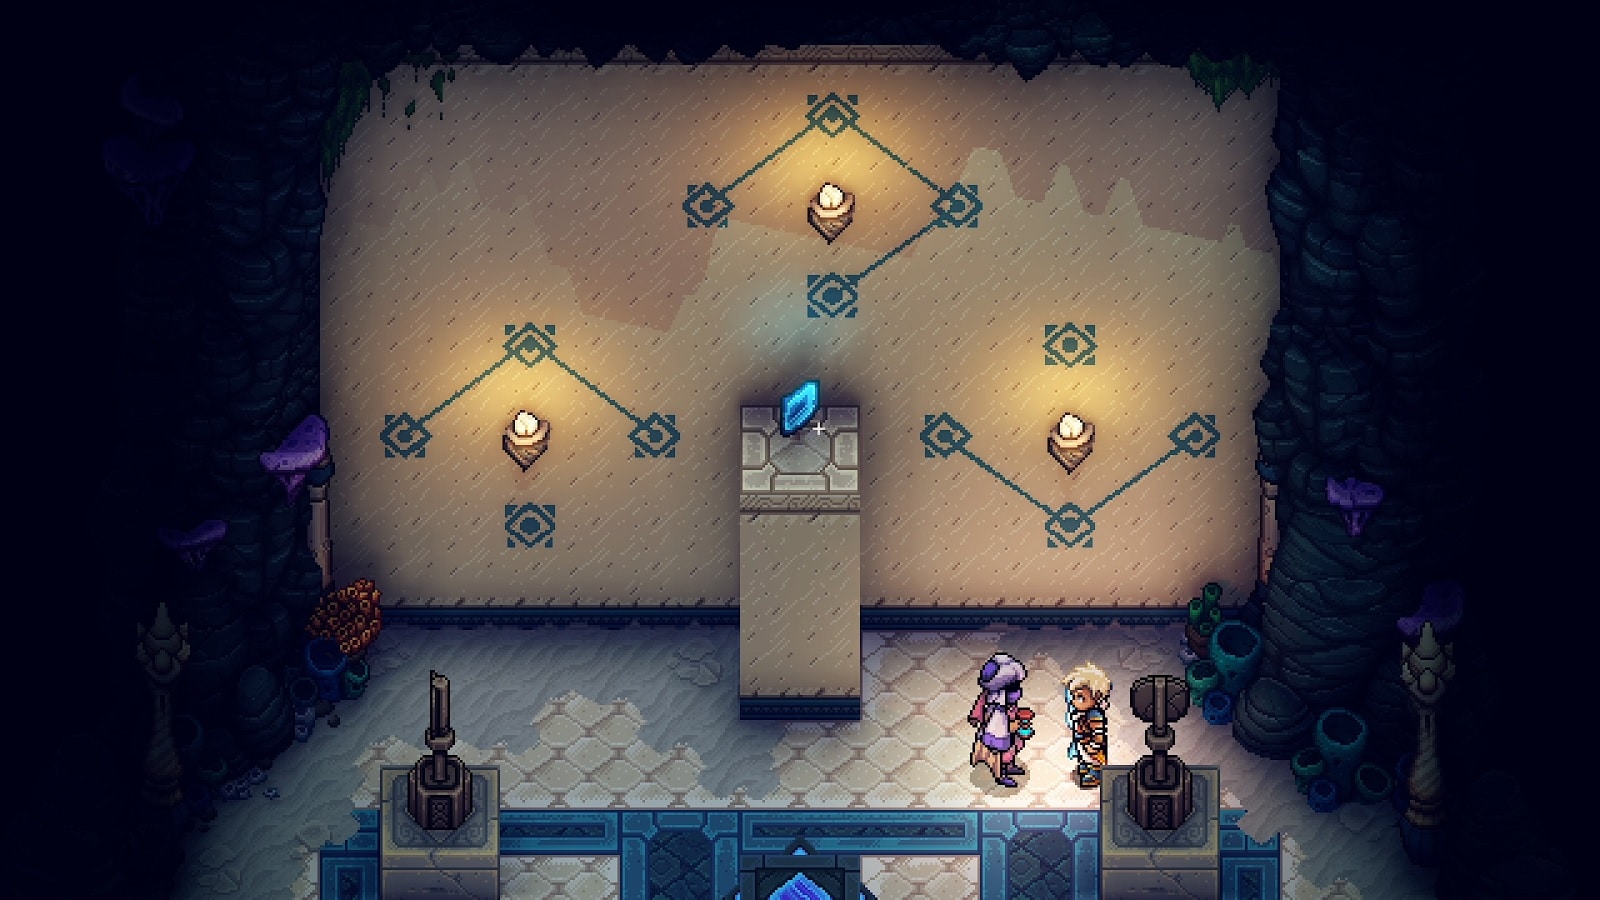
Sunken Docarri Ruins Northwest puzzle solution
There are three elements to this puzzle:
- The vault fills and drains the room
- A wooden crate that floats to with the risen water
- A marble slab that doesn’t float up when the water rises
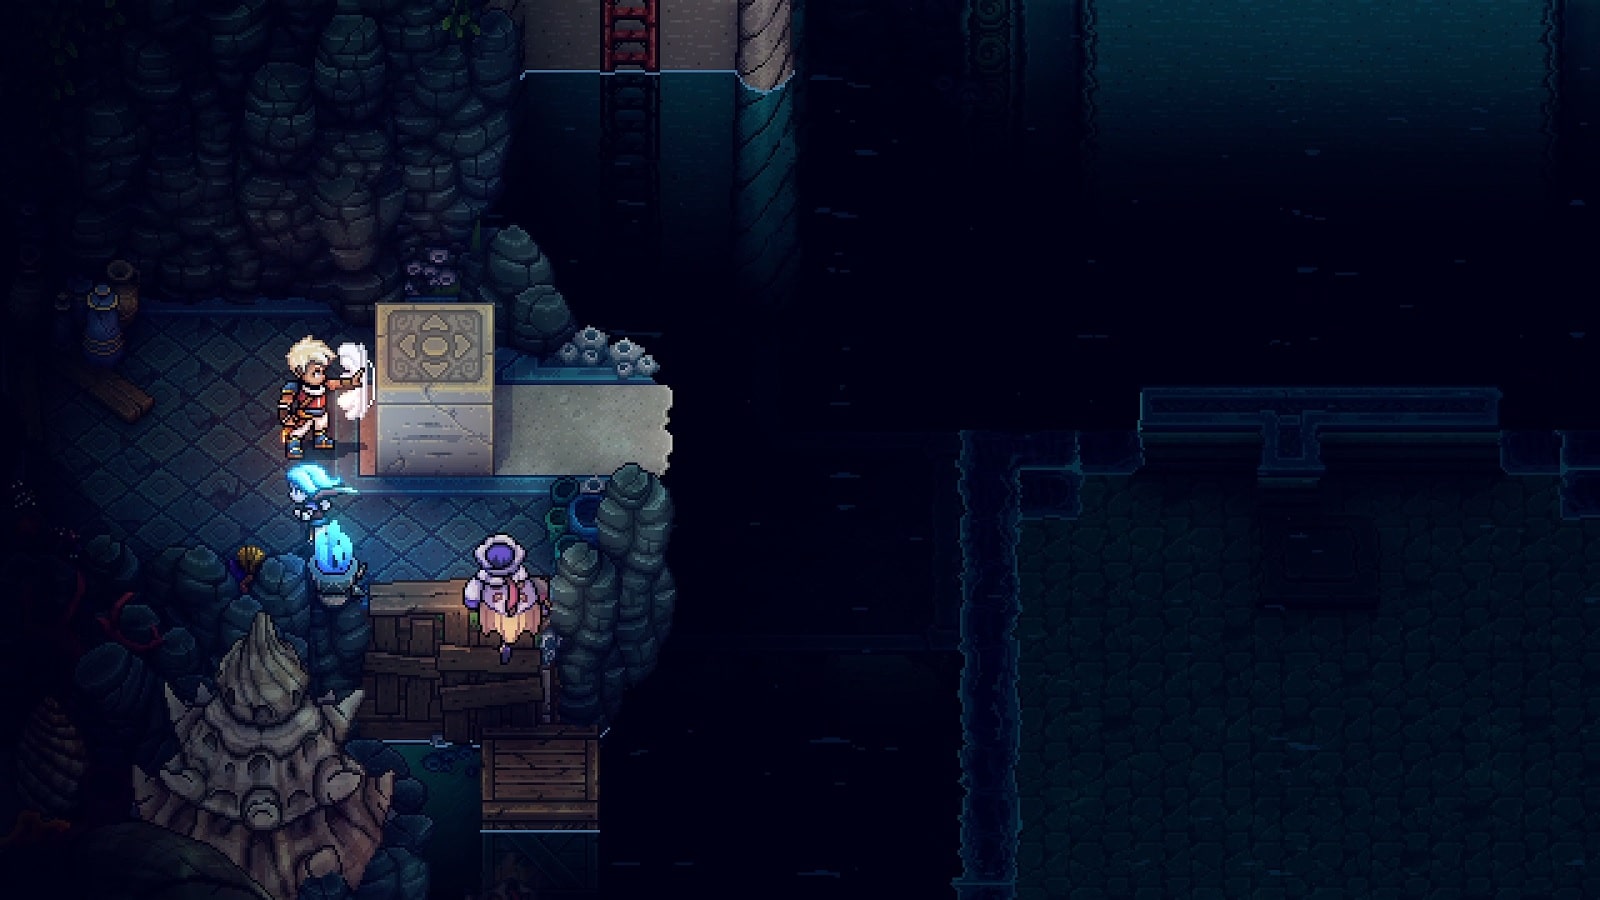
You first need to drain the room and position the wooden crate in the bottom left part of the chamber in order to get to the marble slab above. The slab will then fall and sink to the bottom of the lower floor. You won’t be able to reach its new location unless you raise the floor up.
To do that, you’ll need to drain the chamber and then push the wooden crate above the pressure plate. This will cause the lower floor to rise and allow the repositioning of the marble slab. Push the slab to take over the spot over the pressure plate. This will make sure that the lower floor stays level even if the room is flooded.
Finally, push the wooden crate to the top part of the chamber to create a platform when you fill the chamber with water. Inside the chest is the Docarri Seal Fragment A!
The first puzzle is complete! You are now free to exit the chamber and head back to the surface. Oh, and don’t forget about the treasure chest on the right side of the room. Use the wooden crate to get on the platform and a Sapphire Ingot as a reward.
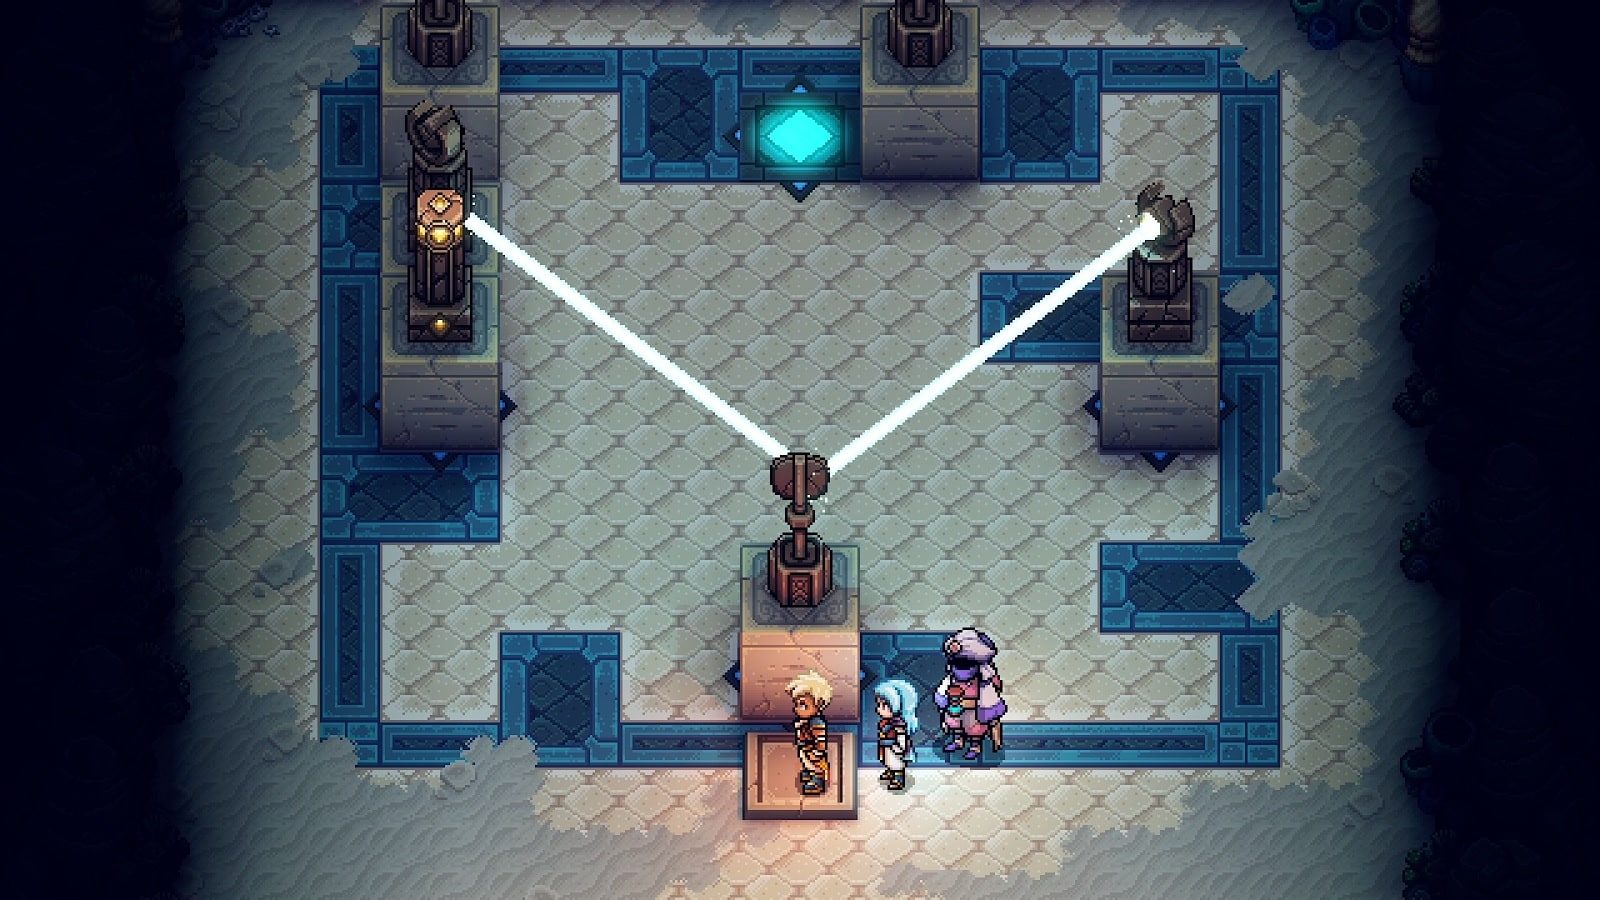
Sunken Docarri Ruins East puzzle solution
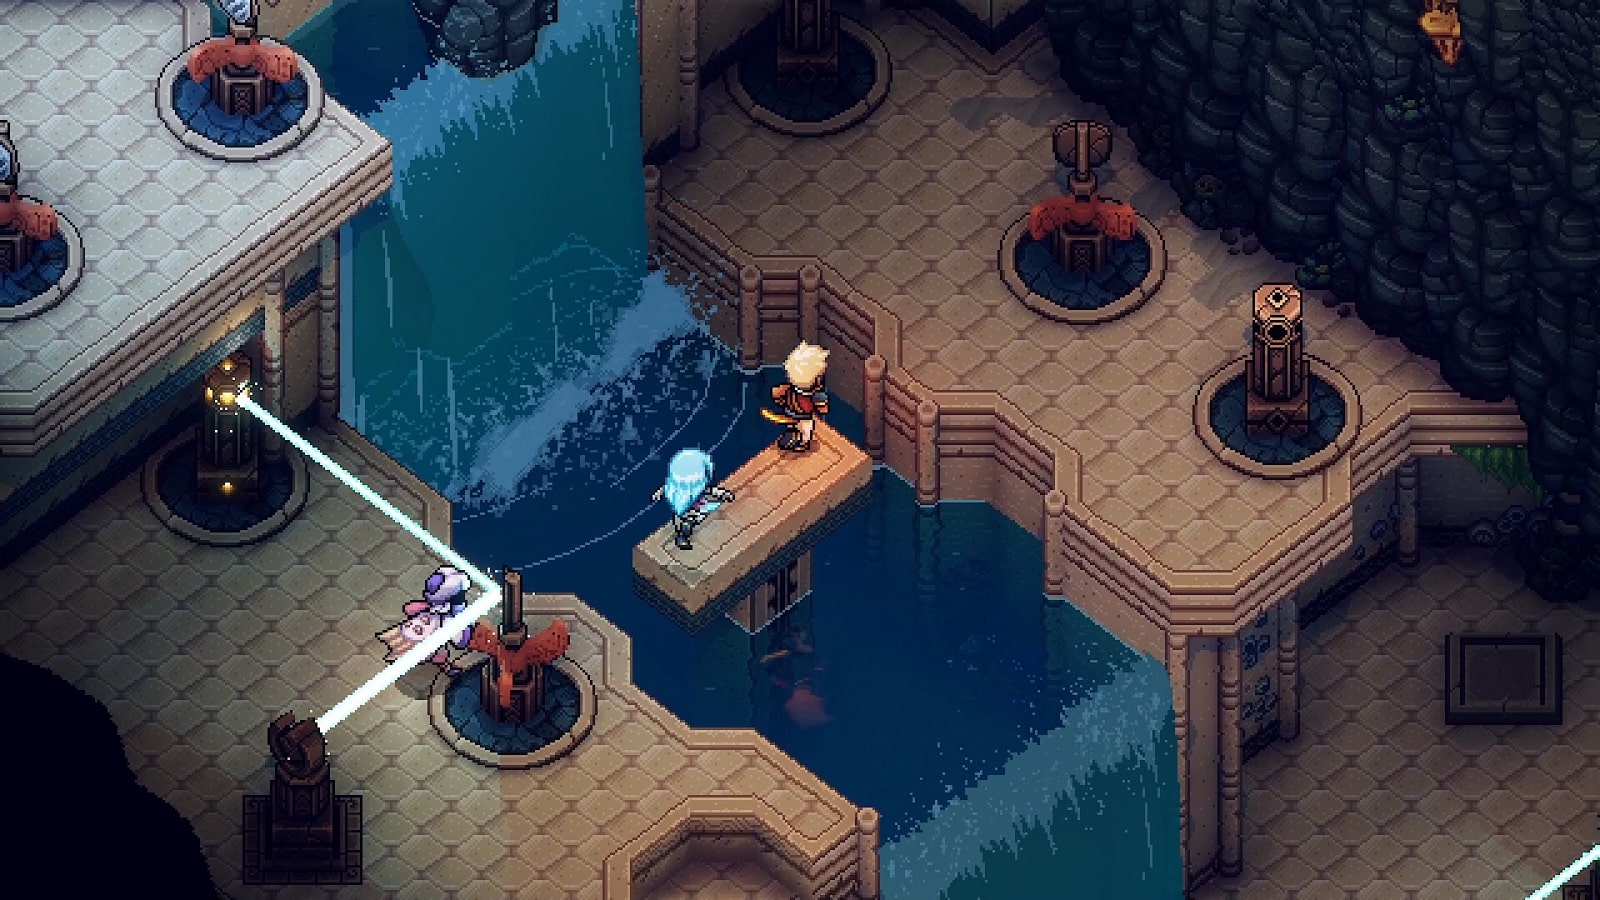
The puzzle in the Eastern ruins is a little more simple. It is a series of lasers and mirrors that you’ll need to manipulate to reveal more paths. The good thing about this puzzle is that you can step on the pressure plate and the beam remains active throughout.
The usual pattern here is to reveal a new platform and then reach the other side of the room using the newly risen platform before rotating the mirror to where the next part of the puzzle is going to be.
Step on the pressure plate at the top of the waterfall to reveal the Docarri Seal Fragment B! You are now free to ride the waterfall down to the entrance of the ruins.
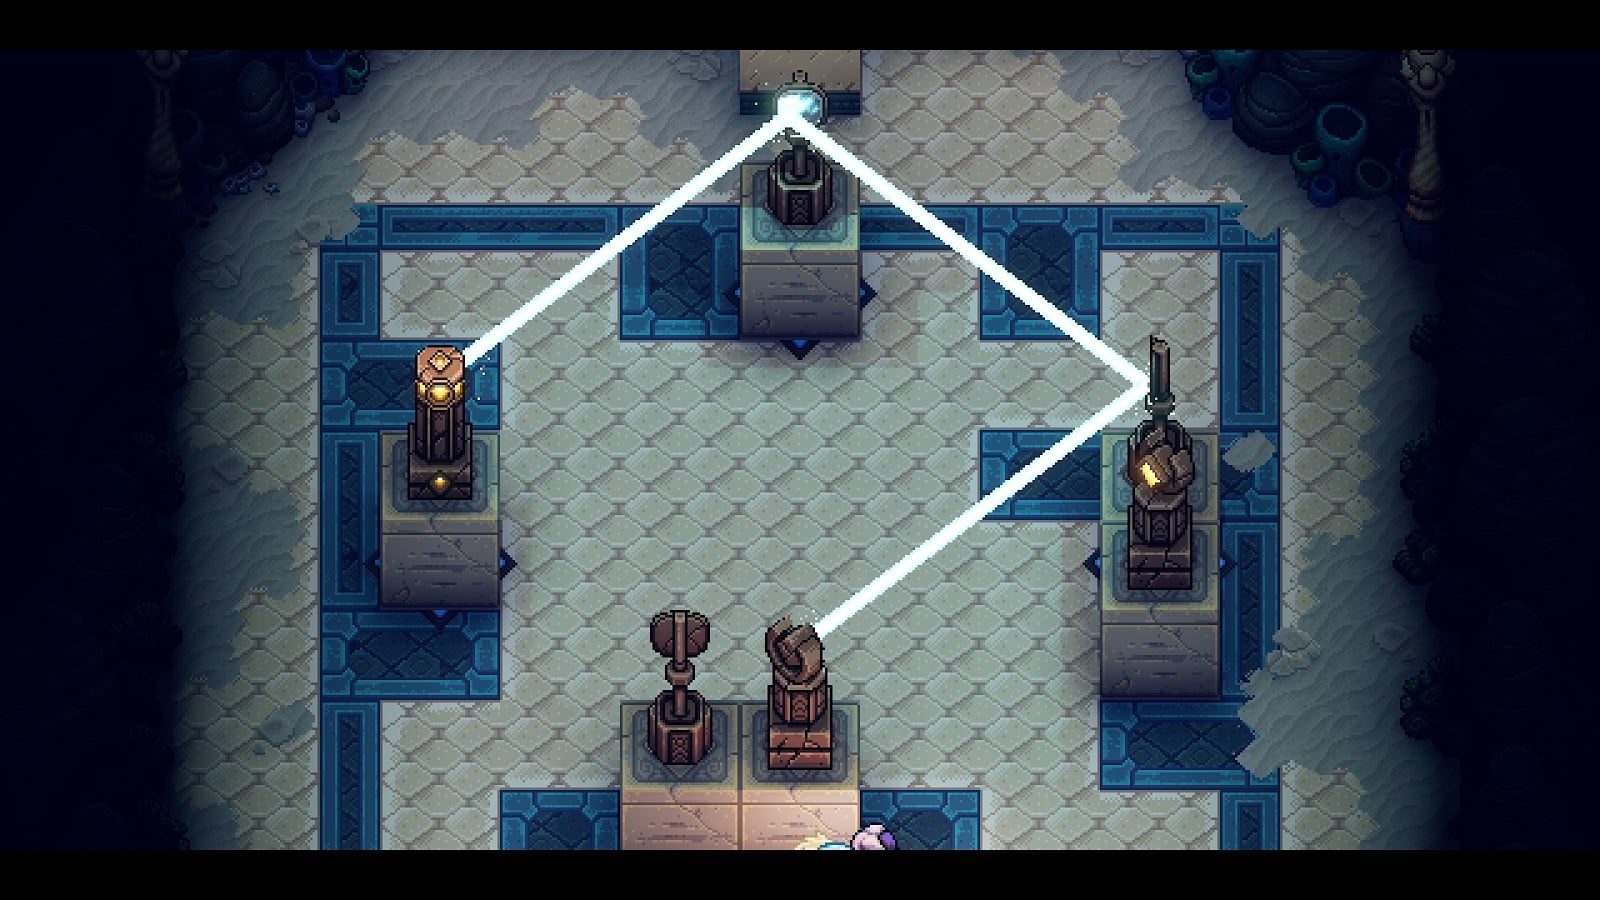
Sunken Docarri Ruins Southwest puzzle solution
The third and final Sunken Docarri Ruins puzzle is the hardest of the three. In this chamber, you are given a set of beam generators, mirrors, and one receiver. The idea is to recreate all three patterns above using the lasers and mirrors.
What makes this puzzle challenging is the fact that the blocks need to be positioned precisely. This will require the use of other blocks in key positions to get right angles to push them. When you think you have a possible solution set up, stand on the pressure plate to power up the puzzle. If the solution is correct, the wall will light up.
Reminder: If you get four blocks into a larger square, it is impossible to separate them. You can leave the room at any time to reset the puzzle.
The following are the solutions I used to get the patterns required. There are more elegant ways of doing them, I just brute-forced my way through until I got the pieces into position.

When all three patterns have been shown, the pedestal holding the Docarri Seal Fragment C! will lower. You now have all the pieces necessary to take on the boss at the end of the quest.
With all the pieces on hand, Resh’an’s puppet will reveal the location of the final part of the quest. When you get to the location marked on the map, follow the chain of lights to the tower that’s supposed to be powering it. When fully powered up, it will reveal the entrance to the Sealed Docarri Ruins.
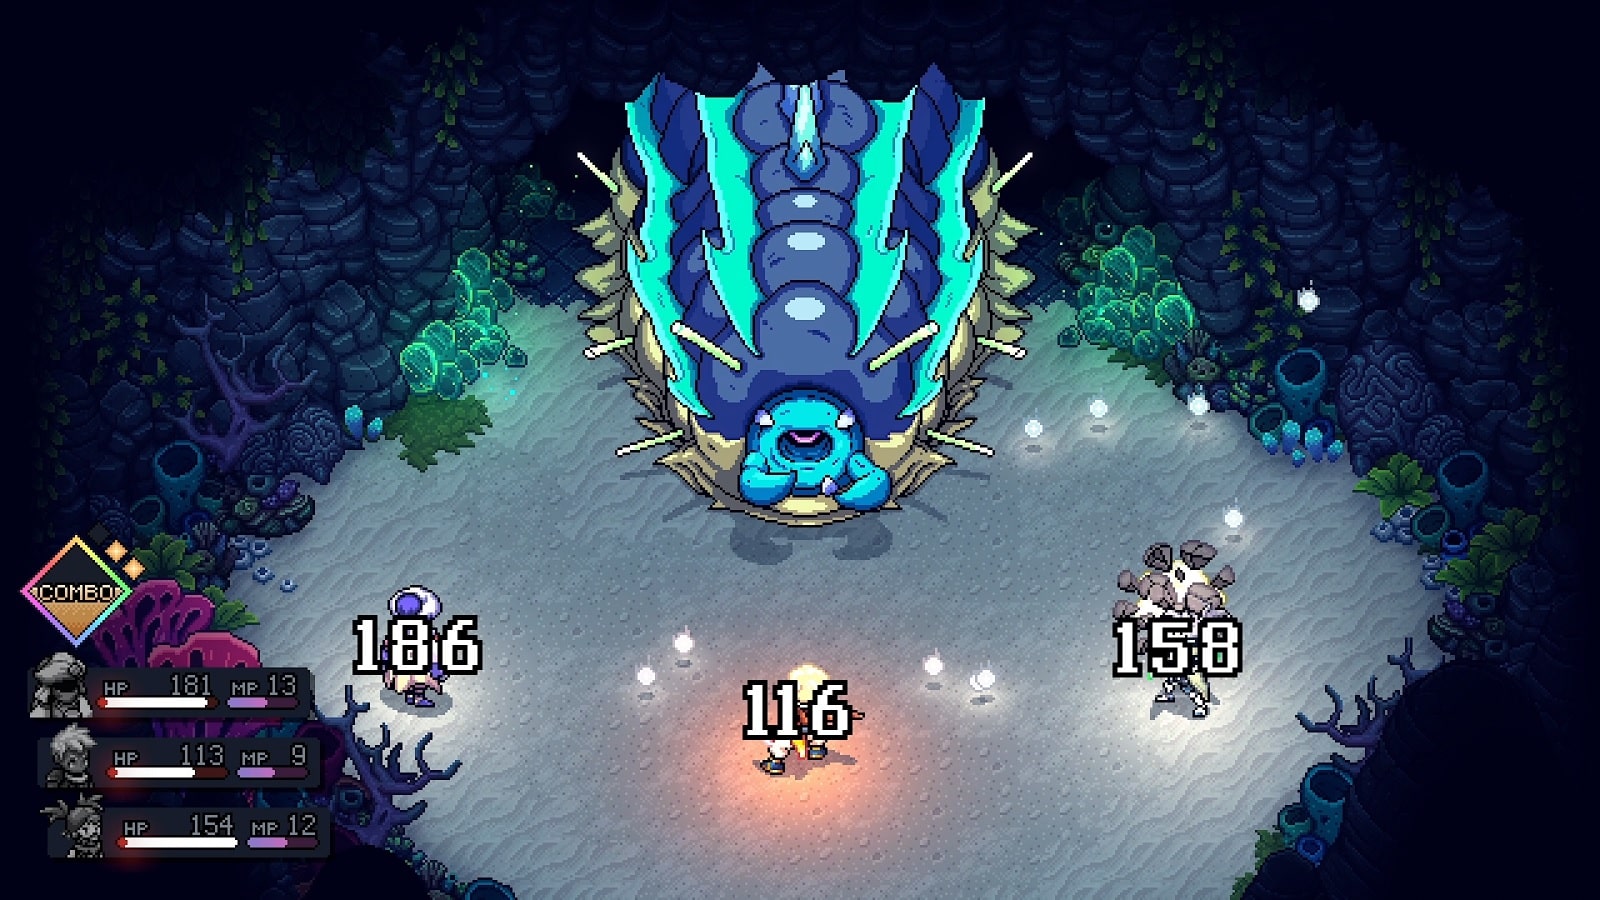
How to Defeat the Sea Slug in Sea of Stars
The Sea Slug is exactly like the Slug boss at the beginning of the game, albeit having the endurance of an end-game boss. Its move set is also the same with damage increases to ensure that it is a somewhat credible threat.
The slime attack is what you’ll be running into most often. It does a hefty amount of damage on hit but not enough to go beyond 50% of regular health. Sometimes the Sea Slug will spawn a bossbug to draw attacks away from it. In most situations, it is better to let the bug do its suicide charge attack since it has insane damage reduction and it only targets one character. But you’ll still want to time that block to mitigate as much damage as possible.
The Sea Slug’s most powerful attack happens when it thrashes around wildly. This attack will almost guarantee your team is reduced to 1 HP. It is good then that this boss is vulnerable to every delay attack possible and Resh’an’s group heal and Ultimate can quickly make up for all lost health.
Survive until the end and you’ll have earned the Hey, That’s a Reskin! Achievement. Head to the back of the claim your prize – an empty chest. That’s right. A chest full of stale air. Turns out, Resh’an’s puppet had Resh’an’s Legendary weapon, Aetherwood Cork, in its possession the entire time. Guess he wanted to give one final test for good measure. Never change, Immortal Alchemist. Never change.
And that’s everything we have for this Sea of Stars achievement guide. Hopefully, this little end-game side quest was for fun than frustrating. It was for me… at least for the most part.
If you want our thoughts on Sea of Stars, check out the review I did for it. You can also check out the trophy guide I’m slowly building towards.


