
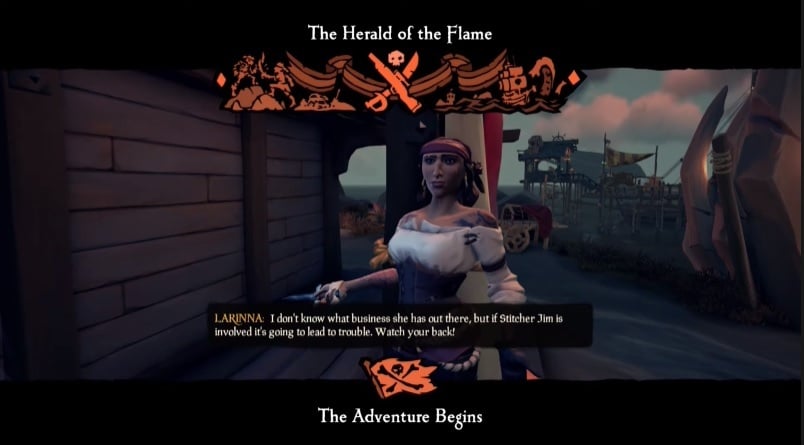
As the eighth Adventure in Sea of Thieves, The Herald of the Flame follows Belle as she investigates the prophecy of the Herald of the Flame regarding the Time of Resurrection.
The normally turbulent Devil’s Roar has grown eerily silent, so this is a question that may not go unanswered for long. Belle is getting ready to call on her pirate allies once more because she is convinced that the Time of Resurrection is drawing near and that they will find the location of the Herald of the Flame. In addition, Stitcher Jim has returned after being involved in the ‘Heart of Fire’ Tall Tale.
Stitcher Jim’s unwavering allegiance was betrayed in the Heart of Fire Tall Tale when he was unknowingly used as a human sacrifice in Flameheart’s scheme to call forth the Ashen Lords. Jim ran from the scene in a panic and hasn’t been seen by anyone since. As a result, Belle isn’t sure how significant of a role Stitcher Jim will play in the upcoming conflict she anticipates.
Starting today, October 13th, 2022 when ‘The Herald of the Flame’ is released, the events that have been building since ‘Heart of Fire’ will reach their climax. Prepare to return to Stitcher Jim’s lair at Liar’s Backbone and finish what you started all those months ago, you have two weeks to scout for him before the Adventure ends on October 27, 2022.
Sea of Thieves The Herald of the Flame Deeds
There are seven deeds that players can do during The Herald of the Flame adventure. (You can see these deeds and your progress in the Adventure Tab):
- Meet Belle at Liar’s Backbone: Belle has called for your help. Find her at Stitcher Jim’s old hideout
- Receive an Enchanted Lantern: Belle’s ally possesses a valuable tool that will help you in your search.
- Find all visions of Stitcher Jim: Memories of Jim’s past actions will help you track him down. There are seven of these memories to collect.
- Find hidden Reaper Scouts: Use the lantern to find memories of creatures spying on Stitcher Jim. There are three of these creatures to uncover.
- Examine Stitcher Jim’s Journals: Sticher Jim left three journals in his wake. What secrets might they reveal? There are three journals to find.
- Defeat the Herald of the Flame: A shadowy figure spoken of in Ancient prophecy, who must be stopped at all costs.
- Complete the Adventure: Return to Belle with triumphant news of the Herald’s defeat.
These deeds will require players to sail to numerous islands to find Sticher Jim and follow his trail to Molten Sands Fortress. Completing all of these deeds will unlock the Quencher of the Flame memento.
Sea of Thieves The Herald of the Flame Walkthrough
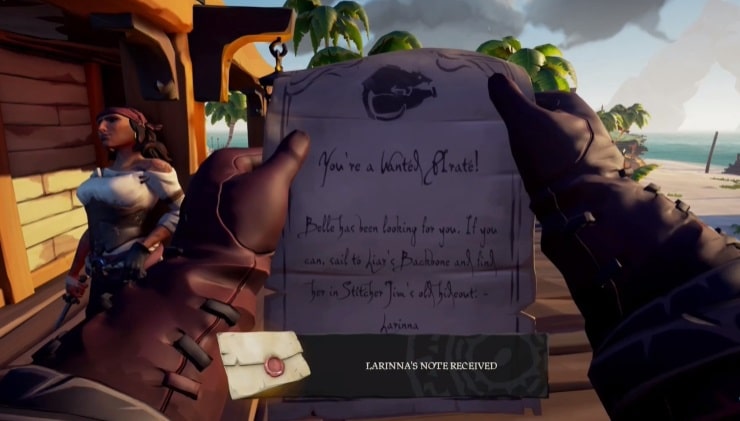
To start the Sea of Thieves The Herald of the Flame adventure, talk to Larinna at an Outpost to get started on this quest. She’ll be waiting for you outside the local tavern.
Speak with Larinna to begin The Herald of the Flame Adventure
Speak with Larinna and if you’re ready to get started, select the option BEGIN ADVENTURE. By selecting the BEGIN ADVENTURE option, you will immediately enter the first chapter of The Herald of the Flame Adventure.
Note: Given that there are no Checkpoints in this Adventure, all Chapters must be finished in a single session. Keep in mind that you can't begin the Adventure if you're already in the middle of a Tall Tale. The Herald of the Flame Adventure can be canceled in the same way a journey or Tall Tale can, by using the ship's Voyage Table.
Once you’ve started Chapter One, Larinna will tell you that Belle needs your help on Liar’s Backbone. Larinna is unsure of the cause but suspects it has something to do with the renowned Stitcher Jim.
Meet Belle at Liar’s Backbone
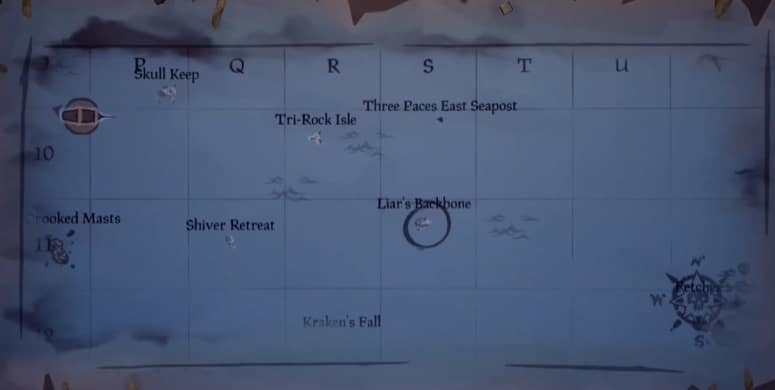
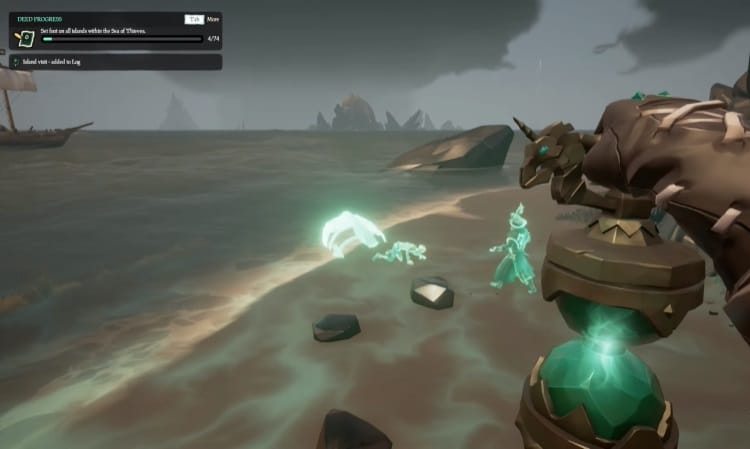
Set sail for Liar’s Backbone, the coordinates on the map are S-11, this will lead you to Stitcher Jim’s old hideout and you’ll find Belle there.
Your ship should be anchored on the Eastern beach, near Belle’s buoy, once you reach Liar’s Backbone. When you reach the island, jump on it and head west up the hill. You need to locate a huge stone door that is blocking the entrance to a cave. Once you’ve located it, use the lever to the left of the door to open it.
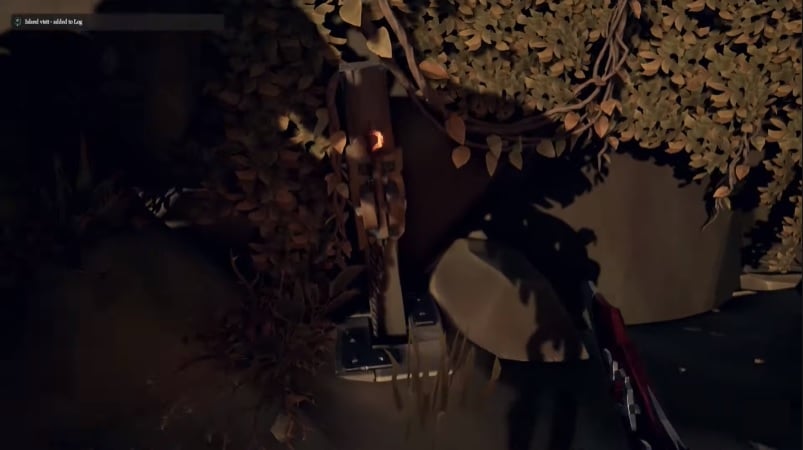
The entrance to Stitcher Jim’s former lair will drop if the lever is pulled. Go on in, Belle will be waiting for you on the wooden scaffolding at the far corner of the cave.

Speak with Belle
Talk to Belle to start Chapter 2 of the adventure, select the CONTINUE ADVENTURE conversation option. When the conversation begins, Belle will warn the you that an old prophecy about an Ashen Lord called the “Herald of the Flame” rising to power and resurrecting Flameheart may be coming true.
Belle has a hunch that Stitcher Jim is the legendary Herald of the Flame. But before going after him, Belle wants to make sure he really is the so called “Herald.” Belle will send you to The Devil’s Thirst, where Stitcher Jim was last seen.
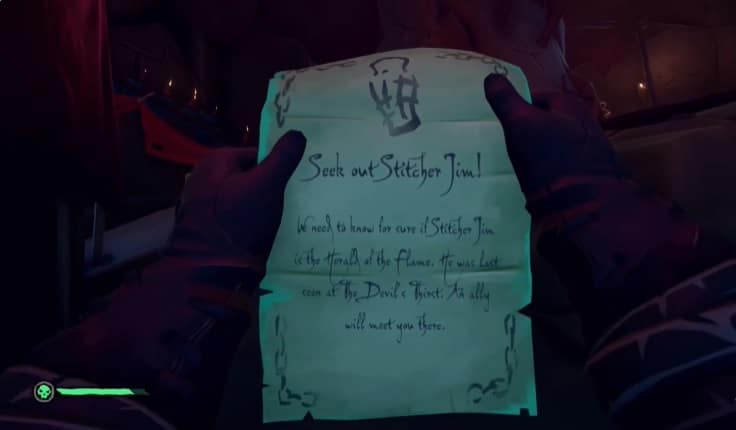
Seek out Stitcher Jim
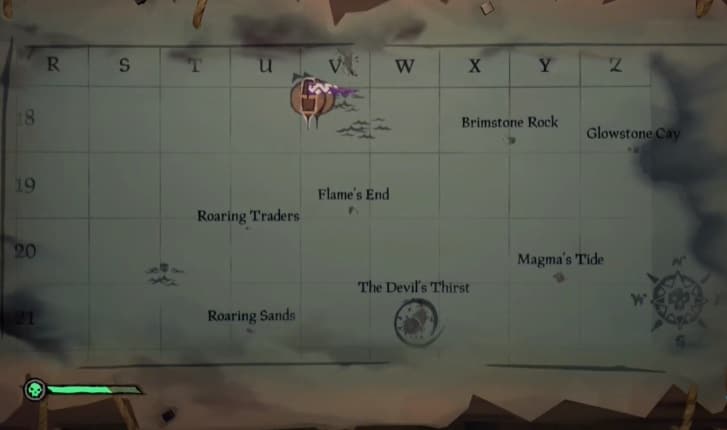
Now that you know what you need to do, it’s time to set sail for The Devil’s Thirst. Map coordinates W-21 will take you to The Devil’s Thirst, a large island located within the region of The Devil’s Roar.
During the hunt, you won’t be on your own. Belle has dispatched an ally, named Pendragon, to the island in advance to investigate. Your ship should be docked on the northern part of The Devil’s Thirst when you get there. The beach is where you’ll see Pendragon waving at you.
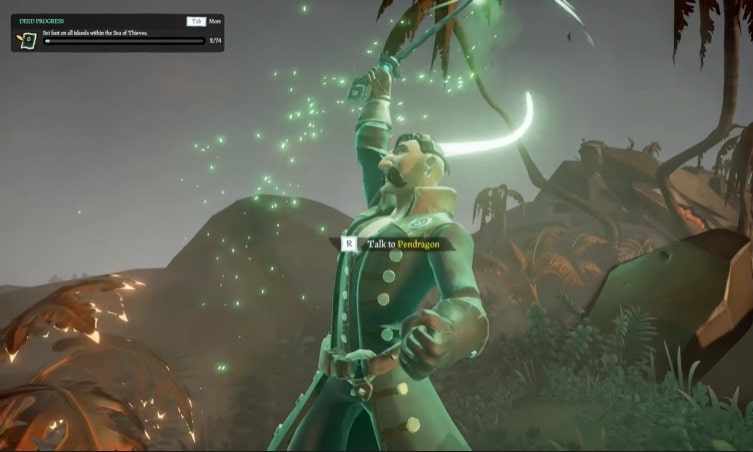
Talk to Pendragon and receive an Enchanted Lantern
Get out of the ship and approach Pendragon. Pendragon will share his experiences in trying to track down Stitcher Jim and learn his role in the prophecy. However, he explains that despite his efforts, Stitcher Jim has vanished, and if you want to find Stitcher Jim, you should look for clues in the path he took.
Pendragon will provide you with the use of his magical lantern in order to accomplish this. You can find Stitcher Jim with the help of the Enchanted Lantern, which can show you visions from the past. Memories of Jim’s past actions will help you track him down. There are seven of these memories to collect.
Find all visions of Stitcher Jim and Find hidden Reaper Scouts
Once you have the Enchanted Lantern, you can begin searching for your first memory. The first reaper scout, which takes the shape of an astral bird, is on a rock right just behind Pendragon. Raise your Magical Light near the object to locate it.
First vision of Stitcher Jim
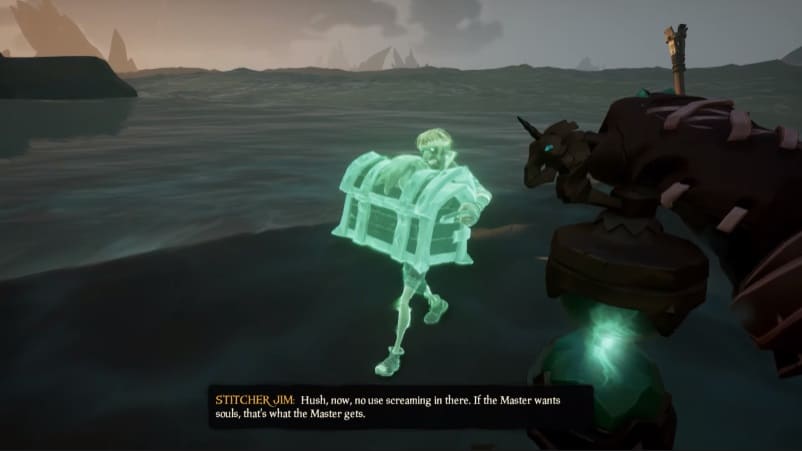
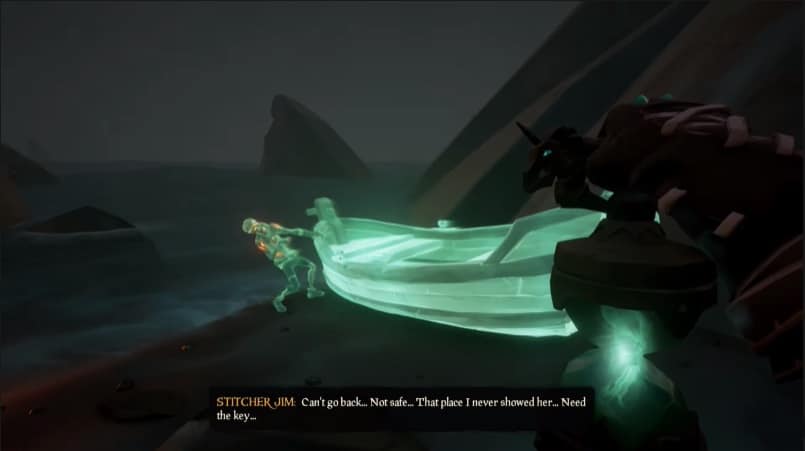
Turn around and walk toward the end of the North beach with your Enchanted Lantern on. You will soon see Stitcher Jim carrying the cursed Chest of Rage in the first vision. Pendragon will emerge once Stitcher Jim is done talking to tell us that this is only the beginning of Jim’s ordeal.

Second vision of Stitcher Jim
Proceed southward along the western shoreline after leaving the first vision. Once you’ve traveled about half way along the island, you’ll come upon the second vision of Stitcher Jim wailing in agony because of his injured arm. Pendragon will show up once more and tell you to continue searching for him.
Third vision of Stitcher Jim
Start walking down the base of the volcano southeast after leaving the second vision. The third and final vision has Stitcher Jim dragging a rowboat to the shore. Pendragon will make another appearance, this time to share the news that Stitcher Jim is likely headed to the city of Ashen Reaches.
Turning around from the third vision will reveal the second Reaper Scout perched on a nearby rock. Raise your Enchanted Lantern in the vicinity in order to locate it.
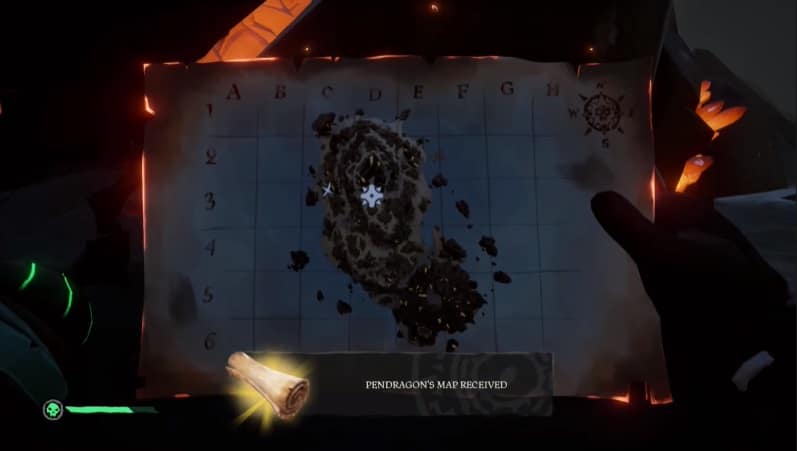
After you have discovered the third vision, speak with Pendragon, and he will provide you with a map for Ashen Reaches with an X marking the spot for the Sun Vault location.
Sail to Ashen Reaches
You should equip Pendragon’s Map from your Quest Radial once you reach Ashen Reaches. Both an “X” and a Sun icon will appear on the map. The Sun sign will lead you to the Sun Vault, and the ‘X’ will lead you to the Sun Vault’s totem key.
Travel to the area in the island marked with an X and dig there to unearth the key to the Sun Vault Totem. After you’ve acquired the key, proceed to the vault now that you have the key in your possession. Pendragon will show up close to the Sun Vault’s entrance.

Enter the Sun Vault and find the third Reaper Scout
A tunnel on the island’s northwestern edge leads to the Sun Vault. The tunnel is reachable from both the Northern cliff and the West shore. Once you enter the tunnel, keep an eye out for a series of painted sun symbols. The location of the vault’s entrance is denoted by solar rock paintings. The lock, which will appear opposite the sun symbols, will require a key.
When the key is inserted into the lock, the vault door will descend, allowing access to the safe. Use your Enchanted Lantern before entering to see the third Reaper Scout perched above the door’s latch.
As soon as you’ve located the Reaper Scout, enter the vault while still carrying your Enchanted Lantern. Your Enchanted Lantern will show the fourth vision of Stitcher Jim scratching down a symbol once you reach the vault. Then Pendragon will show up and instruct you to search the vault for hints.
Fourth vision of Stitcher Jim
The fourth vision of Stitcher Jim is a clue that you need to look for markings to open the stone door in front of the altar. The markings etched into the walls are the keys you seek. You can examine them closely to learn their hidden meanings.

Examine Stitcher Jim’s First Journal: “Alone”
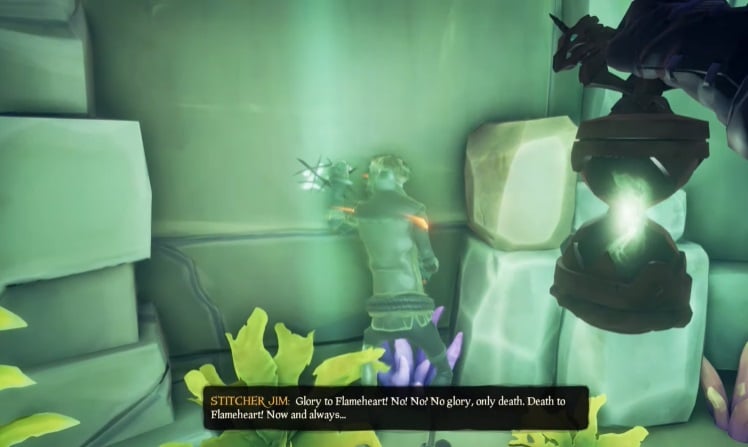
In the middle of the room, you’ll find an altar, on the left side of the altar’s stairway you’ll find Stitcher Jim’s journal titled “Alone”. The most important piece of information can be found in the very first journal which you need to read. This journal ends with the words “DEATH TO FLAMEHEART!”
Following a thorough examination of the journal and its clues, the final step in solving the mystery is to ignite the four pillars surrounding the altar.

Solve puzzle to open altar door
The phrase “DEATH TO FLAME HEART” can be formed using the required skeleton runes, read from left to right. The solution is entered by rotating the blocks on the pillars surrounding the altar. After the blocks have been turned to reveal the appropriate skeleton runes, the altar door will open. The runes should be entered in the following sequence:


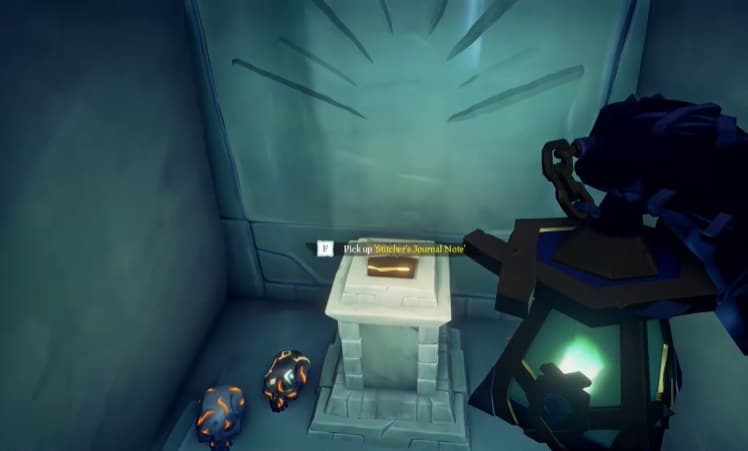
You can then press the hexagonal symbol in front of the altar with a palm symbol, and the stone door in front of the altar will open, revealing a journal note from Stitcher Jim.
Follow Stitcher Jim’s clue to Flintlock Peninsula
Read Stitcher Jim’s journal note by equipping it on your Quest Radial. Stitcher Jim, as you will find out, sailed to the southern coast of the Flintlock Peninsula in order to uncover the tomb of Flameheart. Go back on your ship and sail to Flintlock Peninsula. The coordinates to Flintlock Peninsula is W-15 on the map in The Devil’s Roar.
Drop anchor near the island’s southern beach and walk ashore. Make sure you equip your Enchanted Lantern then proceed to the area of the beach to the south of the white flag, close to the South Crystal Pool. You’ll find the fifth vision of Stitcher Jim being confronted by the Servant’s scouts. Pendragon will show up and tell you to carry on heading to the caves to the north, where Flameheart is buried to find answers to what transpired here.
Fifth vision of Stitcher Jim
From the fifth vision, ascend the trail that runs along the ridge of the hill on the southernmost part of the island. You will arrive at the cave entrance, proceed inside the cave and follow the path to the shrine of the enormous skull that is located there. When you have your Enchanted Lantern equipped, you will be able to see the sixth vision of Stitcher Jim.

Sixth vision of Stitcher Jim
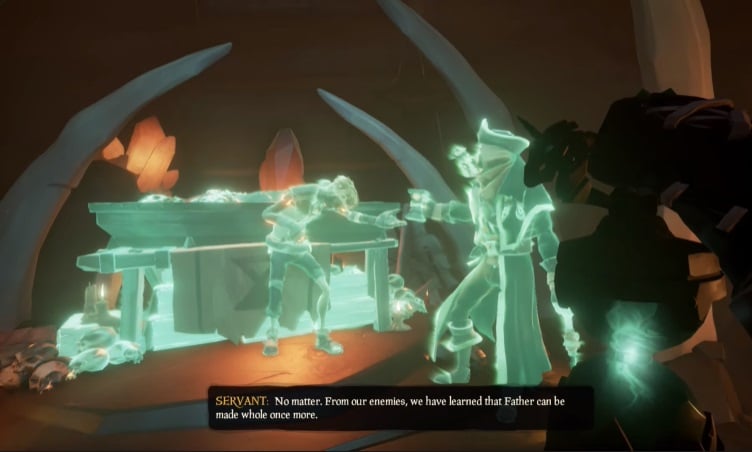
The sixth vision of Stitcher Jim shows an unclear exchange between him and the Servant, of what appears to be Jim playing a big part in Flameheart’s grand design. After finding the sixth vision of Stitcher Jim in the cave entrance, Pendragon will make another appearance.
When you speak with Pendragon, he will tell you that it looks like Belle is right after all, then the massive stone door that leads into the tomb will open. Enter the tomb and make sure you equip your enchanted lantern so you can see the seventh and last vision.
Seventh vision of Stitcher Jim
The seventh and last vision of Stitcher Jim reveals his involvement as the vessel towards the becoming of Flameheart. Pendragon will re-emerge from within the tomb and he’ll send you off to see Belle again with evidence of Stitcher Jim’s involvement.

Examine Stitcher Jim’s Second Journal: “Purpose”
Just below the seventh vision of Stitcher Jim, you’ll find his second journal, “Purpose”. Read through it and you’ll find his convoluted thoughts from being chosen as the vessel for Flameheart’s becoming.
Leave the tomb and sail back to Liar’s Hideout to speak with Belle.
Speak with Belle again
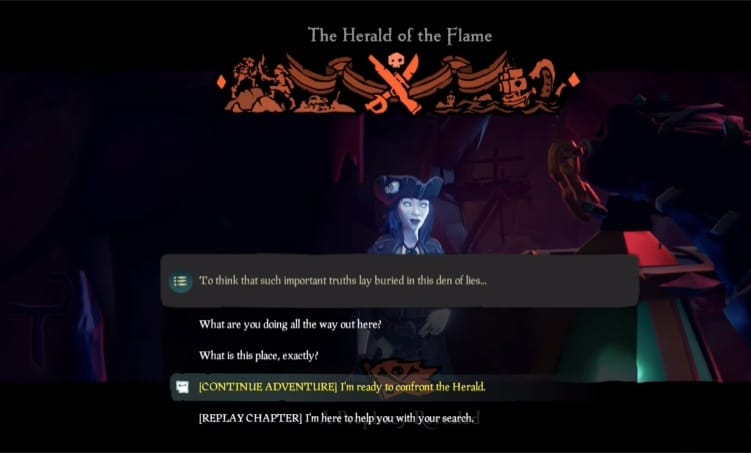
Sali back to Liar’s Backbone start Chapter 3 of the adventure. Meet with Belle at Stitcher Jim’s former hideout, and inform Belle of the things you found out about Stitcher Jim’s involvement. If you’re ready to face the Herald of the Flame, select CONTINUE ADVENTURE.
After you press CONTINUE ADVENTURE, a vortex of Ashen Winds like a tornado will form in the east, directly over the Molten Sands Fortress.
Tips before you CONTINUE:
- It takes at least four Trident of Dark Tides to kill an Ashen Lord such as the Herald of the Flame
- Head to any treasury and loot as many Trident of Dark Tides to help you complete the final battle with the Herald of the Flame
- If you are playing online and you see an active tornado (the vortex of Ashen Winds) wait for it to be gone before you you press CONTINUE ADVENTURE because this means that another crew is doing the same quest and is already doing the final battle. Continuing at this point may cause issues since you are attempting to activate something that is already active.
- Remember that you’ll have to wait a while before you can resume the adventure if there are other active crews doing the same adventure. The timeout was put in place so that pirates wouldn’t be able to exploit the adventure loot in the Molten Sands Fortress.
- Lastly, it is better to play with a crew. The other pirates in your fleet can join the battle against the Herald of the Flame, just like in any other Ashen Lord World Events.
If you’re ready and everything is all set, get on your ship and head for the Molten Sands Fortress to defeat the Herald of the Flame.

Defeat the Herald of the Flame
The fight with the Herald of the Flame will begin as soon as you approach the ritual that will awaken it. The Herald of the Flame will call upon armies of Phantom Reapers to assist during the battle’s second phase. He also possesses the ability to trigger an eruption of the volcano. So, you should either hide in the tunnel leading to the vault or return to your ship.
Since the volcano will erupt at some point during the battle, and make sure to dock your ship in a location close so you can patch up any holes caused by falling rocks. To defeat the Herald of the Flame, survive all the phases like you would on a battle with any other Ashen Lords.
After you successfully defeat the Herald of the Flame, the flame wall will collapse, allowing you to access the vault. Go down the tunnel to the vault and speak with Pendragon again. You will see him destroy the Herald’s Ashen skull with his Sword of Souls. He will then ask you to return to Belle one last time to deliver the good news.
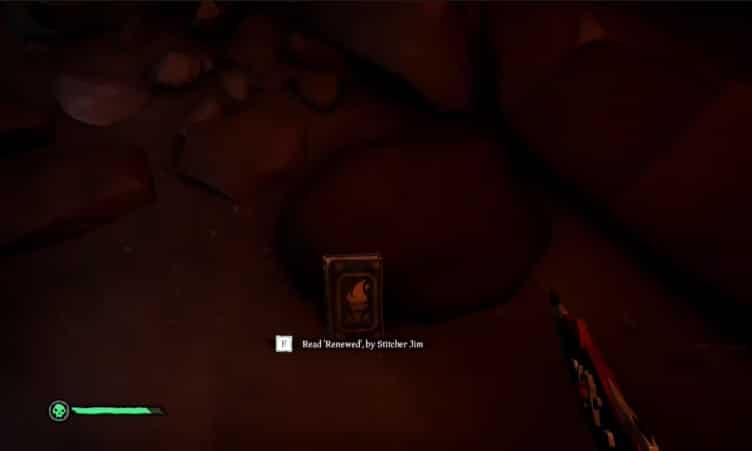
Examine Stitcher Jim’s Third Journal: “Renewed”
On the southwest wall of the vault, not far from a hanging cage, is the final entry in the journey’s journal. Examine Stitcher Jim’s third journal, after talking to Pendragon. Read the third and final journal before sailing back with all the fame and glory that comes with it.

Complete the Adventure
Return to Belle with triumphant news of the Herald’s defeat. To Complete the Adventure, you must sail to Liar’s Backbone and have a chat with Belle. Tell her you’ve finally put an end to the ritual. As soon as the final cutscene of the Adventure has finished playing, the Adventure will be done and you can claim your Sea of Thieves The Herald of the Flame Rewards. You can quit at any time by getting to the “Adventure Complete” screen.
Sea of Thieves The Herald of the Flame Rewards
- Stitcher’s Stitches (jacket) – Stitcher Jim wore this jacket style when he first joined the Bilge Rats; it was based on a traditional work coat.
- Quencher of the Flame (title) – “A Title awarded to those who defeated the Herald of the Flame and ended his ritual.” Earn this Title by completing all the required deeds in The Herald of the Flame adventure.
The Herald of the Flame Adventure has the same reward system as the other adventures. The first cosmetic item you can claim is a jacket called Stitcher’s Stitches, which you have essentially stolen from the main NPC of the Adventure, Stitcher Jim himself. You can earn his jacket by finishing the Adventure at any time during its two-week run. And if you have completed all the deeds listed above by following our guide, you can also earn the title Quencher of the Flame.
If you like this guide, check out our other Sea of Thieves content.
Also check out this awesome video by Syrekx on The Herald of the Flame Full Guide (+ All Journal Locations) – Sea of Thieves:


