
Grind the Bad Apples is a trial part of Program 2 in The Outlast Trials. In this trial, players are sent out to dispose of the animatronic murderer kids. Read ahead as we go through the tasks in order to complete the Grind the Bad Apples trial in The Outlast Trials.
Grind the Bad Apples Main Objective: We must eliminate the misbehaving children. Take them to the “Root Canal,” where the good children won’t see you give them a gentle correction.
The Outlast Trials: Grind the Bad Apples Trial Walkthrough
To start the Grind the Bad Apples Trial, you must infiltrate the Fun Park, navigate through its rides and buildings, and get into the Root Canal ride to destroy the robot kids. There will be enemies wandering including Mother Gooseberry is out to hunt you once she gets alarmed of your presence. Although you cannot do much against these enemies, you can use your skills and surroundings to outsmart them and shake them off your tail.
Infiltrate the Fun Park
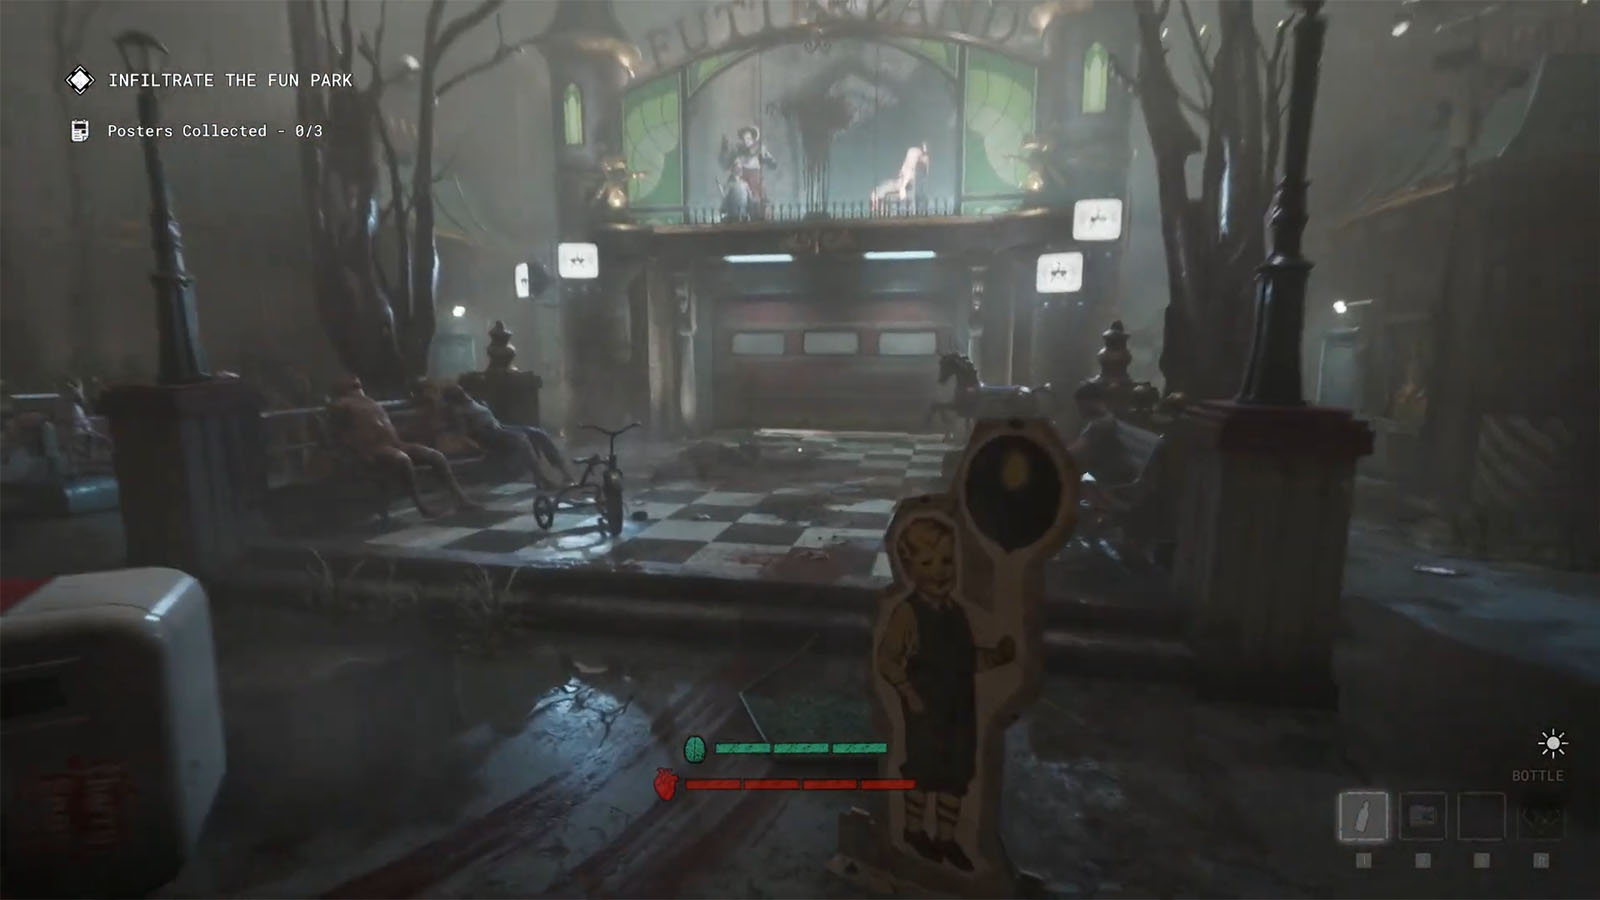
You’ll arrive outside the Fun Park and your objective is to make it inside the park. Go through the buses and through the path on the right where you will find a shutter gate. Lift this gate up and you will be inside the park.
Reach the Root Canal Ride
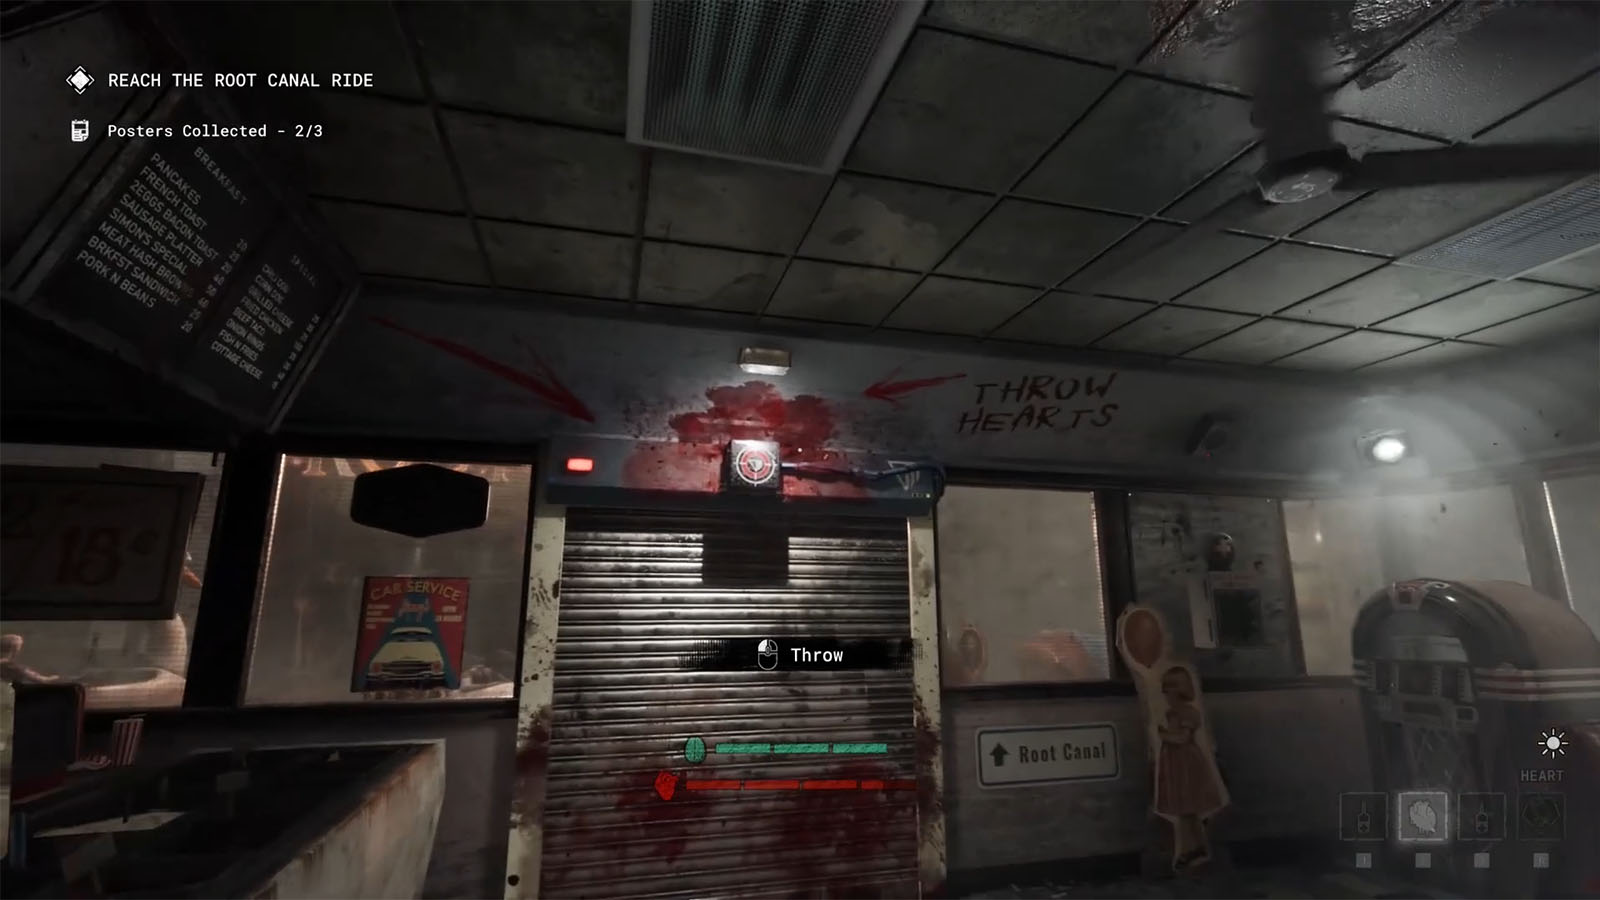
To reach the Root Canal ride, follow the signs to the left which will lead you to the merry-go-round area. The next path with the sign will be boarded up, so make your way to the diner. Inside the diner, grab hearts inside the drums and throw it on the target on top of the shutter to get to the Root Canal ride.
Get Access to the Root Canal Ride
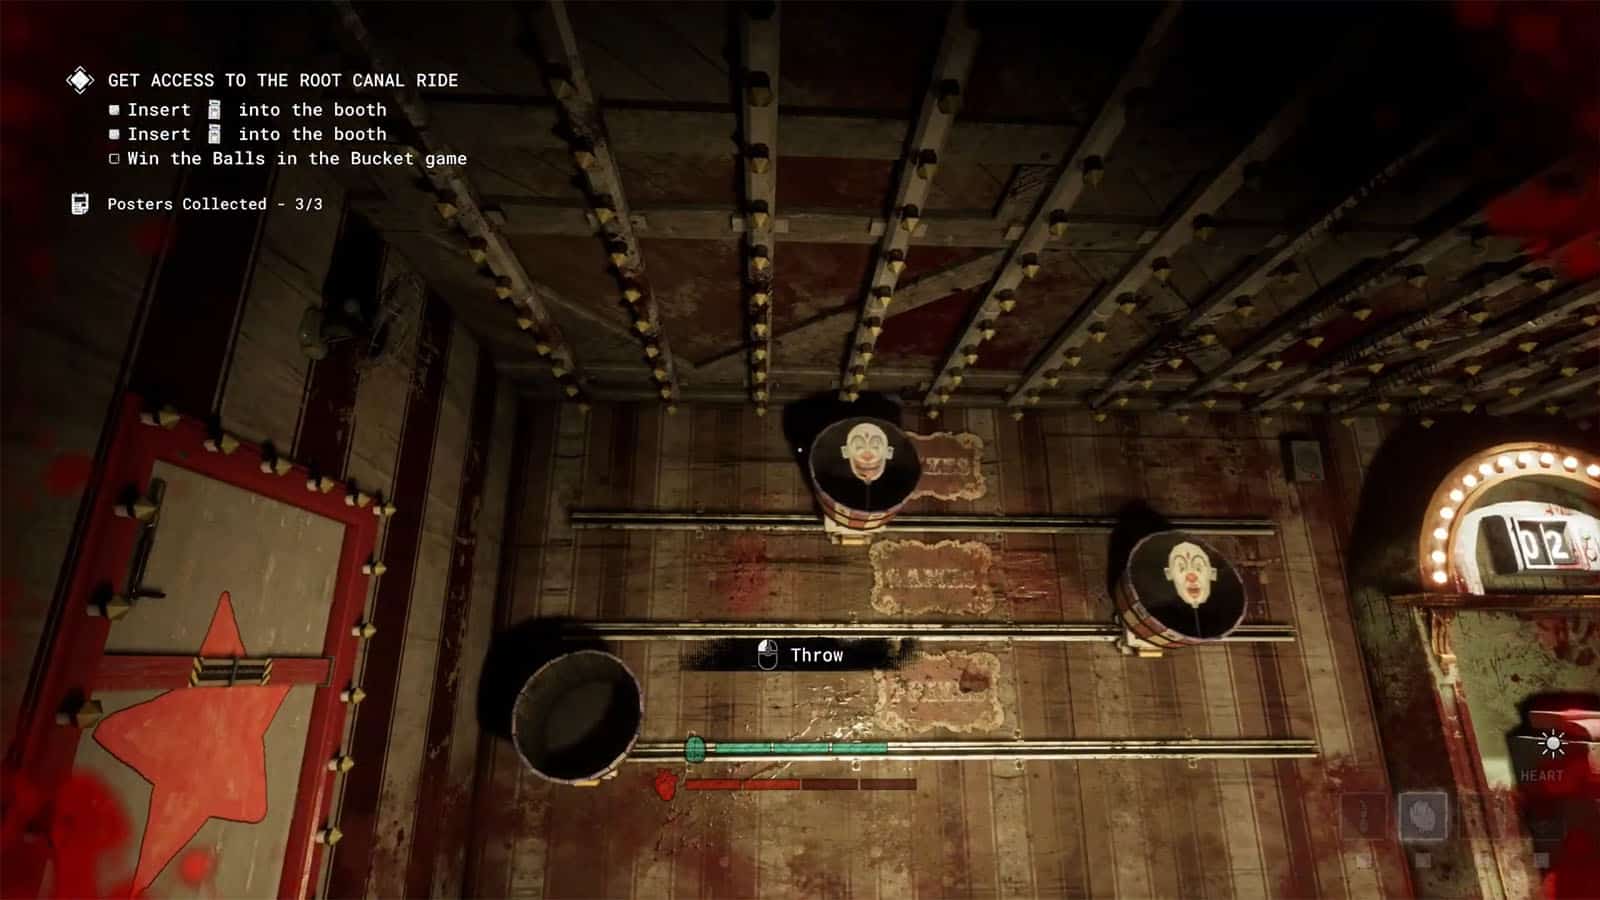
The ride itself is still inaccessible and you will first have to win three games in order to get the tickets to go to the. All these games require you to hit three targets using the hearts in the diner. The problem is you can only carry one heart at a time, so you will have to go back and forth.
Once you hit all the needed targets in a game, you will win a ticket; don’t forget to claim it at the game booth. However, this will also set off an alarm that will call the attention of the enemies in your area.
Once you have the tickets, head over to the ticket booth at the Root Canal ride and hand over all of your tickets to get access to the ride.
Regroup into the Root Canal and activate the ride
Go inside the gate of the ride, wait for the dialogue to finish, then press the button.
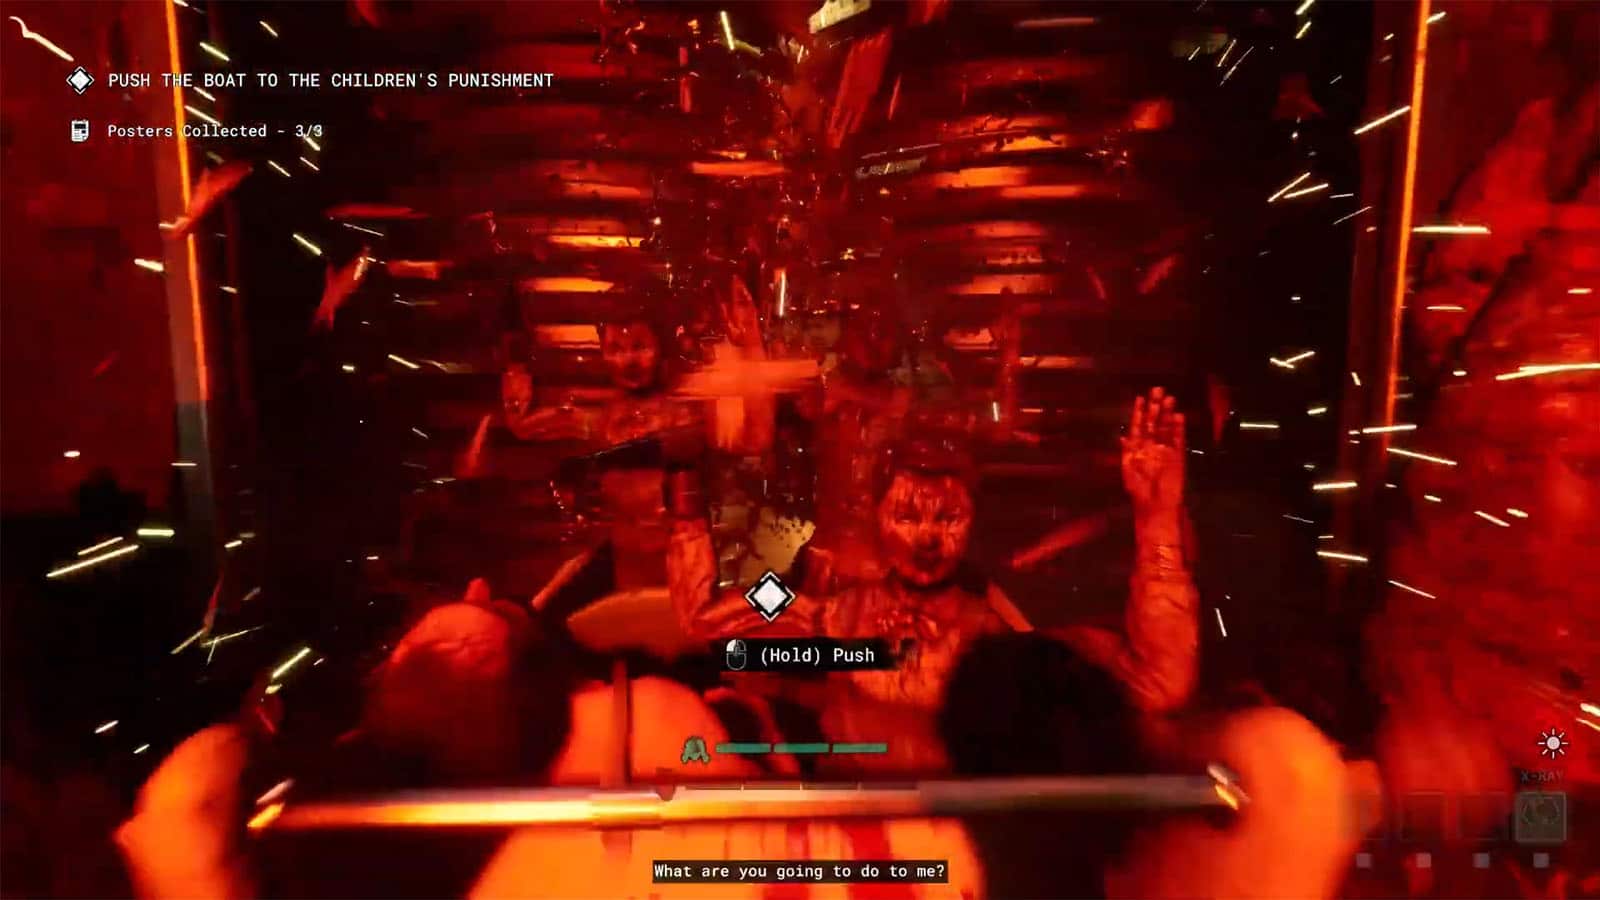
Push the boat to the Children’s Punishment
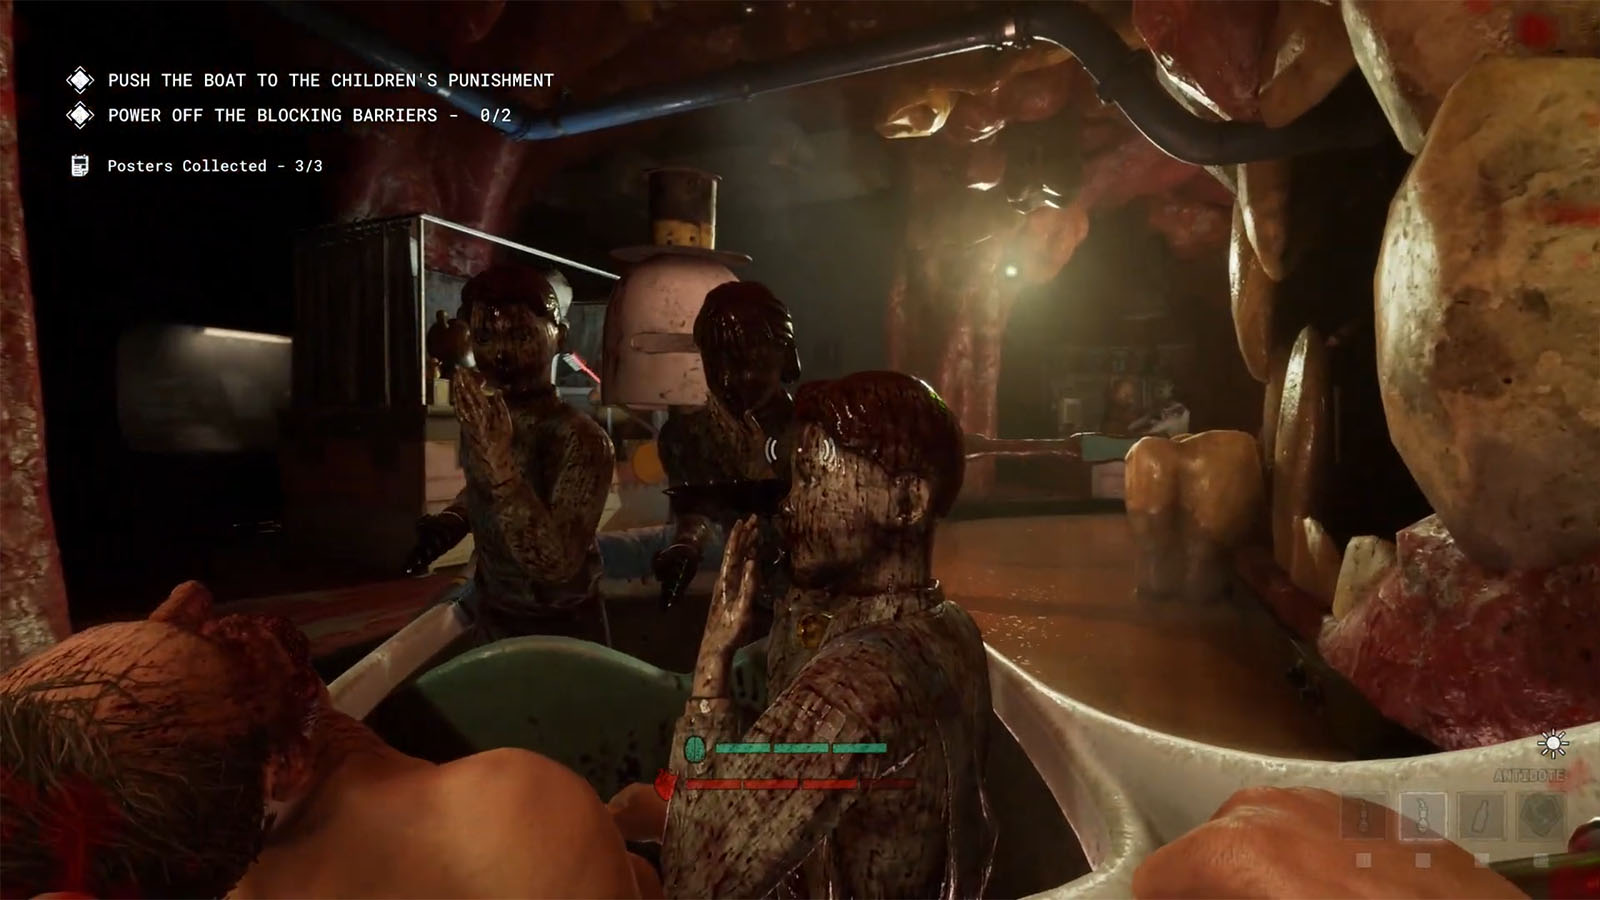
A cart will then appear that you will have to push through the ride, but there will be barriers blocking the rails.
Power Off the Blocking Barriers
Push the cart near the barrier, then follow the cables on the barrier to locate the power sources. Take out the power sources to raise the barriers and allow you to pass. Continue pushing the cart past the barriers all the way to the top.
Raise the Root Canal water level back up
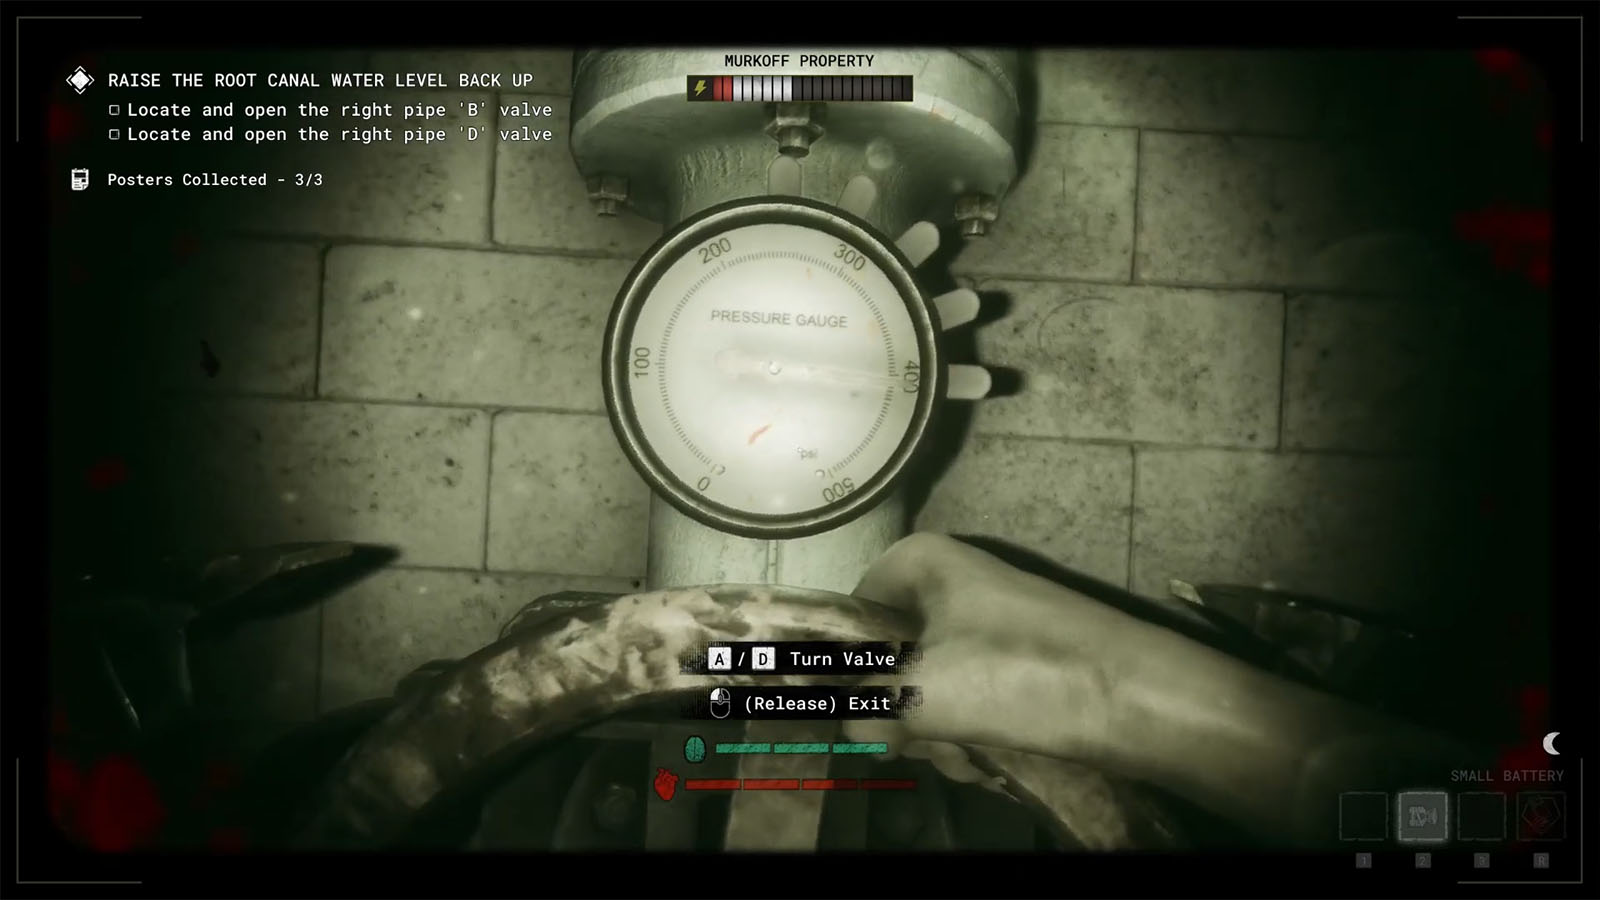
The water will dry out once you reach the top, so you will have to turn the water pumps back again. There are two colored pipes that you can follow back to the pumps. These will be snaking all across the ride. There are also a lot of wheel valves that have traps if you turn them. Open the right valves for each of the pipes to proceed.
Once you have the water level back up, you can continue pushing the cart to the grinder.
Return to Shuttle
At this point, the enemies will be highly alerted and will be chasing you. You will need to make your way back to the shuttle and press the button to call the shuttle.
Grind the Bad Apples Completion Rewards
- First time completion:
- +1500 XP
- +$500
- +$1000 for A+ rating
- Regular rewards:
- Random cosmetic
- Random cell decoration
- XP and $ based on rating
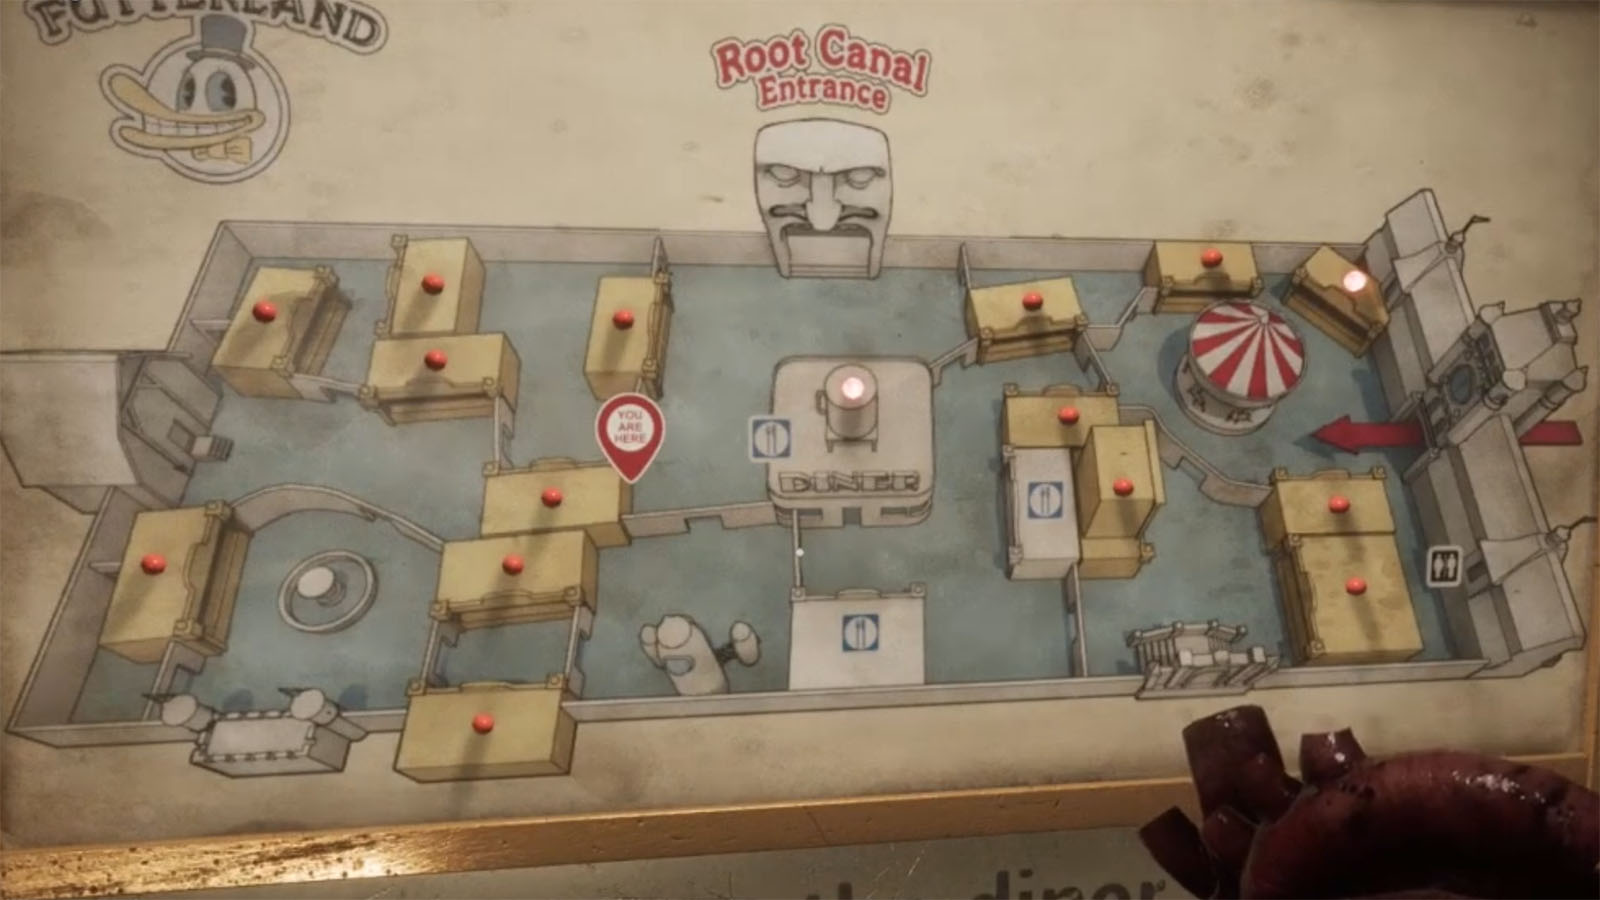
Grind the Bad Apples Poster Locations
There are four posters to be found within the Grind the Bad Apples trial.
- Poster #1 – This can be found within the room on the right as soon as you infiltrated the park.
- Poster #2 – This can be found within a back room beside the merry-go-round ride.
- Poster #3 – This can be found in the building near the diner.
- Poster #4 – This can be found inside the Pump Room B.
See next The Outlast Trials Punish the Miscreants MK-Challenge Walkthrough


