
The Medieval is the third world that players can visit in LEGO Bricktales. In this level, the citizens of the kingdom is stricken by an illness and it is up to the players to find out what’s causing them to get sick, as well as finding the cure.
In this guide, we will talk about the Medieval level in LEGO Bricktales, how to solve the builds and the puzzles, and locate the collectibles within the level.
Medieval Walkthrough and Builds
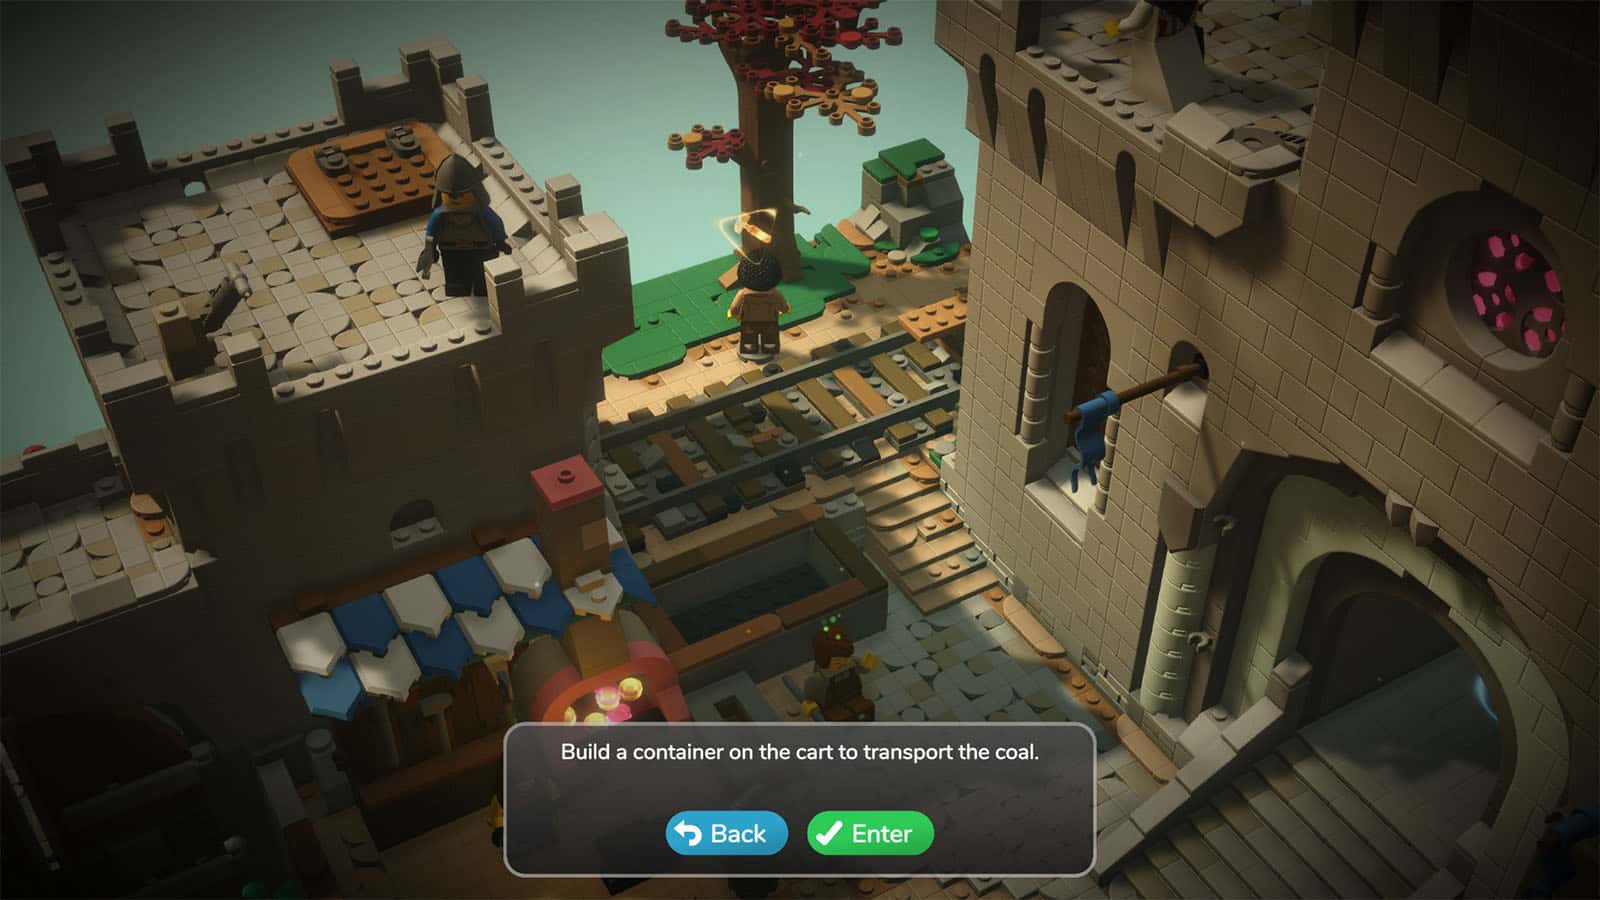
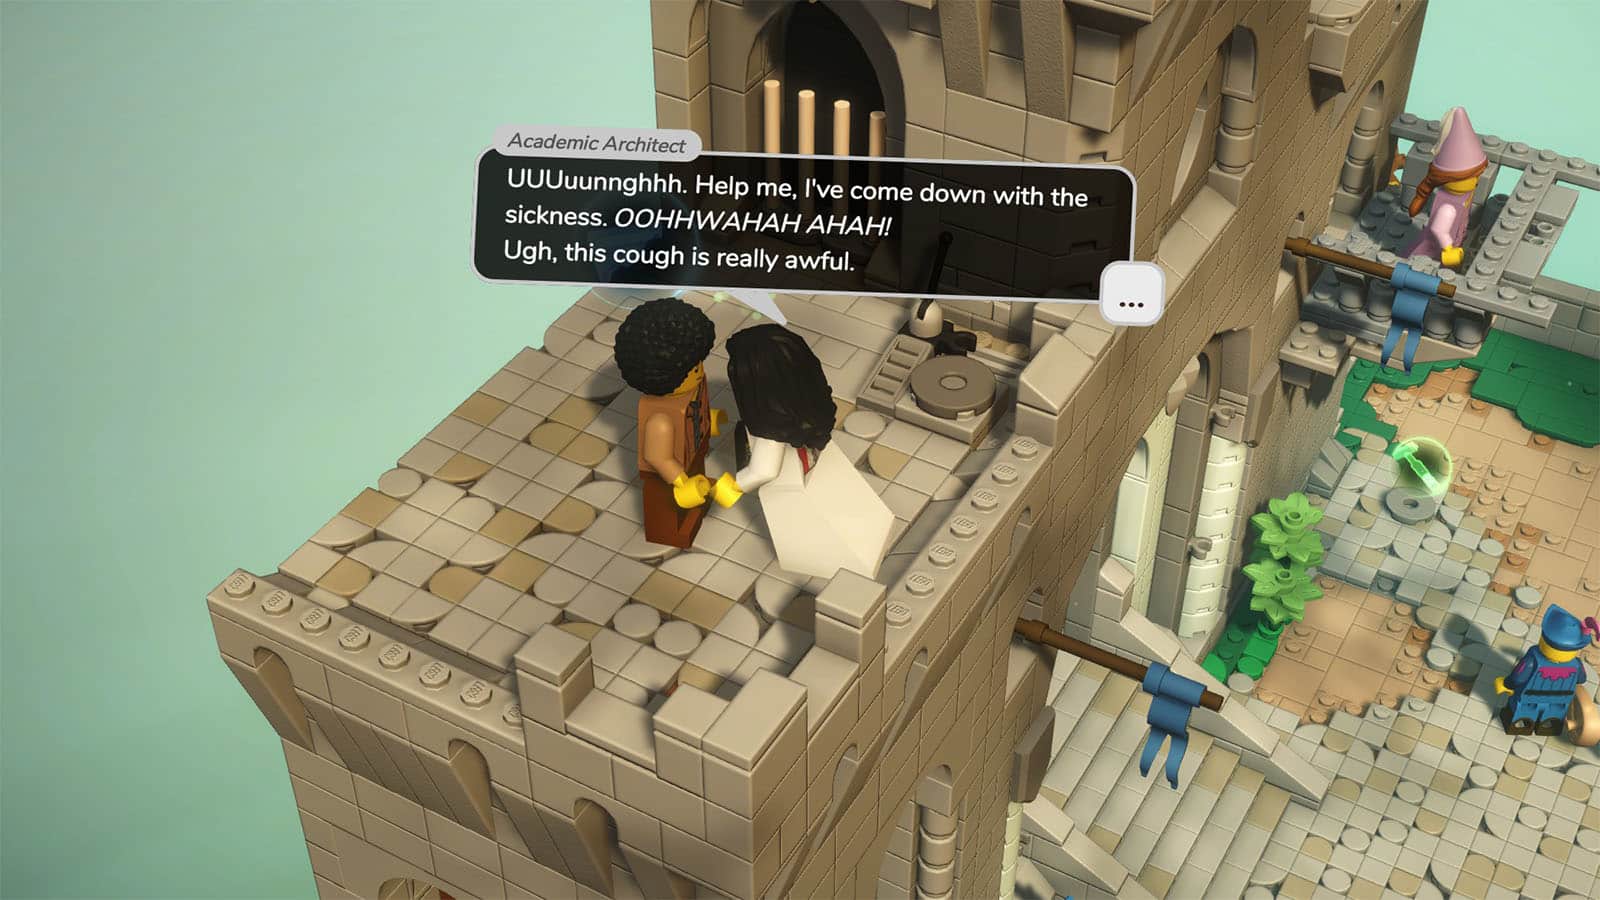
You arrive within the walls of a castle. Head to the castle and speak to the King. Then, go to the Chief of Guard standing at the gate and he will tell you to get a sword before you can venture out. You then head to the Industrious Smith, but he’s out of coal and you need to go to the Charburner.
However, the Charburner is sick and needs your help getting coal by fixing the transport cart. The build shown in the examples below are simple, if not the simplest solutions, but you can change the build as you like, so long as it passes the objective.
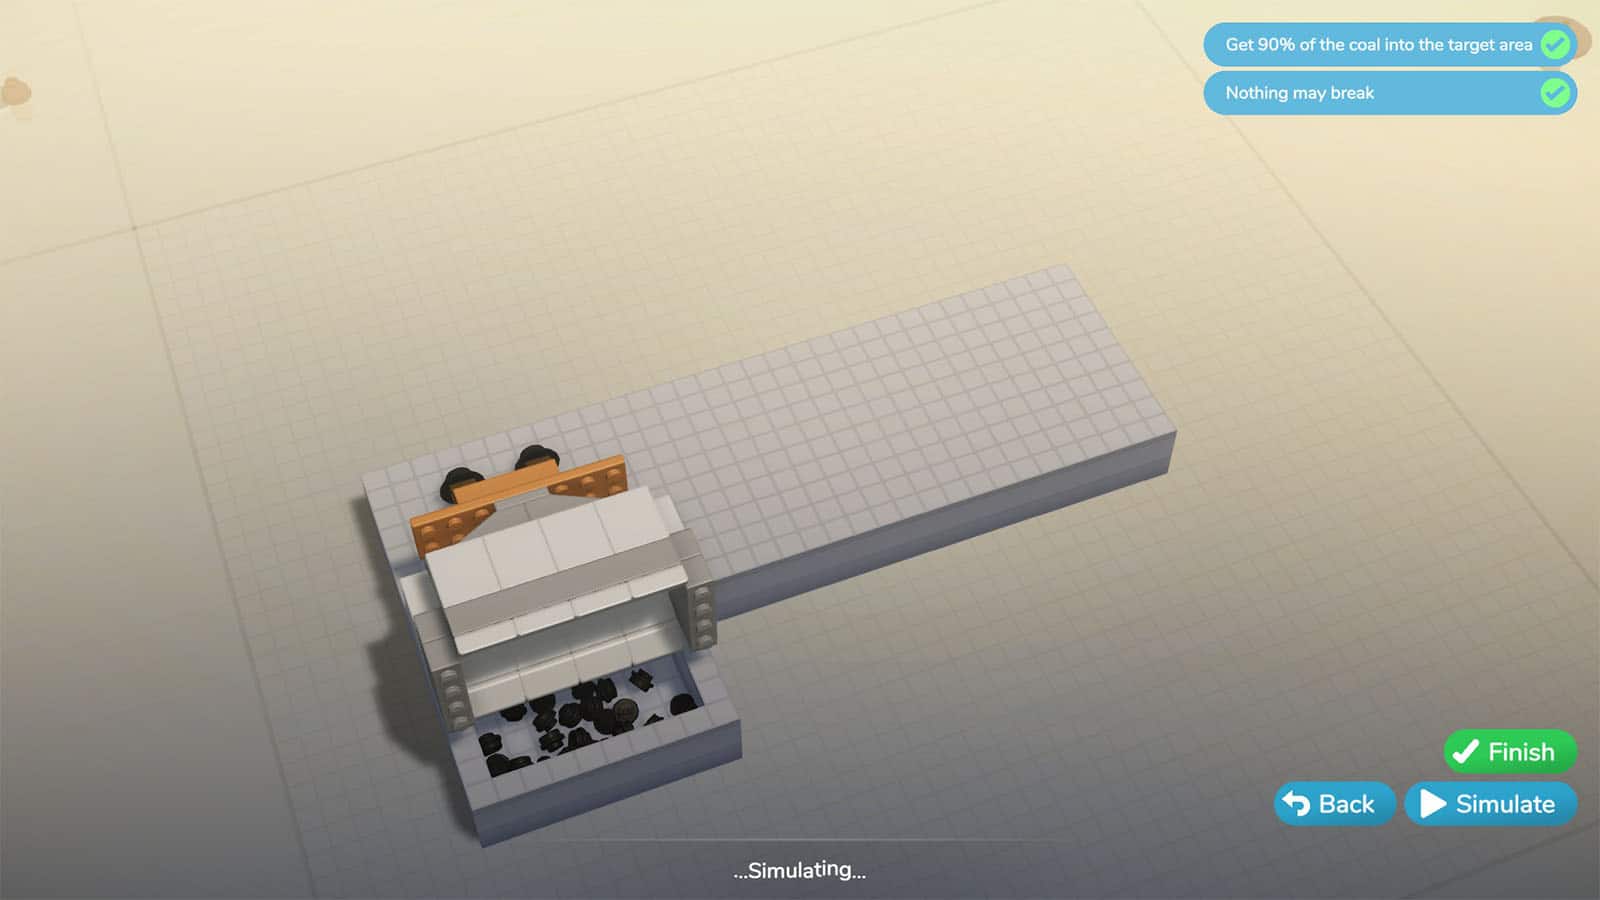
Medieval Build #1 – Coal Cart
For the coal cart, you need to place the tall 2×2 bricks along the sides first, then place the thinner blocks on both ends. Make sure that the slopes are facing down inwards to catch all the coals. You also need to use the 2×3 plates to make 2 layers of flooring inside the cart to prevent the coals from getting stuck when being poured. Do not make the wall facing the dumping spot too high, or the coals will overshoot.
Once done, get your sword forged by the smith and head back to the guard.
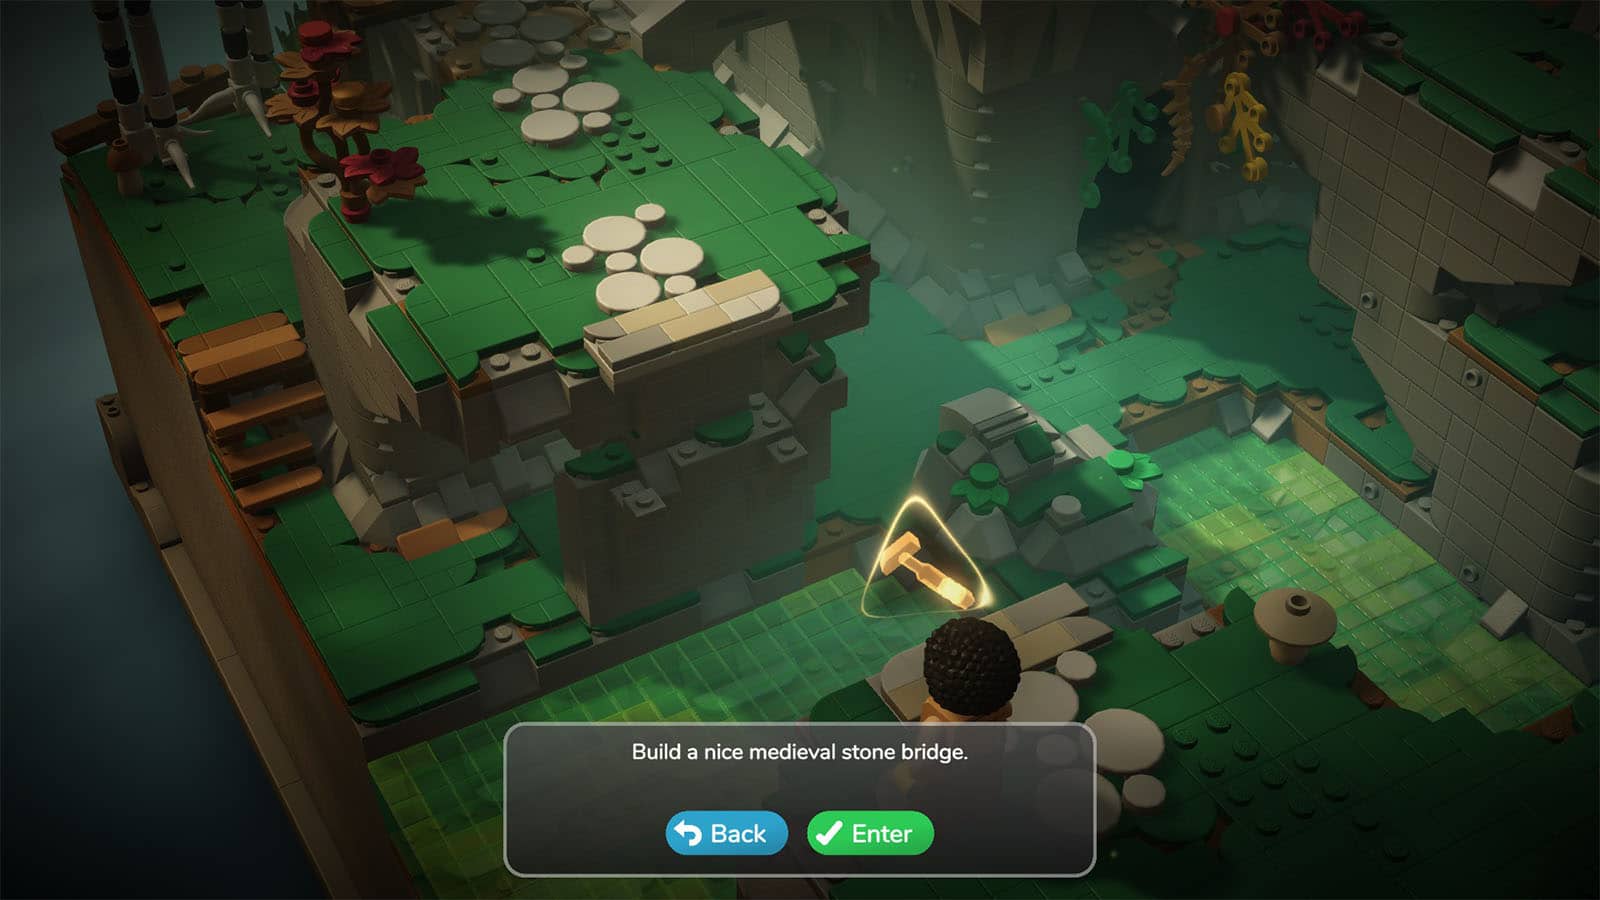
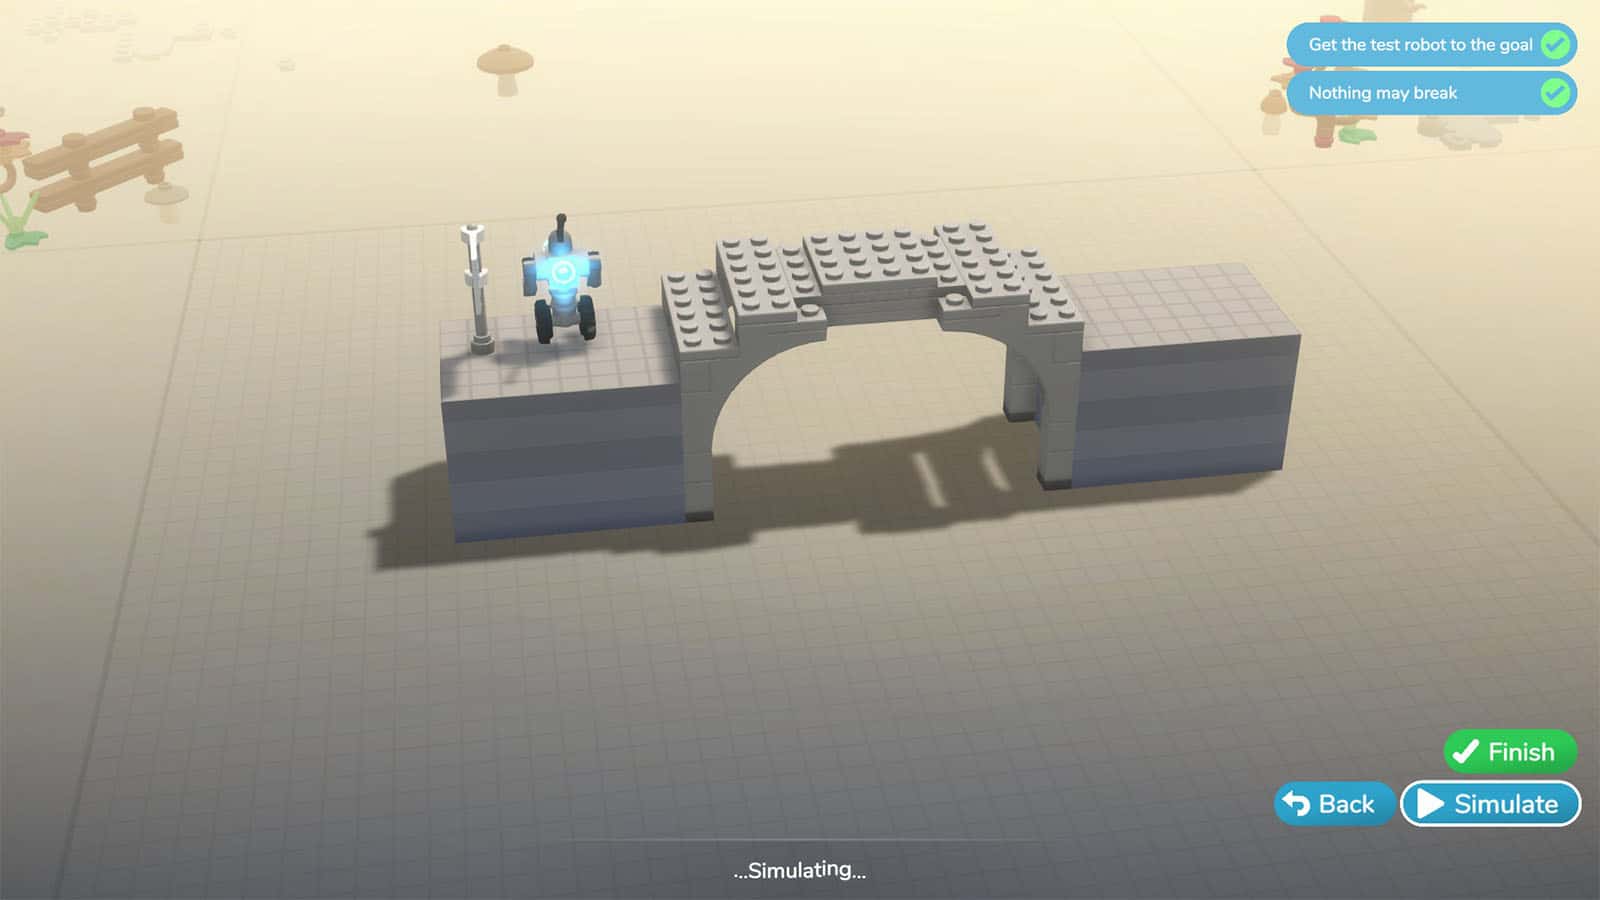
Medieval Build #2 – Stone Bridge
With the sword on hand, you will then be able to venture outside the castle. You will then need to build a stone bridge to cross to the other side. Make use of the arches to be able to reach both ends of the gap.
Explore the area and head to the northwest path where you will pass by the Wizard Imposter who needs help with his rabbits.
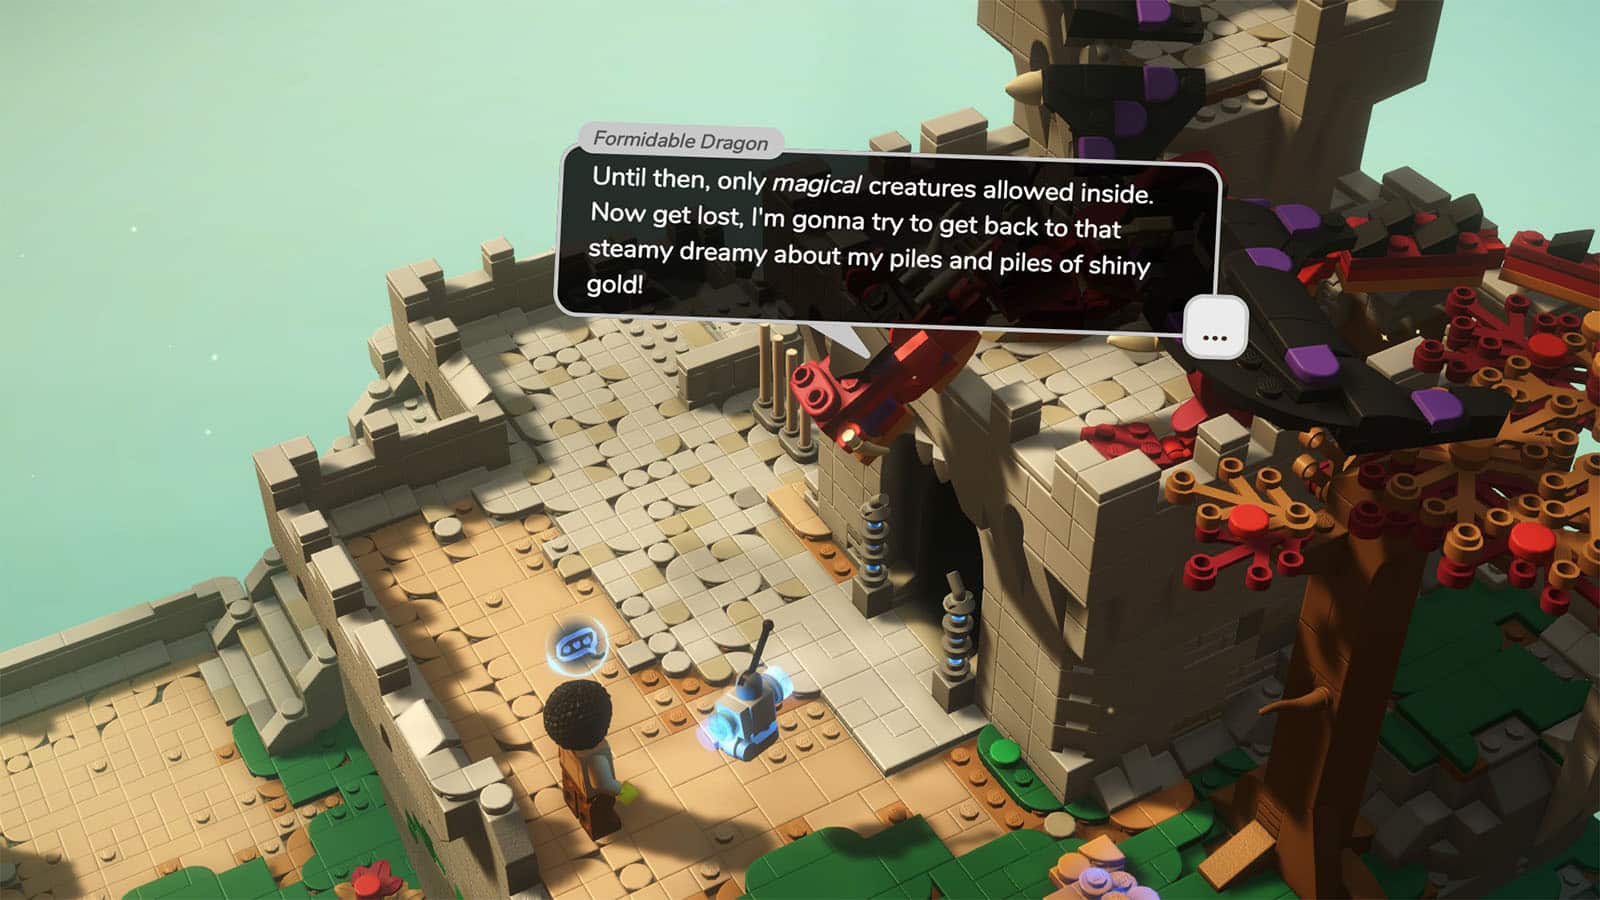
Enter the cave that leads to the Dragon’s lair. Head to the east end and follow the path down into the lower level. When you arrive at a dead end, head to the west and you will be able to get your whip to get the other collectibles in the area. Head back up a level and climb up the ladders to arrive at the exit. Head further back up and talk to the Dragon and it will require you to gather gold before it lets you enter the Skill Temple.
Open the gate near the lair to get a shortcut back to the forest. You then need to talk to several of the people in this level to do some odd-jobs in exchange for some gold. First off, visit the Scatty Wizard Weniglin.
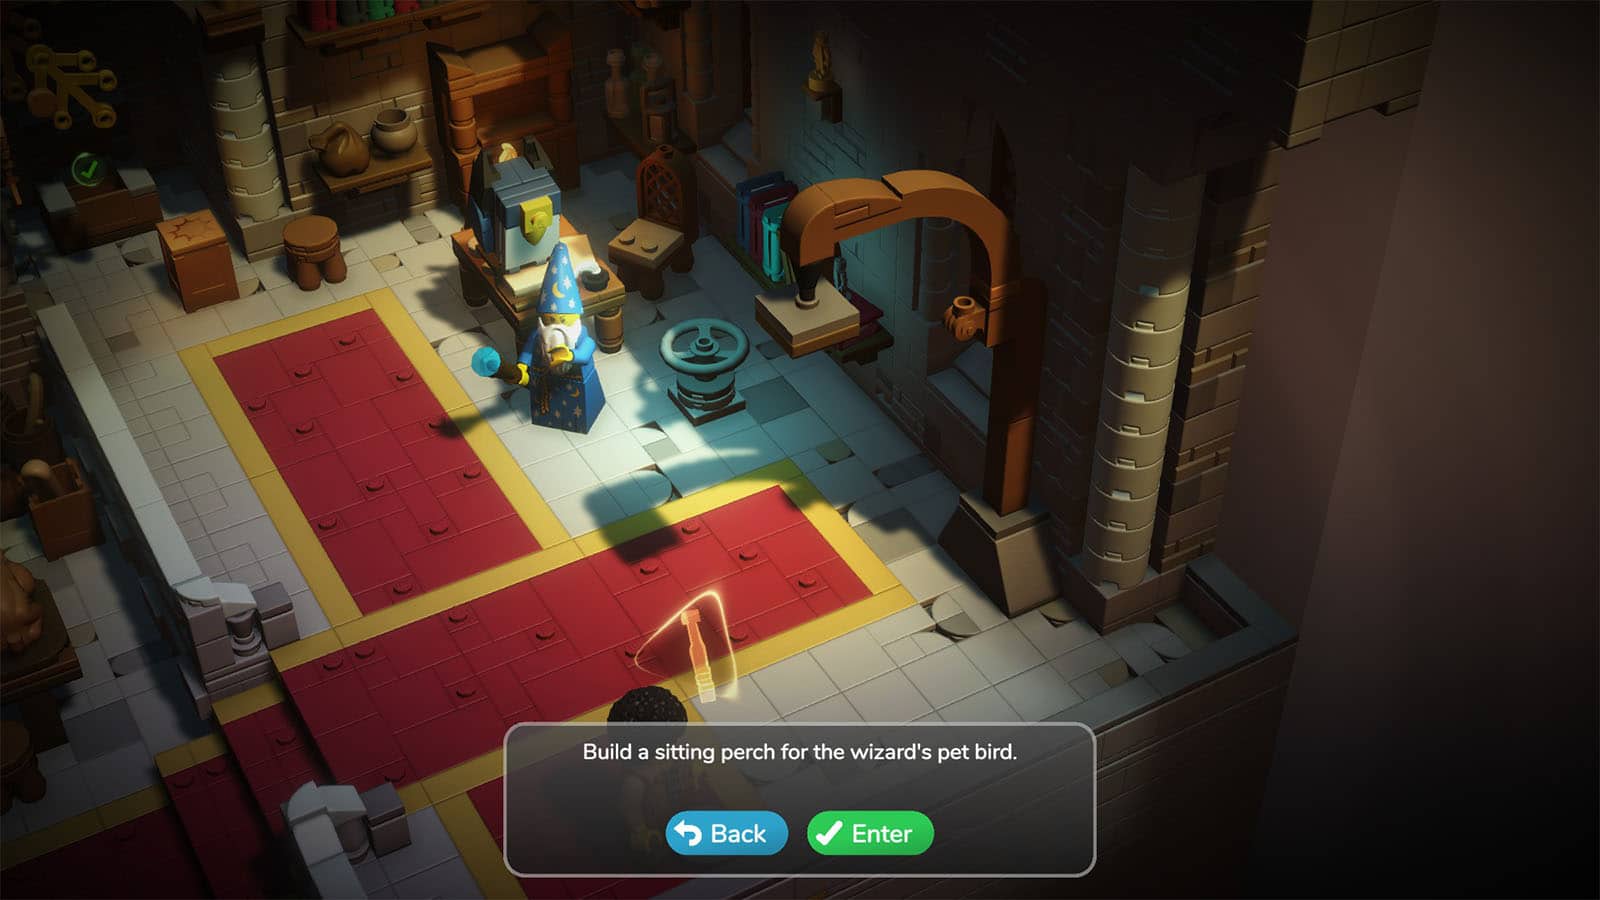
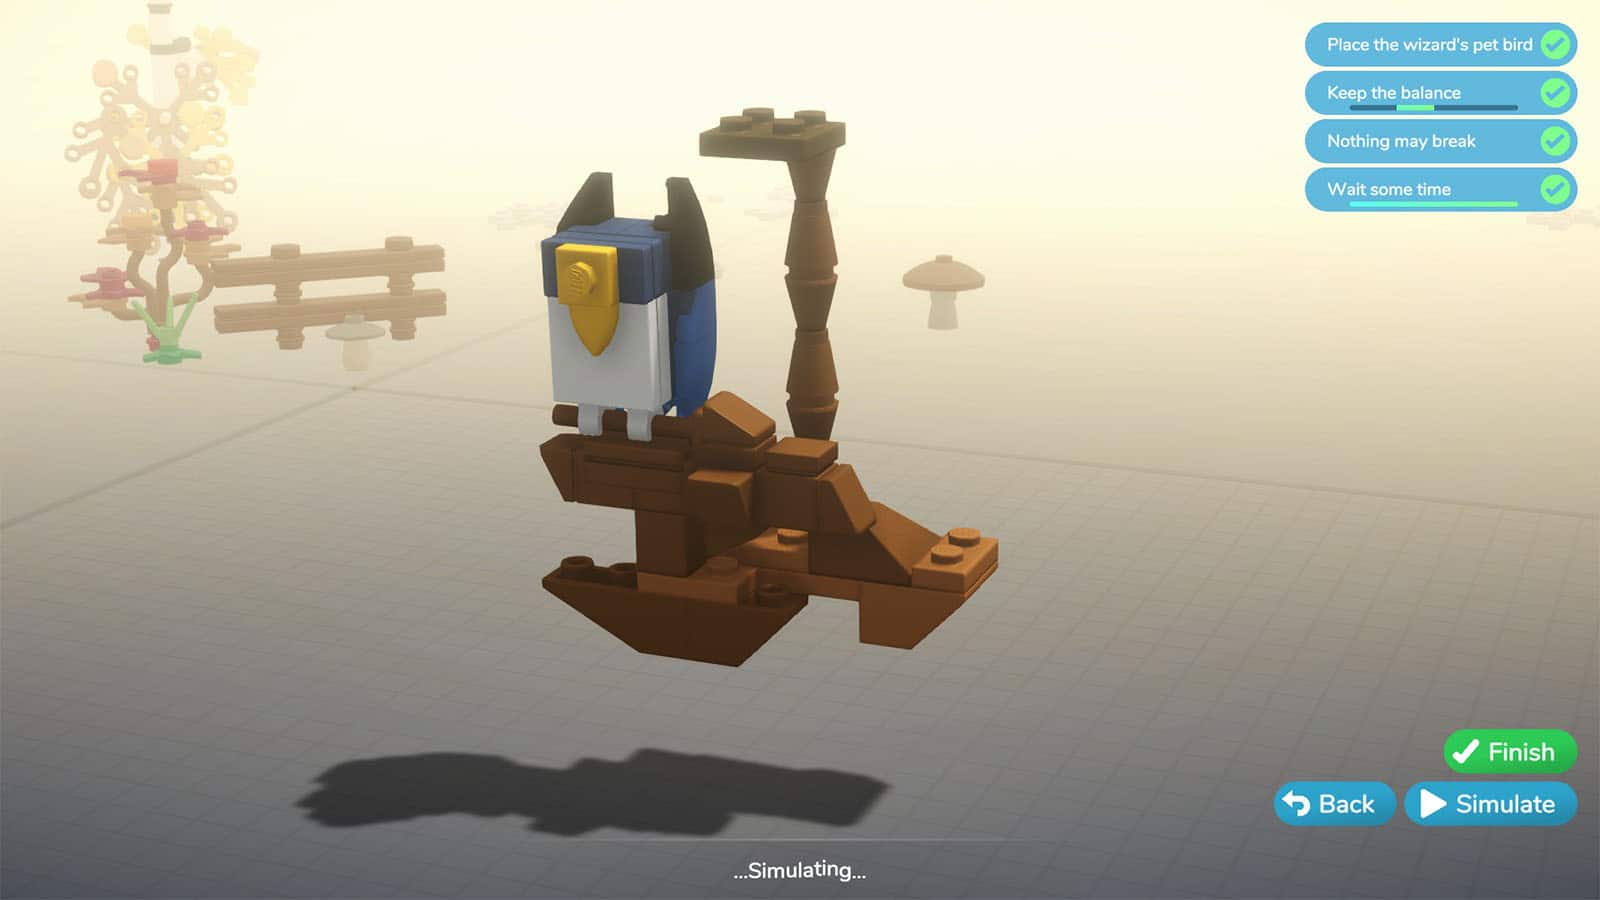
Medieval Build #3 – Sitting Perch
Head back to the place where you first arrived at the forest and head east to arrive at the Wizard’s house. You’ll meet up with the Scatty Wizard Weniglin and he needs your help to create a sitting perch for his owl.
You can start the build by stinging the 1×1 tall studs and create a platform low enough so that the owl can fit or steer clear of the upper base. Then, if you place the owl to the side, you will have to balance the perch by adding more blocks to the other side. You can use the meter on the upper right corner to see if the perch is unbalanced. Once done, you will be rewarded with a gold coin.
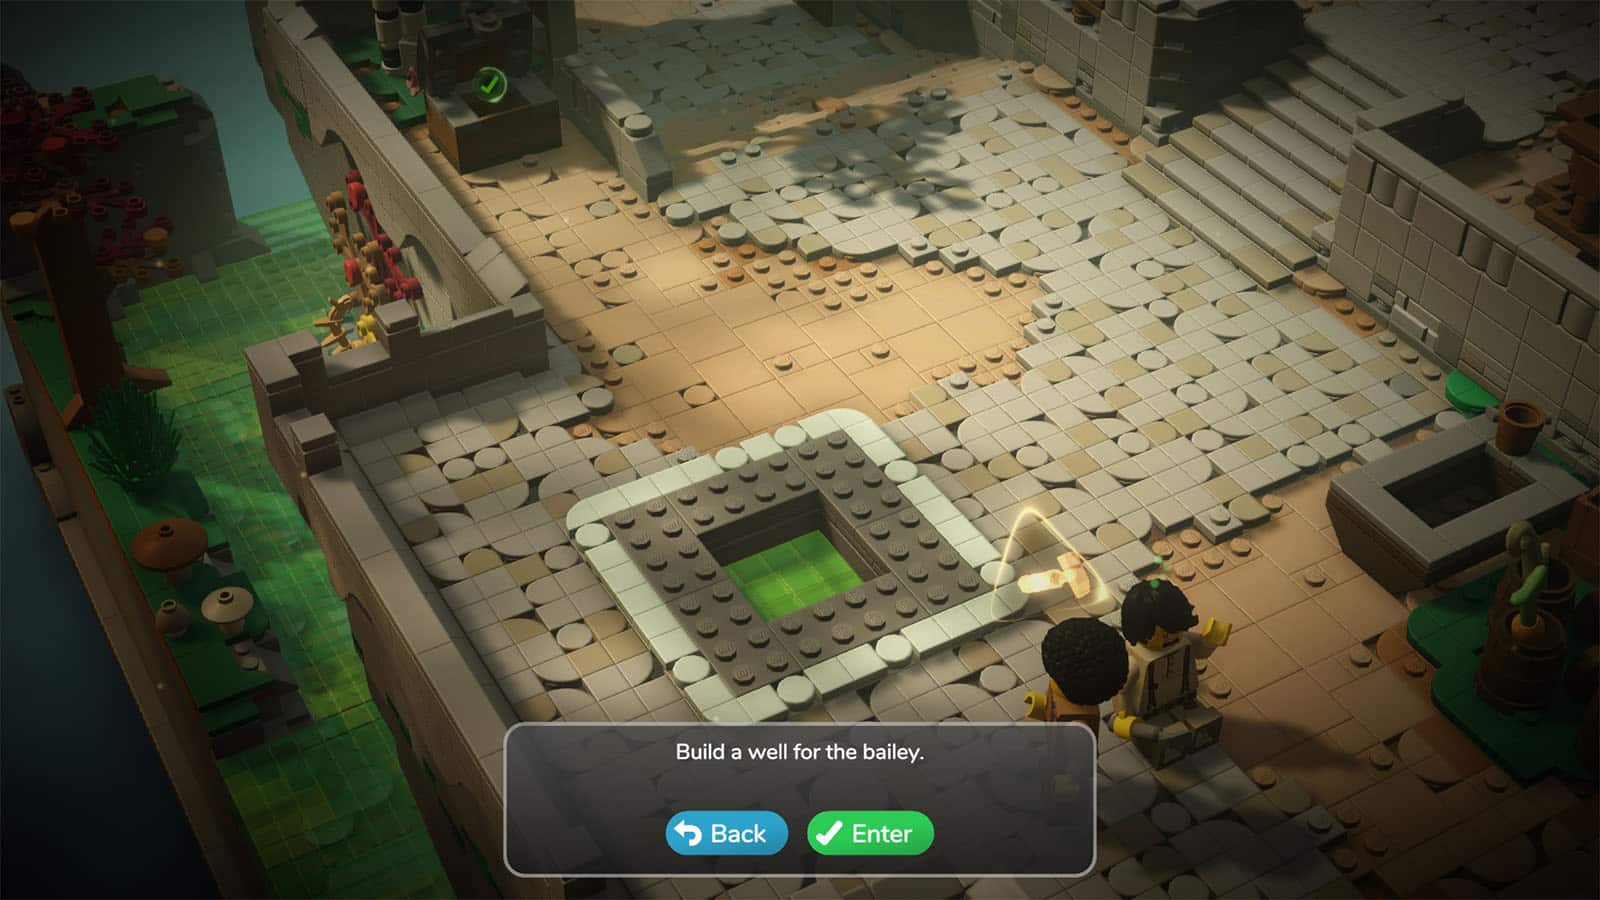
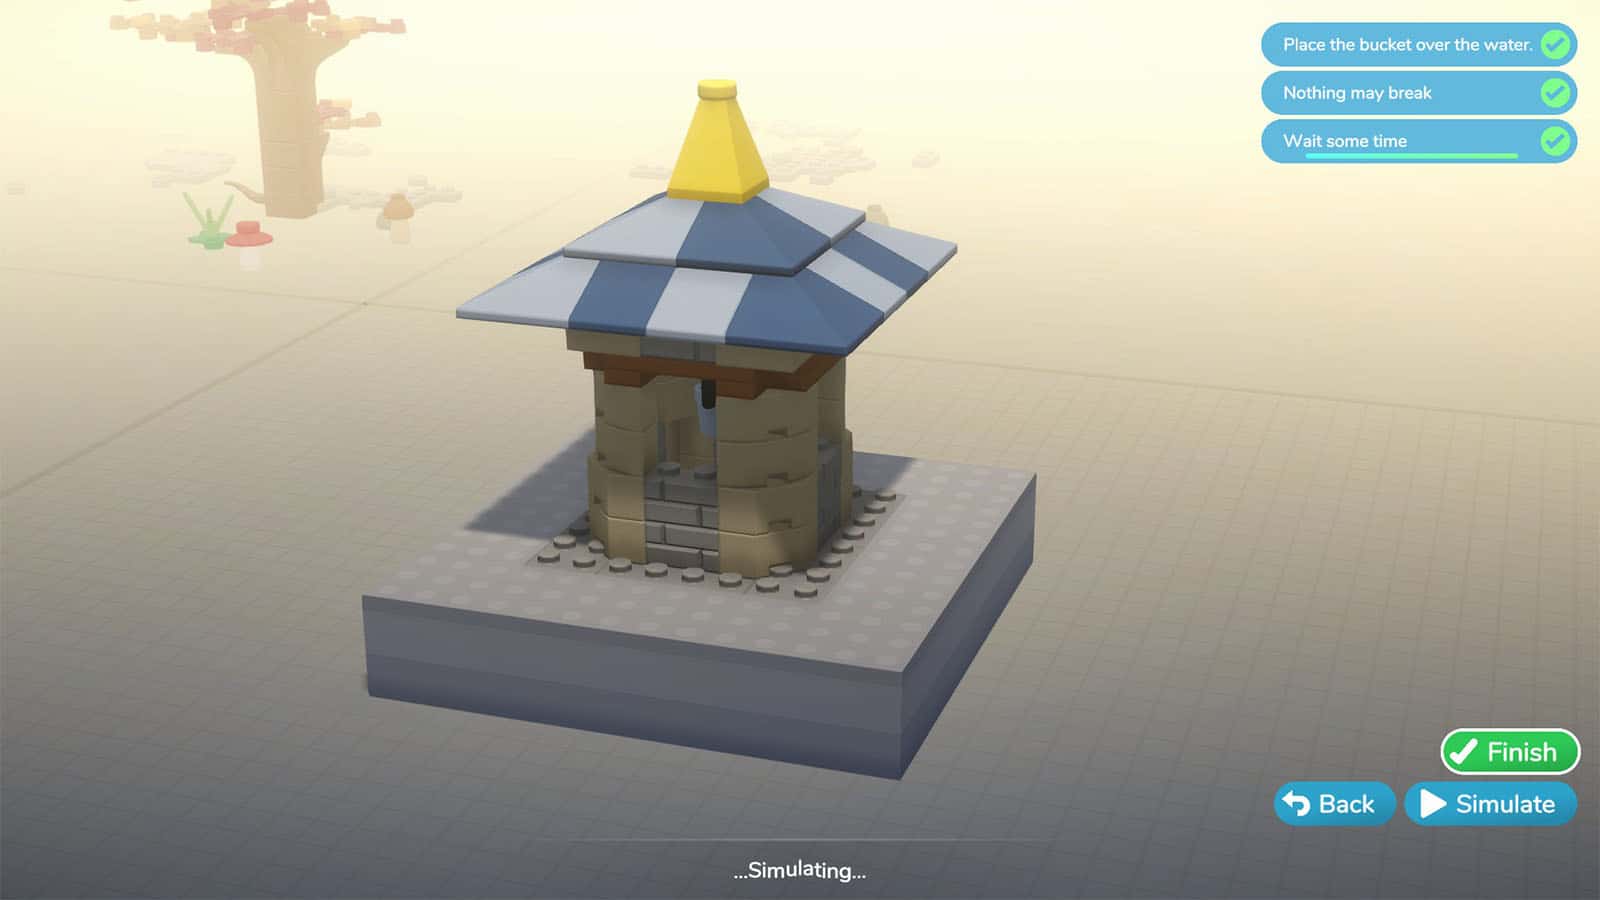
Medieval Build #4 – Well
Head back to the castle and talk to the Well-Builder. You will then have to build a well. Build the walls of the well first, and then put the long plates across the walls so that the main bucket can be placed in the middle. Then finish the well off with whatever blocks you want.
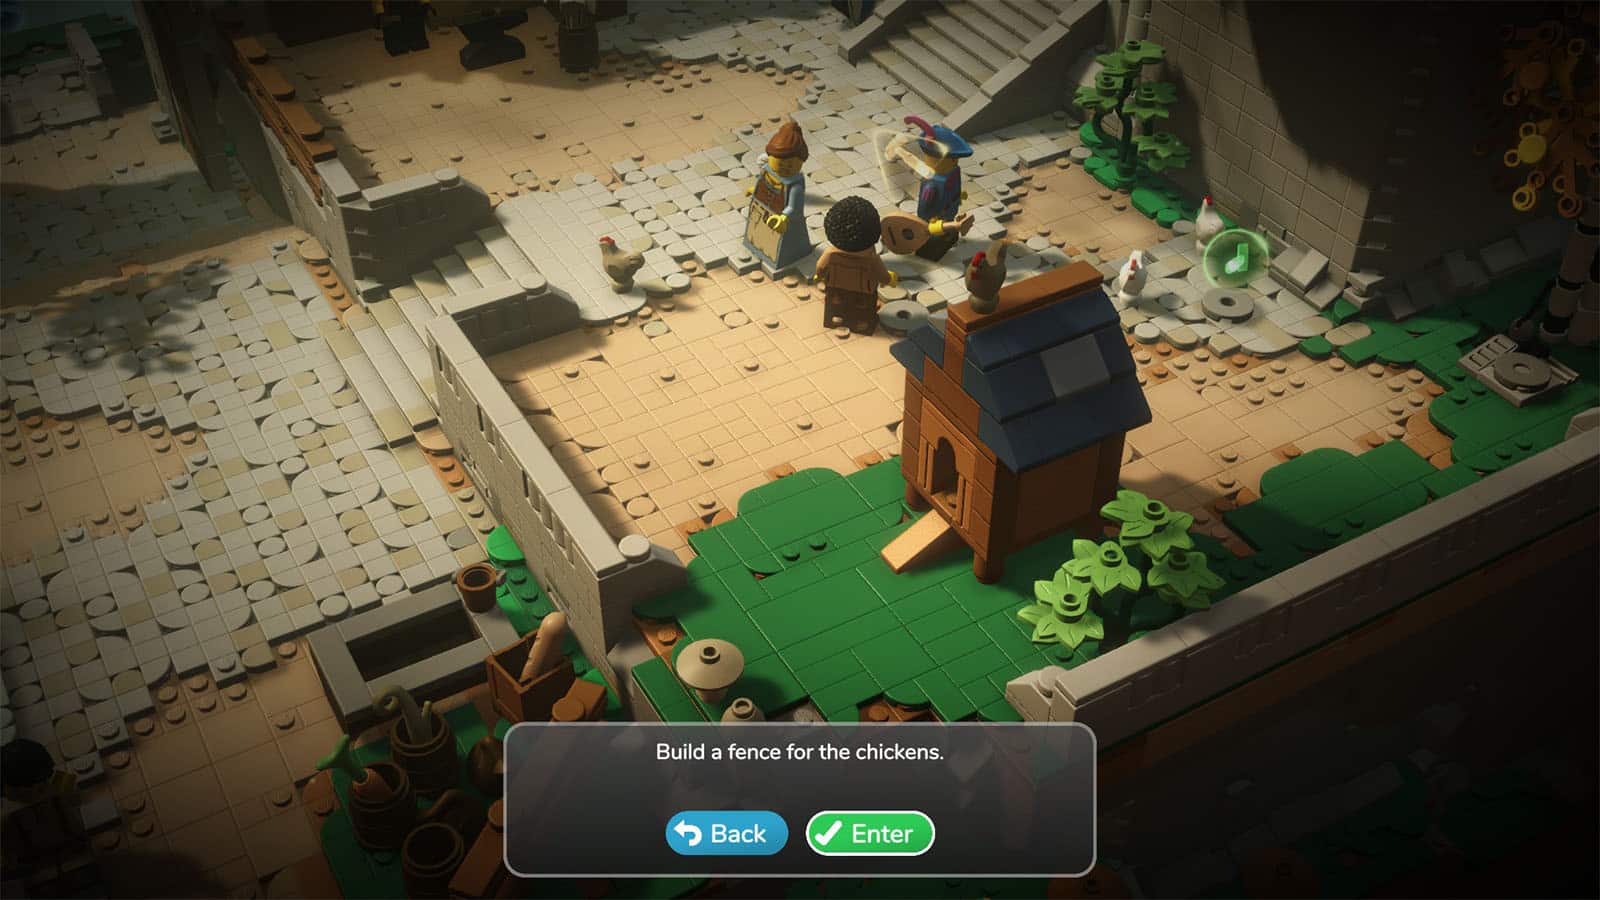

Medieval Build #5 – Chicken Fence
Next, head to the Chicken Keeper and she will ask you to build a fence for her chickens. You can make just a very simple fence out of a few bricks as long as it prevents the chicken from escaping.
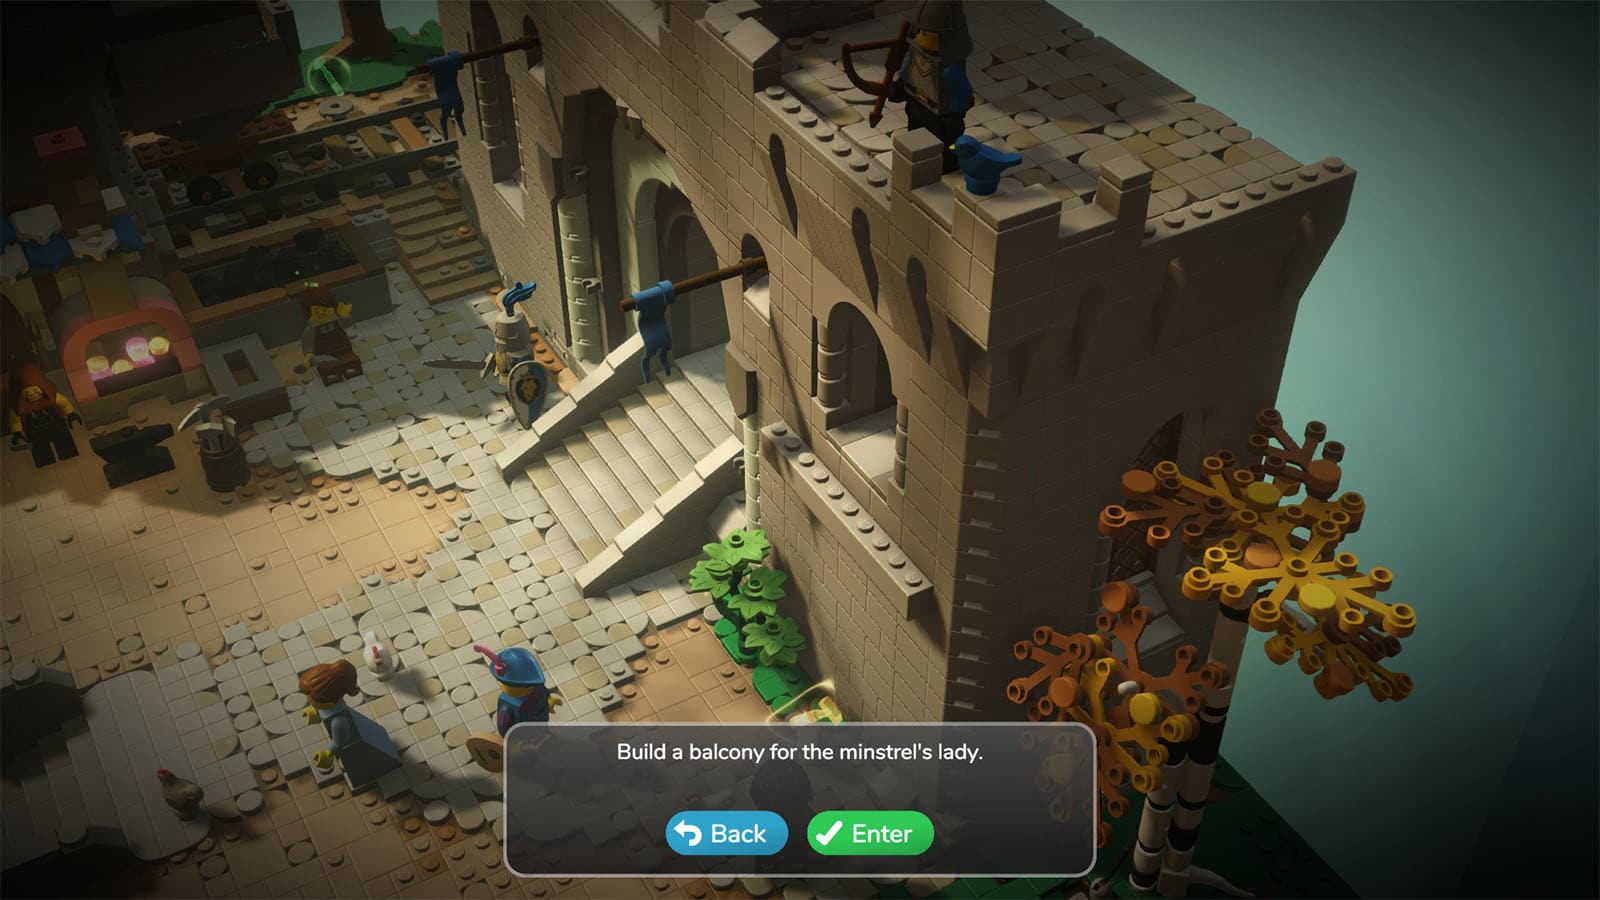
Medieval Build #6 – Balcony
Next, talk to the Minstrel and he asks you to make a balcony for the princess. Mind the filler marks on this build; it’s better to use the studded plates than the flat or tall ones on the spots where you need to fill. Make sure to support and fasten it properly to the wall, too.
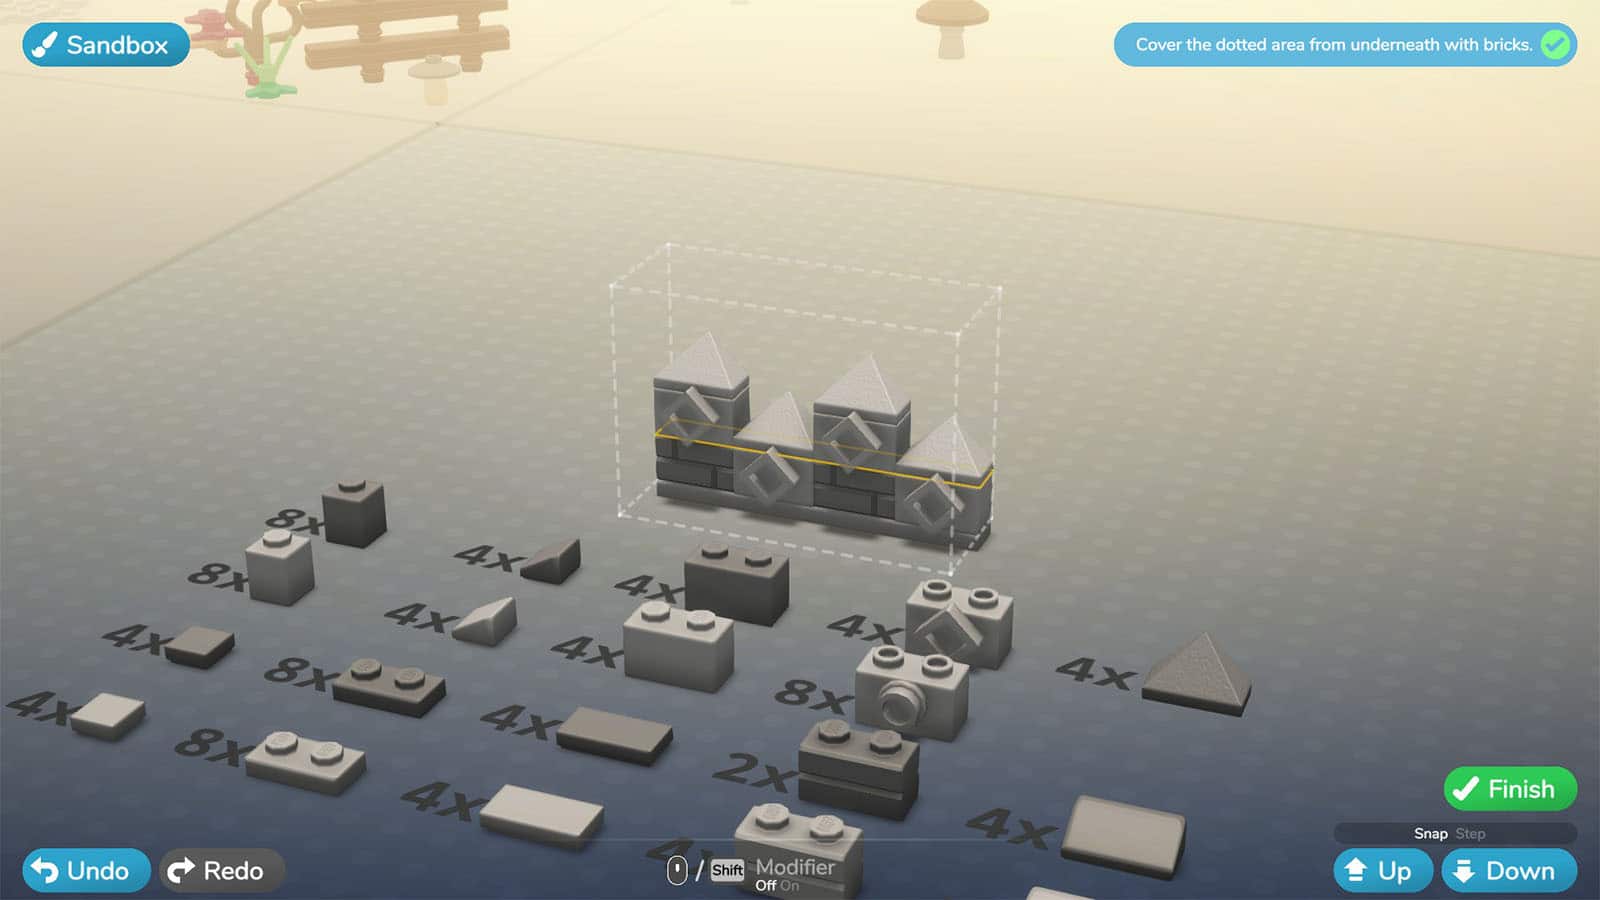
Medieval Build #7 – Crenellations
Head inside the castle and go up the stairs to the left to meet up with the Architect. She will then ask you to create crenellations for the walls. Any crenellation design will do as long as you cover the marked areas properly.
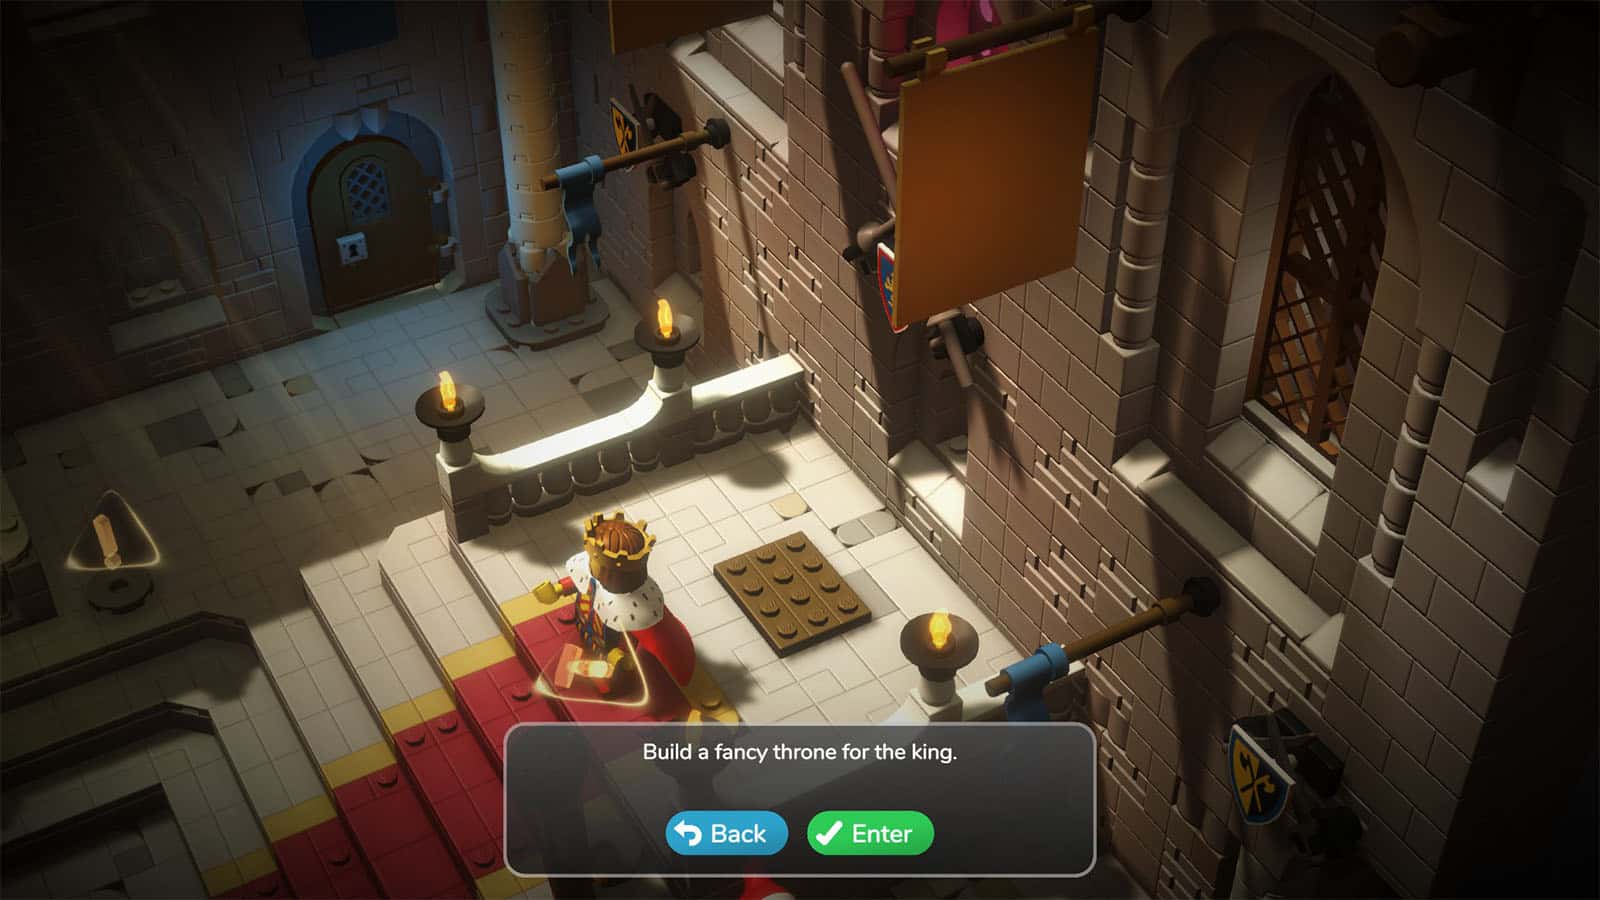
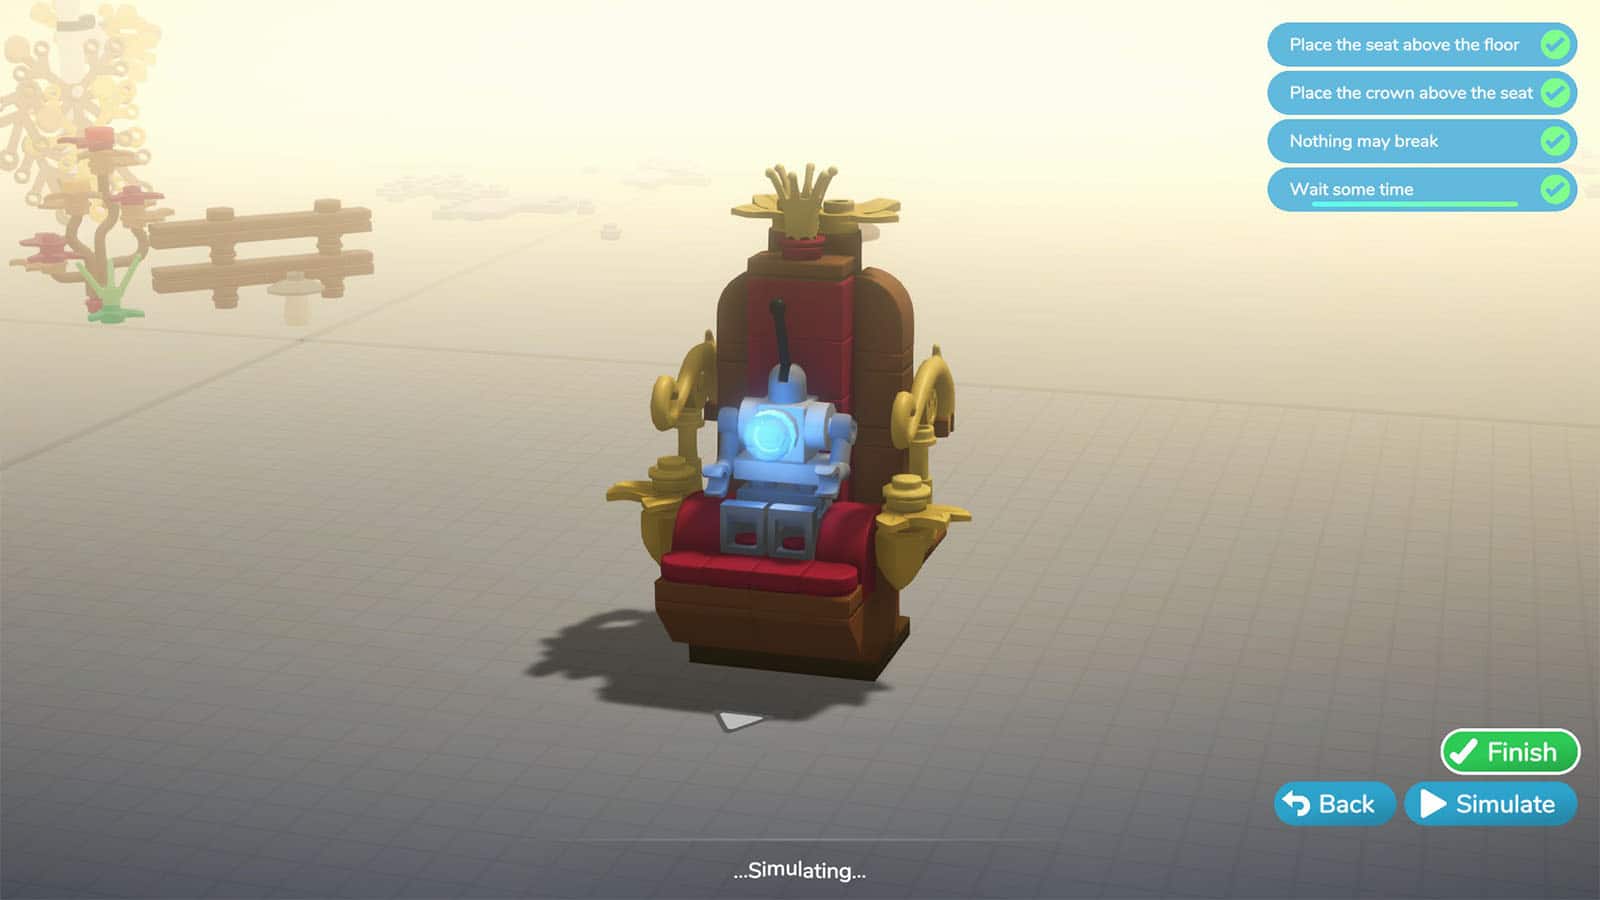
Medieval Build #8 – Throne
Then, head to the Jester in the King’s chamber and she will ask you to create the King’s throne. Do any design that you like, just make sure that the seat is above the floor and the crown is above the seat.
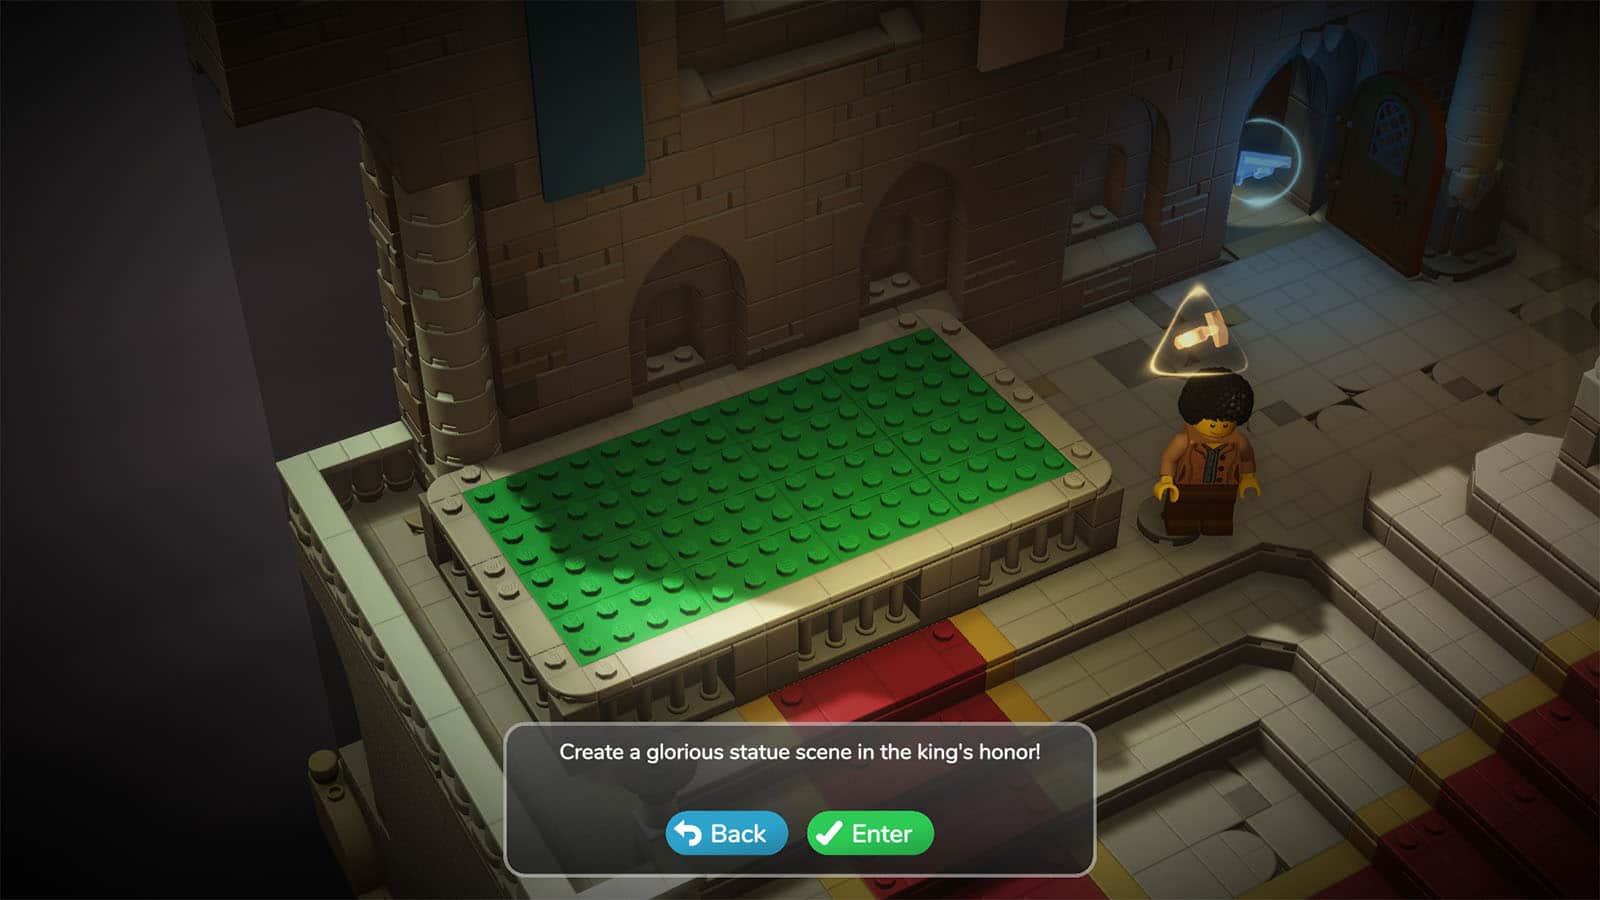
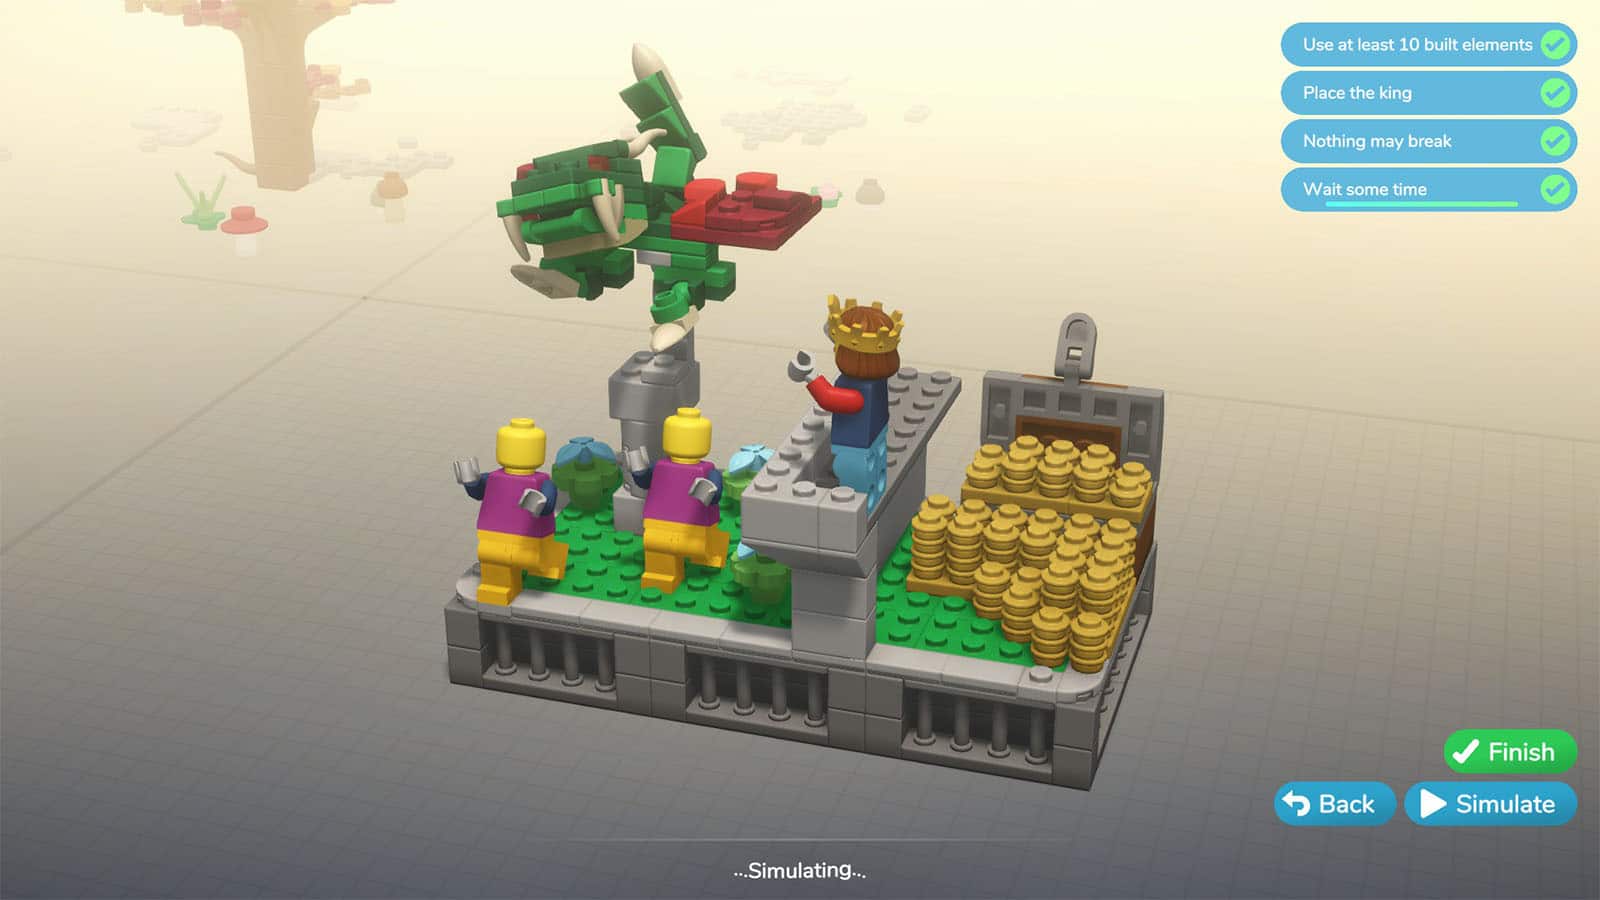
Medieval Build #9 – King’s Statue
Finally, talk to the Jester again and she will give you the key to the Treasury. I here you will need to find the King’s statue and some artificial flowers. Once done, head back to the King’s chamber and build the statue scene for the king. Any design will do as long as there are at least 10 bricks, and the King’s statue is in it. Once you have collected your gold coin from the Jester, head back to the Dragon.
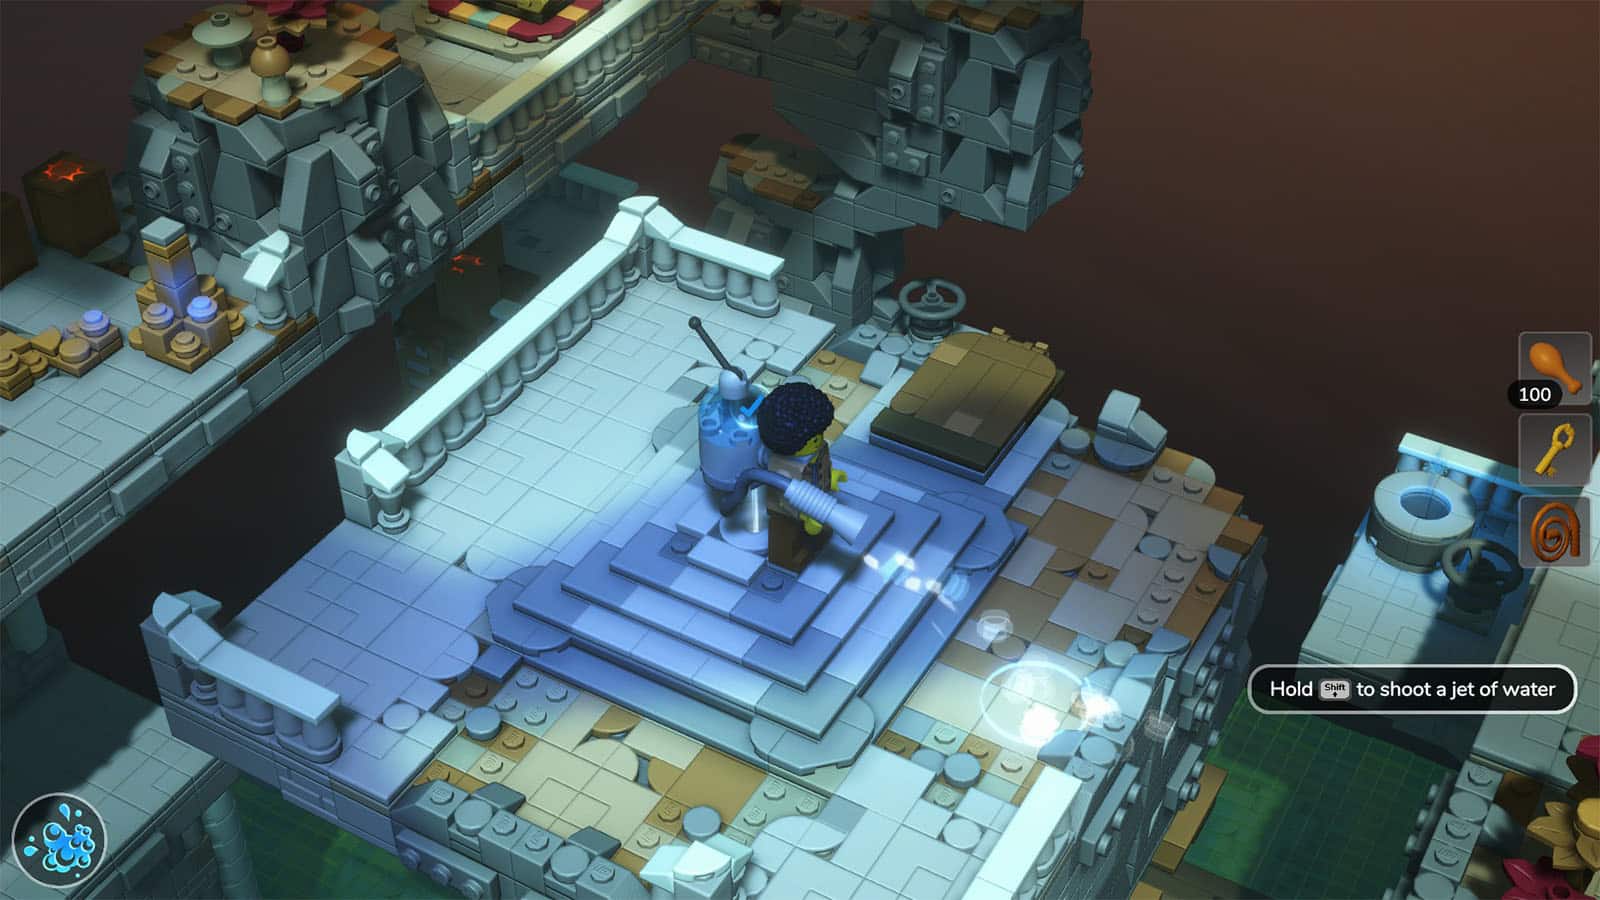
The Dragon will then let you inside the Skill Temple. In here, you will learn the Water skill which allows you to wash off any dirt and fill up any receptacle with water. Grab the skill in the middle of the temple to start. Since it is a Skill Temple, you will only be able to use one skill at a time between the Smash and the Water skills.
To solve the Skill Temple, follow these steps:
- Switch to the Water skill and head down the ladder to the north
- Use the first bridge wheel to turn the bridge and then switch to Smash to destroy any crates
- Go down the ladder again to get the Suspicious Potion, then switch to Water
- Head back up and fill the receptacle with water to make the water rise
- Use the wheel to open a gate hiding the second bridge wheel
- Use the second bridge wheel to get to the other side
- Switch up to Smash to destroy the crates
- Switch back to Water to wash the lever that lowers down the gate
- Climb back up and fill the receptacle to raise the water level again, allowing you to exit
Before heading out, use the Water and Smash skills to reach the chest at the back of the room to get some drumsticks.
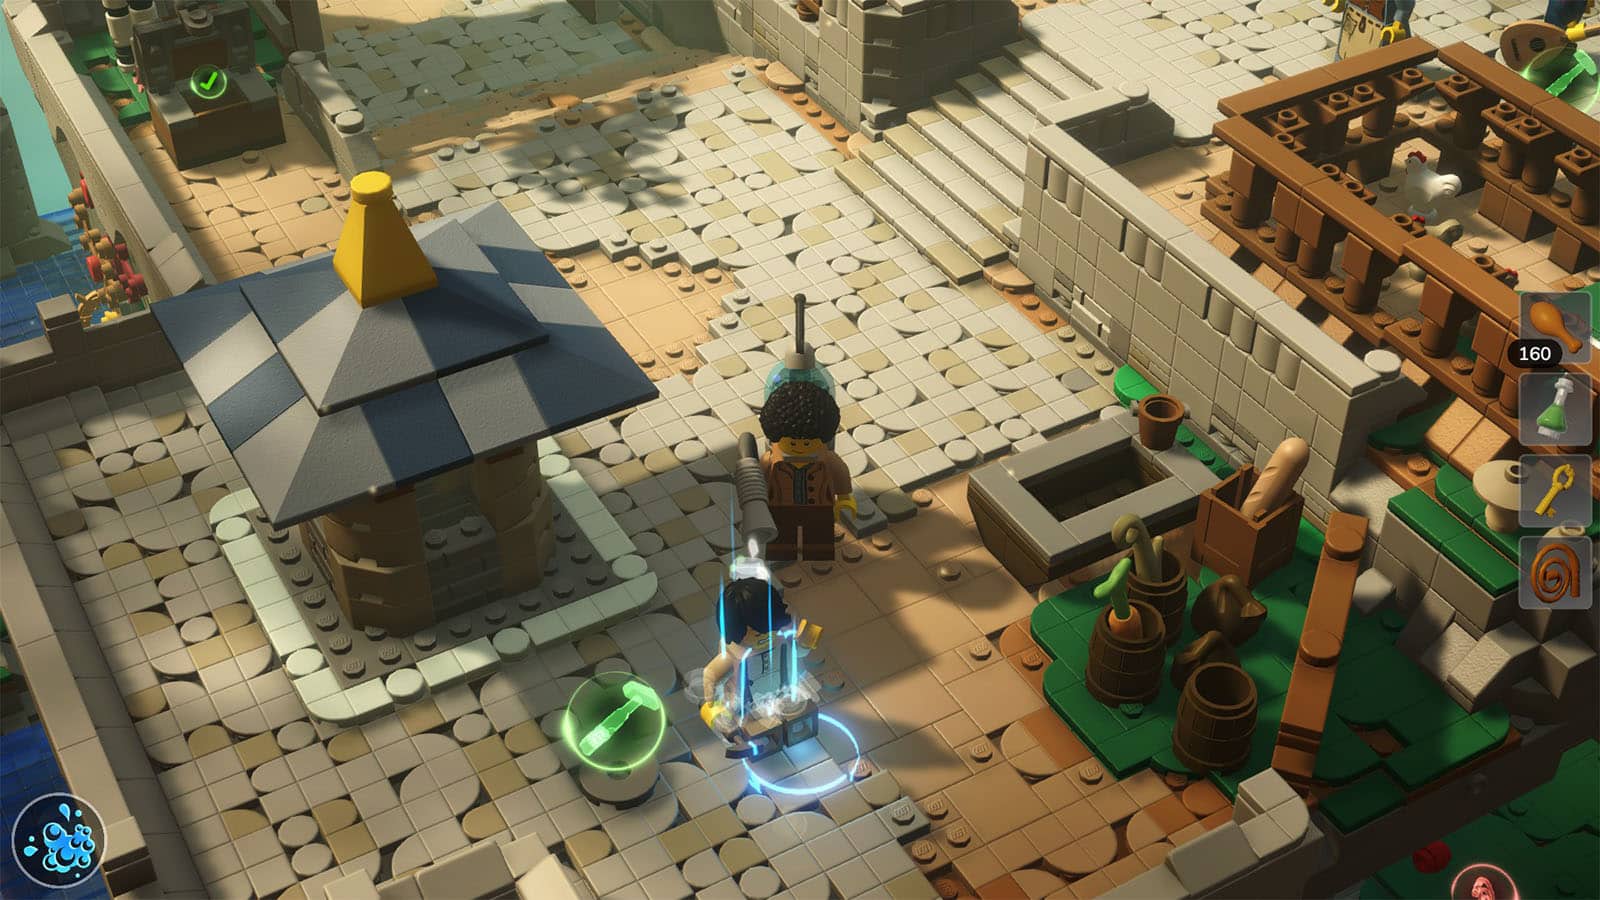
Head back to the castle and use your Water skill to cure the sick people. Then, report to the King and he will require you to find the culprit of the poisoning. Head to the Wizard’s house to find out that the Wizard was the culprit all along. Go back to the King and he will tell you to help the Chef. Talk to the Chef at the castle hall and you will be asked to repair the banquet table.

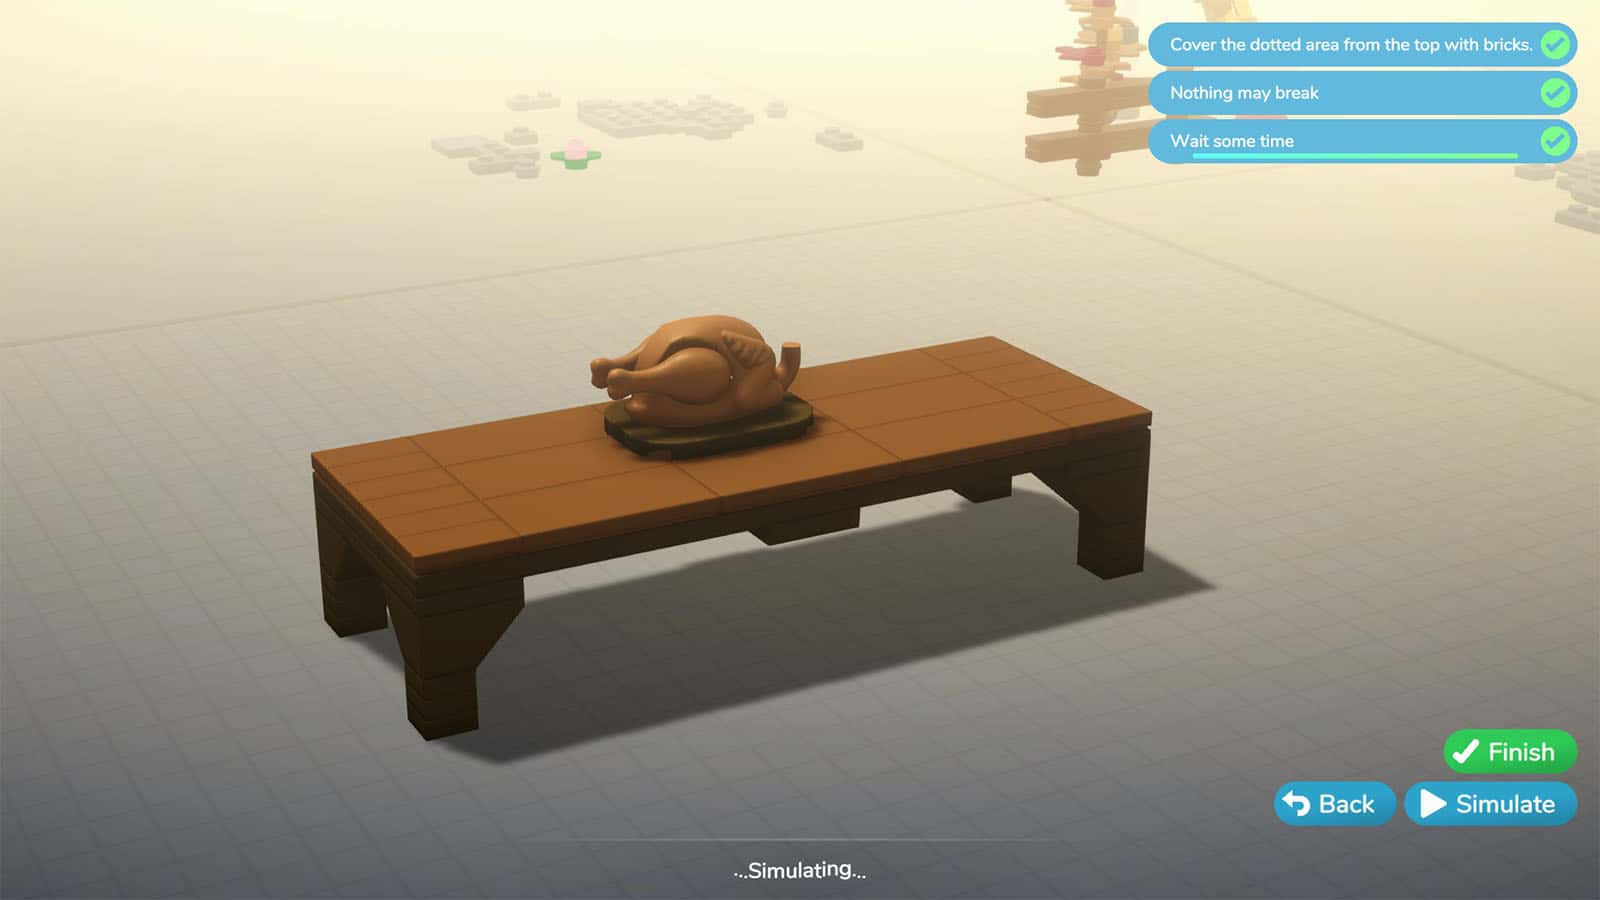
Medieval Build #10 – Banquet Table
For the banquet table, we recommend to use 1×1 studs for each of the leg, followed by the inverted slope. This way, the long plates will be able to sit on top of the legs. Make sure the sandwich the middle part on both the top and bottom sides as the turkey can be quite heavy.
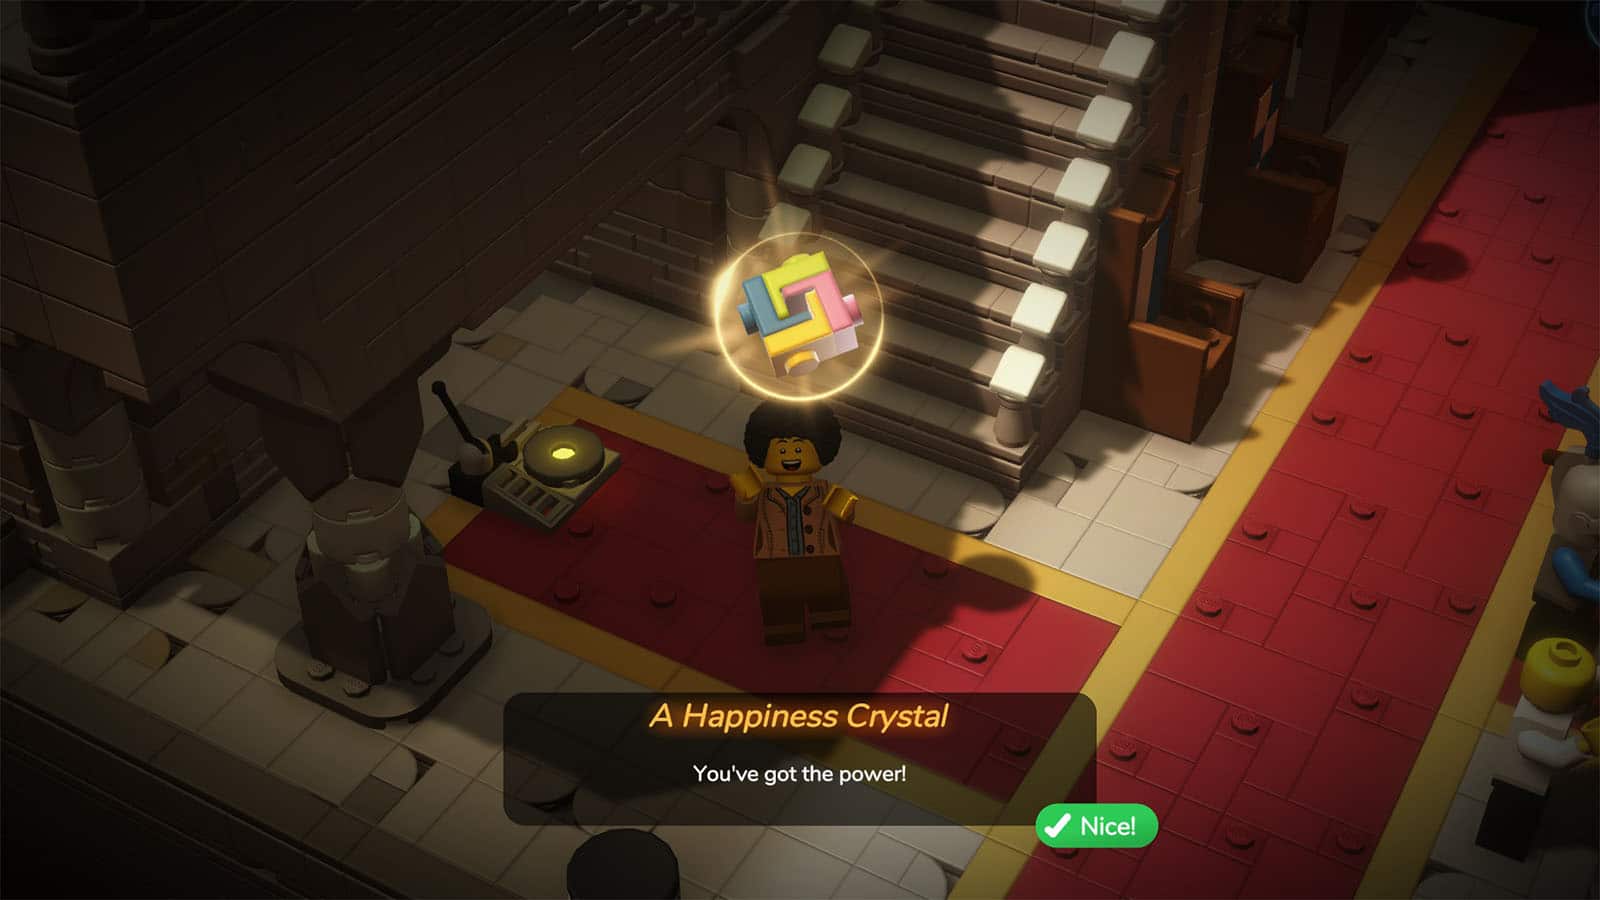
After this build, the kingdom will have a banquet and then you will get another Happiness Crystal.
Head back to the Theme Park to rebuild the next attraction. This build is not part of the Medieval level’s completion, but it unlocks the next level.
Medieval Animal Collectibles
In the Medieval level, there are a total of 20 animals to be collected. 15 of them can be found within the first run through the level, while the other 5 will require a revisit once the necessary abilities to reach them have been acquired. Check out our complete guide for the animal locations in All Animal Locations in Medieval Level LEGO Bricktales.
In Medieval, you will find four (4) of each type of animal, with the Rabbit as the main animal for the level needed by the Wizard Imposter.
Medieval Chests
There are a total of 13 chests to be found within the Medieval level. Not all of them can be found within the first run as you will need to acquire additional abilities to reach them. Check out our guide for the chest locations in All Chest Locations in Medieval Level LEGO Bricktales.
Medieval Shop
There are 10 different items on sale in Boo’s Medieval Shop and they all count towards the level’s completion when purchased. You will need a total of 250 drumsticks to purchase everything in the shop.
- Medieval Bricks – 100 drumsticks
- White – 15 drumsticks
- Dark Stone Grey – 15 drumsticks
- Silver Metallic – 15 drumsticks
- Bright Blue – 15 drumsticks
- Jester’s Shirt – 22 drumsticks
- Jester’s Pants – 12 drumsticks
- Dragon Knight Chainmail – 20 drumsticks
- Jester’s Cap – 18 drumsticks
- Dragon Knight Helmet – 18 drumsticks
LEGO Bricktales is available on PC, PS4, PS5, Xbox One, Xbox Series X|S, and Nintendo Switch.


