")
The Hydroponics Delta is the Lost Sector located in Zephyr Concourse. This guide will tell you what to expect if you’re going into Lost Sector as a solo player. Before we talk about individual encounters, let’s go over a few things.
- Success in a lost sector boils down to preparedness and persistence.
- Lost Sectors are activities that are close to end-game content. They will require specialized, weapons and tactics.
- You can decide to tackle the Lost Sector with blues and greys. It’ll be difficult but not impossible.
- We advise completing the Lightfall campaign first before diving into Lost Sectors.
- You have a limited number of lives in Legend Lost Sectors. You gain more by killing Champions.
- It’s hard to recommend a solid set of weapons as modifiers change per rotation.
You can read up on its location from our article here.
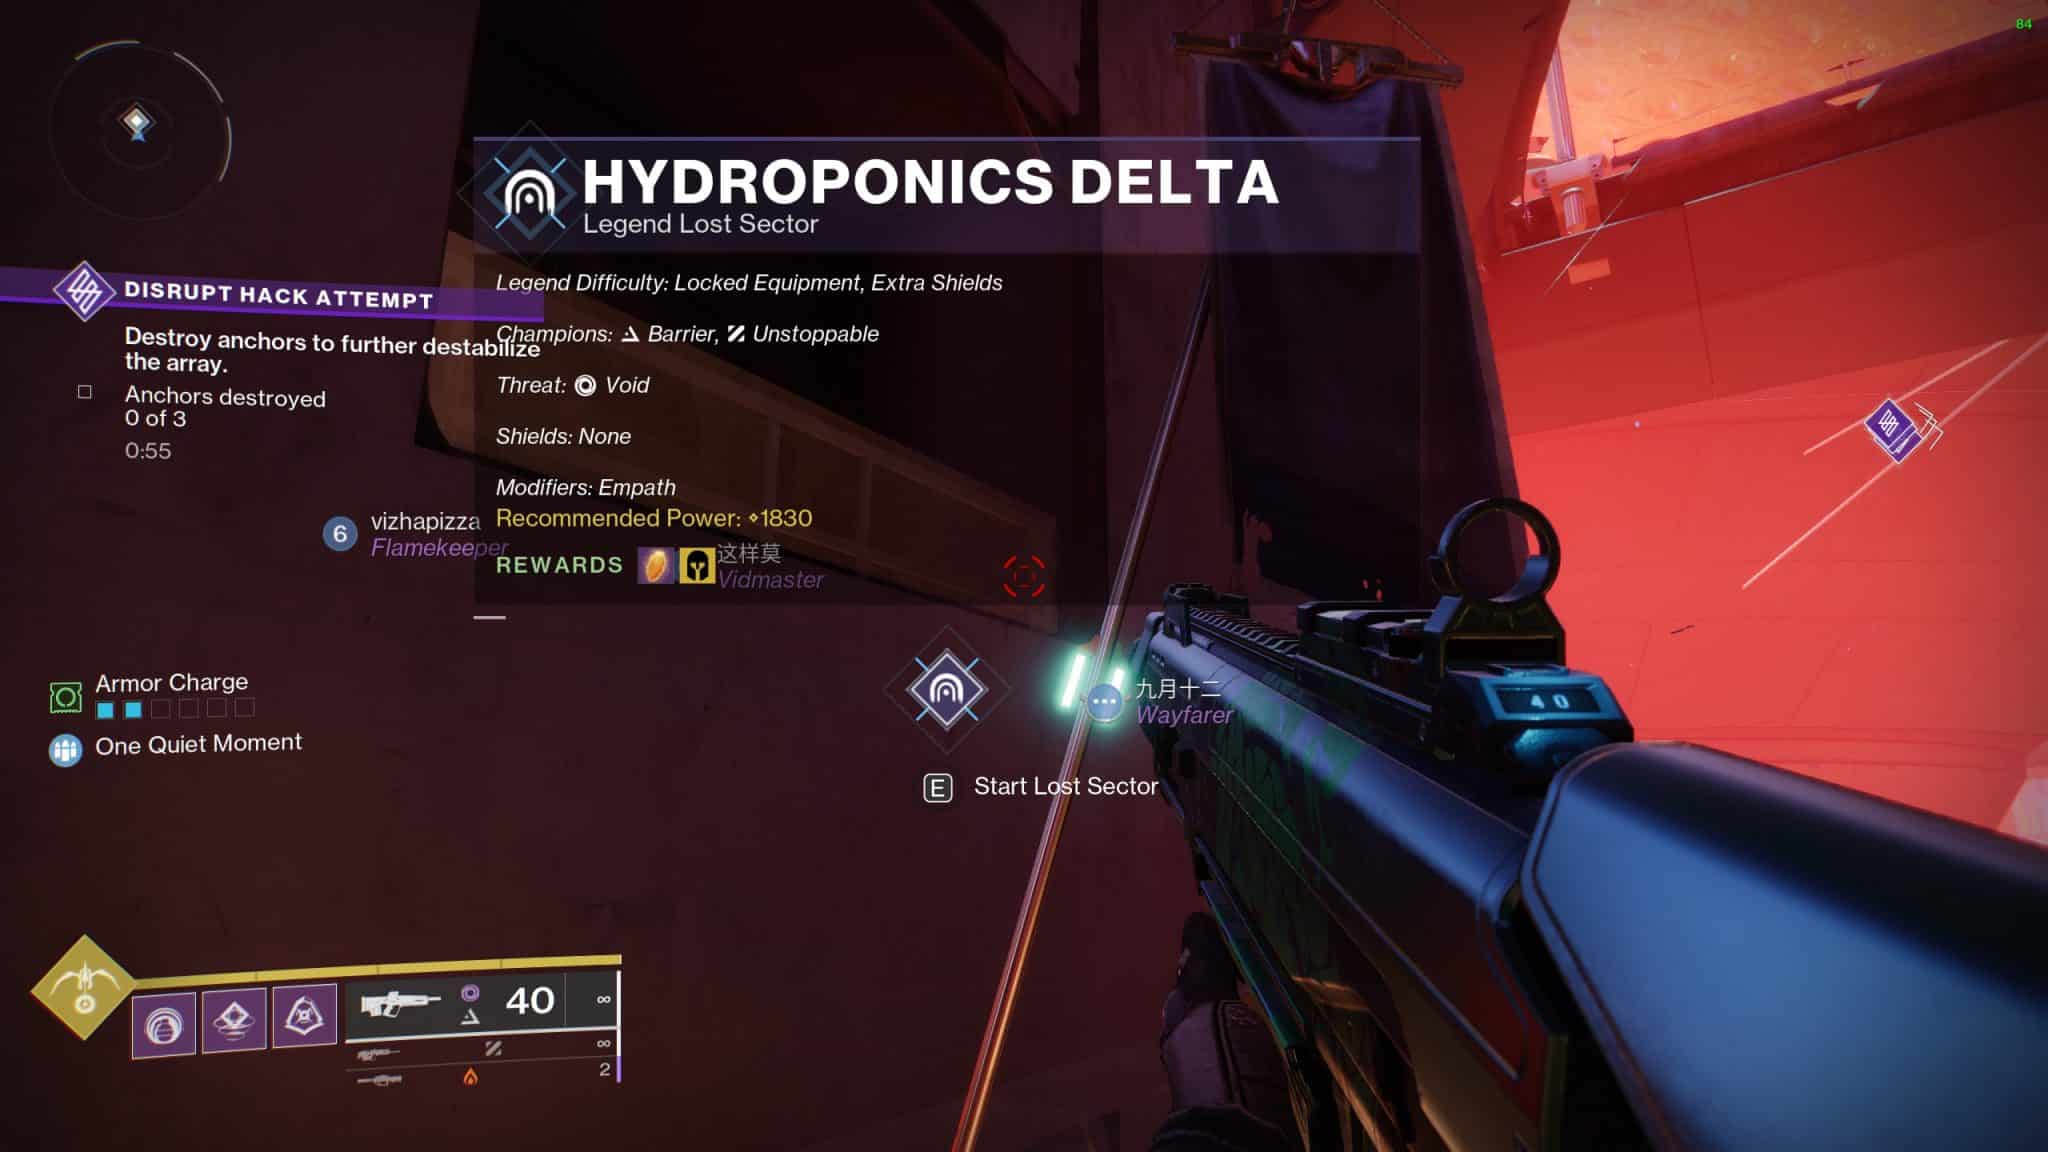
Entering the apartment and going down the hole in the floor officially starts the Lost Sector run. Getting to the soft cap of 1800 is very much recommended for this activity. Legend Lost Sectors have the recommended level of 1830.
Why Can’t I Access the Legendary Lost Sector?
To access the Legend Lost Sector of Hydroponics Delta, you’ll need to complete a full instance of the activity first before the flag can appear next to the entrance. The flags function exactly like mission markers. They will inform you want to expect and the conditions for that instance of the Lost Sector.
Regular runs allow you to change weapons on the fly. Legend Lost Sectors lock your equipment the moment you start the activity. You won’t be able to change them until you either leave the instance or finish all the encounters and open the chest at the end.
Hydroponics Delta Lost Sector Encounters
There are four encounters in total during the Lost Sector. What sets this one apart from previous Lost Sectors is ad density. Previously, there are a set number of enemies to fight in each encounter per room. Hydroponics Delta and others bring in a higher-than-usual number of reinforcements the more you push the enemy back.
First Encounter
The first encounter opens to a multi-floor hallway with a Colossus in the back. You will first encounter Legionaries, followed closely by Phalanxes and Psions. Honored Psions will sniper you from the highest floor. It is highly advisable to deal with the Legionaries and Phalanxes first before dealing with the Honored Psions. If you’re a Hunter, constant movement is your best bet for staying alive.
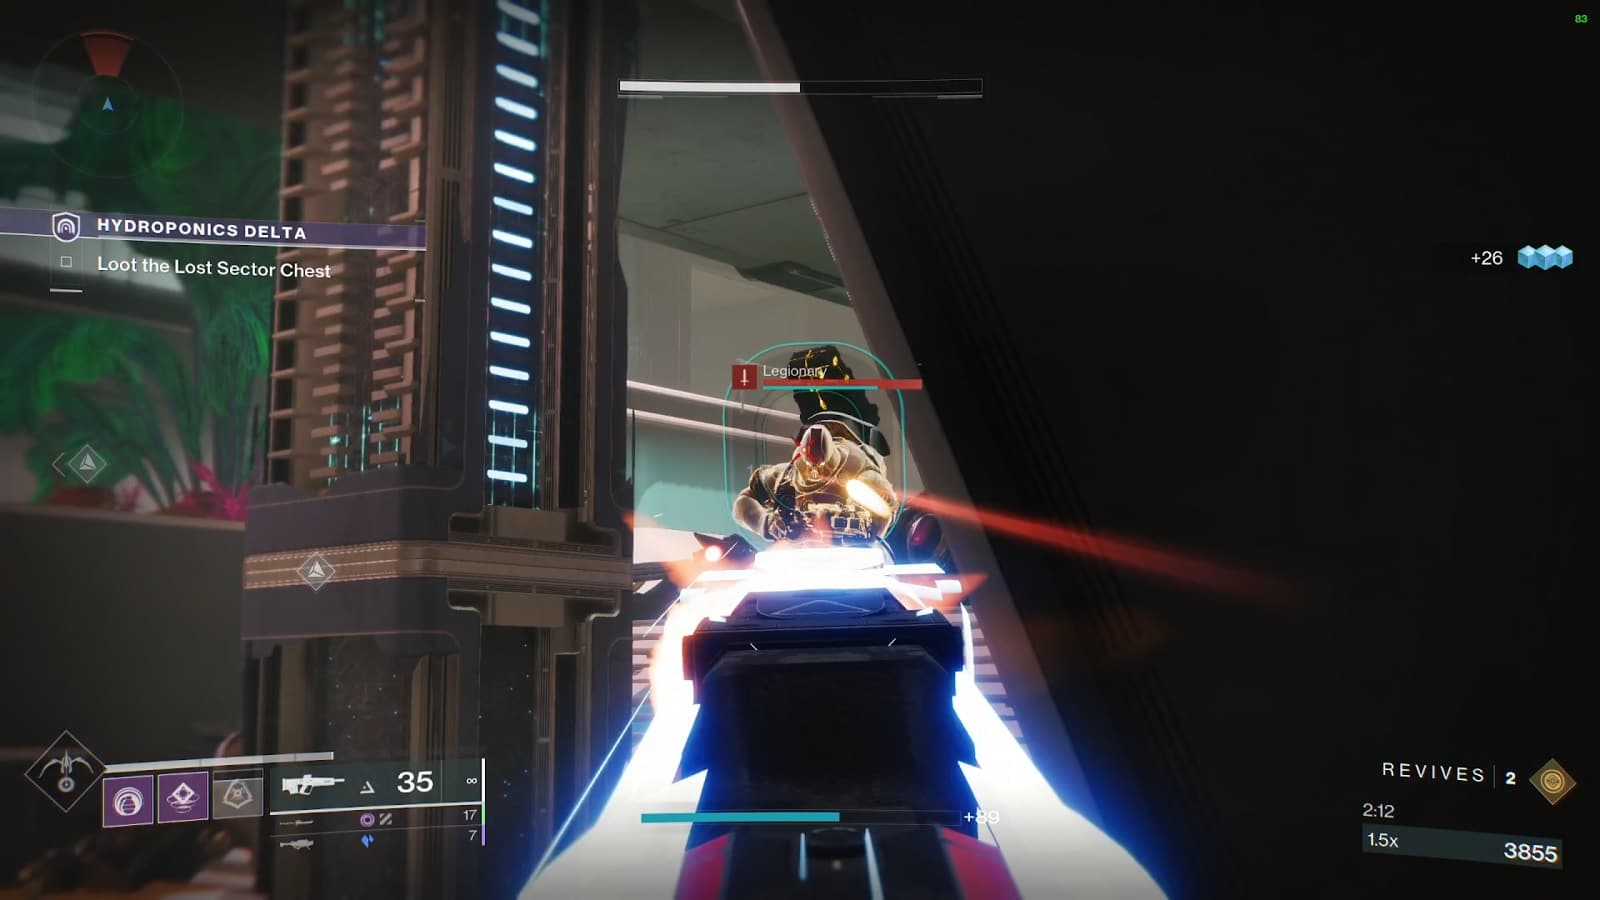
At higher difficulties, you will need to funnel enemies to the small corridor right of the entrance. That narrow hallway allows covers you from sniper fire, allowing you to deal with the Legionaries and Phalanxes first and then turn your attention to the Psions.
If need be, fall back to the doorway if things ever get intense. That’s your safe zone. Enemies will not follow you there.
Once all enemies have been dealt with, you are free to take down the Colossus. in Legendary, you will dealing with a Barrier Colossus. Once that miniboss is taken care of, the second encounter immediately begins.
Second Encounter
The second encounter starts as soon as the door at the back opens. A group of Legionaries and Phalanxes will make their way toward you. Use whatever grenade or Crowd Control weapon you have before they enter your side of the hall.
Further down the hall, you will see enemies in small groups just waiting for you to advance. Once you draw their attention, they will all go for you. Go between cover and prepare to fall back when needed.
When enough enemies have fallen, a group of War Beasts will get into the mix. On Legend difficulty, they can instantly kill Guardians with low Resilience.
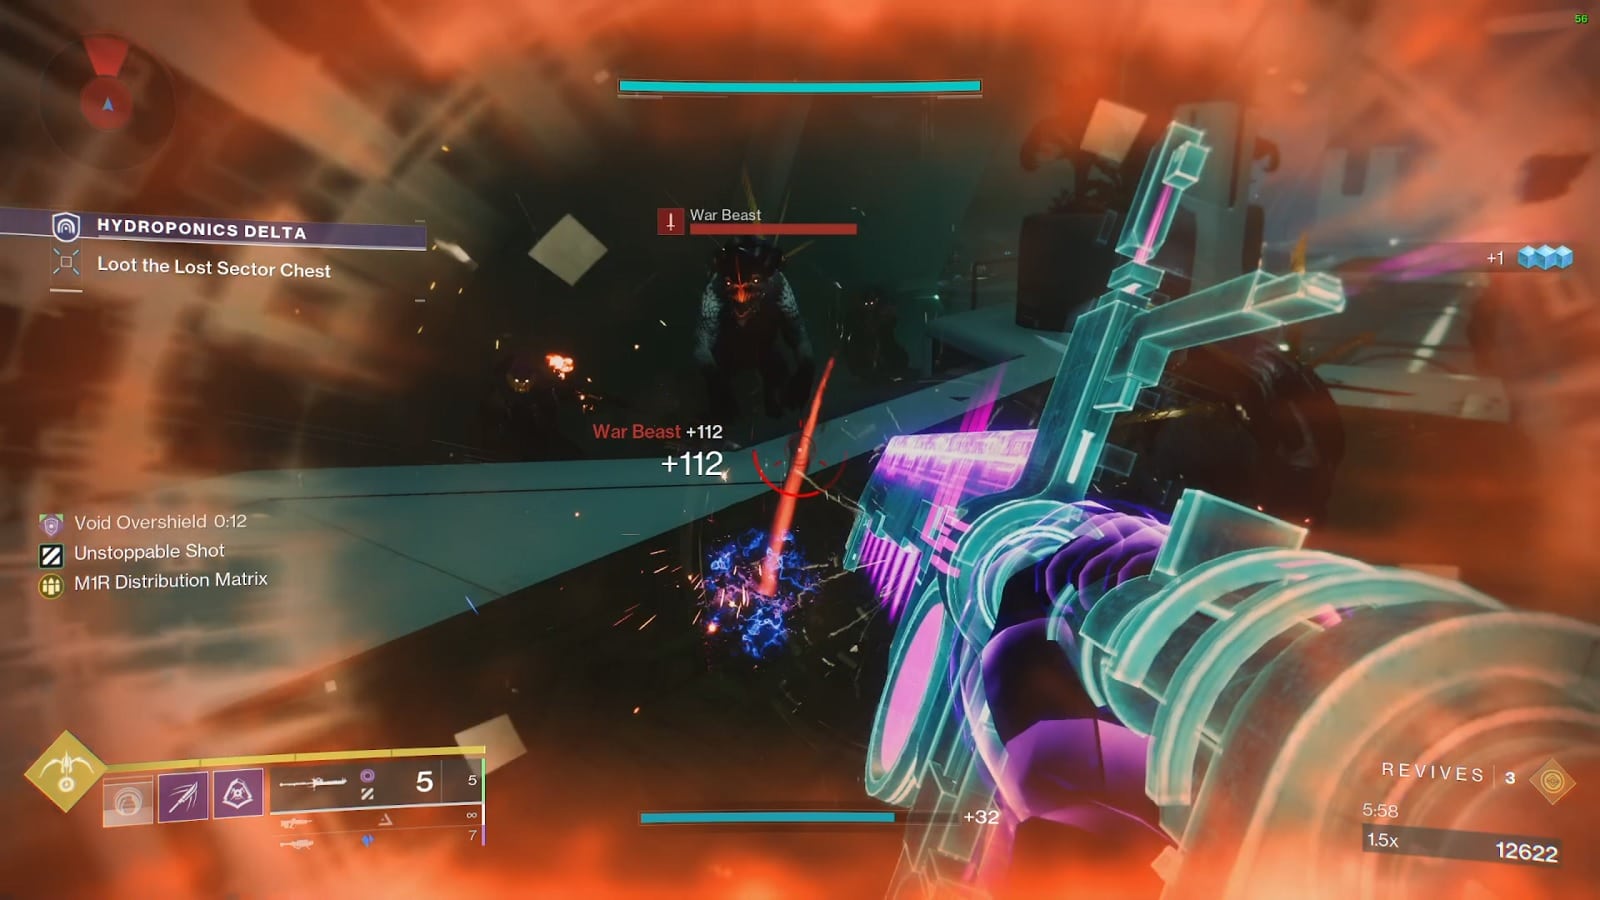
This encounter is the shortest one out of all of them. At the end of the door, you will be greeted by an Honored Gladiator. You may want to use your Power Weapon to speed things up.
Third Encounter
The Third encounter takes place in a processing plant of sorts. There is a huge machine where conveyer belts feed plants to if the facility was functional. At the very back of the room, there are a couple of Scorpius turrets and another Colossus. You don’t need to engage them as they won’t be moving from their position.
Legionaries are what you will be facing first and then psions. The Legionaries have the high ground, and if you move to the center too early, they can surround you. Take it slow and lessen their numbers gradually.
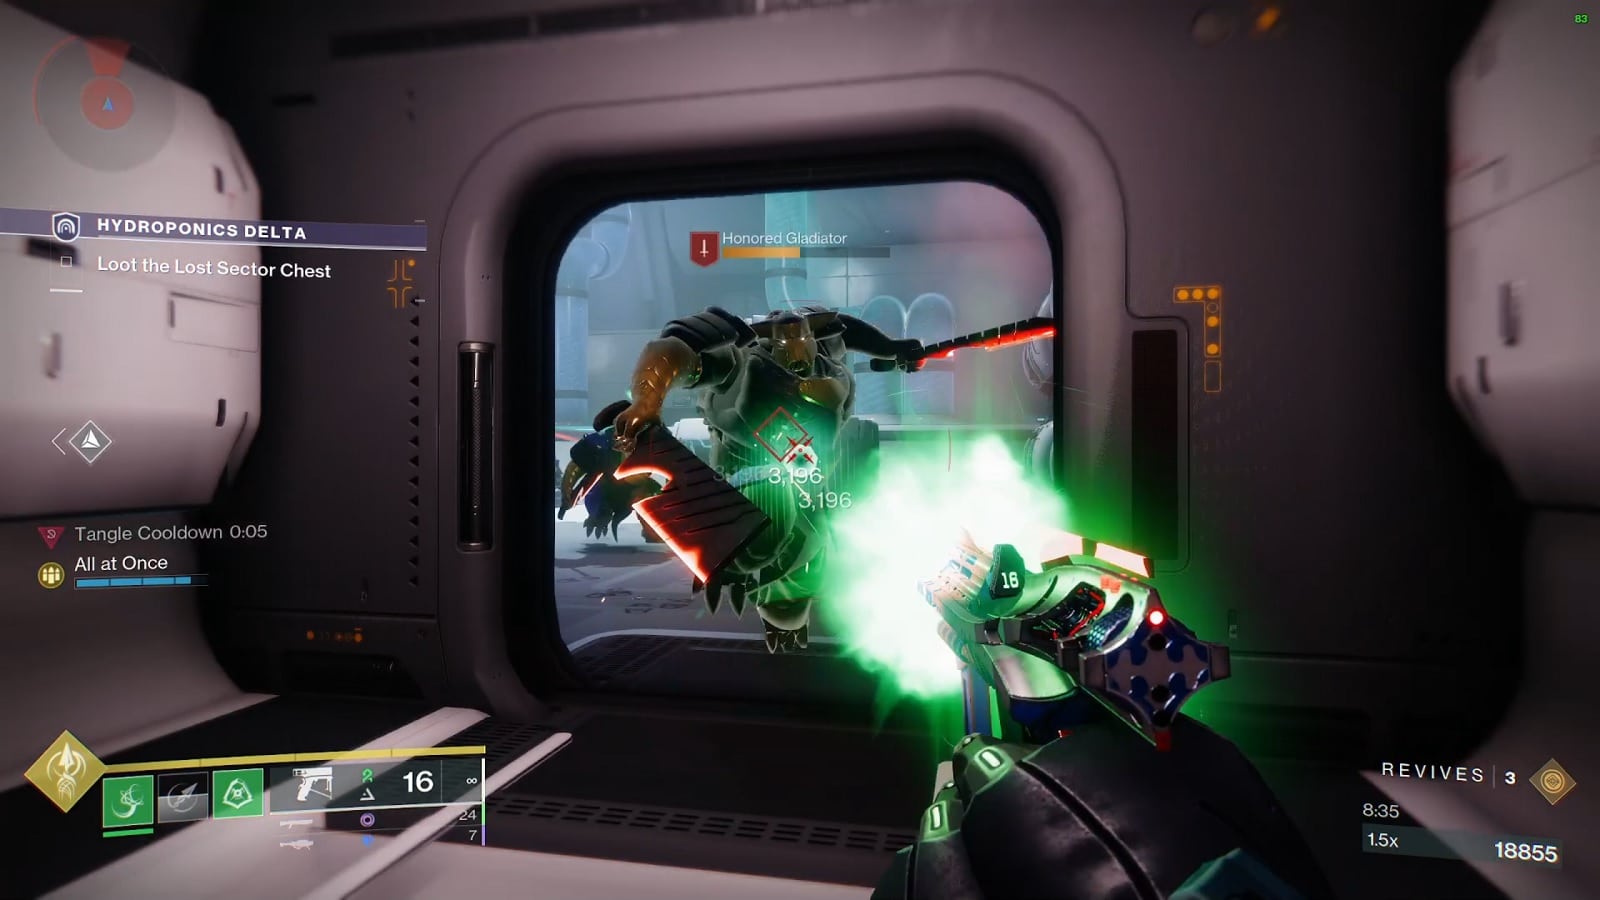
Two different pairs of Gladiators will appear alongside the reinforcements. They will come charging at you if you let them. Your best bet is to lead them to the initial doorway. For some reason, they hesitate to follow you. But will still pursue you if given time to consider their next move.
Once you’ve eliminated all enemies near the entrance, it’s time to consider the enemies further back. Chances are, it’ll mostly compose of psions and any reinforcements that didn’t join the last push. Take them out from a distance, alongside the turrets so you can turn your full attention to the Colossus.
The encounter ends once you enter the vent at the back.
Fourth Encounter
The fourth and final encounter takes place where the plants grow. Three large planters create lanes for you and your enemies. At the center of the room, you will find a couple of Incendiors. Unstoppable Incendiors take their place in Legendary mode. The big boss, Valus Dravusk waits near the exit.
A constant trickle of reinforcement will keep pouring the moment the encounter starts. You need to make quick works out of the reinforcements or you’ll be overwhelmed pretty quickly.

Strand comes in handy for this encounter, especially if it is the current active Surge. Keep moving around as much as possible prioritizing reinforcements and then dealing with the Incendiors. The good thing is that the Incendiors do not have reinforcements once you kill them.
Start focusing on the boss once you have some breathing room. He functions like any other regular Colossus but has a stomp attack that can instantly kill Guardians with 5-6 Resilience.
Once you’ve done enough damage, a group of War Beasts will come charging in. You don’t want them hanging around while the boss is shooting at you. Once they are no more, focus on the boss and end this before the number of reinforcing Legionaries becomes too unbearable.
The Lost Sector mission ends once you’ve killed the boss and opened the chest.
One last reminder, opening the chest on a normal run will net you Glimmer and the occasional piece of gear. Nothing special. Legendary guarantees more Glimmer, a few enhancements cores, and the chance for Exotic armor pieces. The best gains become more likely in Master difficulty. But will require the best weapons and flawless execution to farm.
And there you have it. Everything you need to know about the Hydroponics Delta Lost Sector as a solo Guardian on both normal and Legend difficulty. Till next time. And remember, stay vigilant.
Check out this video from Youtuber Esoterickk showing how to complete the Hydroponics Delta Lost Sector as a solo Warlock.
")
")
