
The Lynx Strikes is the second side mission in Bayonetta 3 where Jeanne continues her infiltration inside the facility in order to retrieve Dr. Sigurd.
In this guide, we will go through Side Mission 2: The Lynx Strikes, listing along any collectibles as well as Bewitchments that can be acquired in the chapter.
See previous Bayonetta 3 Walkthrough Chapter 6 - Off the Rails
Side mission basics
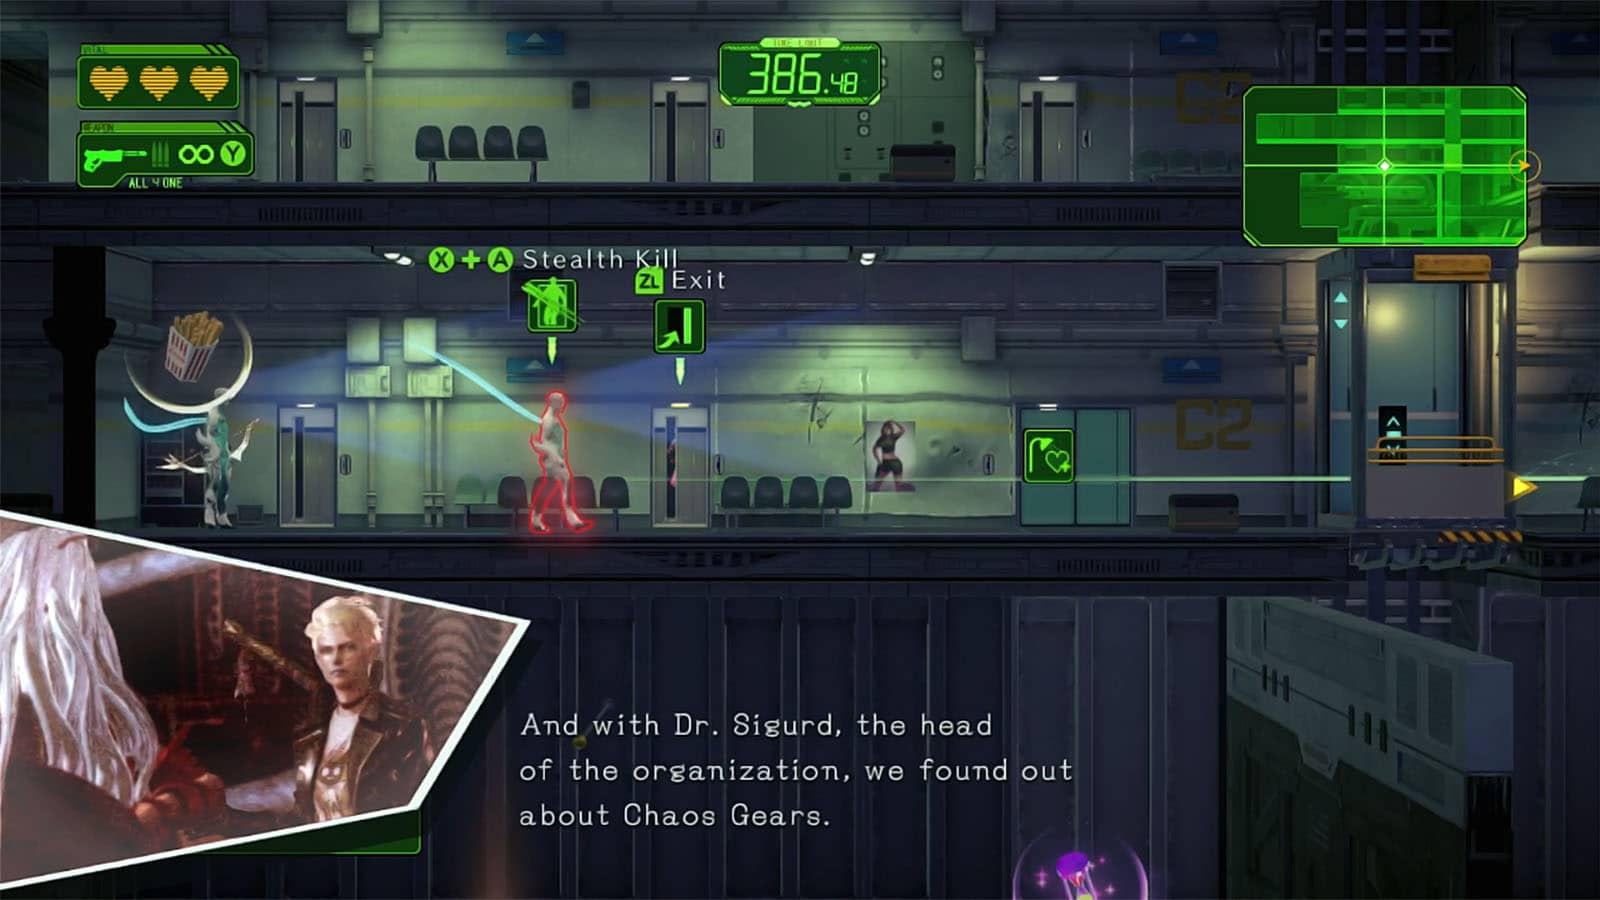
You’ll play as Jeanne as you go through the facility, using her unique skills to sneak through or eliminate enemies. Though you have access to your weapons, unless you’re using the shotgun or bow, it’s easier to to clear out the enemies using stealth kills.
Enemies will have a vision cone showing you the extent of their vision. You can do stealth kills when you are behind them, or you’re hiding behind a door or a vent. There are also turret enemies that latch on to the ceiling; they can be easily passed through and there’s no point to kill them. There is an additional enemy that acts as a proximity mine that explodes when you get too close.
Every time you do a stealth kill, you’ll be put in Witch Time, giving you the opportunity to chain kills. You can also make multiple kills if the enemy you throw lands on another enemy.
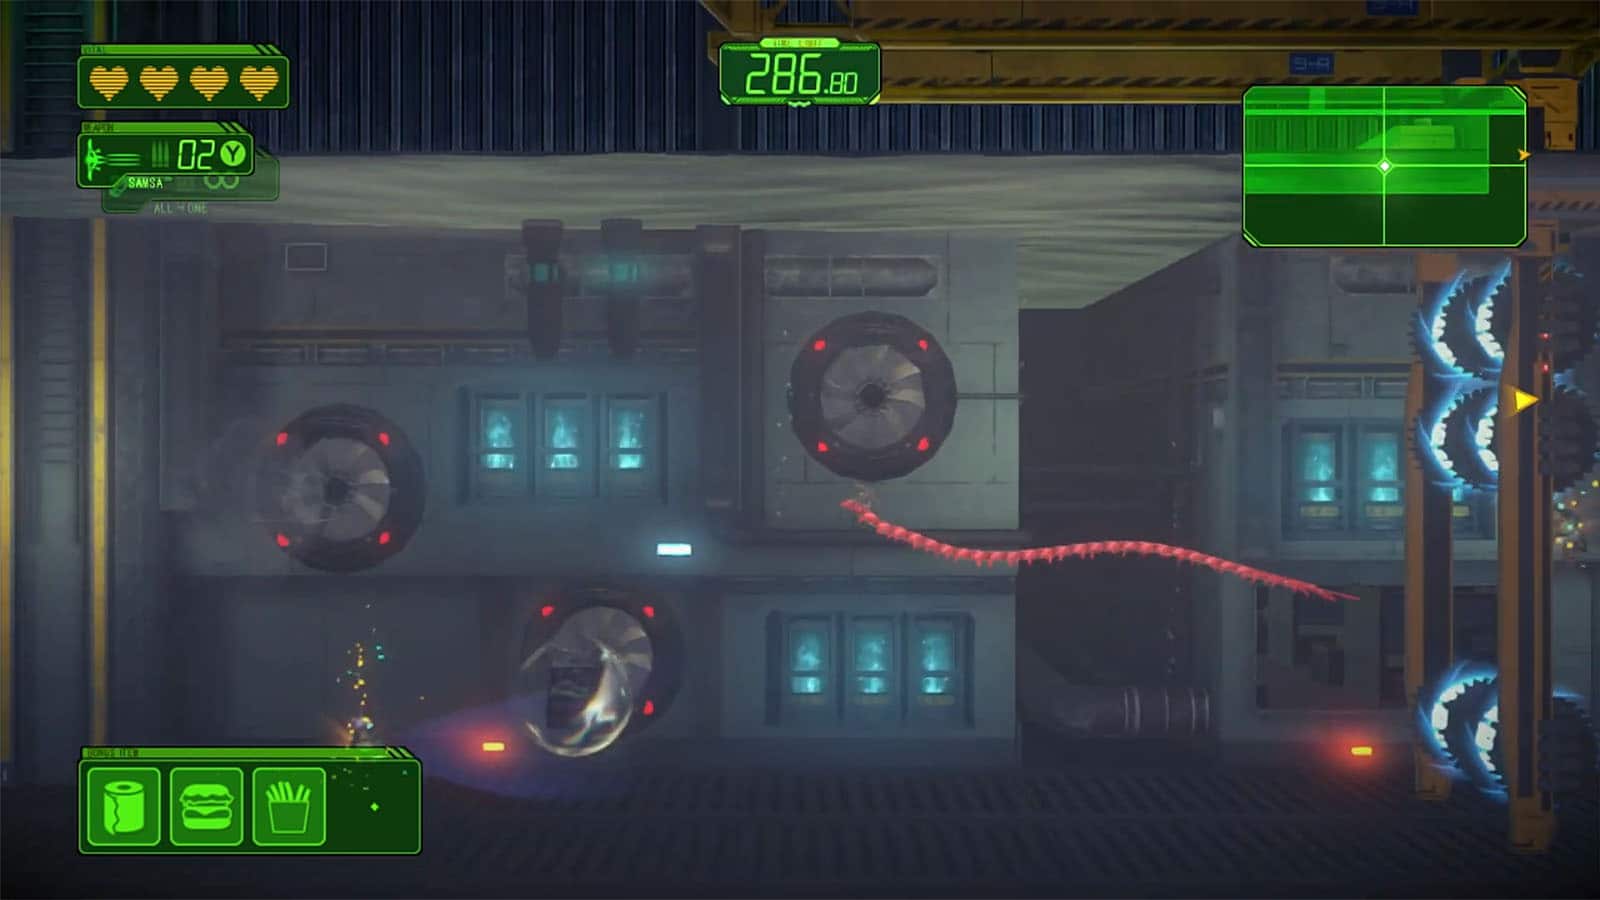
Going through the vents or diving underwater will automatically transform Jeanne to her Lynx or Centipede mode, respectively.
Side Mission 2 The Lynx Strikes Bewitchments
There are five bewitchments to obtain in this side mission:

- Collect all Halos hidden behind closed doors – Enter the doors that are marked with a winged person with three halos around it. There are five doors in total, all before entering the underwater section.
- Avoid taking damage while moving through the water – Similar to the previous side mission, simply go through the underwater area without hitting any of the obstacles.
- Avoid getting hit by the pursuing Cumulonimbus’ attacks – Try not to get hit once you go through the chase section of the level.

- Get a rocket launcher from the supply system – During the boss fight, use the supply system to request a rocket launcher supply drop. The supply rotates as Samsa (bow) > Col. Slade (rocket launcher) > HP Heal > Garnet Roses (shotgun).

- Find and defeat Affinity – While underwater, go towards the left and enter the hole on the wall. Climb the ladder towards the glowing marker to summon Affinity.
Collectibles
There are a couple collectibles that can be found in the facility.
Echoes of Memory #1
After opening the gate to the chase room, you’ll see the Echoes of Memory near the ladder down to the underwater area.

Figure Box #1
In the underwater area, in front of the whirlpool. Time your movement to avoid getting hit.
Food Collectibles
There are special collectibles that can be found in this level that add bonuses to the final level score.
- Fries – Just a level below the C1 starting point, to the left.

- Tissue Roll – Inside the vent of the top floor between the first and second lifts.

- Burger – Top floor, past the third elevator to the left.

- Soda – Near the end of the level, right before the boss fight.
See next Bayonetta 3 Walkthrough Chapter 7: Burning Sands
If you like this guide, be sure to check out our other Bayonetta 3 articles:
- Bayonetta 3 Chapter List – How Many Chapters
- Bayonetta 3 Ending Explained
- Bayonetta 3 Singularity (Explained)
- All Outfits in Bayonetta 3
- Bayonetta 3 Weapons and Abilities
- Bayonetta 3 Day One Update Patch Notes Revealed
- How Long to Beat Bayonetta 3 – Game Length
Check out this video by Timodus sowing gameplay for Side Mission 2:


