


Where we last left off, we have gone across the Realms and acquired all the upgrades we need to access the Spire in each of the realms. The road to the upgrades was not an easy one but we’ve only just begun.
In this fifth walkthrough guide, we’ll tell what you need to do to Awaken the Spire in St. Andrew. This is one of the more enjoyable puzzle quests in the game. This is all thanks to one awesome harvesting robot.
St. Andrew Part 2
We are now going to do what we first set out to do: Awakening the Embrace by activating the Spires on each of the three Realms. Since we’re already in St. Andrew, let’s start there.
Head back to the Omniwheel and set the destination to eh Reservoir.
Go down the front stairs and look for a lift. Take it up to the rim of the reservoir.
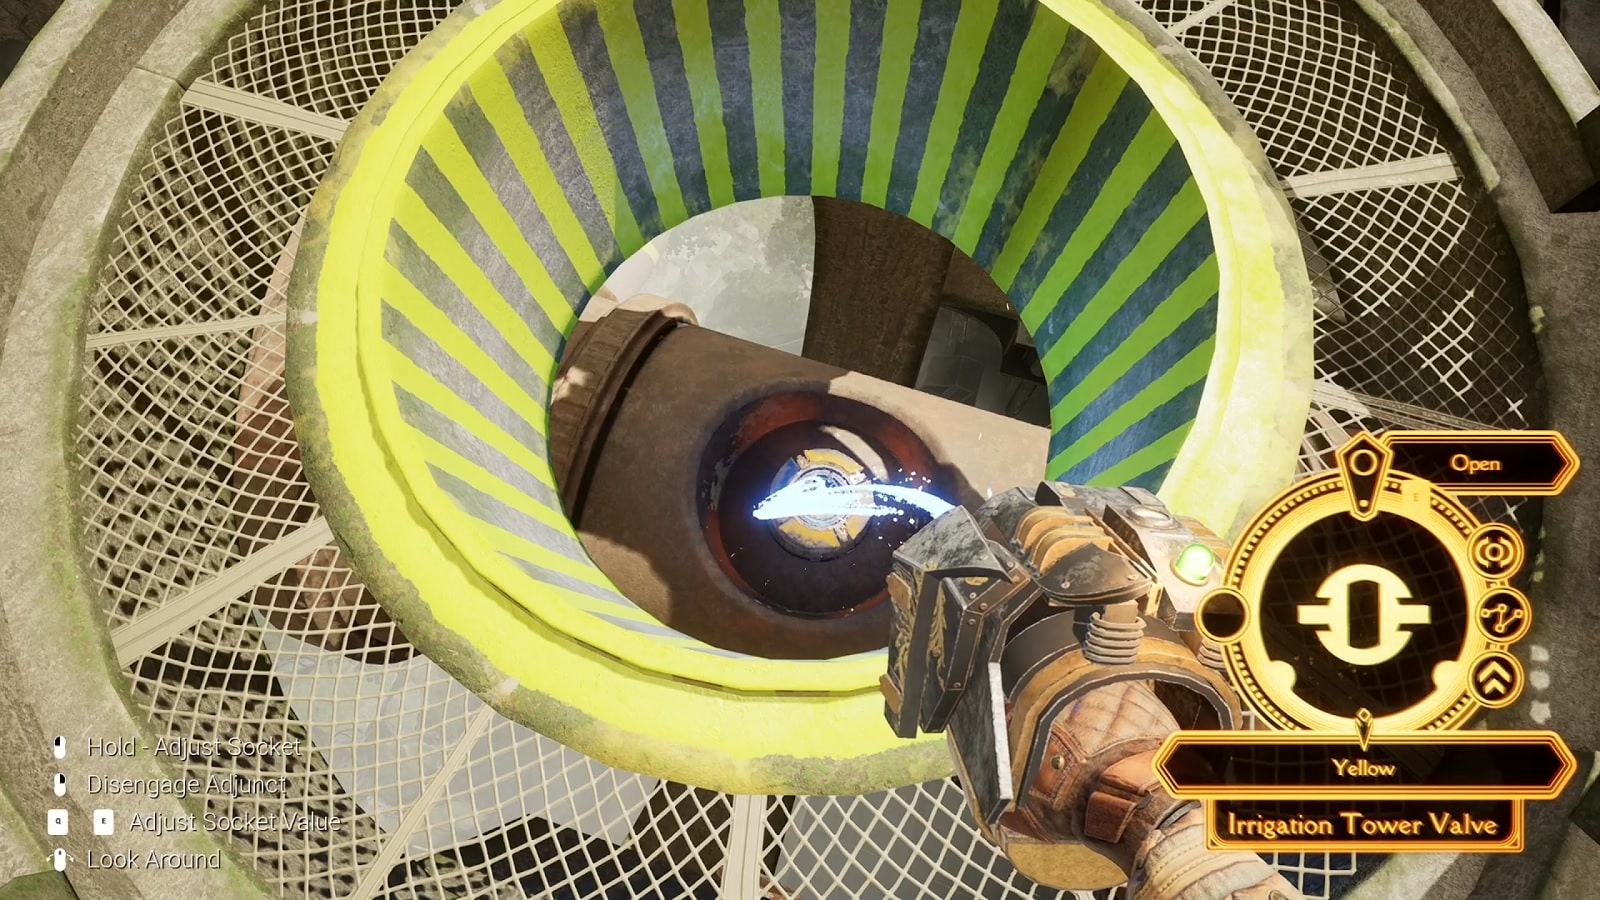
There are four Irrigation Tower Valves near the entrance to the St. Andrew Spire. (There’s no need to run around the reservoir rim.) They feed the four water towers located in different parts of the land down below. Open the four valves and now you’ll have to figure out how to open the endpoints of the valves.
Head back down the lift and immediately head left to find a giant robot spider thing.
Say hello to the Camelus. The game describes it as a watering and harvesting robot.
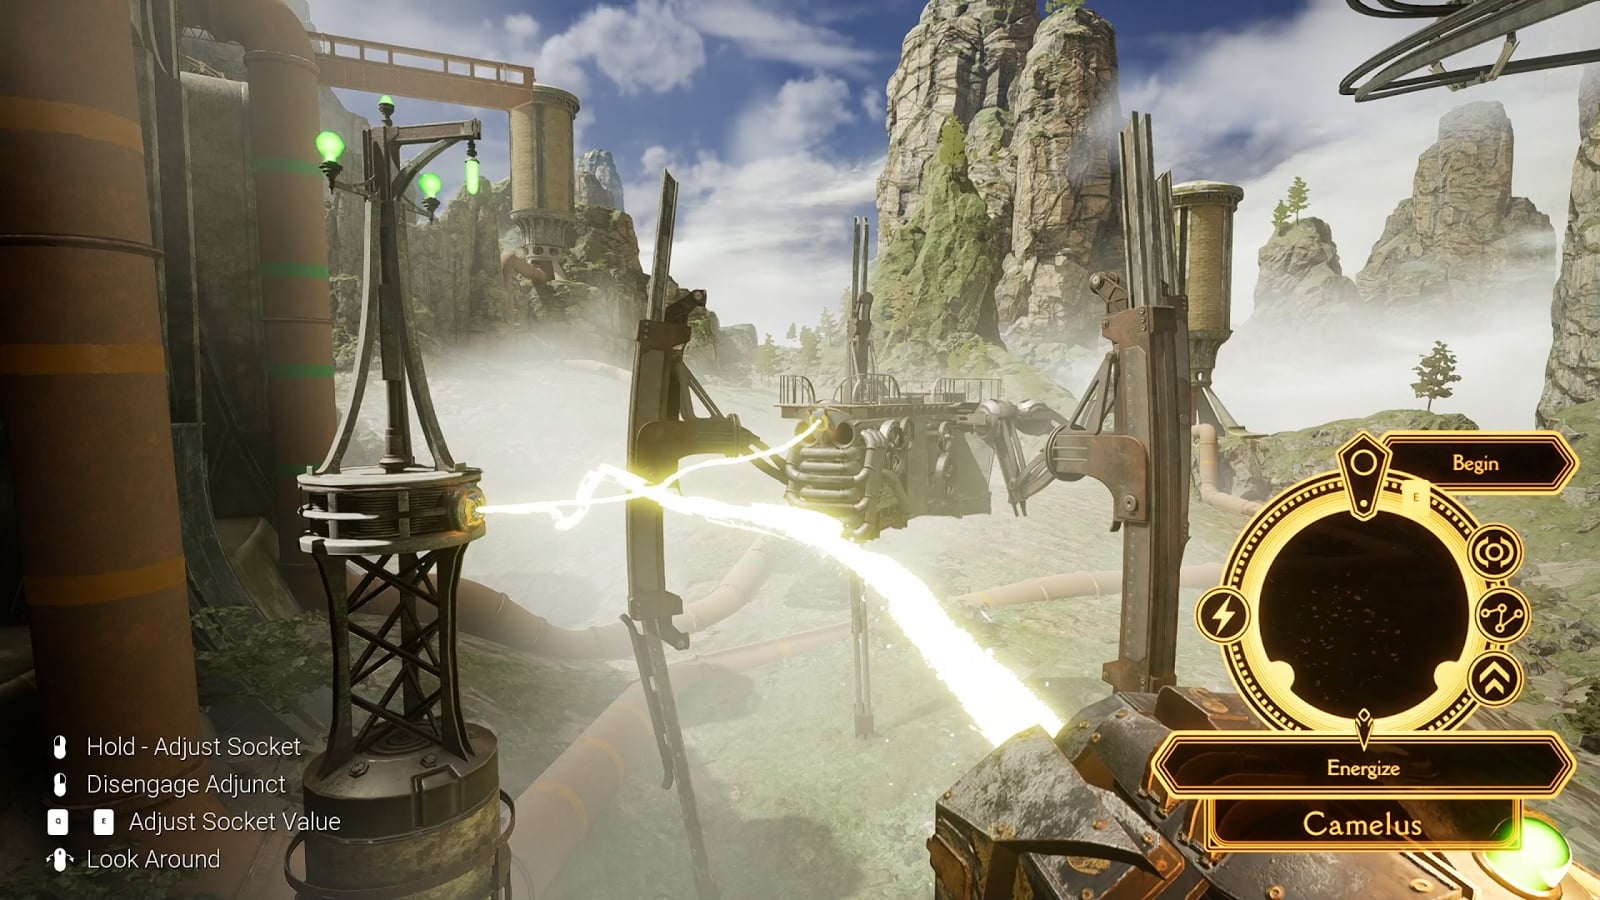
To power up the Camelus, you’ll have to concatenate your Adjunct from the power tower to the walking machine itself.
Now that the machine is powered-up, use the console at the end of the catwalk to summon the Camelus. Open the hatch using the Socket on the back, and then climb inside.
The Camelus control center has two Sockets inside. The Socket up front has two Modes – Drive and Rotate. The Socket in the back allows the for the raising and lowering of the walker. Drive around a bit until you’re used to the controls.

There are pipes scattered around the area. You are going to go to each of them and open the valves with the intent of releasing the water contained inside the reservoir. You can use the map (as pictured above) as a rough guide as to where to go.
Follow the pipes and use the diagram at the bottom right to get the approximate location for the Sockets. You can’t actually socket through the front glass of the Camelus. For two of the valve sockets, you’ll have to make use of the hole that’s looking at the bottom of the walker. The other two sockets will require you to dock the Camelus and look around the area for them. It’s worth noting that the Camelus will automatically dock when close to a docking area.
Now we’re ready to open the valves.
Opening the Orange Pipe
The orange pipe is probably the easiest to do. You can start with this one before going after the harder ones. Simply align the walker in a way that the back lines up with the top of the orange pipe.
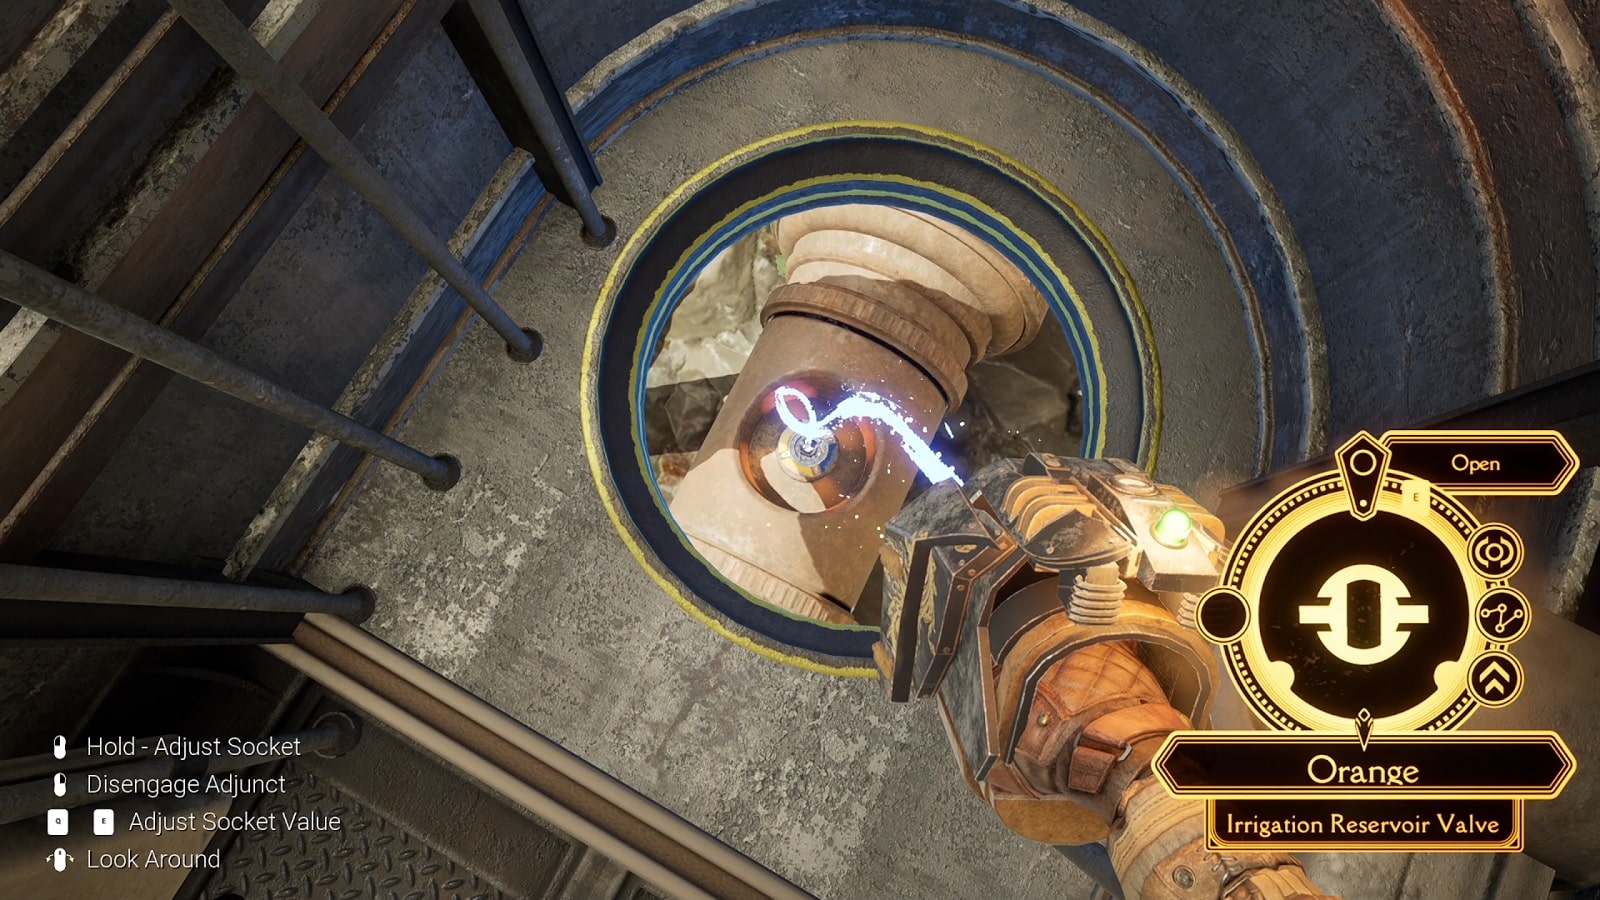
To help you align the Camelus, there is the diagram on the bottom right that will show an “X” and a symbol of the closed pipe. Line up both symbols to get close as possible to the objective. You can also launch the Adjunct from the back of the walker while you’re at the back to allow you to “eyeball” the top of the pipe.
Opening the Red Pipe
The red pipe valve socket is located inside a tube. Thankfully, the tube itself is hard to miss. You’ll need to lower the tube first.
Pack the harvester next to the pipe. Just close enough so that your Adjunct can reach the Socket on the side of the vertical pipe. (It would really help if you can get a visual on the Socket first.)
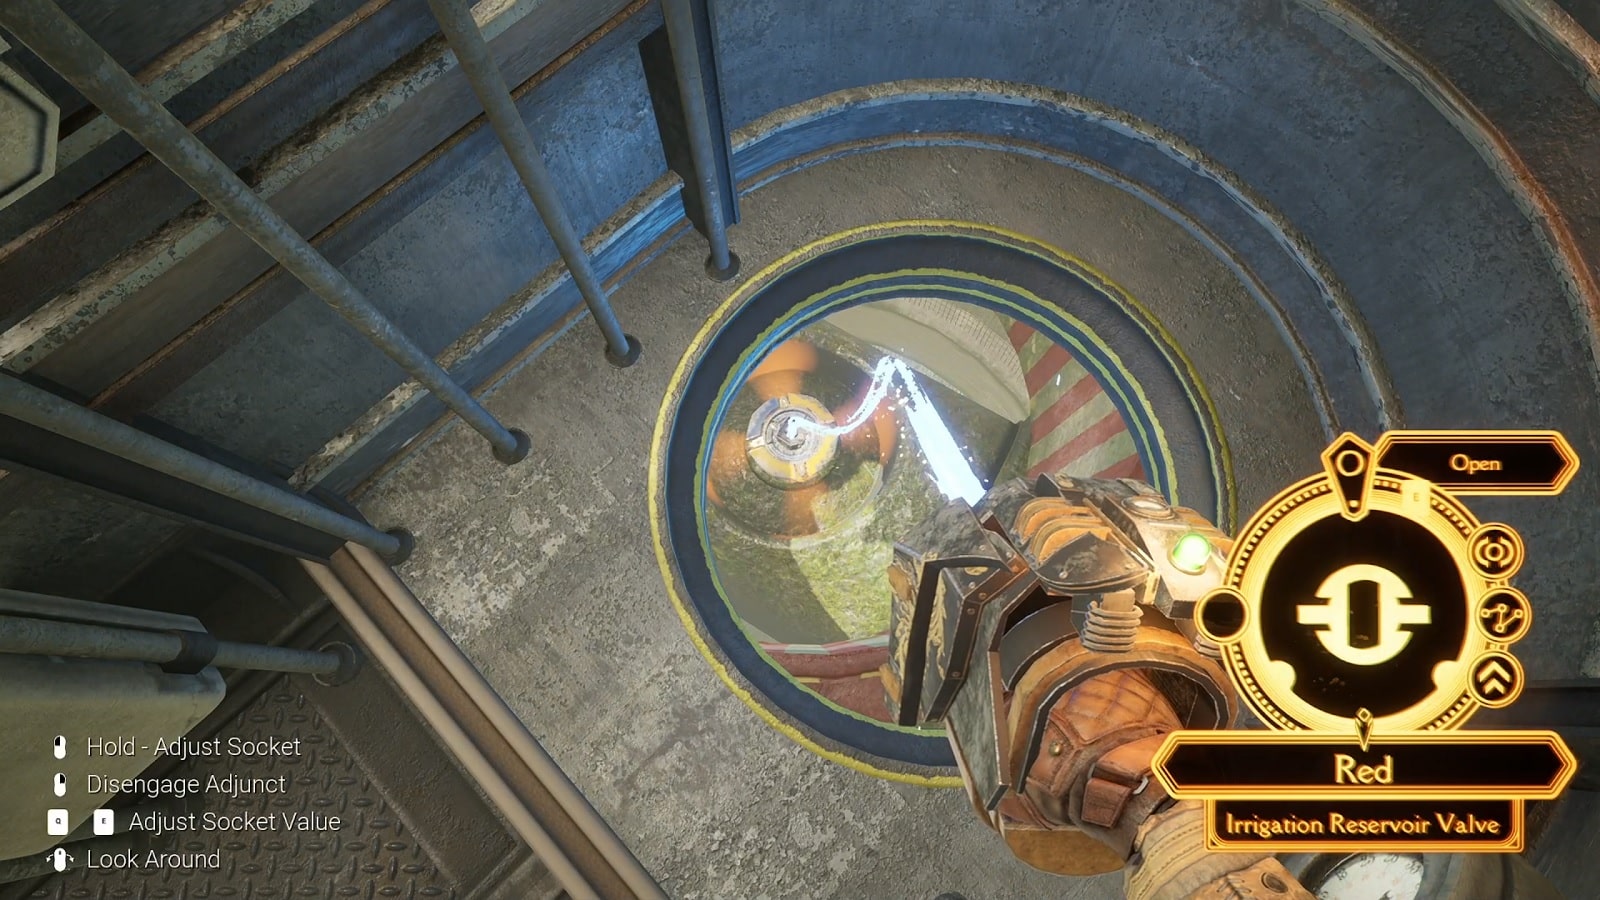
Once the pipe has been lowered, you can go about aligning the harvester the same way you did for the Orange Pipe.
Opening the Green Pipe
We’ll go for the Green Pipe next. This pipe is one of the two remaining pipes where you need to disembark in order to open. It is visible inside the Camelus. It is located on the blind side of the pipe opposite the cliff face.
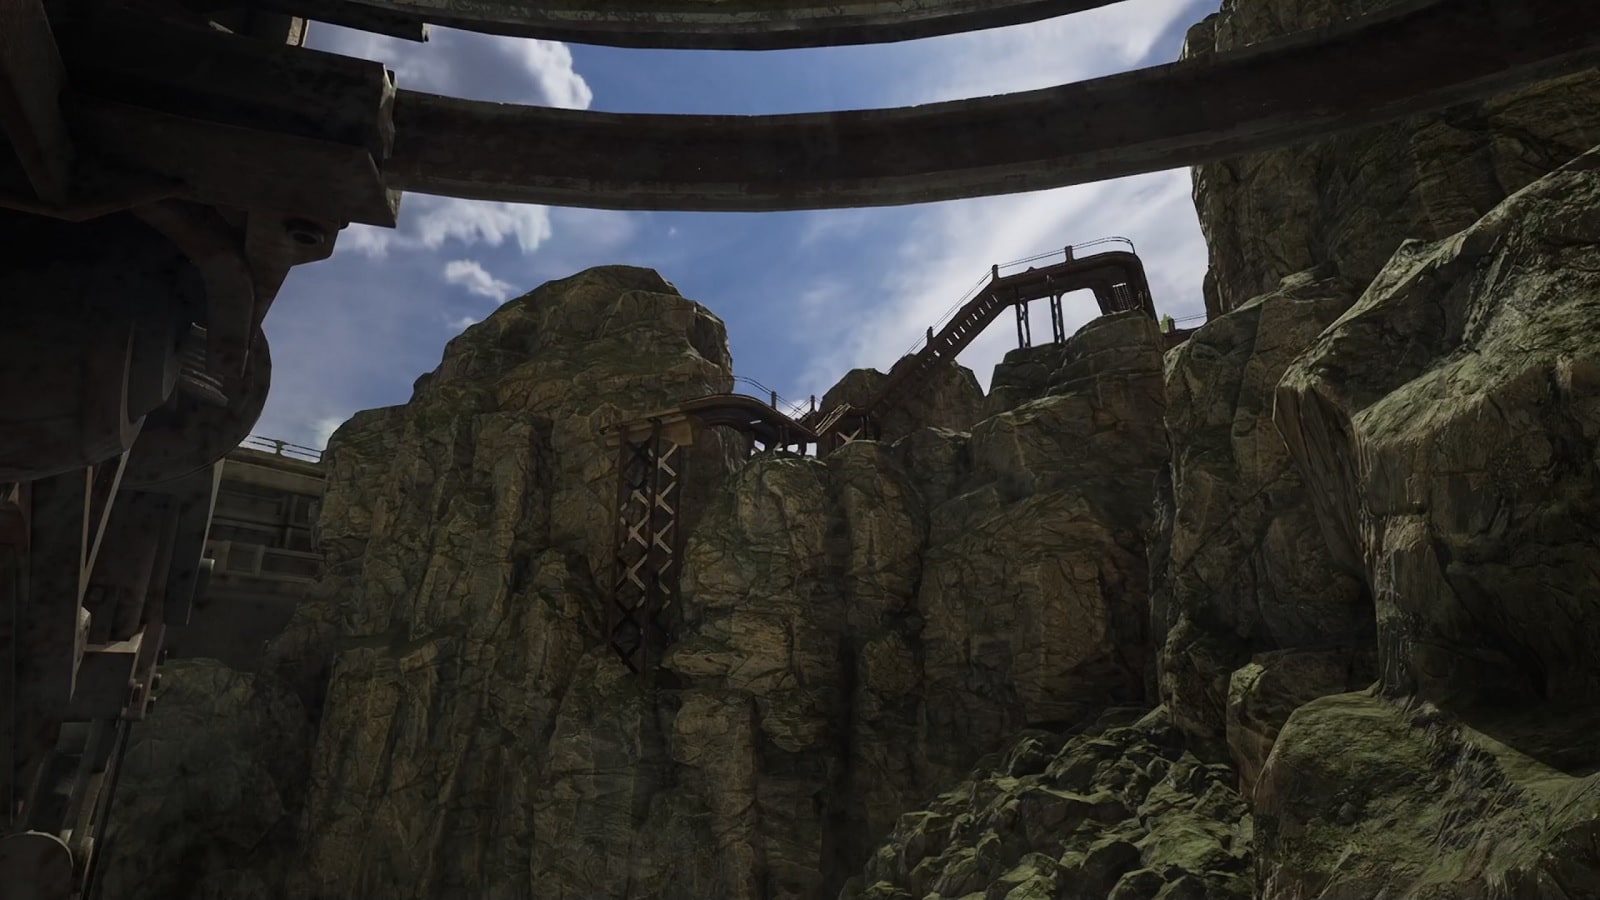
The picture above is the place you need to go to in order to get to the Green Pipe Socket. It is located between the green pipe and the reservoir. The beauty of this is that you don’t even need to adjust anything yourself. Simply go near the cliff face the Camelus will take over the controls and dock for you. (What a handy helper.)
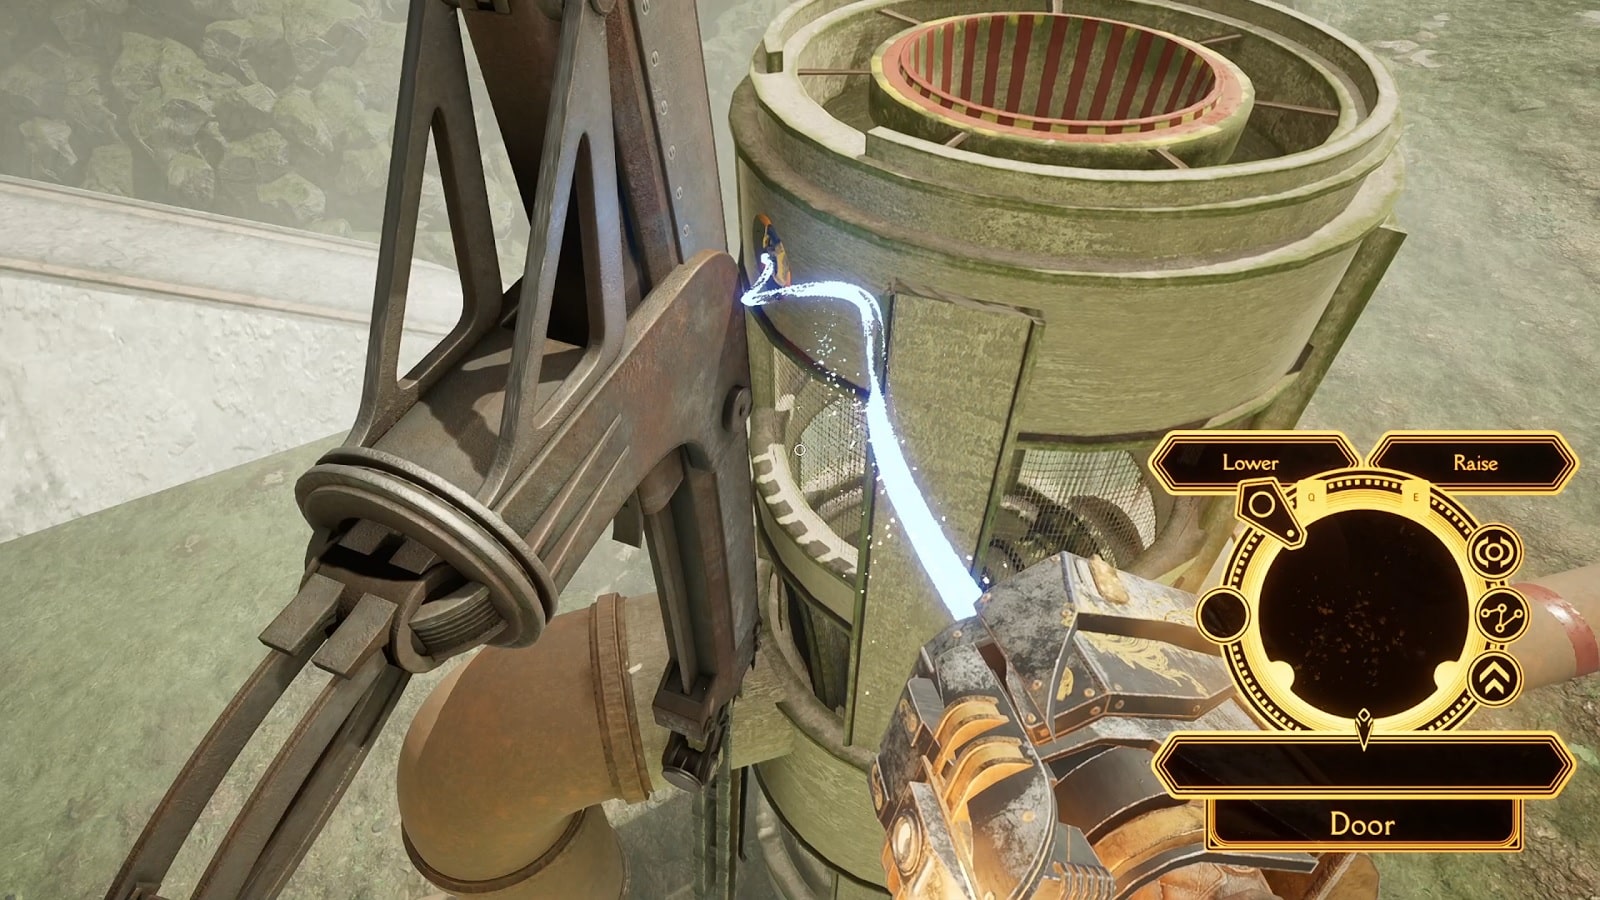
Once you’re out of the Camelus, follow the stairs and you should find a bunker on top of the ridge. Use your Adjunct to raise the bunker entrance. Enter the bunker and lower it again to make another doorway appear on the side.
Open the heavy door and walk to the end of the walkway to find the green piper socket. Open the pipe and then make your way back to the Camelus.
Opening the Yellow Pipe
The yellow pipe is probably the one that gave you a hard time. It certainly did stump us for a moment or two.
Essentially, the Camelus will dock in the maintenance facility. The Yellow Pipe is located in a place that’s covered by a folded bridge. You need to find a way to raise the bridge and expose the Socket behind it.
This starts by going to the middle floor and interacting with the bridge socket there. This will result in the bridge raising up. Great. Now you won’t be able to get back the way you came from because that command folded the bridge on the upper floor.
Worry not though. Here’s the solution.
Go to the lowest floor and look up the hole to interact with the Camelus. Remember, the Socket in the back controls the height of the machine. Lower the Camelus until it is roughly in line with the bridge on the middle floor.
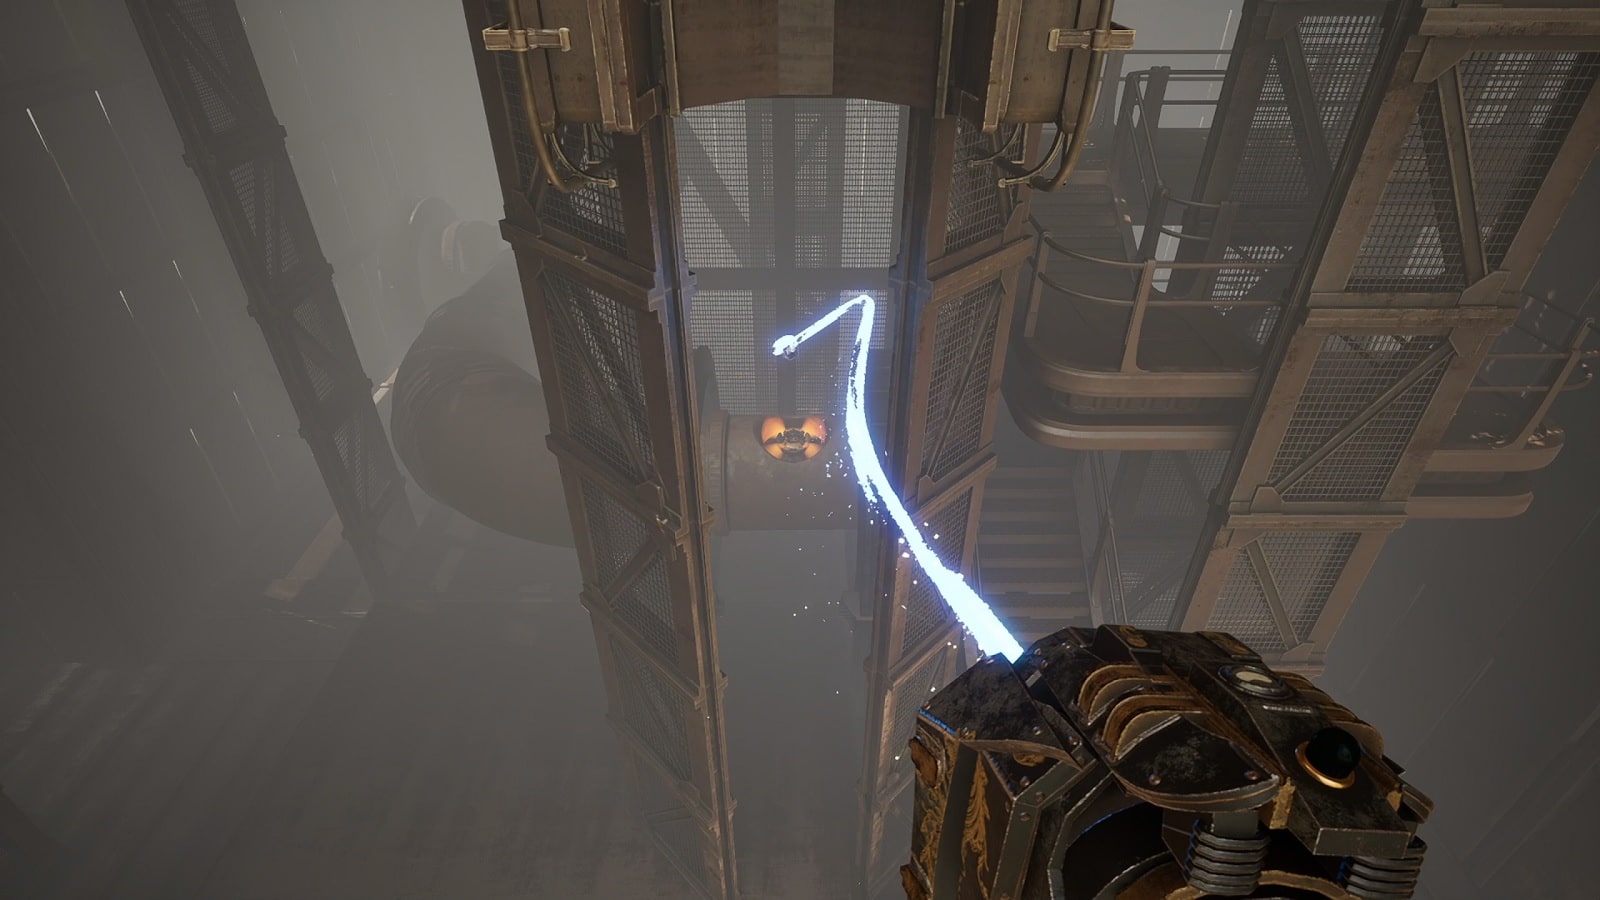
From there, you’ll want to walk back to the Camelus. Once inside, lower the profile to its lowest and exit the machine from the top once again. You can now easily interact with the yellow pipe socket. Activate it to open the last of the pipes.
Now that all four valves have been opened, ride back to the reservoir and dock in the same place where you initially started from. When you get back to the top of the reservoir, you will find that the waters inside have lowered, allowing you to walk down the stairs and enter the Spire.
Take the lift to the top of the Spire. Do note that the lift stops in the middle of the ascent. Interact with the Socket again to make it go up to the top.
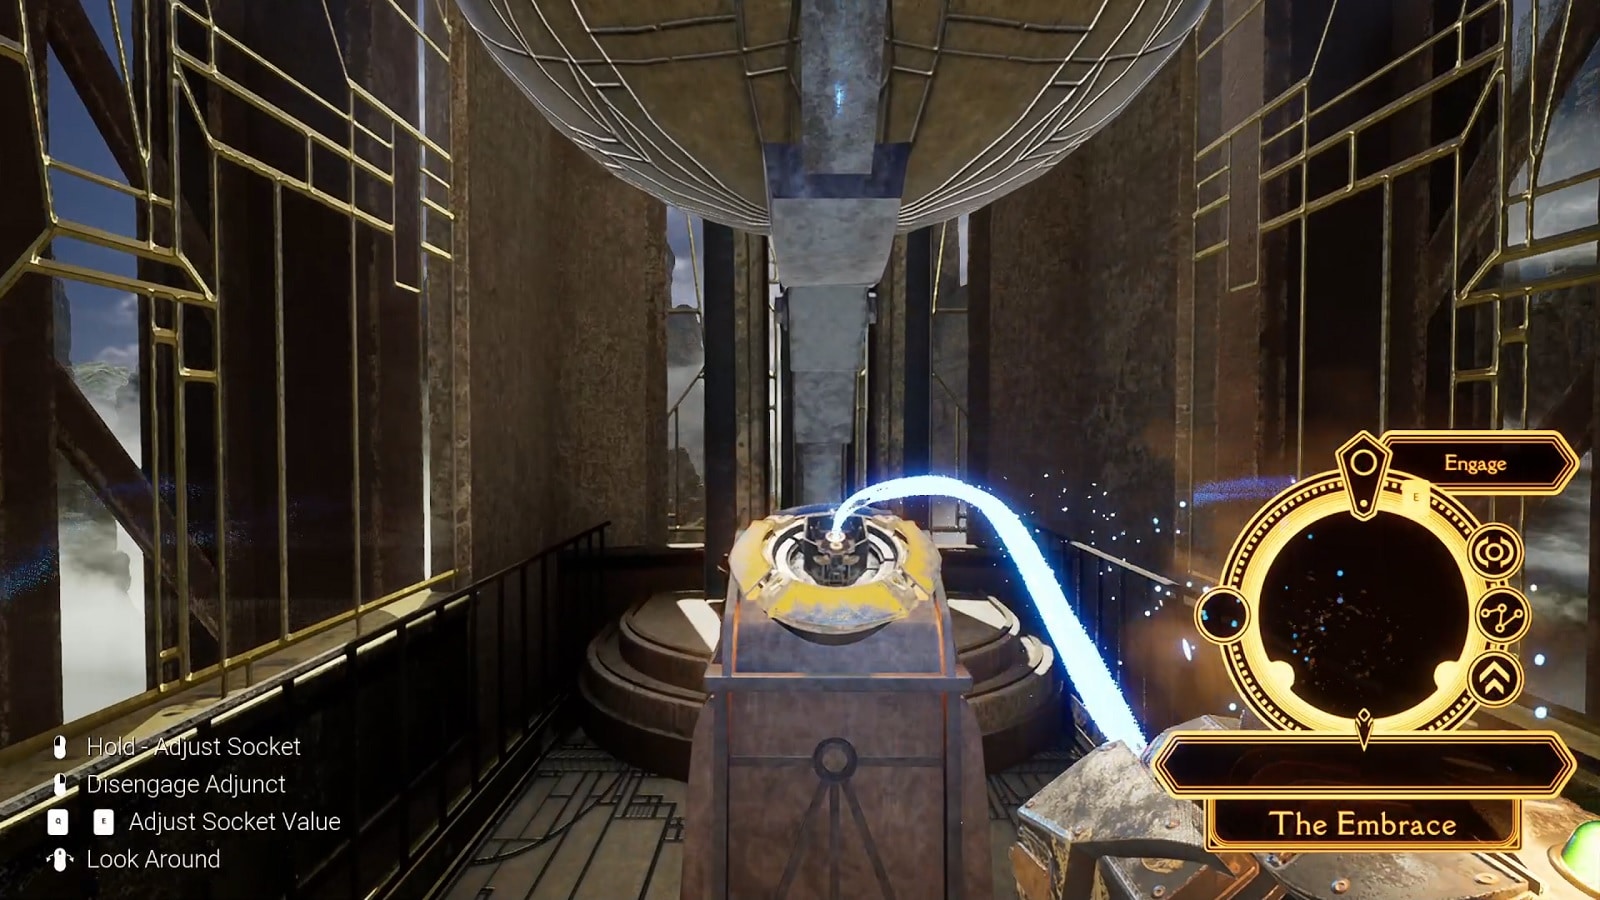
At last, you have now started to Awaken the Embrace by engaging it in this realm. Success!
That’s the first one down. Now, let’s see if you can repeat the process two more times.
Go back down the lift and exit where you came from. Walk across the reservoir until you find the Conveyance Pod. It’s time to leave this place and head back to the Swan.
Please note that we will not be covering the Swan in this Walkthrough guide. The Swan is a hub world, and while the Mentor has a few comments here and there, it isn’t a place of importance until the end of the game.
And that’s the end of the fifth part of our Firmament walkthrough. We hope that you find this information useful to you in some shape or form.
Check our review of the game here:
Check out our full lineup of Firmament guides:
- Firmament Walkthrough Part 1: Waking Up
- Firmament Walkthrough Part 2: First Upgrade
- Firmament Walkthrough Part 3: Second Upgrade
- Firmament Walkthrough Part 4: Third Upgrade
- Firmament Walkthrough Part 5: First Spire St. Andrew
Firmament is out now on PC storefronts. With a PS4 and PS5 version with PSVR support coming in the future.


