
And we are back in Curievale. Where we last left off in part one, we are just about to the Swan for the first time. In this second part of our Firmament Walkthrough, we’ll take you back to Curievale where you are now tasked with acquiring the first of three upgrades.
Please note that we will not be covering the Swan in this Walkthrough guide. The Swan is a hub world, and while the Mentor has a few comments here and there, it isn’t a place of importance until the end of the game.
Curievale Part 2
After first visiting the Swan, let’s get right down to business and get everything we need to start the Awakening. That starts with getting the first upgrade: Distance Extension.
You are now back in Curievale. Exit the Pod and then turn left. Follow the path to your next objective. The bridge before you leads to the Grand Arch of this realm. If you’re curious about it, it’s the huge structure behind you. This is the place you need to go to upgrade your Adjunct.
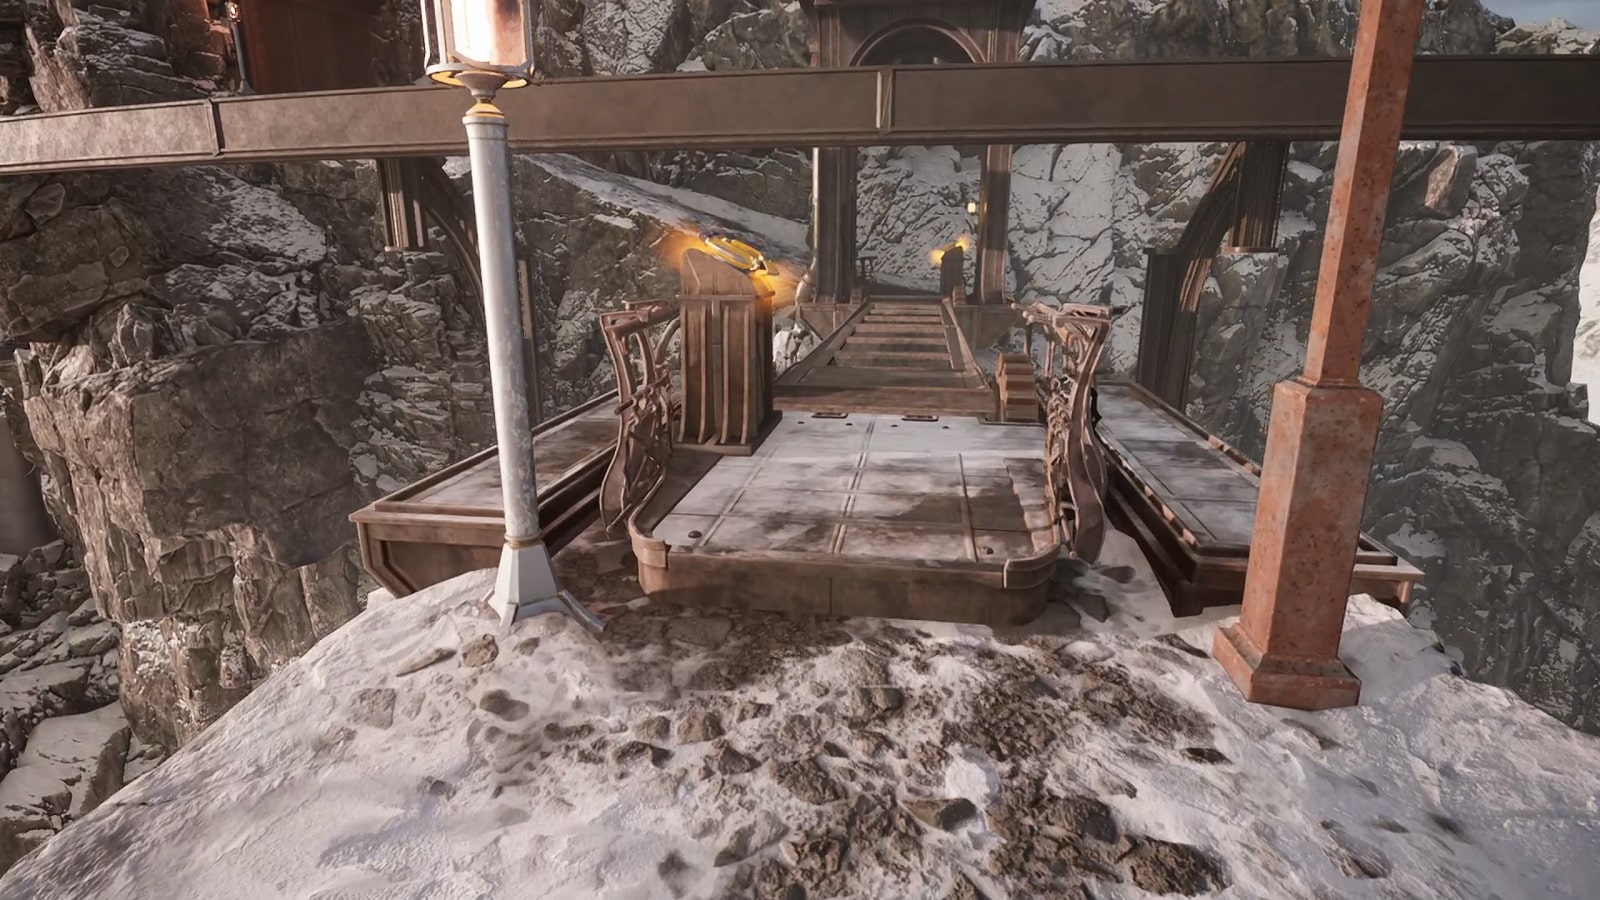
The bridge puzzle is sort of an extension of the game’s tutorial. You are presented with two Sockets. One on either side of the bridge. You can raise the bridge on your side but that leaves the one on the other side. This puzzle will remind you that you can aim and cast your Adjunct to distant targets.
Standing on the tip of the bridge, cast your Adjuct so that it lands on the Socket. You can now use it to activate the bridge from that side. Now, cross the crevasse.
On the opposite side, you won’t see anything except for the metal door further down the path.
There is a ladder on the side of the bridge where the metal door is. It’s a similar situation to the gap puzzle.
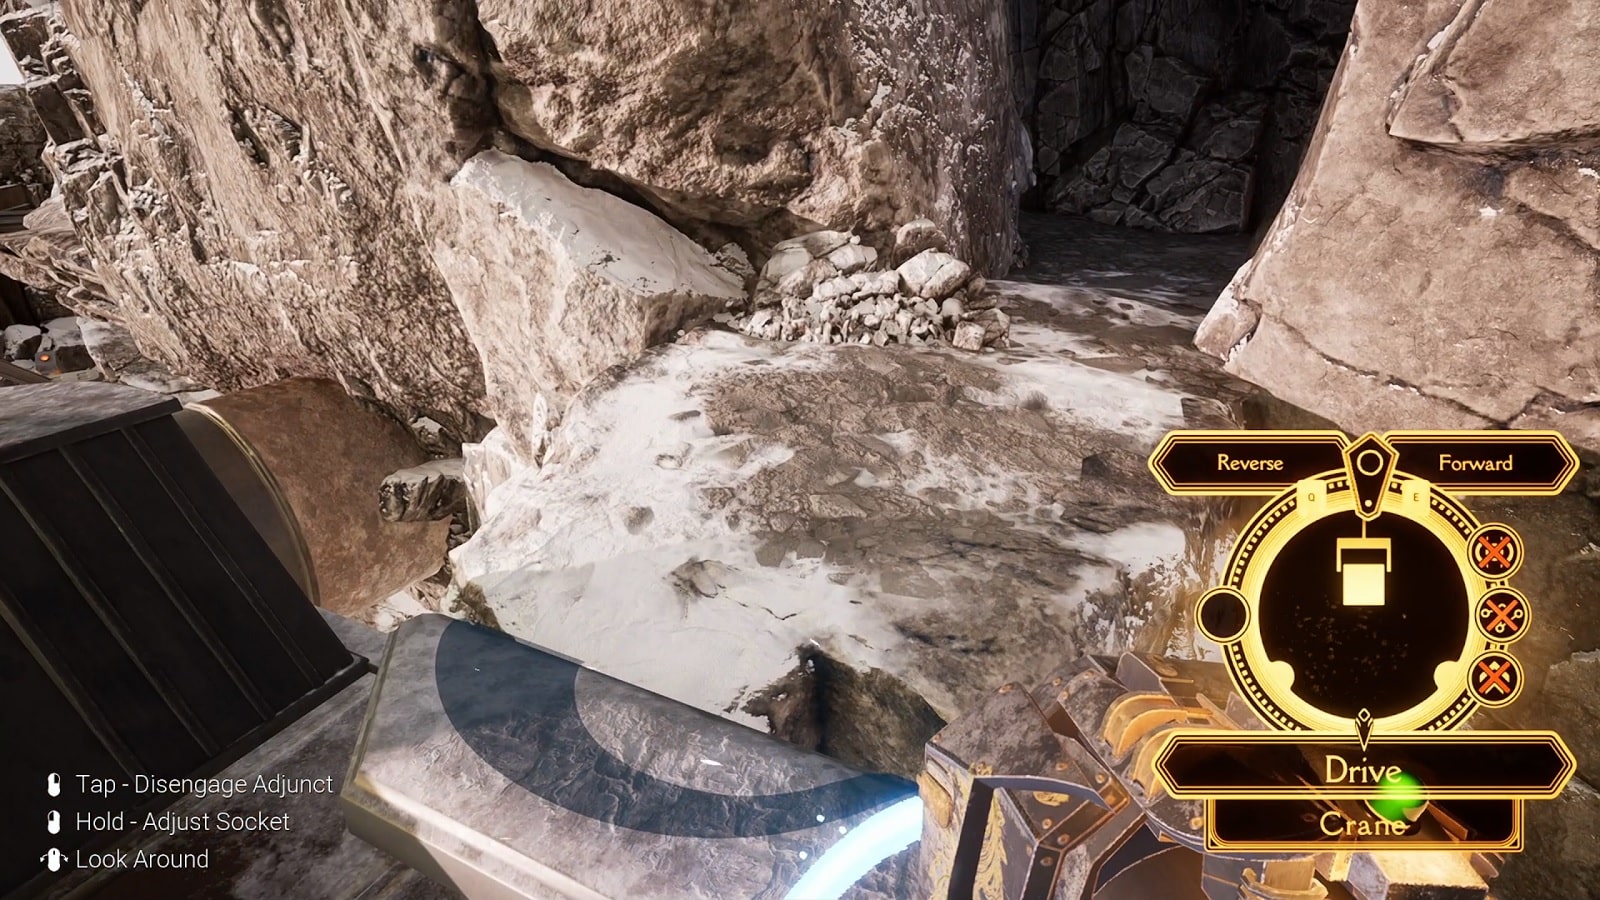
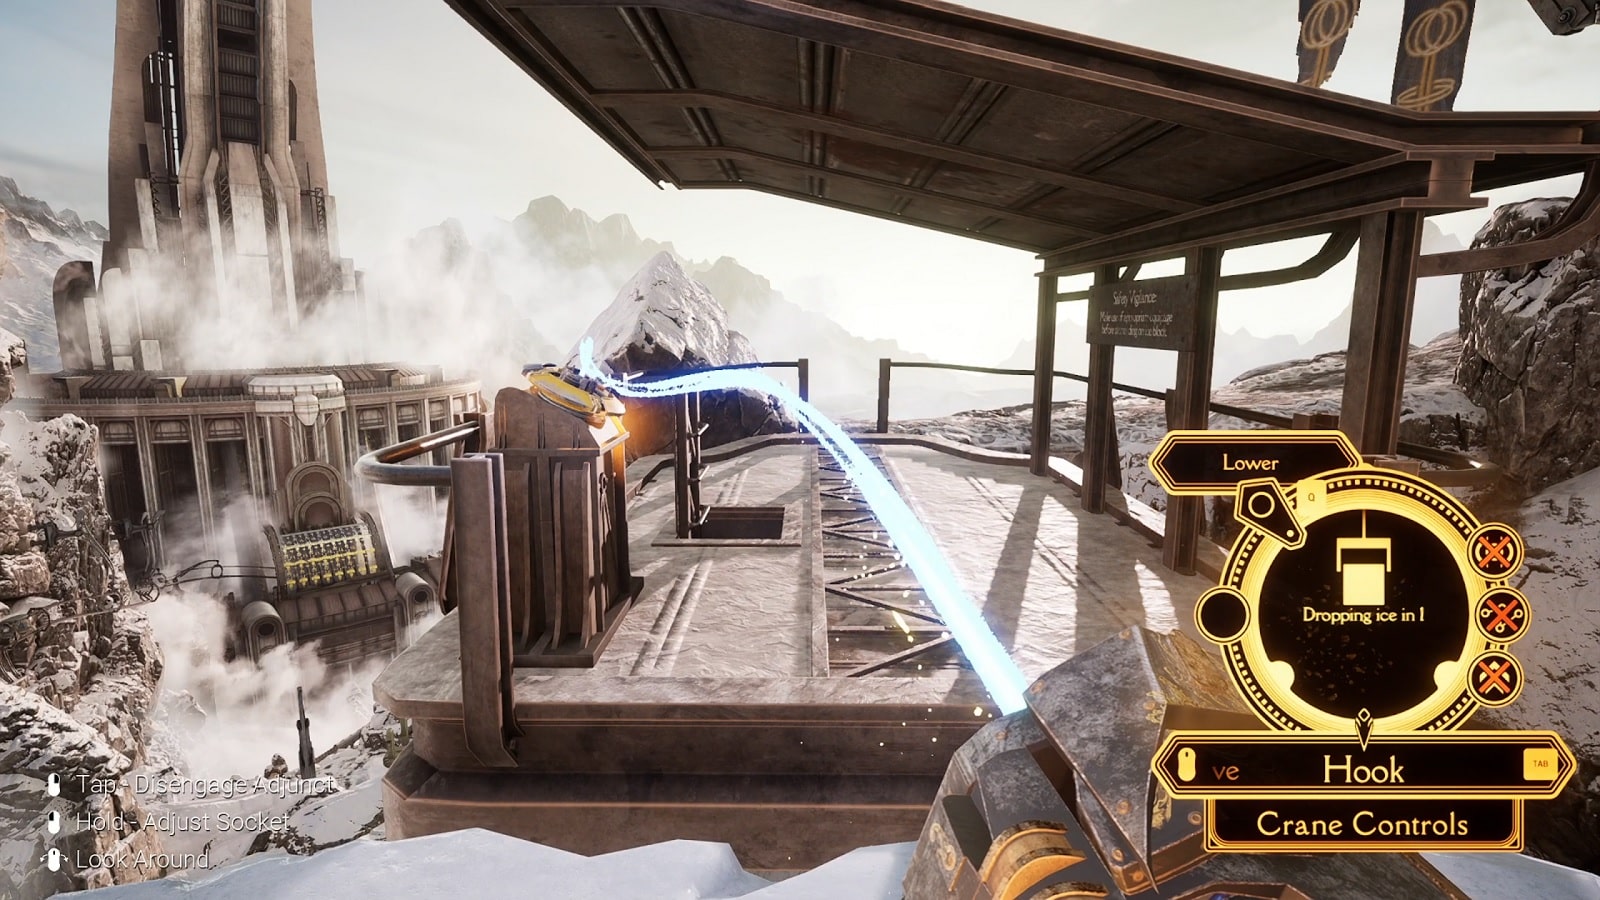
Climb the ladder, and you will find crane controls for the ice block you used to solve the previous puzzle. You will need this block of ice to open the metal door.
You’ll want to ride the ice block to go past the locked door. But it won’t be that easy.
If the crane stops moving for whatever reason, it is most likely that something is in the way of the ice block.
Using the controls back at the control room atop the bridge, lower the ice block to a point where it doesn’t collide with the side of the mountain. But now a new problem arises. If you lower the crane with the bridge up, you’ll won’t be able to lower it. We think it best to lower the bridge first. You’ll then want to lower the ice block as low as possible to make sure that the block clears the mountainside.
Don’t forget that you can activate Sockets from a distance.
You don’t want to go to the end of the line just yet. Stop in front of this cliff first and kindly open the metal door. You don’t really need to do this but it’s better to have shortcuts just in case.
The socket is above the door frame, btw.
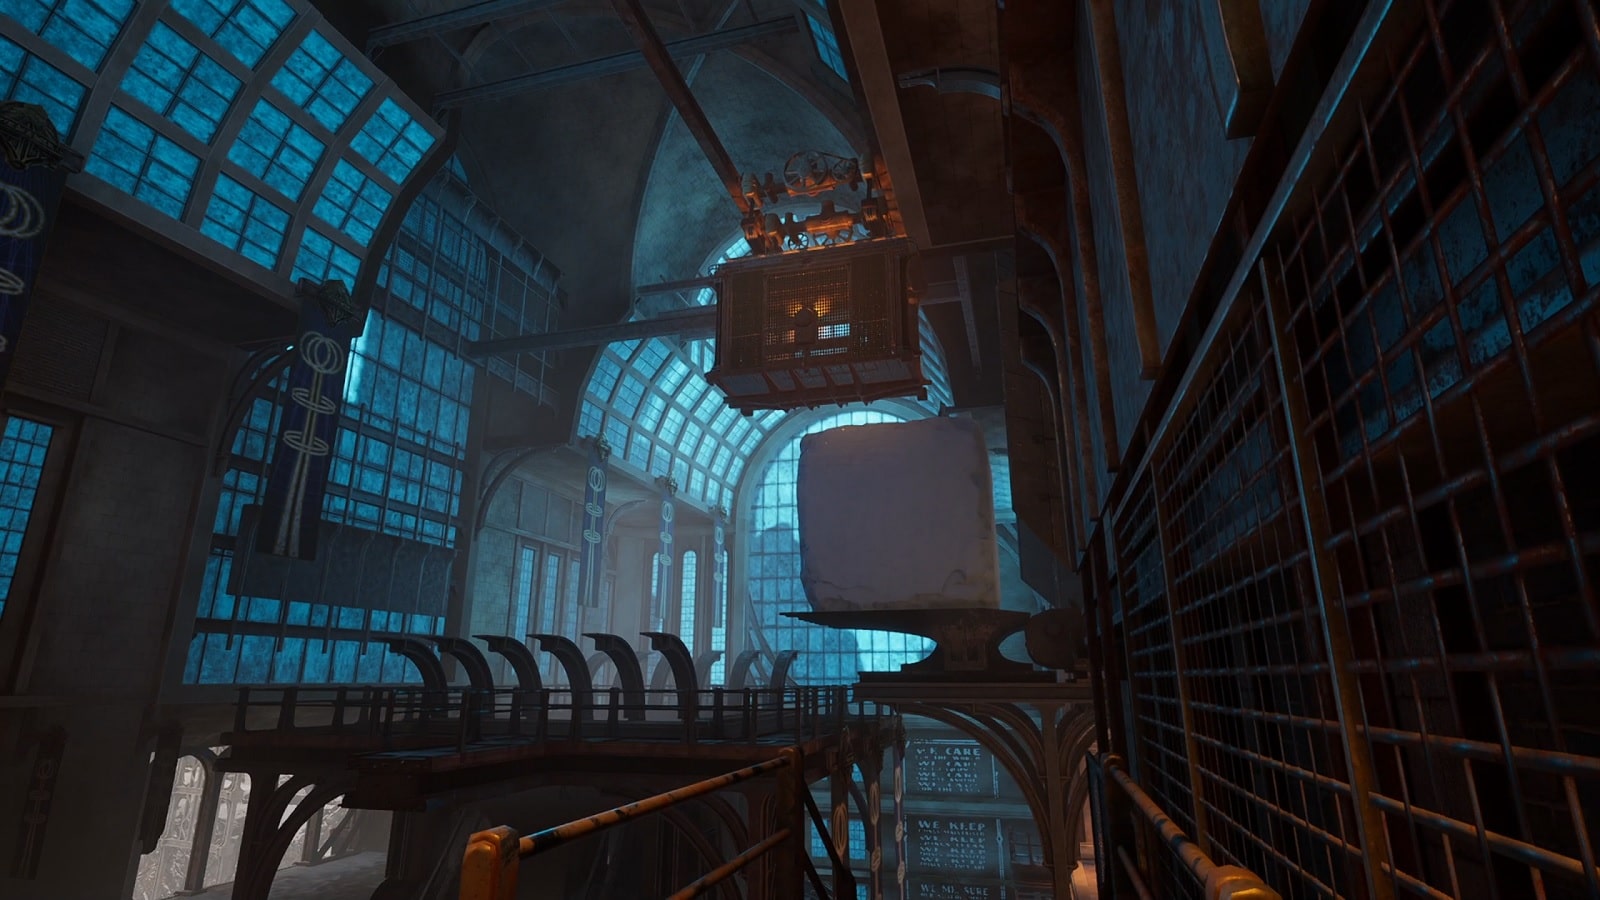
Alright, now we assess our situation. Ahead is an ice chute where the ice block needs to go. Above the chute is a station of sorts. If you go to where the folded bridge is, look behind to see a slightly hidden path going down the cliff. But let’s not think about that now. Let’s try to get the crane into position first.
Unfortunately, you can’t reach the end of the path with the crane being so low as it is. You’ll have to look for an alternative route.
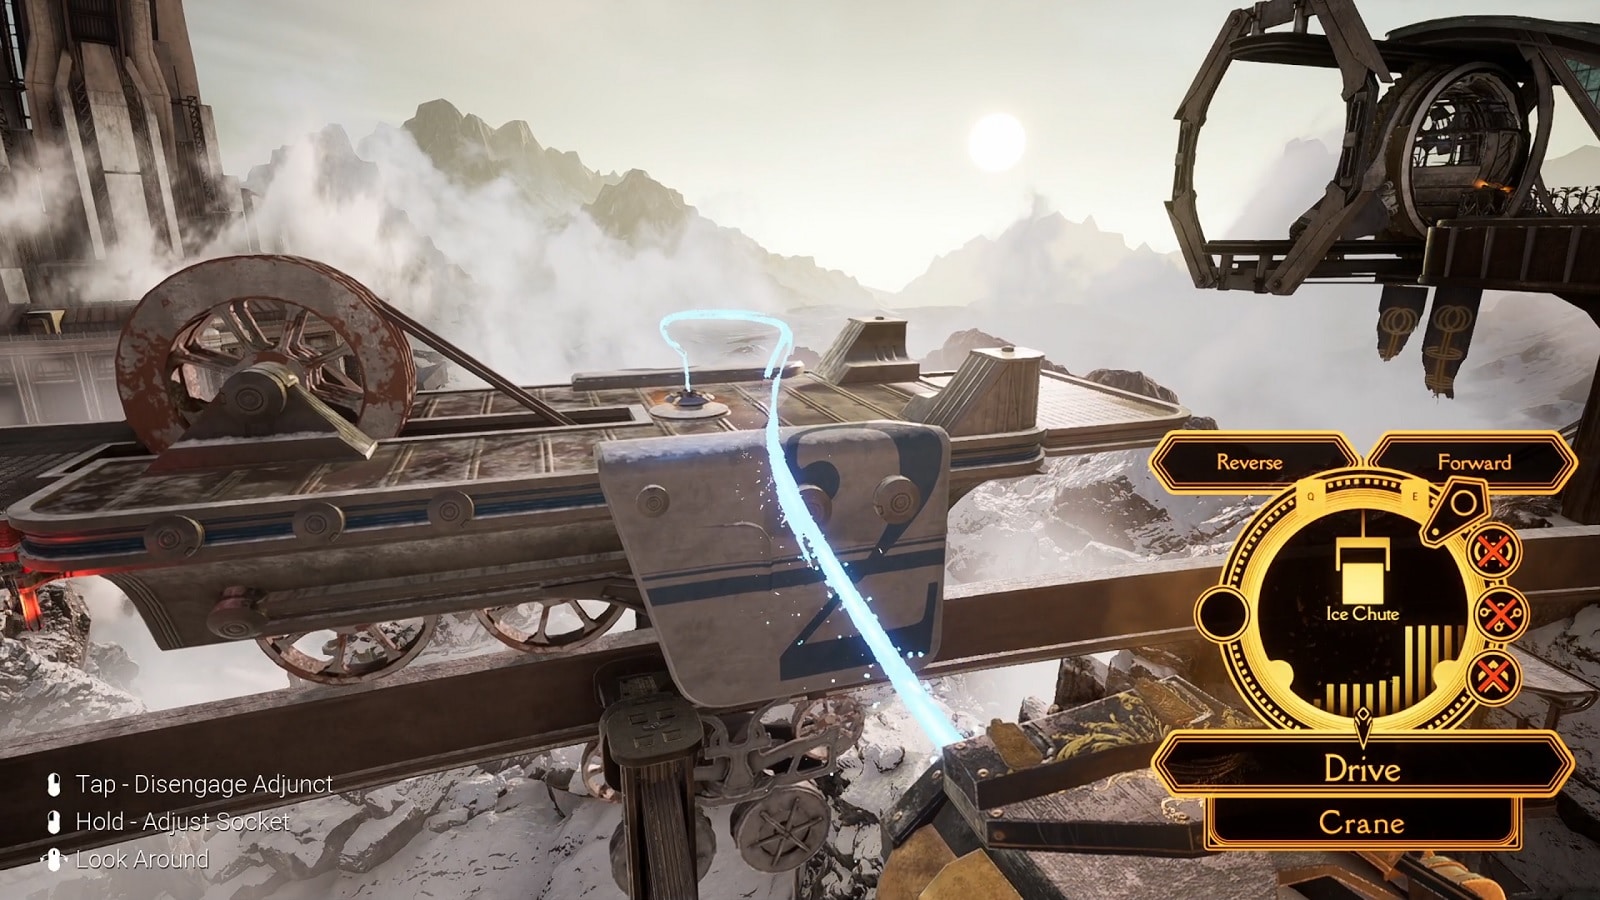
To solve this puzzle, you’ll need to get off the crane transport and control its movement from the edge of the upper cliff. From there, then move the crane as far as you can possibly go on the track. Once you’ve hit the wall, walk down the hidden path and use the ice block to get to the ice chute platform.

To proceed, go to the left of the platform and you’ll find this ladder that’ll take you to the upper platform where the station is. Climb it up to the top.
Once you get to the top, you’ll be greeted with a sign that says:
Safety Vigilance:
Make use of appropriate equipage before descending on ice block
This should be interpreted as a clue to what you need to eventually do.
Hint: you will ride the ice block down the ice chute. Eventually. But not now, first we need to get the ice block into position.
Using the crane controls on the platform, use it to raise up the ice block. It should be high enough to the point that it can go above the ice chute.
Position the ice block on top of the chute. You are now able to safely open the ice chute. Actually, you can open the ice chute right now if you use the Socket above from the ice block. Why not do so to save you a couple of seconds?
Now that the ice block is in position, you’ll see the following message appear on the hud.
Crane locked
Upper chute open
Lower chute closed
This is as far as you can go with this puzzle at the moment. Now, it’s time to press forward. Take the rock path and go up the side of the mountain. At the end of the path, you’ll find the Omniwheel station. This is what we’ll need to get to where we’re going.
But before we get to the station, let’s raise up the bridge first. For good measure.
The station has a couple of Sockets to work with. The outer one is used to call the Omniwheel in the event that the transport itself is in another location.
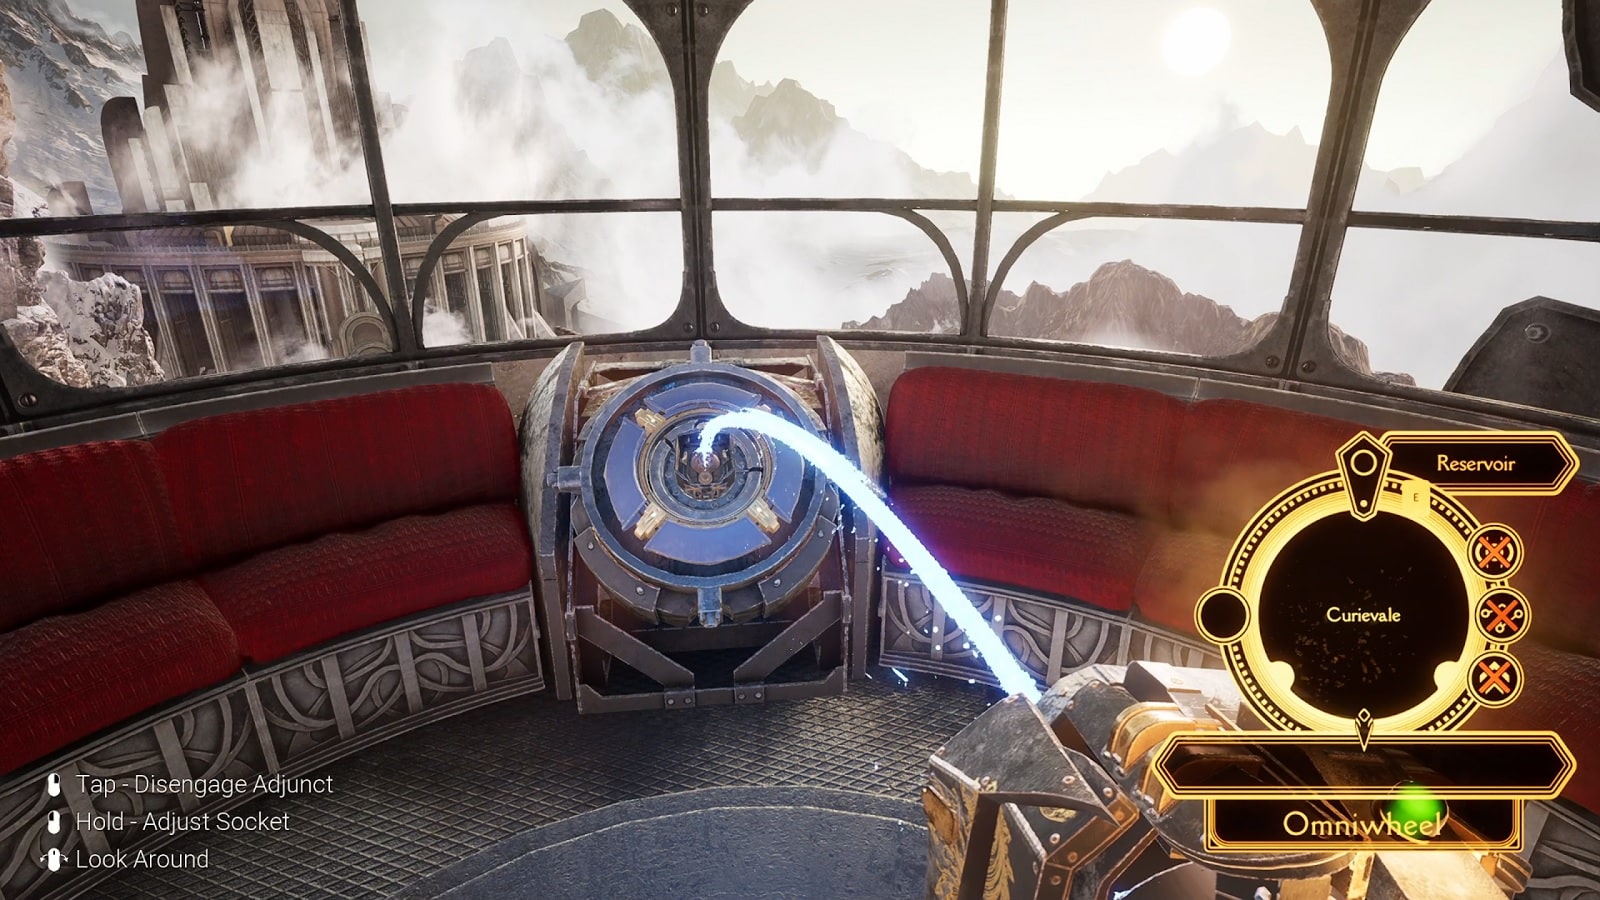
Go inside the Omniwheel and select the only possible destiny available: The Reservoir.
We are now at the Reservoir Station. Get out of the Omniwheel and raise the Lift using the Socket. Get on it and ride it down to the bottom. Once you’re there, go left and follow the path to the ice lake.
At the center of the lake, you’ll see a mysterious structure. This is what we’ll be raising later on. To the right is the Grand Arch. You’re almost there.
On the other side of the frozen lake, you’ll find a metal door. Use your Adjunct to open it. The path before you leads to the Ice Factory.
Once inside the big building, you have a few to do in order to proceed. But before all that, it is a good idea to socket into the Conveyance Pod on the ground floor of the factory. This will add this location to the active list of in-realm locations you can visit.
To proceed, you’ll need to reach the controls at the heart of the factory. But you can’t get to it right now. You’re missing a bridge to get there.
If you look above, you’ll notice this moving platform high above the factory. There is no normal way of getting there currently. You’ll have to be a little creative with your approach.
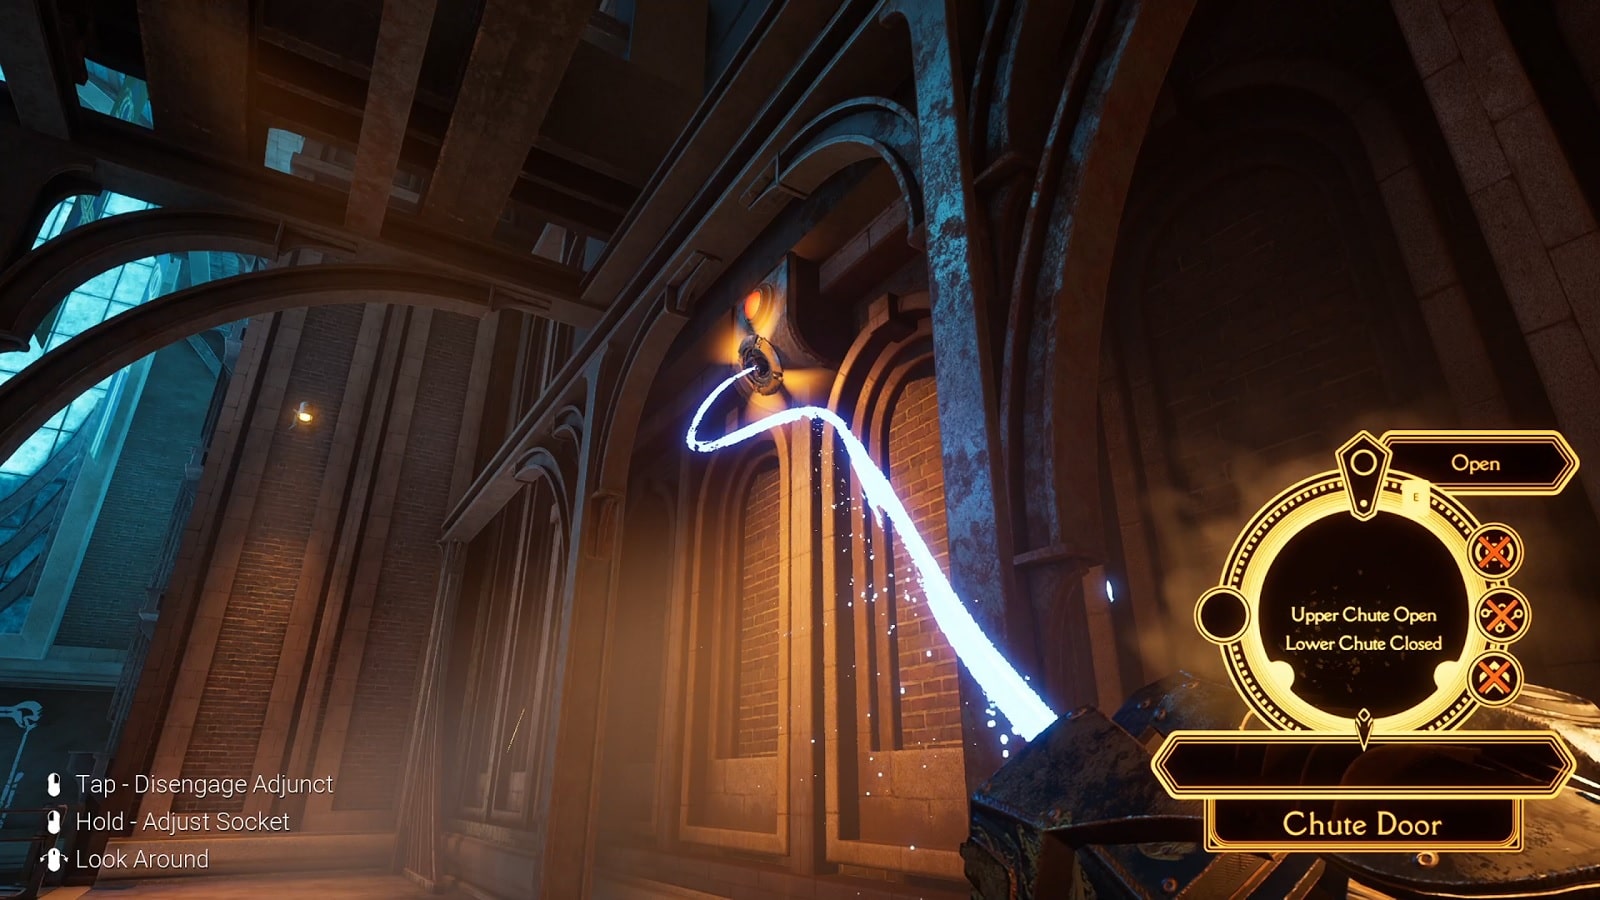
Go back down the stairs to the second level and look at the wall, there is a Socket there that you can activate. Use your Adjunct to open the lower ice chute.
PROGRESS!
Now both the upper and lower ice chutes are now open. You can now return to the Omniwheel station and ride that ice block to the end of the line.
From here, you have a couple of options. You can either return via Omniwheel back to the bluffs or take the Conveyance Pod back to where you started the level. Either way works. And look, opening the metal and raising the bridge worked out for you, didn’t it?
Fast forward to the top of the ice block, use the Socket, and command the machine to Lower the block of ice to the factory below. (You will need to hold the command for a couple of seconds to complete it.)
Enjoy the ride down!
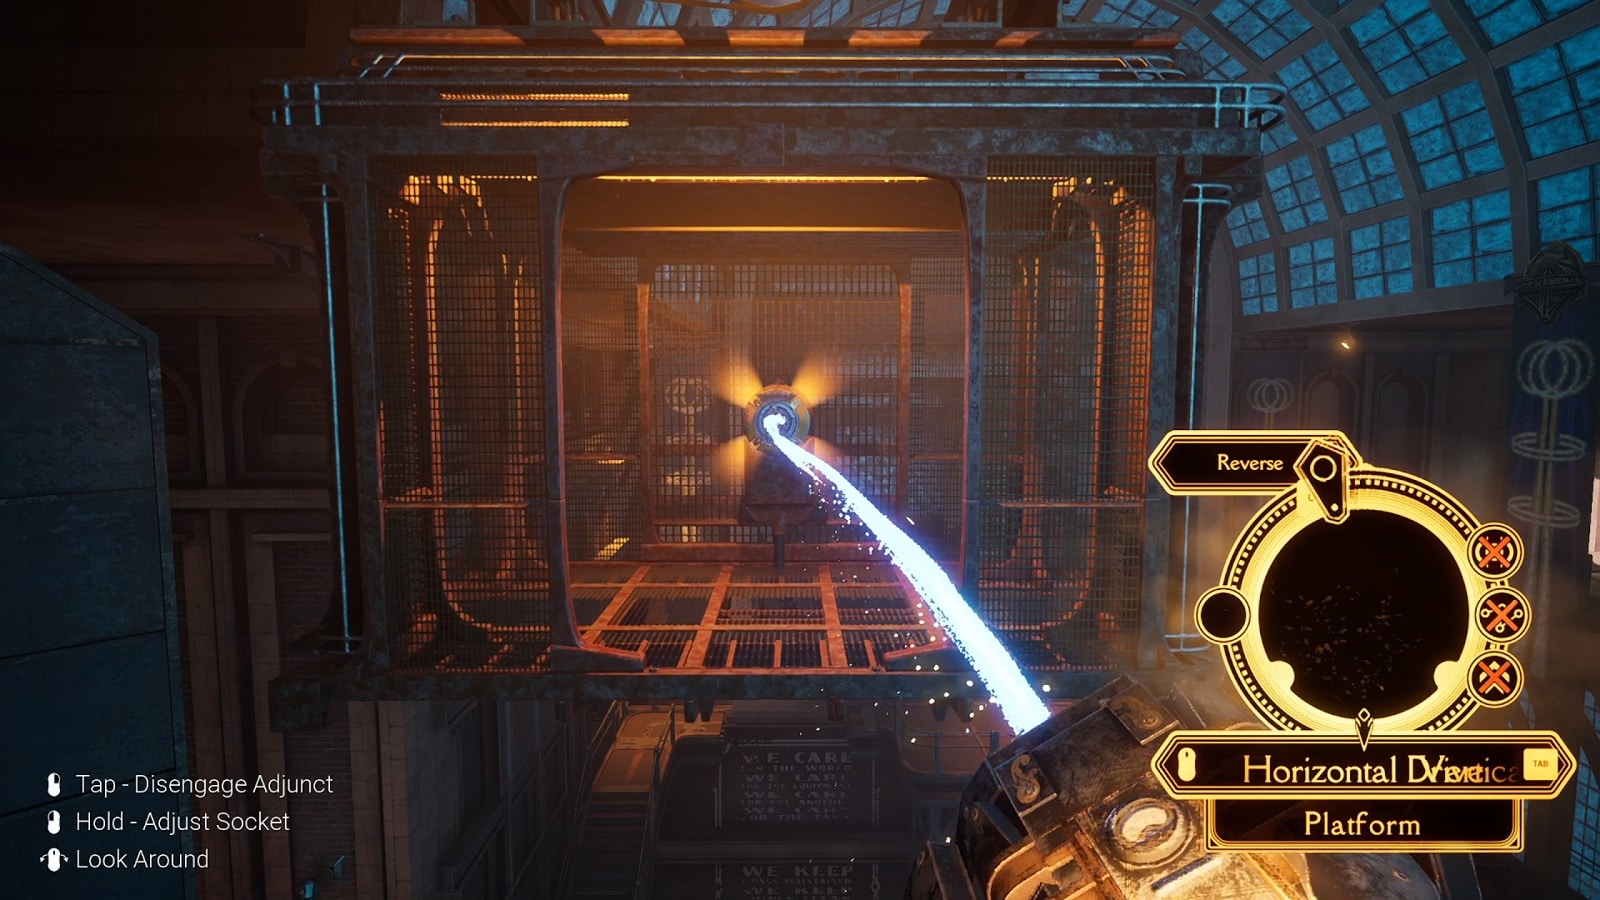
Once you are back in the factory, use your Adjunct to command the platform to go to your location. Next, walk to the floating control booth and move it to the gap where a bridge should have been. (Don’t forget the change modes to have it move up and down.)
At this point, you can turn the ice processor on. Turning it on won’t mean anything to you right now. But it is part of a future puzzle.
Now, walk through the open doorway on the upper floor and will find the Rotary Crane. Walk on top of the ramp to the Fore Cab. (The set of ladders closer to where you entered the Rotary Crane.) There is another cab further in the back called the Aft Cab. You don’t need to go in there yet. That’s for another time, for another puzzle.
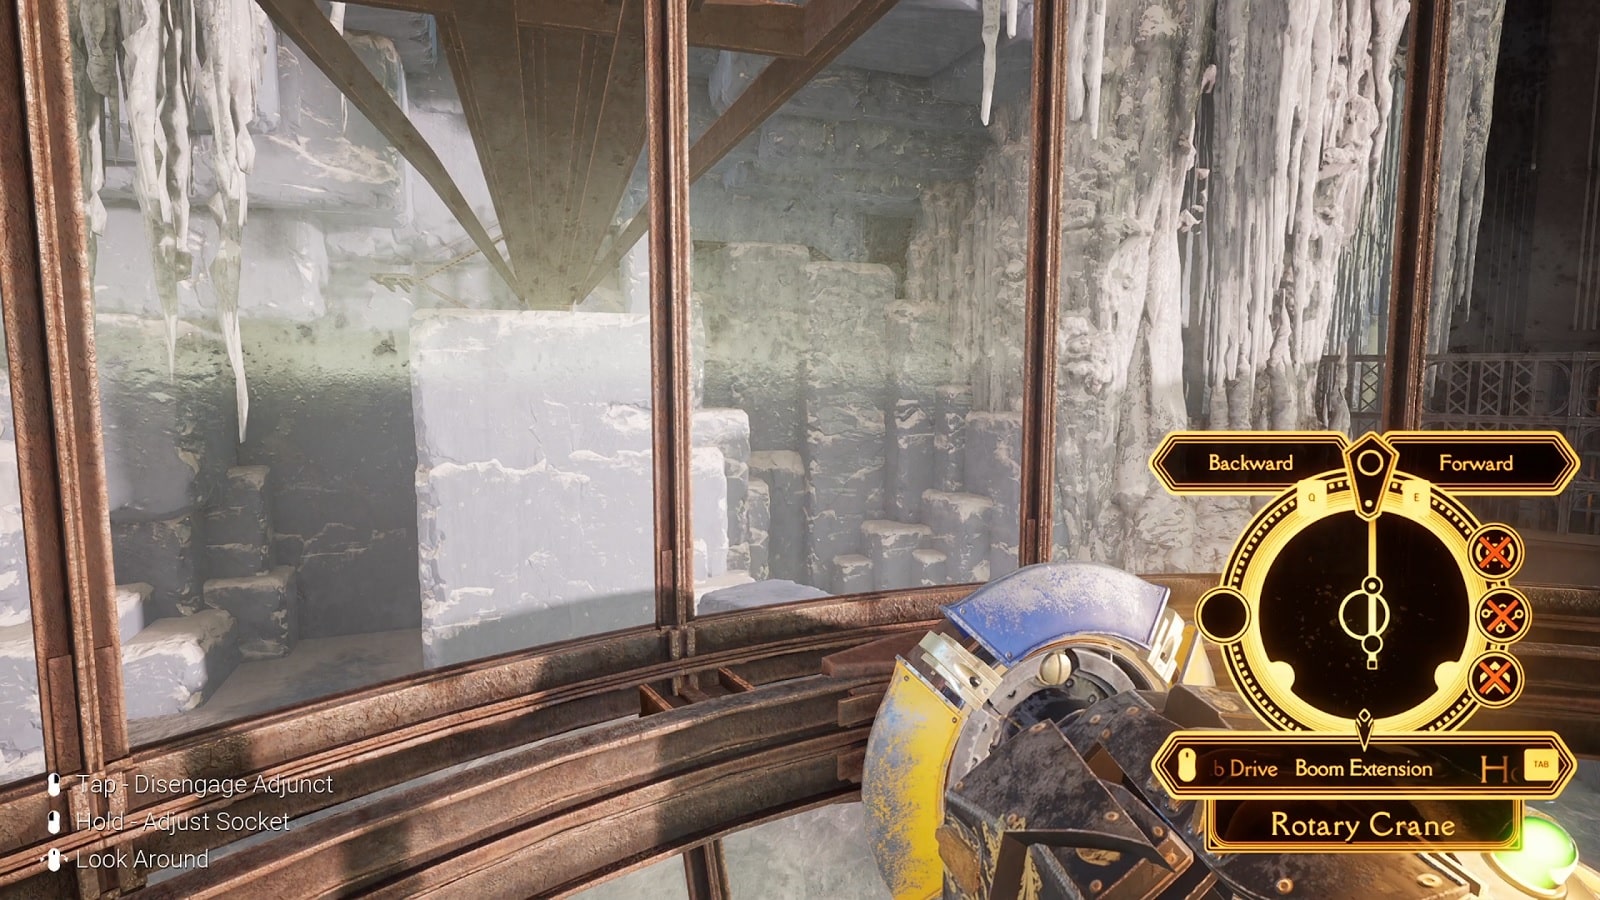
Using the controls in the Fore Cab, move the rig in the direction of the ice falls. You will need to pull inwards to avoid obstacles. Your objective is to align the upper crane walkway with the top of the ice block where a set of stairs can be seen. (The process involves crashing through the ice. So don’t worry too much about the light snow.)
There are times when either the front or back gets stuck in awkward spots. You can see which one got stuck by looking at the top-down diagram on the bottom right of the screen.
We highly advise saving the game before operating the crane. It is prone to getting stuck, and once stuck, it will hard lock any further progress. You will be forced to load your game.
Once the top bridge is aligned with the huge ice block, exit the cabin and walk the bridge. Climb up the stairs to find an Omniwheel Station at the end of the path. But before that, we advise going to the structure to the right first. Use the Socket to raise an elevator that leads to another heavy door. This is a shortcut for future use.
You can now ride the Omniwheel to the Arch.
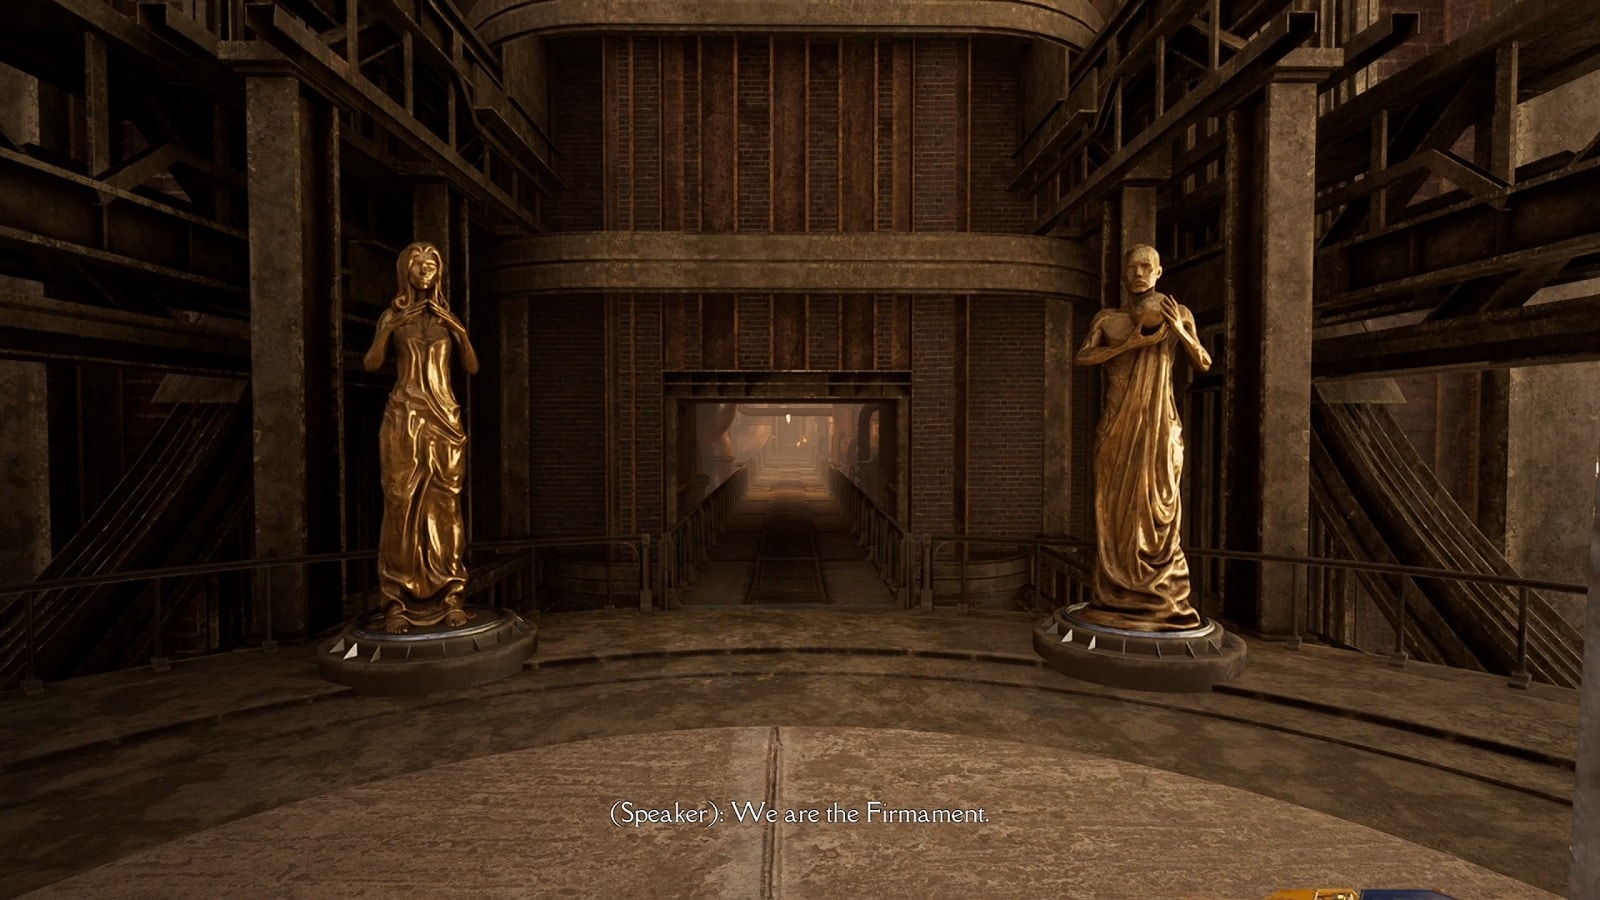
Finally, you are now at the front door of your first Arch. Further exploration of the complex won’t reveal much. The entire structure serves only two functions: to raise the Spires and provide you with a new upgrade.
Take the elevator to the top of the tower and head down the circular stairs. Ahead of you is the main control chamber where you can raise the Spire. We’ll get to that in due time.
Turn around and you’ll see the upgrade machine. Surrender your Adjunct, wait a few seconds, and you will have your first upgrade in Firmament. The Distance Extension does exactly what it says on the tin. You can now interact with Sockets at a much longer distance.
Verify your upgrade by activating the Socket from a distance.
You can now enter the heavy door in front of you. Go inside the inner room. Open the Arch Shutters, and wait for a new Socket to appear.
There’s a fancy heavy door now in front of you. Open it, and proceed to the inner room. Open the Arch Shutters, and wait as a new Socket appears.
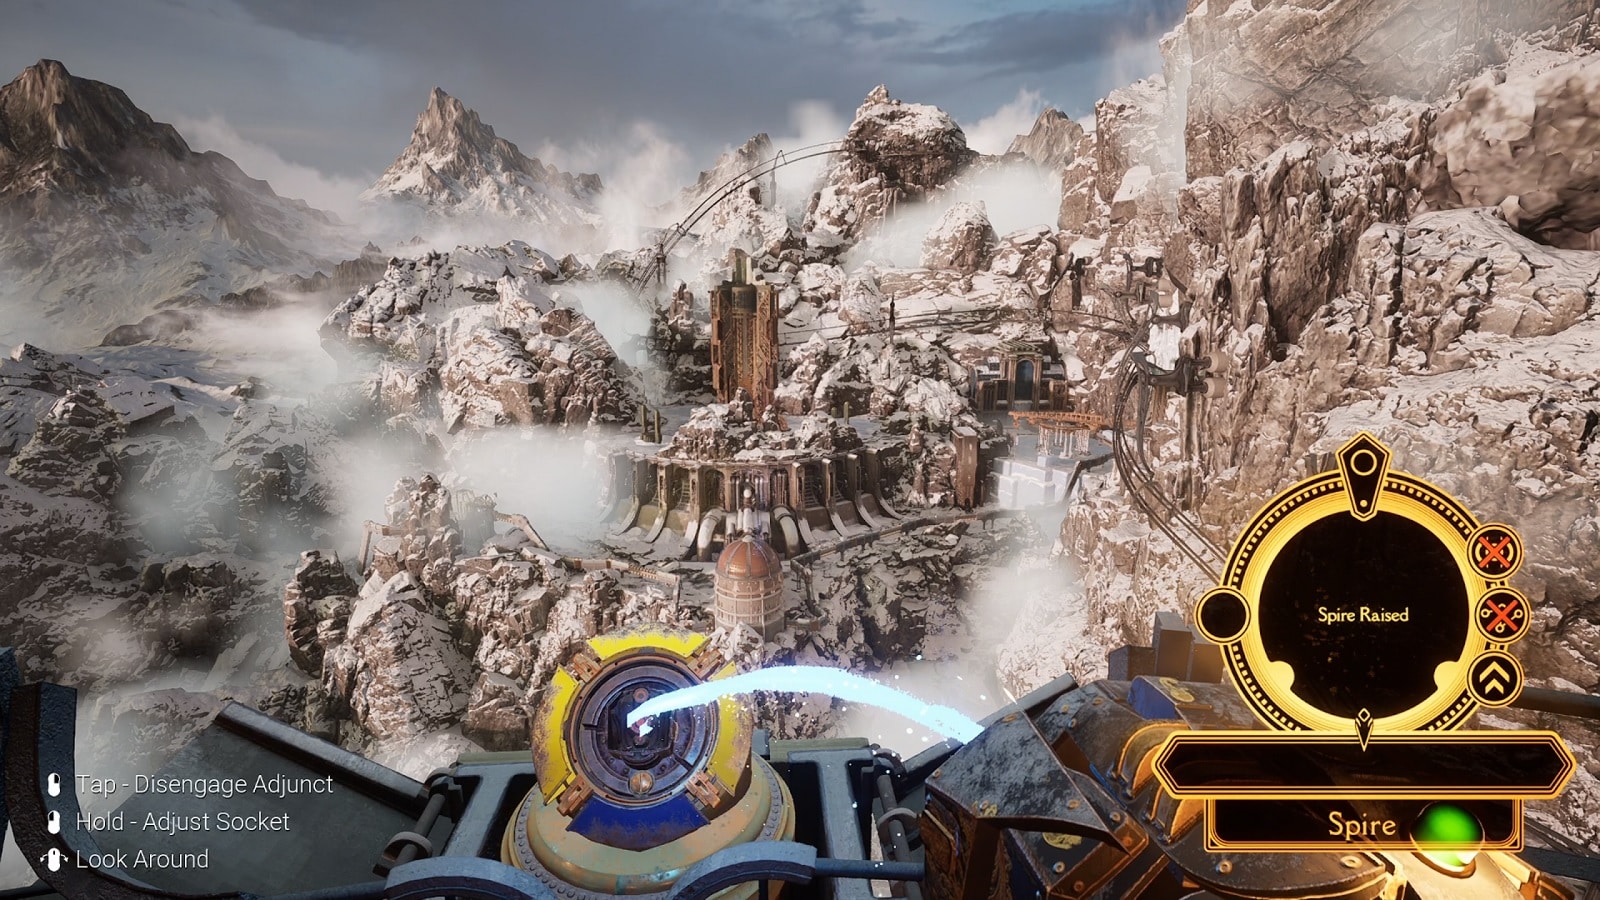
Once the shutters have fully opened, a new Socket will appear. Use it to raise the Spire out of ice. (If you recall, this is the sunken structure in the middle of the frozen lake.)
Congratulations! You are halfway through completing the Curievale Realm. Come back later with more upgrades to properly complete the Realm.
For now, head to the Conveyance Pod behind the upgrade machine to head back to the Swan.
And that’s the end of the second part of our Firmament walkthrough. We hope that you find this information useful to you in some shape or form.
Check our review of the game here:
Check out our full lineup of Firmament guides:
- Firmament Walkthrough Part 1: Waking Up
- Firmament Walkthrough Part 2: First Upgrade
- Firmament Walkthrough Part 3: Second Upgrade
- Firmament Walkthrough Part 4: Third Upgrade
- Firmament Walkthrough Part 5: First Spire St. Andrew
Firmament is out now on PC storefronts. With a PS4 and PS5 version with PSVR support coming in the future.


