
This is the fourth part of our Firmament walkthrough. If you recall, we have acquired the two upgrades necessary to fully Awaken the Embrace. We are now on the way to getting to the third and final upgrade for your Adjunct.
In this walkthrough guide, we’ll tell you how to solve the puzzles that are in the way between you and the third upgrade. Expect there to be a lot of mechanical manipulation with a bit of luck involved. We are going to the St. Andrew Realm for the third upgrade. To get to the St. Andrew Region, you’ll need to access the world from the Swan. If you’ve been following the guides, you’ll see the destination’s name by looking at the plate under the Conveyance Pods.
Please note that we will not be covering the Swan in this Walkthrough guide. The Swan is a hub world, and while the Mentor has a few comments here and there, it isn’t a place of importance until the end of the game.
St. Andrew Part 1
Welcome to St. Andrew! This world is a lot more greener than other worlds you’ve been through. It is also far more inviting. This is the place where many Keepers would rest in between times of being awake. Now, it is a silent reminder of better times.
Our objective right now is to reach the Conservatory at the top of the seed vaults. We’ll go over the rest once we’re there.
Start with climbing up the first set of stairs.
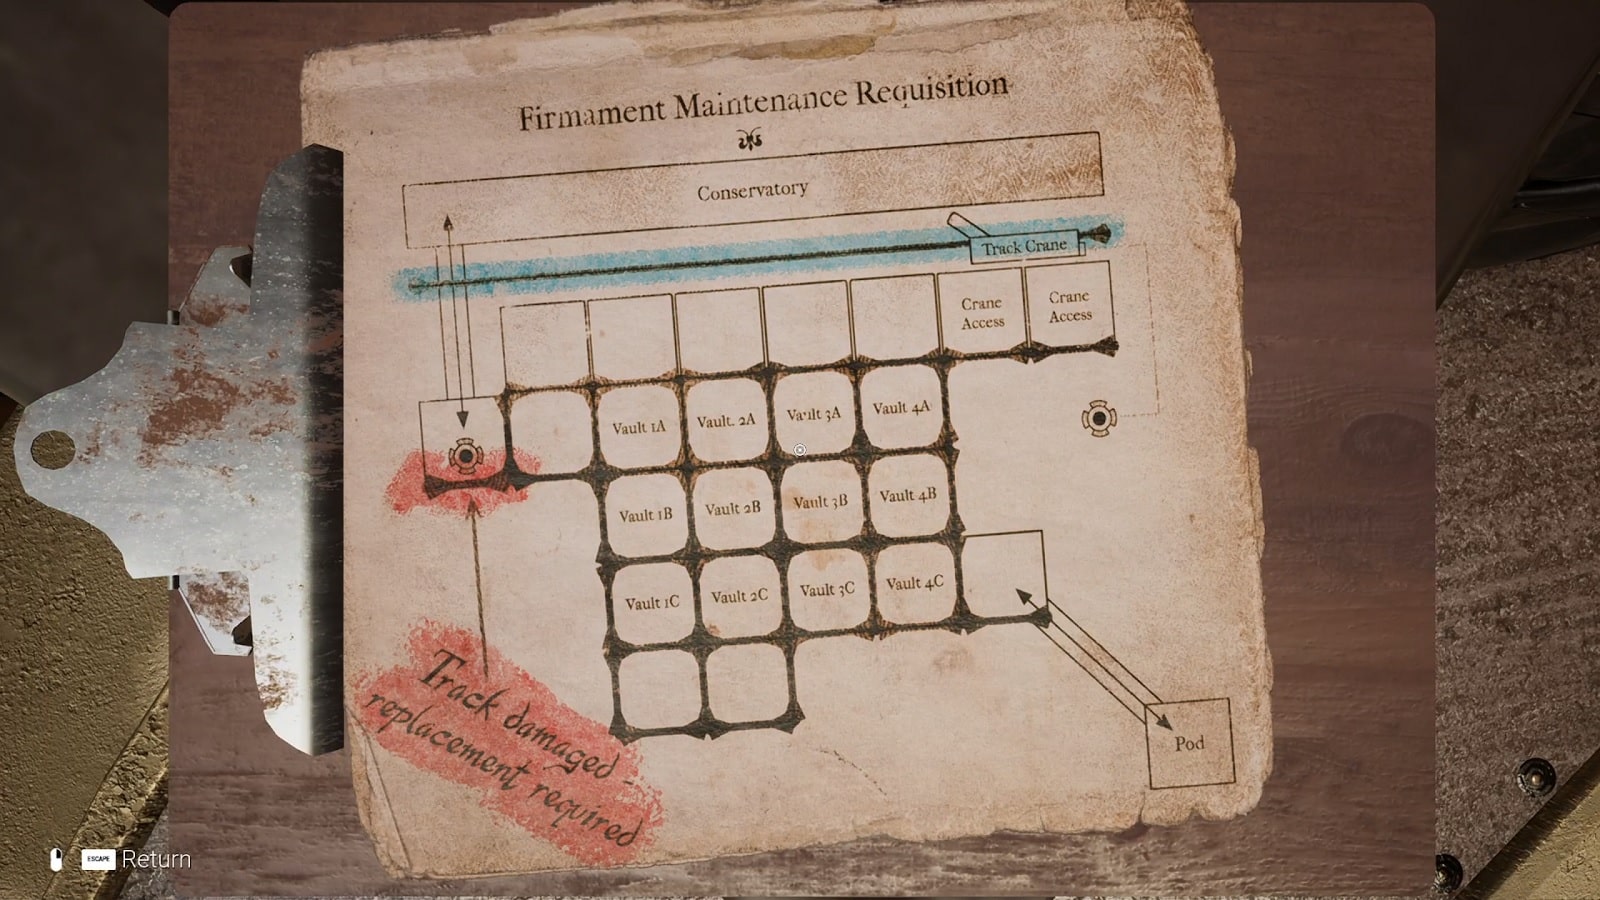
Don’t forget to have a good long look at the clipboard with a diagram. This is a clue to solving the upcoming puzzle that lies ahead.
As shown in the diagram above, you’ll need to add a certain piece of track in the area indicated in the diagram. This task is easier said than done. But that can apply to many things in this realm.
Now, head up the next set of stairs and board the Vault Skiff.
The Vault Skiff is what you’ll need to access the balcony on the far left side of the vaults. The problem here is that you cannot get to the balcony using your skiff. There is a piece of damaged track that needs to be replaced and you cannot access the balcony from your side of the skiff.
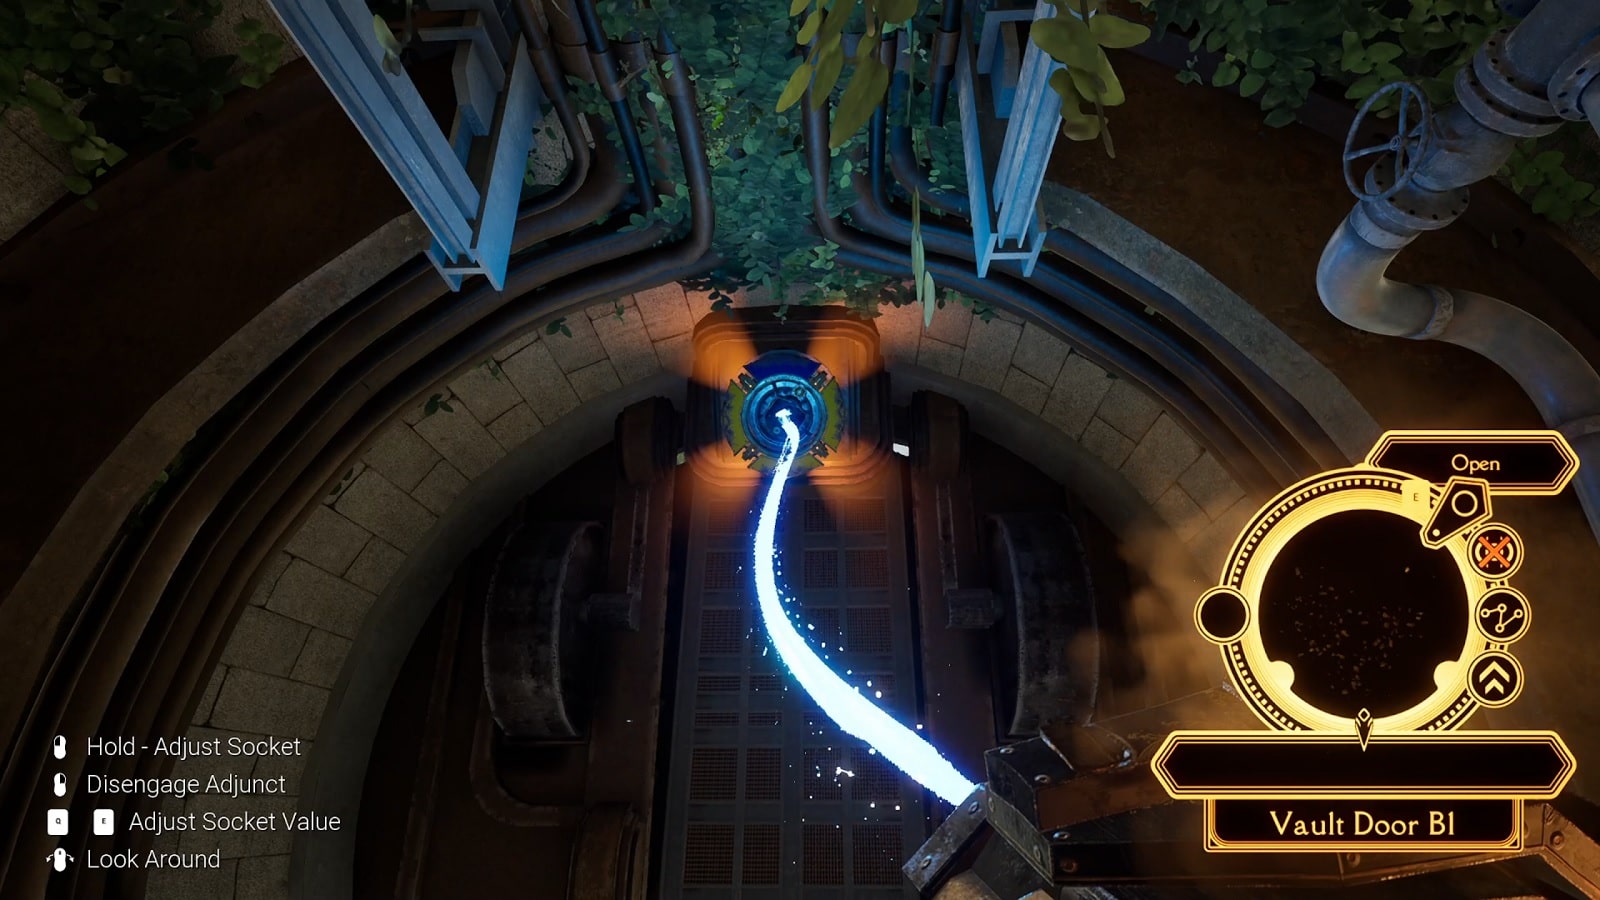
Before we go about fixing the broken track, let’s open up as many vaults as we possibly can. This is going to help us in the long run, trust us. Look for open vaults and start opening up vaults from the inside. There are some places where vines are overgrown. Take whatever path is given to you and keep opening vaults to help you create shortcuts.
Once you’ve opened as many vaults as you can find, go back to the skiff and head straight to the top right of the vaults. Unfortunately, your skiff is unable to reach the crane platform. You’ll need another skiff to cover the distance. Luckily for you, there is one right underneath.
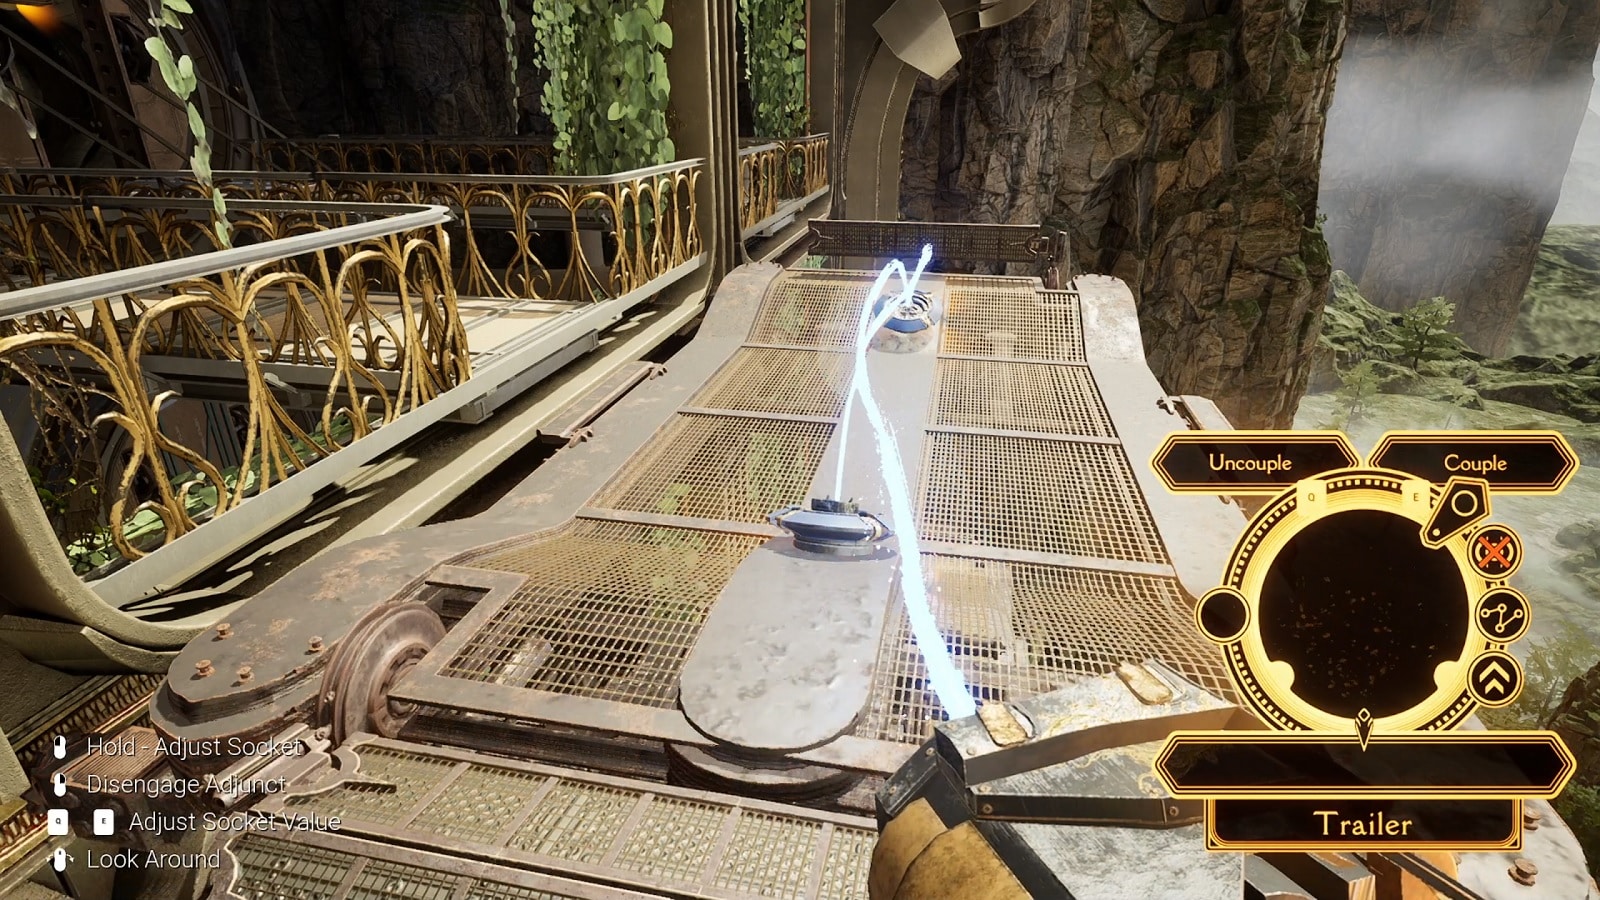
You are able to attach and detach trailers when needed. This will come in handy to reach far-flung areas. It does come at the cost of you needing more clearance and thus being more prone to blockage.
At this point, you can try to open more seed vaults.
Otherwise, you can go back to the maintenance area to get the tracks into place.
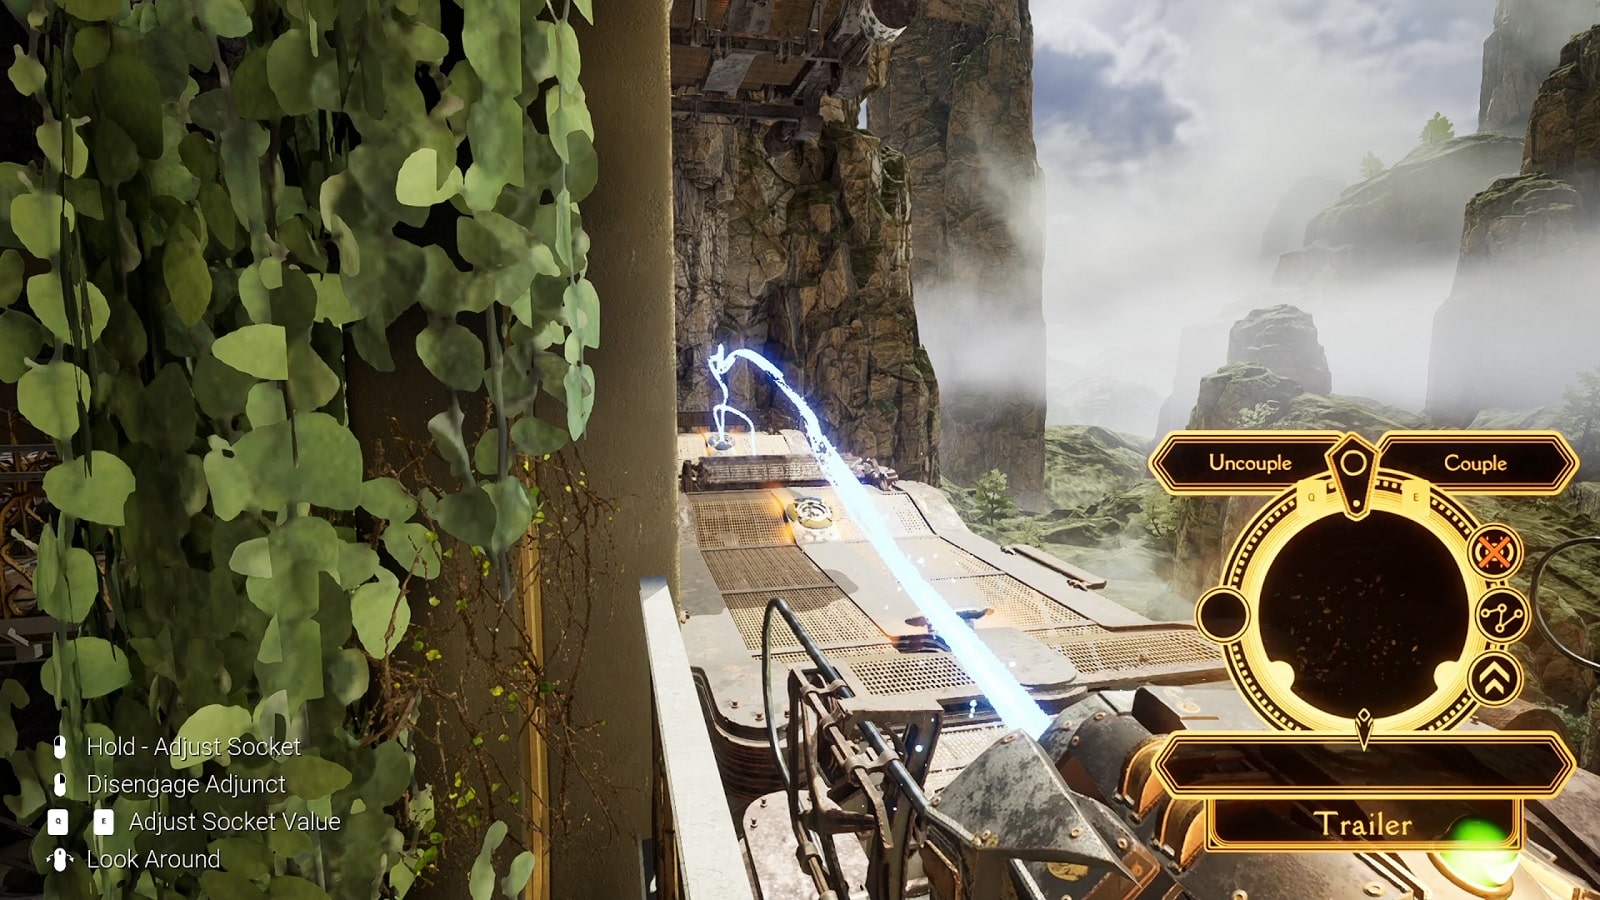
With your trailer on the right side, take your skiff to the crane access. Once there, go up the ladder and connect your Adjunct to the base of the crane’s car. Then, move it across the top to as far left as you can go. You will need to break the connection once the car gets too far. Simply go back down and guide the crane from your skiff until it reaches its destination.
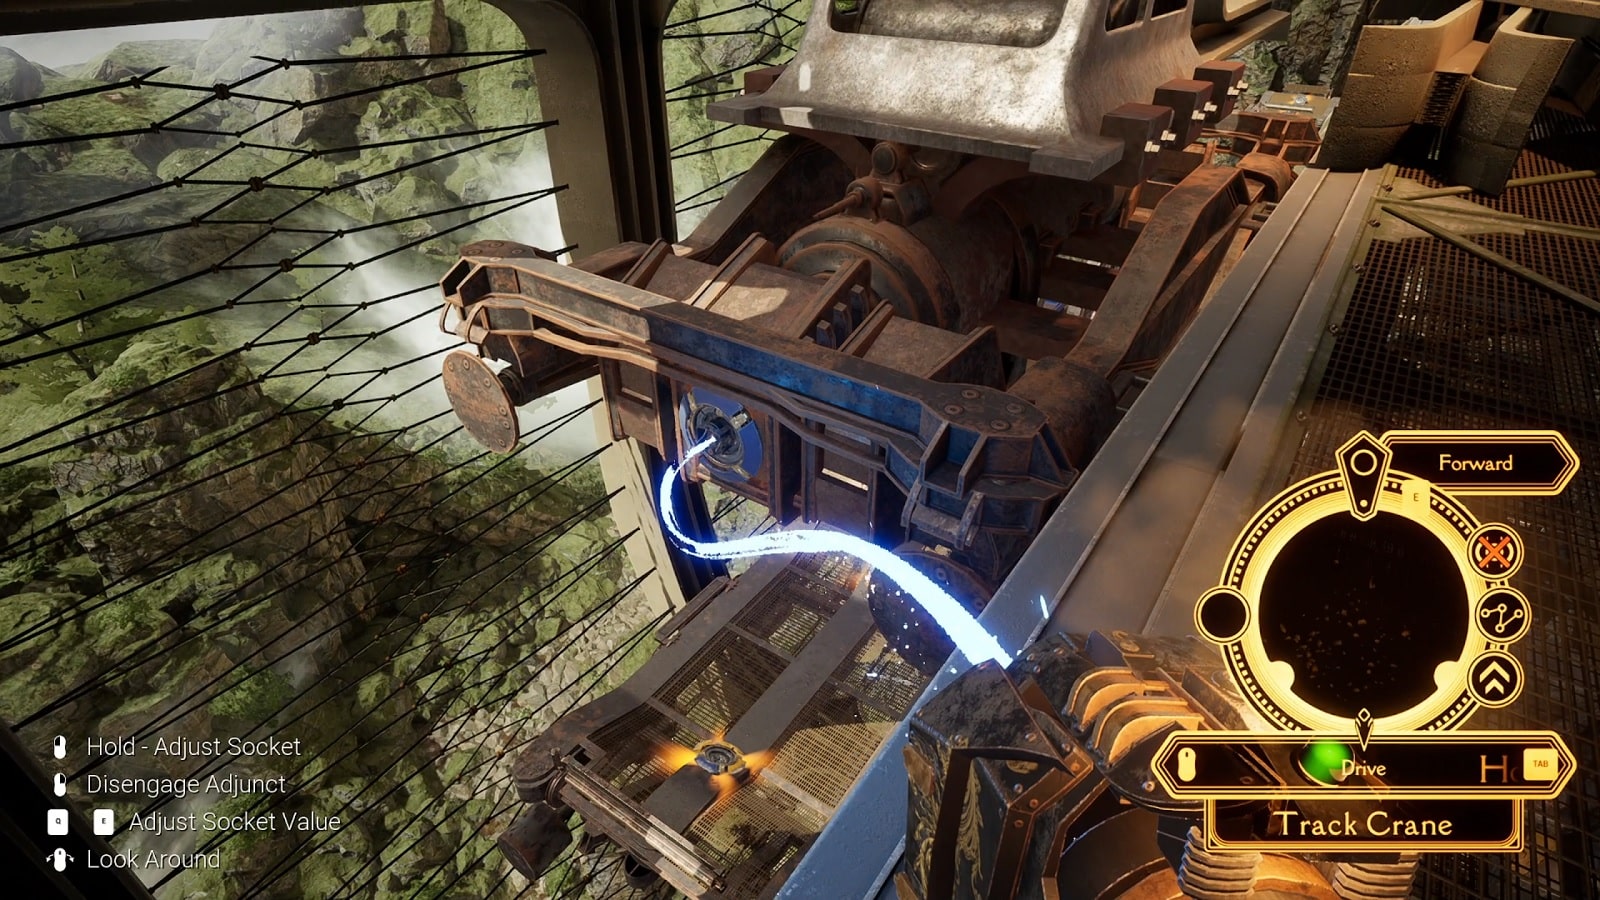
Once the crane car is at the furthest left of the track, change the mode to Hook and Lower the track until it is in place. If possible, do not let go until the track is safely set into place.
Now that you’ve installed the track, it is now possible to access the balcony. But here’s the next problem. You can’t access the balcony from your side of the skiff. You need another trailer on the left side.
This is one of the trickier puzzles in the game. How do you get to the other side of your skiff so you can attach a left-side trailer? You use the seed vaults, of course. It’s a good thing you’ve been opening seed vaults left and right the whole time. This makes the process a lot easier to do.
To solve this puzzle, you’ll first need to go to Vault 4A. If you are in the right place, your mentor will drop a bunch of exposition your way. Go to the back and take the stairs down to the lowest floor. From there, open Vault 1C and then Vault 4C.
At this point, you should have two trailers on the right side of your skiff. Park the Vault Skiff at Vault 2C. From your extended trailer, go through Vault Vault 4C and exit from Vault 1C. You can now attach the left skiff to your current setup. Do so.
Once you have the left skiff attached, go up to the B vaults and begin the process of detaching the skiff on your furthest right. (As pictured above.) This will allow you to go to the A vaults from the left side of the skiff. Enter Vault 1B and exit from Vault 2B.
Once you’ve detached the extra skiff, go back to the left side of the skiff and go up and across until you reach the balcony that has the lift to the Conservatory. Use the lift to get to the Conservatory.
Walk around the grounds and take it all in. You’ve come a long way in your journey and you’re nearly halfway done with your task. Enter the conservatory using the door to the right.
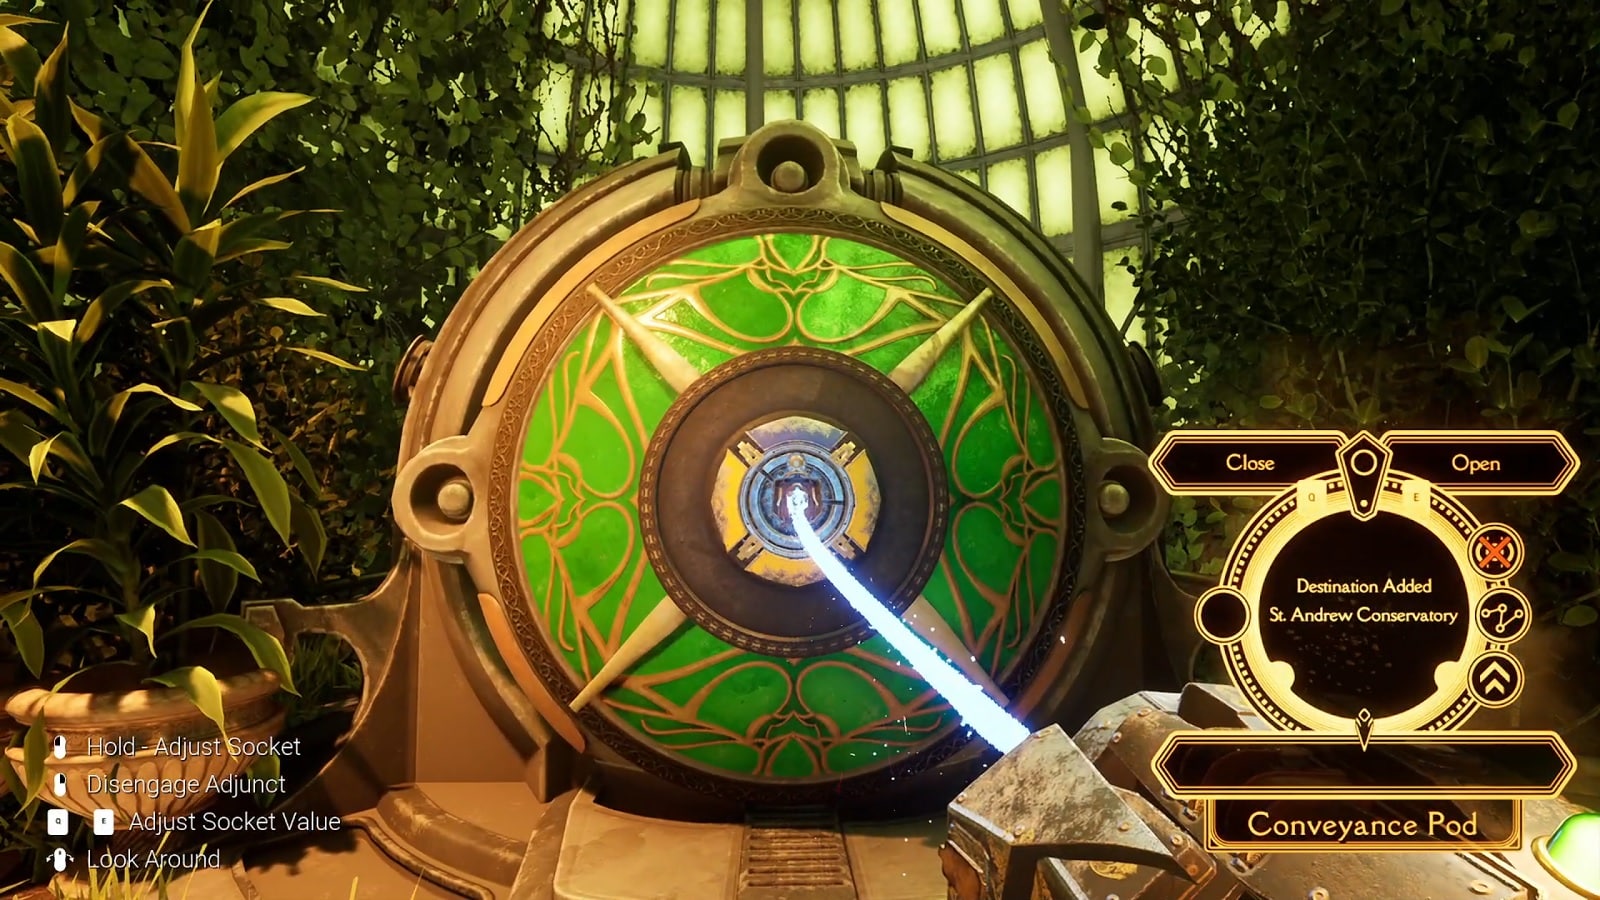
It is in this location that you will find a Conveyance Pod. Socket into it to add it to your list of locations in the realm. Then continue with your exploration.
Further into the conservatory, you will find the place where the Keepers spent most of their break time. Your mentor included.
Your next objective is to get to the back of the atrium where there is a lift that’s going to take you to the Omnistation and then the Grand Arch. But here’s the problem, the path toward it is blocked. You’ll need to find an alternate way.
Use the Botanical Bed Lifts in the center of the atrium as platforms. This task will require a lot of eye-balling if you’re not already familiar with the layout.
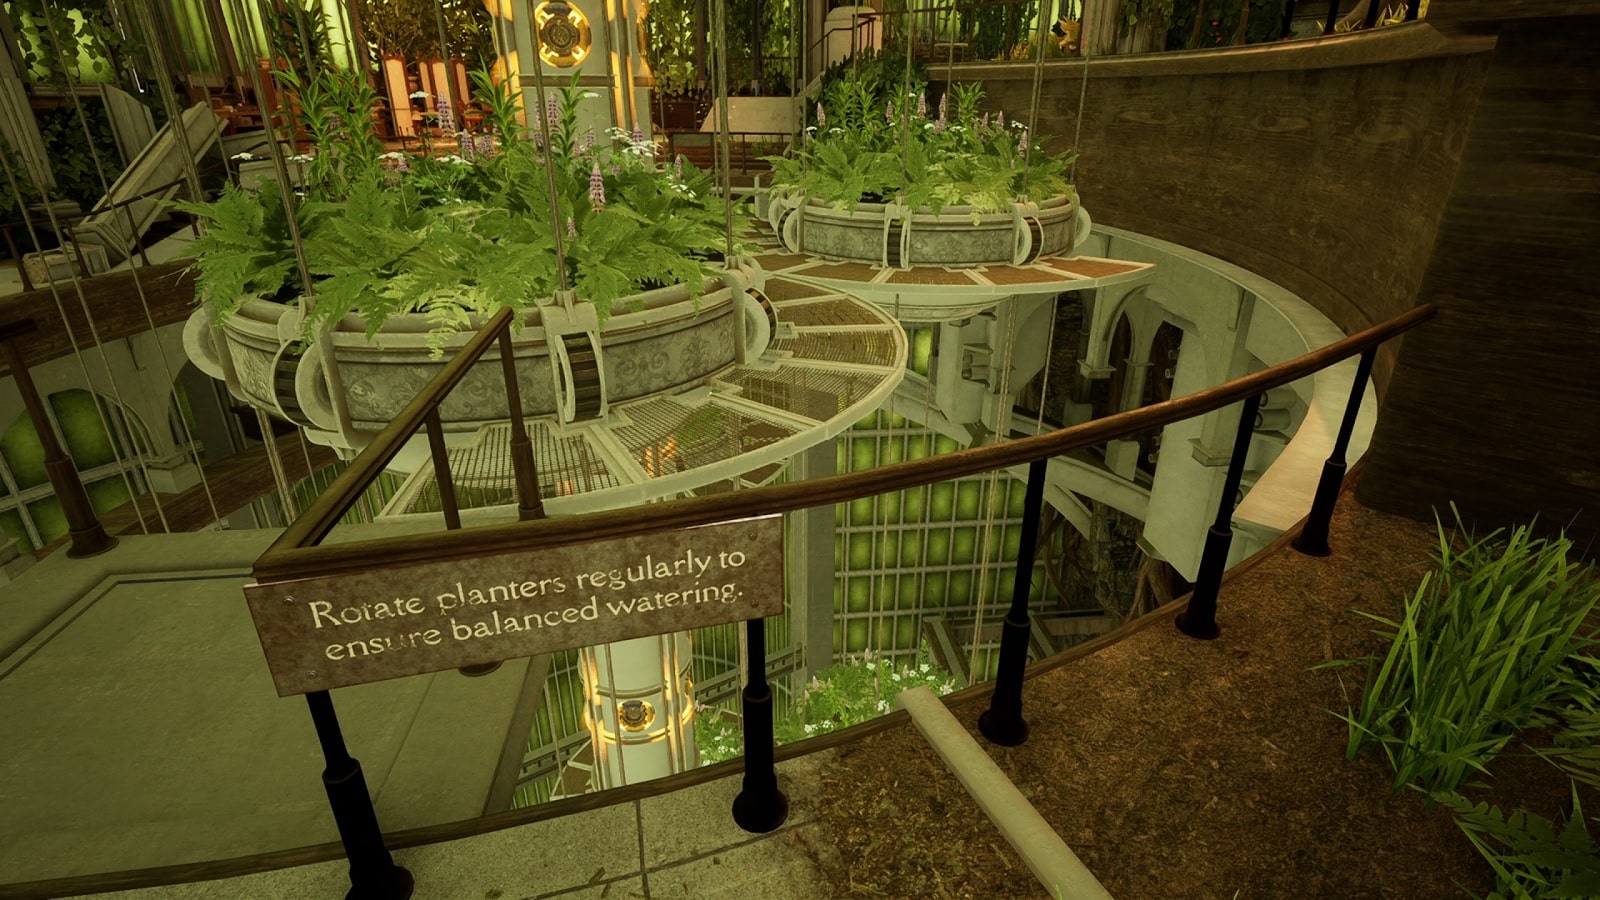
Basically, you will be moving in between botanical beds until you get to the one on the other side of the Atrium. Here’s the rub though: the botanical beds are not perfectly aligned to where you need to go. You’ll need to adjust it from a different location.
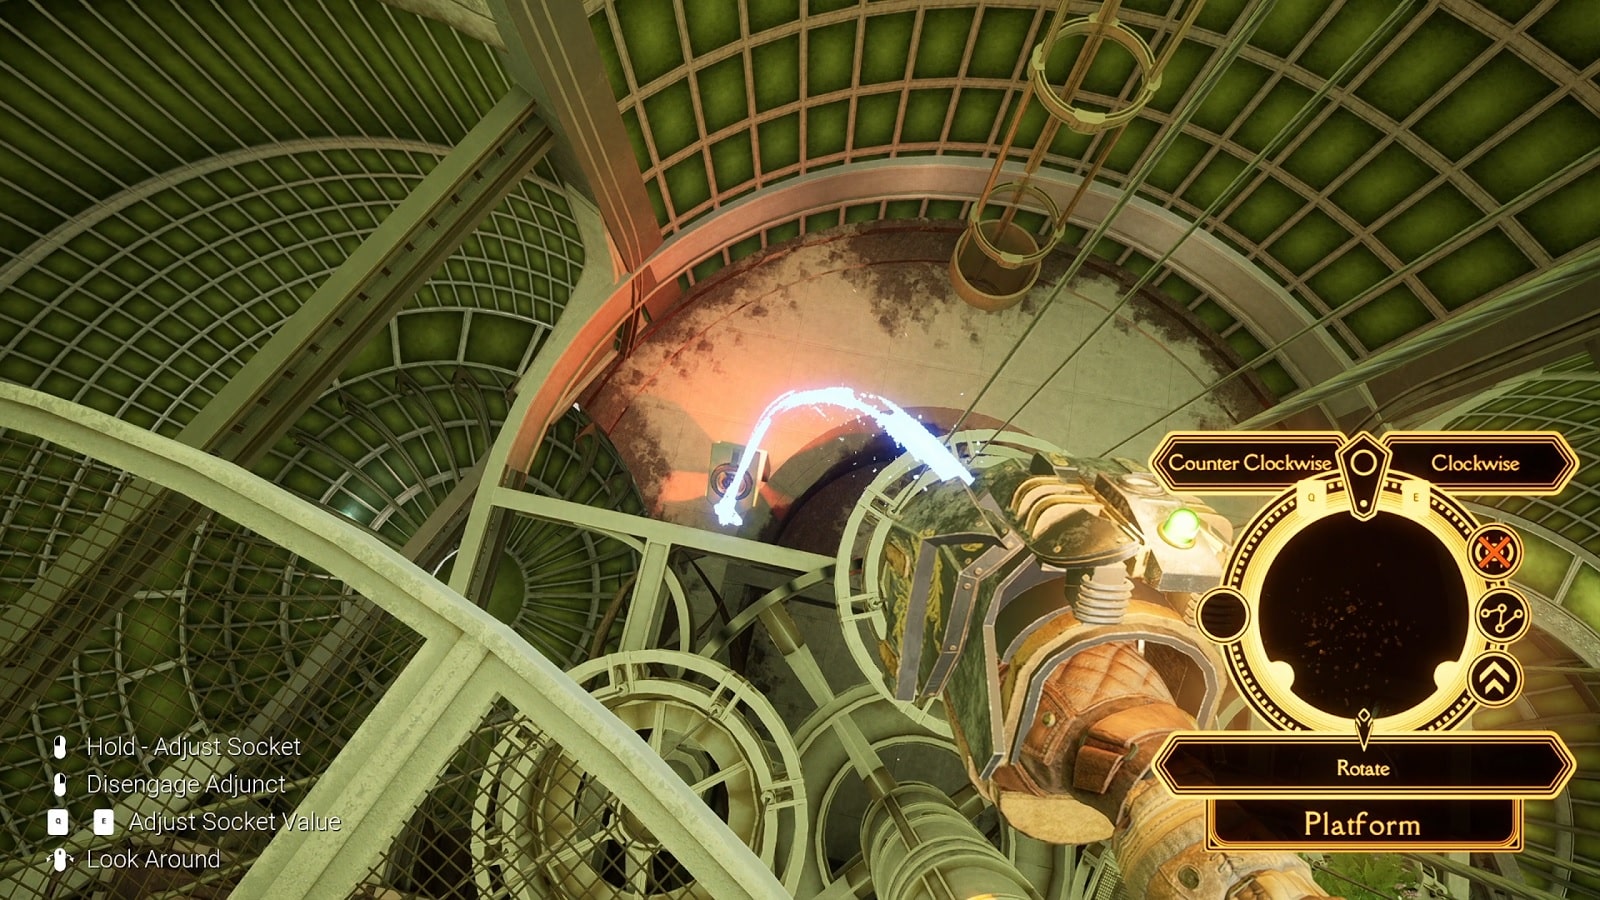
The only way to rotate the botanical beds is to use this Socket pictured above. This deviously hidden socket is located at the very bottom of the chamber. You’ll need to manipulate a few botanical bed lifts to reach that far down.
Keep rotating the botanical beds on botanical bed lift 03 and 04 to align like the image below. (We’ll leave the getting there to you. This puzzle left our heads spinning.)
You finally made it to the other side! Take the elevator down where an Omniwheel is waiting to take you to the Arch. Actually, the Omniwheel is programmed to take you to the Reservoir first. Once there, stay inside the Omniwheel and activate it once more to take you to the Arch.
You know the deal the by now, head up the stairs and get to the upgrade machine before anything else.
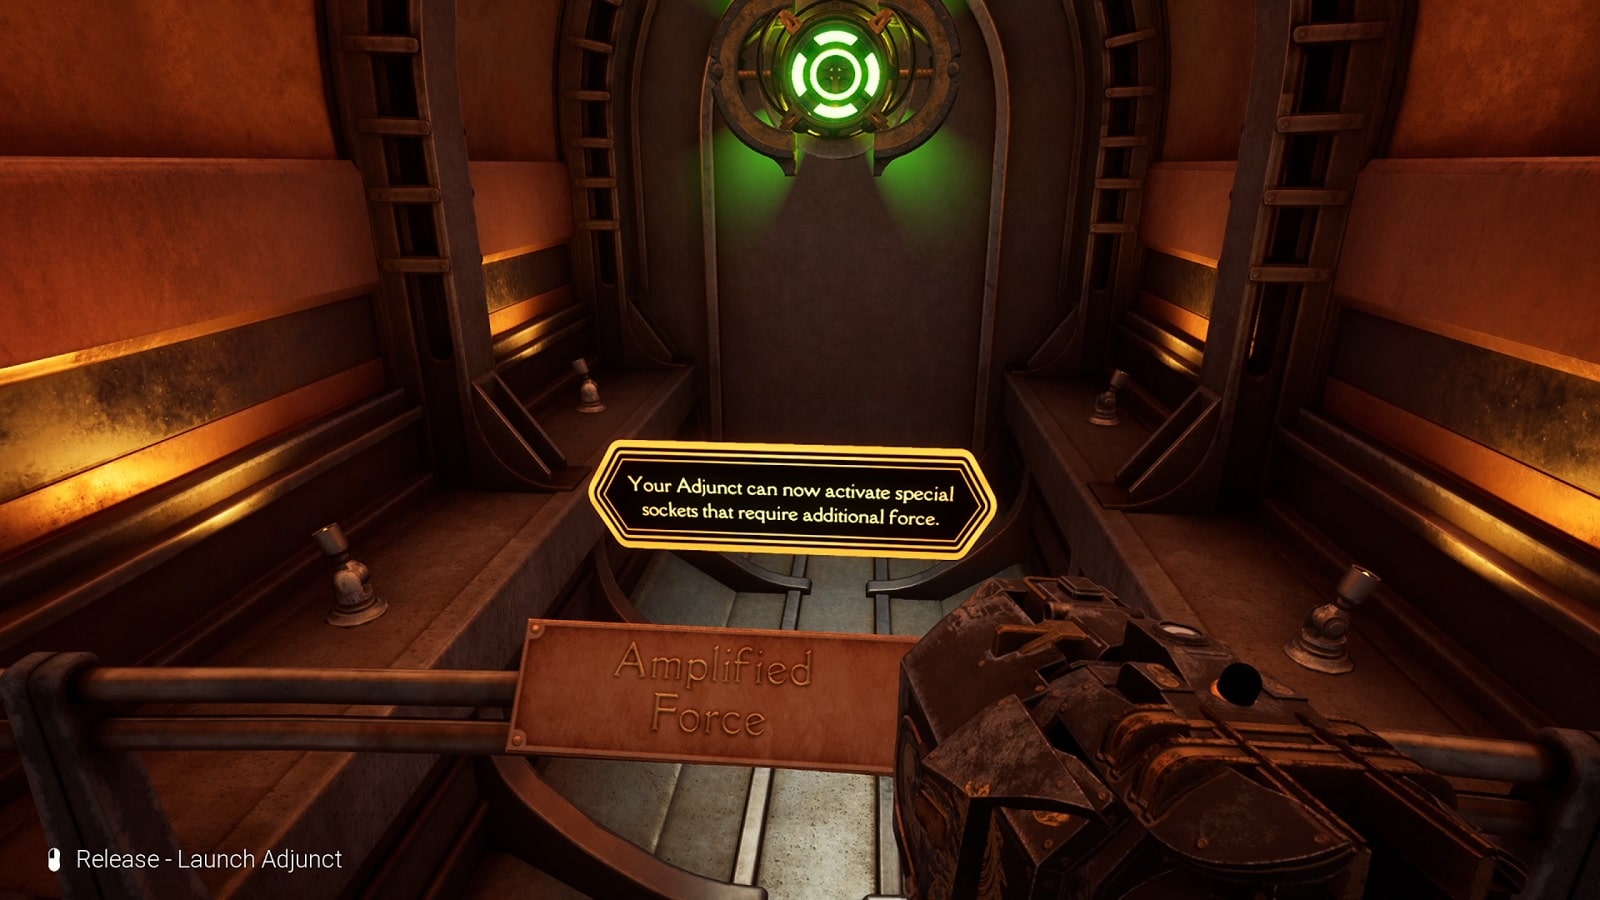
The final upgrade to your Adjunct is called, “Amplified Force”. This allows your Adjunct to interact with Sockets that require more force. It may be a little detail but Sockets that previously glow yellow now turn green. This is the final key to opening the Spires.
Open the heavy door, and the shutters, and raise the final Spire.
Now that you are in possession of all three upgrades. You’re ready to Awaken the Embrace in all Realms.
Let’s start with the Spire in the Realm you’re in right now. St. Andrew.
And that’s the end of the fourth part of our Firmament walkthrough. We hope that you find this information useful to you in some shape or form.
Check our review of the game here:
Check out our full lineup of Firmament guides:
- Firmament Walkthrough Part 1: Waking Up
- Firmament Walkthrough Part 2: First Upgrade
- Firmament Walkthrough Part 3: Second Upgrade
- Firmament Walkthrough Part 4: Third Upgrade
- Firmament Walkthrough Part 5: First Spire St. Andrew
Firmament is out now on PC storefronts. With a PS4 and PS5 version with PSVR support coming in the future.


