
The Wish Ender quest in Destiny 2 has been around since the days of the Forsaken DLC. The quest has seen numerous changes over the years due to no small part to content sunsetting. In 2023, the quest is doable, but with no in-game elements pointing you in the right direction, it can get very cryptic. And that’s where this guide comes in. We’ll tell you everything you need to know about completing the quest step-by-step and all the things you need to watch out for.
Before we talk about getting the Wish Ender Exotic combat bow, we should talk about how to get the Exotic quest first. You first need to get access to the Shattered Throne Dungeon. That’s done by purchasing the Forsaken Pack for Destiny 2. Once you have access to the dungeon, you can pursue the quest that unlocks the Exotic combat bow.
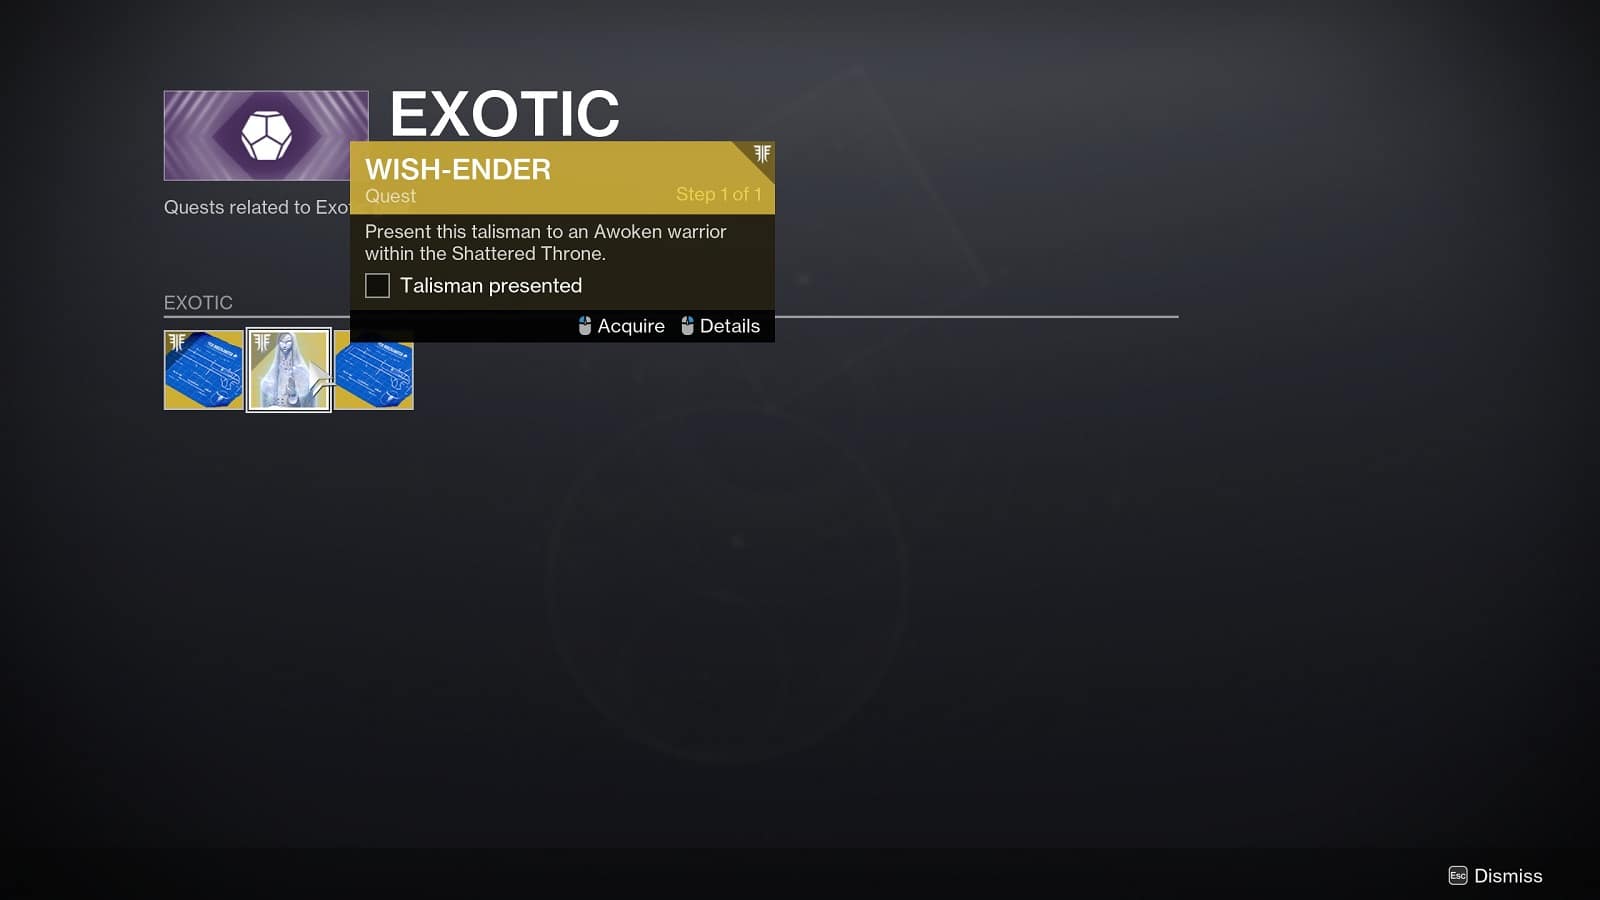
How to Start the Wish Ender Quest
There are two ways to start the Wish Ender Quest in Destiny 2. The first way is to pick up the quest from the Quest Archive. You can find it under the Exotic tab.
Alternatively, you can do a run of the Shattered Throne dungeon and get the quest from the statue inside the dungeon. Do keep in mind that if you get the quest from the statue, you’ll get some extra bits that are essentially leftovers from previous versions of the quests. Either way, the results will remain the same no matter where you pick up the quest.
After starting the quest, you’ll be asked to get the Waking essences of three Taken enemies of the Awoken. Each boss requires you to pick up and deliver an Orb to a statue with an empty palm. The orbs summon the hidden bosses and you’ll earn progress for each defeated boss.
And without further ado, here are the steps for the Wish Ender Quest. It’s going to be a tricky one so be sure to take it nice and slow. You don’t need to do everything in one run. If necessary, you can return to orbit and chill for a bit. The most important thing is defeating the three Taken bosses.
Wish Ender Quest Steps
Step 1 – Go to the statue inside the Shattered Throne dungeon
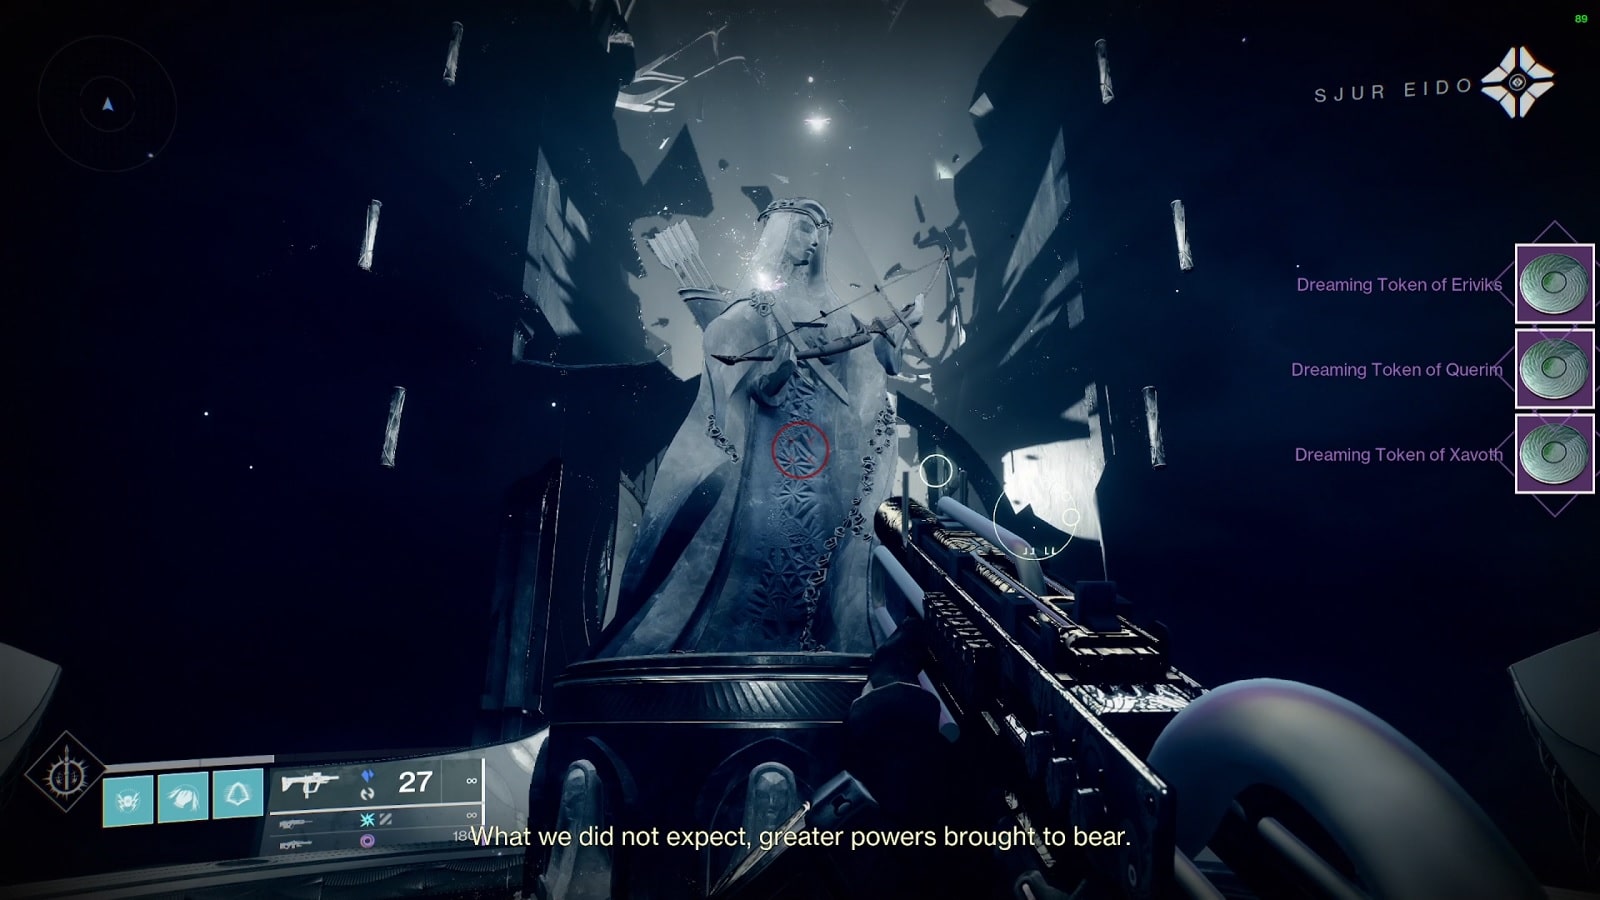
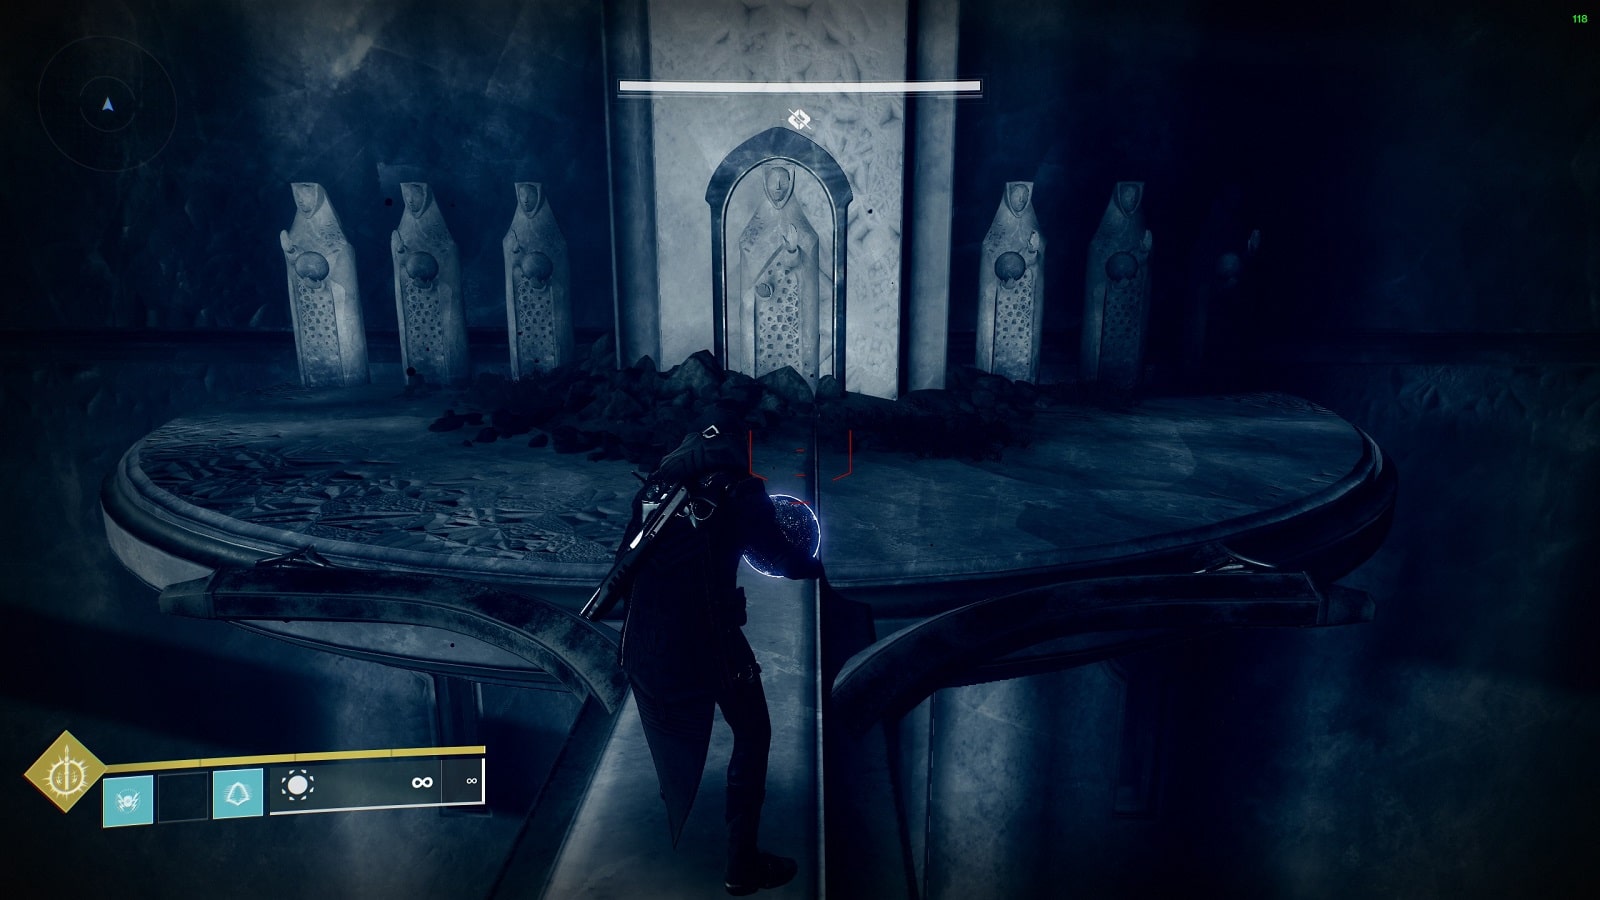
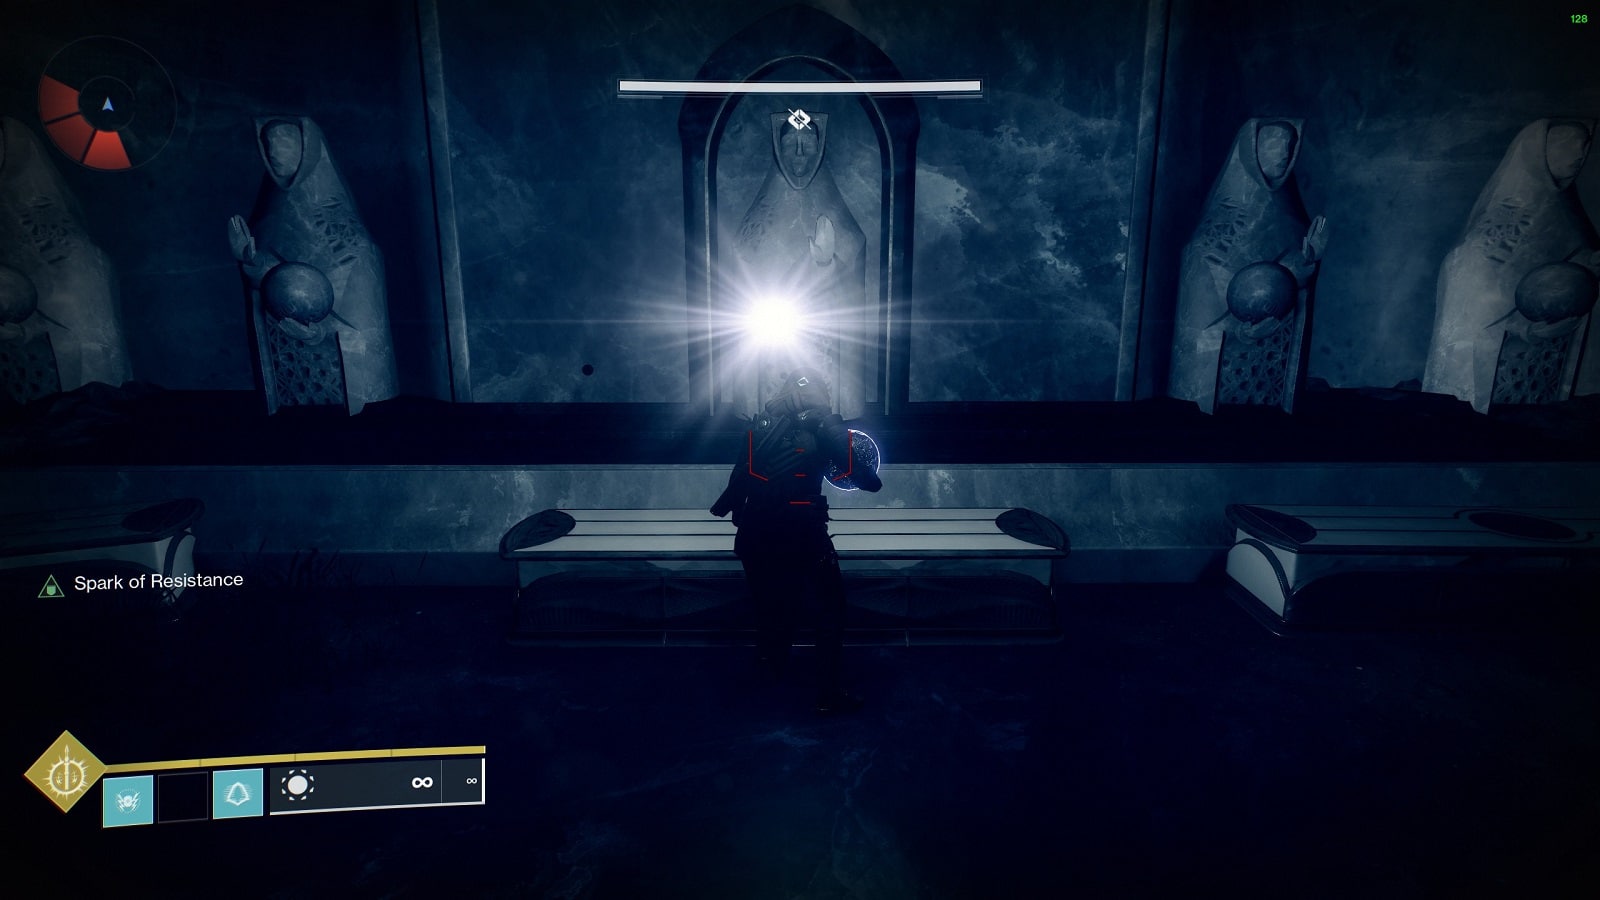
You can find the statue in a courtyard directly after defeating the dungeon’s first boss, Vorgeth. Get closer to the statue and a prompt will appear telling you to ‘approach’ the statue. Present the Token you were first given when started the quest and the statue of Sjur Eido will then give you 3 Dreaming Tokens. Each token is tied to an eternal enemy of the Awoken and they need to be turned into a Waking Token before turning them in. The token changes once a boss has been defeated.
Step 2 – Go back to the first part of the Dungeon
Now that you have started the quest, it’s time to get down to business. Either finish the run to the very end or return to orbit and reset progress on the Dungeon.
To get the first orb, you need to go back to the very beginning of the Dungeon again. After defeating the initial group of Taken and the location of the first beacon, immediately go left and head straight to the Tower of the Deep aka the tower with the Fire-breathing Dragon.
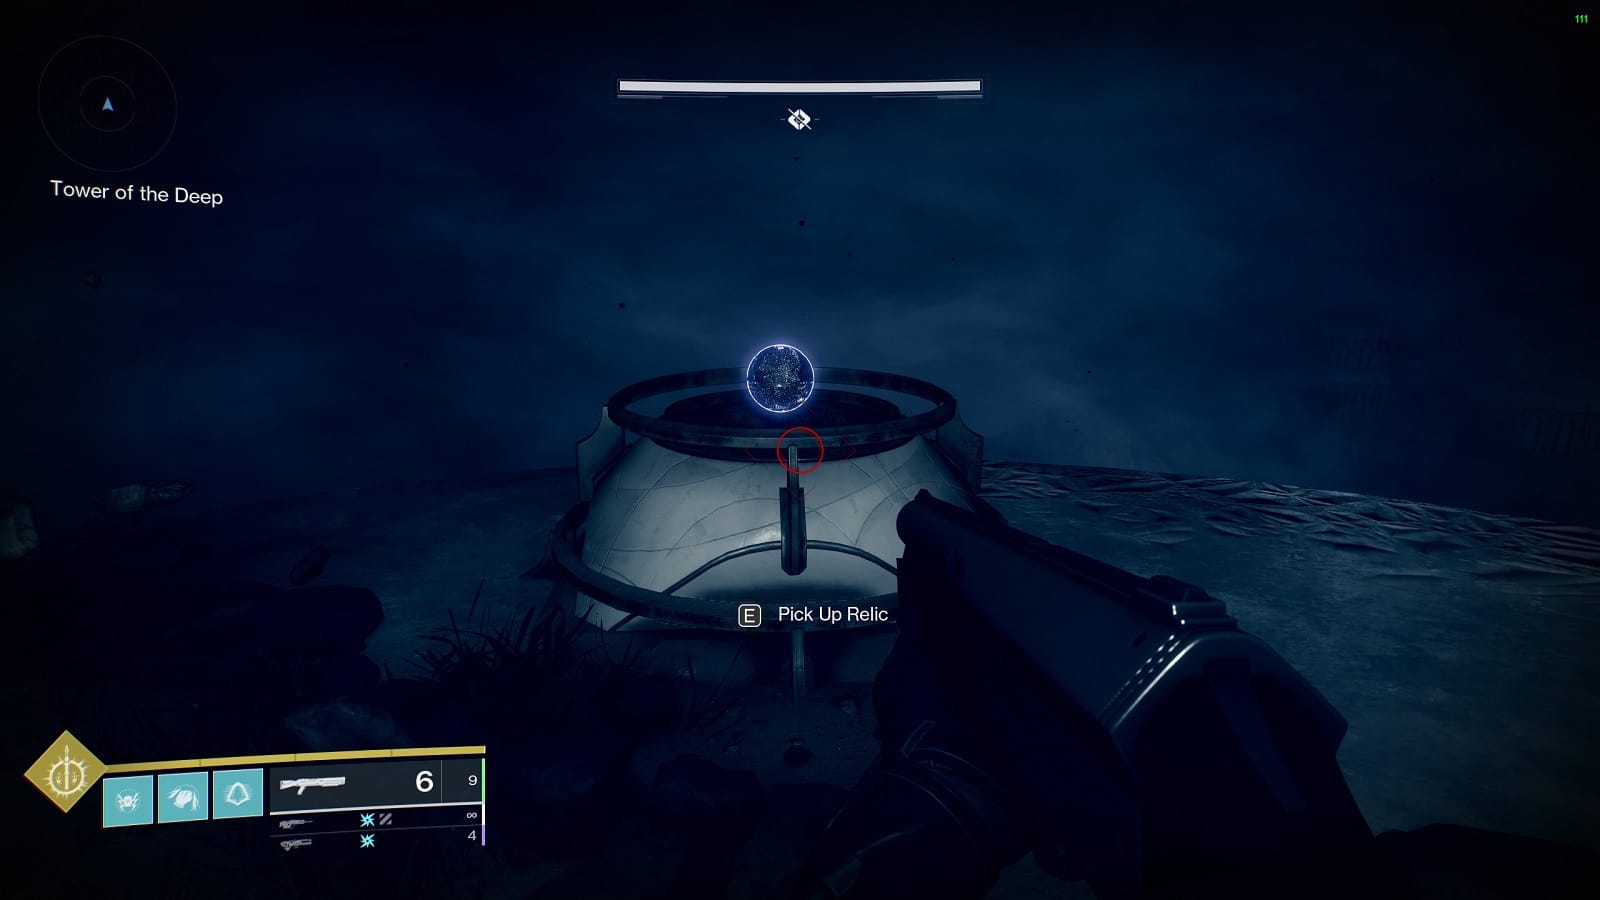
You will a statue between it and the main structure. You’ll need to use it to get to the second floor of the Tower. Climb on top of the statue and jump to the upper floor of the Tower. This is where the first orb is going to be. This is actually the old way of doing things as Strand makes the ascent look easier in comparison.
Once you have the Relic in hand, simply jump on the statue again and reach the opposite rooftop. If you’re a Hunter, you may need to parkour the cliffs on the left. Otherwise, Warlocks and Titans can float and then dash over to the roof.
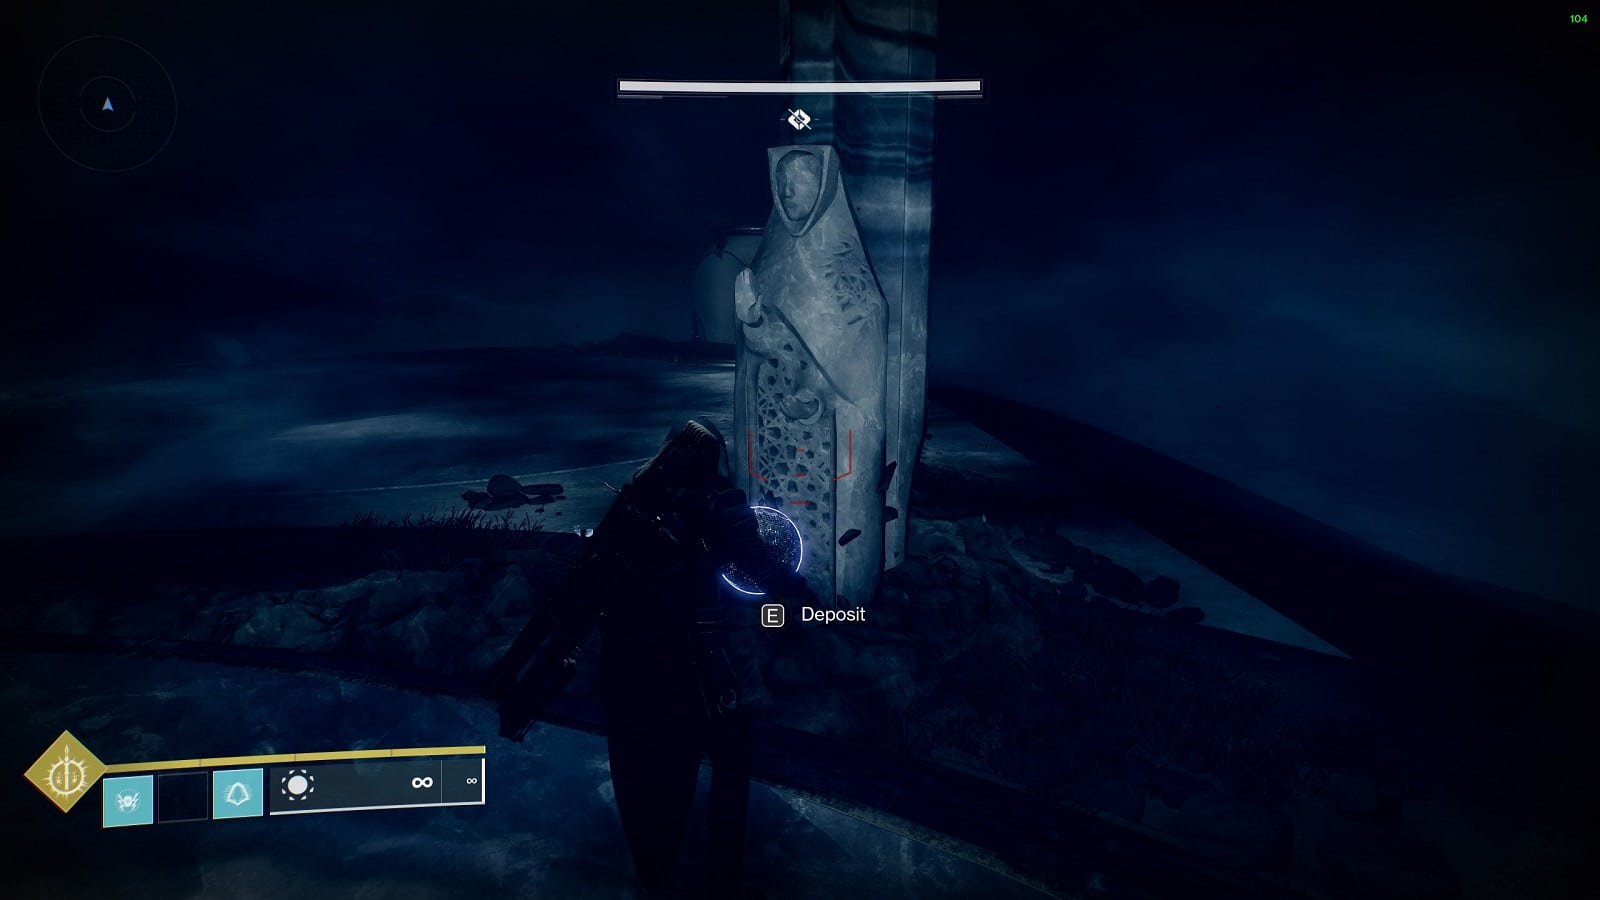

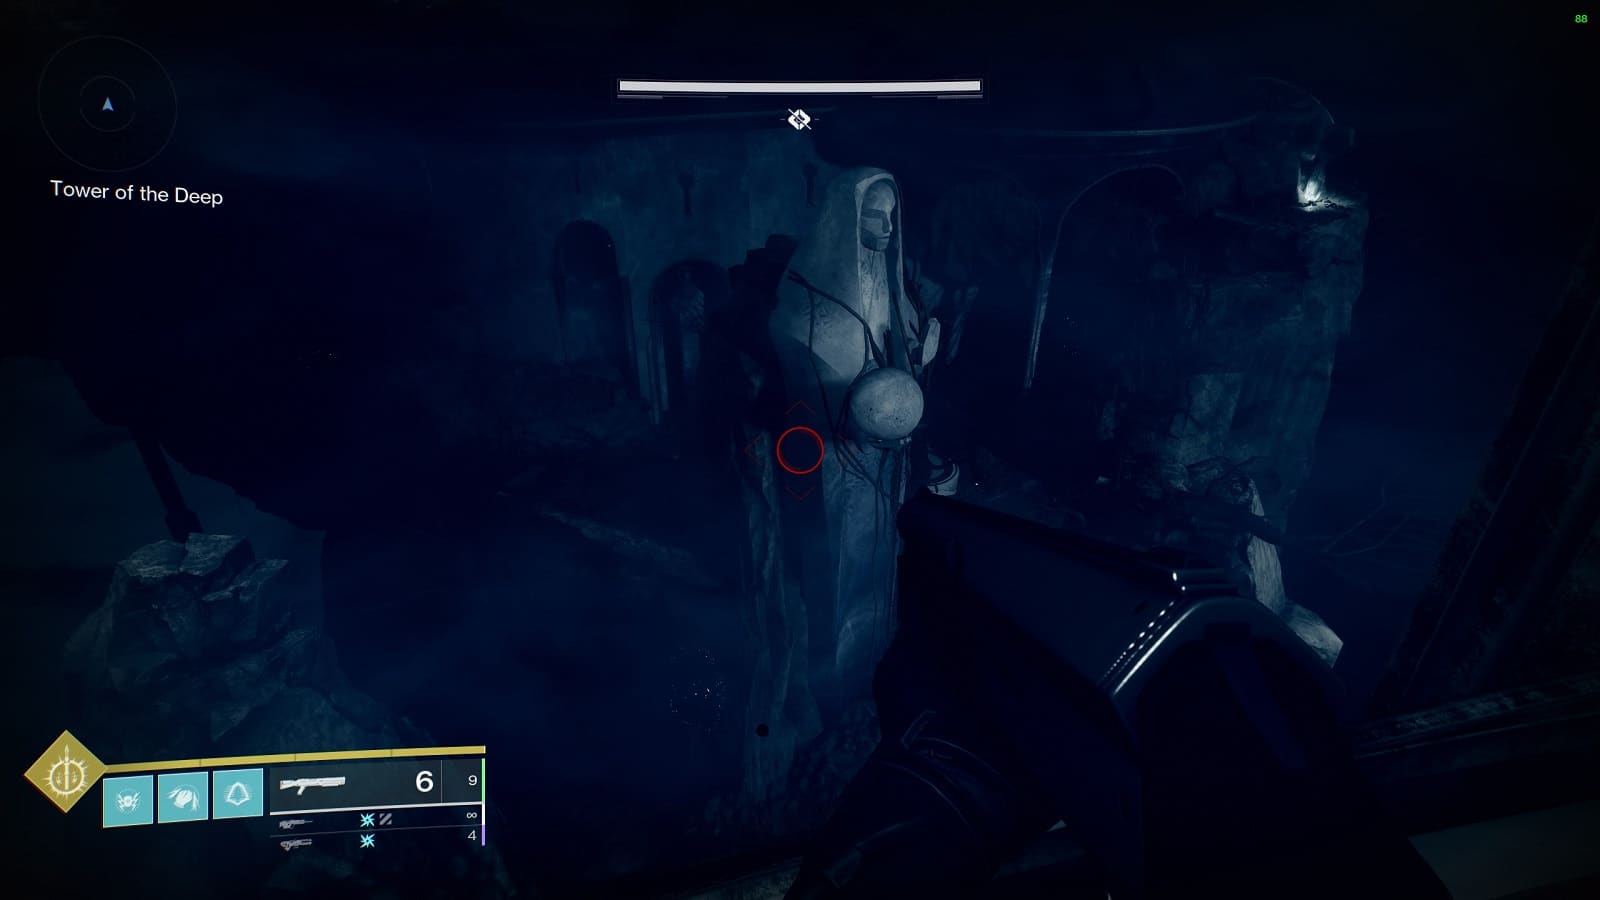
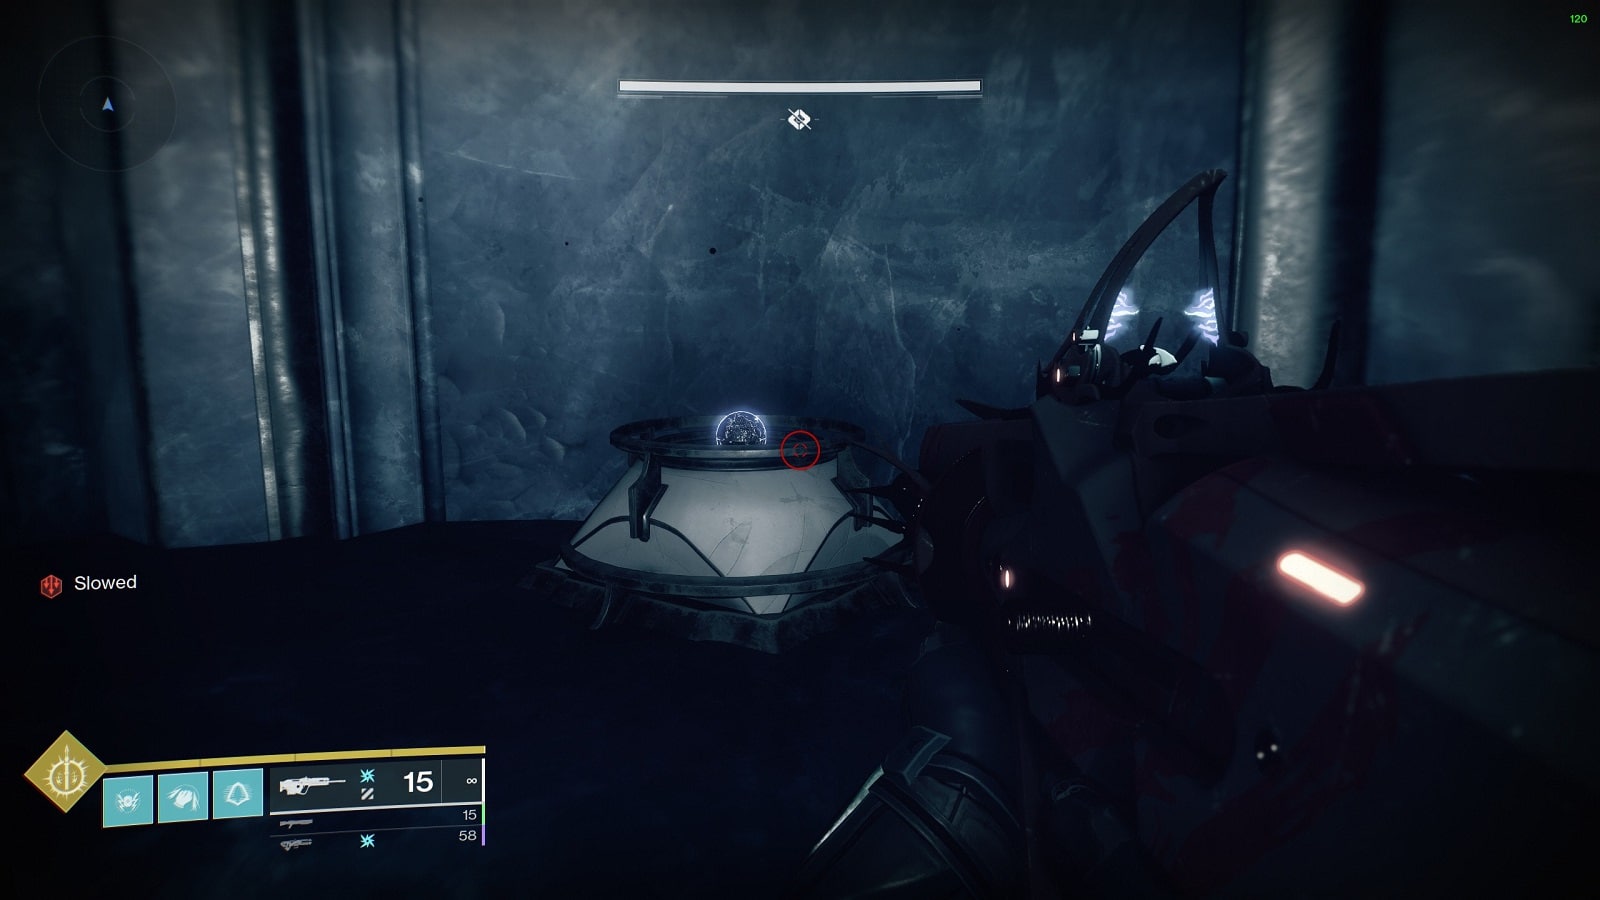
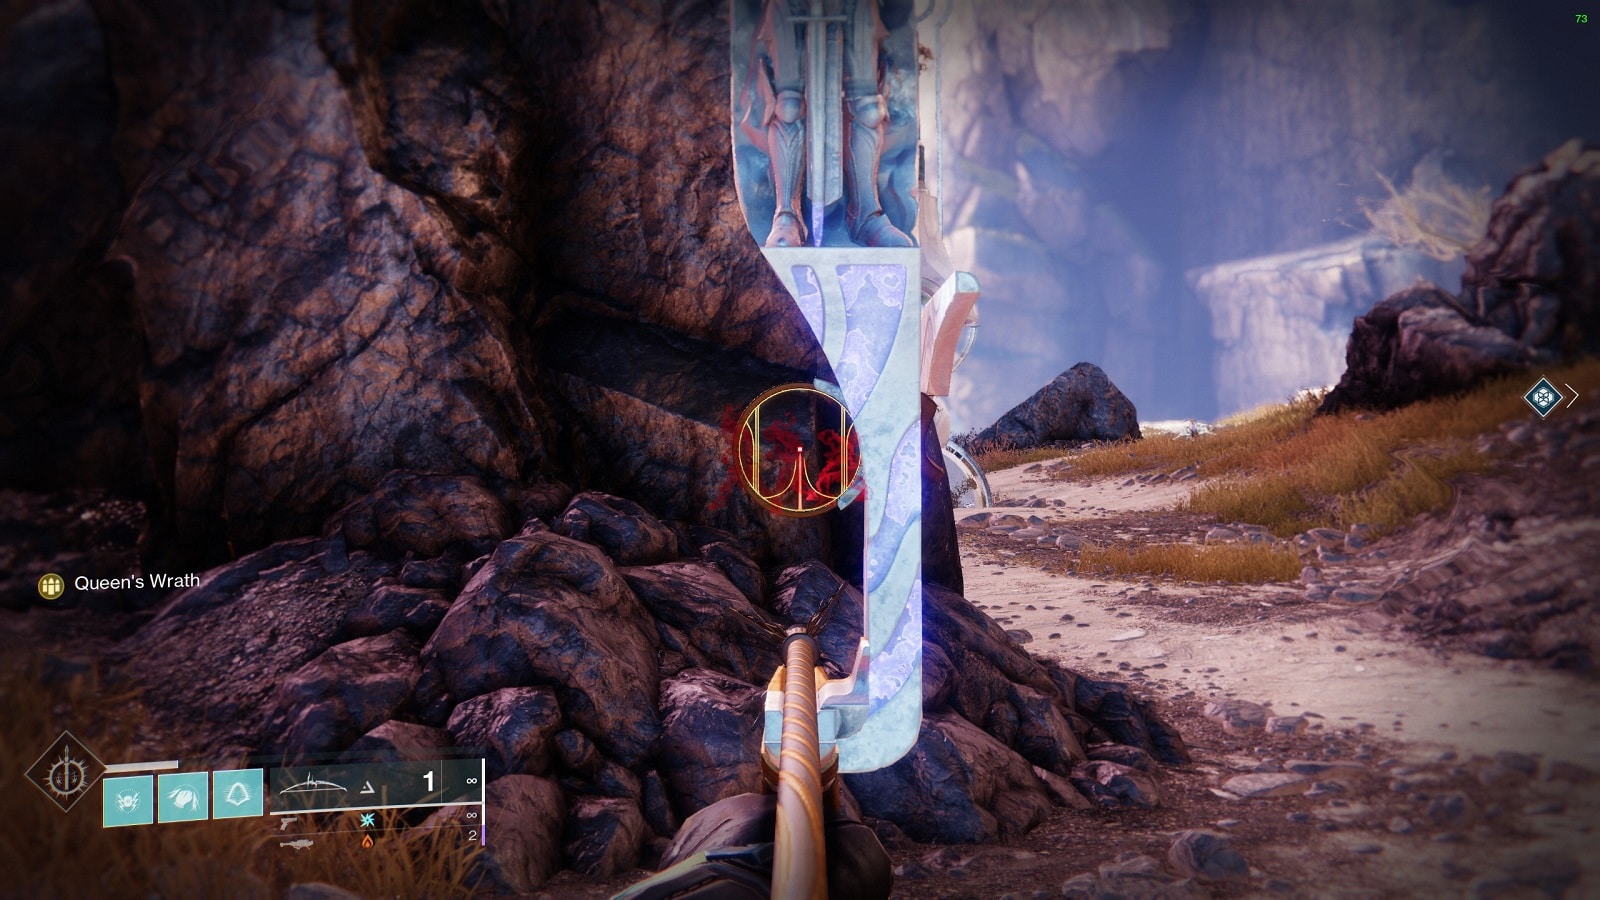
Look for the statue with the open palm and deposit the Orb there. Once done, Querim, the Waking will appear in the middle of the area to challenge you. The mini-boss is like any other Vex Minotaur. Take it down and you’ll receive the Waking Token of Querim.
Keep this mechanic in mind throughout the Dungeon. This is going to repeat at least three more times.
Step 3 – The Descent
This next part is split between two phases: the part where you have to cross thin bridges with Taken Ogres poised and ready to knock you off and the marathon where you need to outrun Taken Thrall. Both the required to open the next door to the next Taken mini-boss.
After doing the initial part of the descent, you’ll find yourself in a cavernous chamber with columns and thin platforms. Ogres will spawn on the platforms to the right. Use a long-range weapon to get rid of them ASAP. These ogres are designed to push you off those beams. You do not want to be hit by their eye beams.
For this part, you definitely want to clear the room of enemies. The orb is located behind the right-most pillar closest to where you entered the room. If you do not see the orb on the pillar you are on. Do not panic, the orb is going to be on the other pillar. Guaranteed.
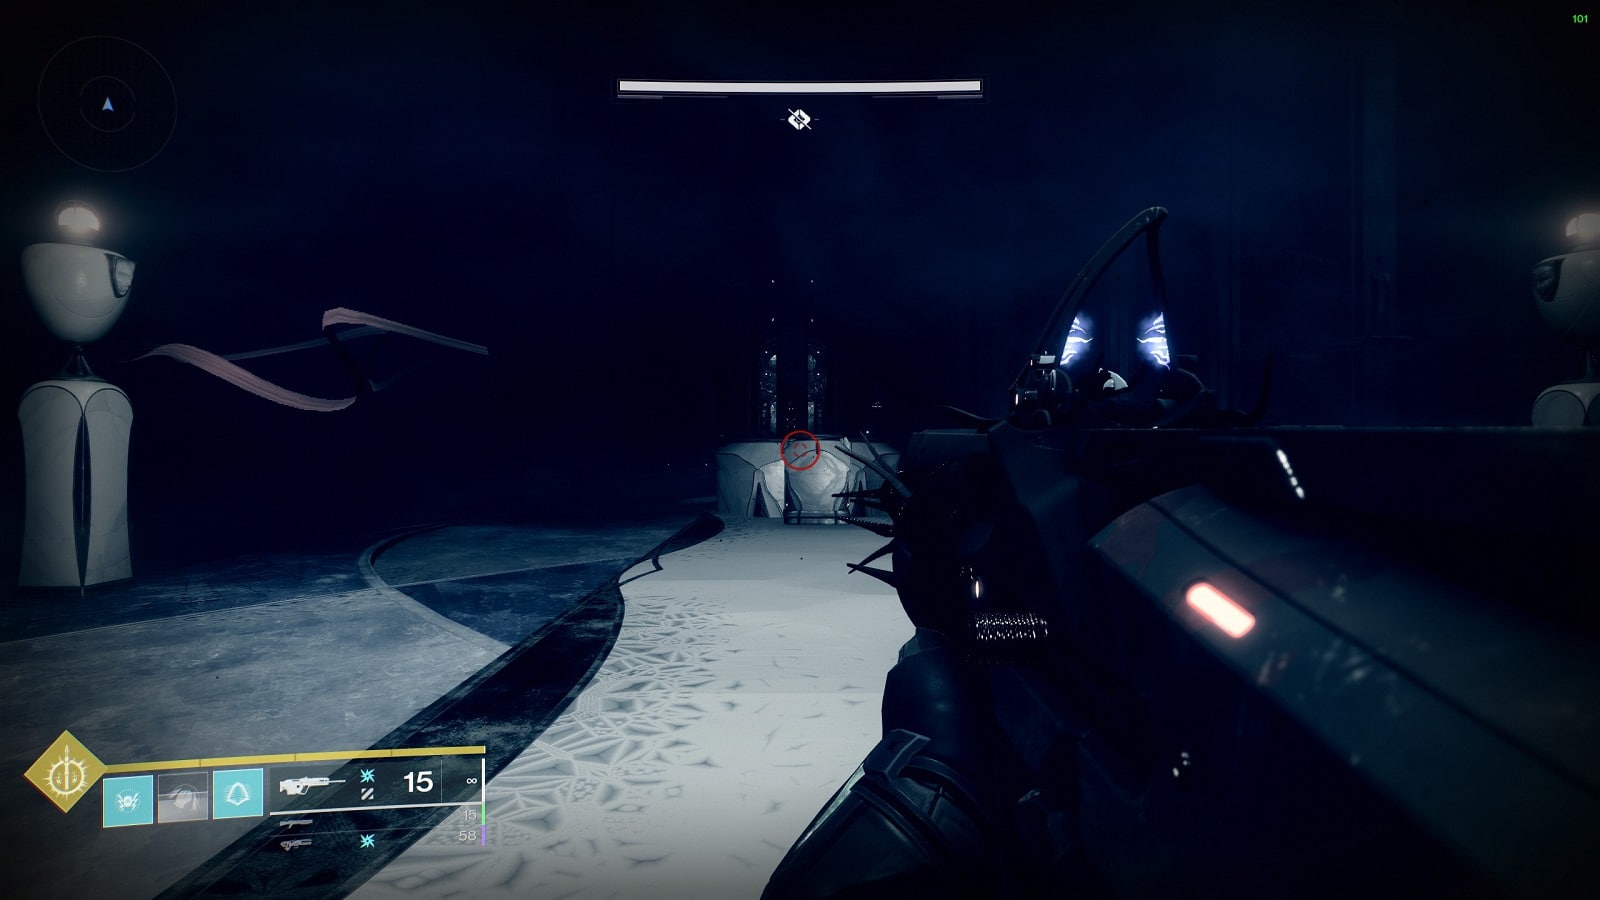
Pick up the orb and carry it across two pillars over to the wall where an open palm statue is waiting for you to deposit the orb. The only thing that can complicate things now is where the Taken corruption appears. They randomly appear on the pillars so the path forward always changes. If you’re lucky, you’ll get a straightforward path to the statue.
Warning: If you fall during the Ogre part, you will restart the whole Descent section from the top. It's annoying to have to do this over and over again. So take this part really slow.
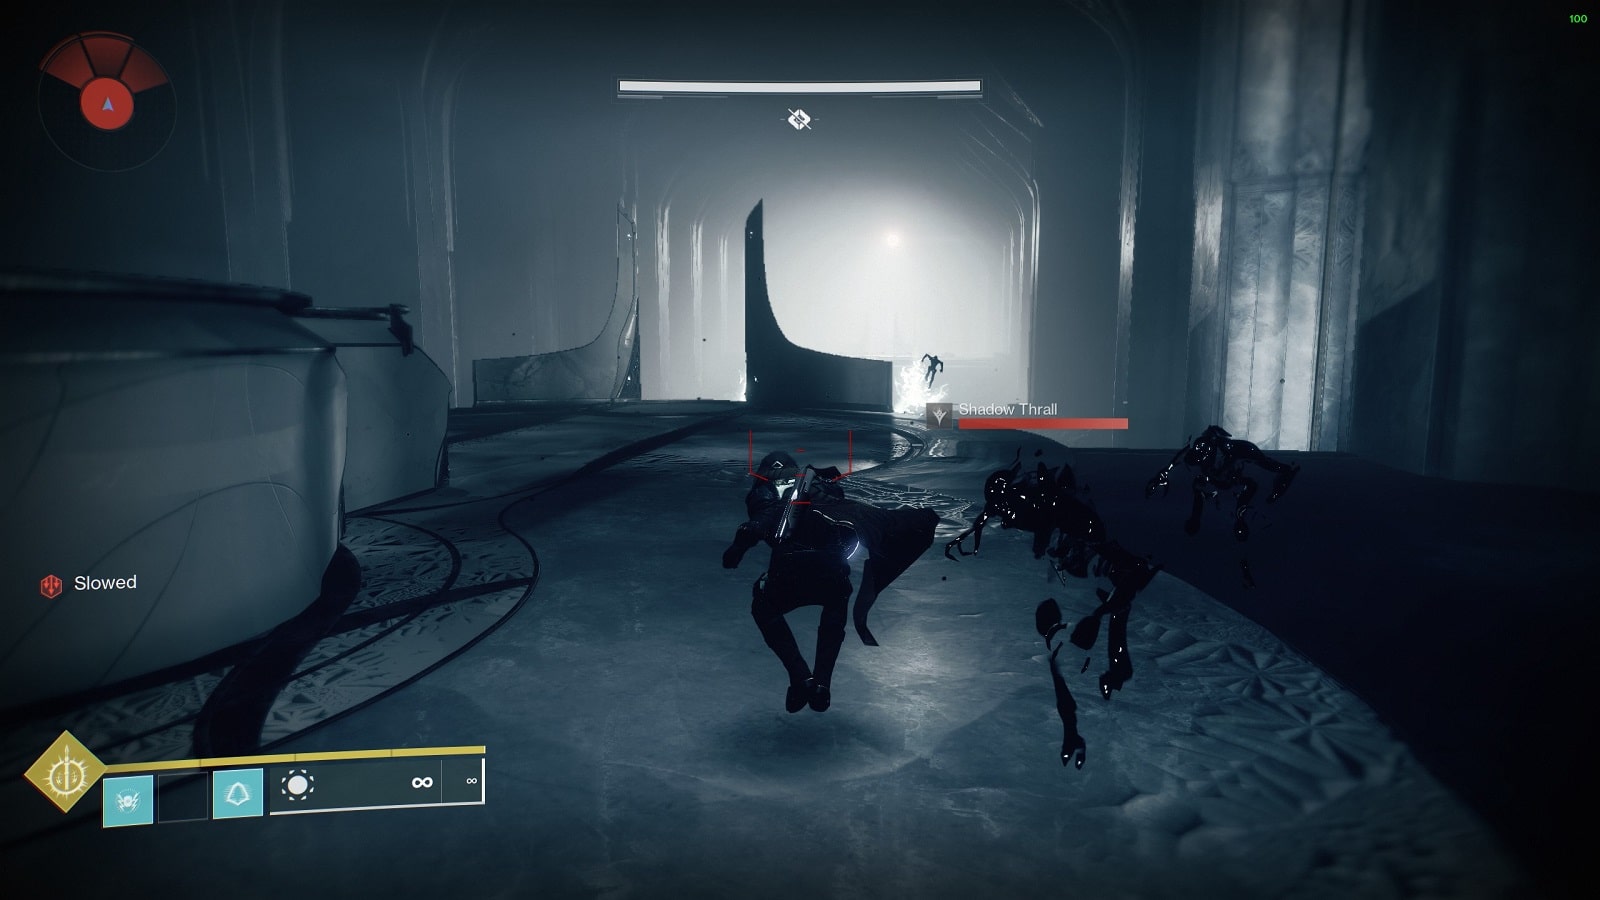
Step 4 – The Gauntlet
The third orb appears in the outside hallway on the right side immediately after falling into the gauntlet. Thrall will continuously spawn until you make it to the second drop. The key is getting out of this alive in one piece is to bunny hop to the end. So, you’ll want to jump and melee to give yourself a boost to get out there. The melee also functions to clear a path forward and keep thrall away.
You do not want to die to the Thrall during the critical stage.
If you lose the Orb during the second part as you’re running away from the Taken Thrall, you might have no choice but to restart the whole Dungeon from the beginning. There is a chance that the orb will despawn entirely if you die to the Thrall.
It sucks. And you’ll have to do the Ogre section again too. But at least you don’t have to do the first objective a second time.
Once you reach the second drop-off point, immediately go to the right and dunk the orb. You don’t want to linger too long as Taken Thrall will rush toward you in one last hooray, and you don’t want to die at this point.
If you die after dunking the orb, there is a chance that the door that has the second boss behind it will remain locked. You may be forced to do the whole dungeon again.
So if you do everything correctly, the door across your current location will open.
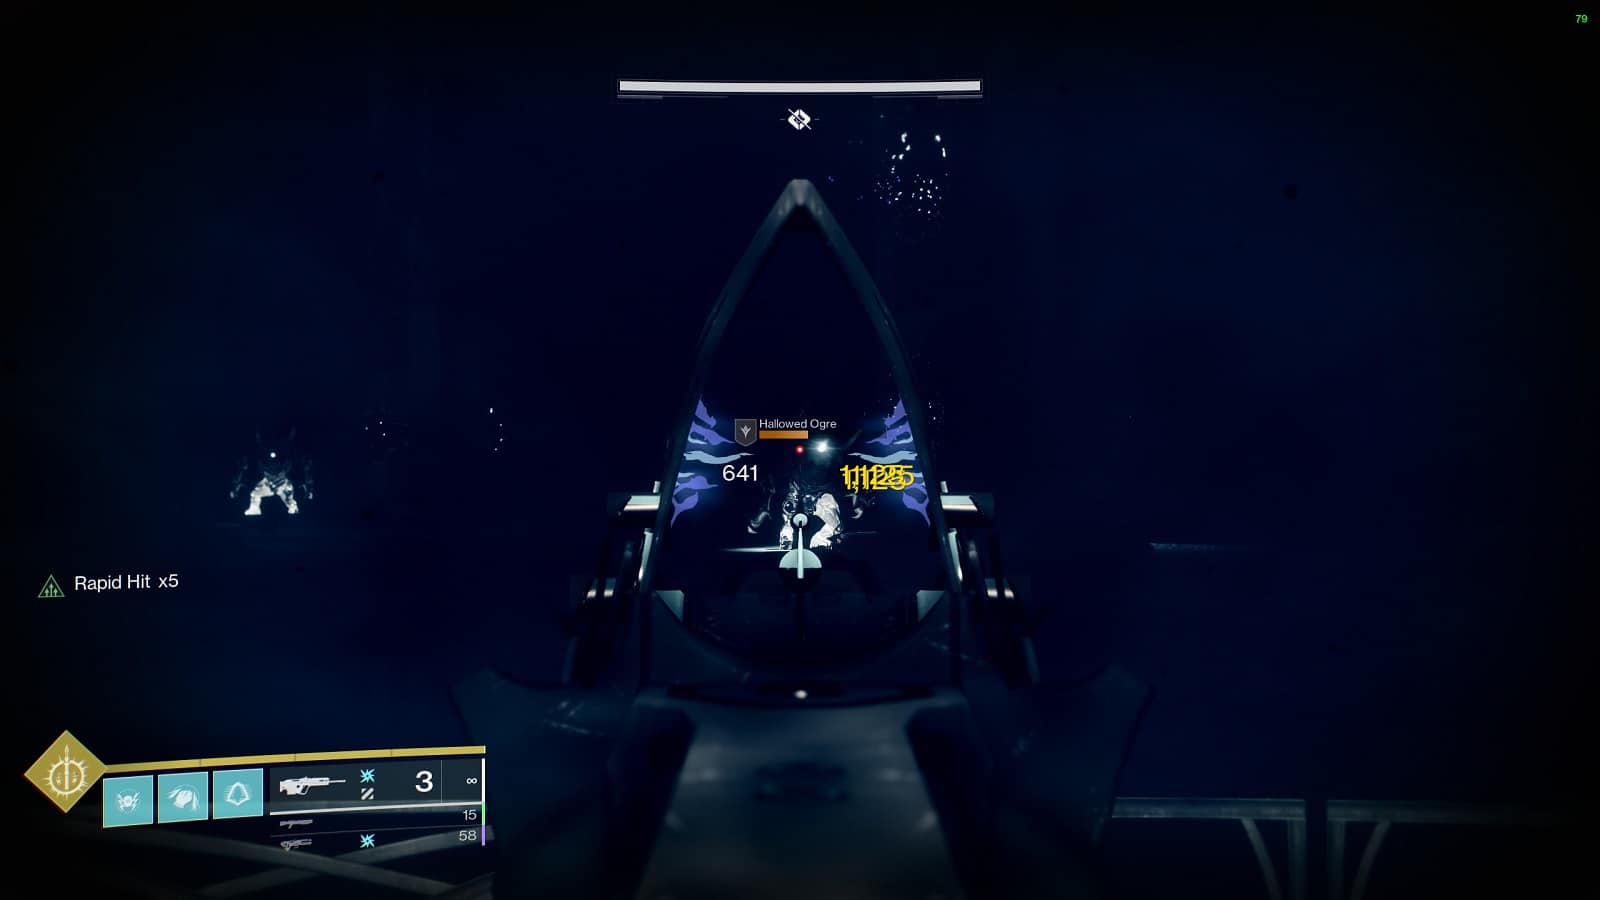
The encounter with Eriviks, the Waking is a short one. Once you enter the room, go around the pit to the central platform hanging over the abyss. A dozen or so Taken Psions will appear a few seconds later. Immediately leave the central platform and go back to the outer ring. You don’t want to mess with these guys. Unlike Taken Thrall, they have ranged attacks and will melt you if caught unprepared.
For Hunters, go invis if you get into trouble. Play around your barrier if you’re a Titan. And if you’re Warlock, don’t hesitate to pop a well to keep yourself topped off.
Once you’ve dealt with the Taken Psions, Eriviks will appear in the middle of the hanging platform. Since the fight with the Taken boss can be buggy, you don’t want to be in the same place where it spawns. Especially when Eriviks can randomly teleport right on top of you and just smash you to death.
Keep your distance and you should be able to clean this up and get the Waking Token of Eriviks. That’s two down and you don’t have to do any of that again, no matter what happens next.
Last up is the Taken Ogre, Xavoth.
Step 5 – The boss fight within the boss fight
The last mini-boss fight takes place during the Vorgeth boss fight. We don’t need to tell you how annoying this boss fight is the first time around, so let’s get down to what you need to do to get the final token.
For this final part, do as you would normally do when doing this boss fight. Upon entering the encounter, head straight to the left and go around the edges in a clockwise fashion, collecting the four tokens from the Wizards while destroying the escorts. Once you have the fourth buff, dunk it into the nearest receptacle. This will trigger the damage phase.

But you won’t be damaging Vorgeth like you normally would. Instead, you’ll need to look for a newly spawned invisible Minotaur called the Fleeting Shade. It can be found roaming around the pillar in the back left of the chamber (we’re using the entrance as a reference point.) Destroy it while avoiding Vorgeth’s floating ball attacks.

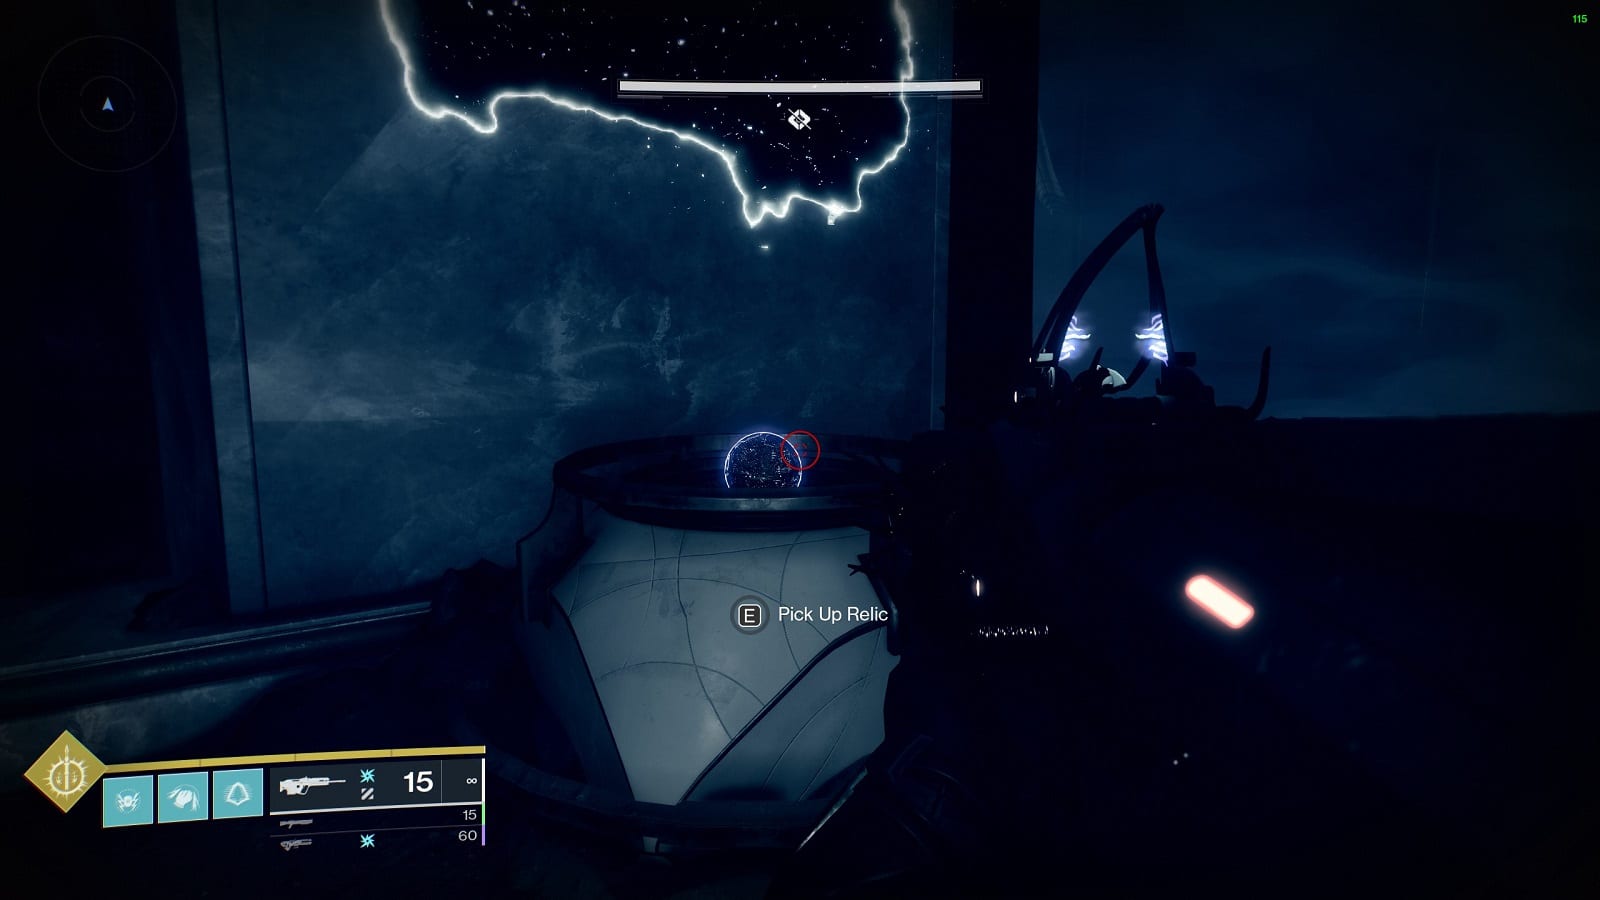
The moment you destroyed the Taken Minotaur, an orb will spawn back at the entrance. At this point, you are nearing the end of the damage phase and the Taken Wizards and their escorts have returned. Be quick as you pick up the orb or you will be quickly overwhelmed.
Once you pick up the orb, make a mad dash forward to the right side of the chamber. The statue will be waiting there along the wall. You can avoid incoming fire while waiting for the prompt to appear. Dunk the orb and the final mini-boss, Xavoth will appear immediately to your right.
Things are about the get frantic. But the most important thing is to kill Xavoth and get that token. We highly recommend saving your Super and heavy weapons exclusively for Xavoth. All that matters is that the ogre dies. Because even if you die after claiming the token, you don’t need to do any of this again to draw out Xavoth. Under no circumstance are you to fight anything other than the mini-boss. If you fall here, you’ll have to do the whole summoning process again.
If it gets a little hot in the kitchen, it may be a good idea to bring in some friends. Don’t worry about losing progress. Your checkpoint is safe for now. And getting some friends together just might be enough to get you over the top.
If you’ve done everything correctly, you can finally take a moment and take comfort in the fact that you only need to do one more thing before you can get the Wish Ender bow.
Step 6 – Return to the statue
The final step involves defeating Vorgeth and talking to the statue again.
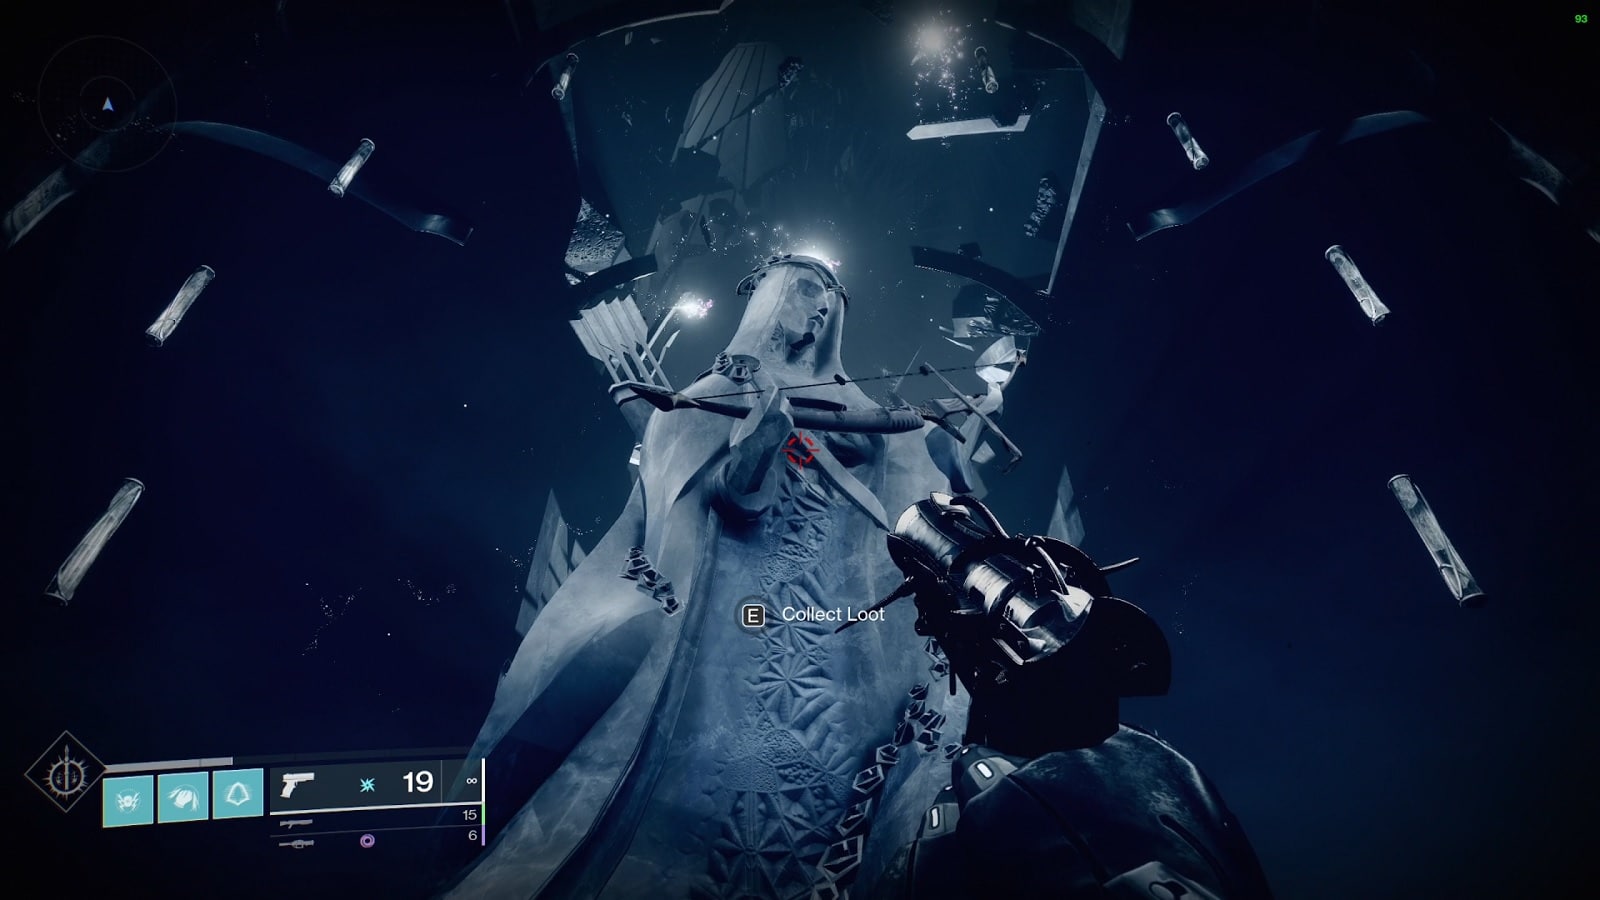
Once Vorgeth falls, go and talk to the statue. You will present the tokens as proof of conquest and you’ll be able to collect the Wish-Ender Combat Bow. Congratulations! You have accomplished one of the more difficult Dungeon Exotics in Destiny 2. Take a moment to pat yourself on the back.
So, what’s so good about the Wish-Ender? Well, the bow grants you the ability to legally wallhack for as long as the bow is fully drawn and if only one wall is directly in front of you and your enemy. The best thing about it is that it even works in PvP. But it seems limited usage on account of Le Monarque being so strong.
And that’s everything you need to know about the Wish Ender Quest in Destiny 2. Frankly speaking, with how much Power Level impacts PvE content, going through the Shattered Throne again was a lot easier than it was two seasons ago. 1820 Power Level hurts a lot. But I do like that there is still some level of challenge for this Exotic quest. Good luck and have fun out there, Guardians.
Check out this video from YouTuber TriGs where he shows you how you can get the Wish Ender Exotic combat bow in Destiny 2 2023.


