
Tangaroa is a floating dome city that players can sail to in Raft. Inside this abandoned city are lots of scraps and treasures waiting to be discovered. However, this city isn’t fully uninhabited as what was left are the automatons that once served the citizens of Tangaroa.
In this guide, we will take you through Tangaroa, how to navigate through its buildings and corridors, as well as find a key information that will lead to the next destination of the final chapter.
How to get the coordinates for Tangaroa
The coordinates for Tangaroa can be found in Caravan Town. Search for the Mayor’s Key and use it to open a chest inside the Mayor’s house. Written on the note stuck inside the chest are the coordinates for Tangaroa.
Tangaroa Walkthrough Part 1
As you navigate to and approach Tangaroa, you’ll need to follow the yellow arrows on the side walls to locate its entrance. Before leaving your raft, make sure that you have enough space in your inventory for loot, as well as some oxygen bottles since you’ll have to do some diving later on.
Go through the entrance to Tangaroa and through the first corridor. The door to the right is closed, so head to the left towards the Cafeteria. Be careful as there are Lurkers in the corridors and rooms, with tougher ones that take a bit more beating.
Head inside the cafeteria and you’ll see a note on one of the countertops. Then, head inside the kitchen and you’ll find a generator part. You’ll need to find two more of these for the next section, which are not that hard to spot. After exploring the Cafeteria, exit through the opposite door and turn left first and follow the path to find the next generator part.
Head back to the main corridor and go to the Storage Area. As you enter, you’ll see a generator part to the left. Grab it and then climb the ladder to the right where you’ll find the generator. Plug in all three parts on the generator to power up the magnetic crane. You’ll then have to play a mini-game where you have to arrange the containers to make yourself a path to the next area.
Tangaroa Container Mini-game
The objective of this game is to move the containers around to create a path from the left to the right. The grid is 7×5 with two empty slots (left hand side and one next to the exit on the right). Use the panel near the generator to control the magnet arm that will move the containers around.
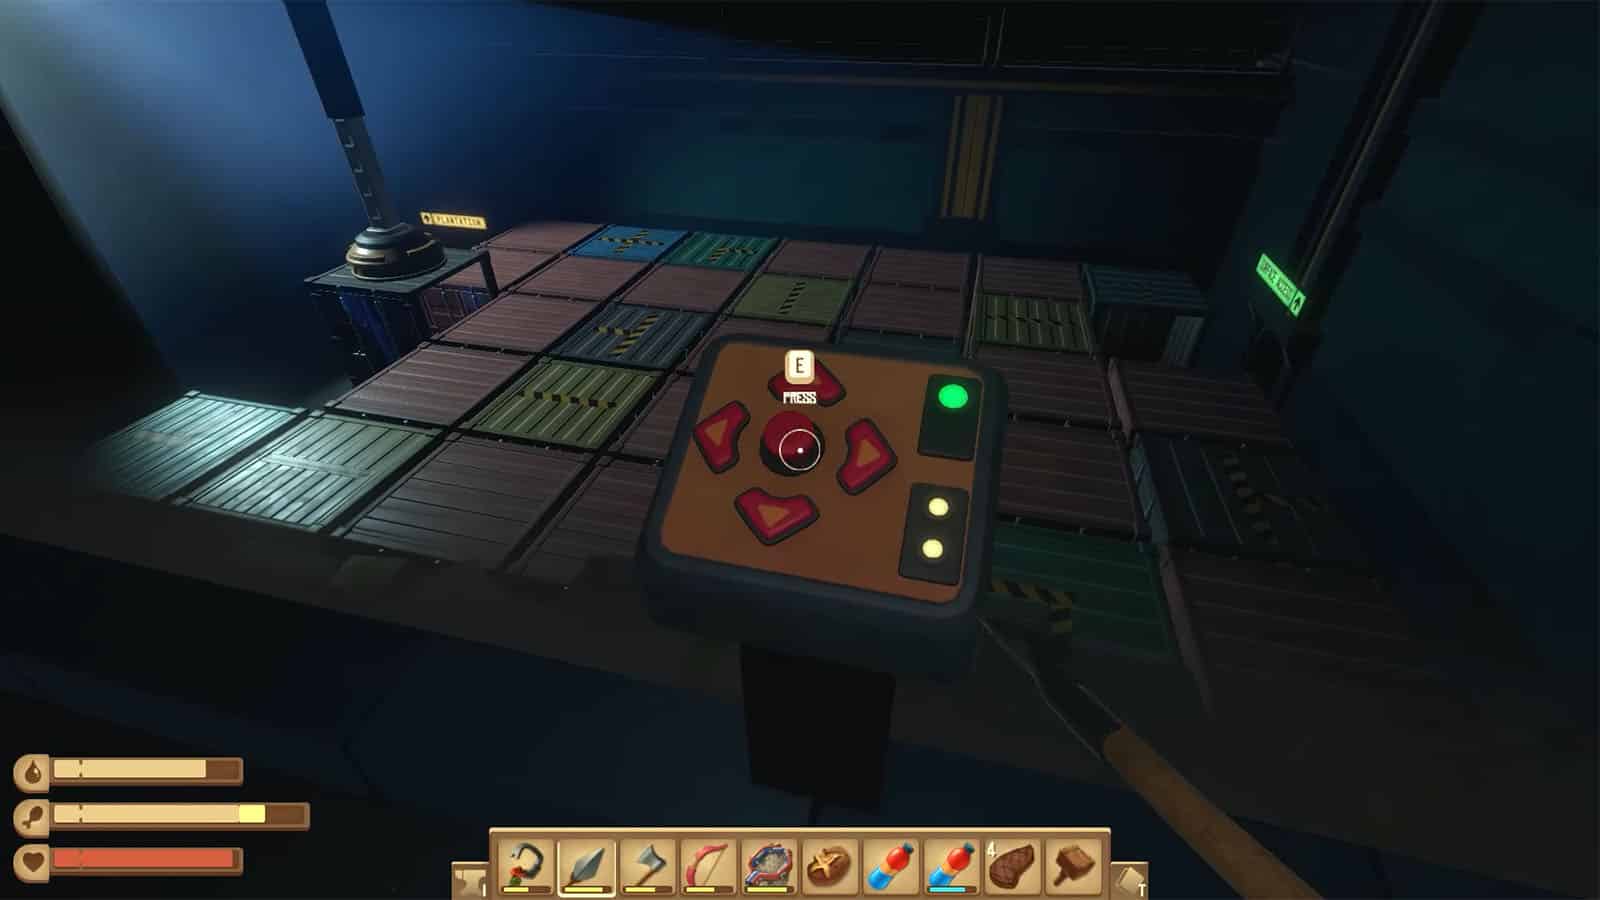
Two different kinds of containers are present: the red closed ones, and the marked ones. The markers indicate which side of the container is open and can be passed through. Both kinds of containers can be moved around to an open spot, and open sides do not necessarily have to link up to each other as long as there’s an open space between them.
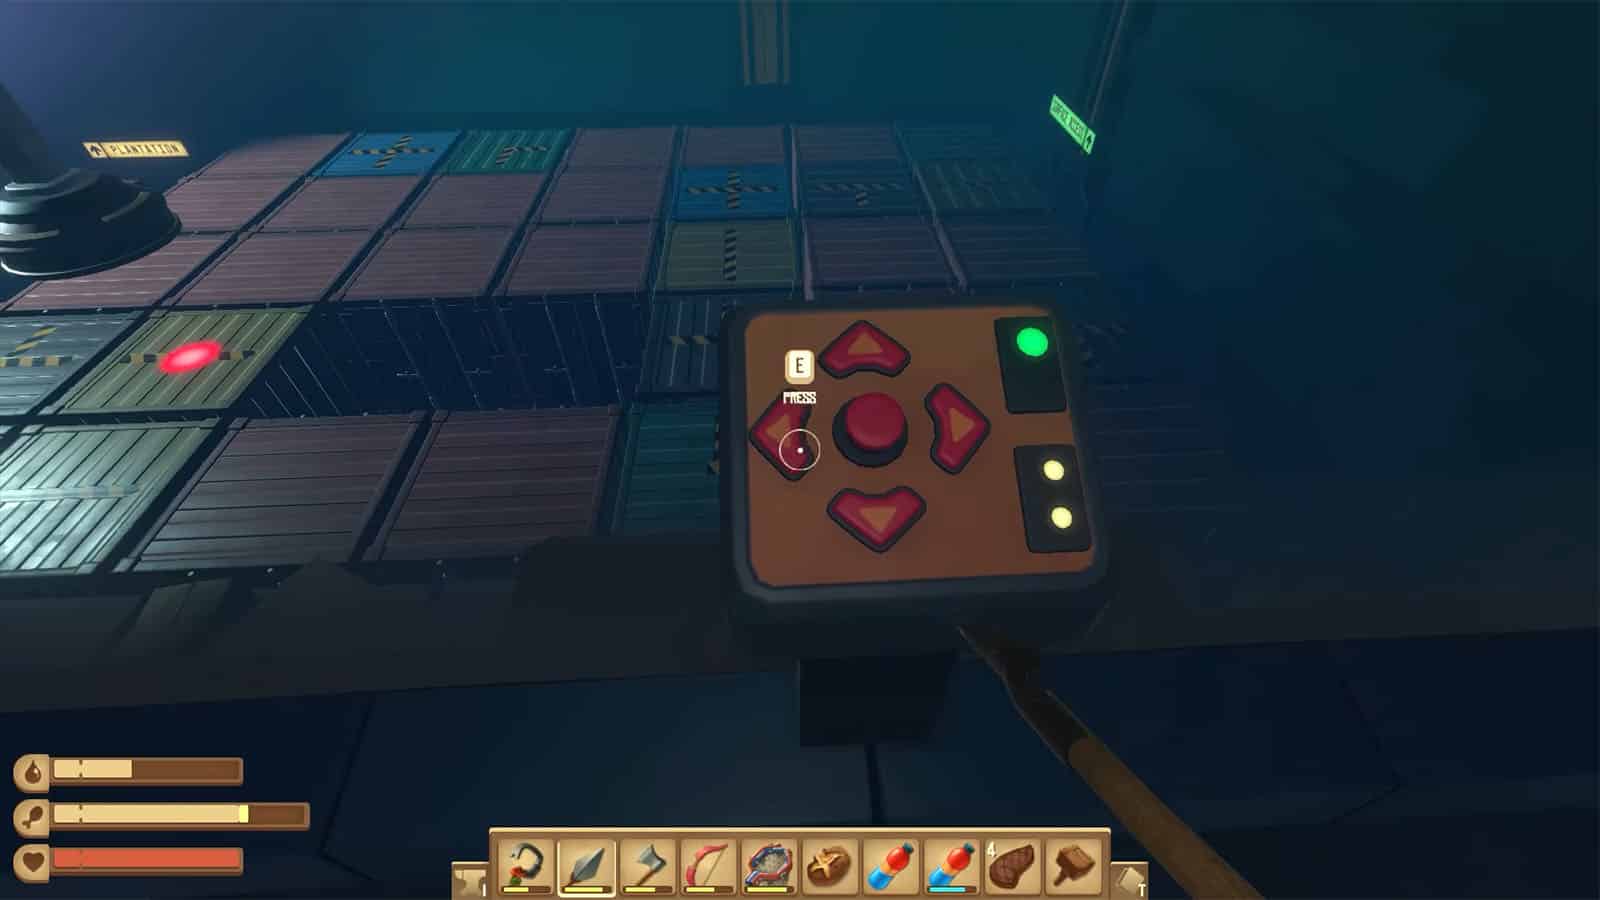
Solution:
- On the right side, move the yellow – to the right next to the exit.
- Move the gray T around and place it next to the yellow -.
- Move the blue + around and place it next to the gray T.
- On the left, move the gray upside-down T down.
- Use the second open spot on the left to help you shift the containers around so that the yellow | sits below the blue +.
- Move the gray <T around and place it below the yellow |.
- Clear the path from the yellow – on the left so that you can pass through to reach the gray <T.
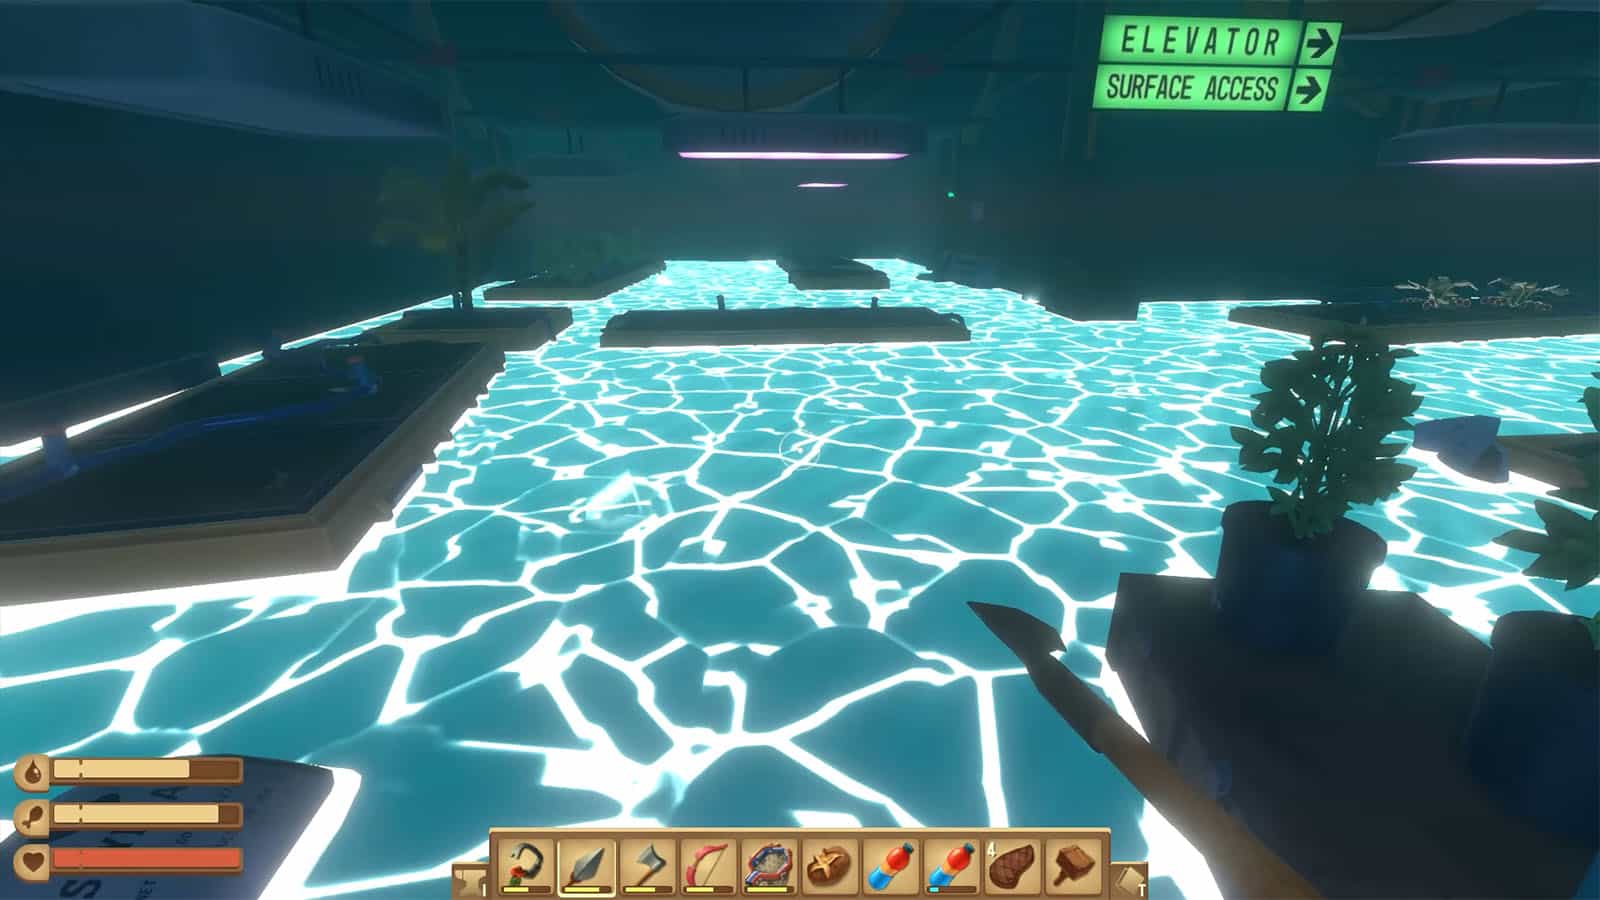
Once you are through the containers, follow the path to the Surface Access. You’ll find another note to the left next to a Water Pipe Blueprint. There’s a locked door on the opposite side and a ladder to a hatch on the right. Climb the ladder and open the hatch. Water will start pouring in which will flood the corridors.
The locked door will then be opened. Head through this door and follow the path as quickly as you can. You’ll reach another door that was locked from the other side before, which you can now open. Then, swim back to the storage area at the containers.
At this point, the water should have risen high enough for you to swim on top of the containers and reach a broken ladder to the Plantation. Head inside the room and you’ll find another note on a table. Open the door to the right if you need a shorter path to get back to your raft.
Follow the path to the plantation once more and climb the ladder. You’ll then see a flooded room, but the water gets electrocuted at certain intervals. You’ll have to go across and on top of the dry areas to avoid the water, and only swim during safe times. You only have around 2 seconds of safe periods between shocks, so make sure to time it right.
First, you need to go directly straight from where you entered to the doorway that has a green light. There are 2 duct tapes in this room which you have to grab. Head back out and go to the red light doorway. Grab the other duct tape and the next note nearby. Then, use the duct tapes to fix the electrical box which will open the doorway.
On the next room, there will be another red light doorway to the left with its electrical panel nearby, but there won’t be enough duct tapes in the room to fix it. You’ll have to go through the buildings in the city to find all the duct tapes that you need and then return to this area later on. For now, head to the doorway straight ahead to reach the surface.
Turn around as you reach the surface to see an exit gate. Open this gate so that if ever you need to revisit the place, you’ll have direct access to the surface level. You can also take the time to get back to your raft and repark it near this entrance.
Tangaroa Walkthrough Part 2
Now that you are on the surface level of Tangaroa, you will have to face another threat which are the Butler Bots. These are the automatons that were meant to keep Tangaroa well-maintained, but they have now become corrupted due to years of abandon and now act unintentionally hostile towards explorers.
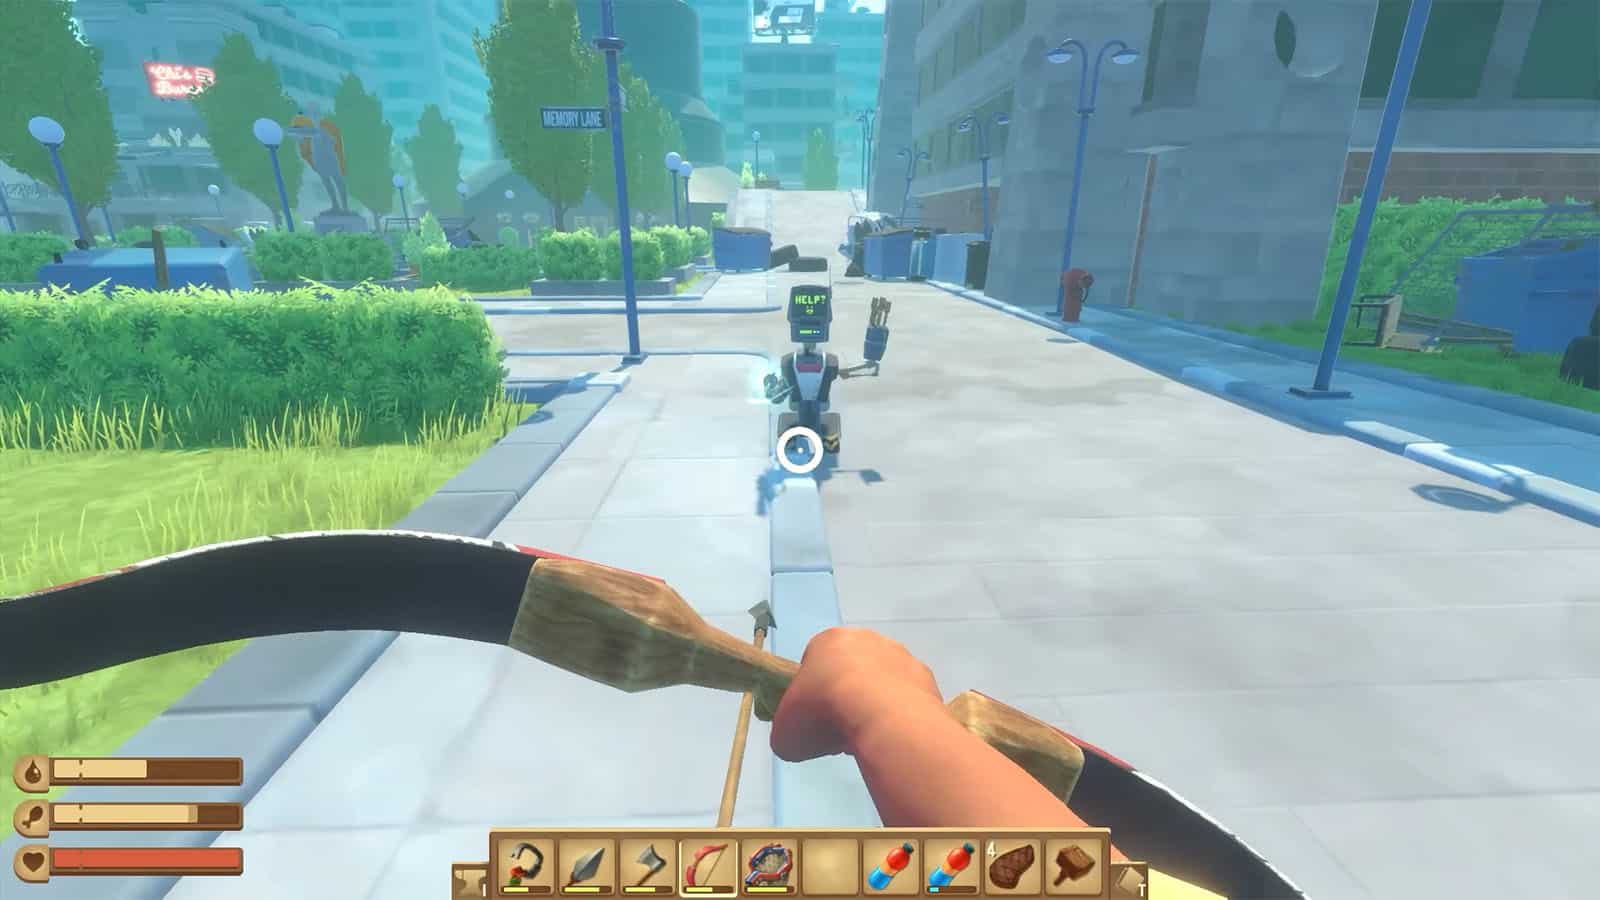
Defeating these Butler Bots will reward you with Tangaroa Key Cards which you can use to open rooms within the buildings, so make sure to grab as many as you can. While you are at the surface, head to the statue in the middle to find a note at its base.
Your objective at this point is to explore the buildings and gather at least 9 duct tapes to access the locked doorways in the lower levels. One of the buildings that connect to the central tower where you need to go next can only be accessed from one of the buildings via a zipline. However, that building can only be accessed via an elevator in the Plantation below.
Once you have collected 9 duct tapes, head back into the plantation and fix the electric boxes. The final electric box that you fix will open the door leading to the elevator area and also disable the electricity, making it safe to go through the water. Inside the next room is a blueprint for an Electric Purifier. Instead of going directly to the elevator, head to the Loading Bay first and open the door which is the same locked door you saw upon entering Tangaroa.
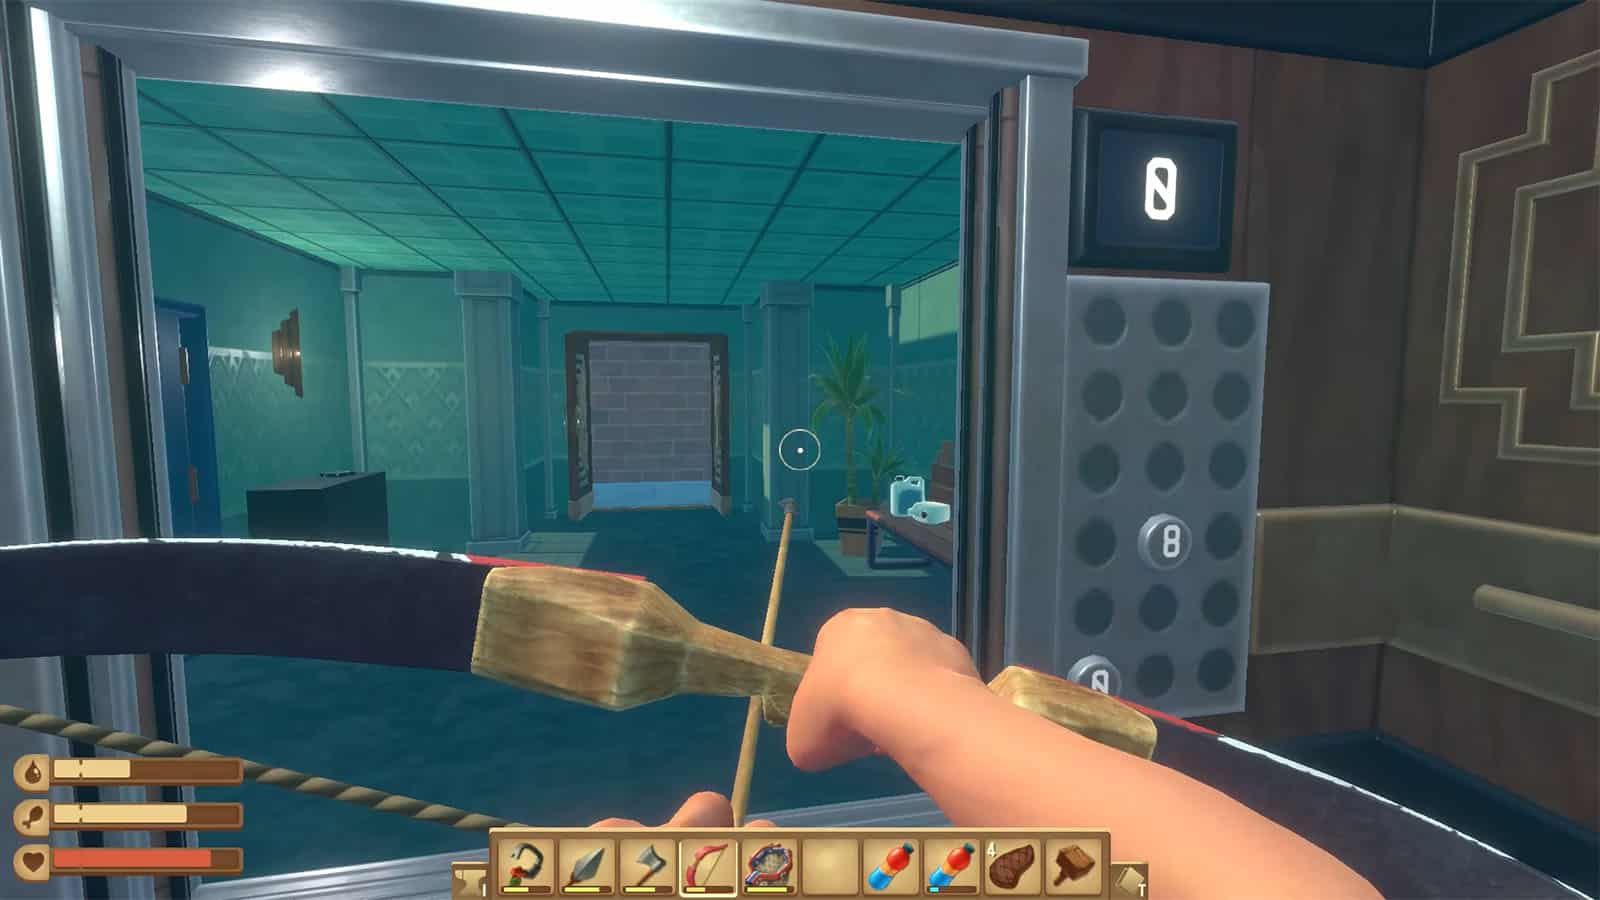
Head back to the elevator and visit the 0th floor first and open the door that will lead to the surface level. Go back to the elevator and head to the 8th floor. You may have already seen Tangaroa tokens by now which you can use on the vending machines at the base of the central tower to get special items. There are more to get in this floor, so make sure to check every nook.
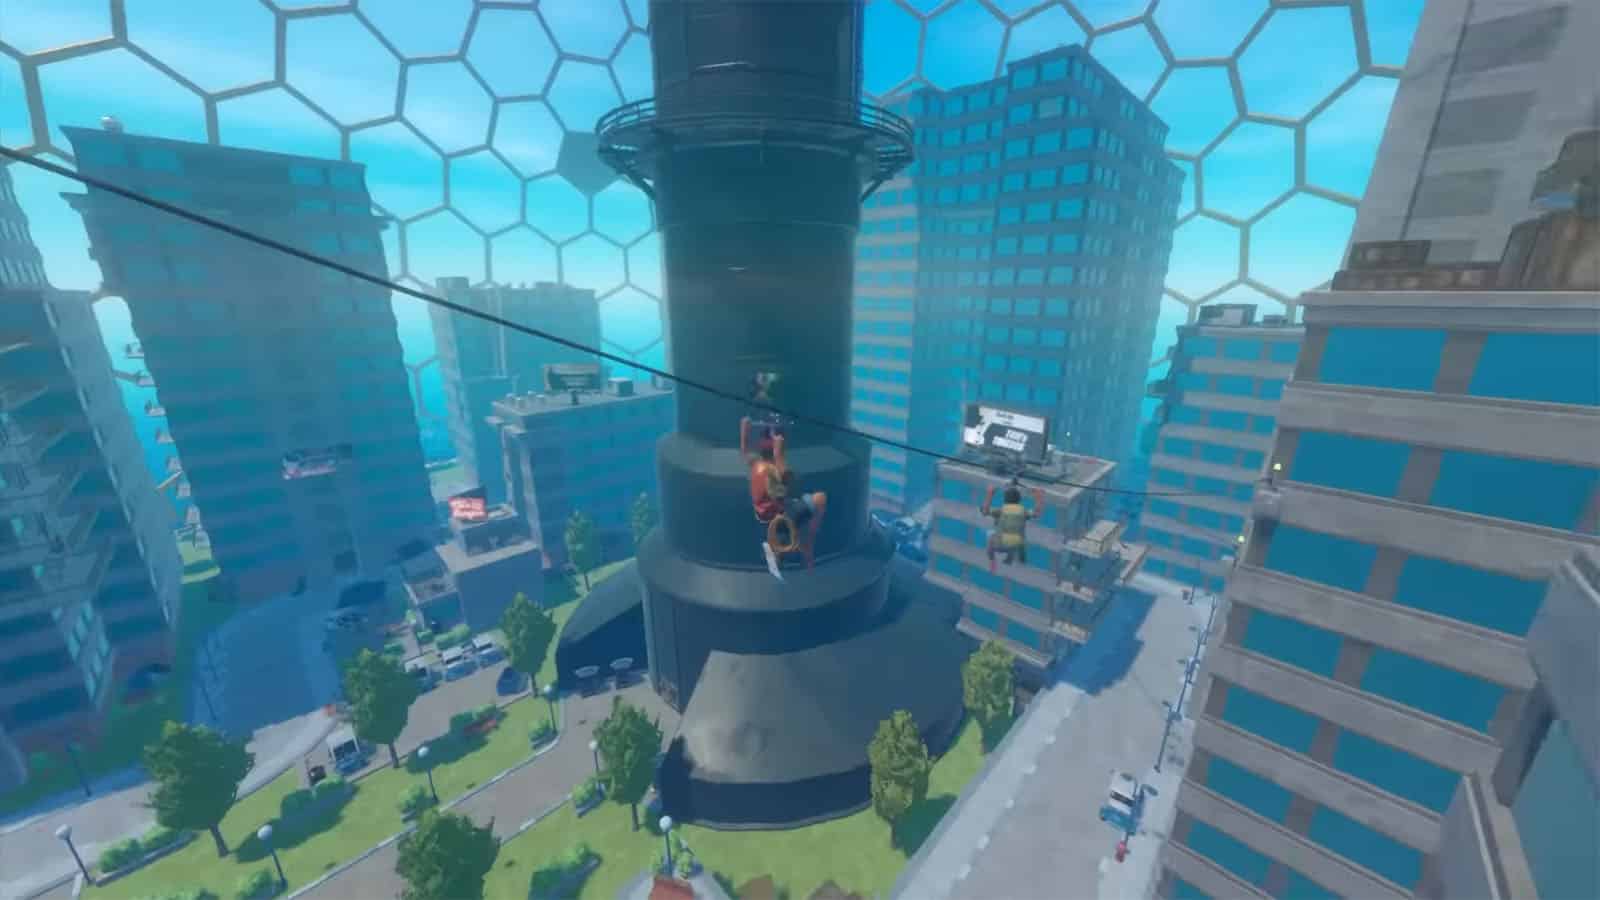
Once you’re done checking the 8th floor, head to the outdoor area and make your way up to the other room up top. There’s a connecting room that has one of its windows broken which lets you access another outdoor section. From here, climb up the crates and the machinery to get to the zipline which leads to the adjacent building.
You’ll then arrive at a 4-storey unit. You can climb up the higher floors where you can get more Tangaroa tokens and some materials. Go up to the fourth floor to find another broken window which leads to the zipline that is connected to the central tower. Once you’re at the tower, climb up the ladder and find the room where the tower’s elevator is.
Head to the 0th floor first to get the next note and open the door to the base level. Then, head back to the elevator and go up to the 2nd floor to find another note and a blueprint for a Large Storage.
Tangaroa Walkthrough Part 3
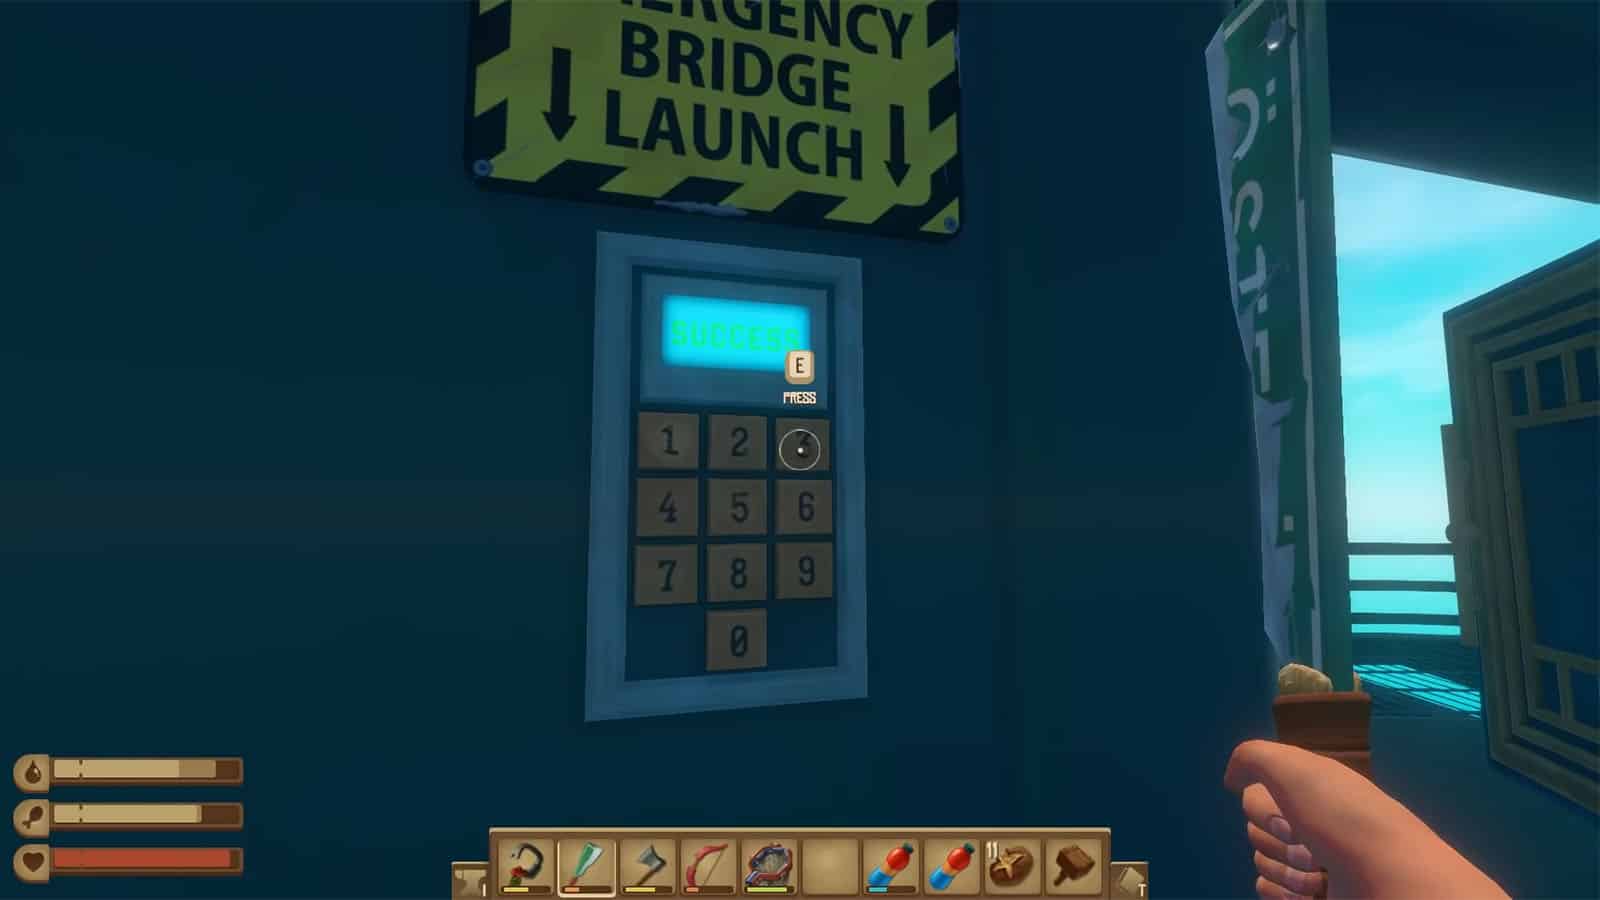
On the latest not that you have picked up, it shows the name of the streets along with symbols on the side. Your objective this time is to locate these streets and use the symbols to figure out which buildings they are referring to. These buildings have numbers on them which you’ll need to take a note of as they will be used as a code later on.
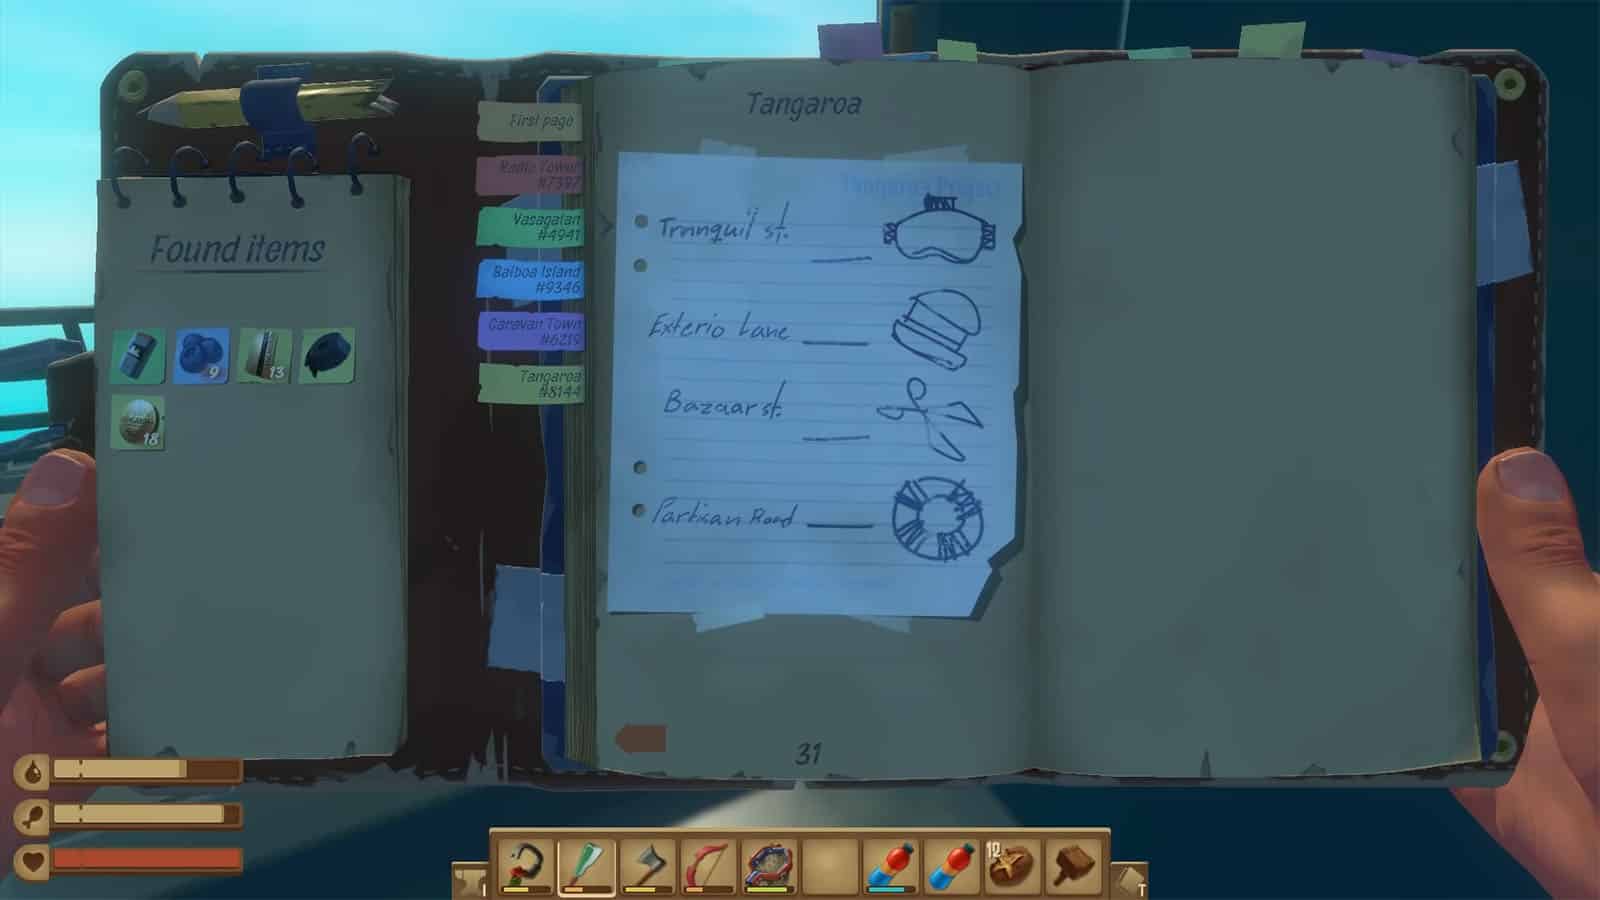
Here are the numbers for each building:
- Tranquil St.: 4
- Exterio Lane: 8
- Bazaar St.: 1
- Partisan Road: 3

Once you have the numbers, head back to the 2nd level of the central tower and punch in “4813” on the Emergency Bridge Launch panel. This will cause the bridge or the cockpit part of the tower to be ejected from the dome and crash into the sea. At this point, you would want to move your raft closer to the bridge since you will need to explore it some more.
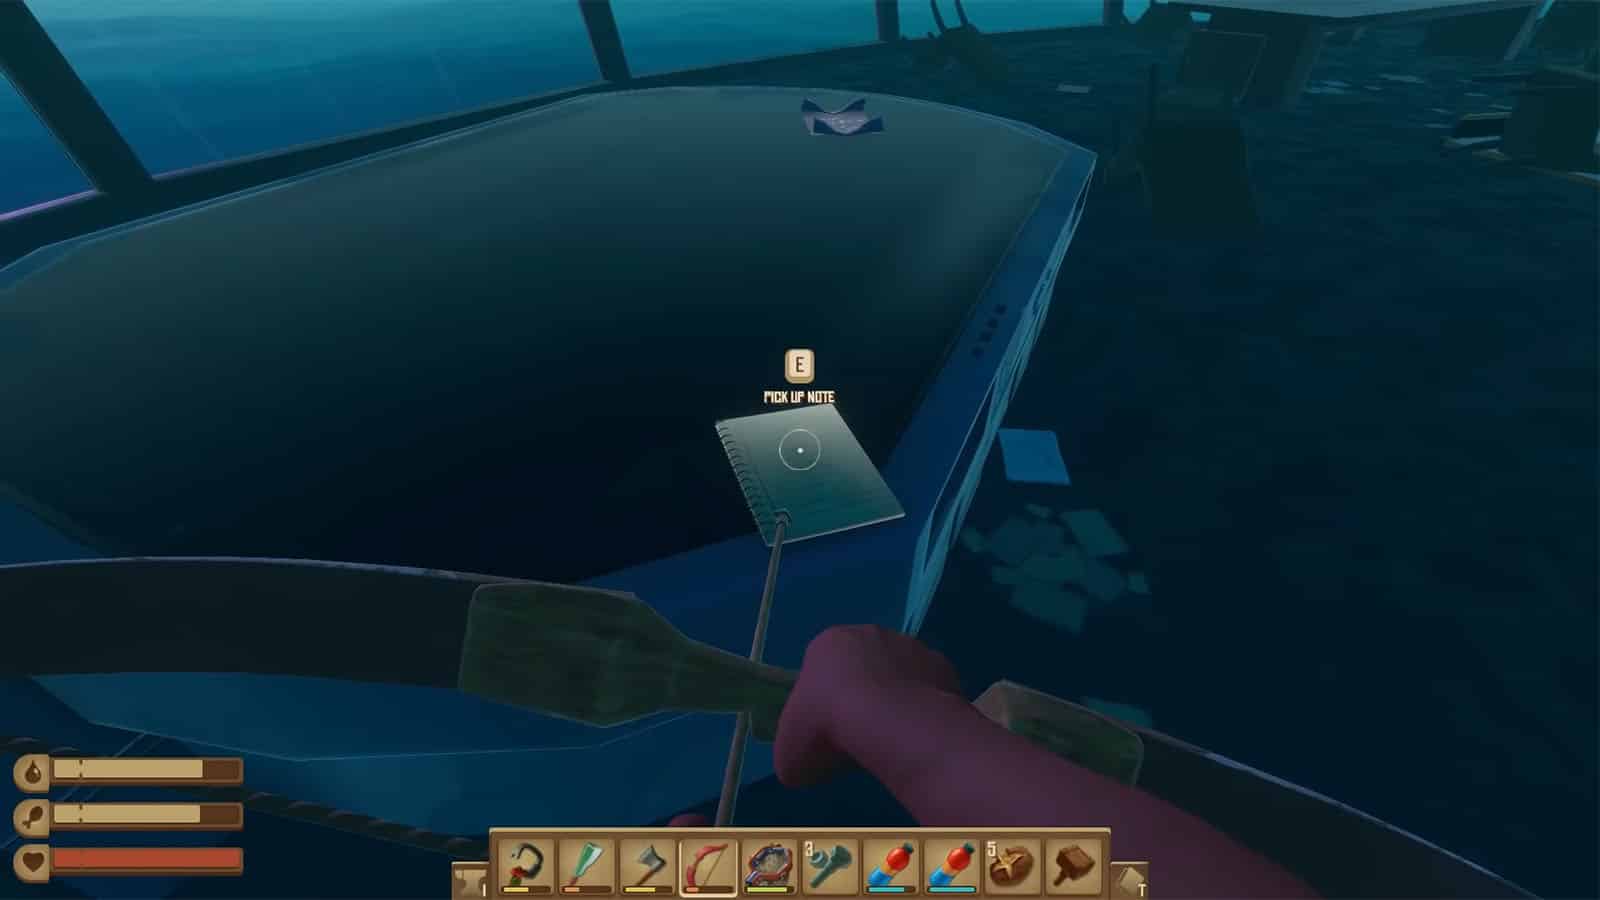
Head inside the bridge by climbing up the ladder on its side and then climbing back down through a hatch. In this bridge, you’ll find a note that contains the Varuna Point coordinates, another note, and a Water Tank blueprint. After taking all these, you can prepare for your next destination which is Varuna Point.
If you like this Guide, be sure to check out our other Raft articles:
- Raft Varuna Point Walkthrough
- Raft Fishing Guide: How to Get Bait in Raft
- Raft Recycler Guide – How to make Trash Cubes
- Raft Net Launcher and Net Cannister Guide
Check out this video by Sl1pg8r – Daily Stuff and Things! as he explores the mysterious Tangaroa:


