
In the Queen’s Drawing Room will be the first Quest you’ll face in Steelrising, and your objective is to depart the Saint-Cloud estate by heading to the docks and boarding a boat to Paris.
This quest will take you through six different areas and two different bosses, and the following steps will show you the quickest way to complete the objectives. Read on to learn about the various routes you can take to reach your destination and retrieve the necessary modules, vestals, and equipment.
Château de Saint-Cloud
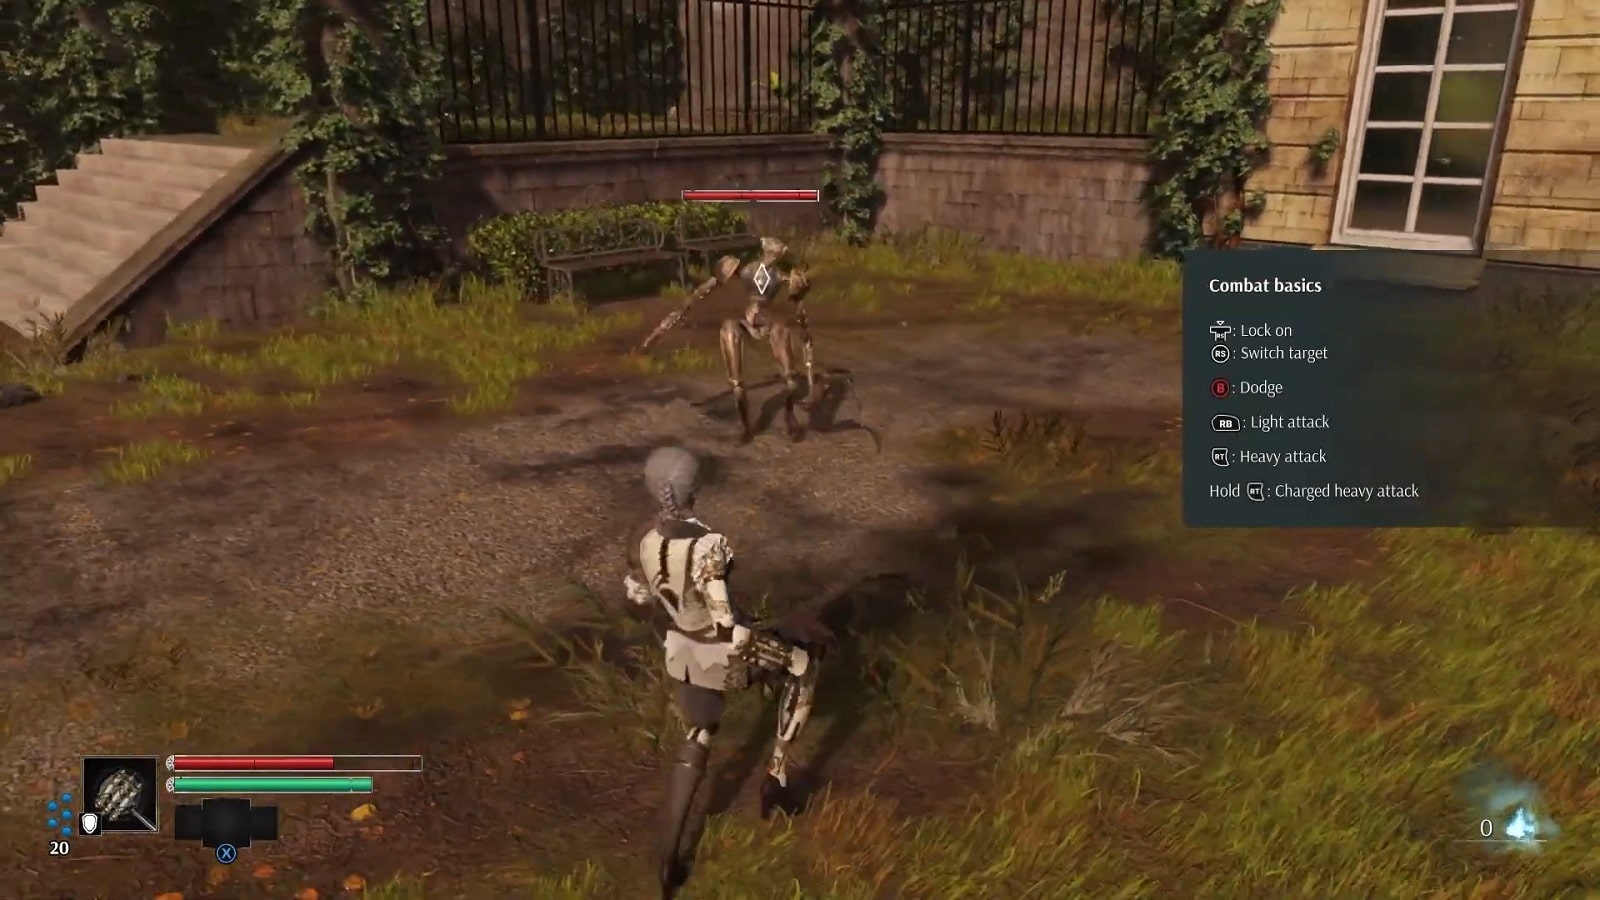
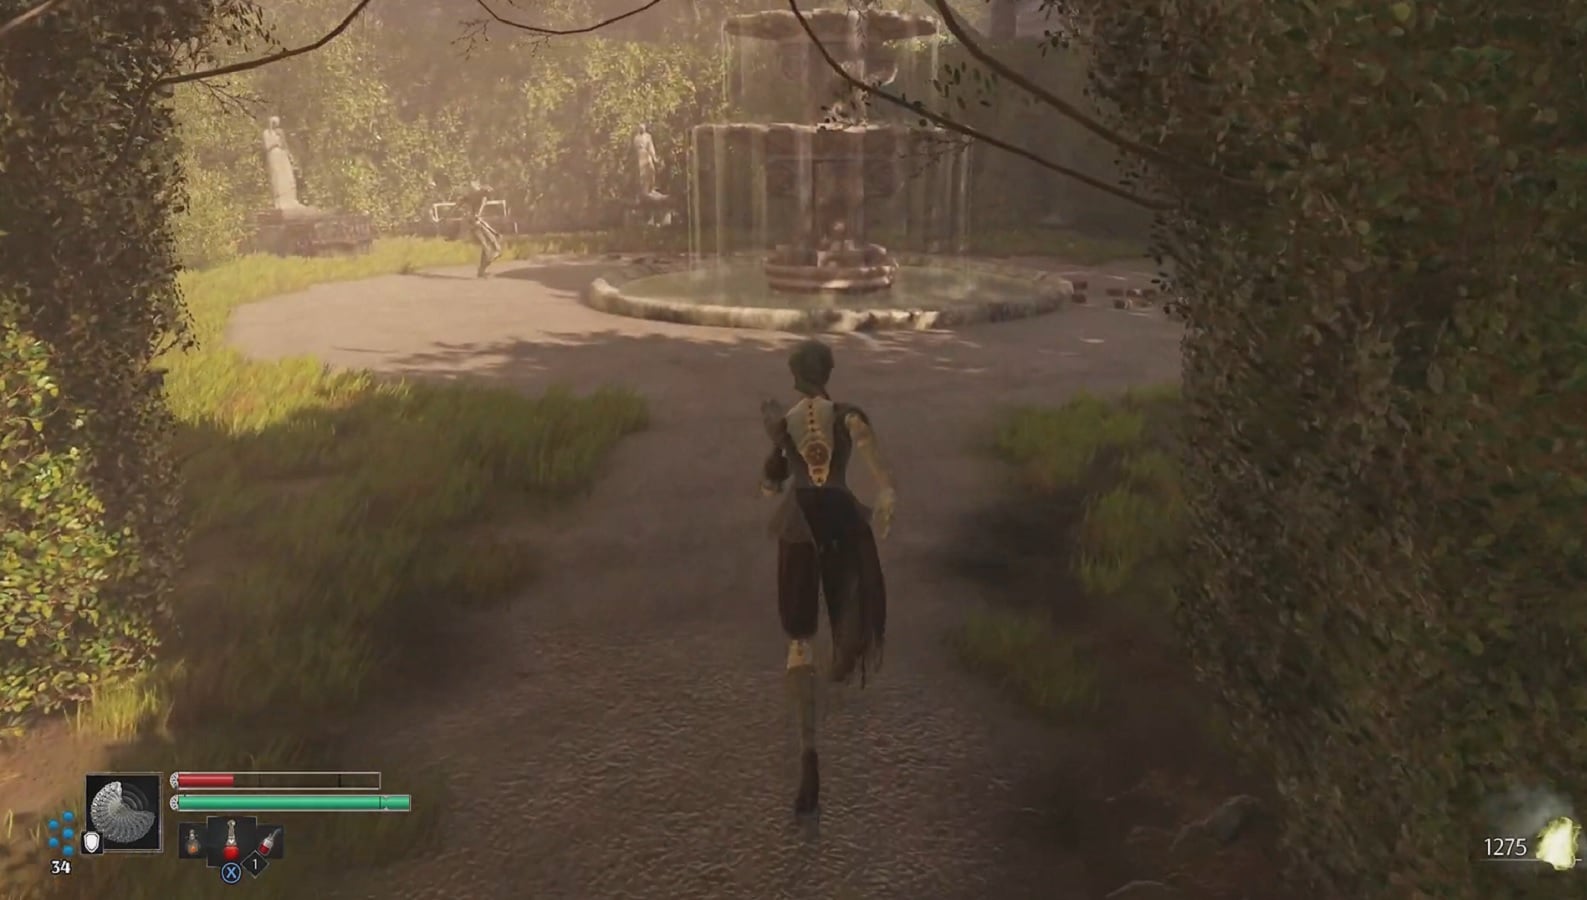
You’ll spawn in the chateau gardens after the introductory cut-scene.
Move forward and fight your first Sinistral Prototype enemy. Once dealt, head up a few set of stairs and climb the wall.
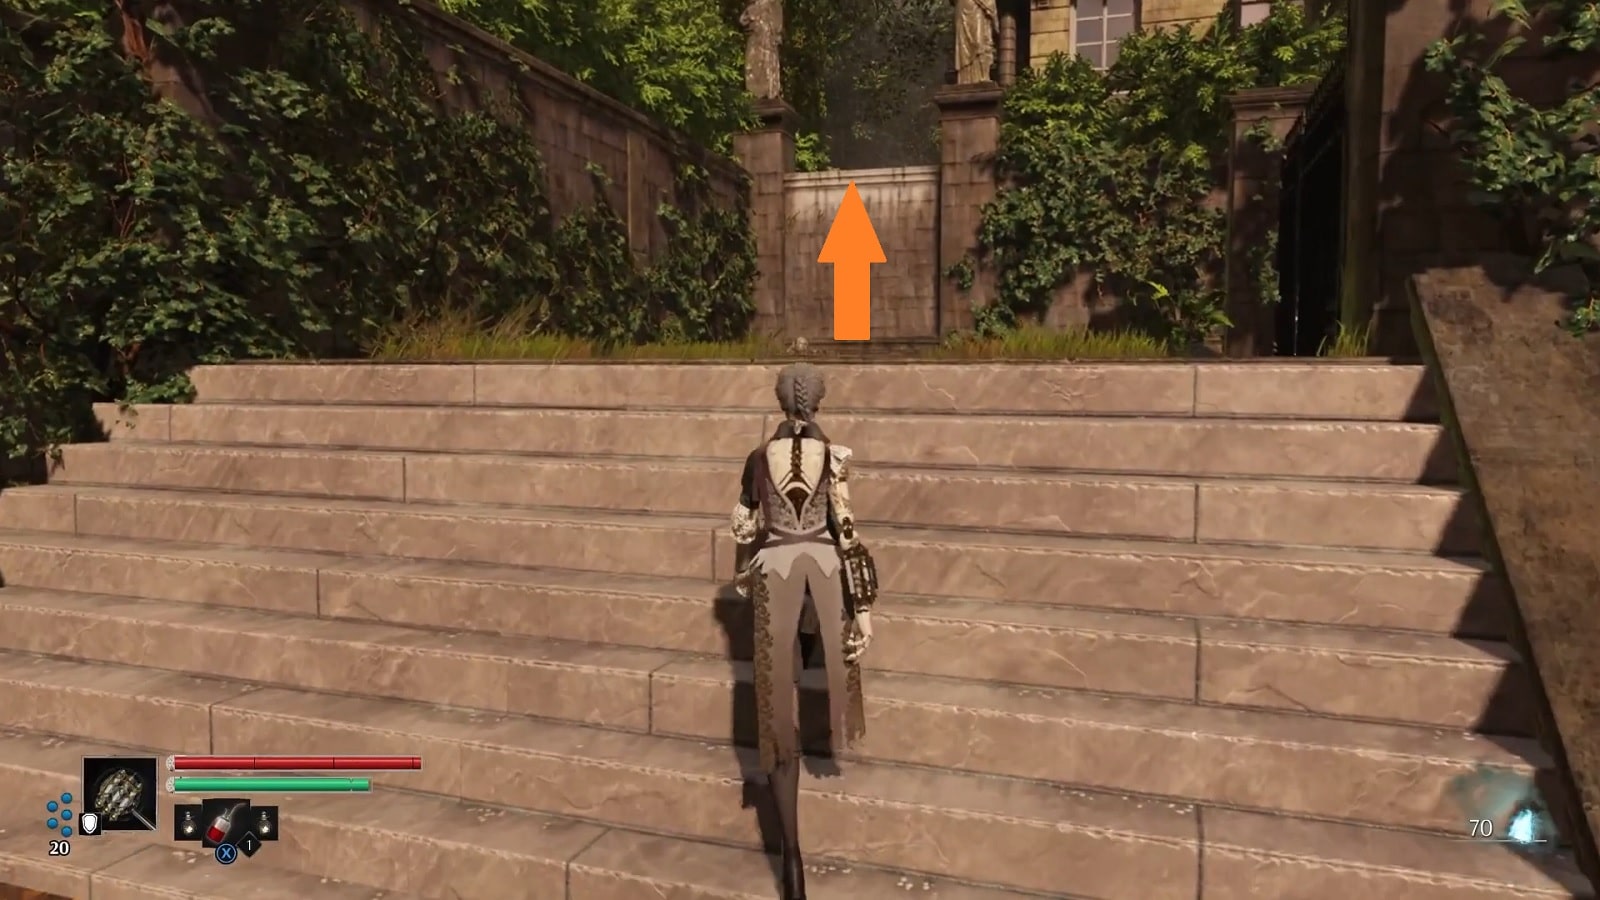
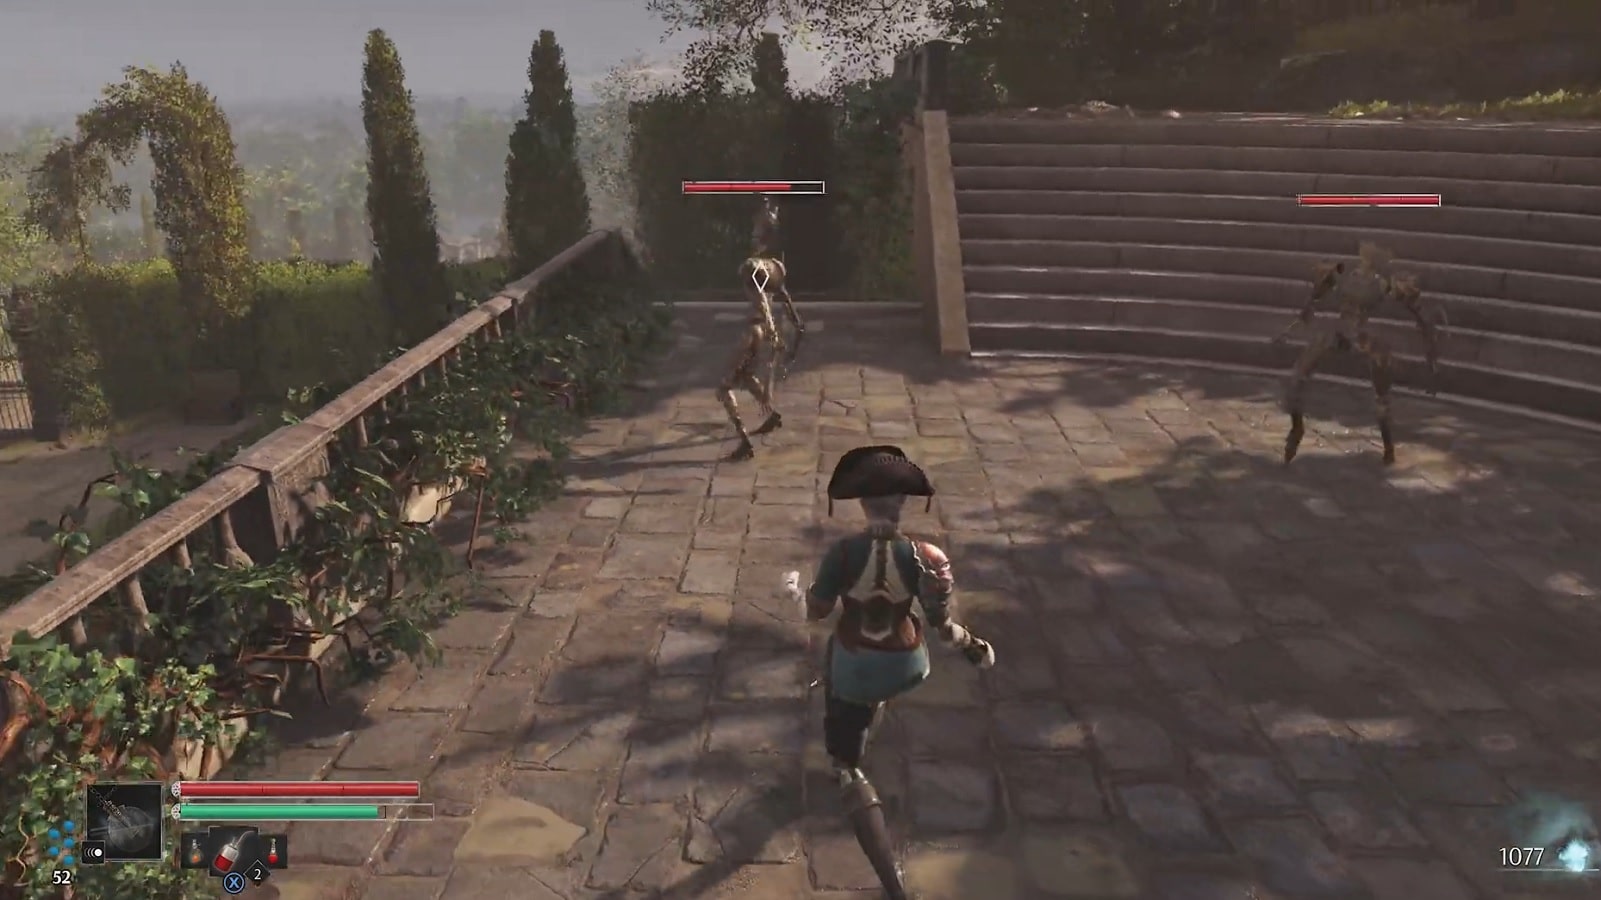
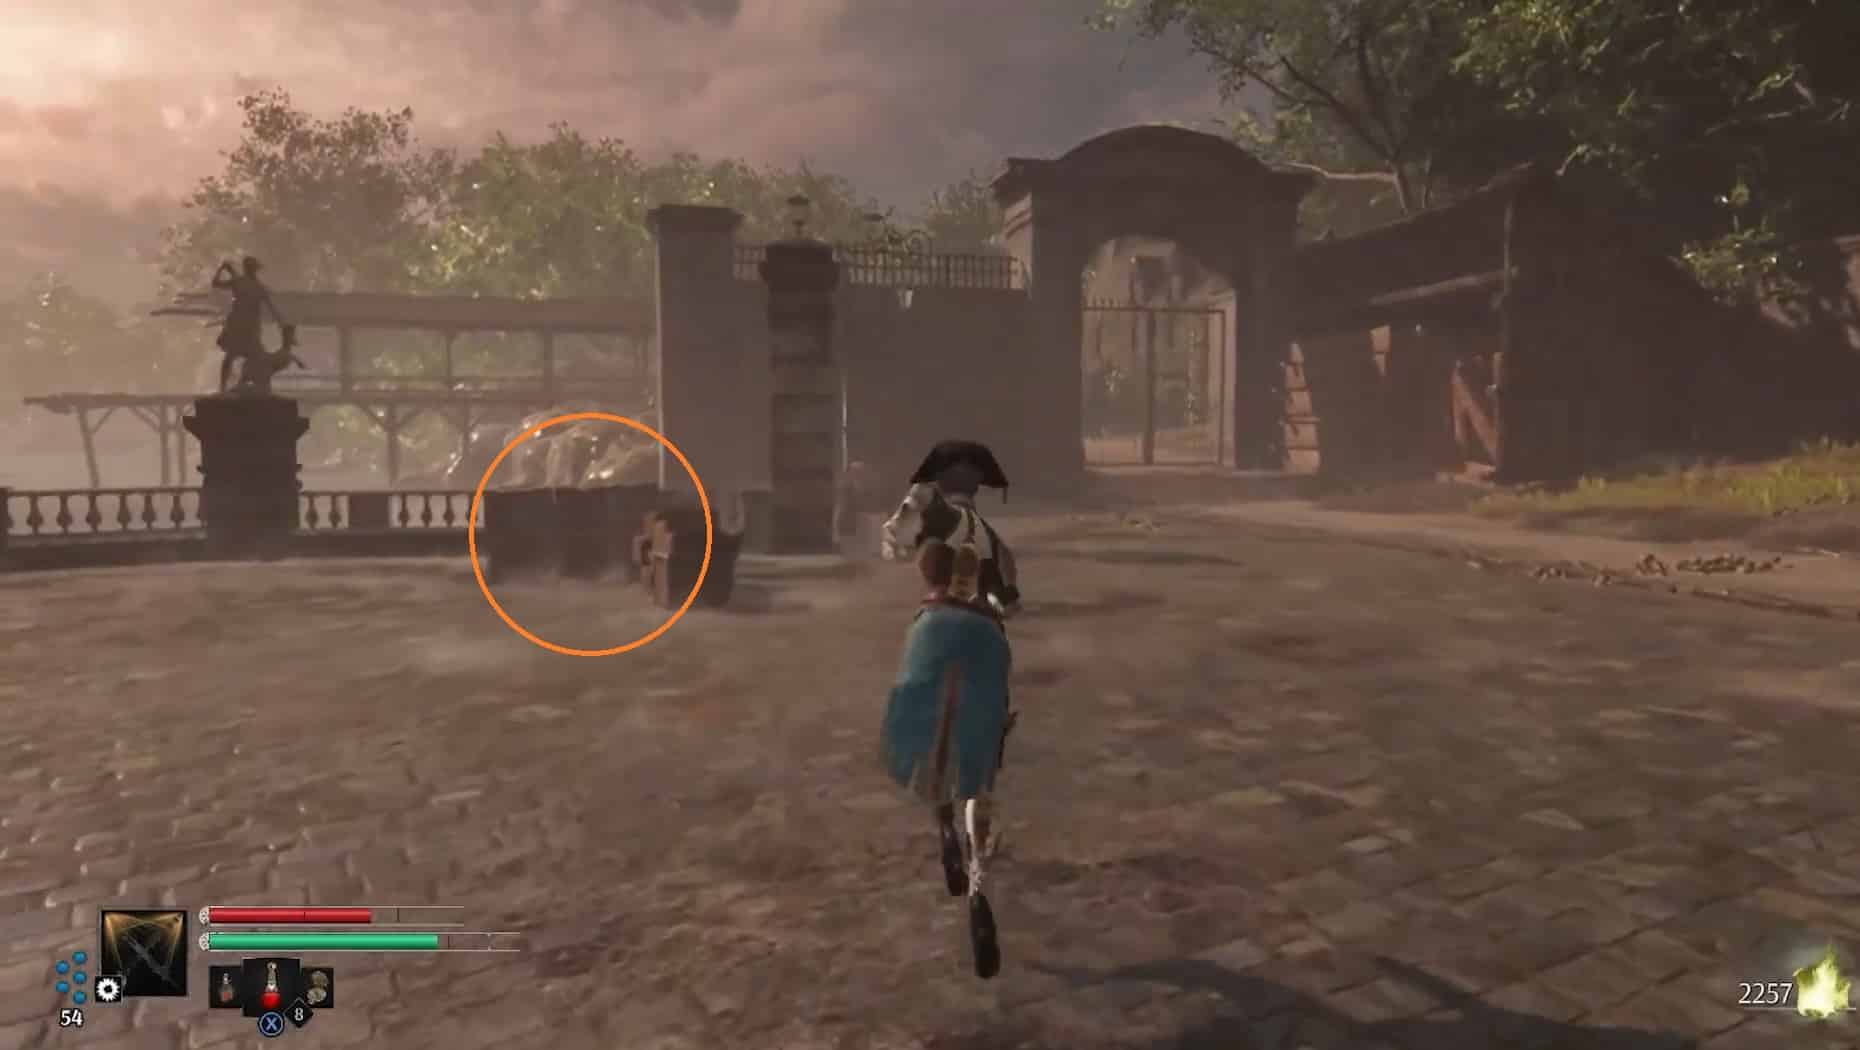
You’ll reach a large square and face another prototype immediately after climbing. After that, there will be a larger courtyard ahead and a gate, along with 3 other prototypes
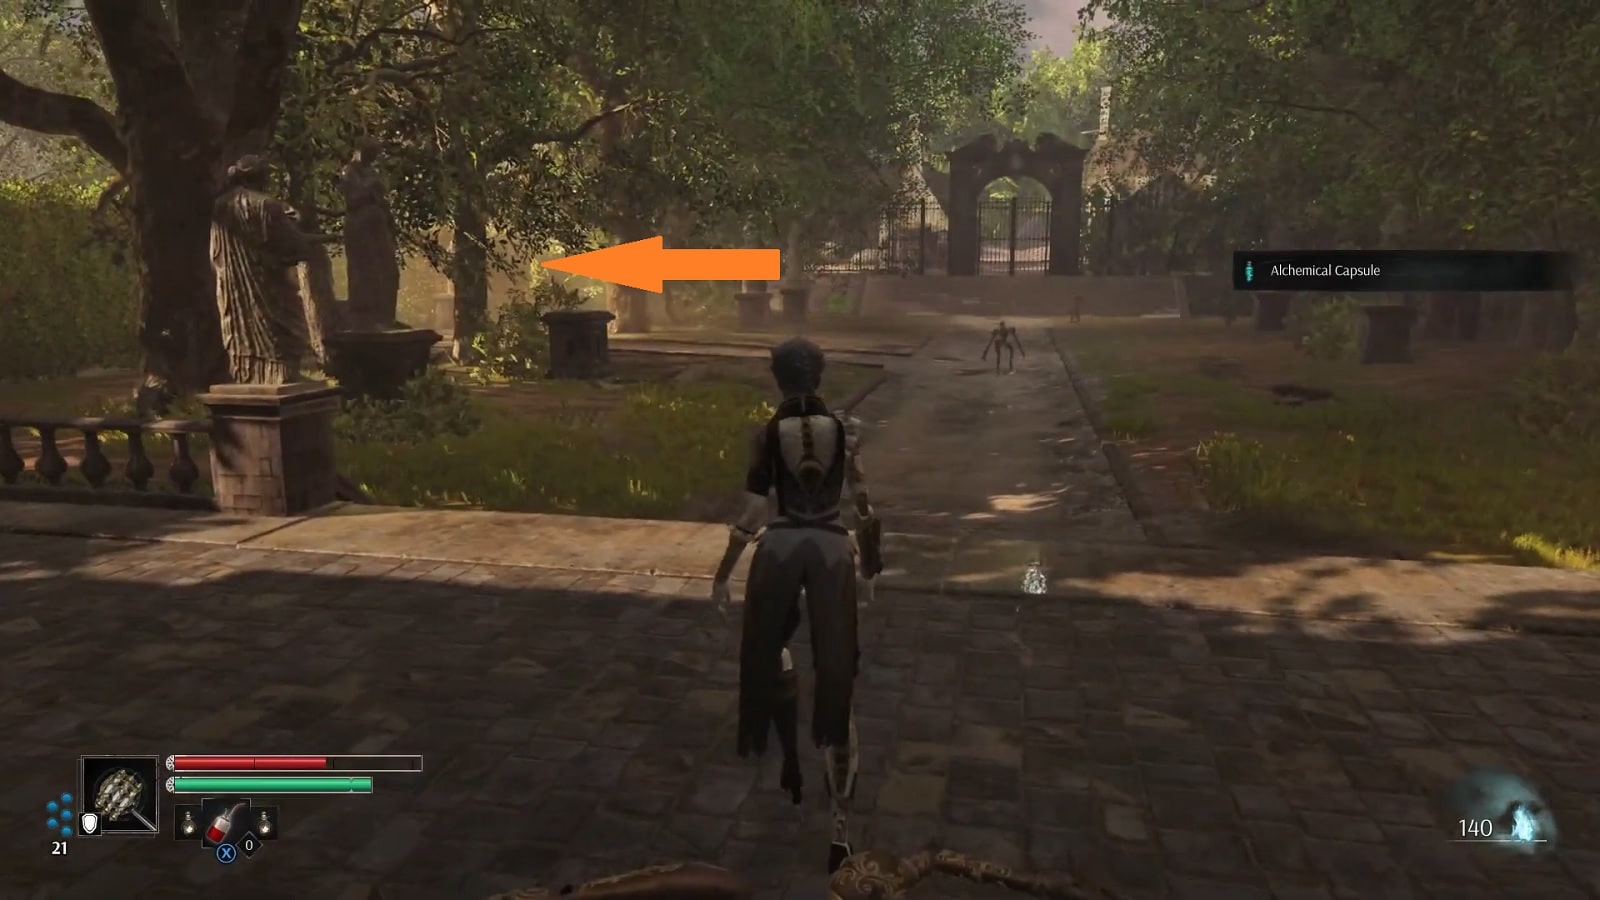
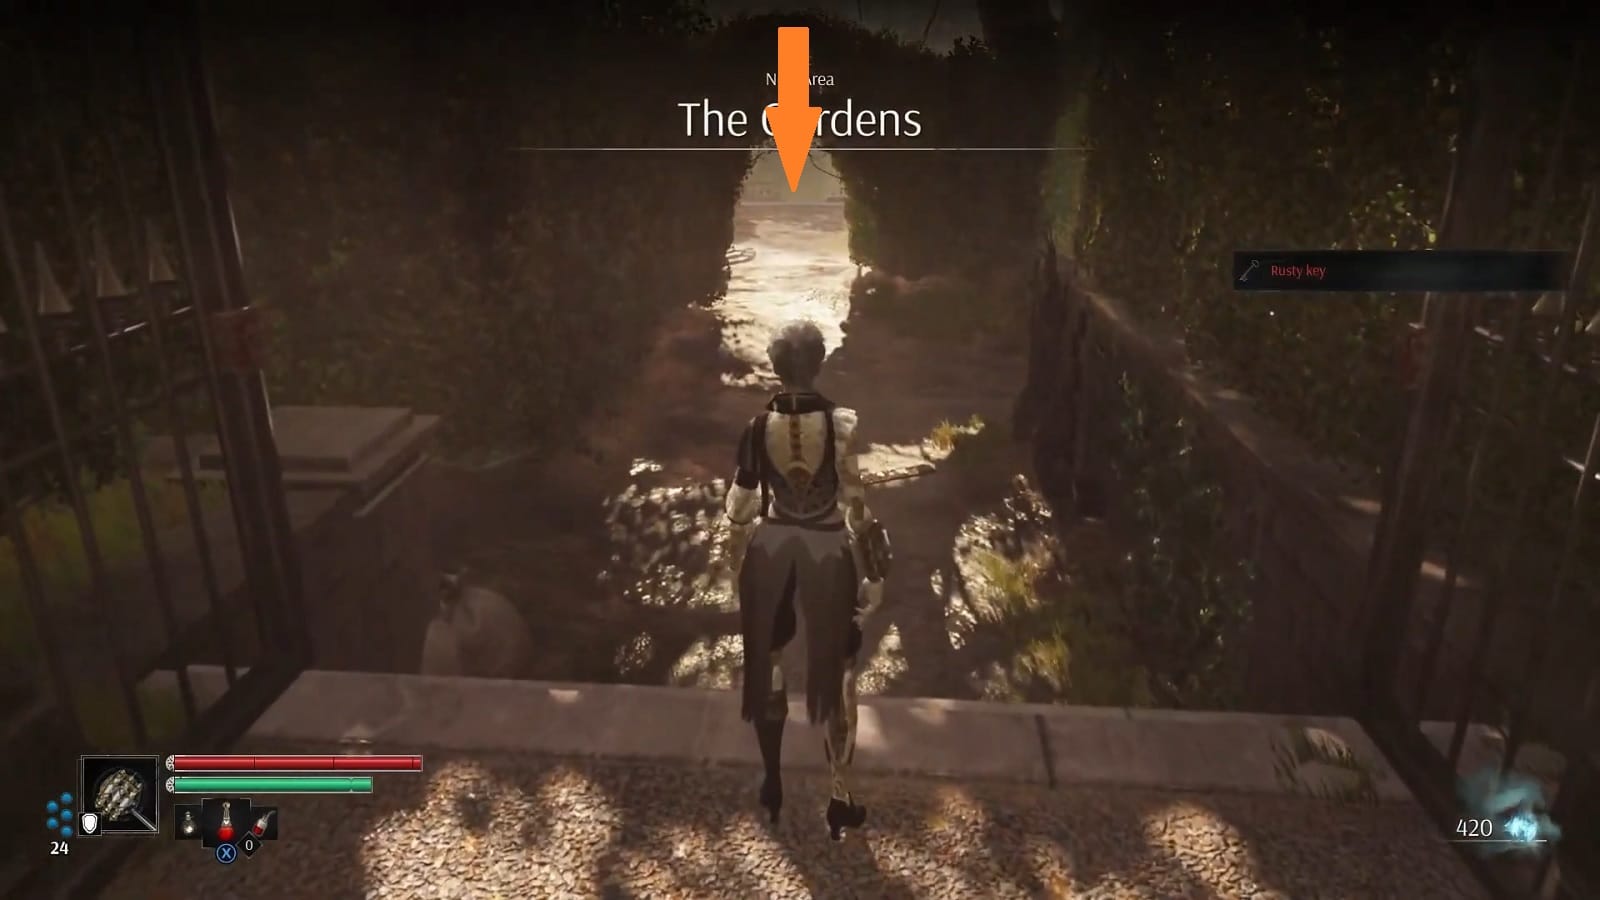
Continue forward and turn left (we suggest you deal with the enemies first), then you’ll spot another gate with a Sinistral Prototype guarding in front. Defeat it and obtain a Rusty Key that you can use to open the gate to The Gardens. (Check the path to your left before passing through the gate to find an Essence of a Lesser Spirit).
The Gardens
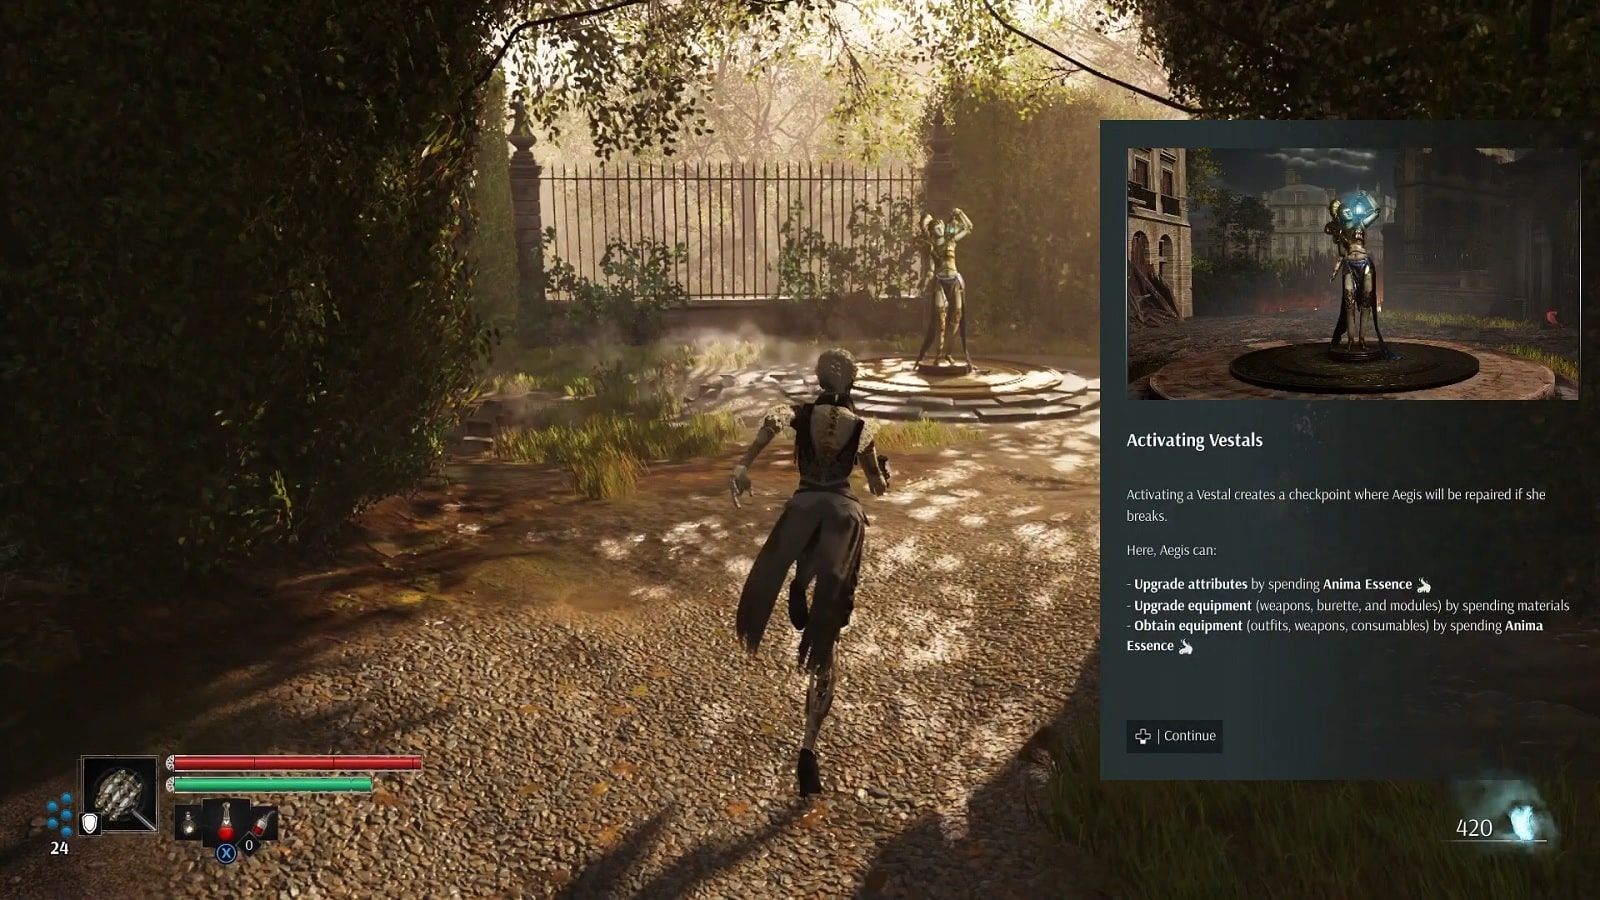
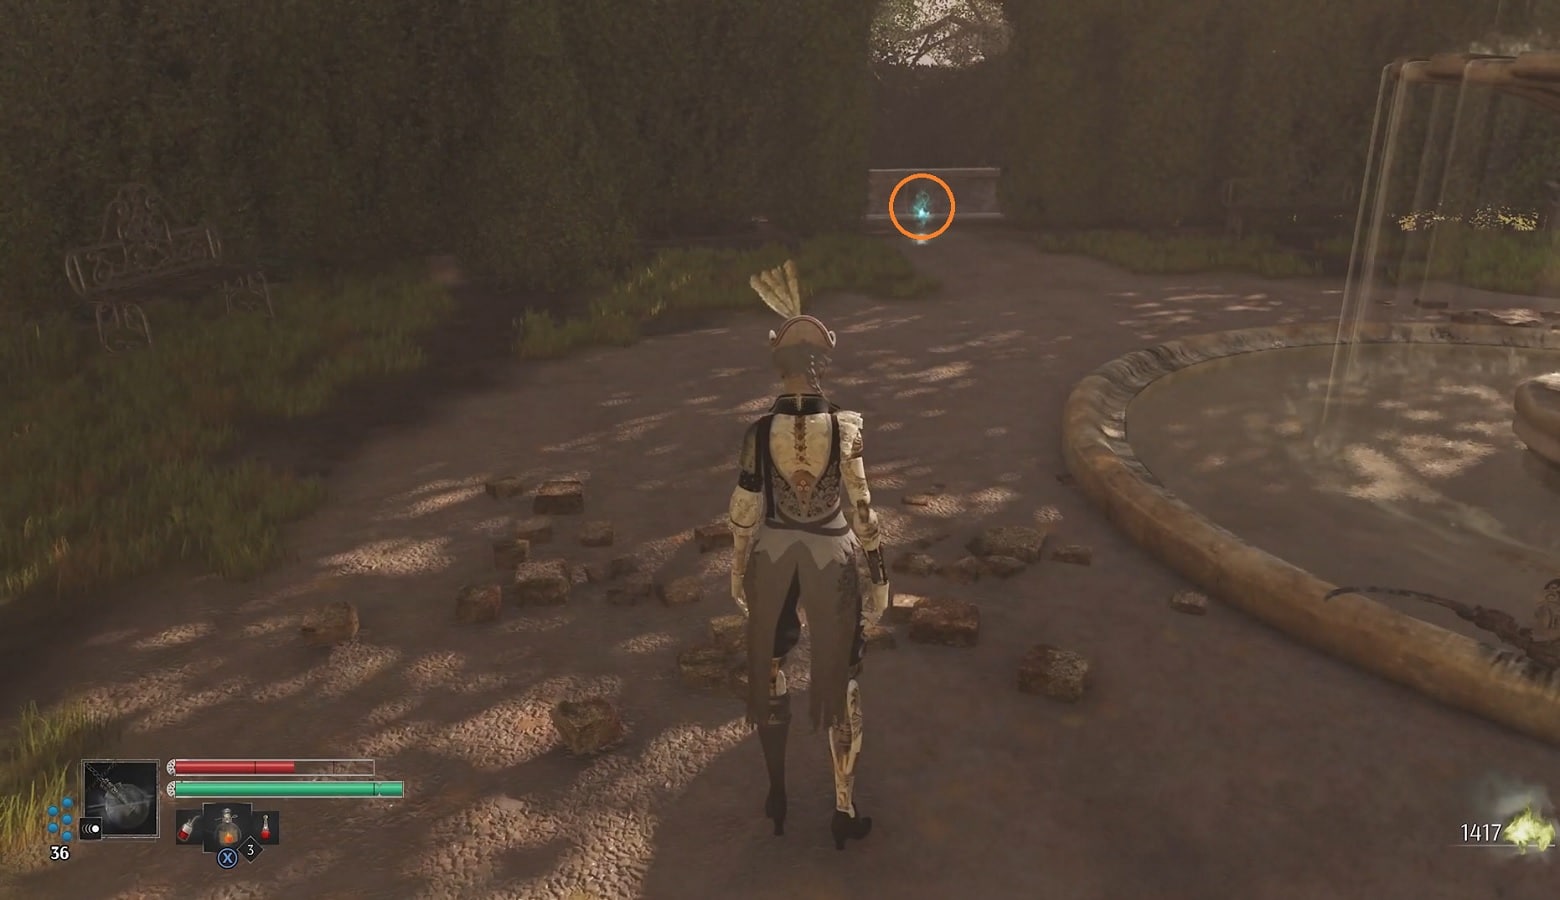
Once past the gate into The Gardens, head straight ahead and you’ll find your first Vestal. These are like checkpoints in a way, you respawn here if you die and grants you access to upgrade your Anima & equipments. Keep in mind that resting at the Vestal restores health, but it also causes all enemies to revive.
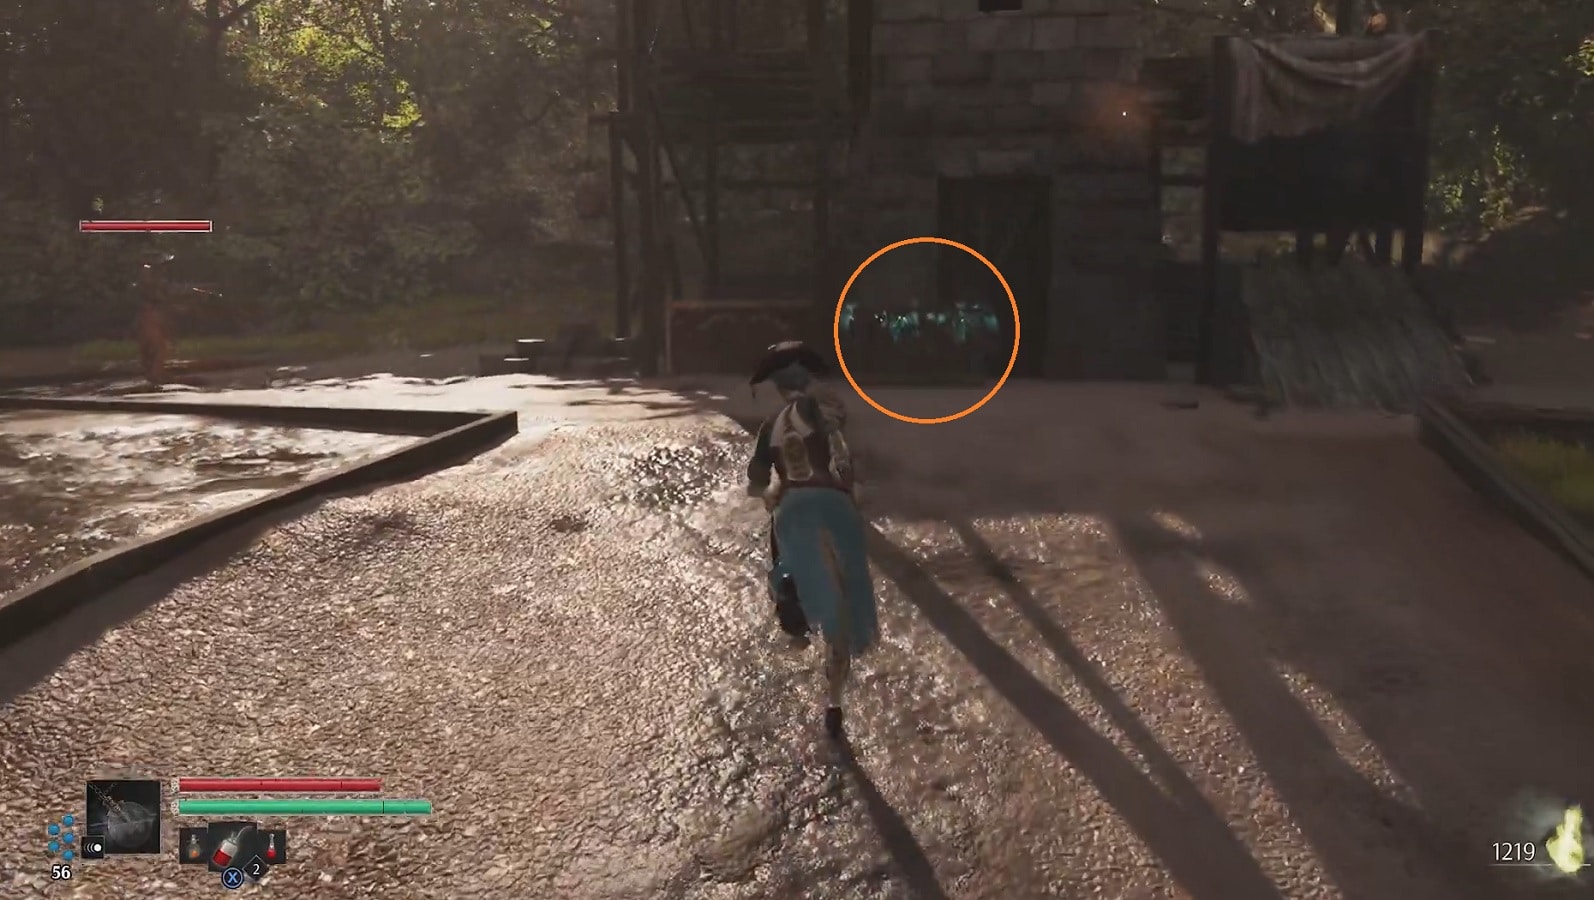
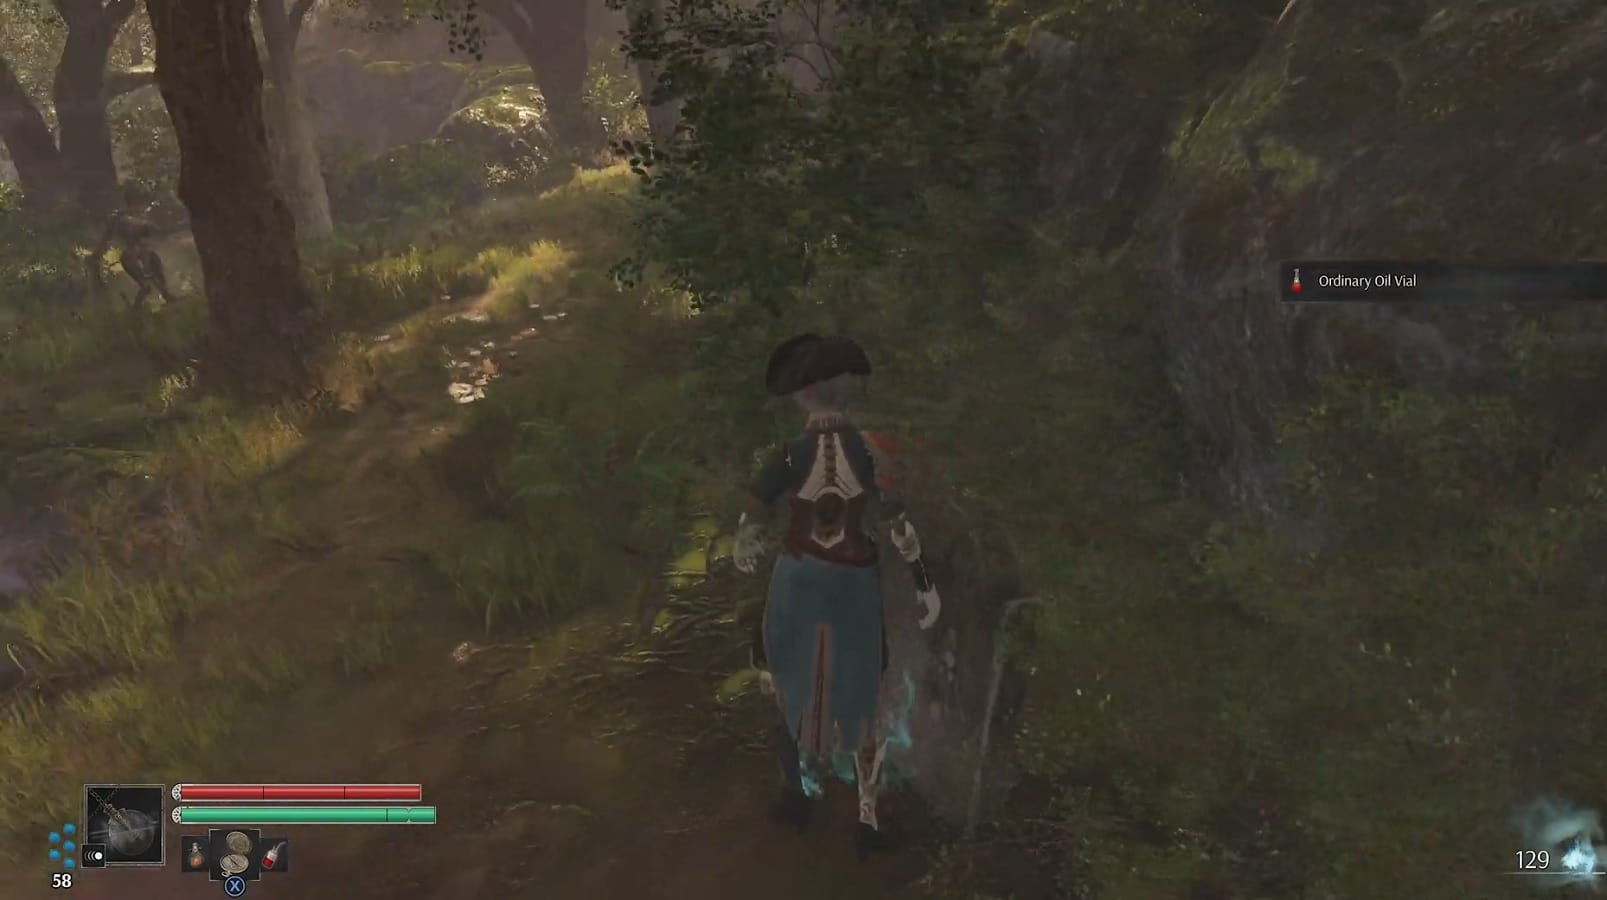
Now, turn around (to where you entered the gate) and go right, you’ll eventually encounter 1 prototype and a mini-fountain behind 2 barrels. Defeat the enemy first and destroy the barrels to find an Ordinary Oil Vial.

Move ahead past the first Vestal and jump down the ledge to defeat another enemy. Once dealt, take a right at the intersection and up the stairs first for extra loot. After a short run (assuming you’ve taken care of the enemies along the way), you’ll reach a fountain guarded by two Sinistral Prototypes.
Once they’re killed, open the chest nearby to get a Polignac Cap and the orb by the balcony to get an Explosive Grenade.

Jump over the balcony where you obtained the Explosive Grenade and head back to the first Vestal. Go down the ledge once again and turn left at the intersection.
You’ll encounter an enemy after heading down a set of stairs. Once dealt, approach and destroy the crates behind it to find and Ordinary Oil Vial.
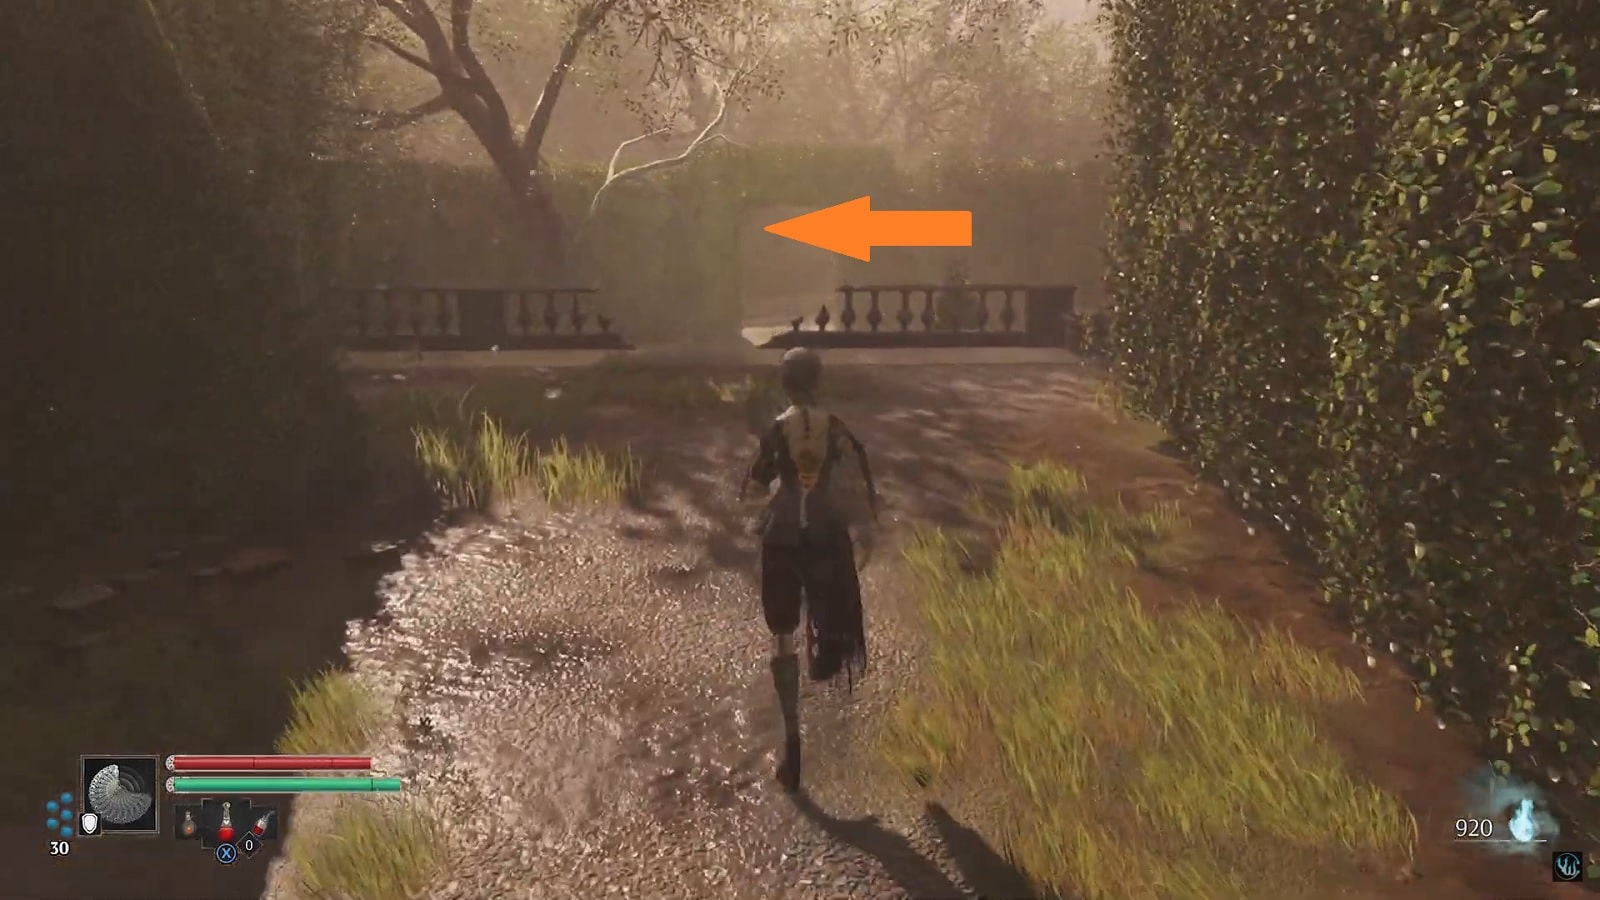
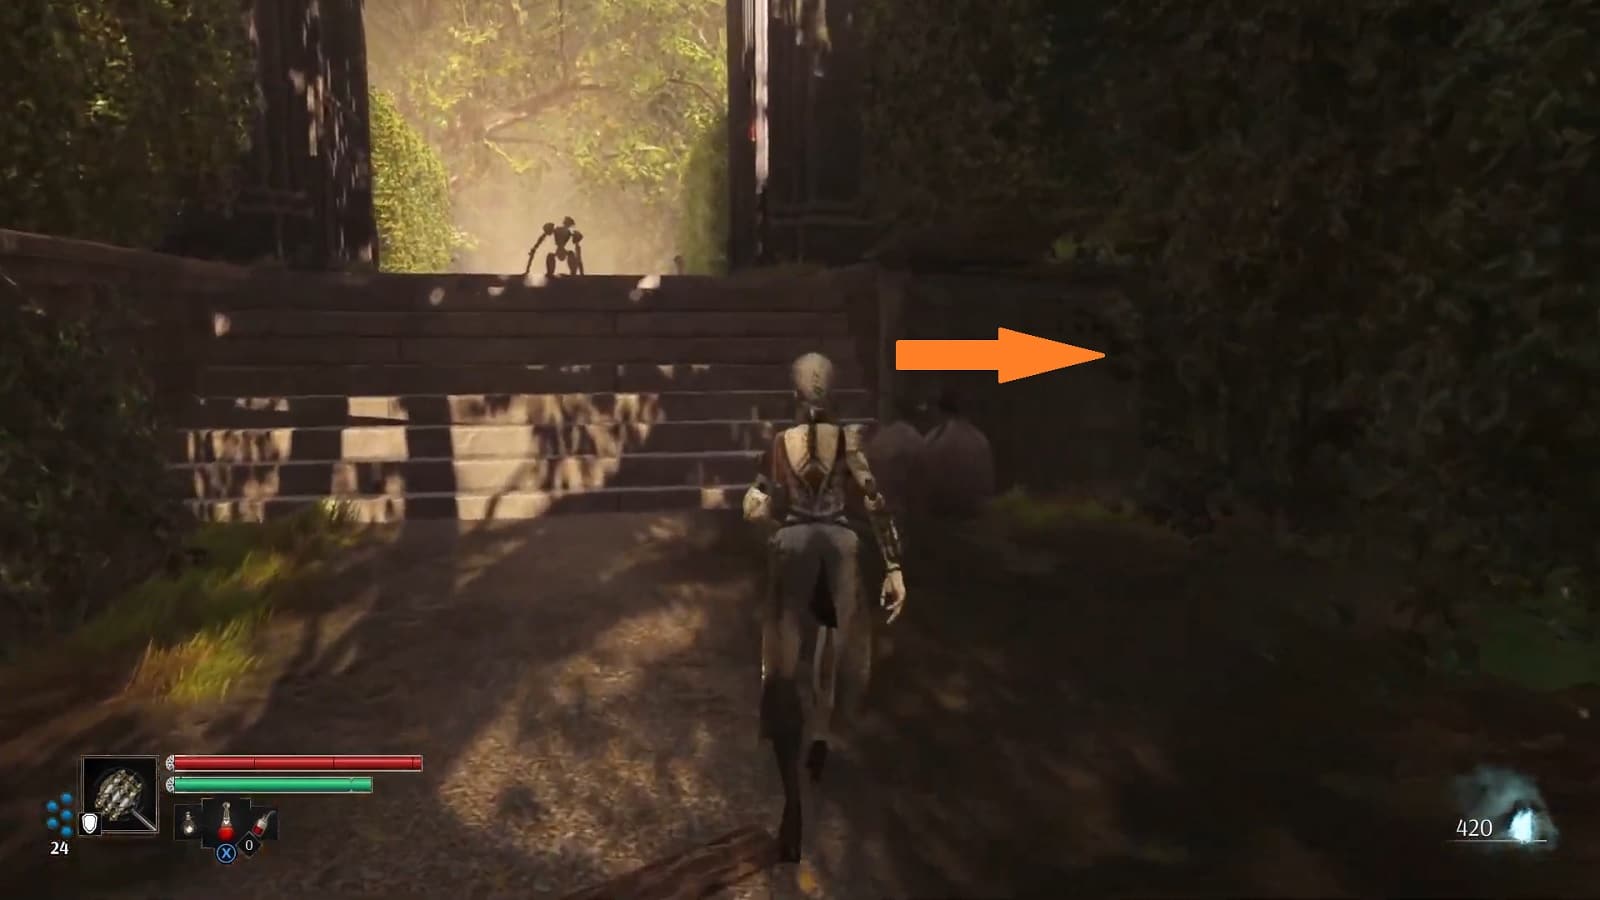
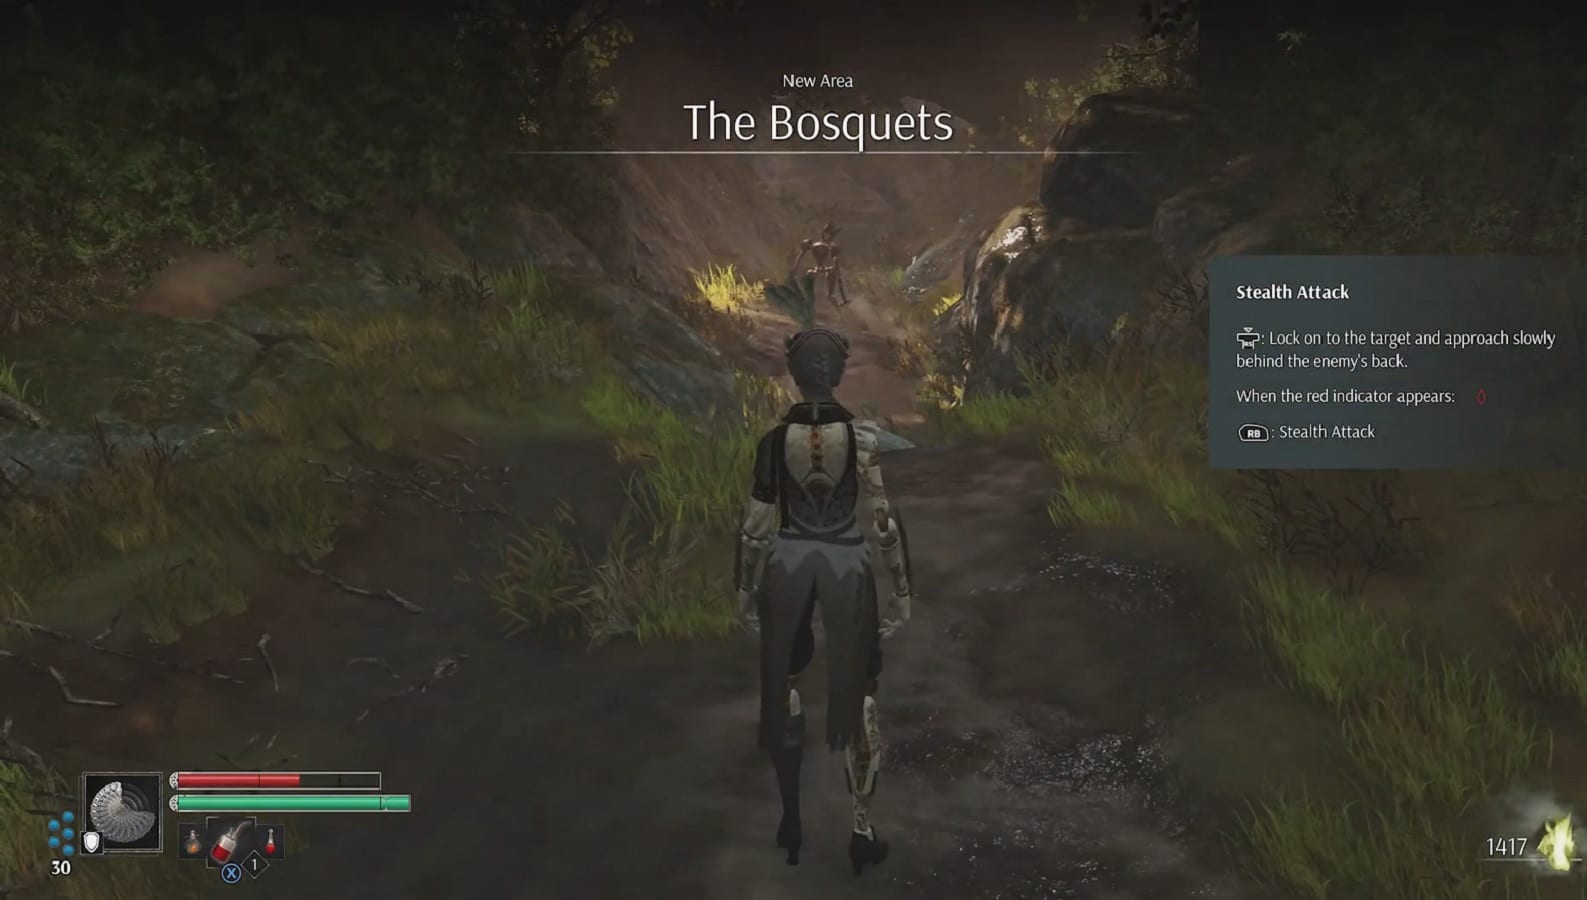
Now Continue along the path until you spot another gate to your left, approach it and examine a ruptured wall beside it, then proceed ahead into The Bosquets.
The Bosquets
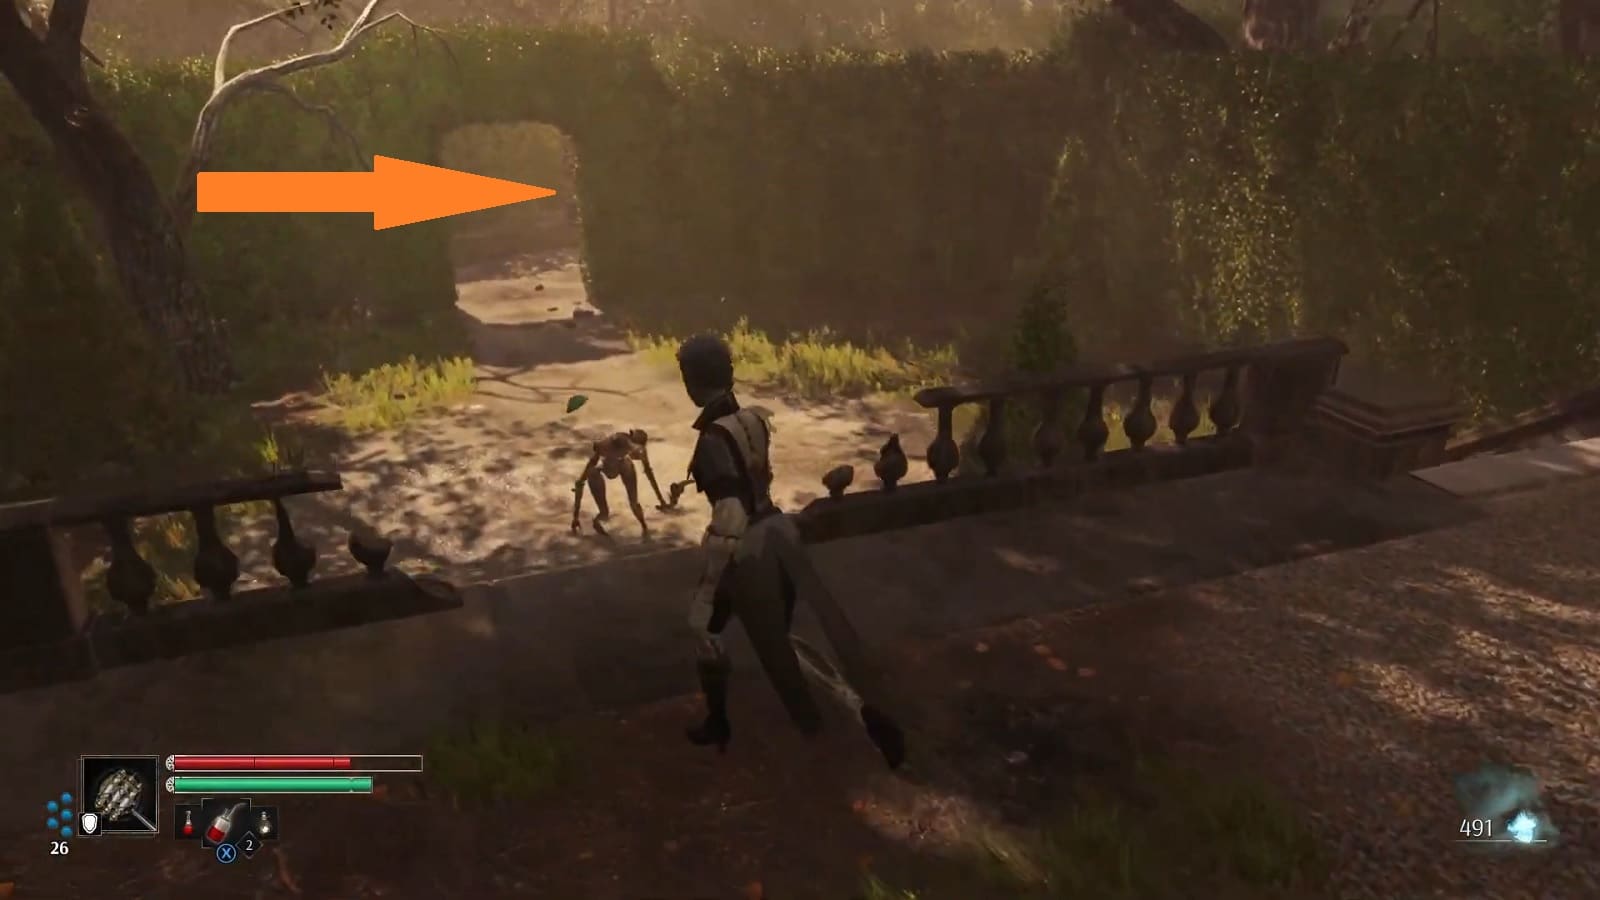
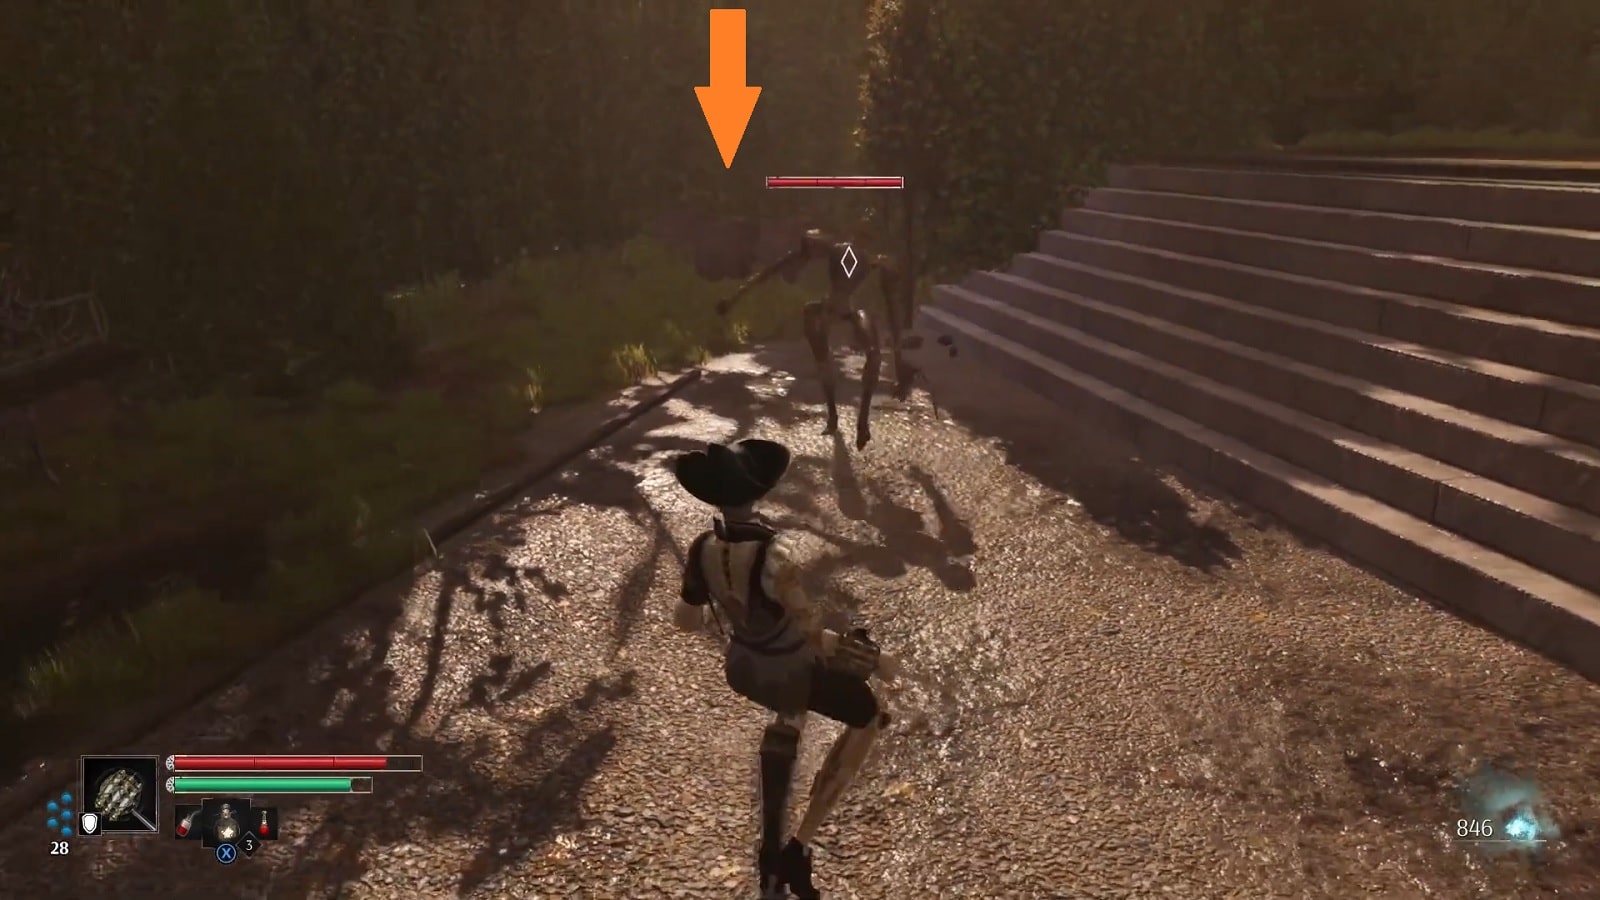
Shortly after sneaking up to an enemy, follow the straightforward path ahead until you reach the first open area where you can spot a Sinistral Prototype patrolling around a tree.
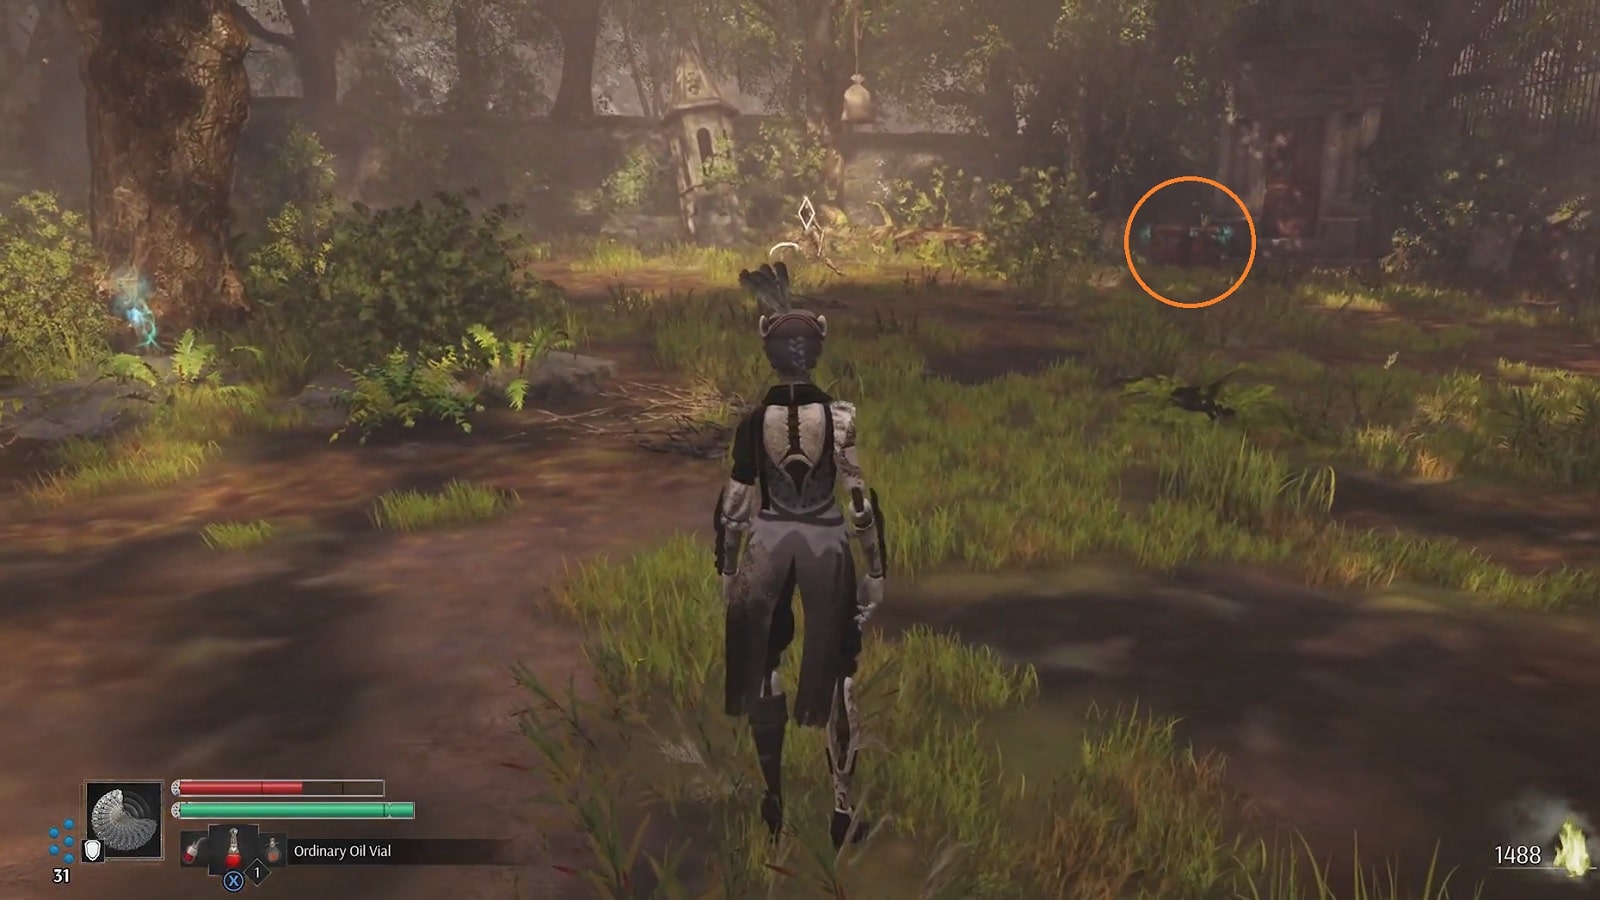
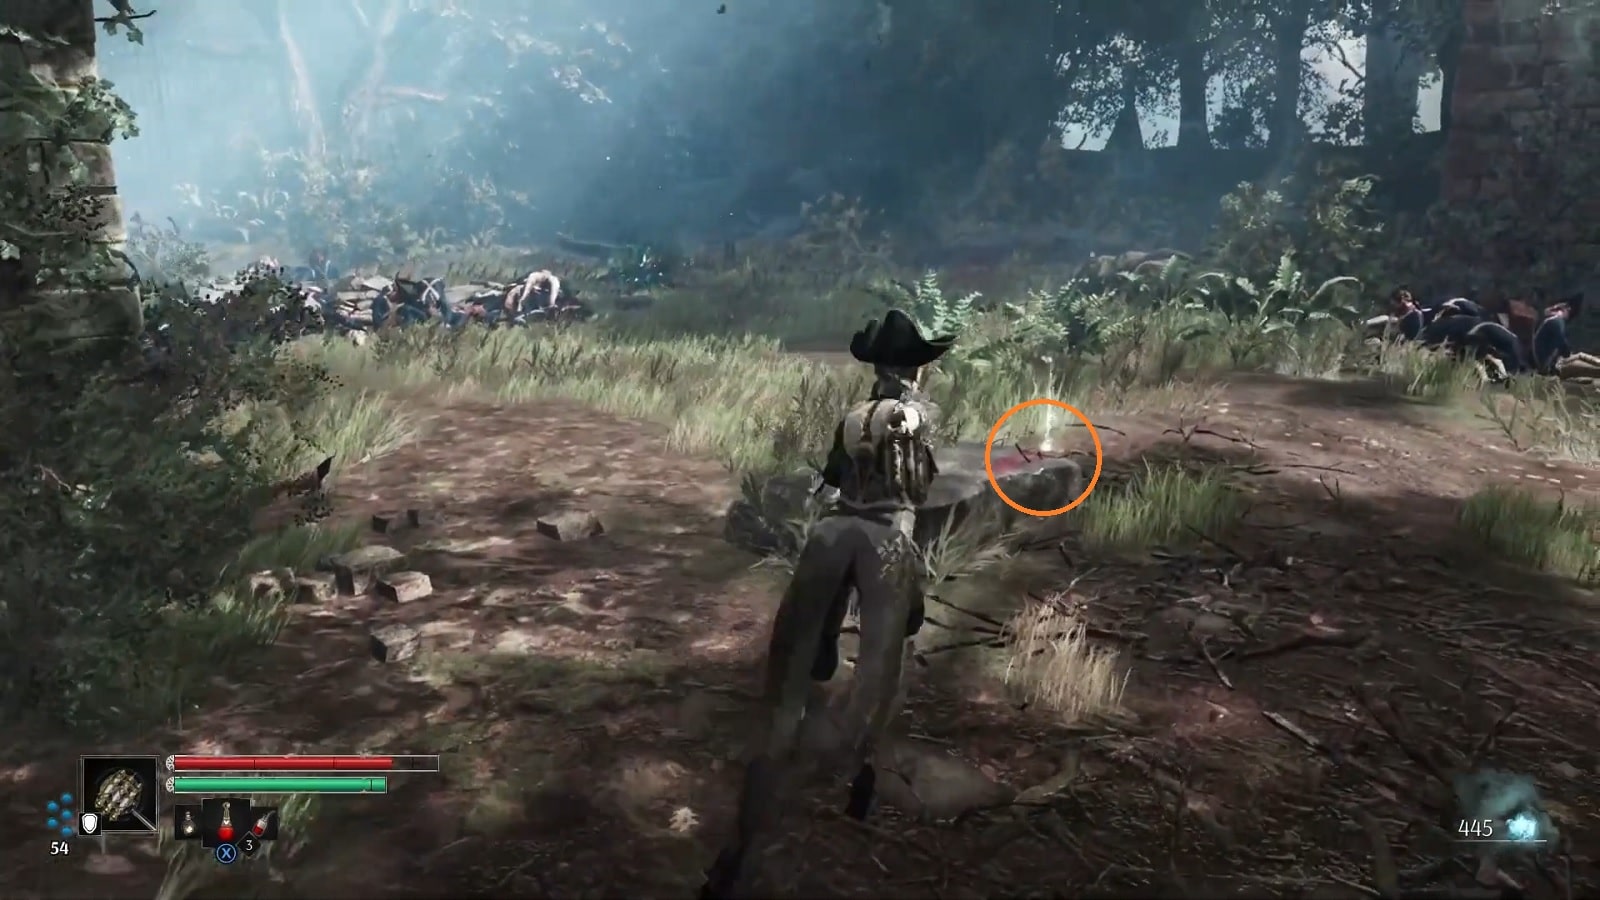
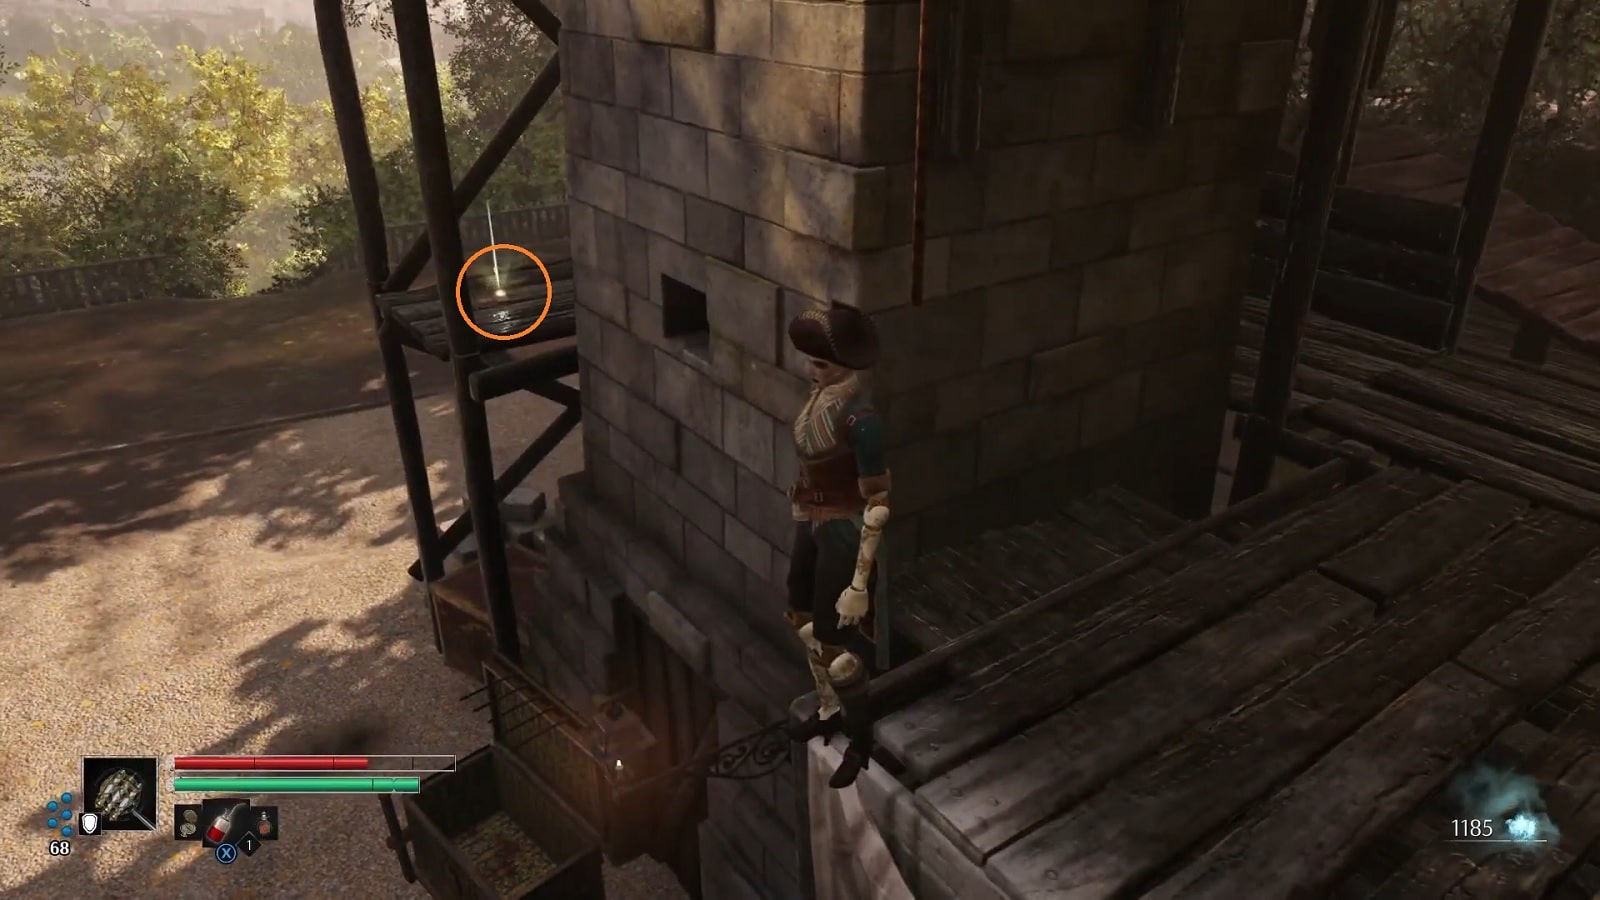
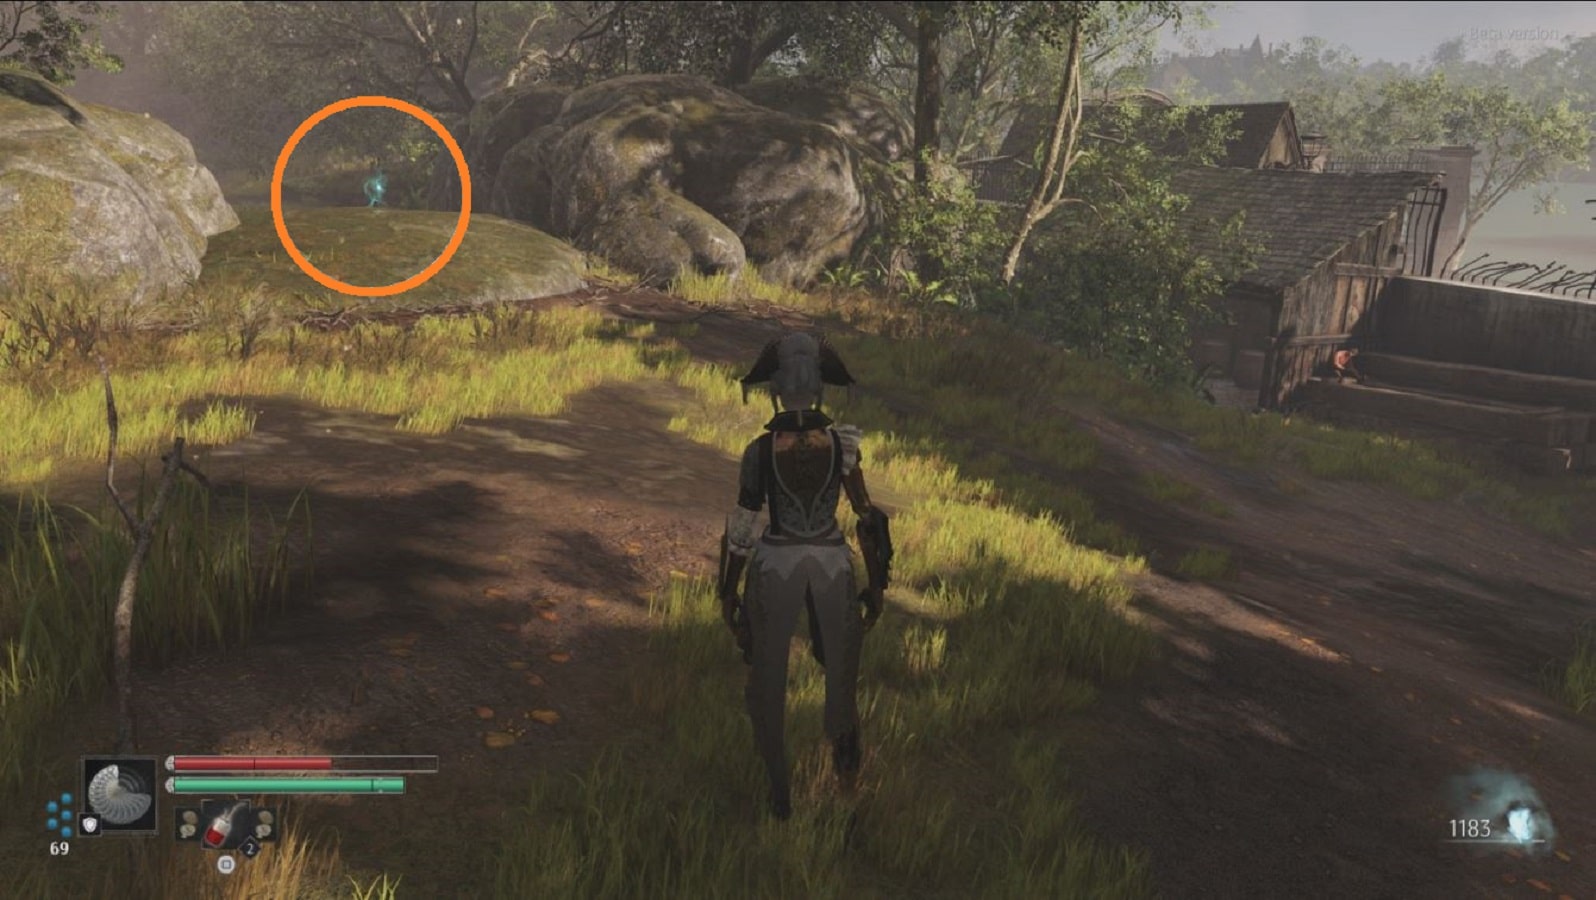
Once the enemy has been defeated, take the Granite Cobblestone loot orb and open the Treasure Chest marked in the image below to find a Grade I Longevity Module.
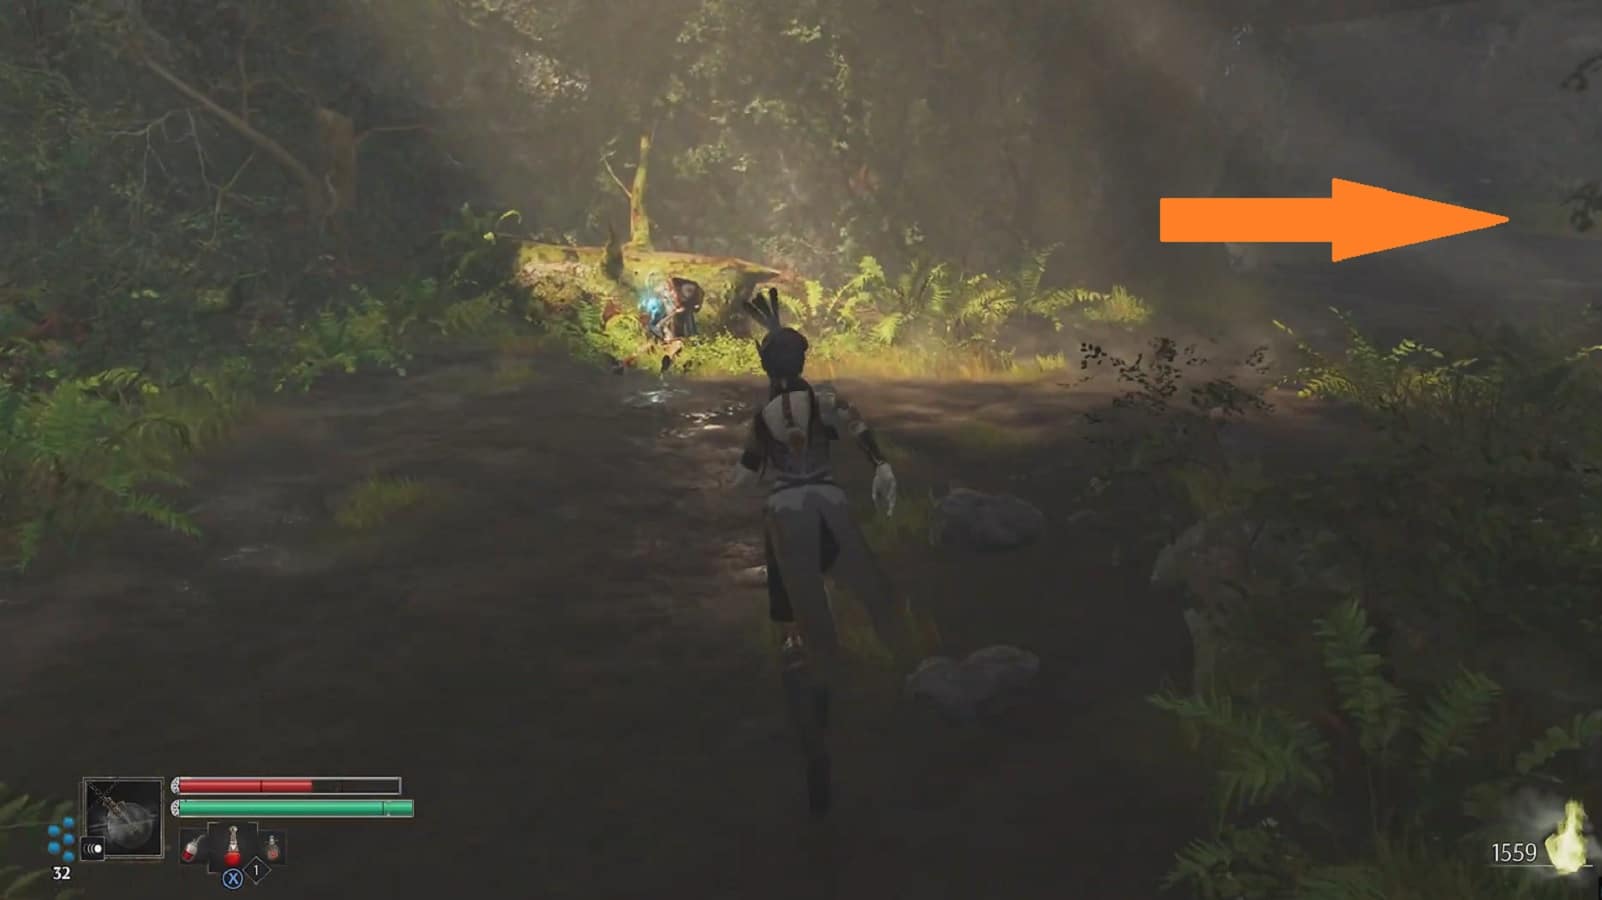
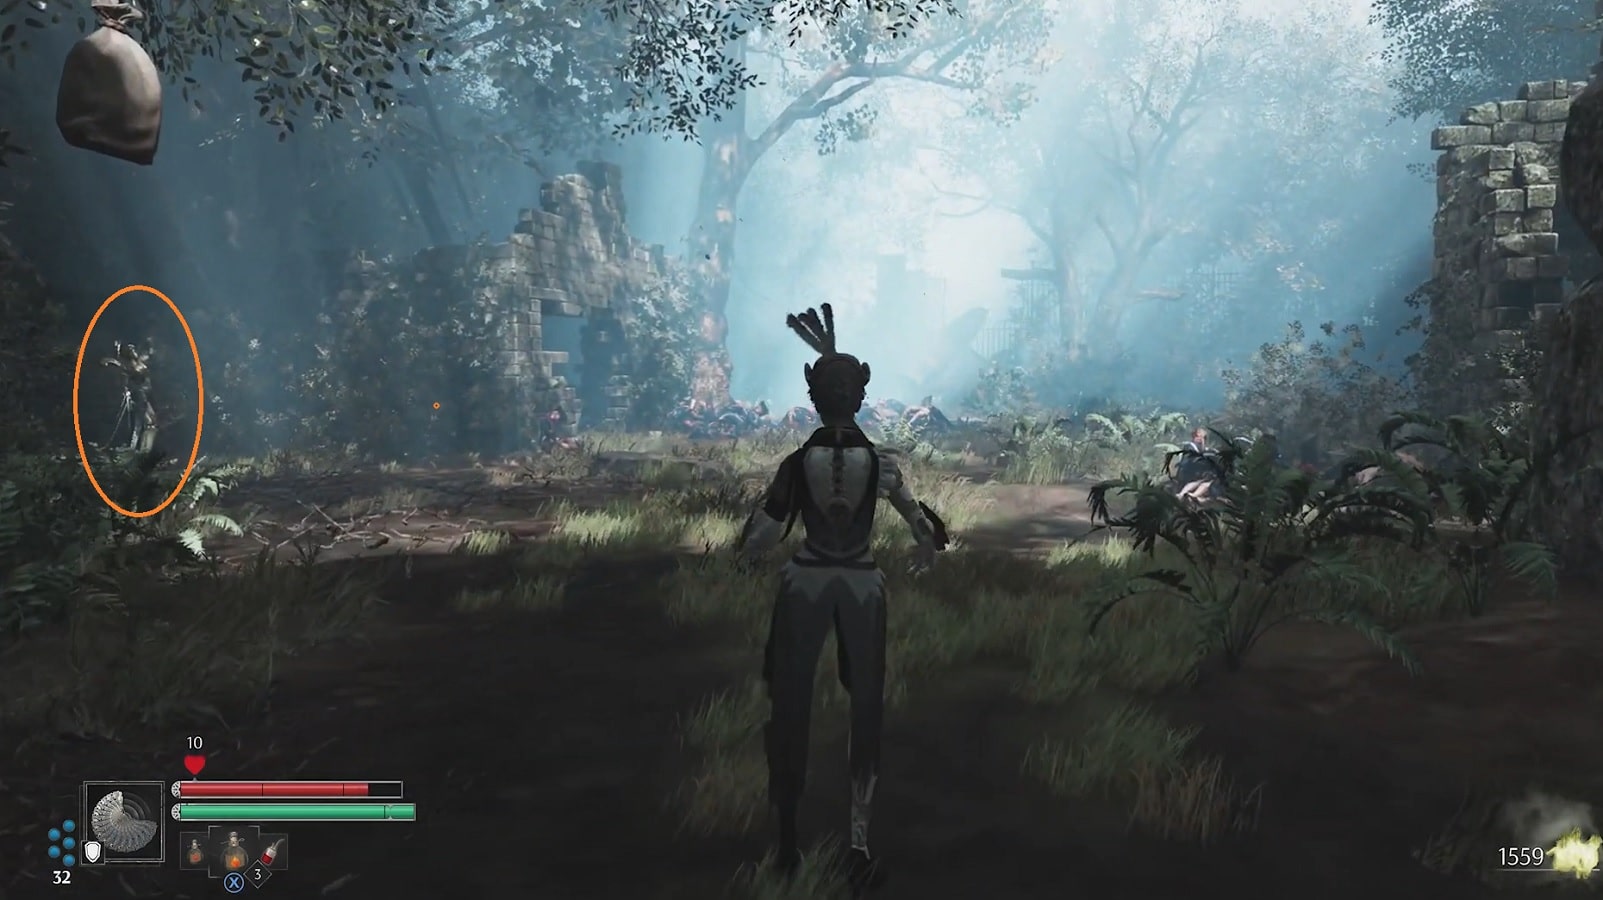
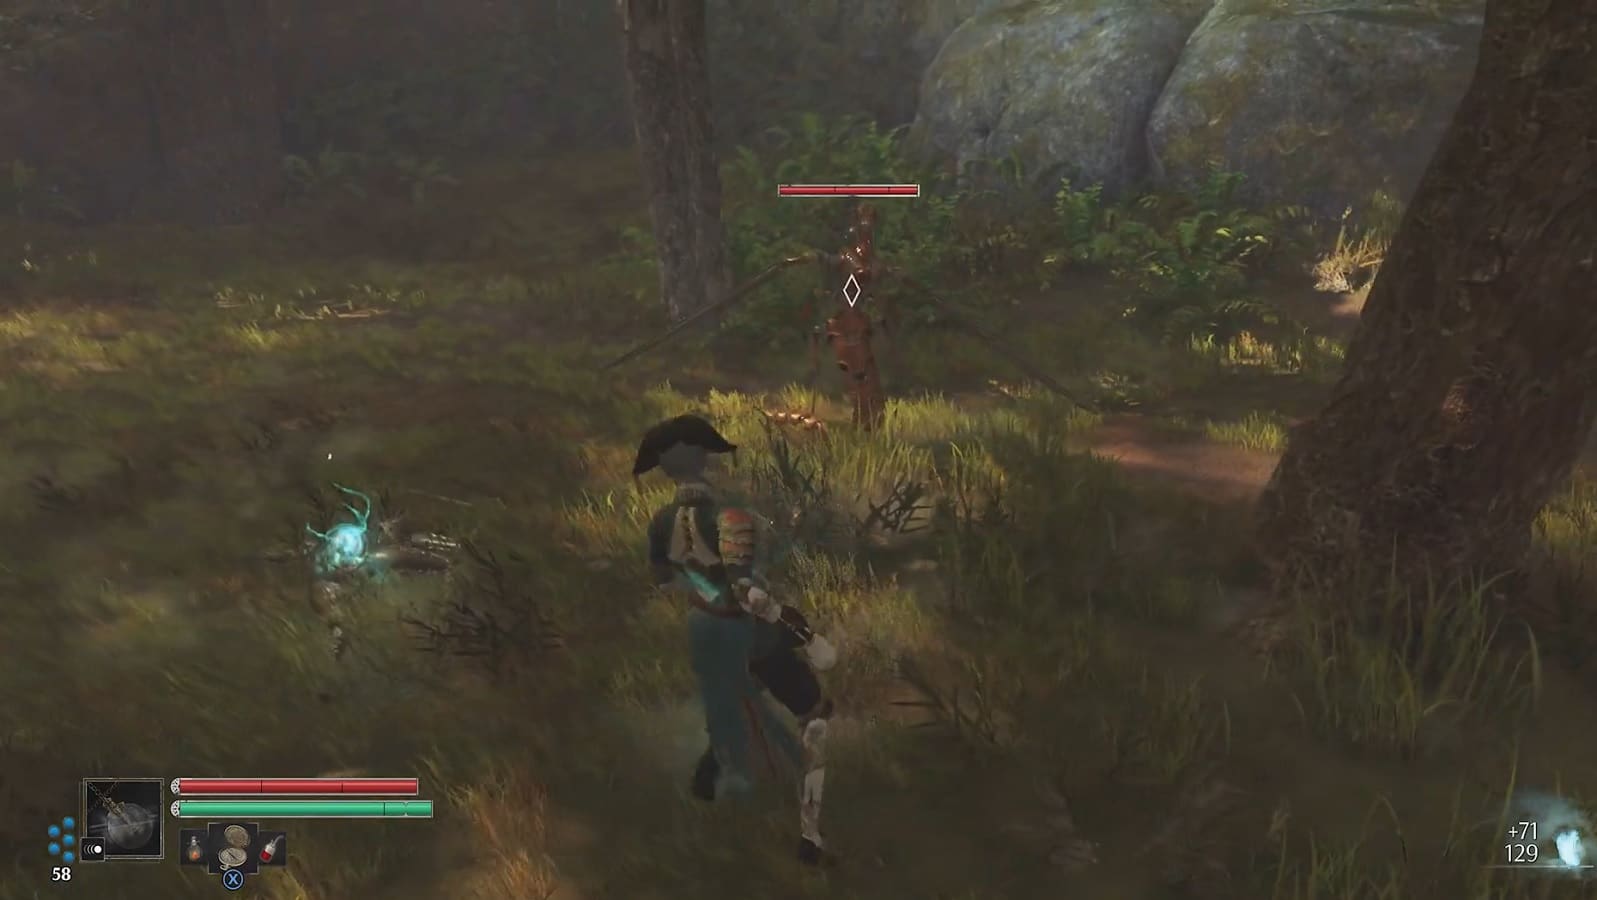
Continue following the path ahead and loot the corpse for an Ordinary Oil Vial. Shortly after, you’ll reach another open area with a Vestal to the left (can only be activated after defeating the mini-boss). Continue to your right and a boss will appear (pick up the “A Bloody Note” on top of a rock with blood in the middle first before spawning the boss).
Unstable Lancer Boss
The Unstable Lancer may use his spear and musket for a variety of ranged and close combat actions, including but not limited to the following:
- Quick forward jab attacks
- Diagonal slash
- Horizontal sweep
- Two swing melee combo.
- Musket ball Projectiles from his left hand
Explosive grenades are an option since the damage these inflict is significant and swift. It’s important to avoid his initial long-range attack, and after taking one or two hits, depending on the severity of his strike, you should Dodge to the right.
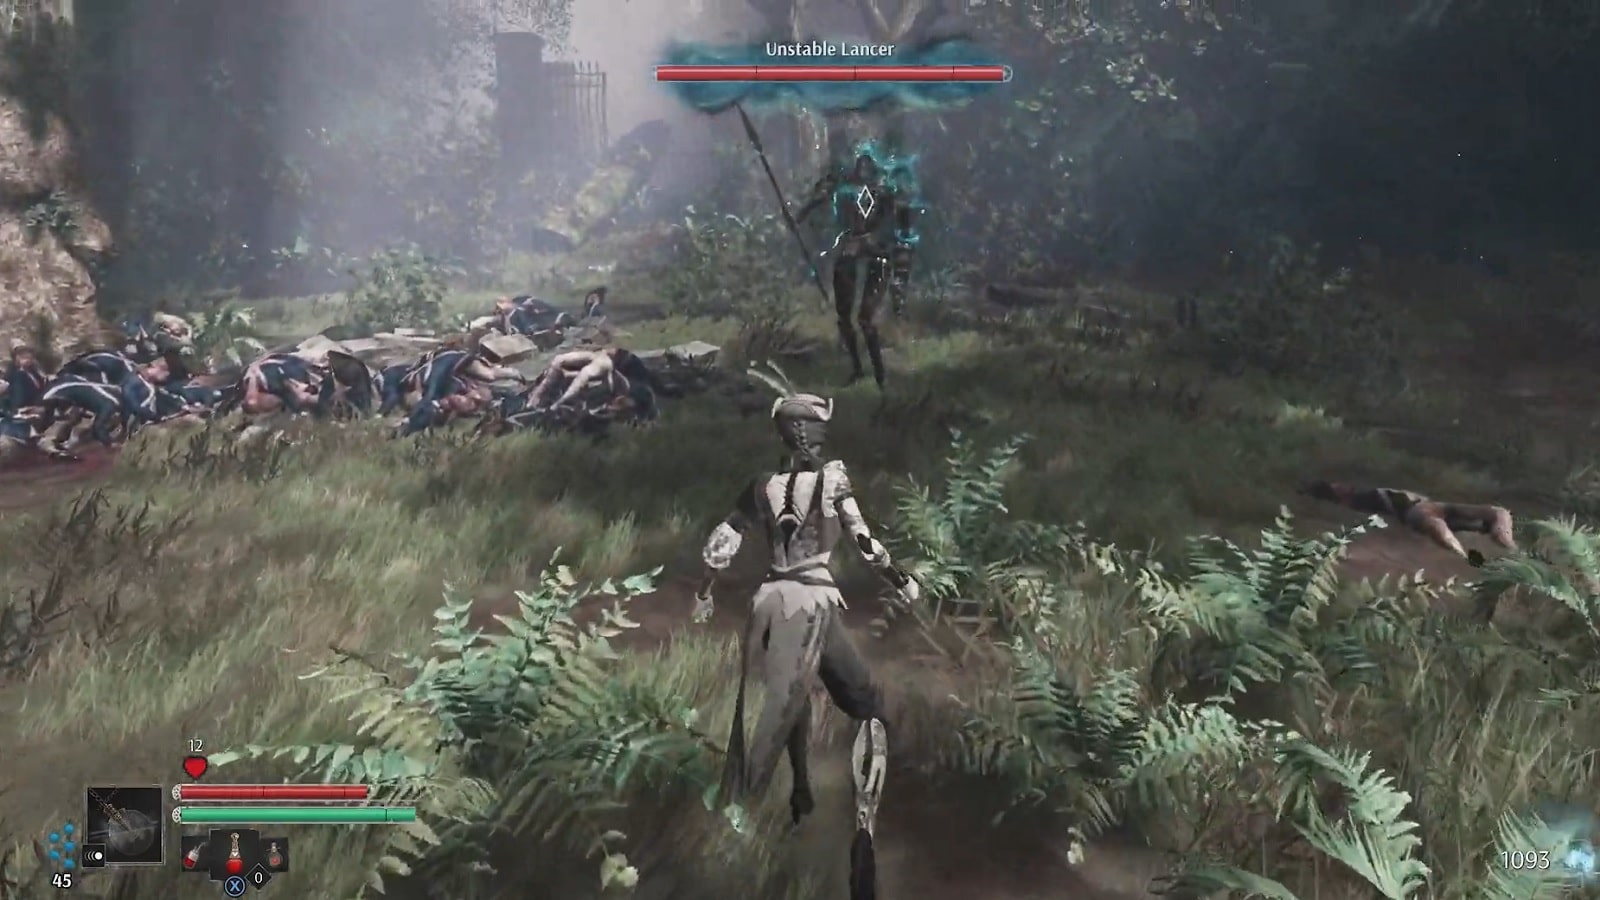
Staying near to him will reduce his ability to use projectiles, leaving you with only his spear to evade as a primary threat. patiently wait for him to launch an assault, then dodge over his next blow and close in for a series of hits before backing away and starting the process over again. Keep it up until he can’t take any more damage.
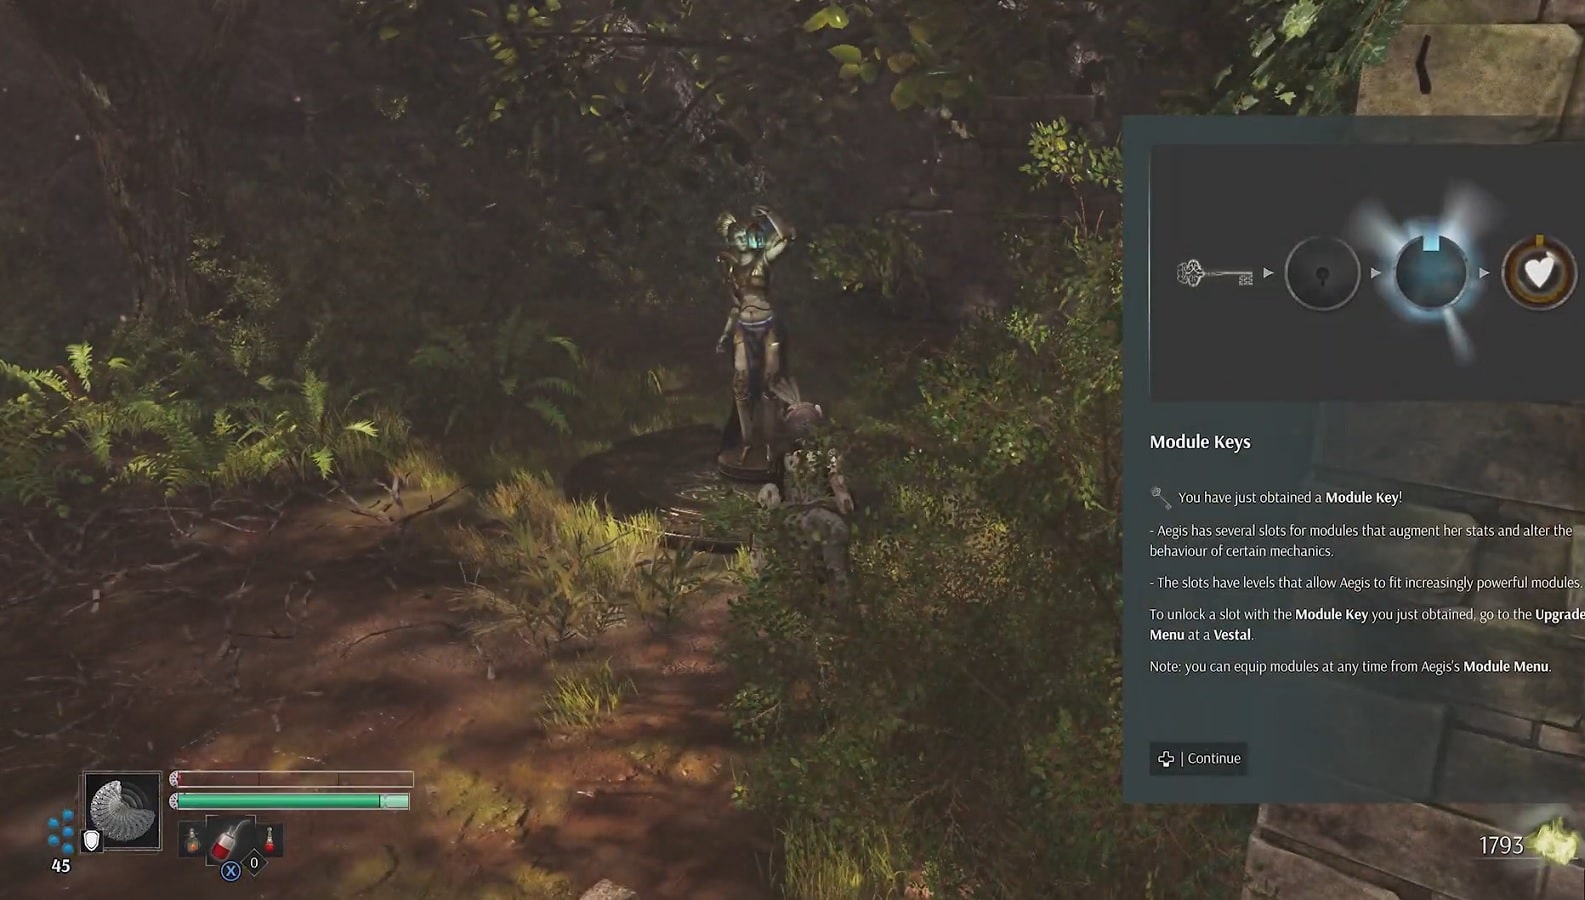
After you have defeated the boss, you will receive 700 Anima. Collect the Module Key from its corpse, then return to the Vestal and activate it.
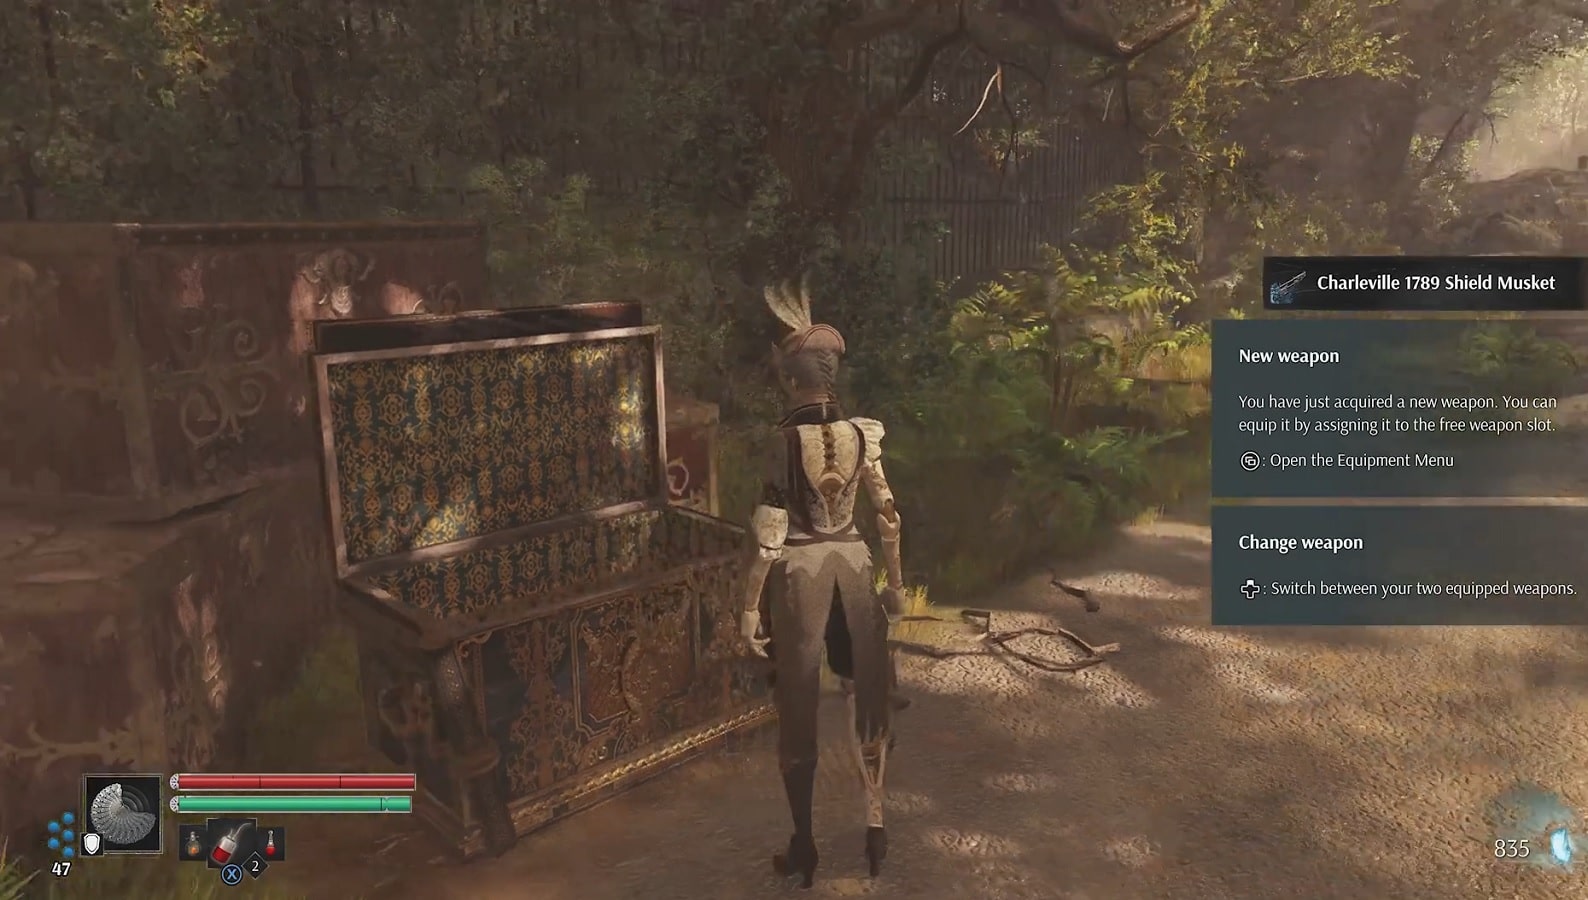
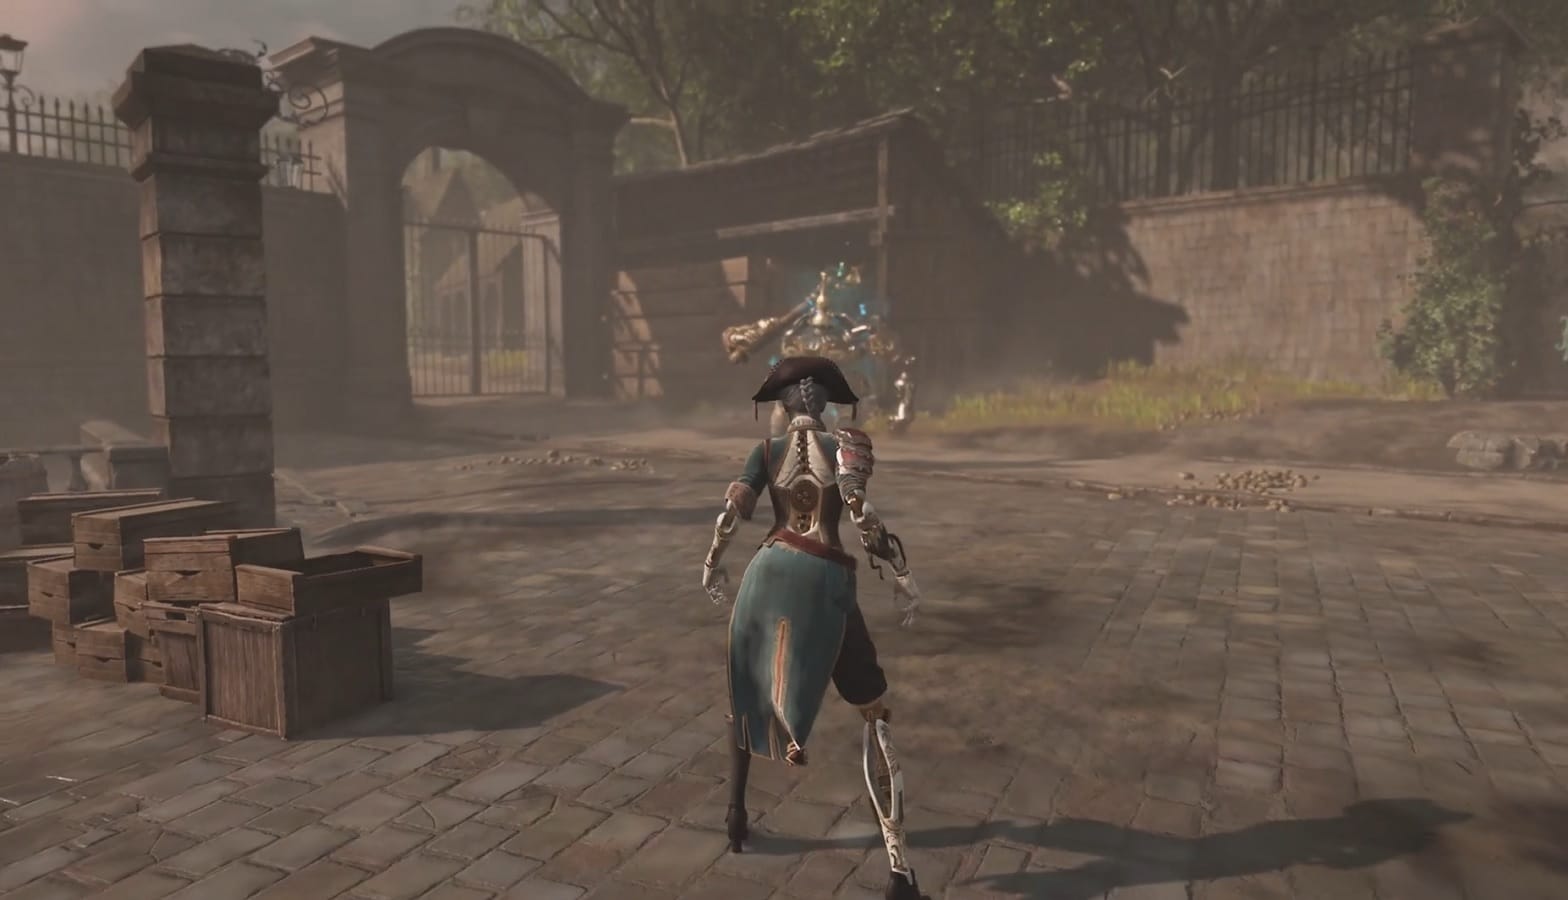
After hopping the fence with the help of the large tree, you can open the Treasure Chest and retrieve the Charleville 1979 Shield Musket. After that, continue along the path ahead, across the bridge, and you’ll reach The Lantern area.
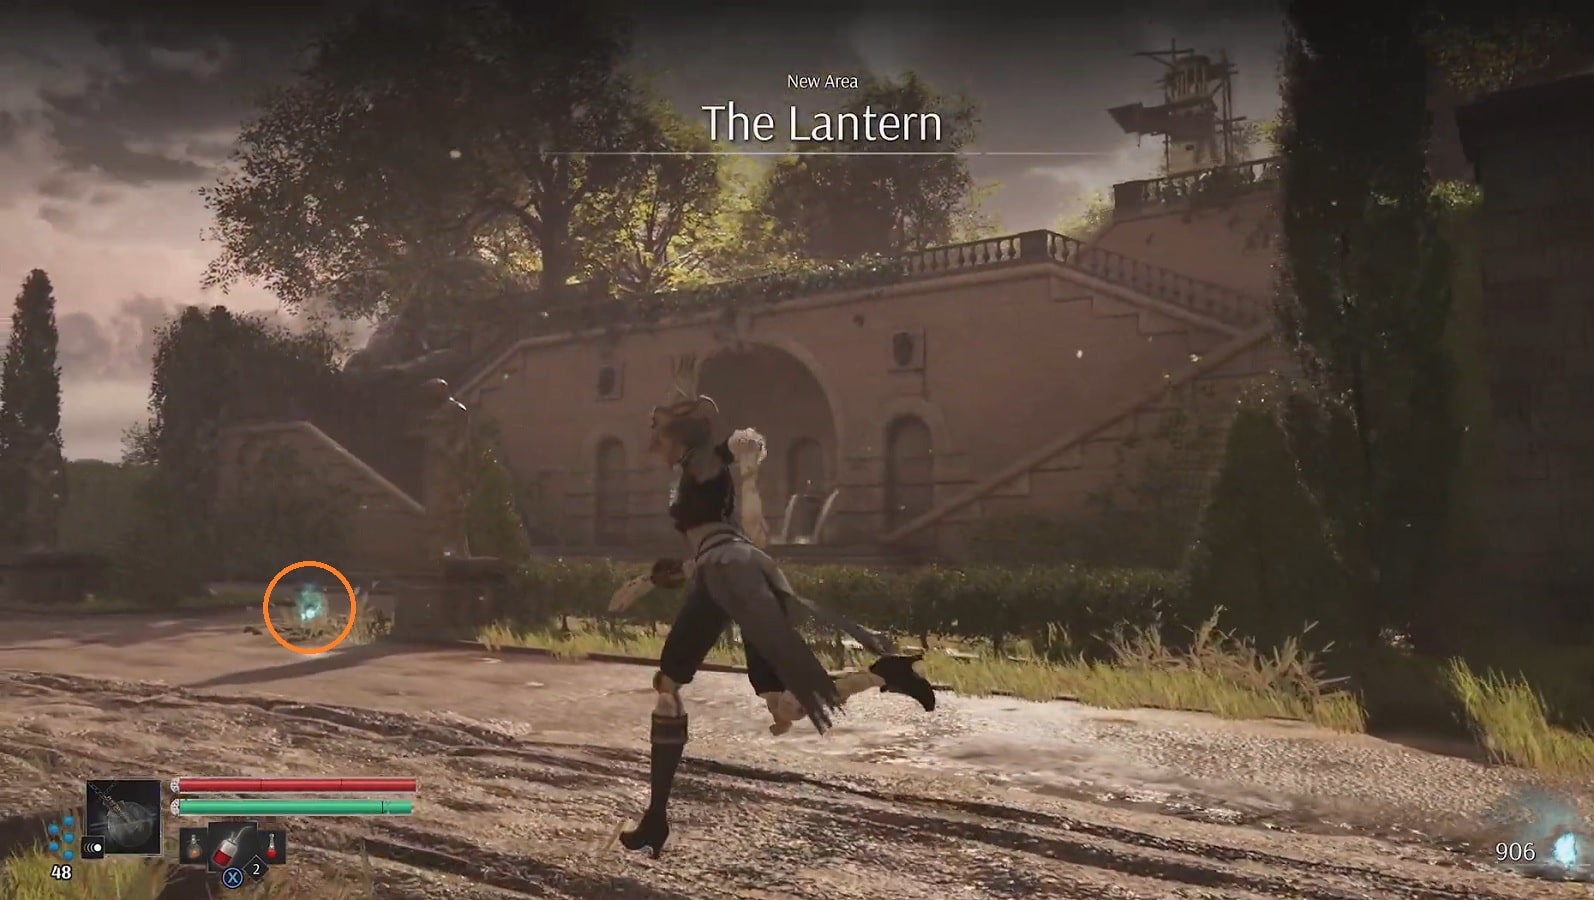
The Lantern
Upon entering the Lantern area, you’ll notice a locked gate on your left and a structure on your right. Loot the Orb on the ground to your right for Granite Cobblestones, then defeat the enemy further ahead and open the Treasure chest beside if for equipments (Muscadin Bicorn and Muscadin Coat).

Get close to the structure’s stairs and a Stalker will appear from the fountain. After that, you can take either set of stairs to the top, where you’ll find a pair of prototypes.

Next, kill another stalker atop the slope leading to the tall building in front of you, and then open the chest there to retrieve the Nemesis Claws and a compass.
Climb over the ledge up to the second floor of the building, then go around it to find “A Call for Workers” note lying around.

Proceed through the gap in the fence to the left of the building, and then down the slope into The Forest.
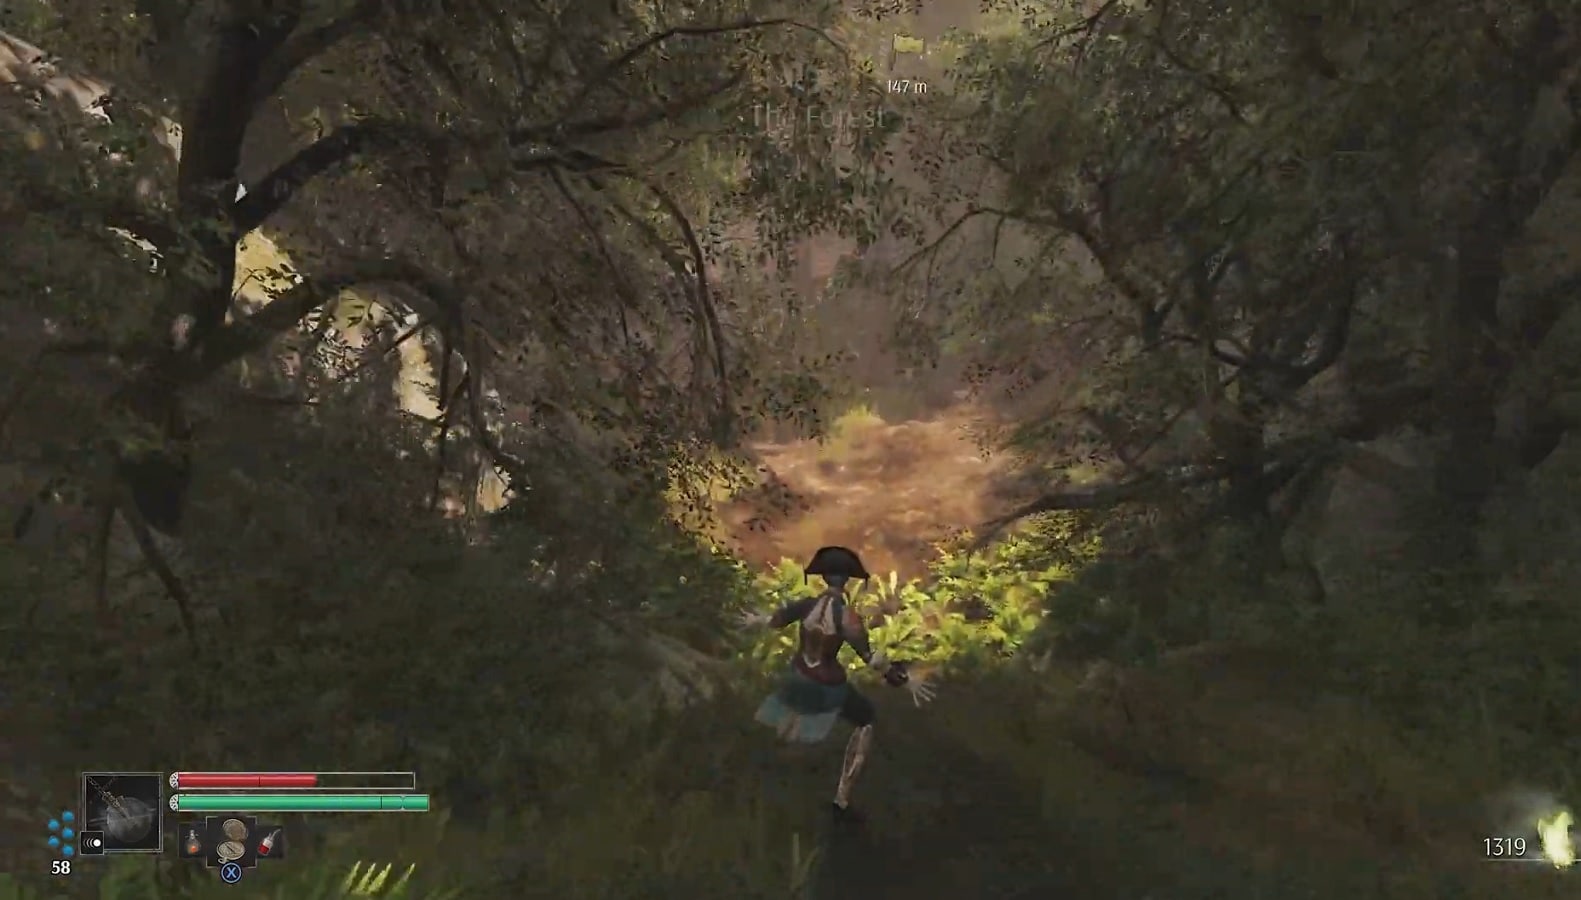
The Forest
Immediately after going down, you’ll spot another Vestal just in front of you to activate.

Continue along the path further down, then look to your right to find an orb beside a grave for Ordinary Oil Vials (you’ll have to deal with enemies here as well).
Continue along the main path further down ahead, you will eventually reach a stonewell guarded by two enemies. Once dealt, head behind the stonewell to find a chest containing a Lavioier Catalyst.

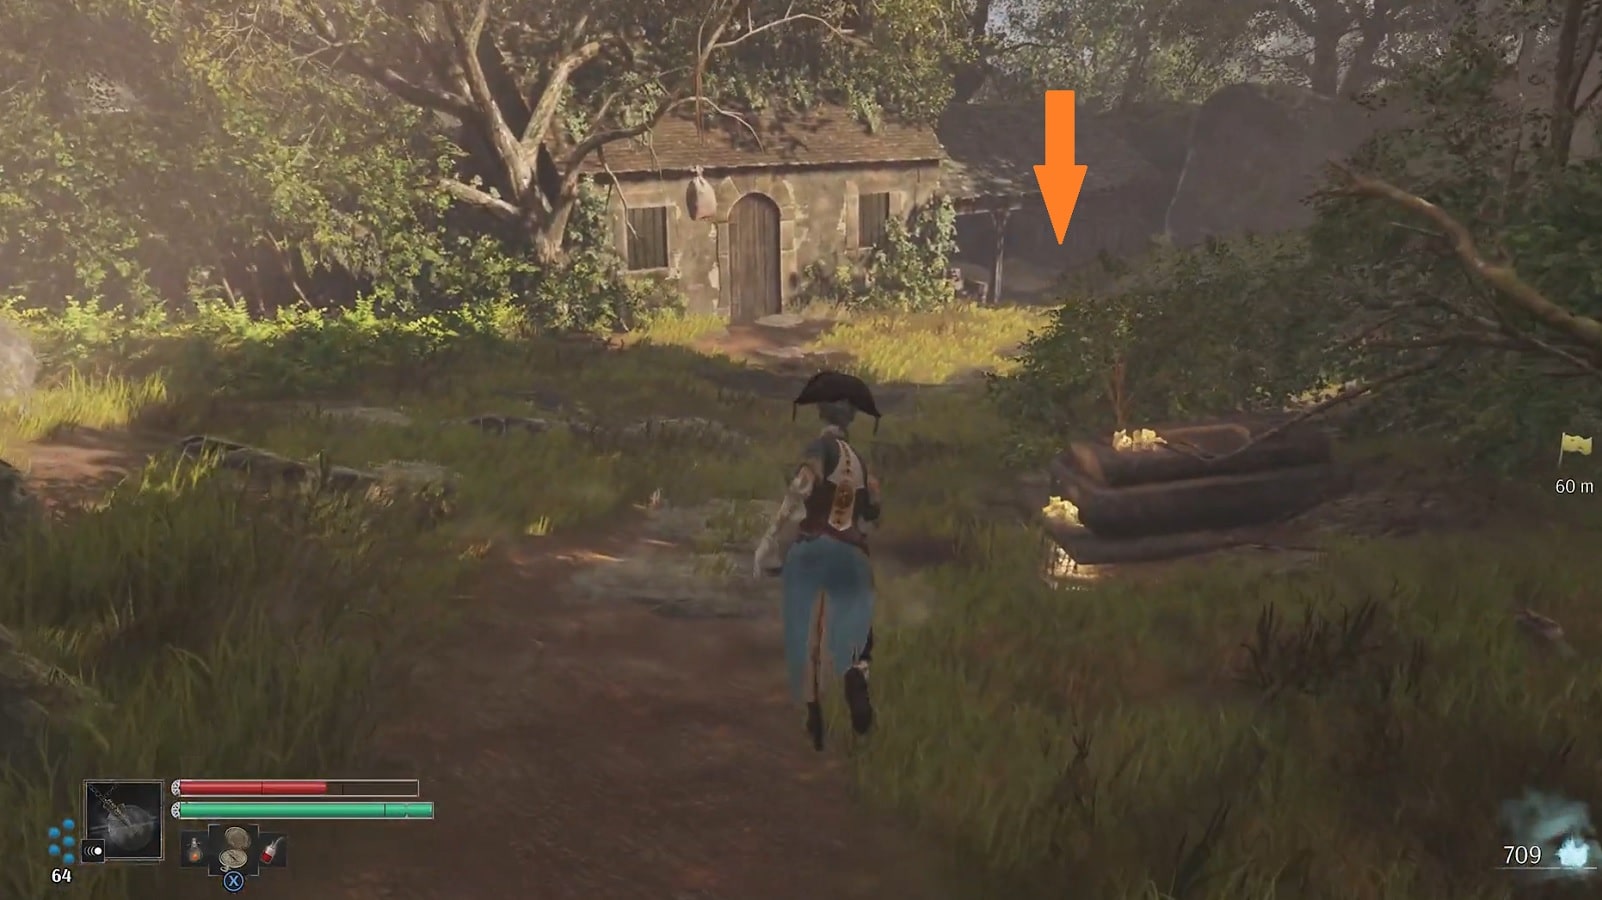
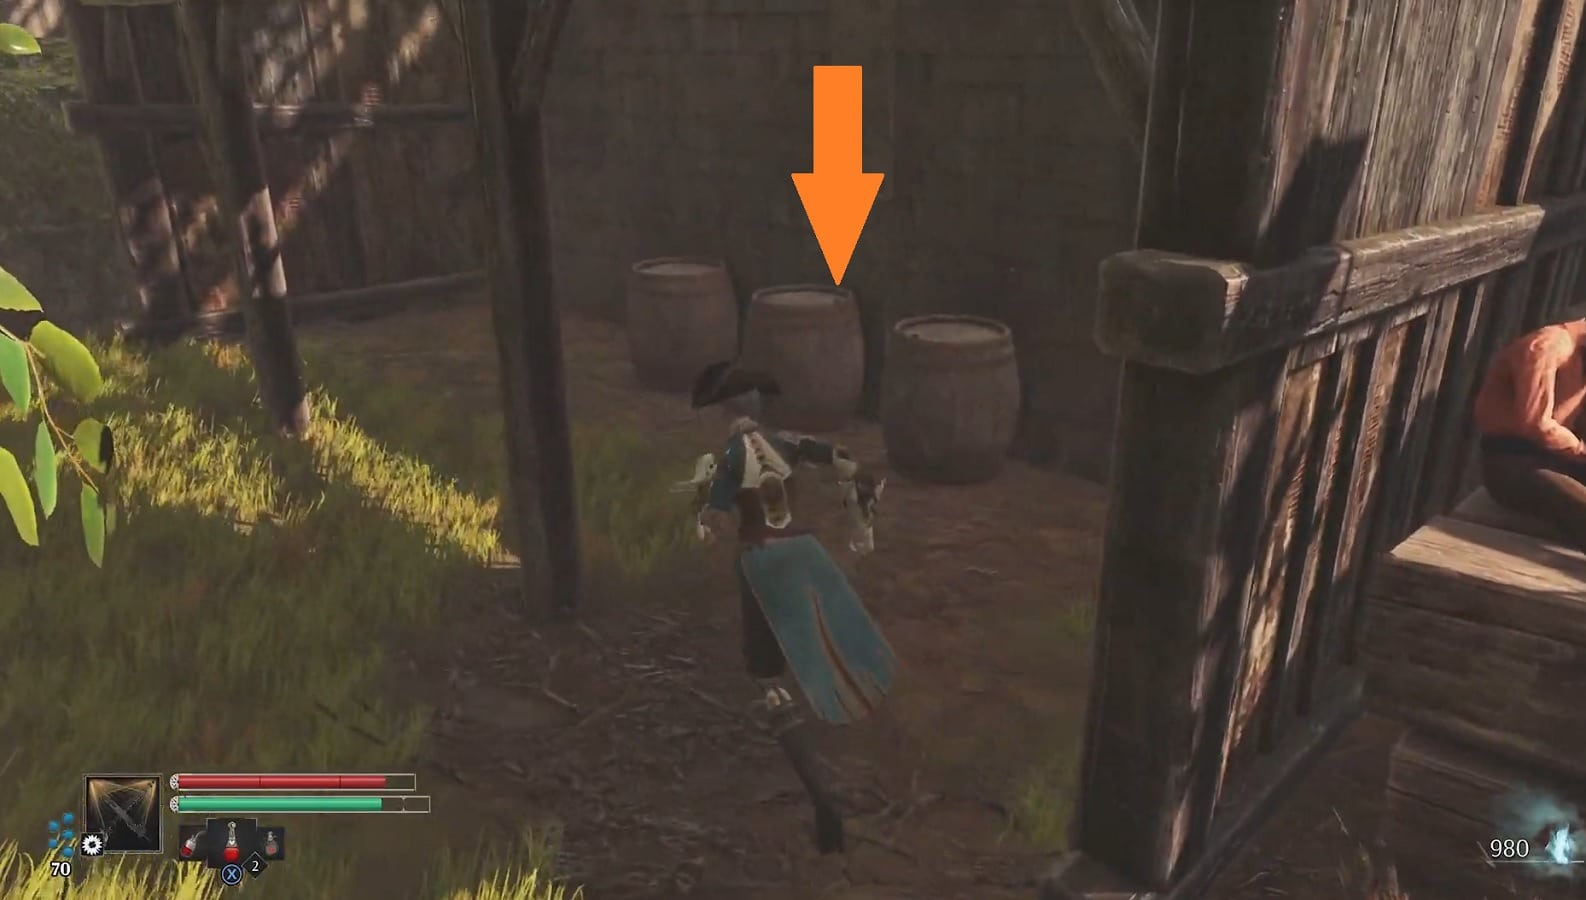
If you head down the slope to the left from the well, you’ll find a house. Defeat the enemy in front and then open the Treasure Chest (contains the Falchion and Sabre) found based on the image above. Keep an eye for a Stalker that will pop out behind the barrels.
Now, go back to the stonewell. You can find a Sinistral Prototype and a dead Automaton down a slope on the right, along with a Module Key. After that, return to the main path and keep going down. You’ll eventually spot a loot orb along the path up for grabs.
Keep an eye out for an another Loot Orb (Insulation Elixir) off to your left as you travel further down the main path. Also, look in the small shed to the left of the gate at the base of the slope. Here you can break barrels to find a Fulmination Resistance Vial.
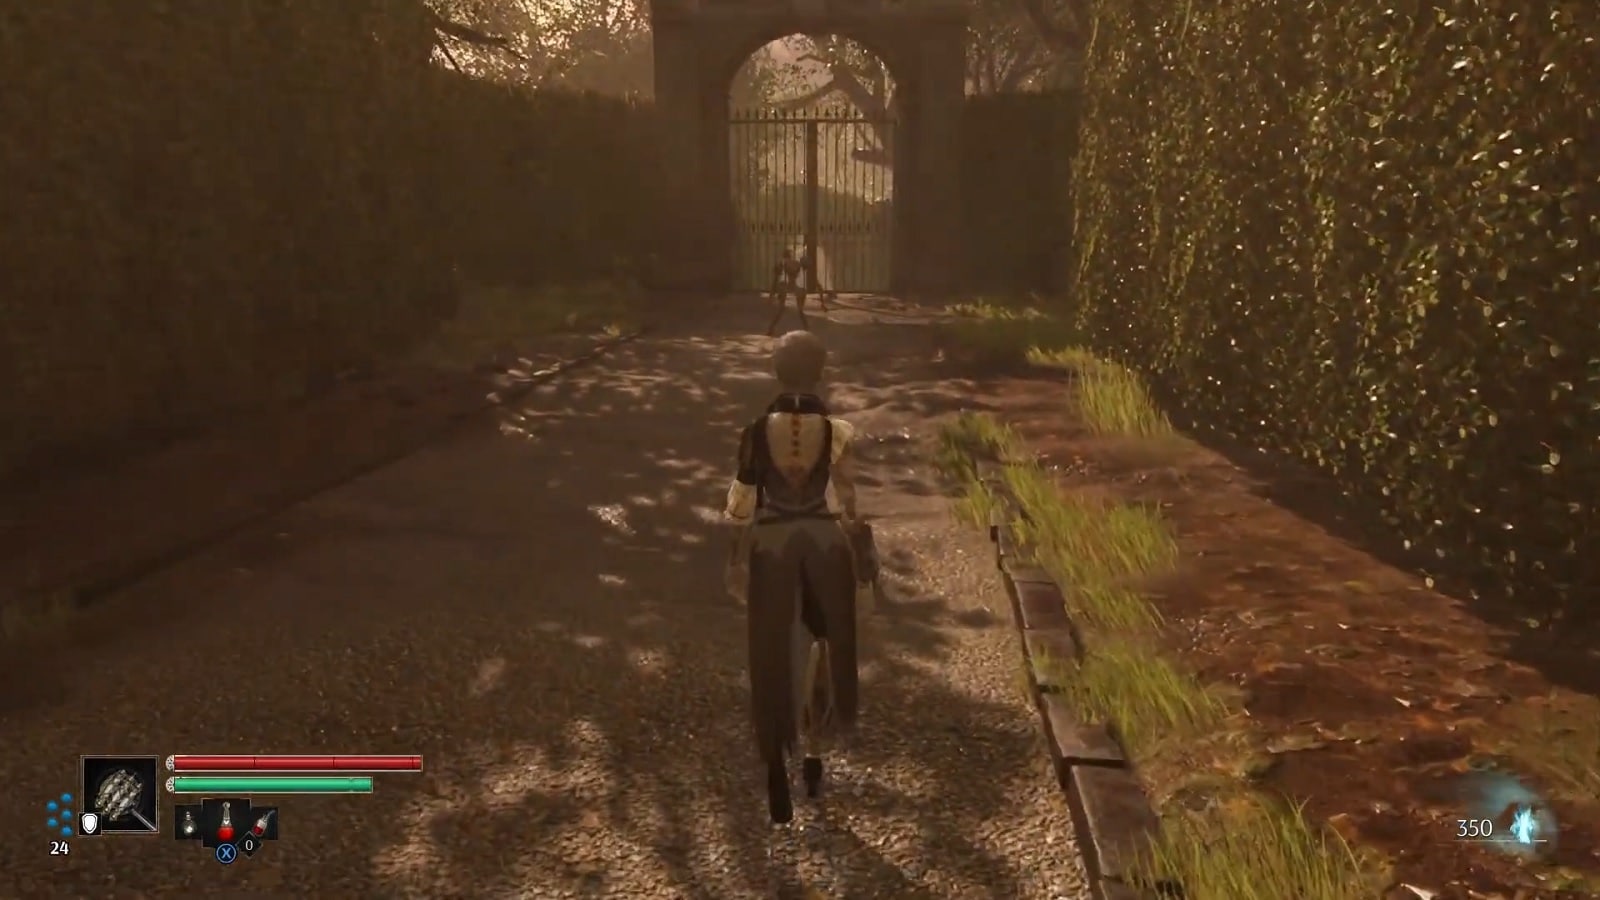
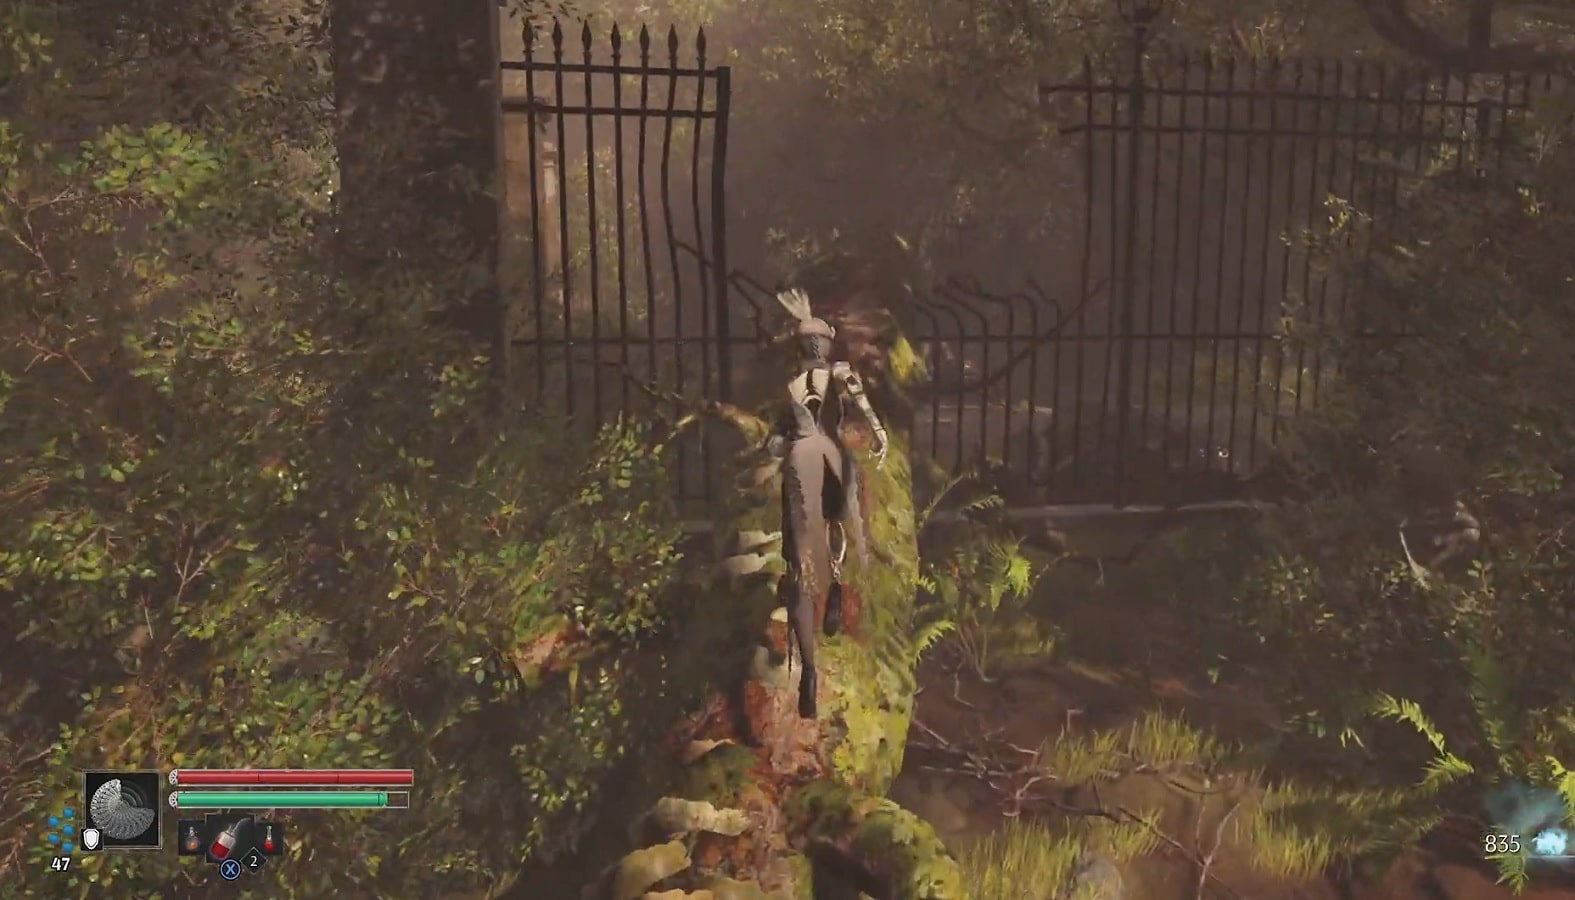
Keep in mind that the gate is locked. You can’t access these at the moment, but you may come back and check them out later on. For now, cross the gate by climbing the fence to the left and proceed to The Pier.
The Pier

Upon reaching The Pier, you’ll be greeted to a short cutscene before being thrown into another boss fight.
Unstable Lightning Ram Boss
The Unstable Lightning Ram carries a massive mace and has access to a wide range of abilities that can cause the Fulmination debuff. Among the tactics it employs in an attack are:
- Overhead smash
- Large horizontal swing
- Jab melee combo
- Spinning slash followed by a horizontal slash
It will make an aerial dive, ram its weapon into the ground, and wrap itself in a protective electrical field. Keeping your distance from him and forcing him to resort to melee attacks is your best choice here. Just wait for him to launch a melee attack, dodge it, and then close in for a few blows before retreating and dodging his next attempt. Don’t be sucked into the electrical field he’ll set in place, and you shouldn’t have too much trouble beating him.
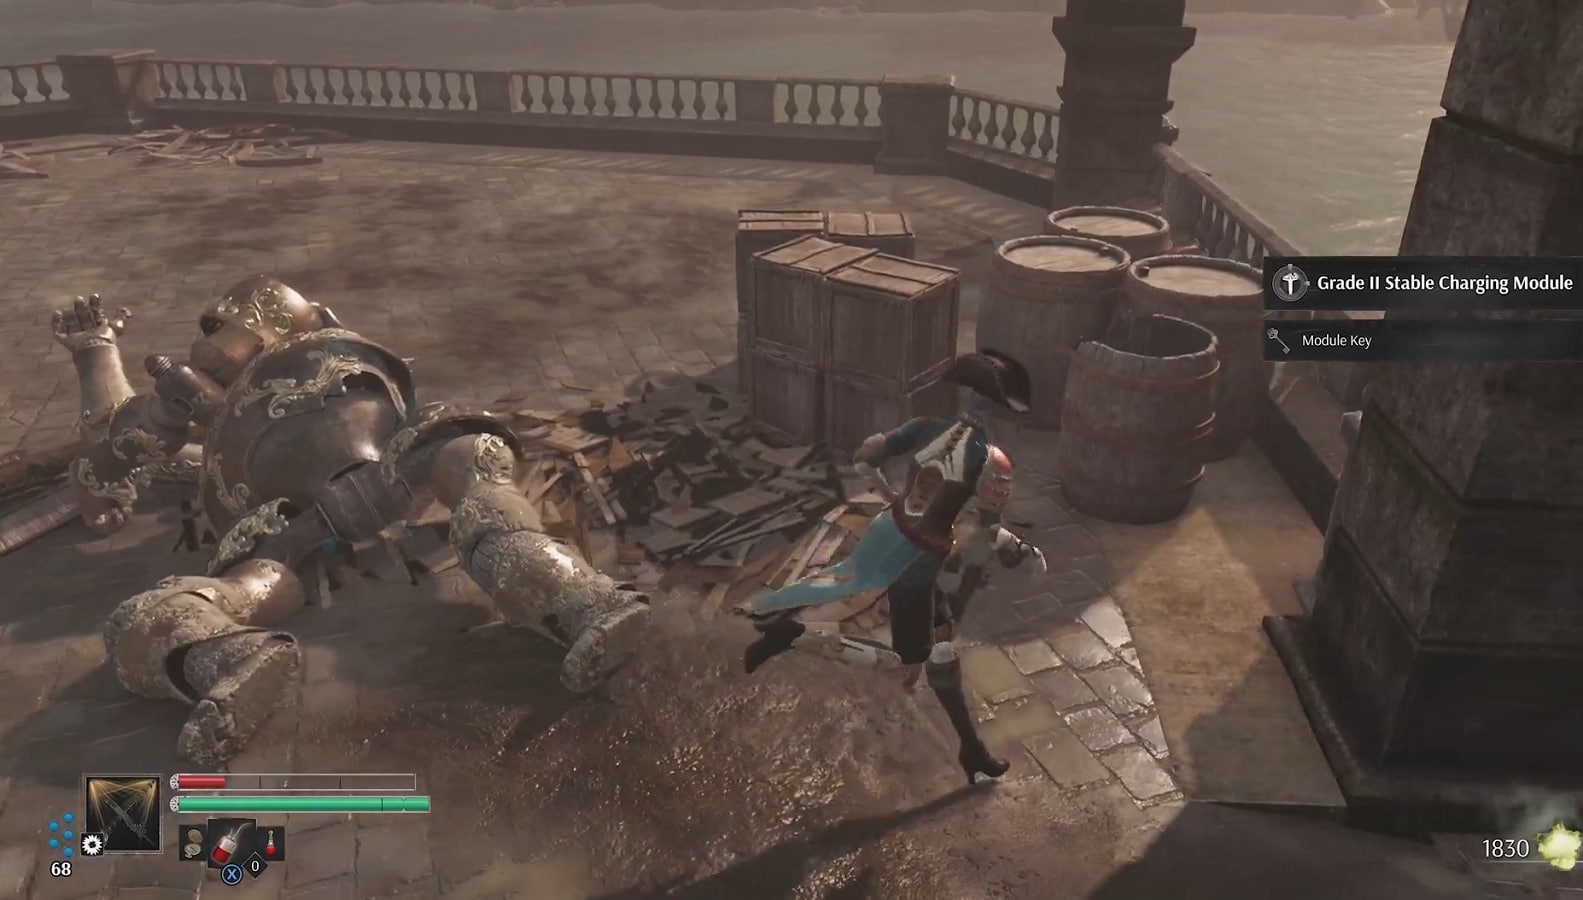
After you have defeated the boss, you will receive 850 Anima, you can also loot its corpse for a Module Key and a Grade II Stable Charging Module.
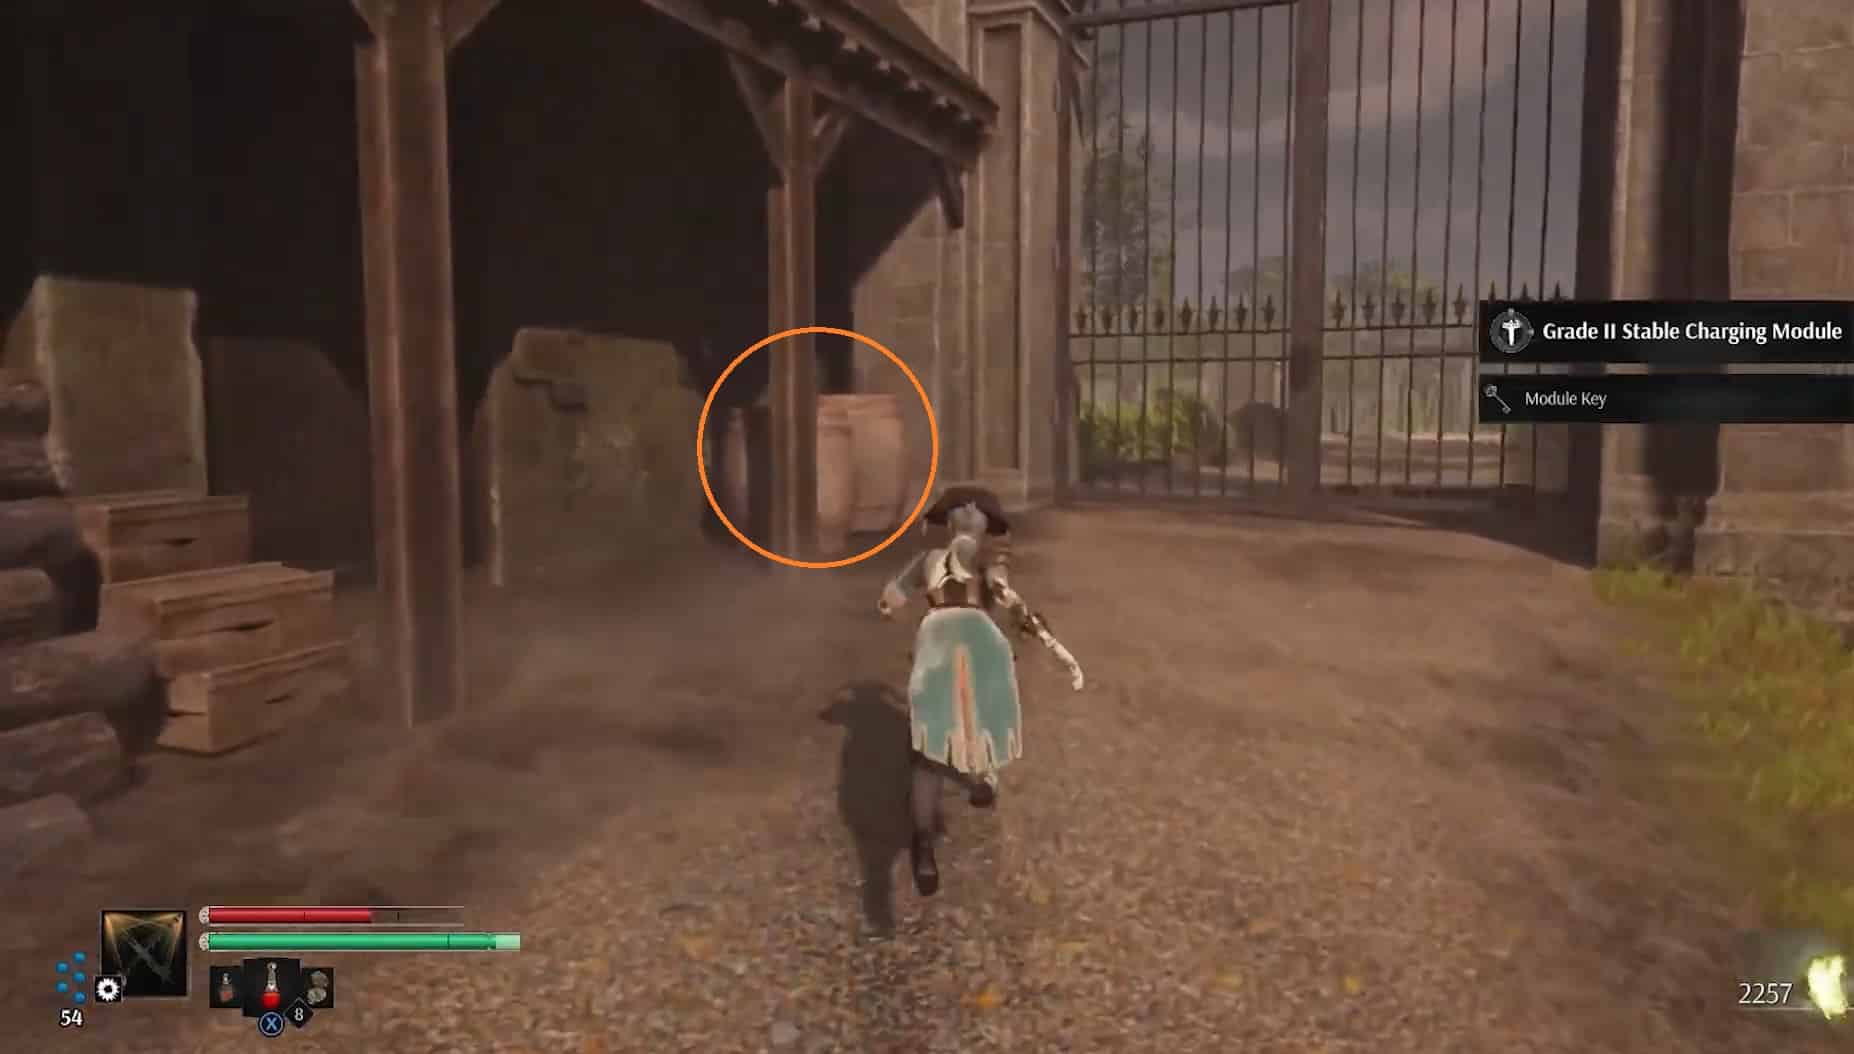
For extra loot, Explosive Grenades can be obtained in the crates beneath the shelter next to the entrance on the left, which is where you entered the area.

Additionally, destroy all the crates near the dock to earn yourself an Essence of a Lesser Spirit and Insulation Elixir. After that, you need just board the boat and travel to Paris to finish the quest.
If you like this guide, you can check out our other Steelrising articles here.
Also check out Gaming Zone’s Full Gameplay video on Steelrising In the Queen’s Drawing Room Quest:


