
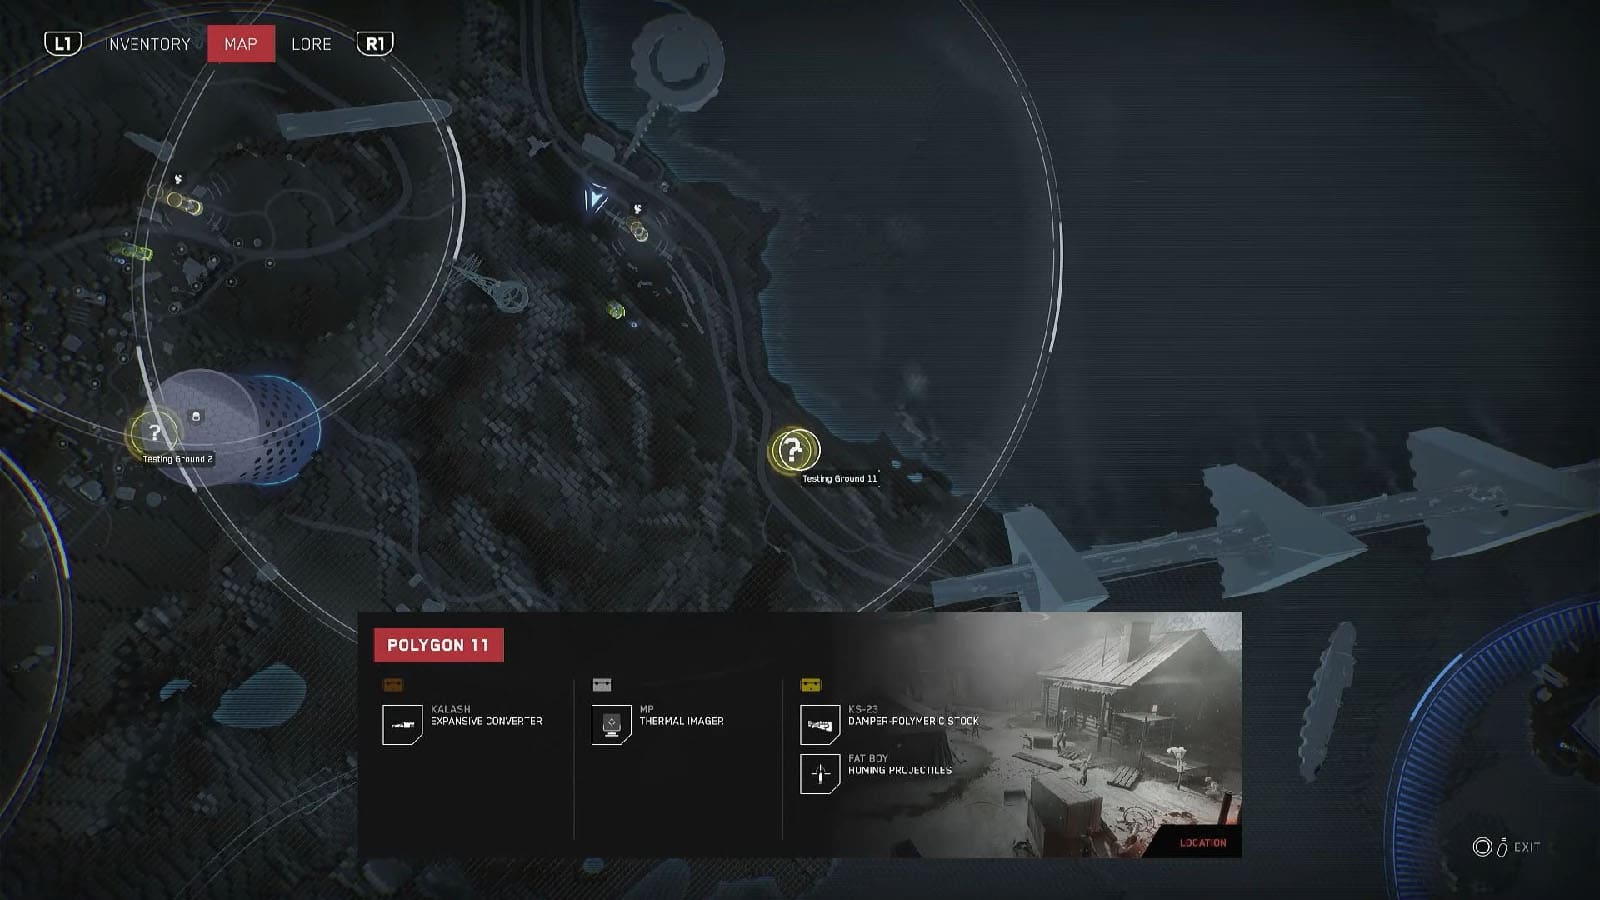
Testing Ground 11 is one of the areas in Atomic Heart that is an optional place to go through to get weapon blue prints and upgrades. Testing Grounds, also known as Polygons, are usually filled with puzzles and obstacles, as well as enemies that patrol the area.
Read ahead as we go through the steps on how to complete Testing Ground 11 in Atomic Heart, as well as share the locations of where the Loot-yagins can be found.
How to access Testing Ground 11
To access the testing ground, you must first head to the tower up the road northwest. Up the tower is an antenna that you can use to hack the camera nearby. Use the camera to open the door of a little shack.
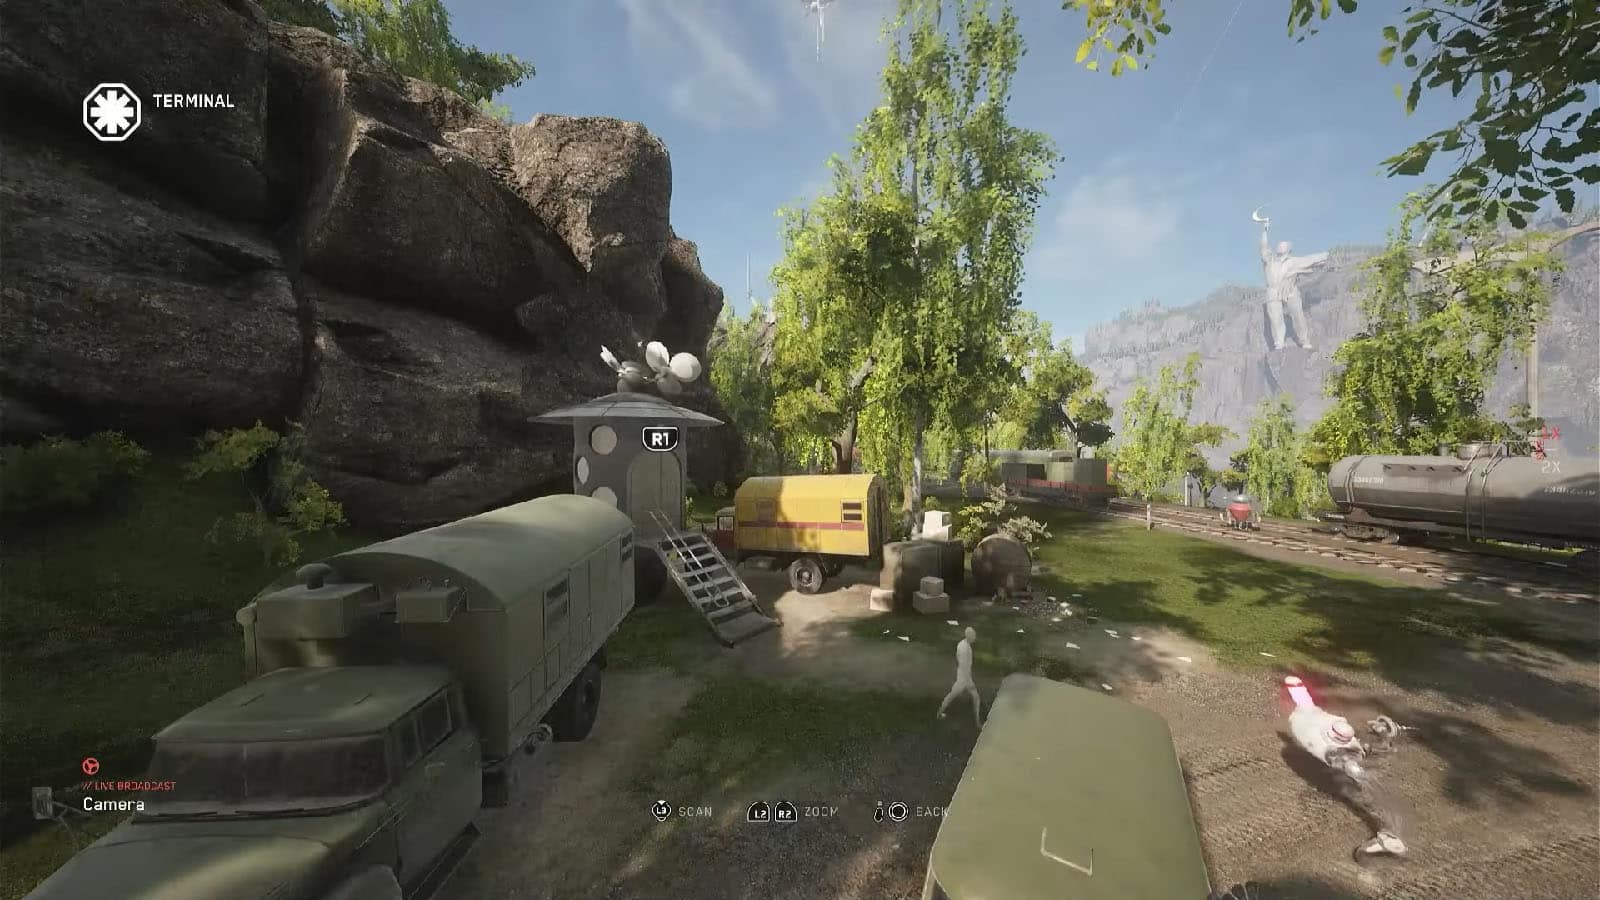
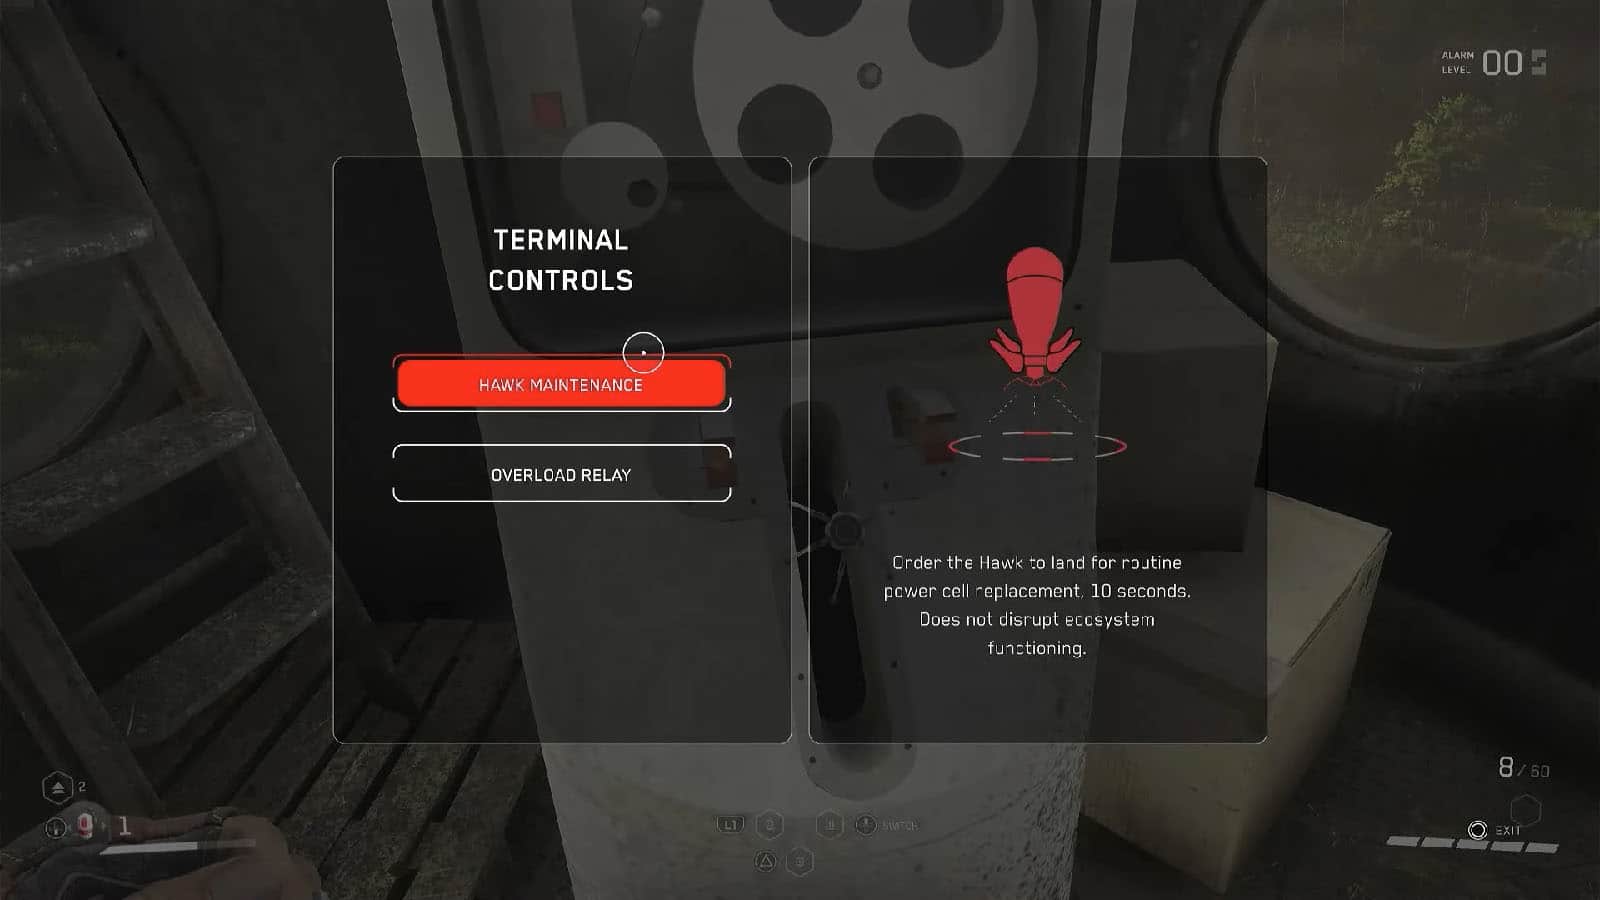
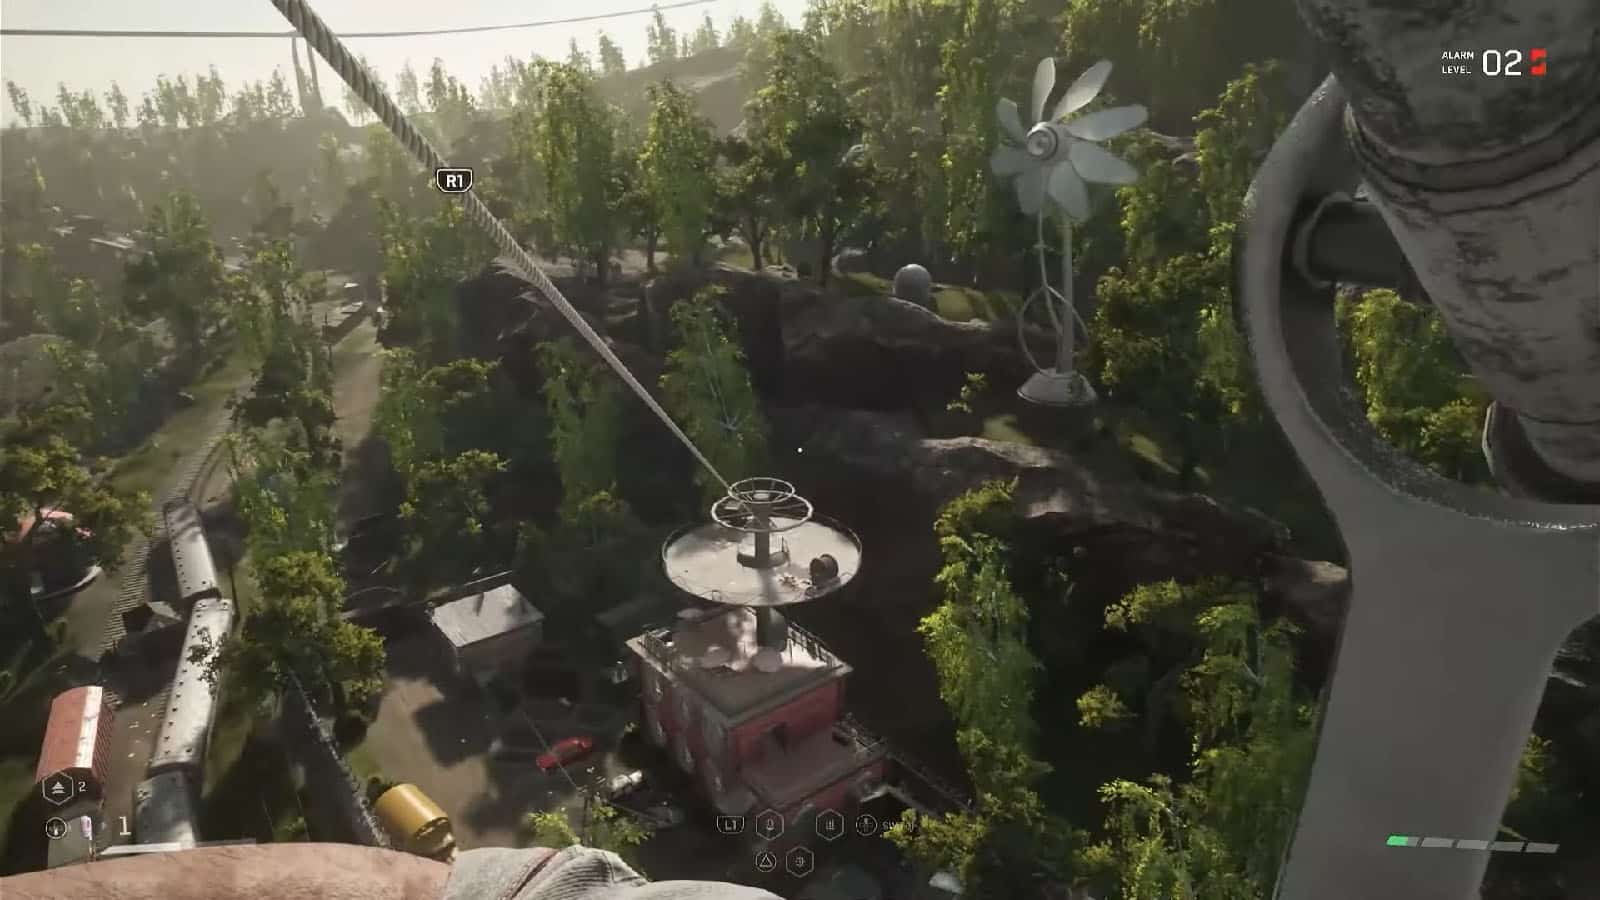
Head inside this grey shack and interface with the terminal, then select Hawk Maintenance. A flying machine will descend; go towards it and hang on to it. Once it’s above ground, use the zipline to go down towards a building. Make your way towards a wooden shack and pick its door to go inside. Pick up the key disk which you’ll need to unlock the access to the testing ground.
You can then head towards the testing ground elevator and unlock its door by solving a dot lock and using the key disk.
Platform puzzle #1
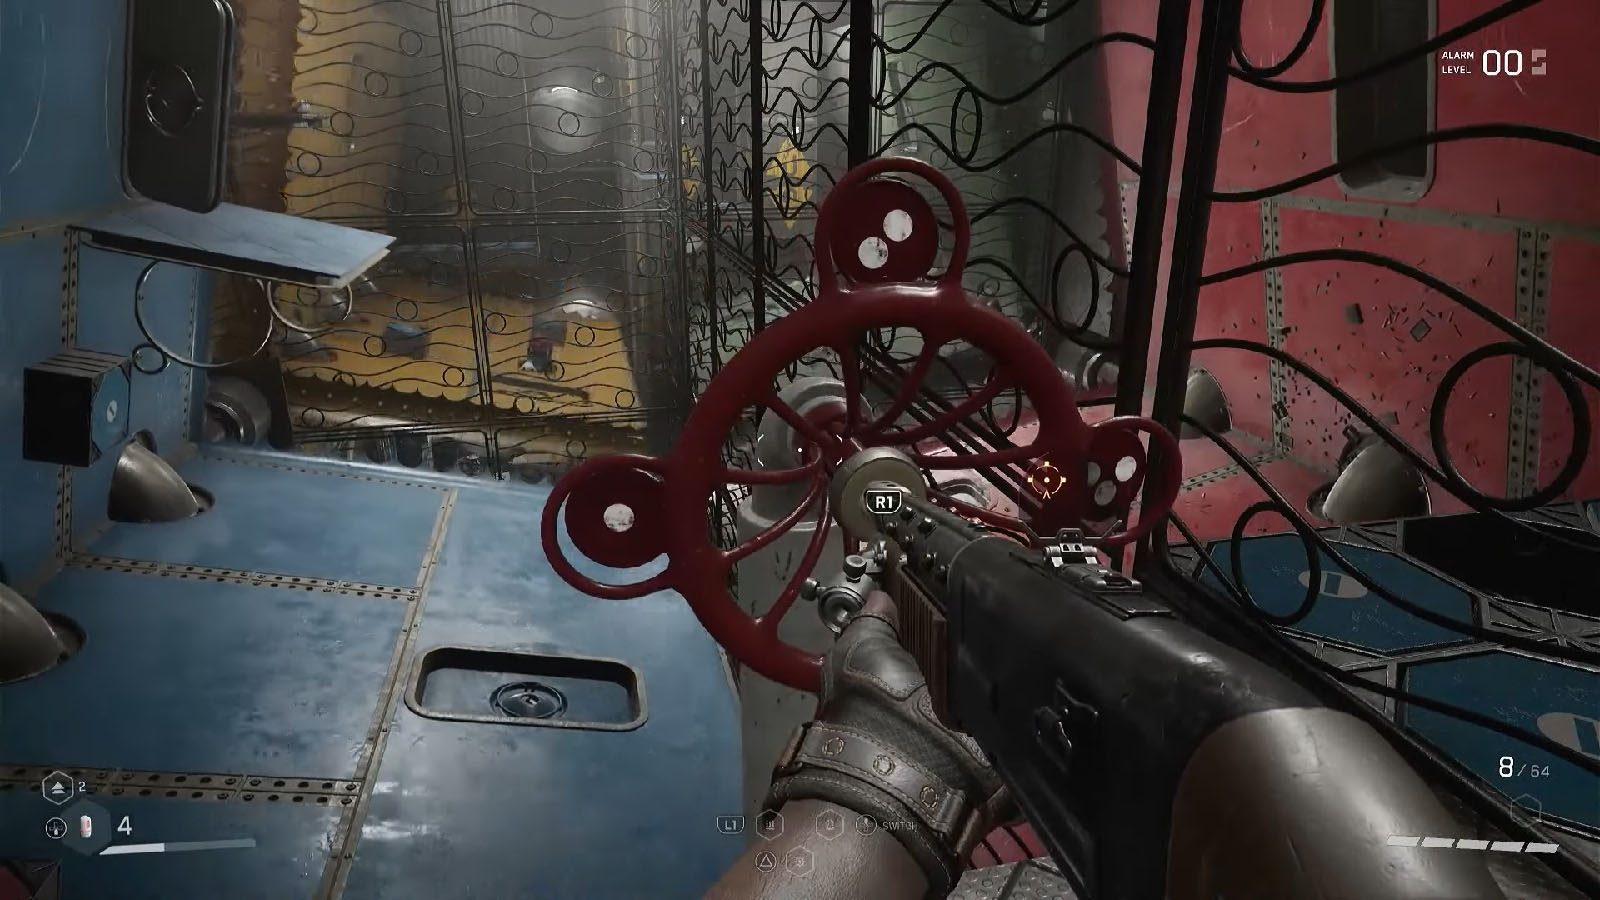
Make your way into the first part of the testing ground until you arrive at the revolving platform room. Turn the wheel to one dot first, then jump down into the pit as it revolves. Then go through the doorway on the platform, and reverse the polarity of the ceiling to lower the magnet wall. Climb up the wall and reverse the polarity again. Jump towards the next blue magnet platform and reverse again.
Jump towards the platform and turn the wheel to one dot, then jump back to the magnet platform again to cross over to the next side of the room. Make the jump using your dash over to the doorway to cross to another side of the room.
Ride the platform on the corner of the green room and reverse the polarity. Move to the next platform and reverse again. Go to the edge of the room and ride the magnet platform, then reverse again. Pay attention to the arrow marks painted on the wall where all rooms meet as you’ll have to jump towards it; there should be a gap in the fence.
Finally, fall down from the red platform, go through the doorway, and make your way up to the exit.
Bronze Loot-yagin – Kalash Expansive Converter
Just on the corrider up ahead, you’ll pass by the room where the Bronze Loot-yagin is. This contains a Kalash Expansive Converter.
Make your way to the next rooms until you arrive at the big room with a glowing boiler. On the left side of the room next to the clear pipes is a crate of Candles. Put one Candle in the pipe and move it towards the connecting boiler.

Climb up the house near the entrance on the right side, then jump over the platform to make it on the next house’s roof where there’s a hole that you can jump into. Grab a Candle and put it in the pipe. Unlock the door using the dot mechanic, then continue guiding the Candle until it reaches the next boiler. This will open the door ahead.
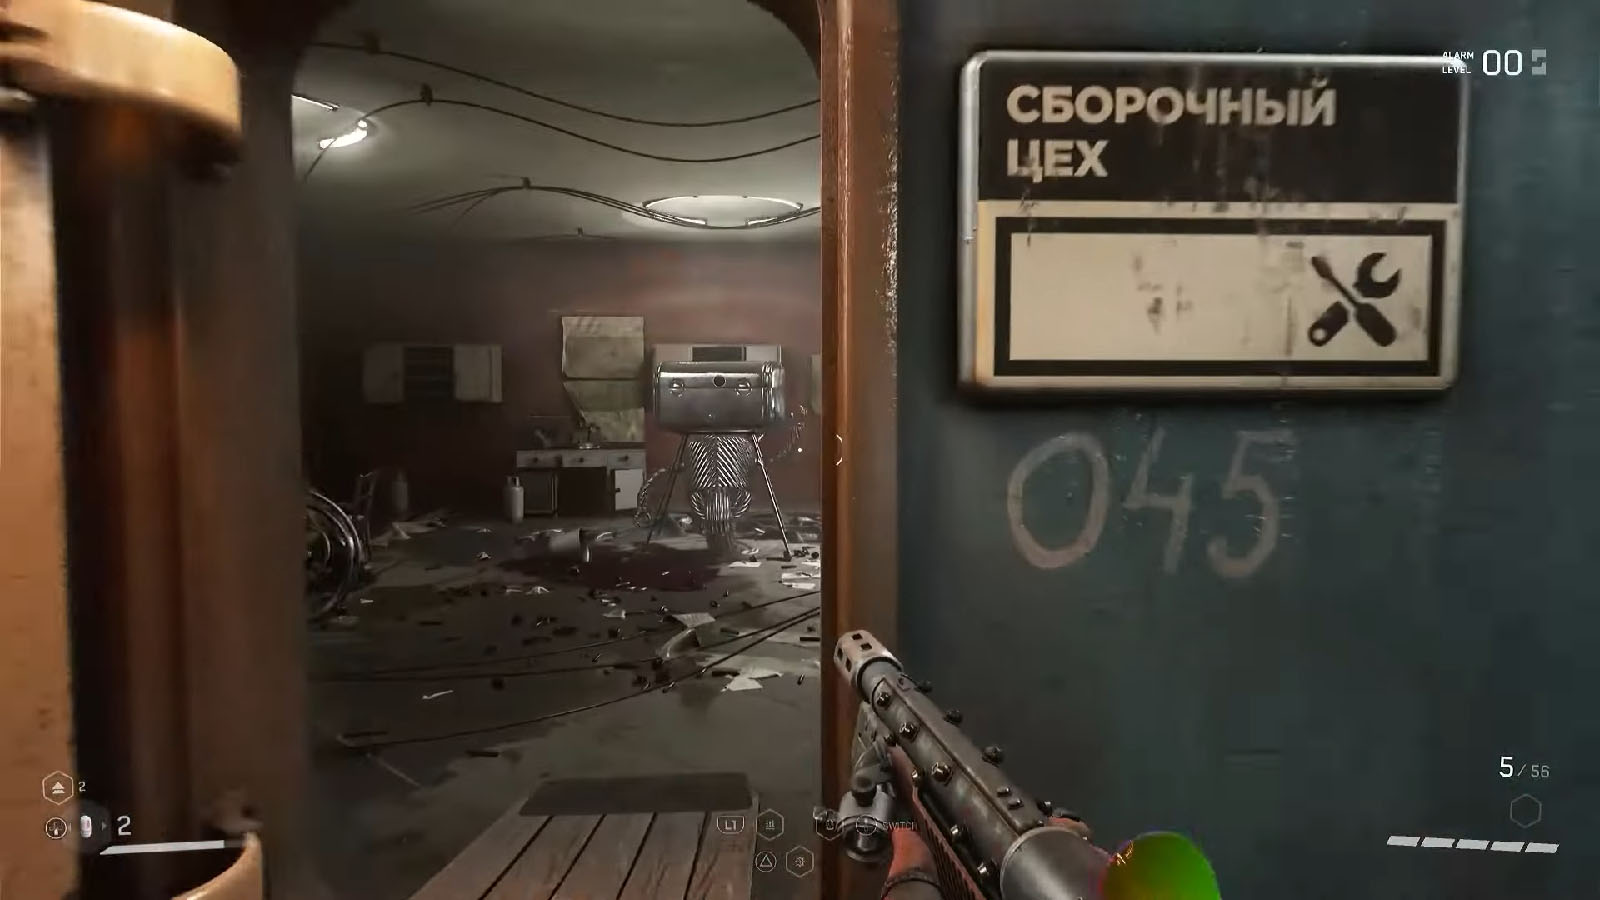
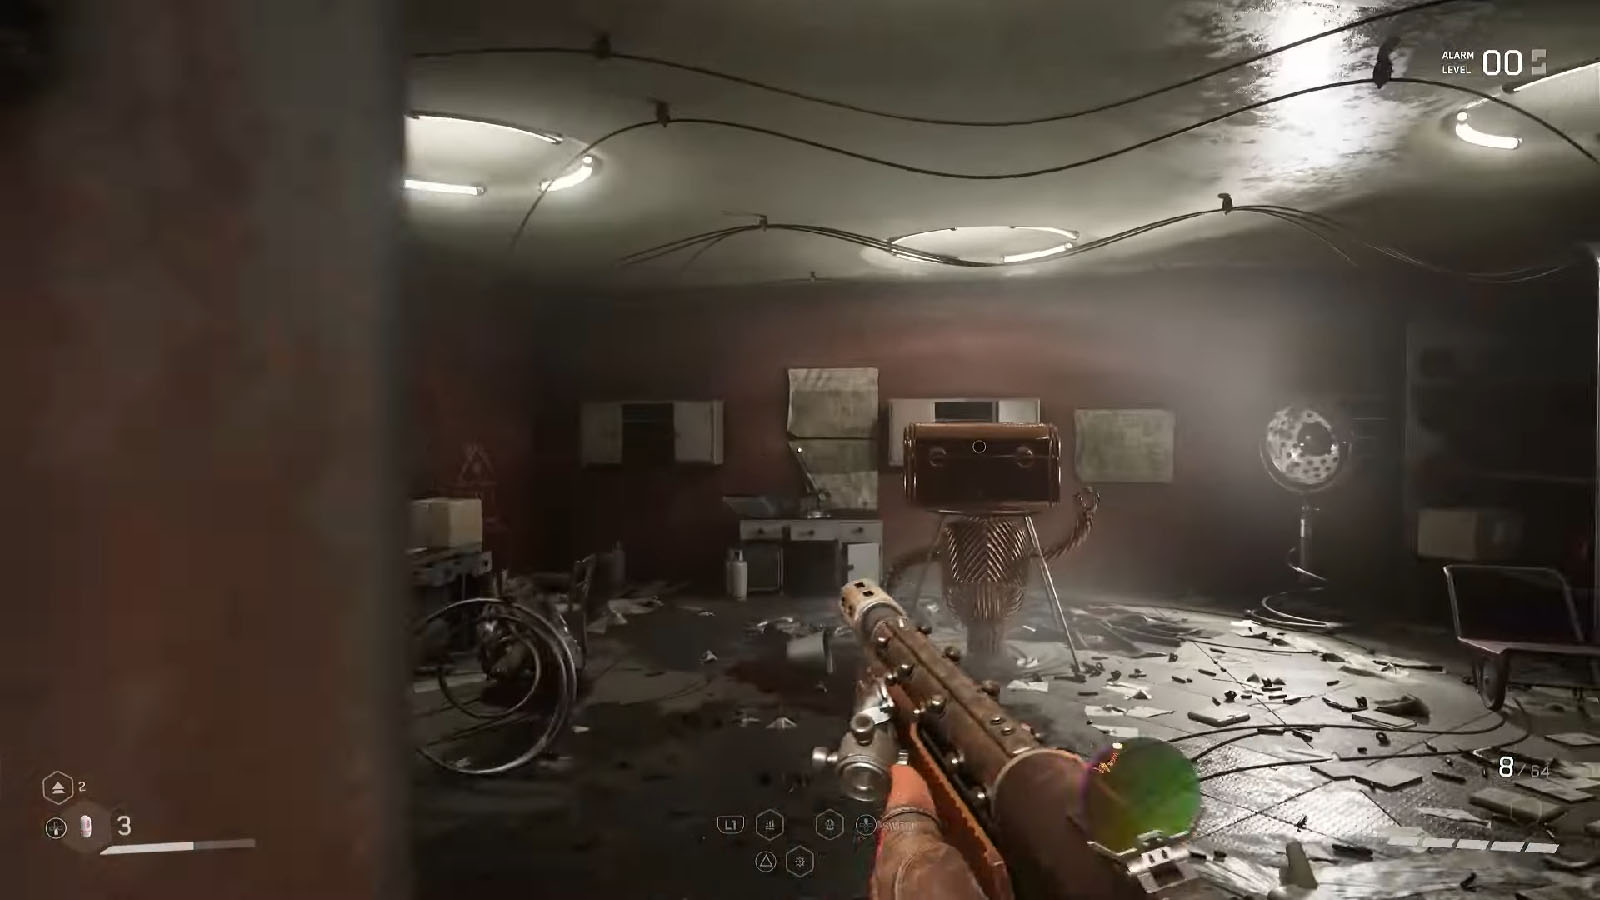
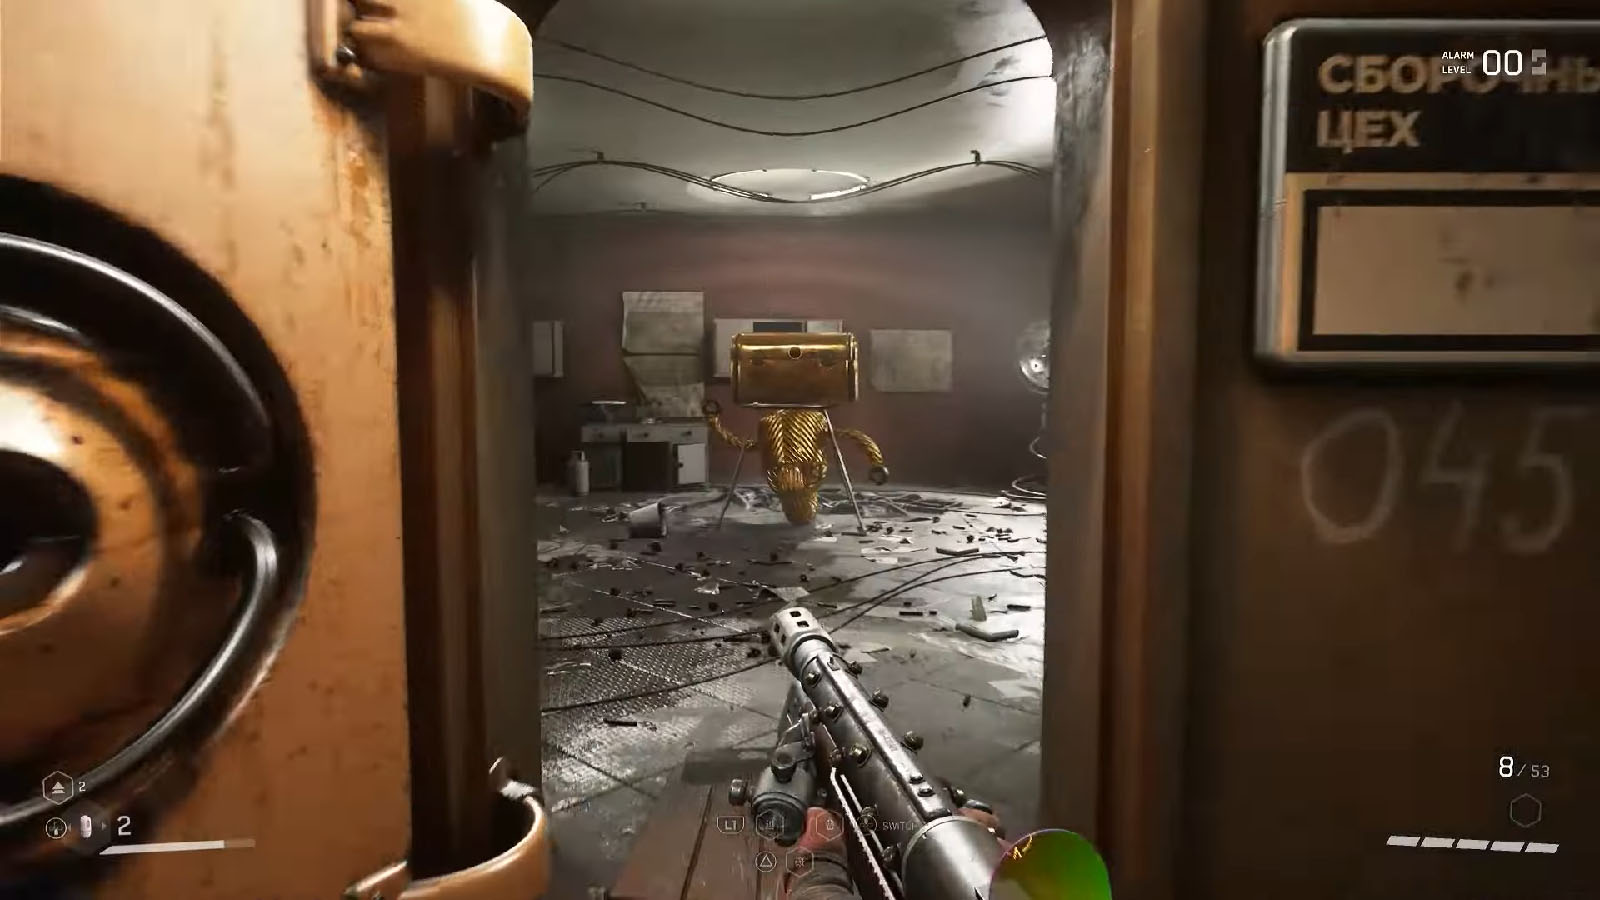
Silver Loot-yagin – MP Thermal Imager
Continue down to the left side where a gate is open, then walk up towards the next doorway and you’ll see the Silver Loot-yagin. It contains an MP Thermal Imager.

Platform puzzle #2
From the previous room, turn left and go into the vent up ahead. Turn right down the vent, then left to arrive at another room.
Go to the red room platform on the right first to grab the Candle; you can reach the Candle without stepping on the platform. Then, head into the blue room and try to place the Candle on one of the empty holders. If you fall, you can still throw the Candle from the ground, just wait for the platforms to give you a window.
Head back into the red room and get the other Candle, then do the same steps over at the blue room. Time your crossing over to the next doorway immediately after the platforms stop moving.
Gold Loot-yagin – KS-23 Damper-Polymeric Stock / Fat Boy Homing Projectiles
Head towards the far left corridor and go into the room on the left to find the Gold Loot-yagin. It contains a KS-23 Damper-Polymeric Stock and a Fat Boy Homing Projectiles.
Check out this video by 100% Guides showing how to complete the Testing Ground 11 in Atomic Heart:


