Close Menu
Sirus Gaming
    • News Stories
    • Features
    • Reviews
    • Previews
    • Guide
    • Review Policy
    • Privacy Policy
    • Contact
    What's New in Sirus?

    Omnimon Triumphantly Returns To Digimon Story: Time Stranger

    May 12, 2025

    Gundam Extreme Versus 2: Infinite Boost Announced

    May 11, 2025

    Mafia: The Old Country Gameplay Trailer Released, Launch Scheduled for August 8

    May 9, 2025
    Facebook X (Twitter) YouTube
    Sirus Gaming
    Sirus Gaming
    Ready Or Not Twisted Nerve Mission Walkthrough
    Guide

    Ready Or Not: Twisted Nerve Mission Guide

    By Kyle Christopher GoDecember 22, 20234 Mins Read
    Share
    Facebook Twitter LinkedIn Pinterest Email

    “Twisted Nerve” is the third main mission in Ready Or Not. The LSPD is set on raiding a residence in 213 Park based on a new lead for meth production. Along with your SWAT team, the goal is to shut down the lab, gather evidence, and secure the area filled with cranked-up gunmen.

    Unlike “23 Megabytes a Second,” the map is pretty huge, with the area consisting of 2 houses (brown, white & blue stipes) and a cave hideout in the backyard. Additionally, the suspects are more tricky to deal with, along with a couple of hidden tasks. Read on, and this guide will walk you through every objective in the “Twisted Nerve” mission, including where to find them in Ready Or Not.

    All Twisted Nerve Mission Objectives

    There are a total of 5 main mission objectives to complete in Twisted Nerve, which are as follows:

    • Bring Order to Chaos
    • Rescue All Civilians
    • Arrest 2 Suspects
    • Locate 2 Crystal Meth Laboratories
    • Locate Crystal Meth Storage

    How to Bring Order to Chaos and Rescue All Civilians

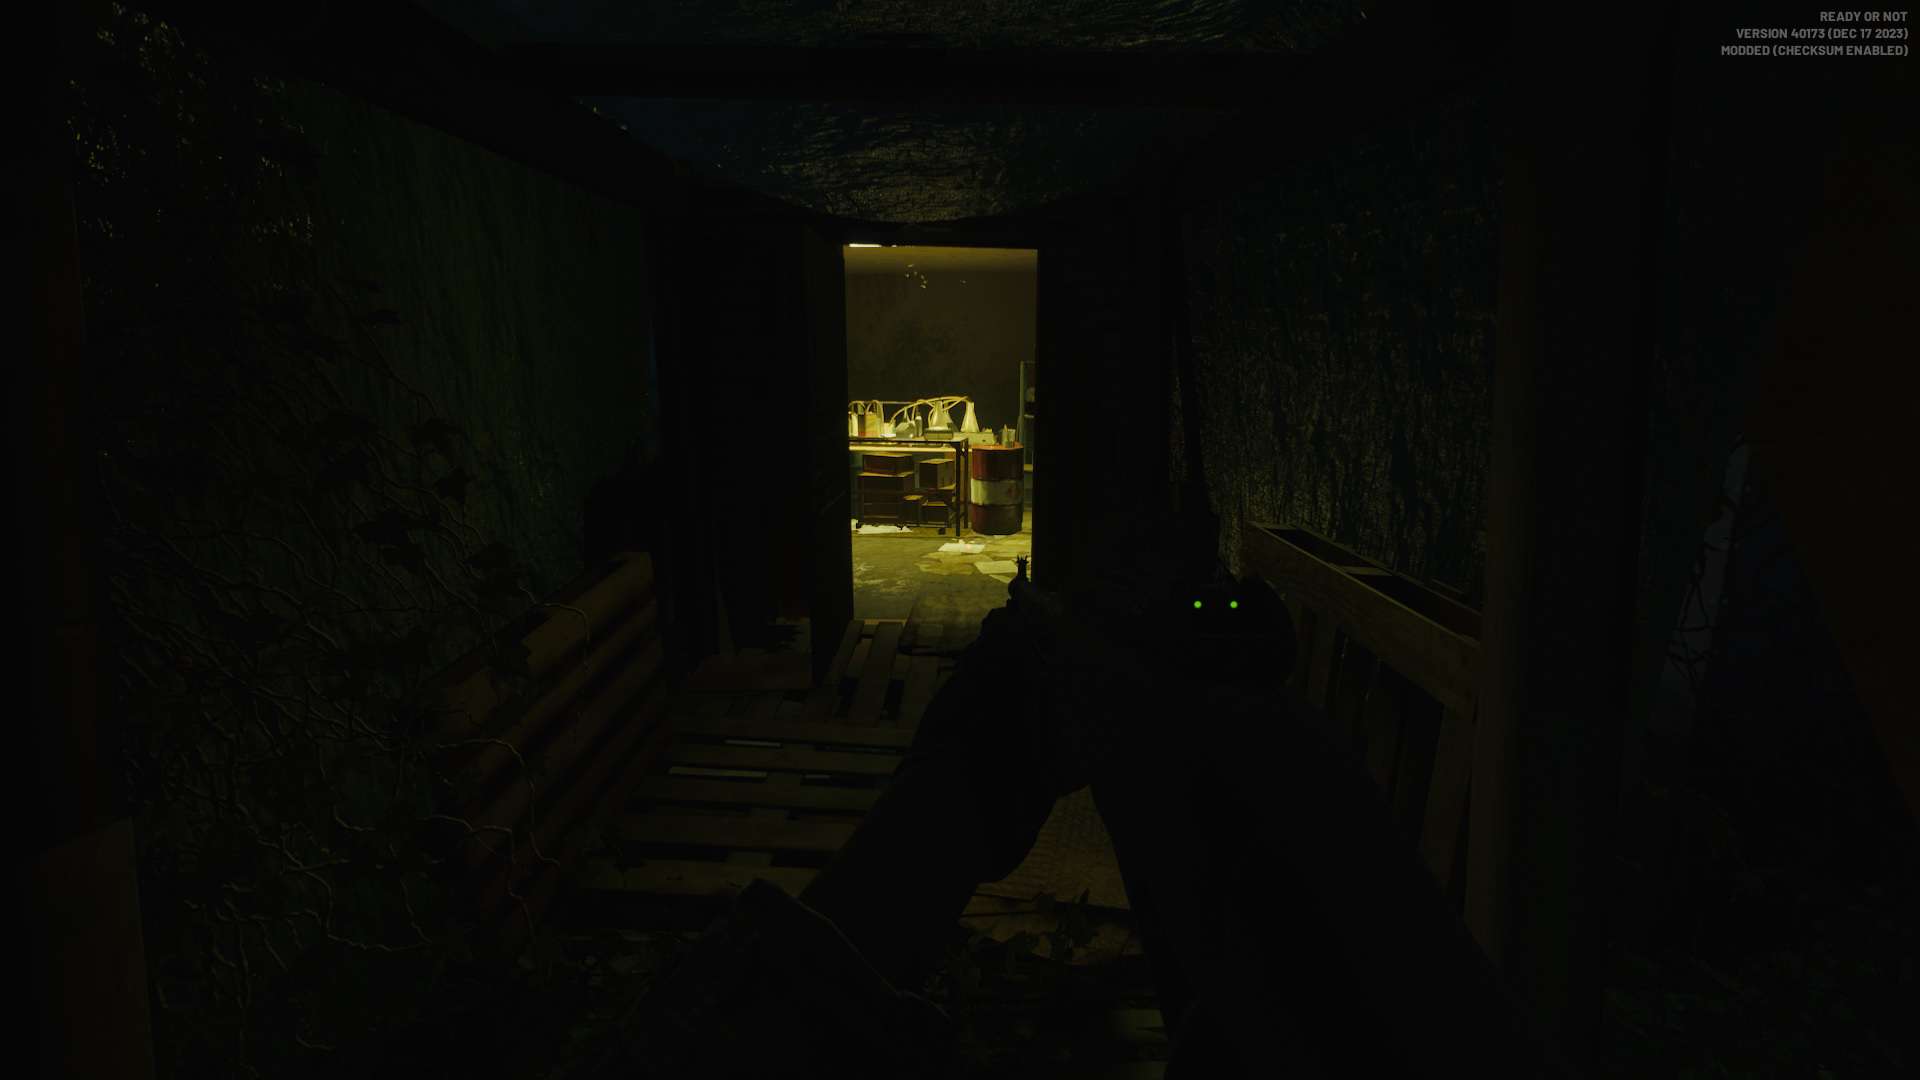
    The safest way to complete these two objectives is by equipping non-lethal weapons to avoid killing civilians, along with deployables that can obstruct armed suspects to increase the chances of restraining them for extra points. It’s best to deal with suspects before completing the other objectives. Make sure to equip NVGs since most parts of the map will have dark areas, especially the cave hideout.

    How to Arrest 2 Suspects

    Arrest 2 Suspects - Ready Or Not Twisted Nerve Mission Objective

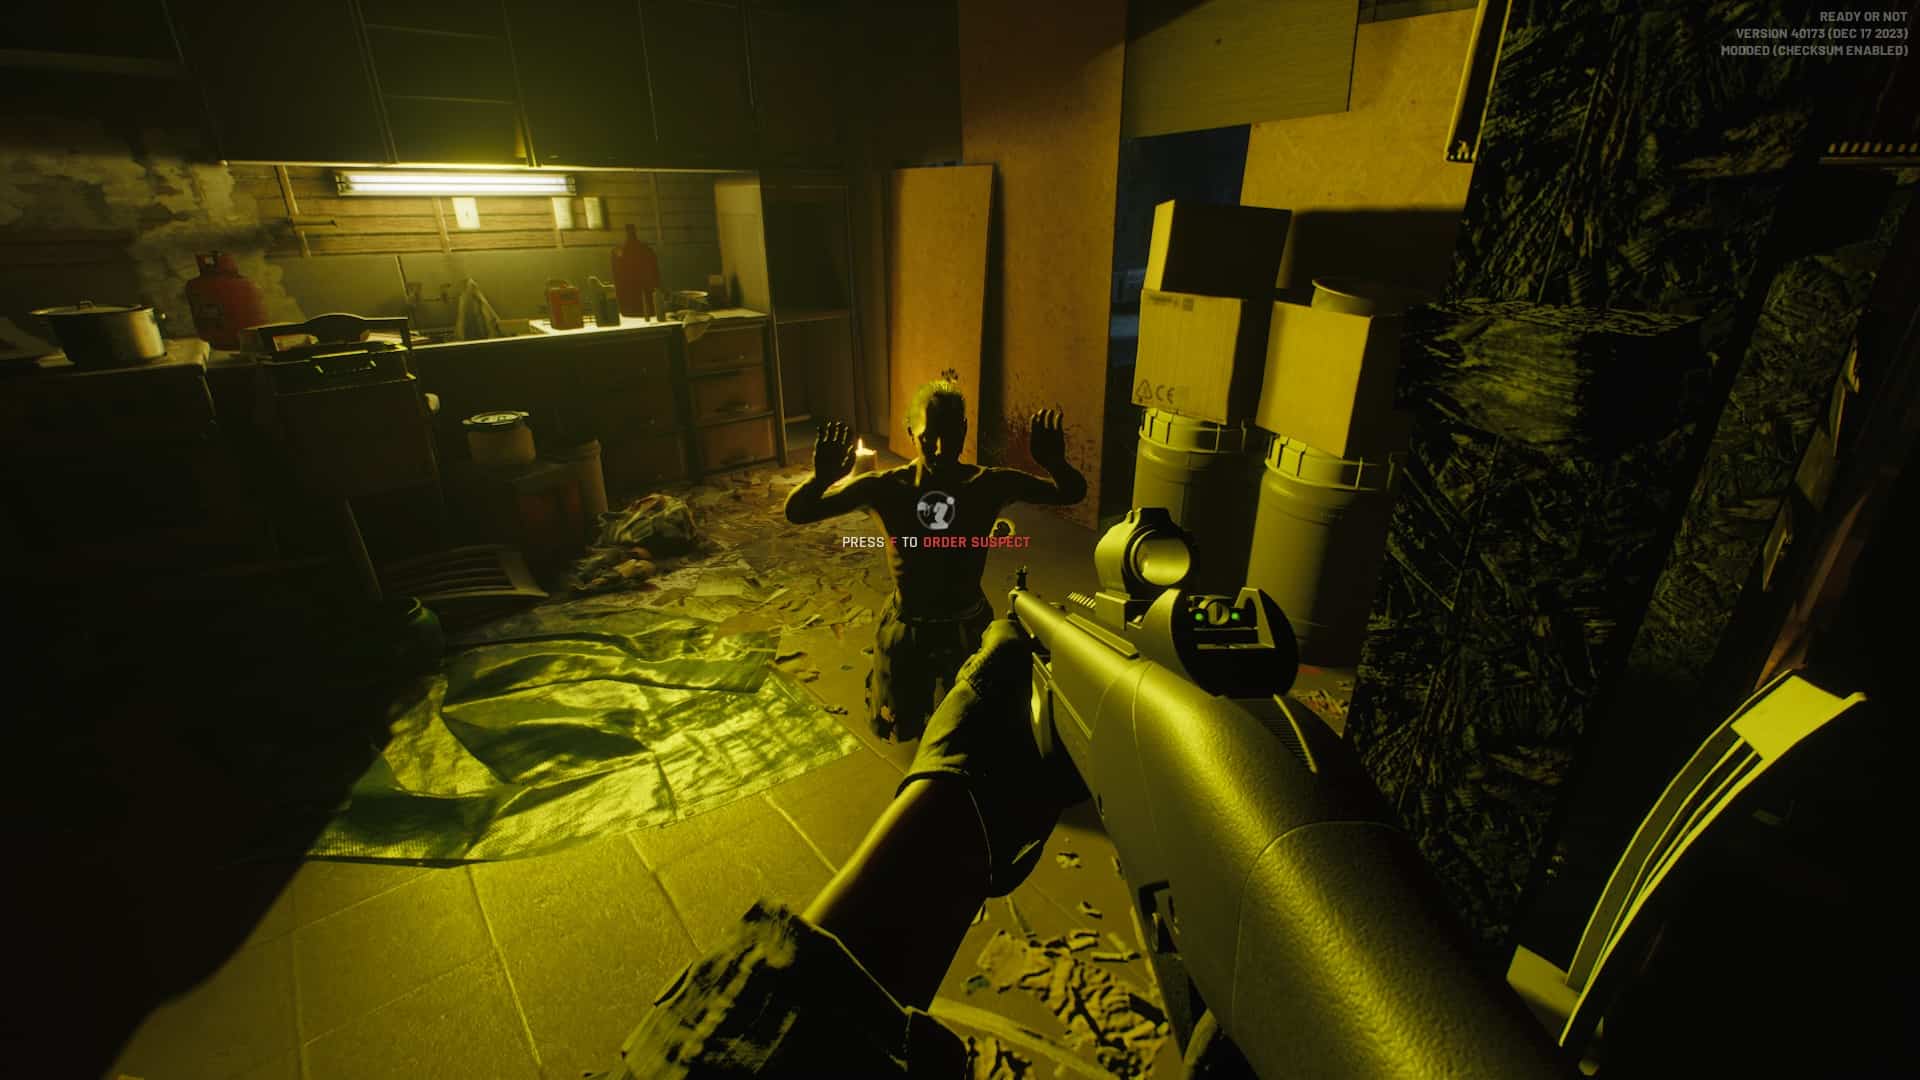
    The best way to arrest suspects in the Twisted Nerve Mission is by using the beanbag shotgun, which has a higher chance of disrupting them and decreasing their morale. If there are multiple enemies in the vicinity, always make use of flashbangs or CS gas. As such, create a bit of distance when trying to restrain suspects, since some of them will stab you or pull out a gun by surprise.

    Where to find 2 Crystal Meth Laboratories

    Where to Find and Report Meth Labaratory - Ready Or Not Twisted Nerve Mission Objective
    First Meth Lab
    Where to Find and Report Meth Labaratory 4 - Ready Or Not Twisted Nerve Mission Objective
    Second Meth Lab
    Where to Find and Report Meth Labaratory 3 - Ready Or Not Twisted Nerve Mission Objective
    Third Meth Lab
    Where to Find and Report Meth Labaratory 2 - Ready Or Not Twisted Nerve Mission Objective
    Fourth Meth Lab

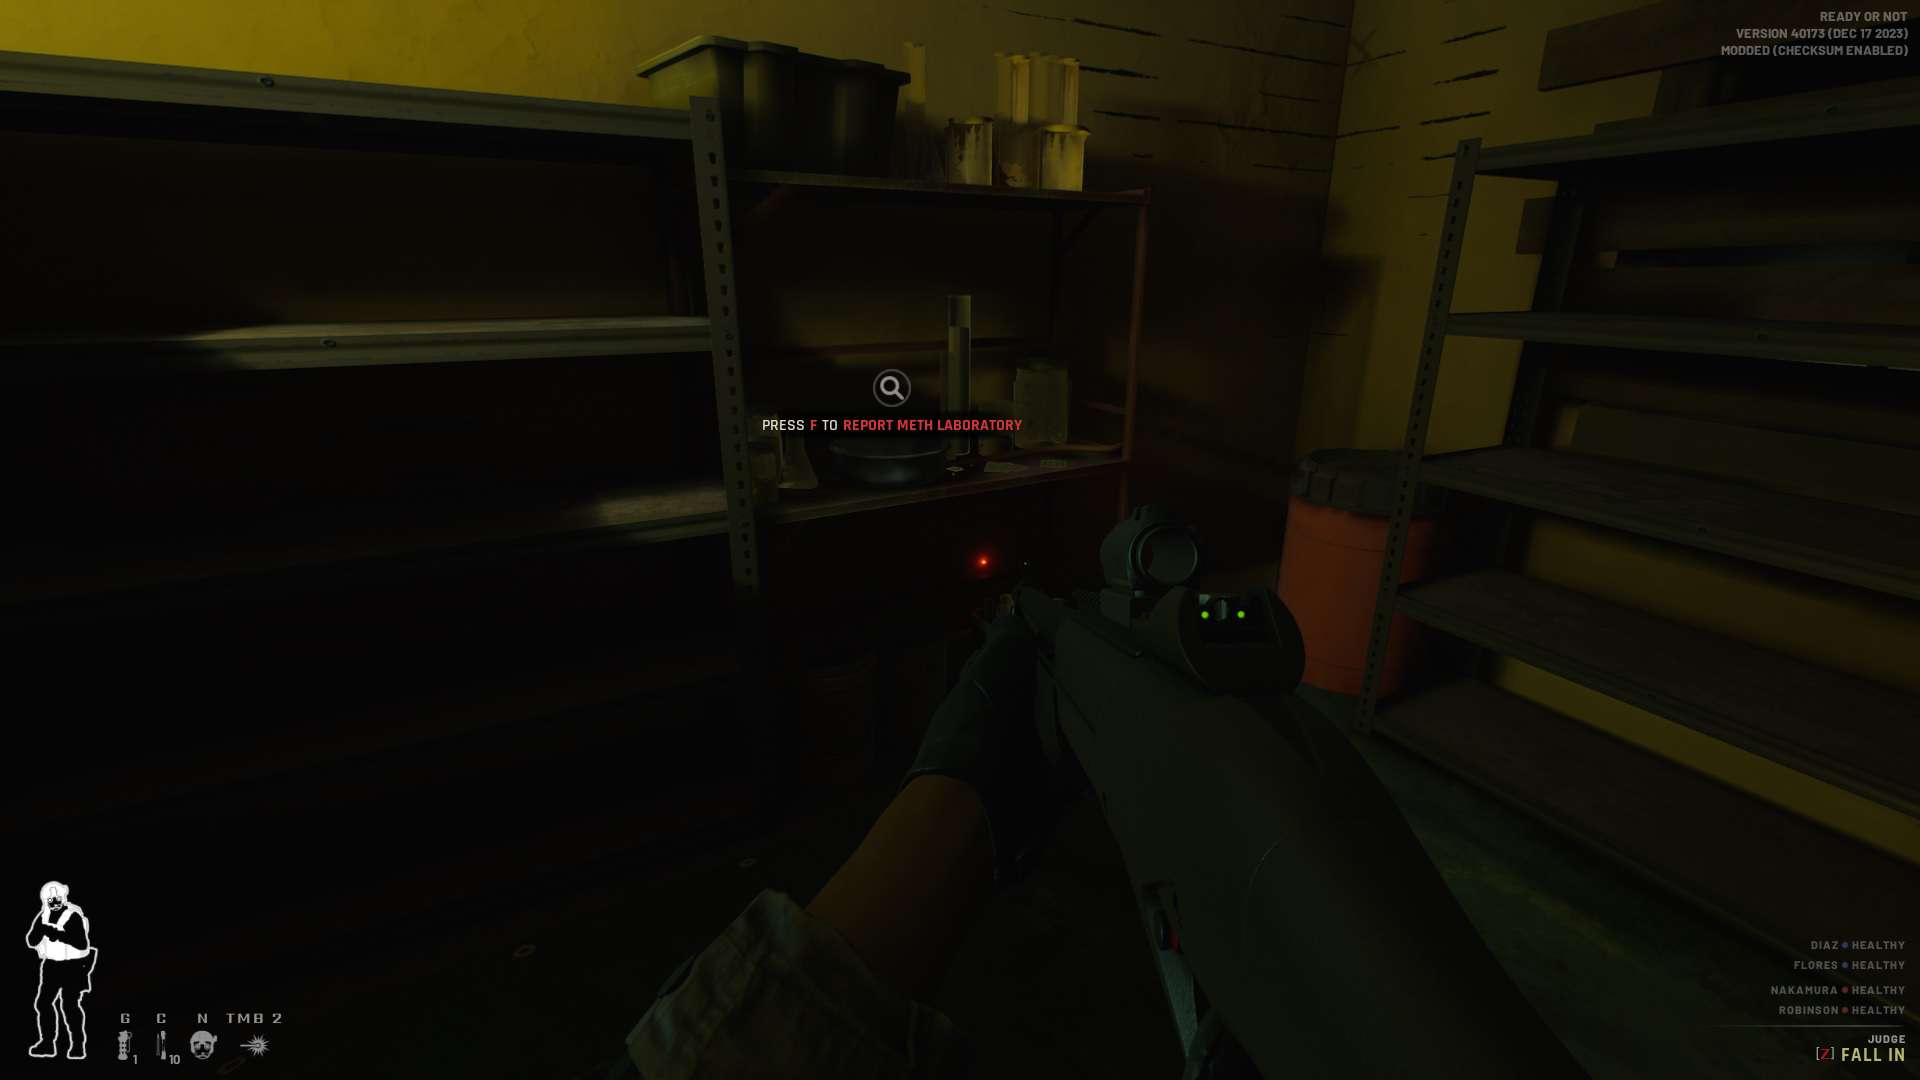
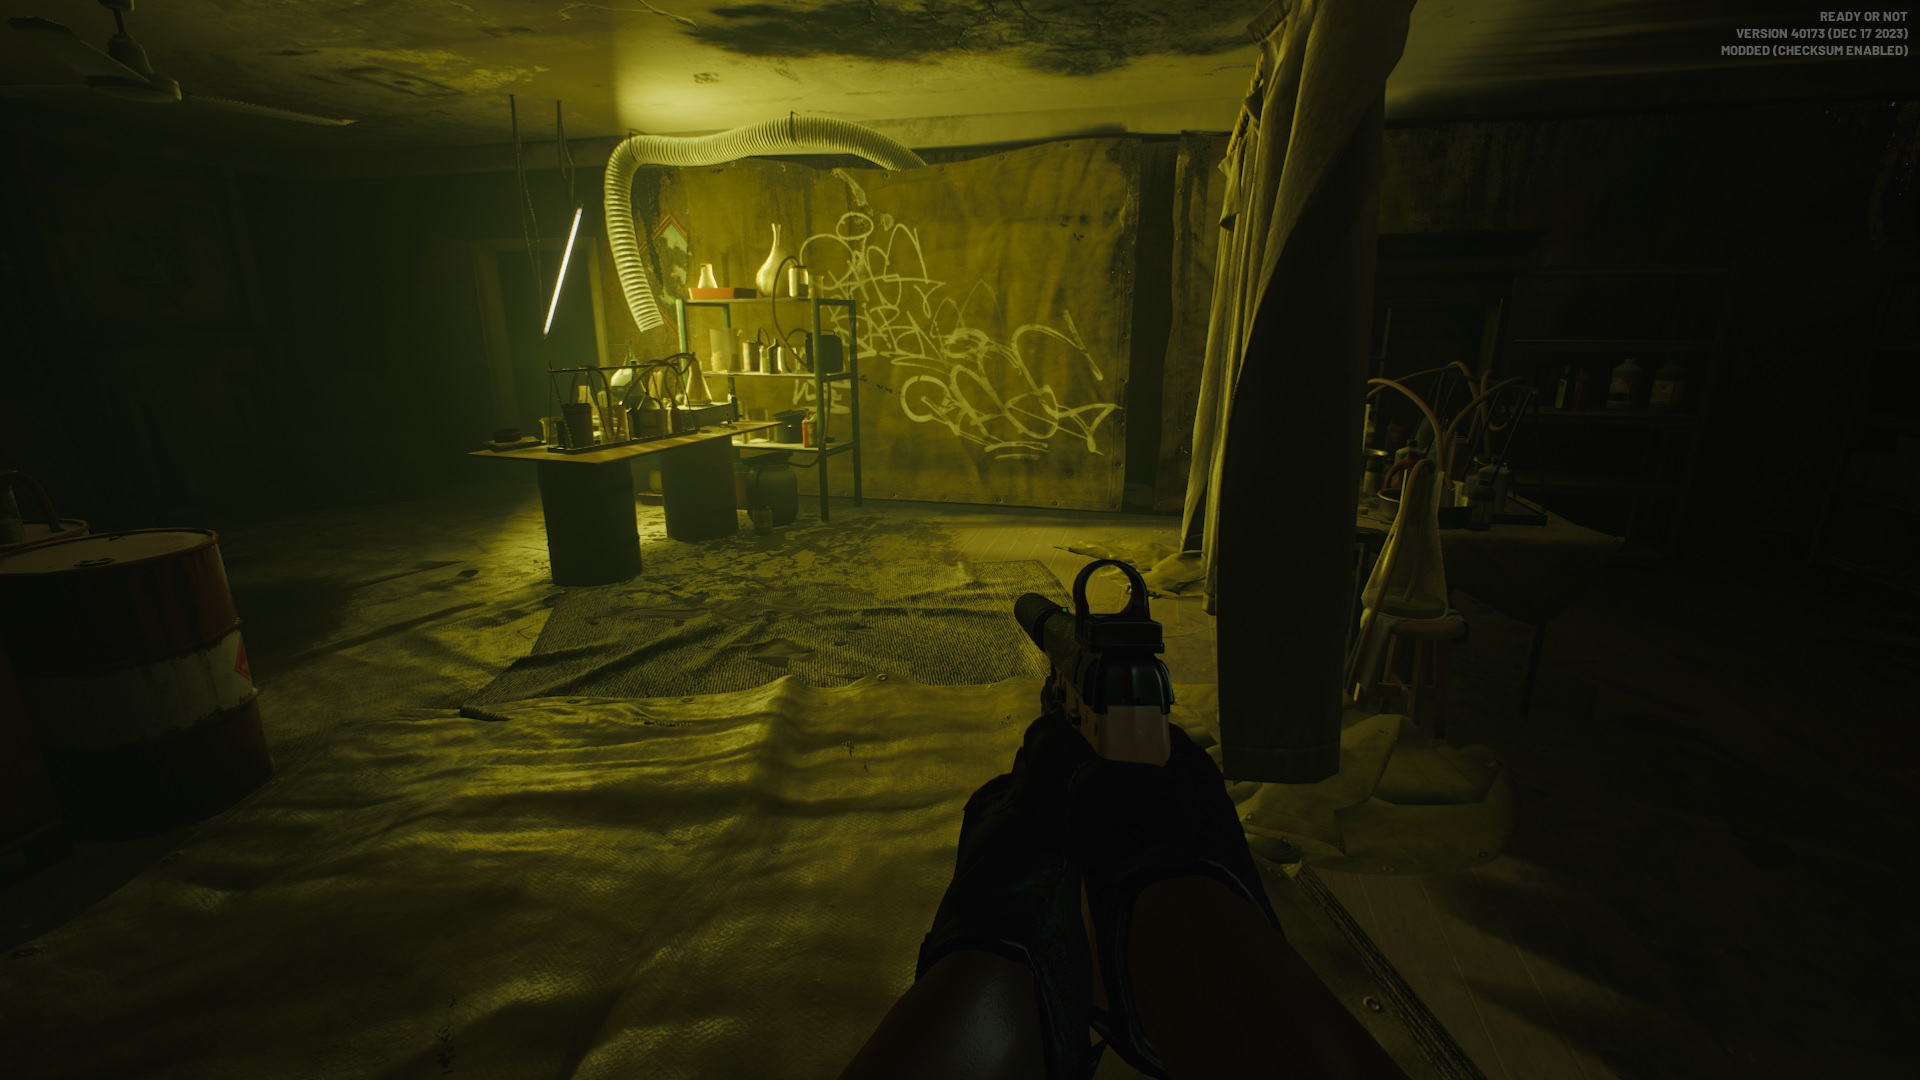
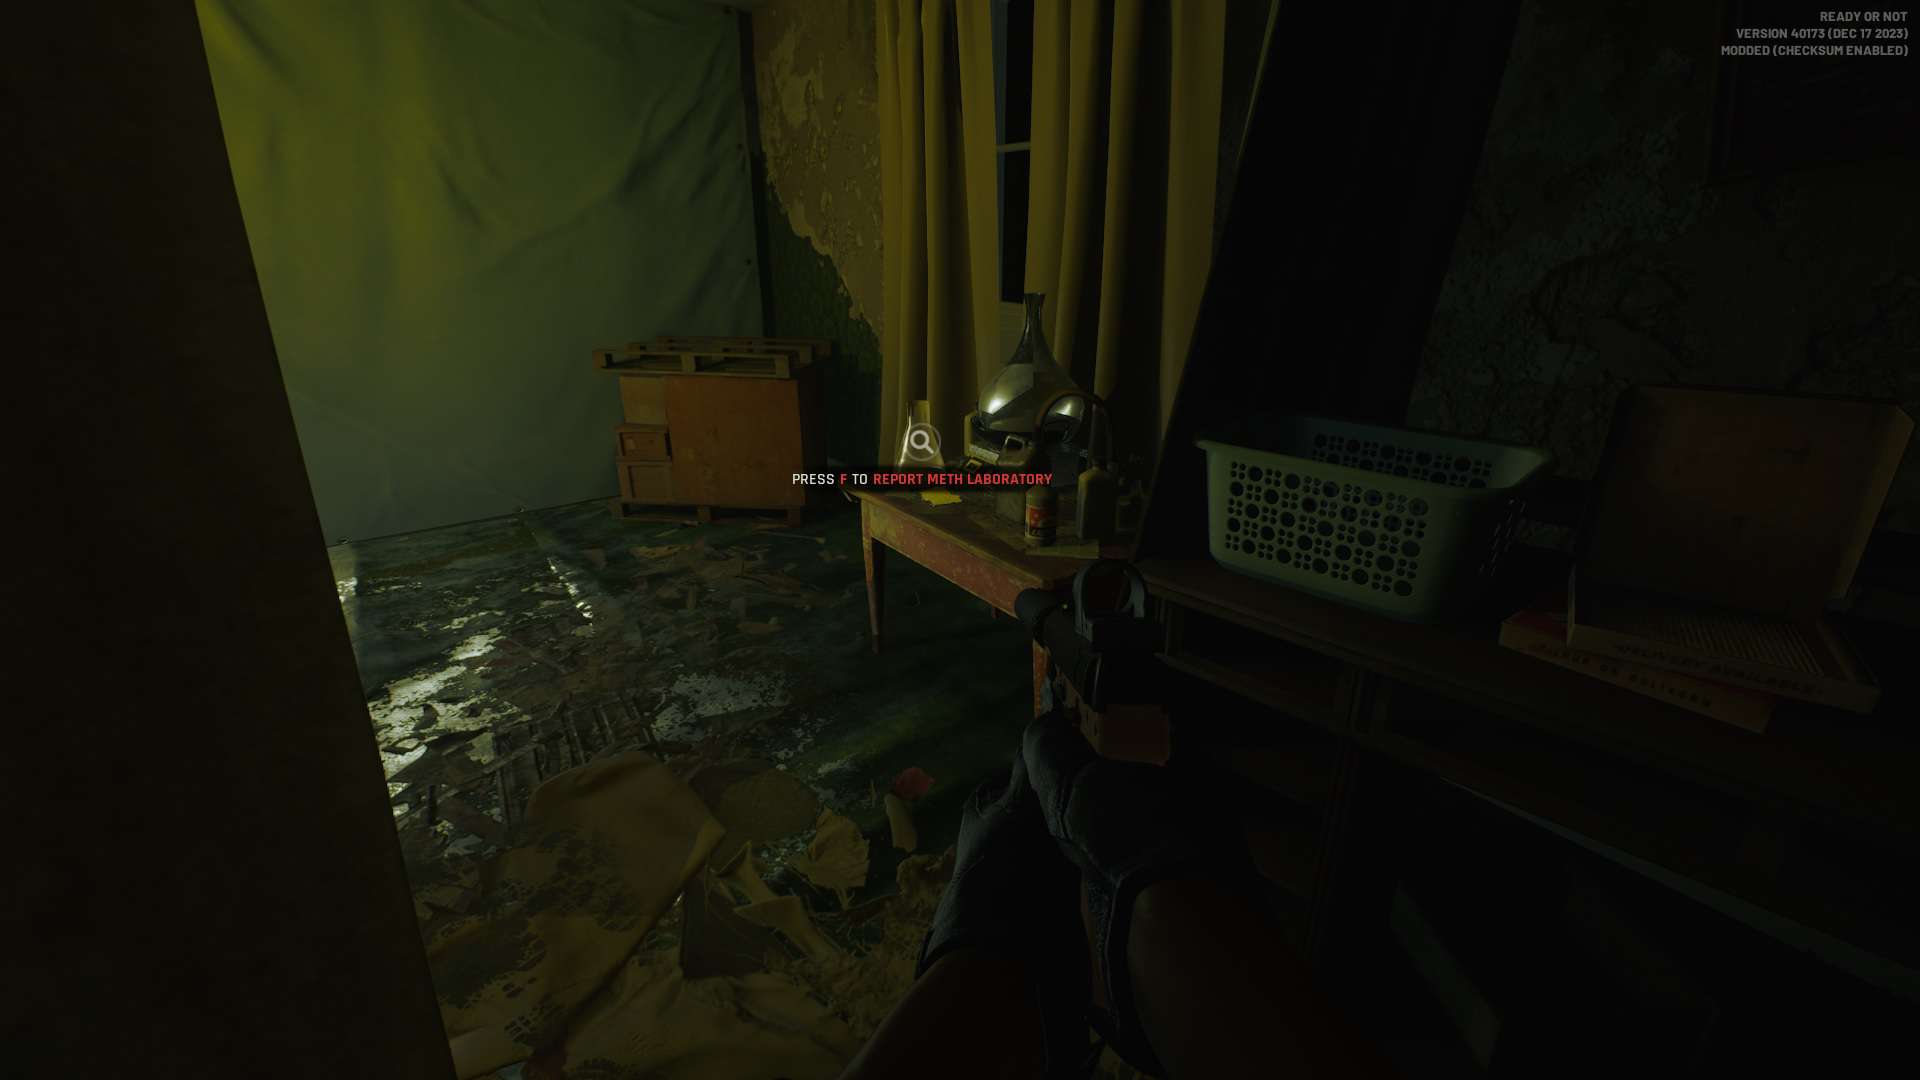
    There are 4 meth labs in total, but the mission only requires you to report 2. Here’s where you can find all meth labs in Twisted Nerve:

    • First Meth Lab – Breach the main front door of the second house and go through the first door to your right to find the meth lab.
    • Second Meth Lab – can be found in the back area of the second house. From the starting point, take the path to the left and head past the cave entrance to reach the backyard. Open the backdoor of the second house and you’ll spot the meth lab.
    • Third Meth Lab – From the first house, go to the second floor and walk across to the bridge connecting to the second house. You’ll find the meth lab once you open the door.
    • Fourth Meth Lab – From the third meth lab, transfer to the first room on the left to find the fourth meth lab.

    Where to find the Crystal Meth Storage

    Where to Find and Report Crystal Meth Storage 2 - Ready Or Not Twisted Nerve Mission Objective
    Where to Find and Report Crystal Meth Storage - Ready Or Not Twisted Nerve Mission Objective

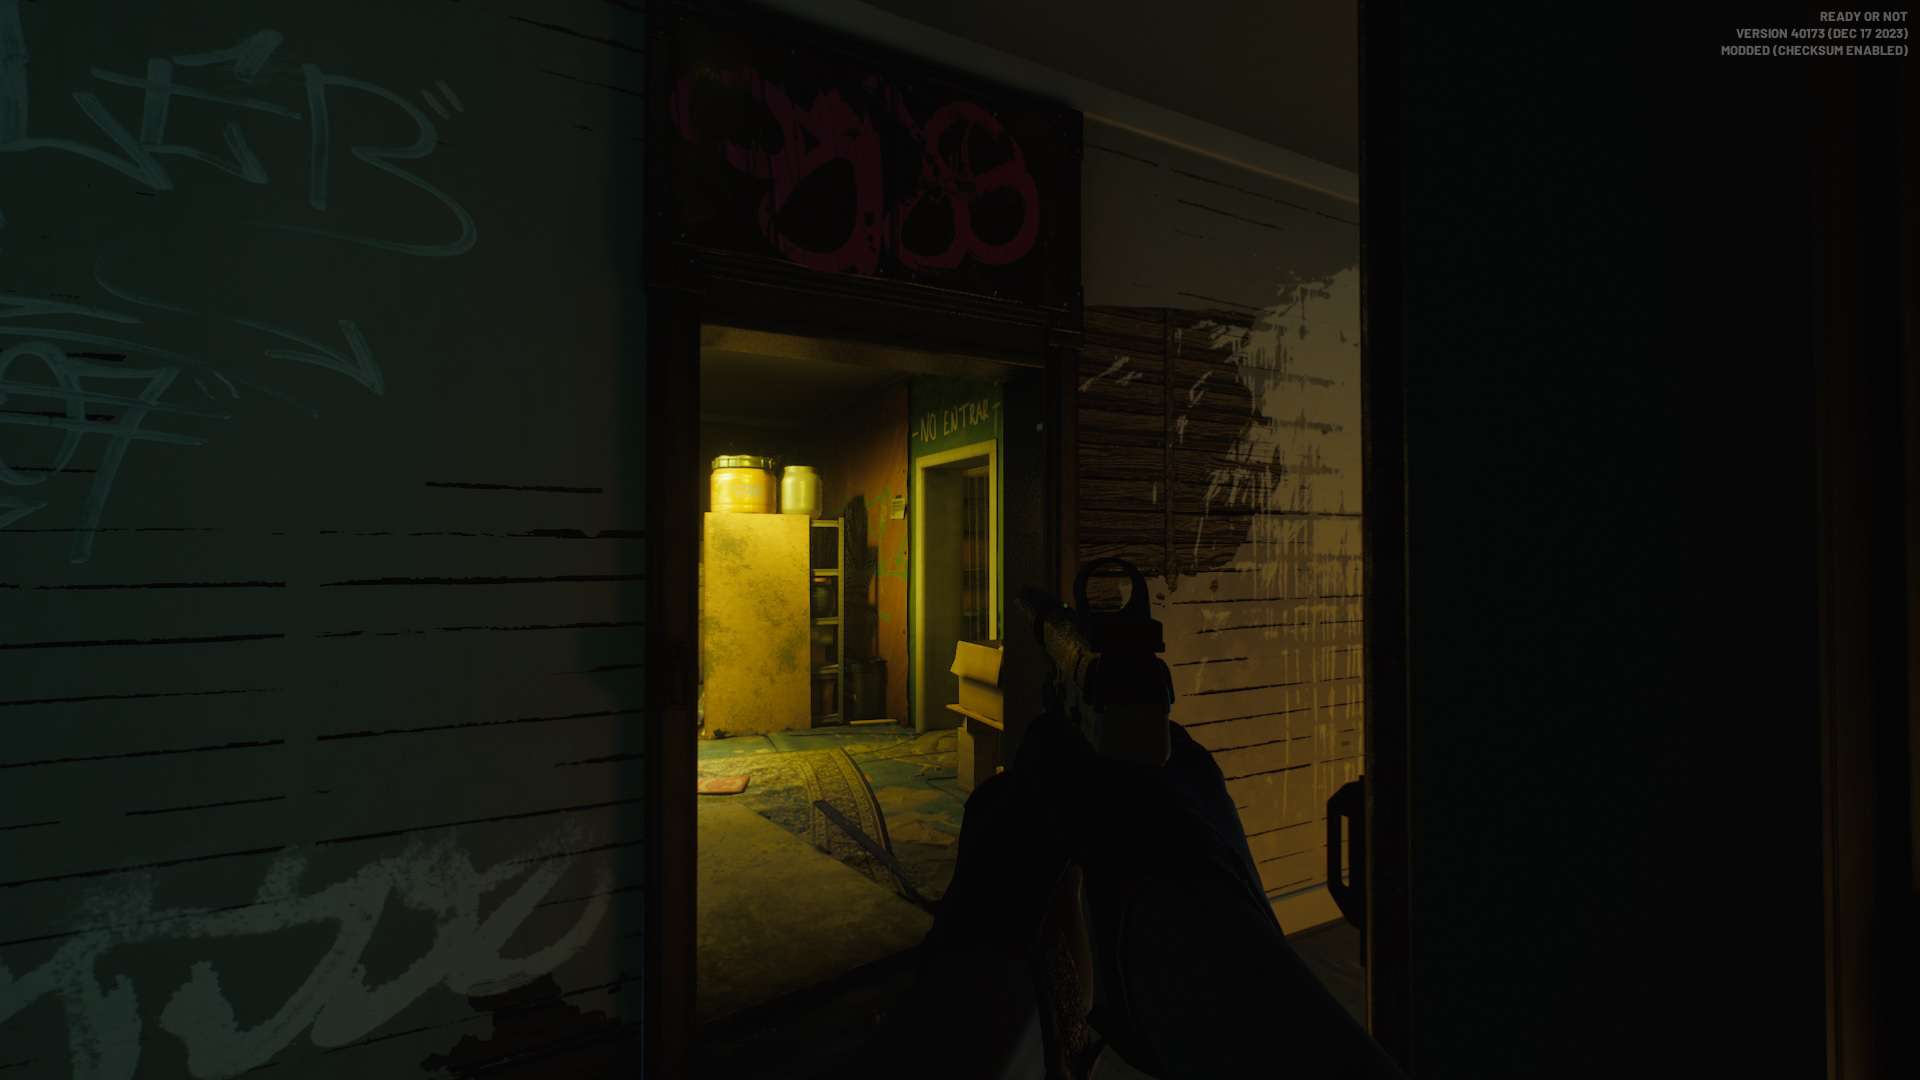
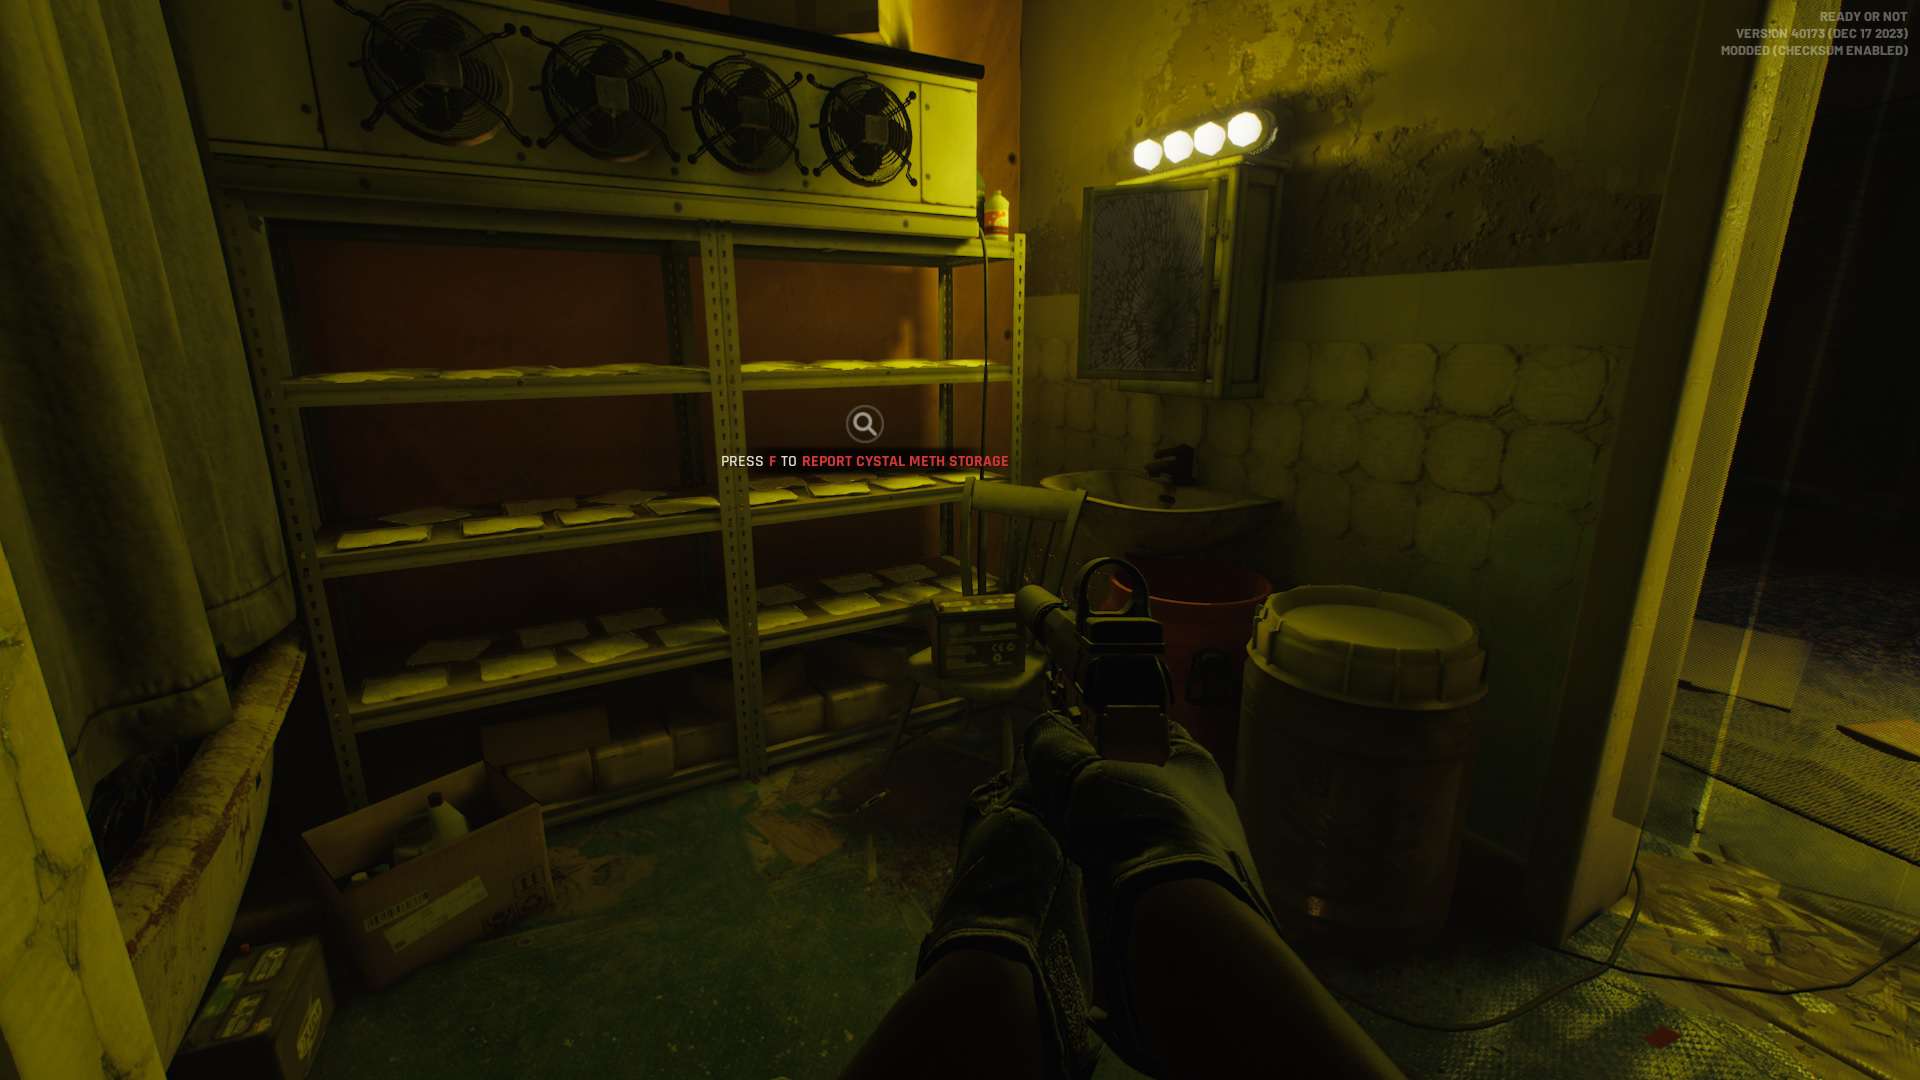
    The Crystal Meth Storage can be found on the second floor of the first house. The easiest route you can take is by going through the main door. Once inside, veer to your right to reach the living room (with the TV on), then climb the stairs to reach the second floor. As you reach the top, go through the hallway behind the stairs, then go inside the left door with red graffiti above it to reach the Crystal Meth Storage.

    All Twisted Nerve Soft (Hidden) Objectives

    There are 2 missable hidden objectives that you can optionally complete during the Twisted Nerve mission:

    • Reported Hidden Money Cache
    • Found Incapacitated Minor

    Where to find the Hidden Money Cache

    Where to Find and Report Money Cache - Ready Or Not Twisted Nerve Mission Objective

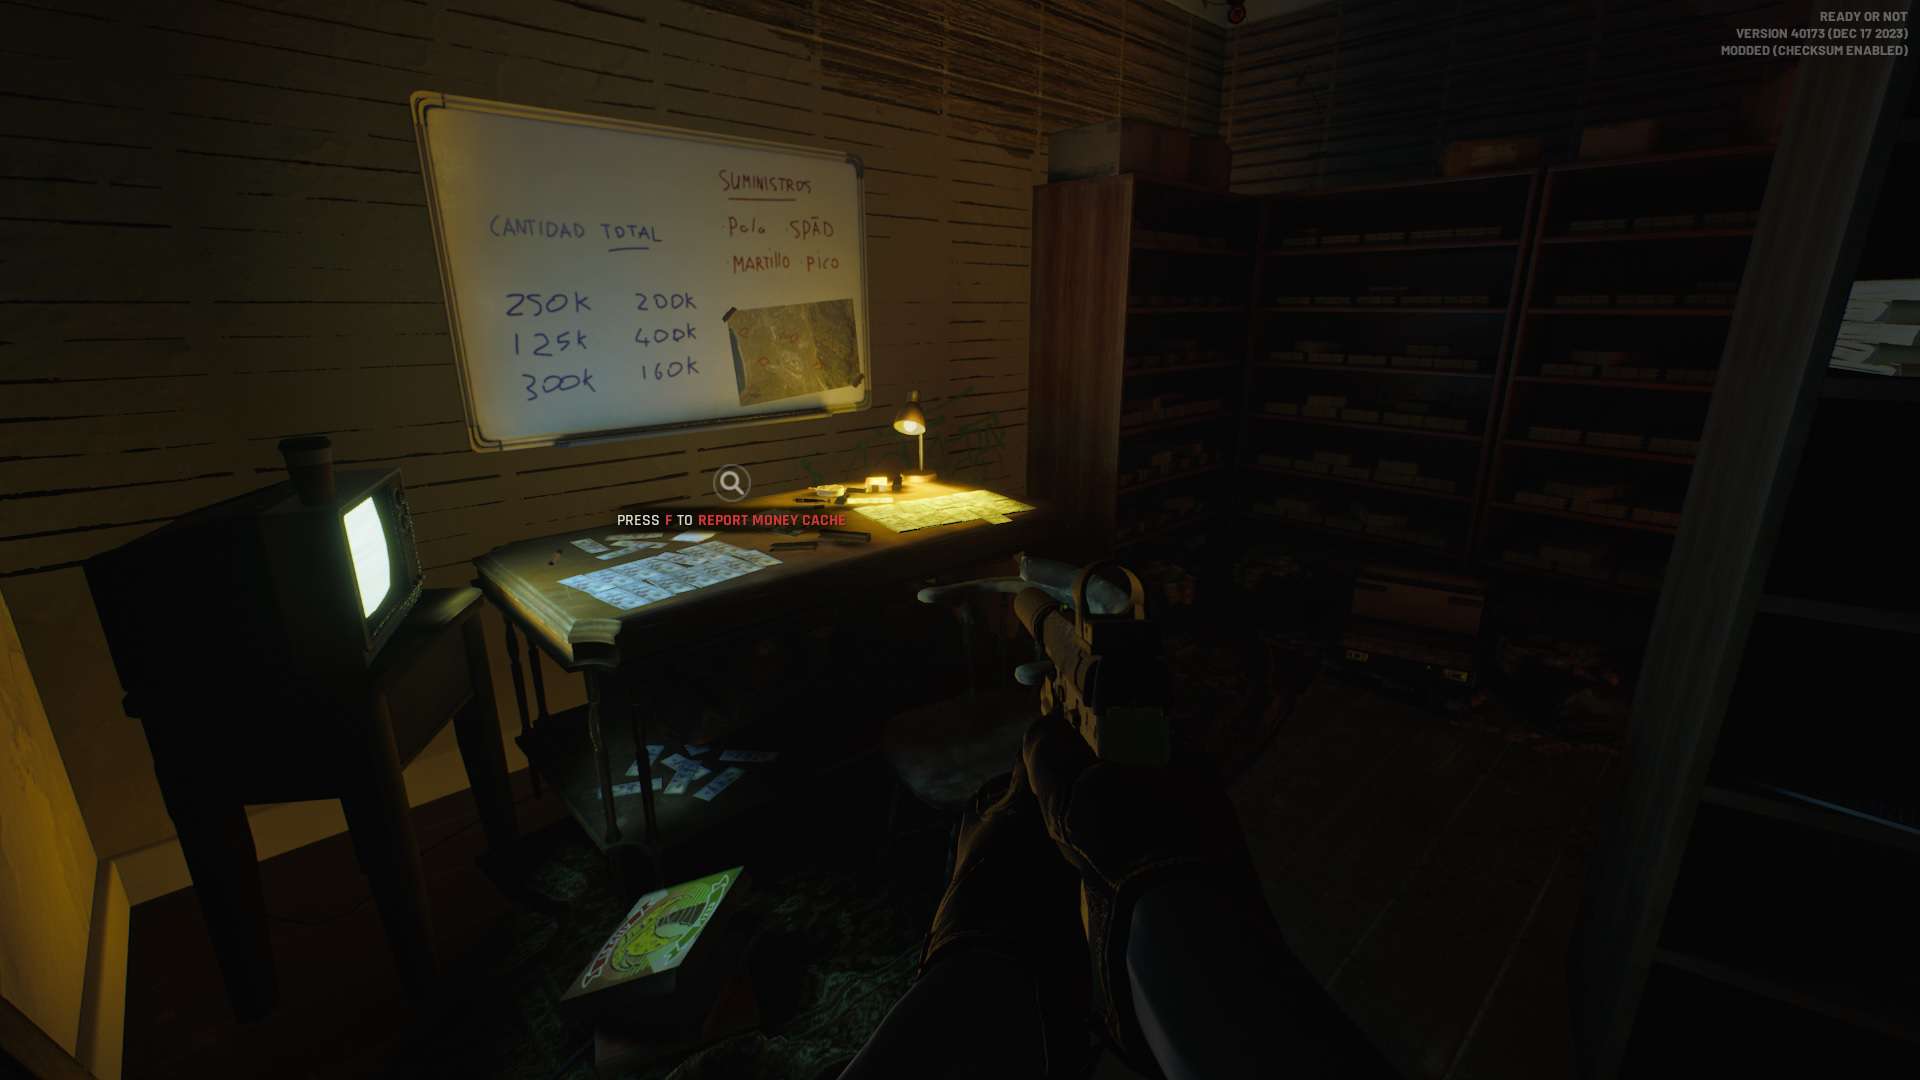
    In the room across from the one where the crystal meth storage was found, you will find a desk piled with cash and a bulletin board that summarizes earnings. Go near it to report it and complete the Hidden Money Cache objective.

    Where to find the Incapacitated Minor

    Where to find the Incapacitated Minor - Ready Or Not Twisted Nerve Mission Objective

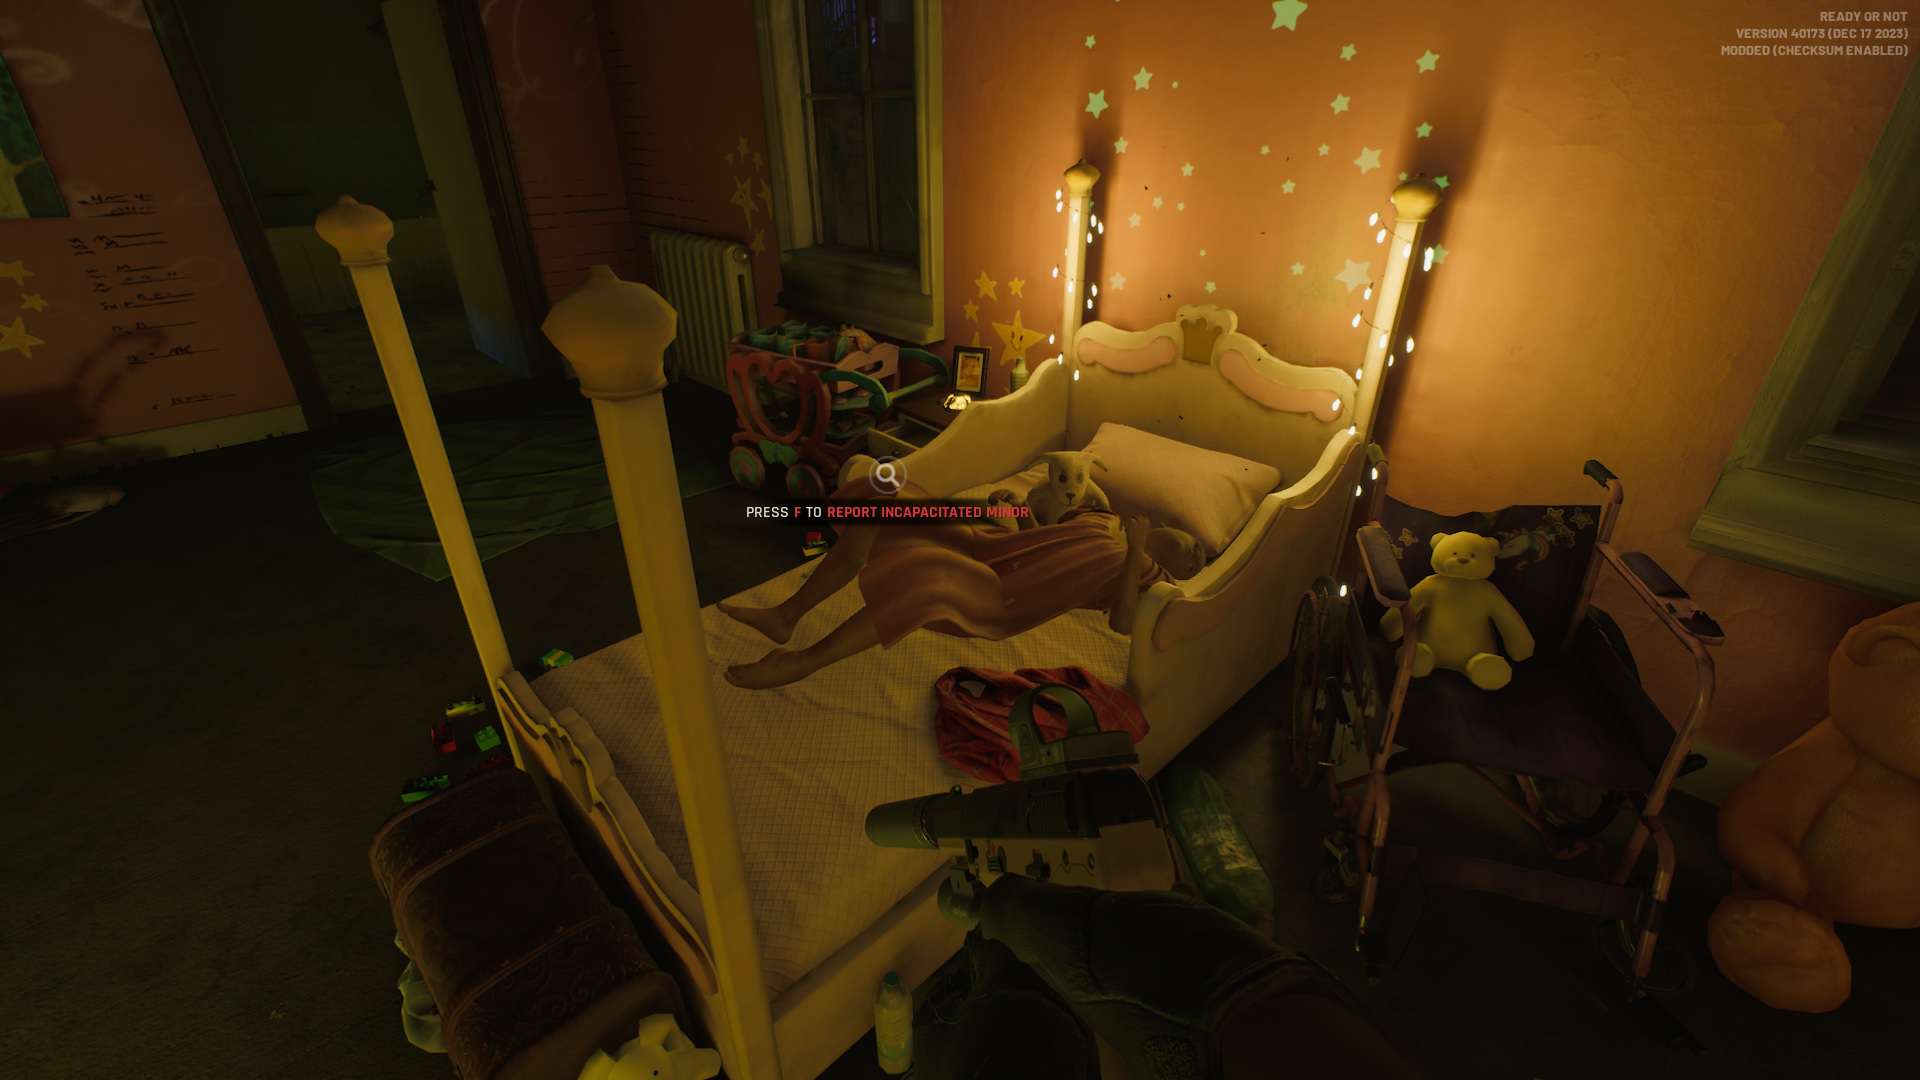
    To find and report the Incapacitated Minor, return to the same corridor where you reported the Hidden Money Cache and enter the room next to it.

    Once every objective is cleared, you’ll be automatically brought to the Twisted Nerve mission’s rating screen and unlock the next main mission, called The Spider.

    Share. Facebook Twitter Pinterest LinkedIn Tumblr Email
    Kyle Christopher Go

    Kyle may come across as reserved, but he's where professionalism meets gaming passion. As a seasoned Apex Legends player, he brings a wealth of experience and knowledge to the table. When he's not dominating the battlefield, you can rely on Kyle to provide insightful analysis, strategic tips, and well-informed perspectives on the gaming industry.

    Related Posts
    Ready or Not Sinuous Trail Walkthrough featured image

    Ready or Not: Sinuous Trail Walkthrough

    December 22, 2023
    Ready or Not The Spider Walkthrough featured image

    Ready or Not: The Spider Mission Walkthrough

    December 22, 2023
    Ready or Not Ides of March walkthrough featured

    Ready or Not: Ides of March Mission Walkthrough

    December 21, 2023
    Sirus Exclusives
    Onimusha 2 Samurai's Destiny First Impressions Featured Image

    Onimusha 2 Samurai’s Destiny – Hands-On Impressions

    April 22, 2025

    5 Animes Making Their Debut In Super Robot Wars Y

    April 22, 2025

    10 Mecha Animes That Should Be Added in Super Robot Wars Y

    April 15, 2025
    R.E.P.O. Early Access Review Featured Image

    R.E.P.O – Early Access Review

    April 9, 2025
    About Us
    About Us

    Sirus Gaming is a team of passionate gamers delivering the latest news, reviews, and insights on the gaming industry.

    Find us on OpenCritic, and we're proud to have been a voting jury in The Game Awards since 2022.

    Contact us: [email protected]

    Check Our Reviews
    9

    DOOM: The Dark Ages – Review

    May 9, 2025
    Revenge-of-the-Savage-Planet-featured
    8

    Revenge of the Savage Planet – Review

    May 5, 2025
    Clair Obscur_Expedition 33 Review Featured Image
    10

    Clair Obscur Expedition 33 – Review

    April 23, 2025
    Exclusive Content
    Onimusha 2 Samurai's Destiny First Impressions Featured Image

    Onimusha 2 Samurai’s Destiny – Hands-On Impressions

    April 22, 2025

    5 Animes Making Their Debut In Super Robot Wars Y

    April 22, 2025

    10 Mecha Animes That Should Be Added in Super Robot Wars Y

    April 15, 2025
    Facebook X (Twitter) YouTube
    • Privacy Policy
    • Review Policy
    • Contact
    © 2025 Sirus Gaming. Designed by Sirus Media Digital.

    Type above and press Enter to search. Press Esc to cancel.