
Cyberpunk 2077 Gig: Treating Symptoms is one of the Gigs you’ll be doing for Mr. Hands in the Phantom Liberty DLC. New trouble with the Voodoo Boys arises where V is asked to eliminate a blackmailer named Milko Alexis to help a certain Indira Barazza. You’ll have to make some pretty important decisions in this Gig that lead to different outcomes.
In this guide, I’ll be teaching you how to complete the Treating Symptoms Gig the best way possible, including the crucial decision involving Milko, and the rewards gained upon completion.
In this guide:
Treating Symptoms Walkthrough
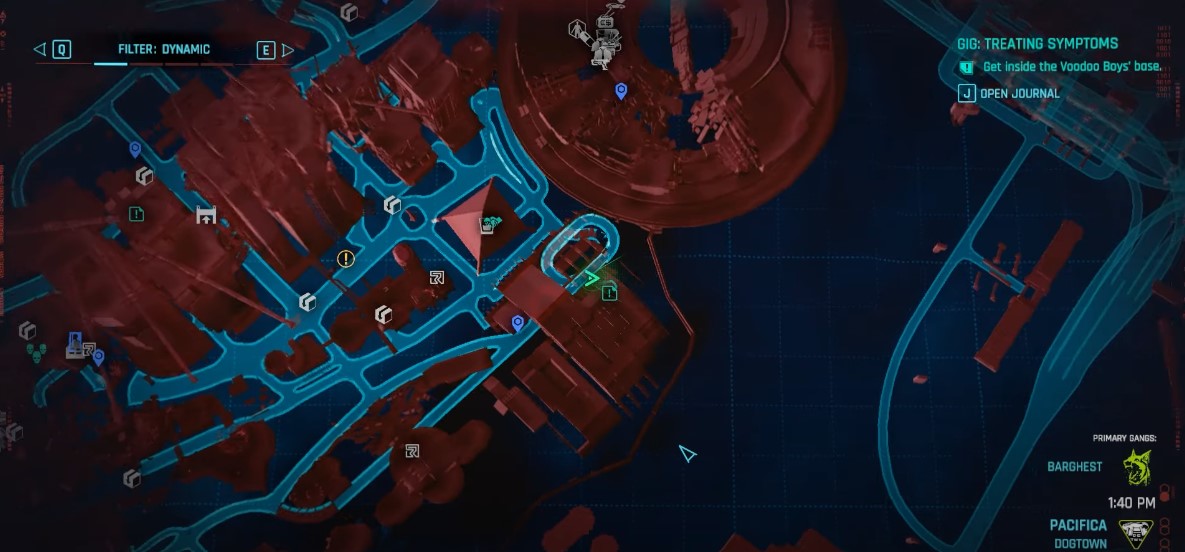
The Treating Symptoms Gig will be available from Mr. Hands after completing the opening mission called “Spider and the Fly” of the Cyberpunk 2077 Phantom Liberty DLC. This Gig can be started by heading to the green Gig icon near the Voodoo Boys base within the Luxor High Wellness Spa. Your mission objective is to eliminate the elusive Milko Alexis.
Once you’re at the location, you’ll be contacted by Mr. Hands who’ll tell you about a nightmare he had regarding his lungs being hacked. He will provide you with the details of the task to eliminate the Voodoo Boys blackmailer by the name of Milko Alexis to protect his client.
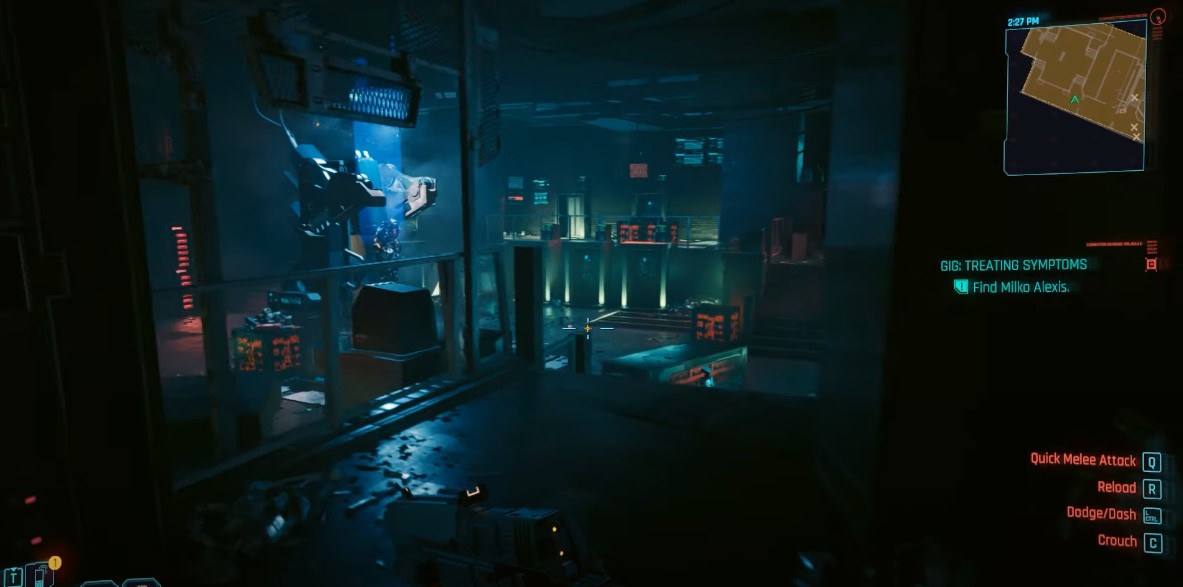
As you approach the entrance, you’ll encounter a Voodoo Boys guard standing guard outside. A skirmish with this guard is inevitable before you can proceed through the front door. You can stealth your way through the base at first to take out as many of the Voodoo Boys as you can. However this will be tough unless you’ve really upgraded your hacking skills to deal with the cameras and drones in the vicinity. Or you can also just go in guns blazing if it’s to your preference. Either way, prepare for a tough fight.
After clearing the area, go up the stairs and into the doorway to the left side. You’ll arrive in a small office with a Griffin Drone and some more Voodoo Boys looking to halt your progress in the hallway to your right. Take them out and keep moving.
Eventually, you’ll arrive in an arena full of deactivated robots. Entering this location will trigger the Robot R Mk. 2 to power up and challenge you to a boss fight. You can’t damage this boss while it’s powering up so you’ll have to wait until it’s on the ground and the fight properly starts.
How to beat Robot R Mk. 2 Boss Fight
As soon as Robot R Mk.2 activates, you won’t be able to leave until you beat it. It’s a good idea to save your game before you continue. The best way to beat Robot R Mk. 2 is by keeping your distance as it will always attempt to close in on you throughout the fight. Stay near the edges of the room, so you can react quickly when new robots wake up. Robot R Mk.2 has a lot of health and tough armor, so it’ll take time to beat it. If you’ve got a perk called Vulnerability Analytics, use it to find Robot R Mk.2’s weak spots.
You won’t be fighting the Robot R Mk. 2 by itself as it will also awaken other robots around it during the fight. You should focus on taking out the smaller robots first because they’re easier to deal with, and it stops them from ganging up on you.
These robots, including the boss, are weak against electricity. If you have weapons or gadgets that use electricity, use them. You can also hack the robots to disable them or mess up their weapons. There are also servers in the room that you can destroy, and that will damage all the robots nearby.
Once you manage to beat the Robot R Mk. 2 boss, the other robots will also power down. Make sure to loot the remains of the boss for some Tier 2 item components, the Smart Link Cyberware, and as well as the Iconic (Tier 3) Ogou Smart Pistol. The Ogou Smart Pistol is outfitted with explosive rounds and has a +50% Headshot Damage, +25% Armor Penetration, and +50% Crit Damage so it’s a solid weapon.

After you’ve beaten the boss, you can keep going with your mission to find Milko Alexis. Head to past the double doors at the back of the room and take the stairs down. You’ll eventually arrive in a room with two people. Your target, Milko Alexis, is on the netrunner station with another netrunner hooked up to him.
From here, you can choose to talk to the netrunner, Alan, beside your target or just shoot Milko to get it done. If you pick to get some information from Alan first, he’ll tell you about other Voodoo Boys victims besides Indira Barazza and that he’s with NetWatch as an undercover agent. Alan tells you that Milko is just a small part of a bigger problem, and he wants to take down the big boss at the top. To achieve that, he needs Milko to be alive.
Here’s where you have to make an important decision whether you choose to spare Milko and follow Alan’s advice, or kill one of them, is entirely up to you.
Should You Spare Milko?
Depending on your dialogue choices, the outcomes will be different on each of the choices below:
Spare Milko Choice
Choosing to spare Milko and go along with Alan’s plan is the best option. It’s generally more worth it to spare Milko and let the NetWatch agent do his work. You’ll complete Treating Symptoms either way and NetWatch will contact you later to give you extra credits.
Once you enter the room Milko and Alan are in, talk to the netrunner first. He’ll tell you about how he needs Milko alive to ensure that no future victims are blackmailed by the Voodoo Boys like your client. Johnny will appear and tell you that he’s full of it, but you can just ignore him and spare Milko. Here are the dialogue choices to achieve this outcome:
- “He’s a dead man anyway.”
- “Maybe. Do you know Bryce Mosley?”
- “Good luck with that.”
- “I came across some combat bots.”
- “Sure are confident.”
- “Fine, finish your op.”
This option will also protect your client, Indira Barazza, as she’ll be placed on the NetWatch protection list. Mr. Hands will be impressed with how you’ve handled the situation.
Kill Milko Choice
Another path that you can take is to kill Milko. Once you enter the room Milko and Alan are in, you can pretty much go ahead and just shoot the guy lying down on the netrunner station anytime. This accomplishes the initial objectives of the Treating Symptom Gig. This option protects Indira Barazza and Mr. Hands will tell you a good job. However, NetWatch isn’t going to cut you a bonus. Alan will be angry that you took out Milko, whom he spent months shadowing, and demands you leave.
Kill Alan Choice
Killing Alan is another scenario that is only triggered when choosing certain dialogue choices. Once you enter the room Milko and Alan are in, you can pretty much kill Alan at any time. However, he will turn hostile if you choose the following responses:
- “He’s a dead man anyway.”
- “Maybe. Do you know Bryce Mosley?”
- “Good luck with that.”
- “I came across some combat bots.”
- “Sure are confident.”
- “Here to protect my client.”
Alan will attack you with this choice and you’ll have to eliminate him. You can pick up Alan’s Keycard and his Dog Tag from his corpse. This won’t change anything with NetWatch and you’ll still get the same rewards and outcome as killing Milko.
What you do here is up to you but once you’re done, head out from the back door and Mr. Hands will call you. The Treating Symptoms Gig is done.
Treating Symptoms Rewards: 8,000 eddies, +1,300 XP
For more Cyberpunk 2077 Phantom Liberty Gig Walkthroughs:


