
We Were Here Forever is the fourth installment of the We Were Here series. It is a co-op puzzle game where two players have to help each other out in solving puzzles while navigating through mazes and obstacles within a castle.
This guide will cover the puzzles in the Royal Cemetery, one of the three locations where you and your partner need to go to search for a missing part for the astrolabe machine in the chapel. Check out our other We Were Here Forever guides for the previous challenges:
- We Were Here Forever Walkthrough Chapter 1 (Part 1)
- We Were Here Forever Walkthrough Chapter 1 (Part 2)
- We Were Here Forever Walkthrough Chapter 2
- We Were Here Forever Walkthrough Ruins of Rockbury
- We Were Here Forever Walkthrough The Nautilus (Part 1)
- We Were Here Forever Walkthrough The Nautilus (Part 2)
How to Solve We Were Here Forever Royal Cemetery Puzzles
We pick things up right after your escape from the chapel. After riding the cart to go down from the chapel, you arrive at the abandoned village which will serve as the hub area. Heading straight past the village statue from the chapel will lead to the Royal Cemetery.
Note: if you have decided to do a different location first, make sure to deposit the astrolabe piece into the astrolabe machine in the chapel to be able to proceed to the other locations.
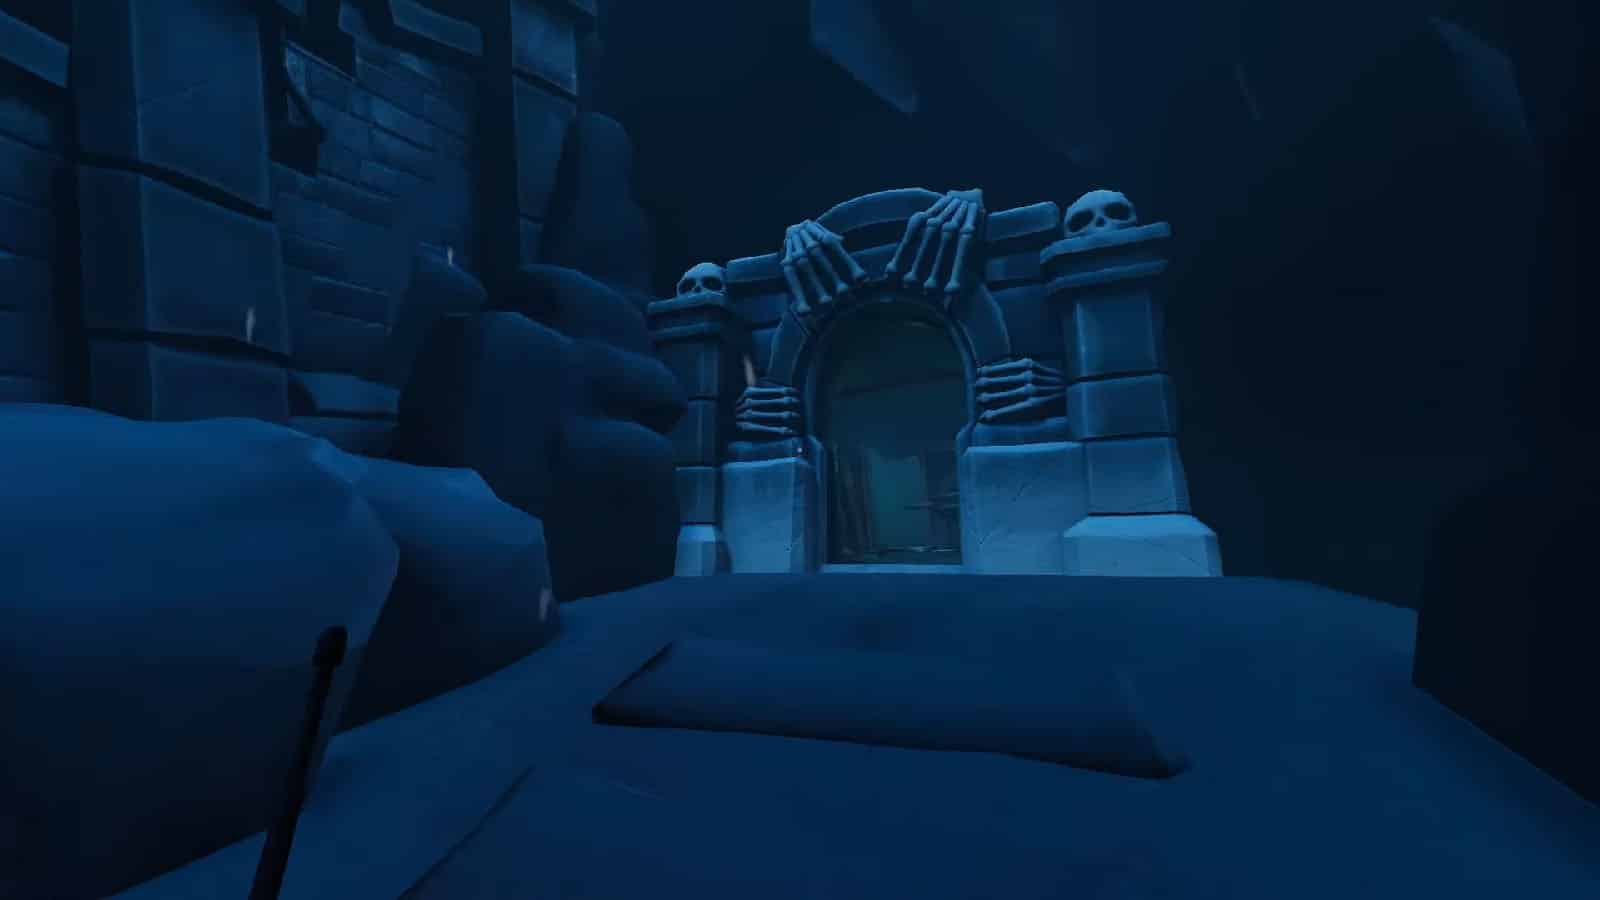
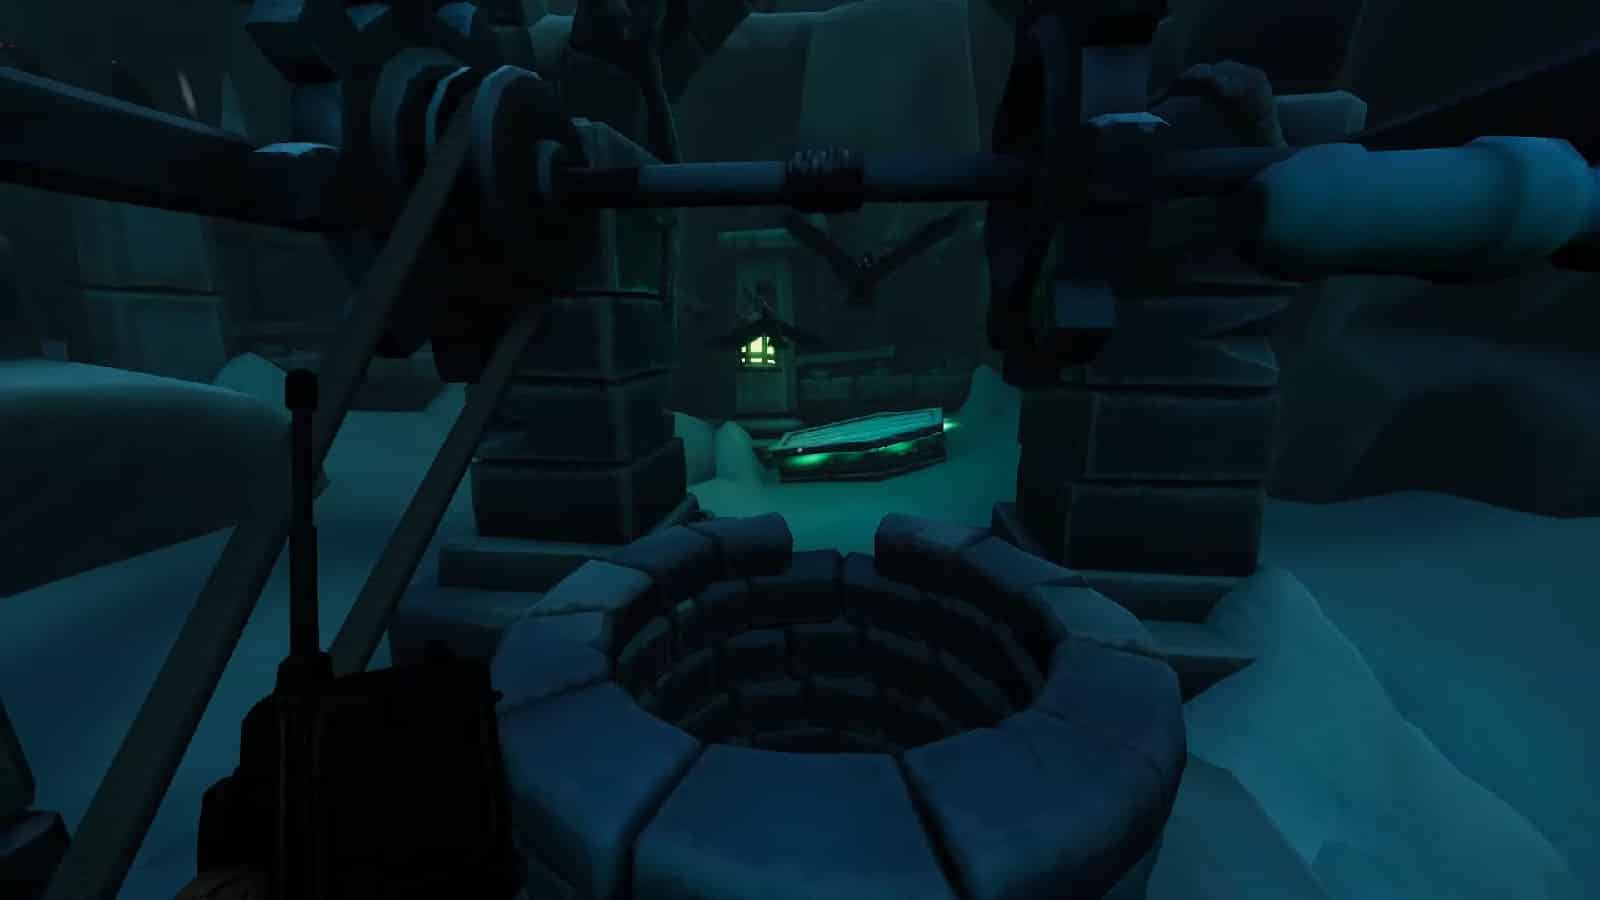
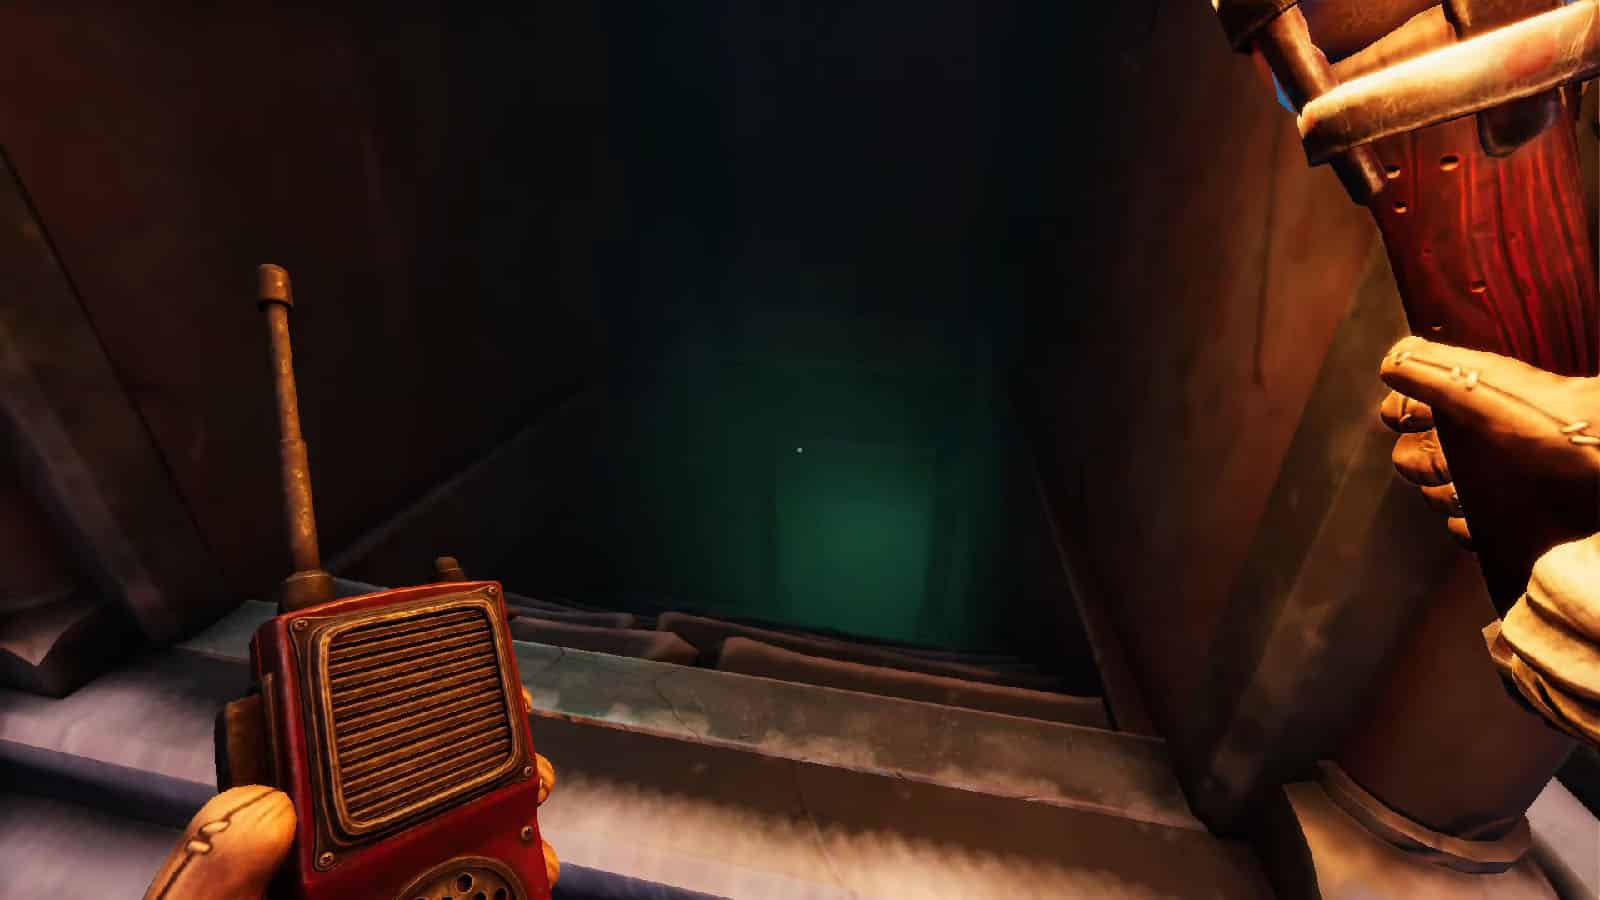
You enter the gate to the Royal Cemetery where you and your partner will have to turn a capstan to get transported into another location. Follow the path outside the gate and you will arrive at an open area with a bell. Nearby is a well with a glowing coffin behind it. Decide between you and your partner on who would want to head down an underground tunnel as they will have to open the glowing coffin which will make them fall down the well.
As for the person who will stay up top, the gate past the bell will open once the glowing coffin has been opened. For the sake of this guide, you will be the one going underground while your partner stays up top.
Obol Exchange
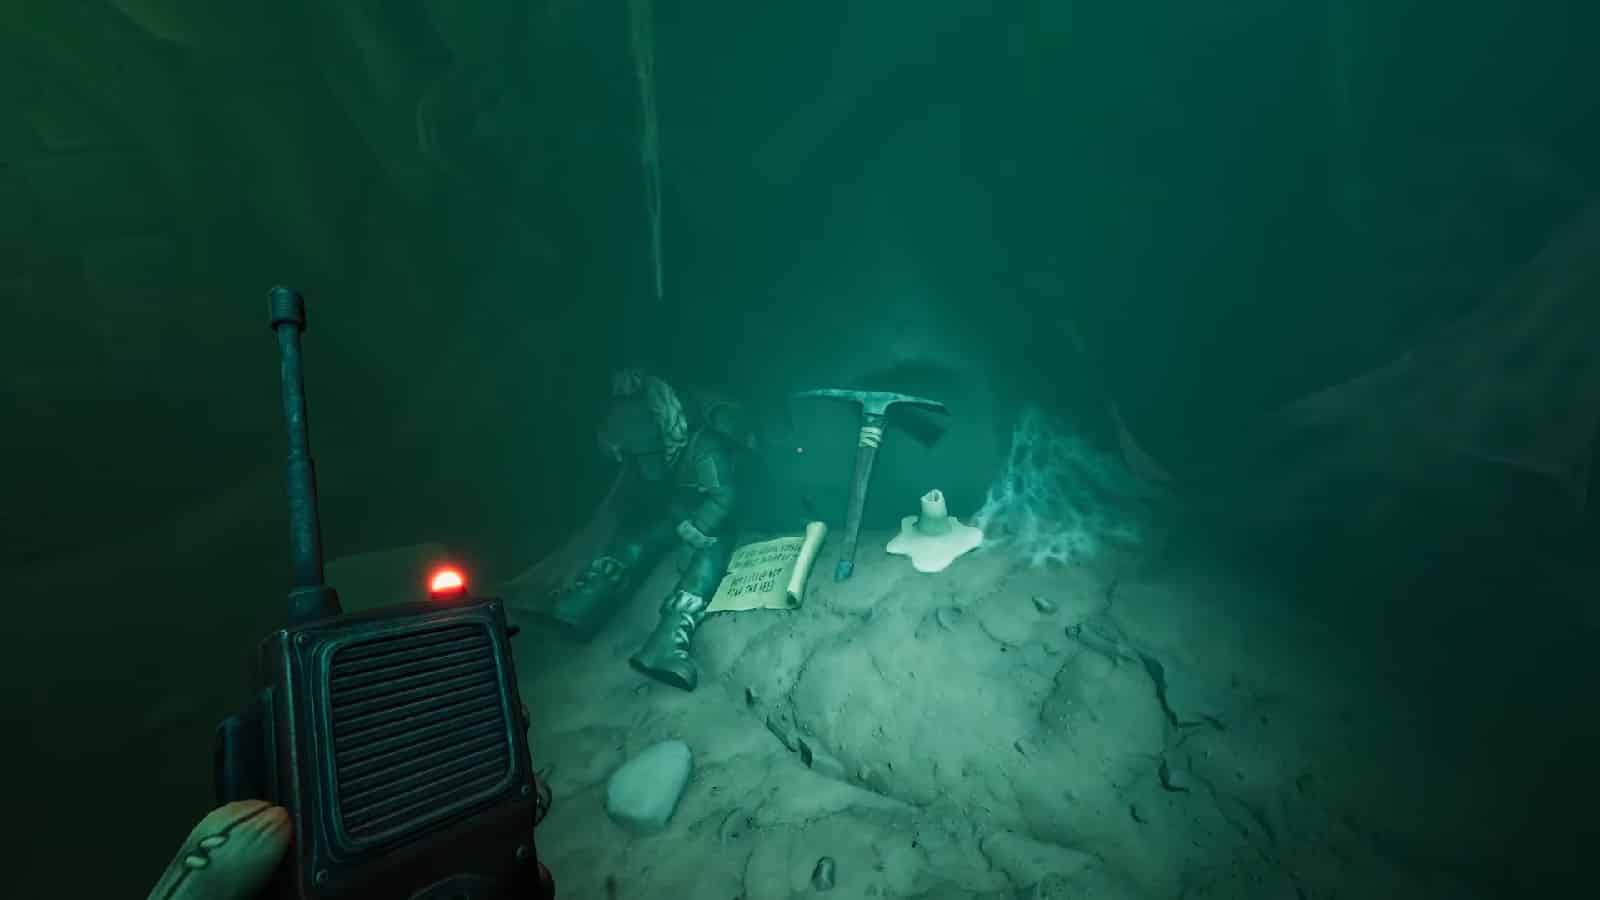
Down the well, you will find a corpse of a dead explorer with a scroll and a pickaxe nearby that can be picked up. Turn left and use the pickaxe to breakdown the rocks blocking the passageway, then turn left again. You will end up at a junction with three other paths. Choose to go to the path that is directly to your right, making a U-turn. Follow the path and make a right turn until you arrive at a chamber that has a wall showing eight circular stone emblems or obols.
Up above, your partner will have to go through the open gate and climb up the gazebo where a similar structure can be found. On the right side of both structures is a cabinet where one of the lower obols can be placed inside and exchanged with your partner’s obols. On the left of your structures are halves of a tablet that show a link between the symbols that are showing on the obols.
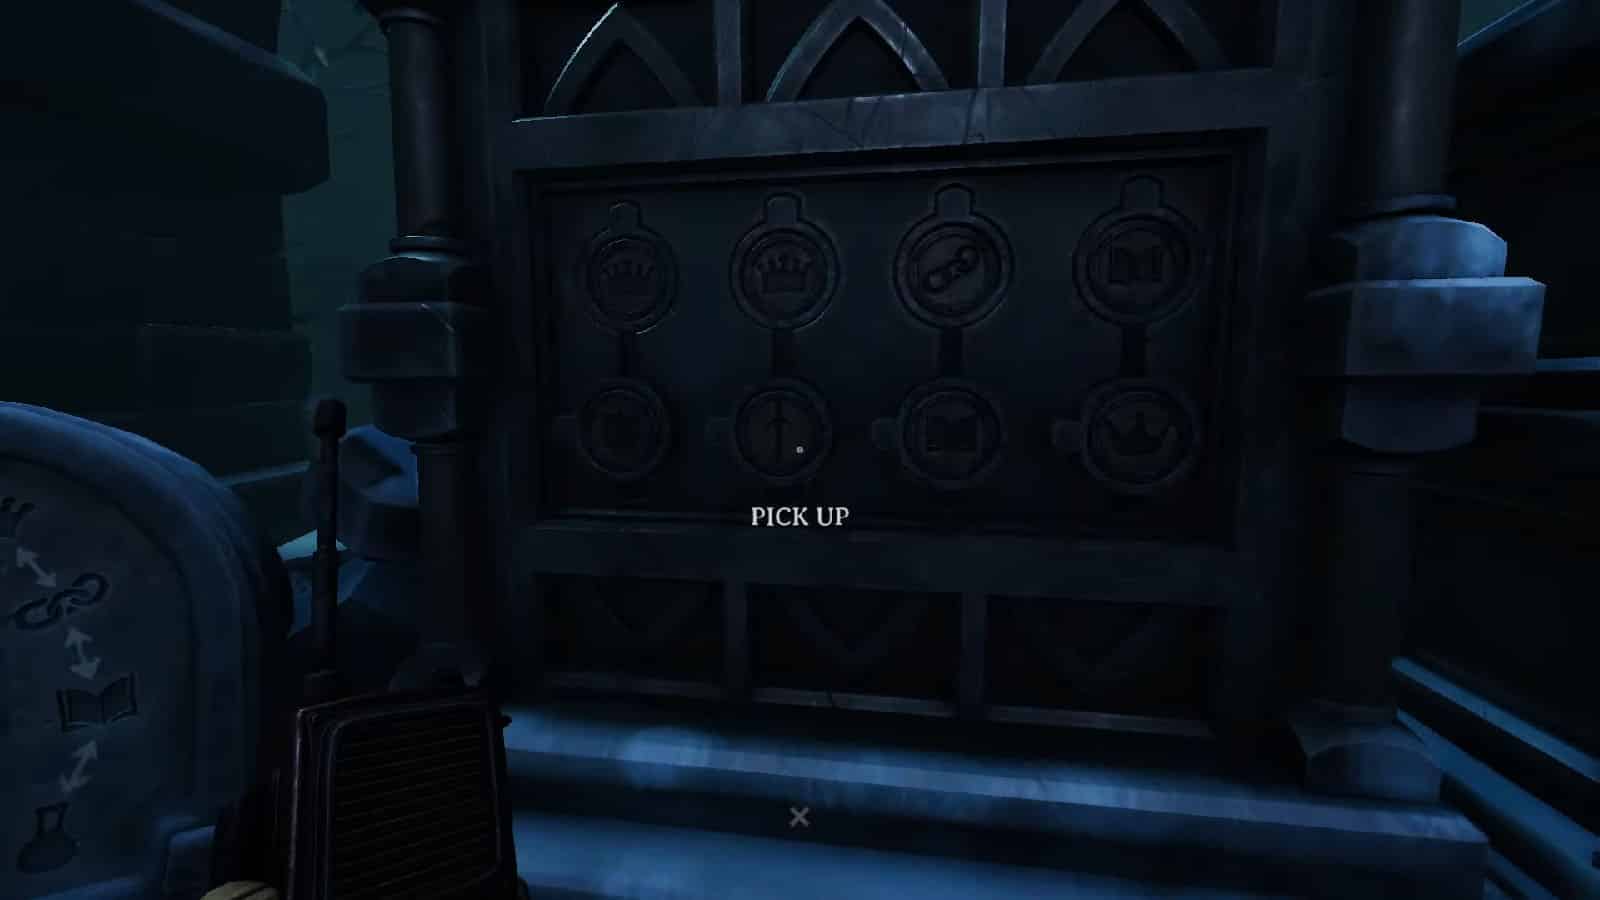
The tablet below shows the link between shield – sword – clock – 3-pt crown, then it connects to the tablet above with 5-pt crown – chain – book – flask. These tablet halves show two things: they show the solution to the puzzle, and they also show what obols can be exchanged with each other. For example, the 5-pt crown can only be exchanged with the 3-pt crown or the chain obols.

At the start of the puzzle, these are the removable obols present in the structure:
- Above: Shield, Sword, Book, 3-pt Crown
- Below: Clock, Chain, Flask, 5-pt Crown.
How this works: Using the tablet as a guide, you will have to exchange the obols between each other and form a continuous link between the obols. The link will not have a proper left-to-right or right-to-left order on the structures since the obols on the upper row are fixed; they only need to be linked to the right obols according to the tablet.
Here’s the solution:
The first goal is for each of you to get the right obols through exchanging. This is what you and your partner should get and how they should be placed in order from left to right:
- Above: 3-pt Crown*, Chain*, Book, Flask
- Below: Clock*, Sword, 5-pt Crown, Shield*
*Obols that share the same link can be swapped places

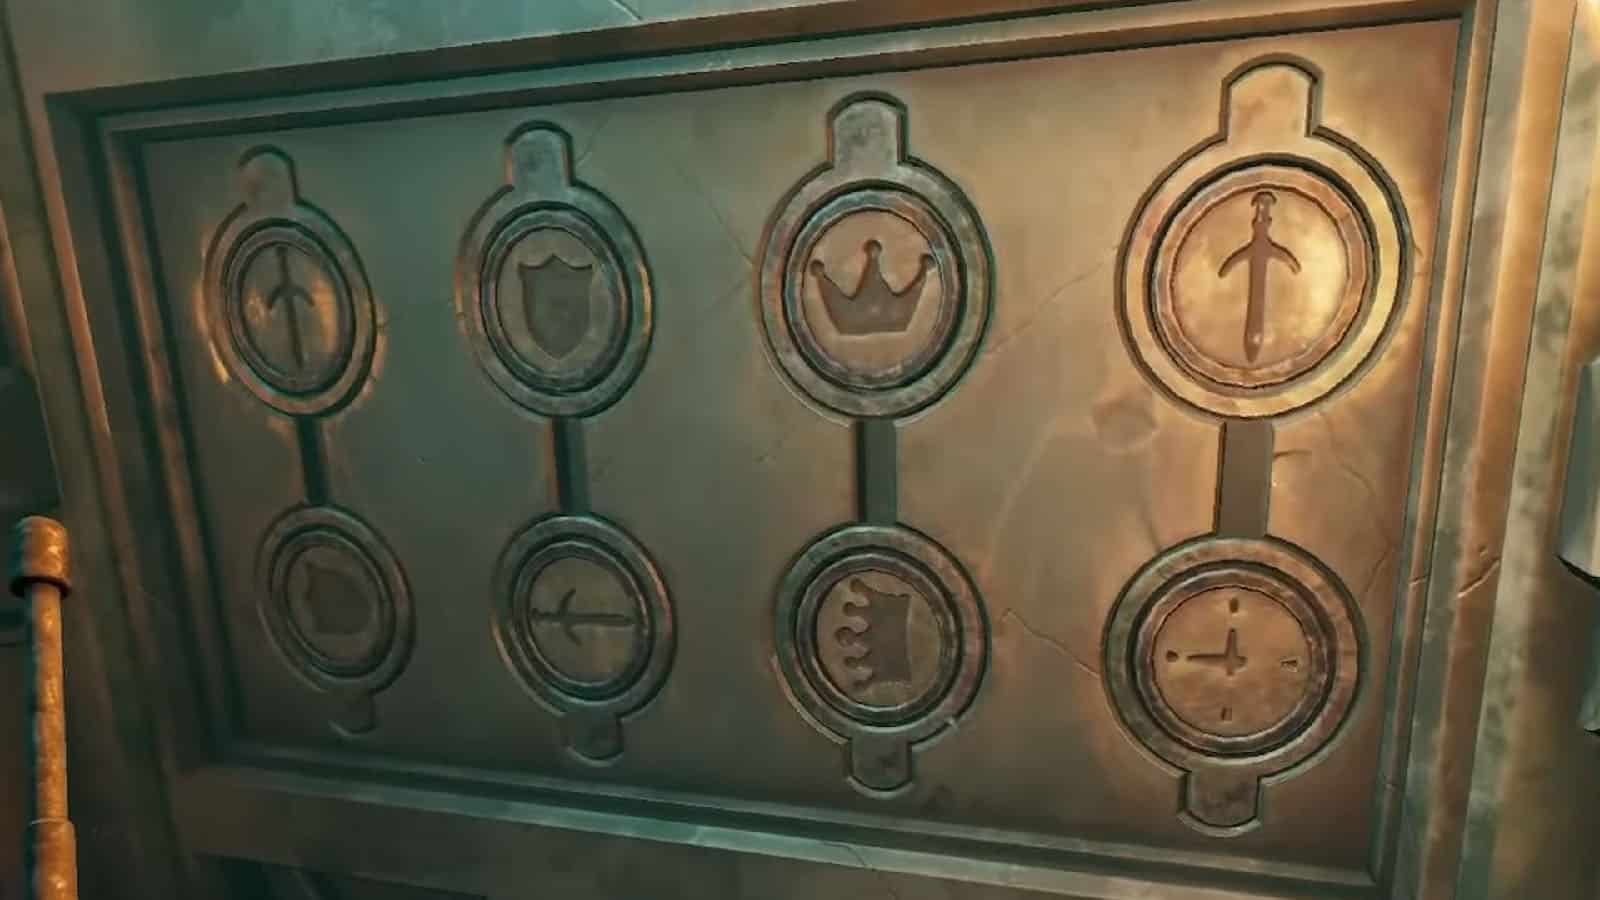
Here’s the order of swaps (*Above* and *Below*), starting with the Book and Flask since the Flask is at the end of the sequence:
- Book and Flask
- Sword and Clock
- Shield and Sword
- 3-pt Crown and 5-pt Crown
- Clock and 3-pt Crown
- Sword and Clock
- 5-pt Crown and Chain
- 3-pt Crown and 5-pt Crown
- Clock and 3-pt Crown
- Chain and Book
- 5-pt Crown and Chain
Once the obols are set into their proper positions, the structures will open up, revealing passages down to the catacombs. You and your partner will be able to see each other again, but you will still be separated by a gate.
The one above ground does not need to go down yet, but rather they have to go to the well at the far end of the graveyard and wait there. As the person below, go further down the well and make your way into the chamber with the gate. Look to the left and there is a wall that you can break down with your pickaxe. Break the wall and go to the bucket where you can deposit your pickaxe.
Once the pickaxe is in the bucket, have your partner crank the wheel at the well to pull up the bucket and get the pickaxe. With the pickaxe, your partner will have to break down the walls that lead to the different sections of the graveyard.
Grave Robbing
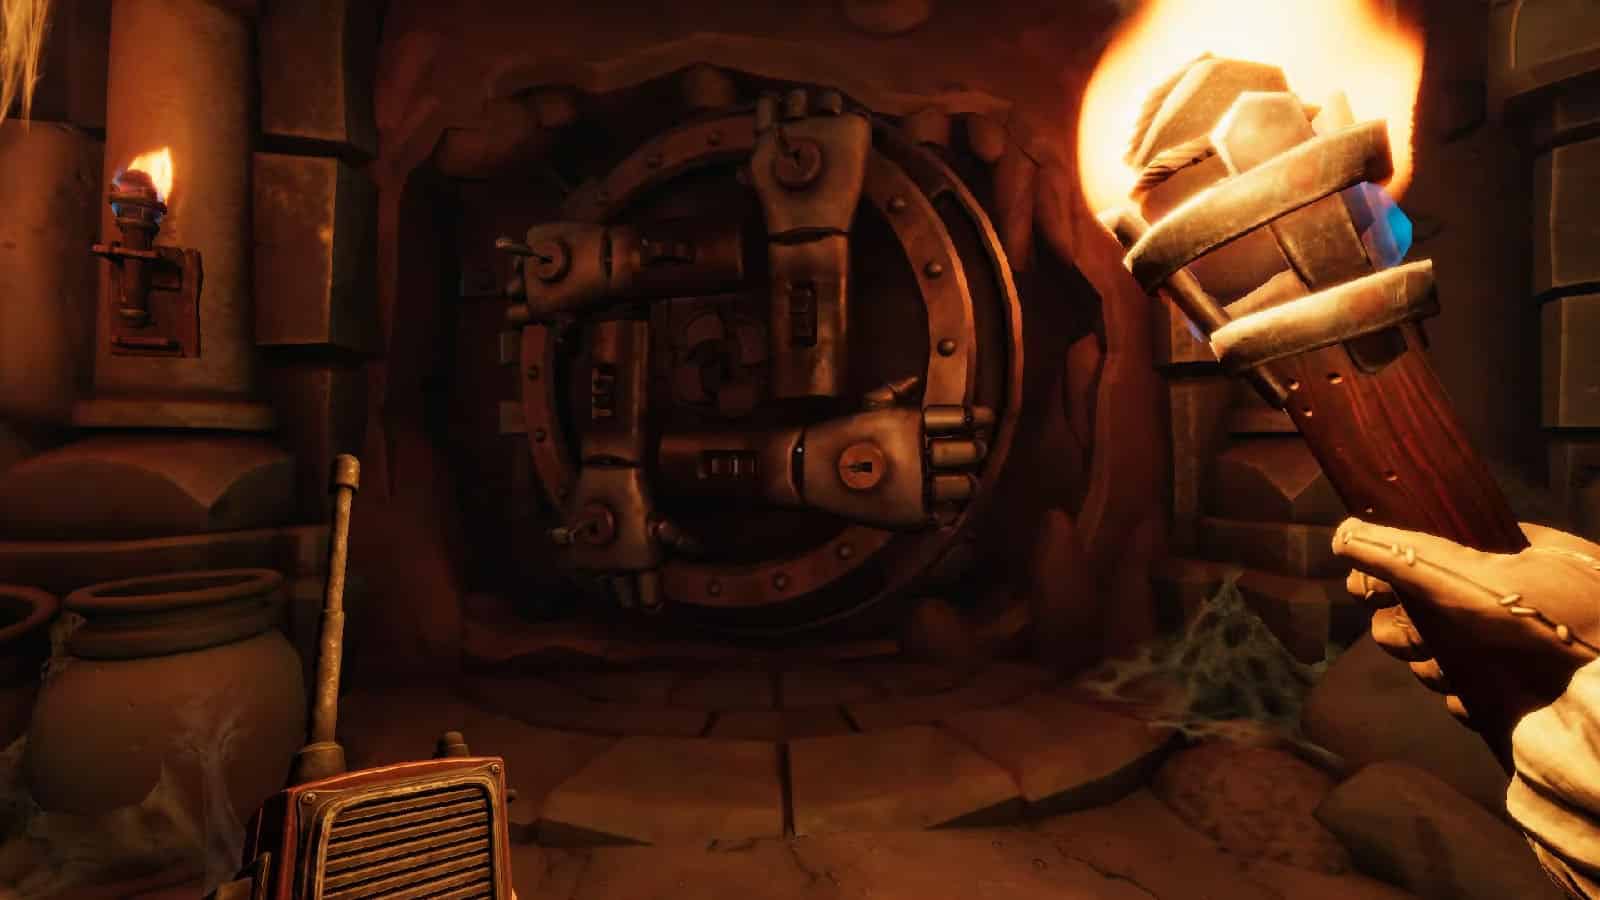
Within the same chamber that you are in underground, you will find different kinds of information about the families that once lived in the kingdom. They can be found by opening up the coffins and looking at the family tree. There is also a huge vault door doors that needs four keys at first, and eventually the fifth key. These keys can only be found from specific graves in the graveyard above.

How this works: You and your partner need to work together to find out which graves have the keys in them. Clues can be found within the underground chamber that will pinpoint which grave your partner has to dig up. They are usually short riddles painted inside the coffins. There is a key in each of the major families’ graveyards, except for the Bronze Heaters’ that holds two.
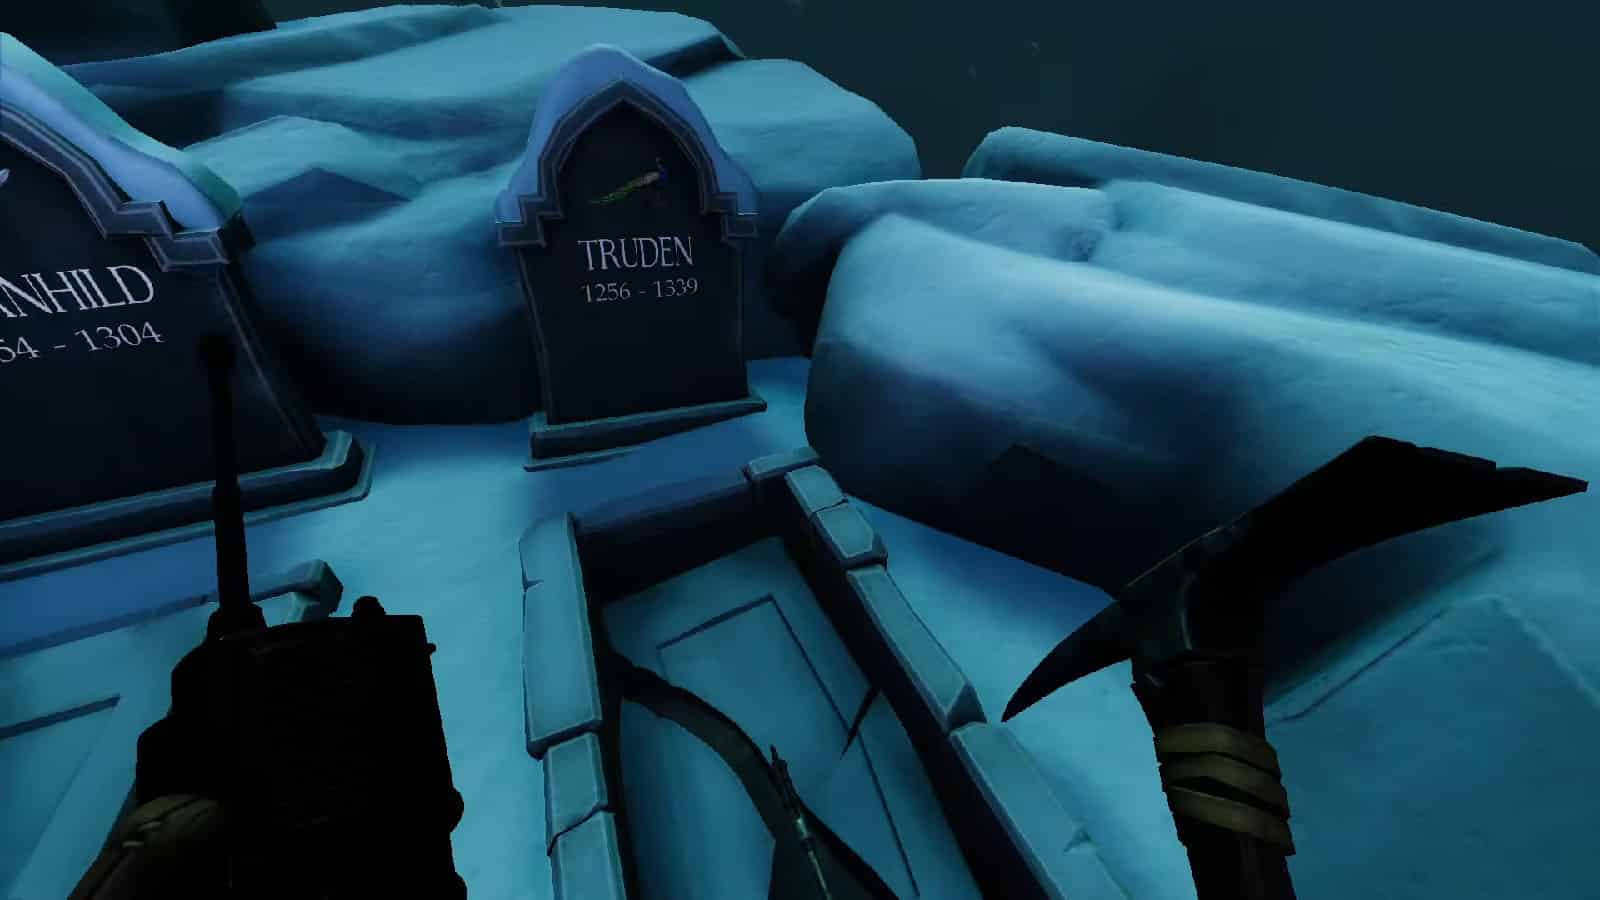
Here’s the solution:
- Steenhouwere/Masons (hammer/ruler): Dig up the grave of Gertruid (1232-1310).
- Clockenmakere/Clockmakers (gears): Dig up the grave of Truden (1256-1339).
- Glaseblasere/Glassblowers (flask): Dig up the grave of Reynwi (1261-1339).
- Bronsghieter/Bronze Heaters (bucket): Dig up the graves of Ysenbrant (1207-1285) and one that’s marked as XXX (1253-1331).
Make sure to only dig up the graves that have the keys in them. Otherwise, breaking three incorrect graves will get your partner cursed and they will gradually lose their vision until they pass out.
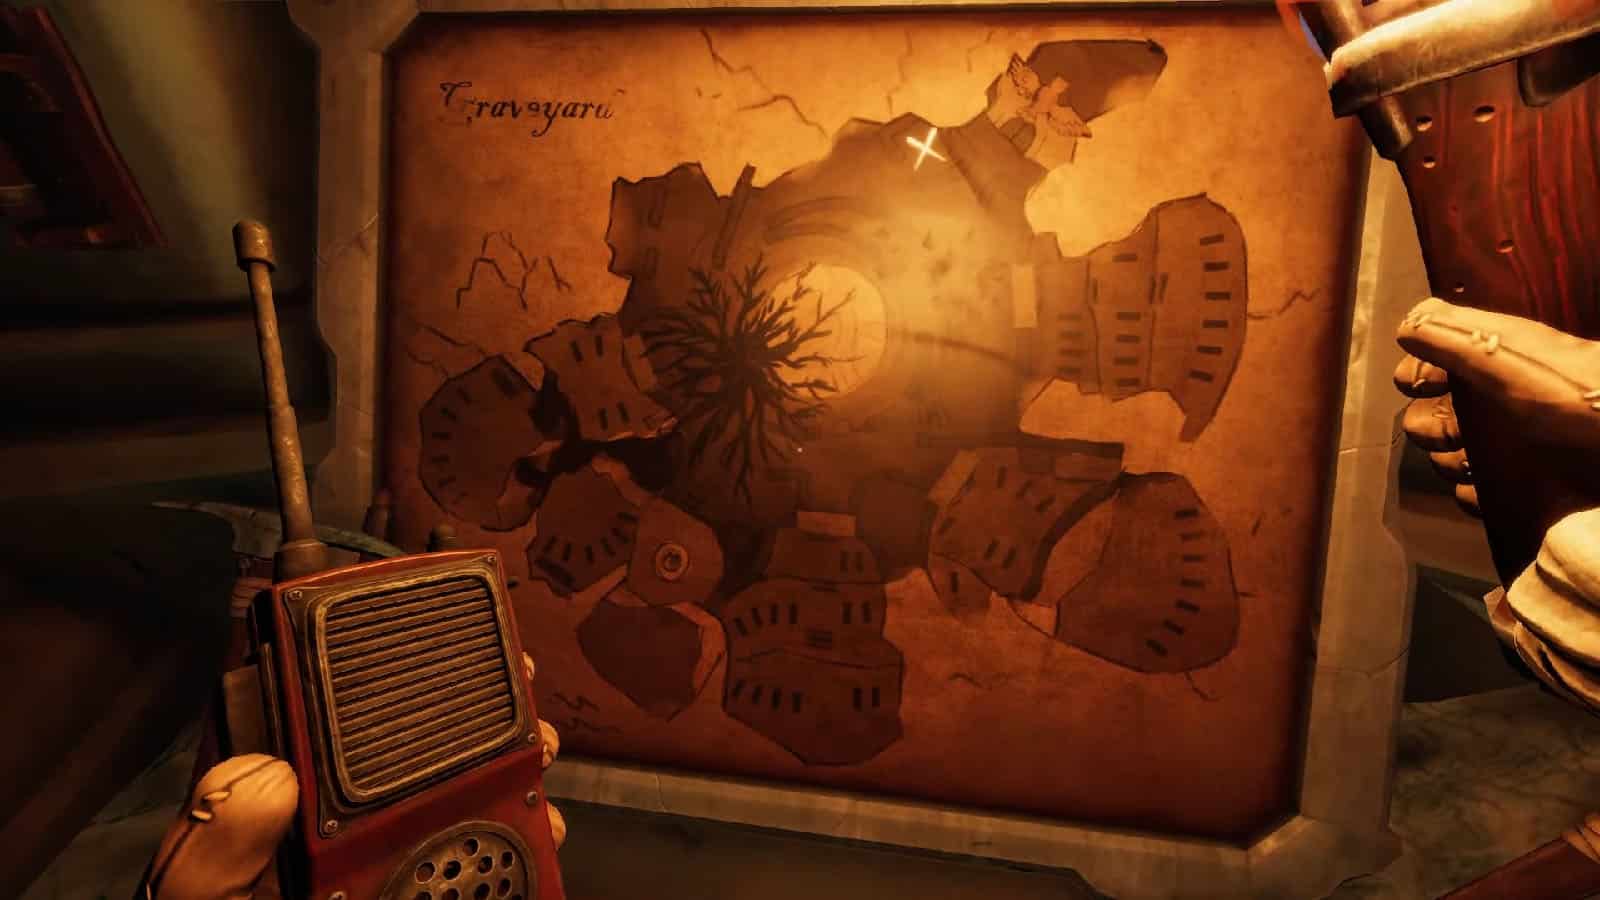
Once all five keys have been collected, they have to be sent to you underground via the well. This has to be done one by one. Use all the keys to open the door and you will find a map that marks a specific location in the graveyard.
X Marks the Spot
You will end up in another chamber where the astrolabe piece is in, but it is locked and you will need your partner to open it. First, there is another puzzle that you will have to solve.
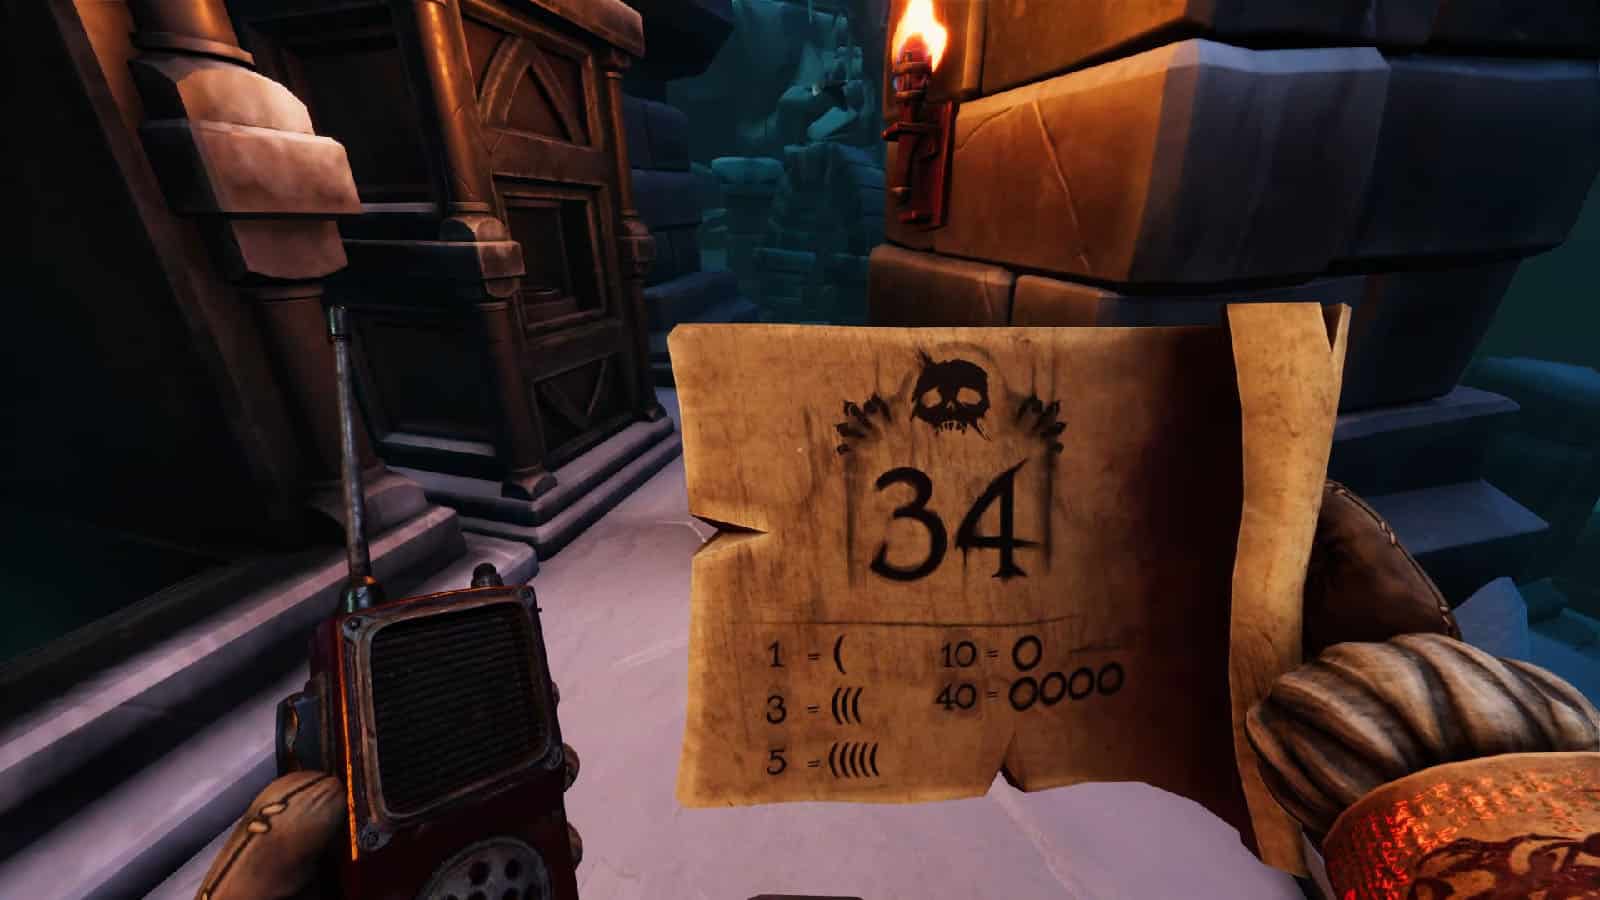
How this works: Inside the chamber, you will find a map with a spot marked with an X. You will have to guide your partner to go to that spot where they will see a pile of snow. They have to dig this to find a chest that contains a note. This note shows a big number and other numbers equating to different symbols.
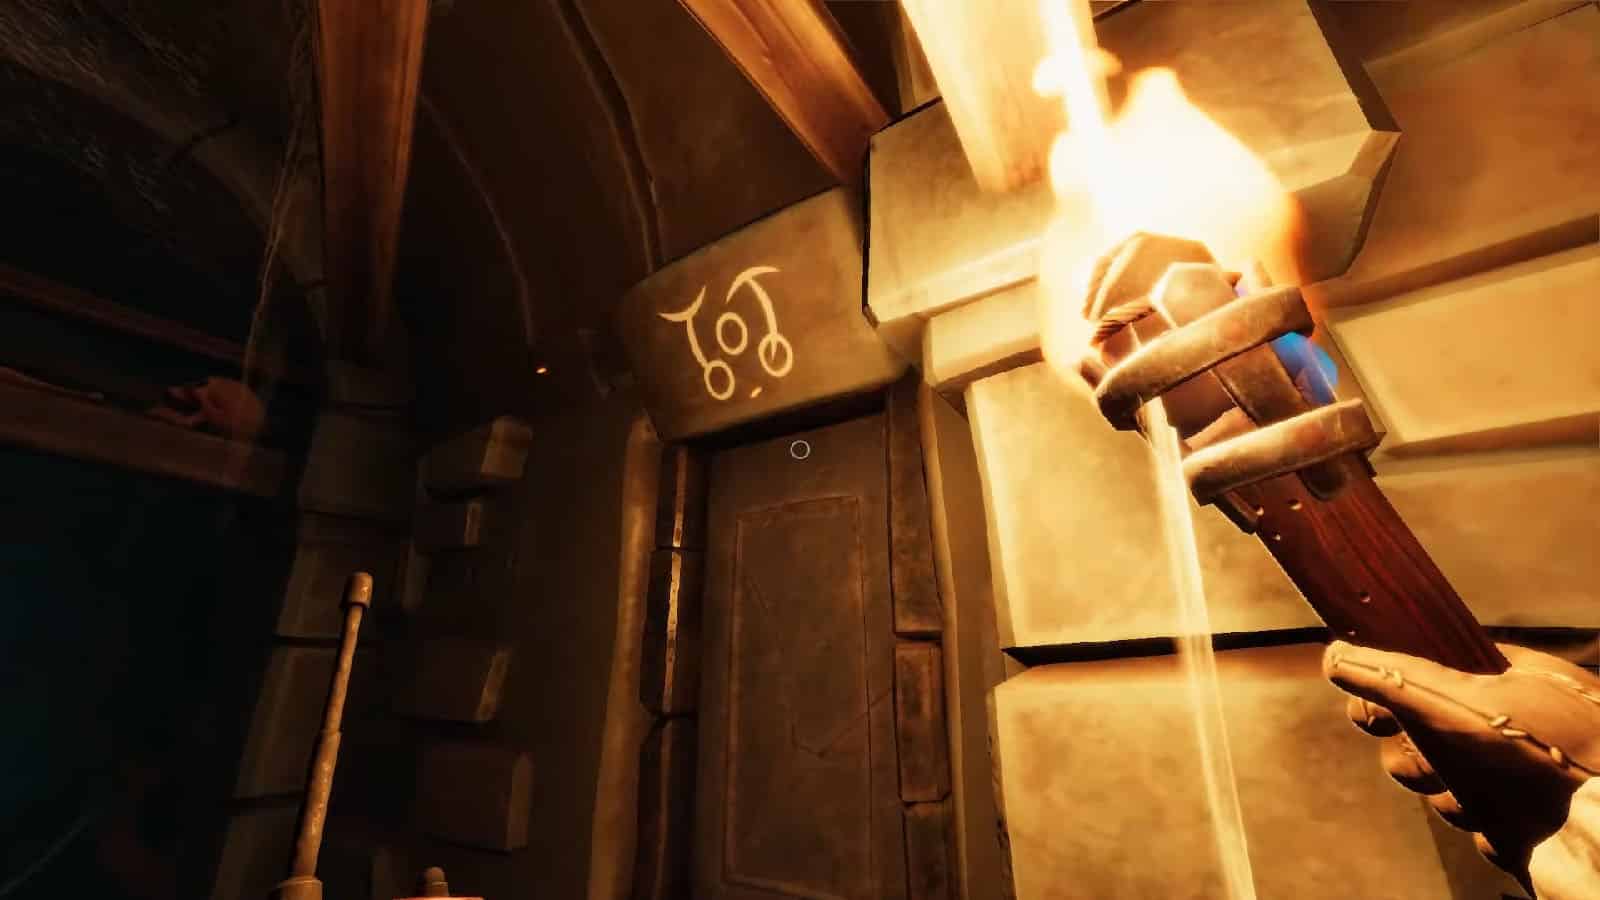
Similar to how Roman numerals work, they have to break down this number to the smaller numbers starting from the biggest number applicable. Once that is done, they will end up with a number of circles and lines. They will have to communicate these to you and use this info to look for a particular niche inside the catacombs that has these symbols.
Breaking that niche will give you another piece of the map which will show another spot marked with an X. Do the same process, but this time, your partner will also get a cog along with the second note with a different number on it.
You can get different possible starting spots for the X. Regardless of which one you get, you will end up doing the same mechanics to solve this puzzle twice, and the order will just switch among the possible digging spots.
Here are some of the possible digging spots:
- If the X is at the north, the chest is near the Owl Gate and will contain the number 34, translated to OOO(((
- If the X is at the southeast, not inside a family graveyard, the chest is in between the Masons and Clockmakers and will contain the number 52, translated to OOOOO((
- If the X is at the southeast, inside a family graveyard, the chest is in the Masons graveyard hard right past the first XXX tomb and will contain the number 14, translated to O((((
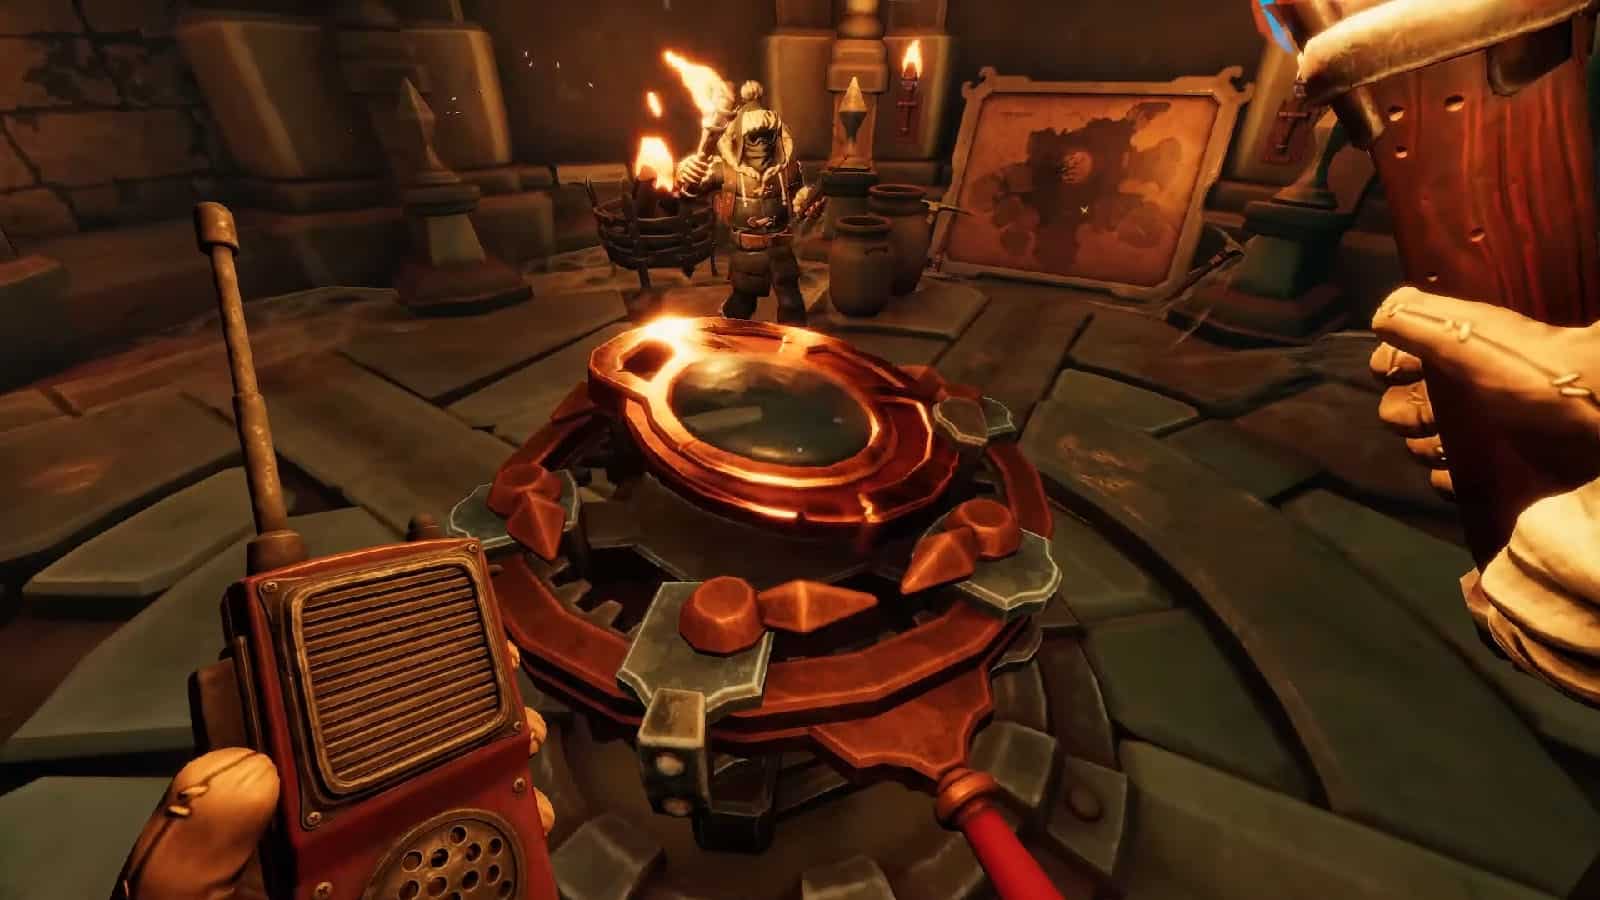
Decipher the second note to get the combination of symbols and look for the niche that has the symbol once again. Breaking the niche will also give you a cog. Both you and your partner should then go to the metal gate in the middle and place your cogs on the wall which will open the gate. Then, head to where the astrolabe piece is and unlock it from its pedestal. Bring the piece back to the chapel and install it on the astrolabe.
If you have completed all three astrolabe pieces and installed them on to the astrolabe, then you can check out our We Were Here Forever Walkthrough Final Chapter if you need help with the last puzzle of the game.
For easier navigation, check our complete We Were Here Forever Walkthrough – All Puzzle Solutions:
- Chapter 1
- Chapter 2
- Chapter 3 – Ruins of Rockbury
- Chapter 4
- Chapter 5 – Royal Cemetery
- Chapter 6 – Final Chapter
If you like this Guide, be sure to check out our other We Were Here Forever articles:
- Castle Rock Doors Are Open, We Were Here Forever is Available Now on PC
- We Were Here Forever Walkthrough Chapter 1 (Part 1)
- We Were Here Forever Walkthrough Chapter 1 (Part 2)
- We Were Here Forever Walkthrough Chapter 2
- We Were Here Forever Walkthrough Ruins of Rockbury
- We Were Here Forever Walkthrough The Nautilus (Part 1)
- We Were Here Forever Walkthrough The Nautilus (Part 2)
Check out this video by Orbital Potato with his friend Retromation as they explore the Royal Cemetery:
