
We Were Here Forever is the fourth installment of the We Were Here series. It is a co-op puzzle game where two players have to help each other out in solving puzzles while navigating through mazes and obstacles within a castle.
This guide will cover Chapter 2’s puzzle rooms, from the Headless Dolls to The People’s Hymn. Check out our other We Were Here Forever guides for the previous challenges:
- We Were Here Forever Walkthrough Chapter 1 (Part 1)
- We Were Here Forever Walkthrough Chapter 1 (Part 2)
How to Solve We Were Here Forever Chapter 2 Puzzles
We pick things up from the cutscene where the king chased us out from his castle. You and your partner find yourselves in the middle of a snowstorm. You then make your way in a castle’s courtyard where there are headless dolls and a towering owl statue in the middle.
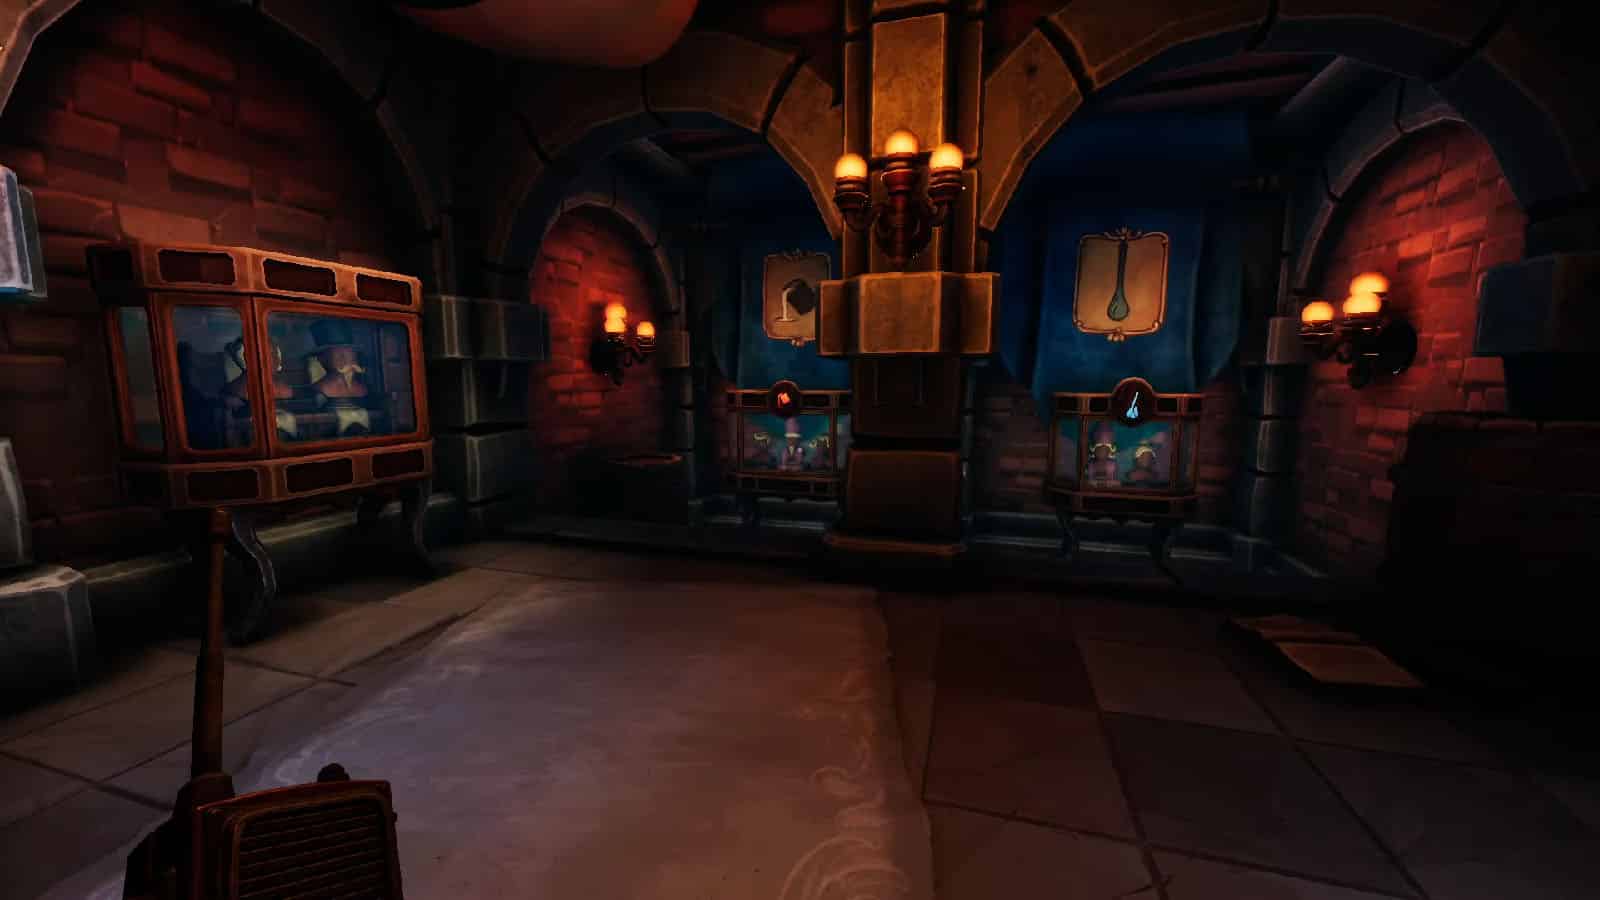
Headless Dolls
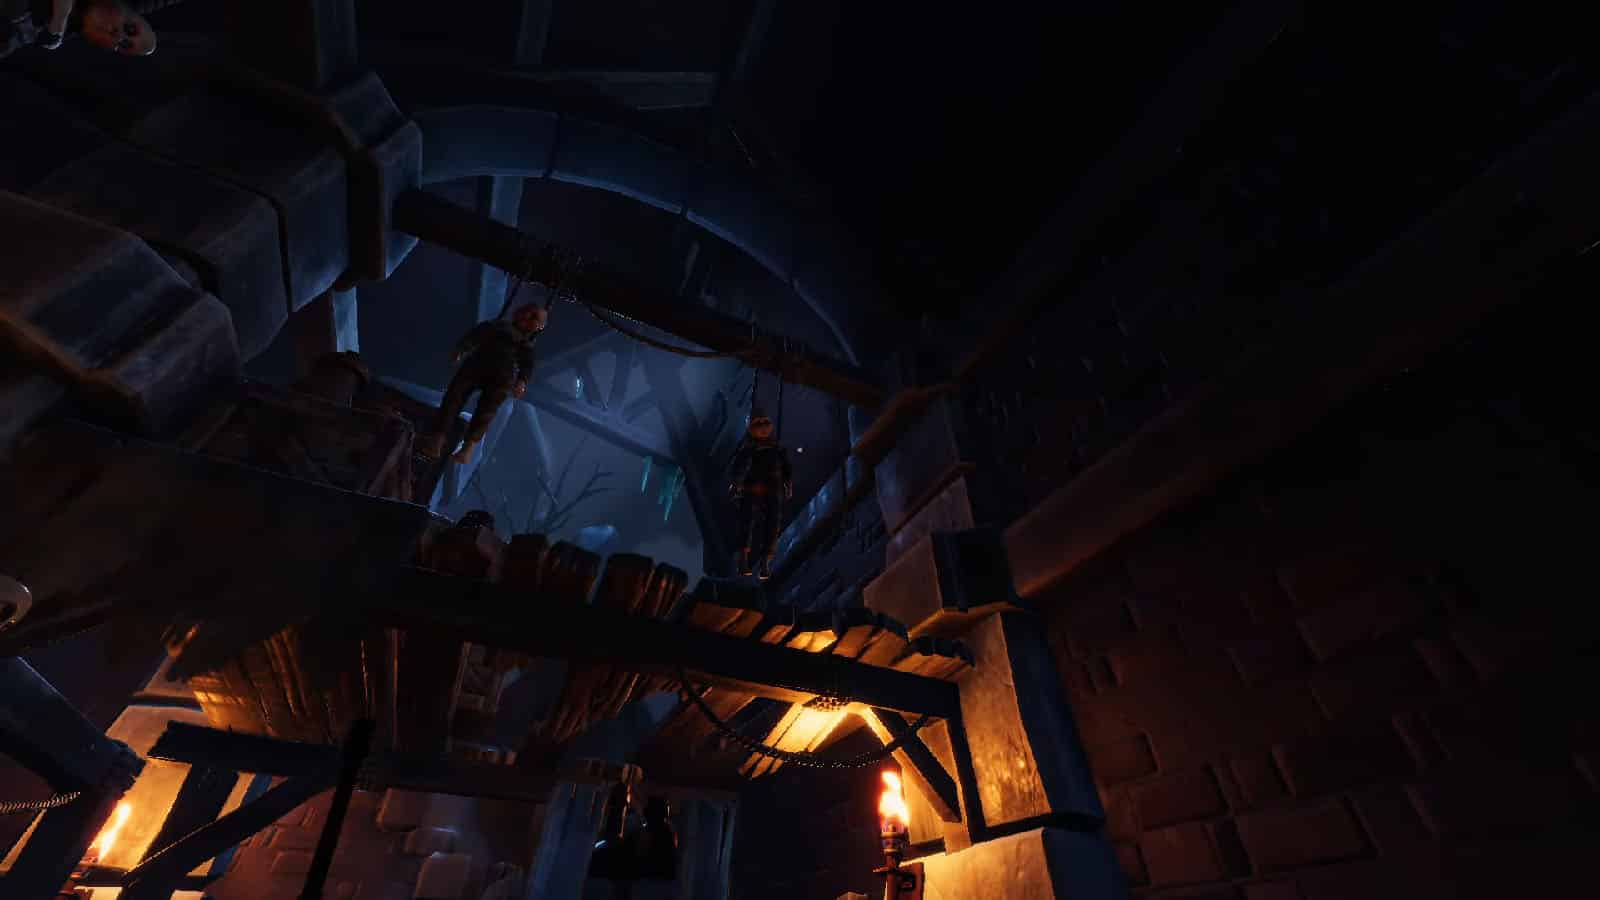
In this puzzle, you and your partner will have to search for the missing heads of the dolls that are shown on the small doll theater and place them back in order. The owl statue will give out riddles as to which head goes to what body.
How this works: One of you will have to go to the small owl statue at the right side of the entrance and interact with it. This will activate the hidden door and bring that player to a secret room that has shelves with doll heads on them. There are also books on the lecterns that will provide some more clues about the characters in connection to the riddles that the owl gives.
Once you figure out the heads to pick, bring the heads over at the doll beside the secret room’s entrance to send them out into the courtyard one by one. On the other side, the name of the head placed on the doll will show up so you can check if it’s the right head. You can also approach the huge owl statue and press on one of his talons to listen to the riddles again.
Here’s the solution:
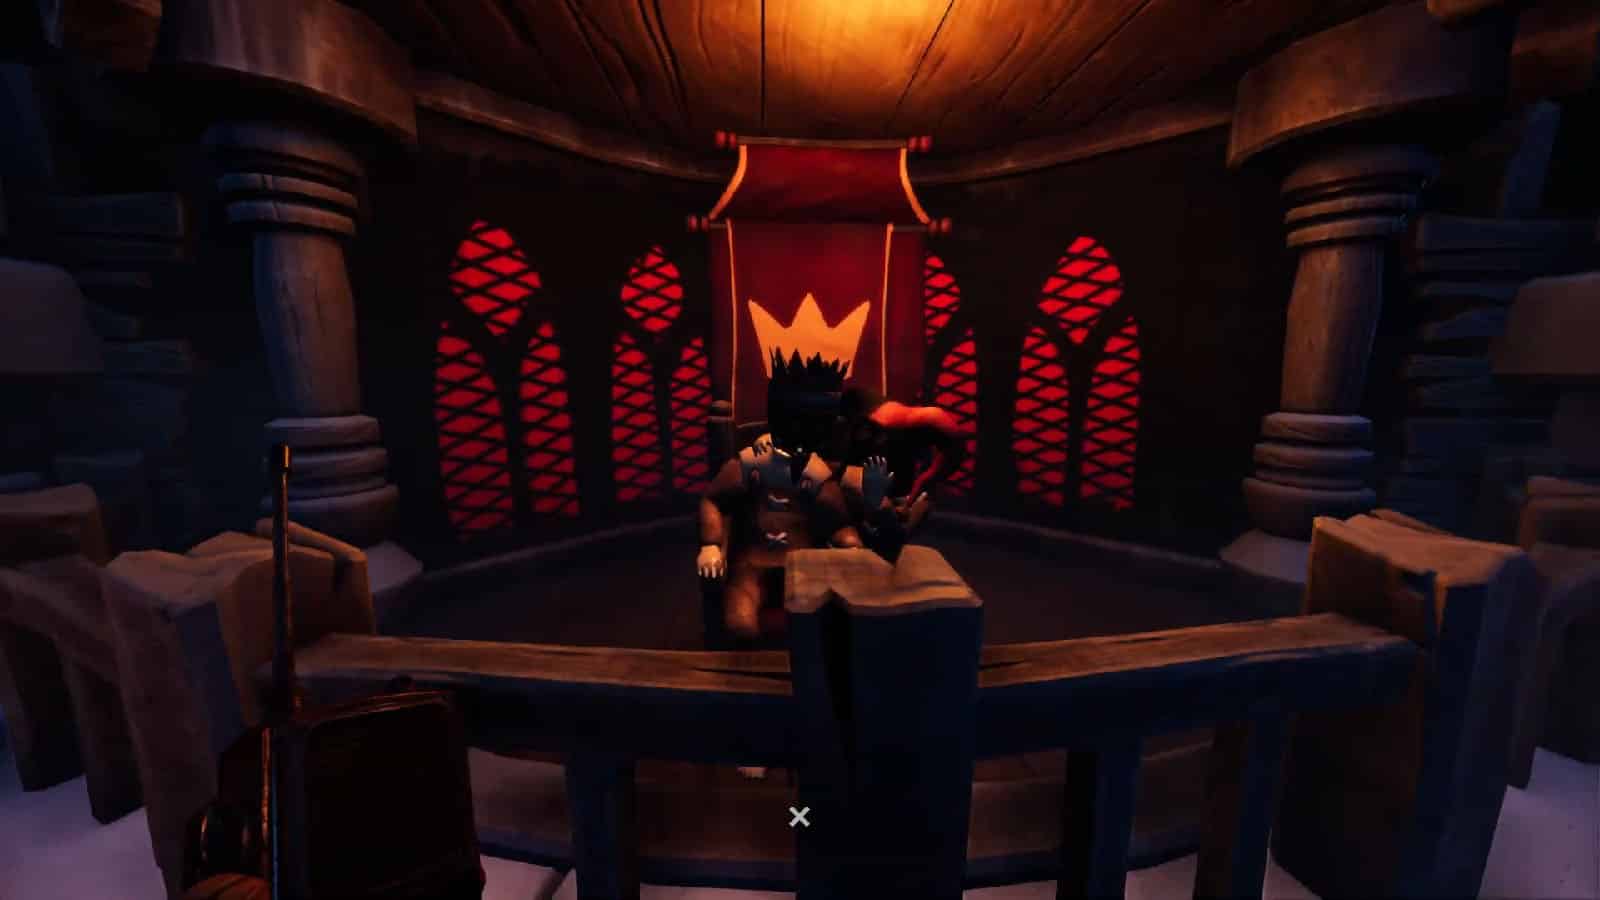
First riddle: The owl will say “Who are the ones that betray? Who led us Rockburians astray?” which refers to the Court Jester head and the King head. These two heads are on the table to the left side of the room. For the player in the courtyard, place the King’s head on the doll sitting on the throne, then place the Jester’s head on the doll whispering to the king.
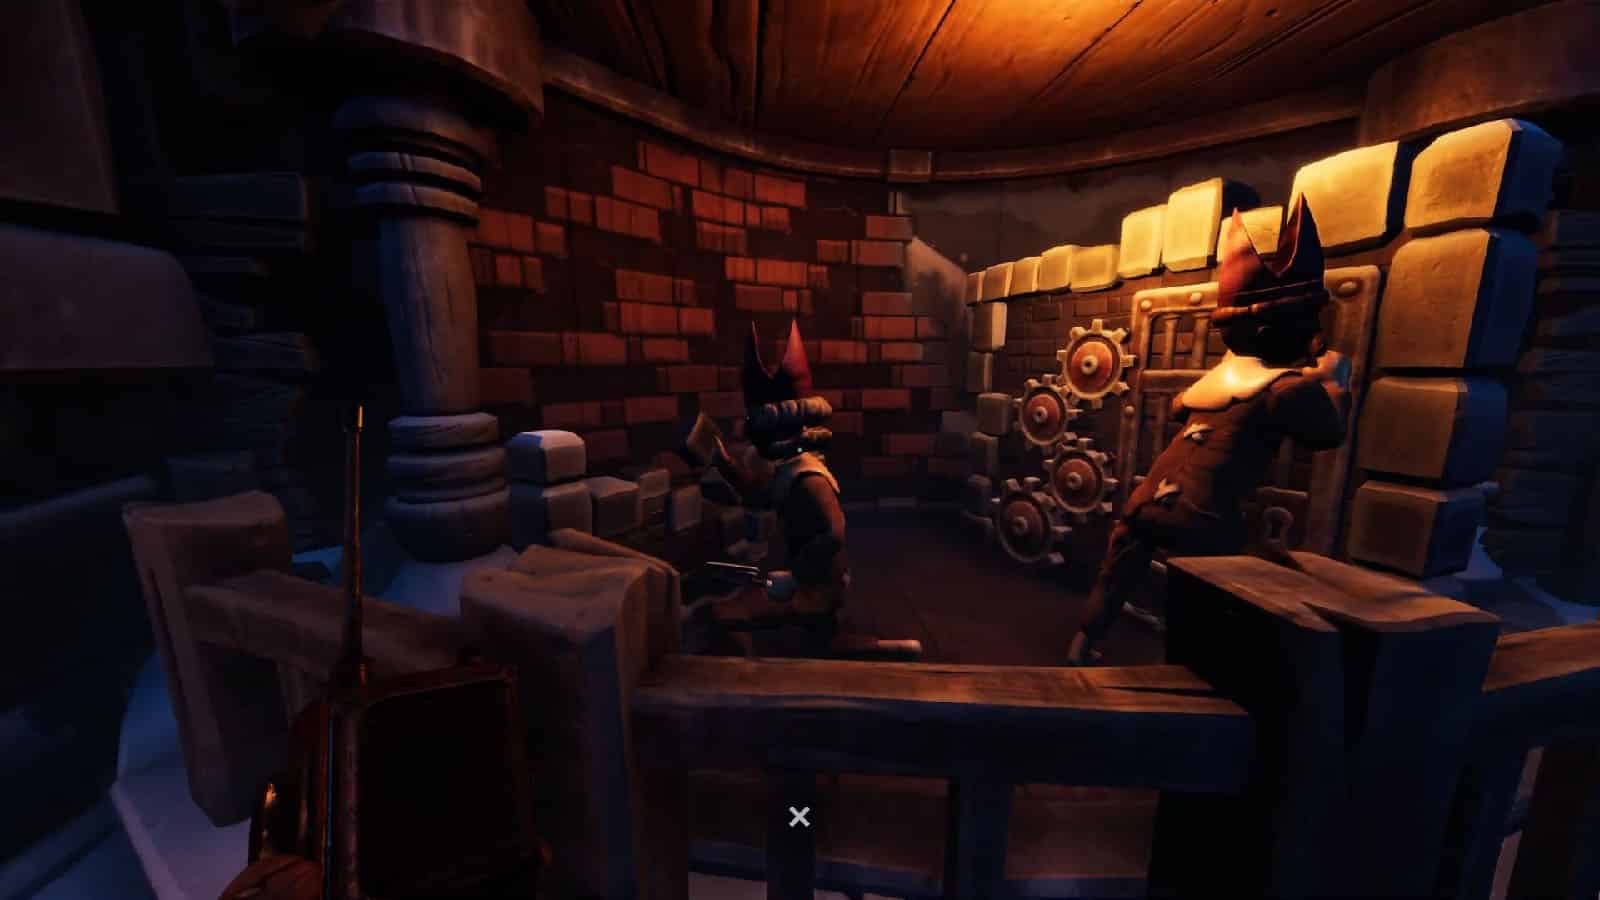
Second riddle: The owl will say “Who shelters our secrets and souls? Who keeps out the King, and his cold?” which refers to the Clockenmakere head and the Steenhouwer head. The Clockenmakere has a mustache and is at a shelf on the right side, while the Steenhouwer’s head has curly hair and is at a shelf near the right side. Both heads have purple mitre caps. Place the Clockenmakere’s head on the doll by the wall with the gears, while the Steenhouwer’s head should be on the doll making another wall.
Third riddle: The owl will say “Who guides our journey by starlight? Who forges the ancient way through night?” which refers to the Glaseblasere head and the Bronsghieter head. The Glaseblasere head has blonde hair and is at the table at the back of the room, while the Bronsghieter head has a beard and is at the shelf on the right side of the room. Both heads have purple mitre caps. Place the Glaseblasere’s head on the doll looking at constellations, while place the Bronsghieter’s head on the doll by the board.

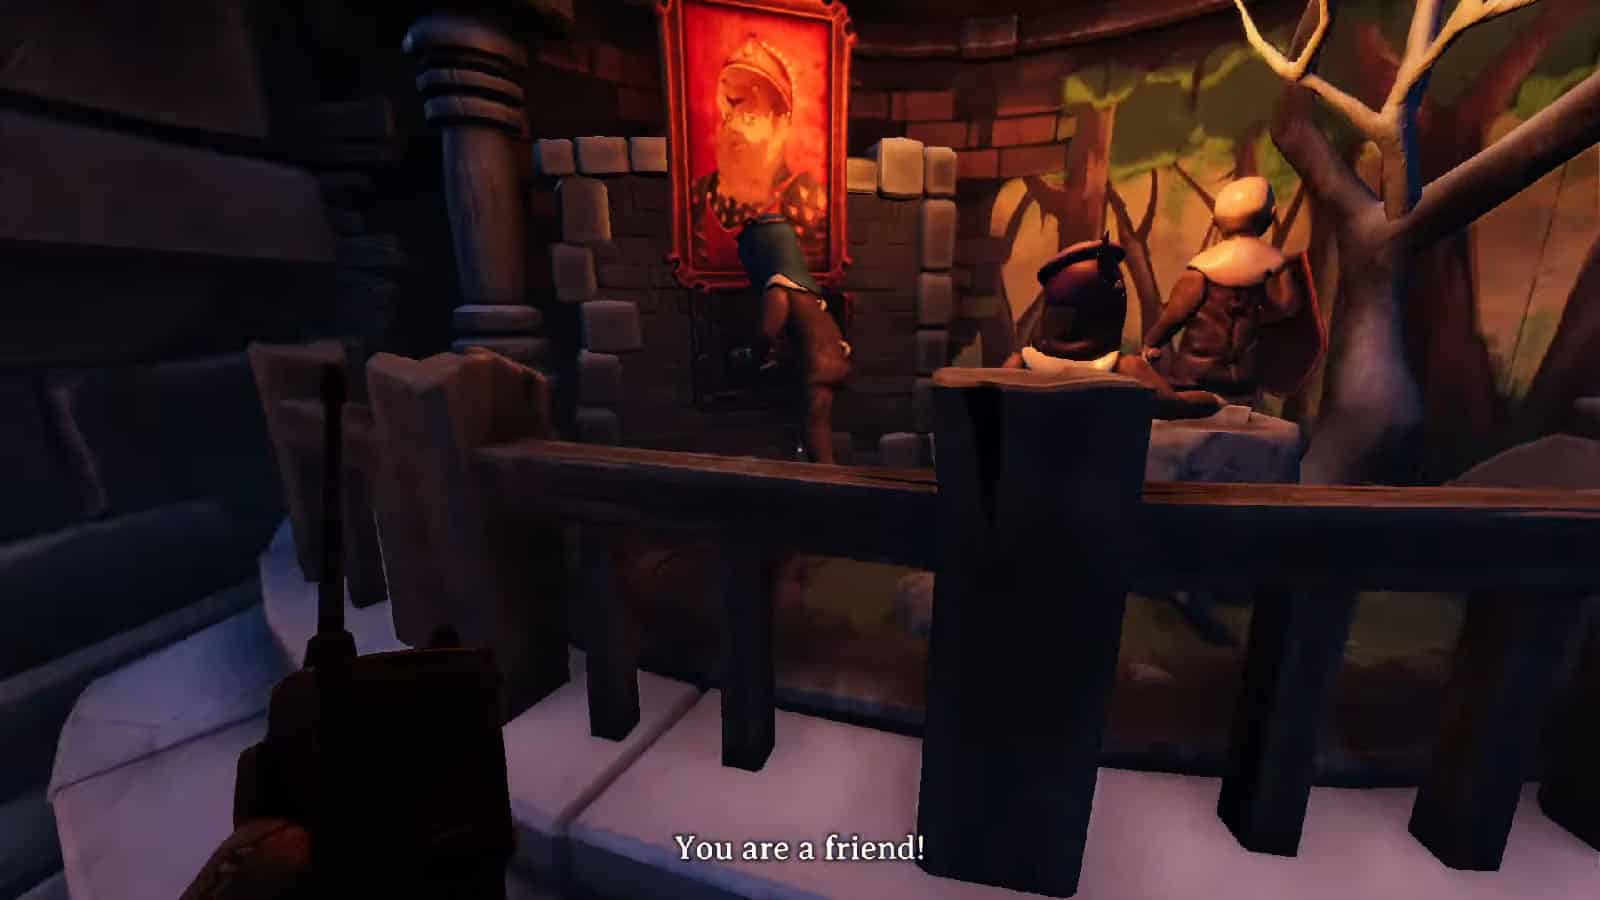
Fourth riddle: The owl will say “Who are Rockbury’s unlikely friends? Who defy our King until his reign ends?” which refers to Princess Katherine and Princess Emilia. The two princesses are at the shelves at the left side of the room. Place Princess Katherine’s head by the portrait of the king, while place Princess Emilia’s head by the rocks.
Once all four riddles are solved, the secret door to the room will open up and the huge owl statue will stand up and open its wings, revealing a passage between its legs.
Helpful tip for the next puzzle: read back about the mitre cap people as their identities will be helpful in solving a part of the next puzzle.
Holy Mass Puzzle
Enter the newly revealed room to find a small wooden owl statue with confessional rooms behind it. The room to the right has the words “Confess your greatest sins” on one of its walls, while the room on the left has “Grant Absolution”. The walls will then open up and lead towards the inside of a chapel with empty pews.
Right across the confession rooms, one player should ride the elevator while one cranks it up. This will bring the player to the mezzanine where they will find a room that has display cases with busts in them, a wall of portraits behind a gate, and a lever. Pulling the lever will open a door in the ground level that has a bunch of dolls hanging on hooks.
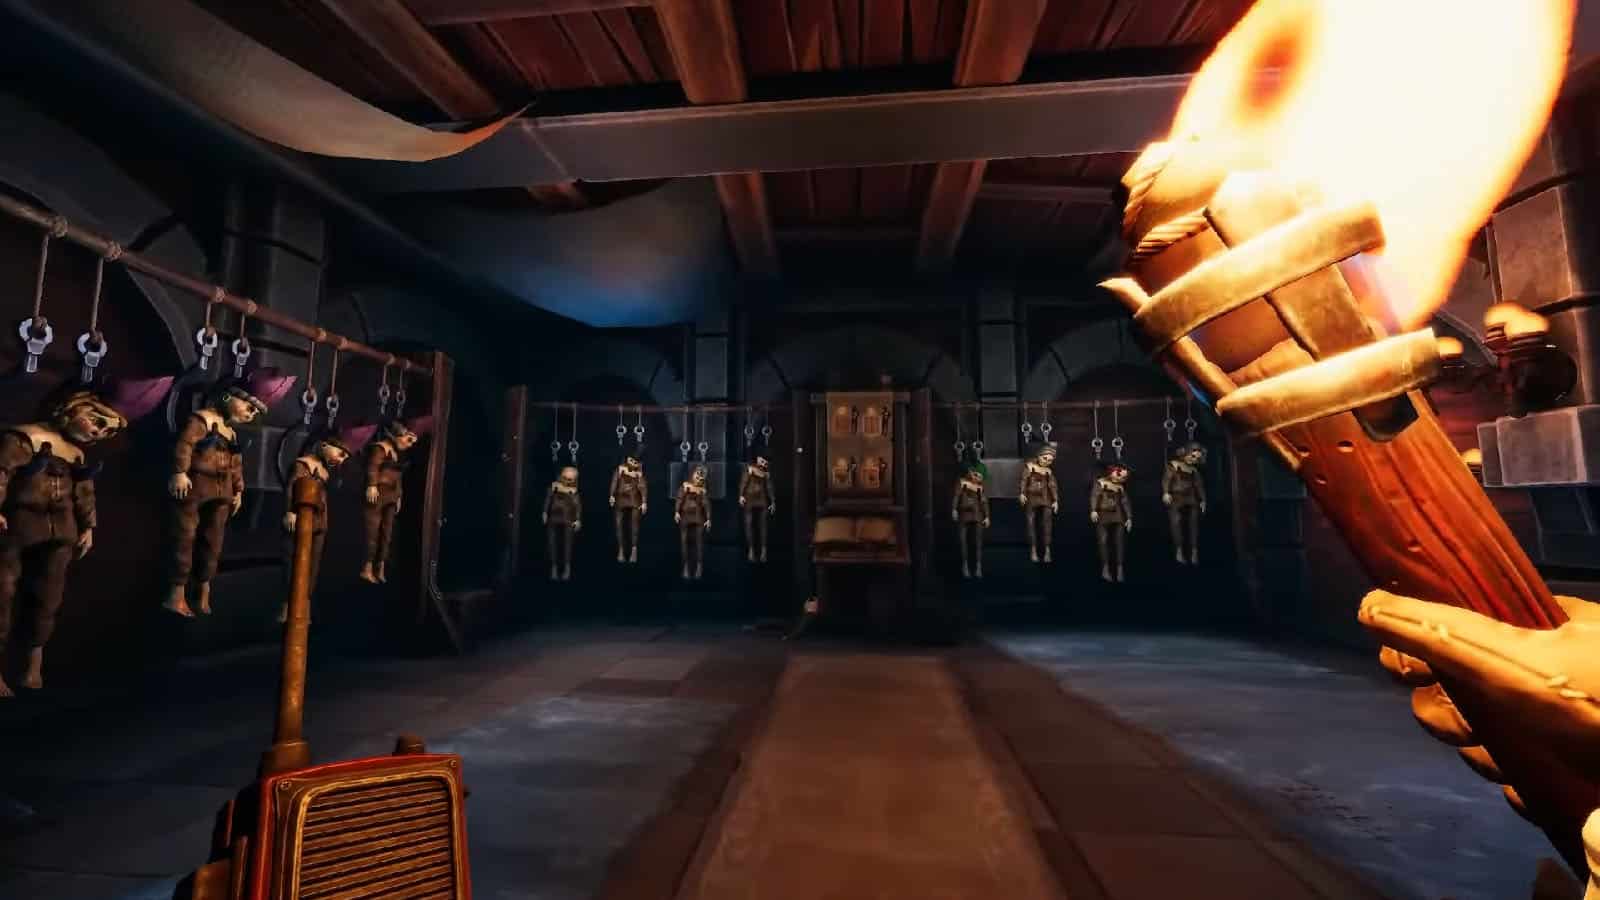
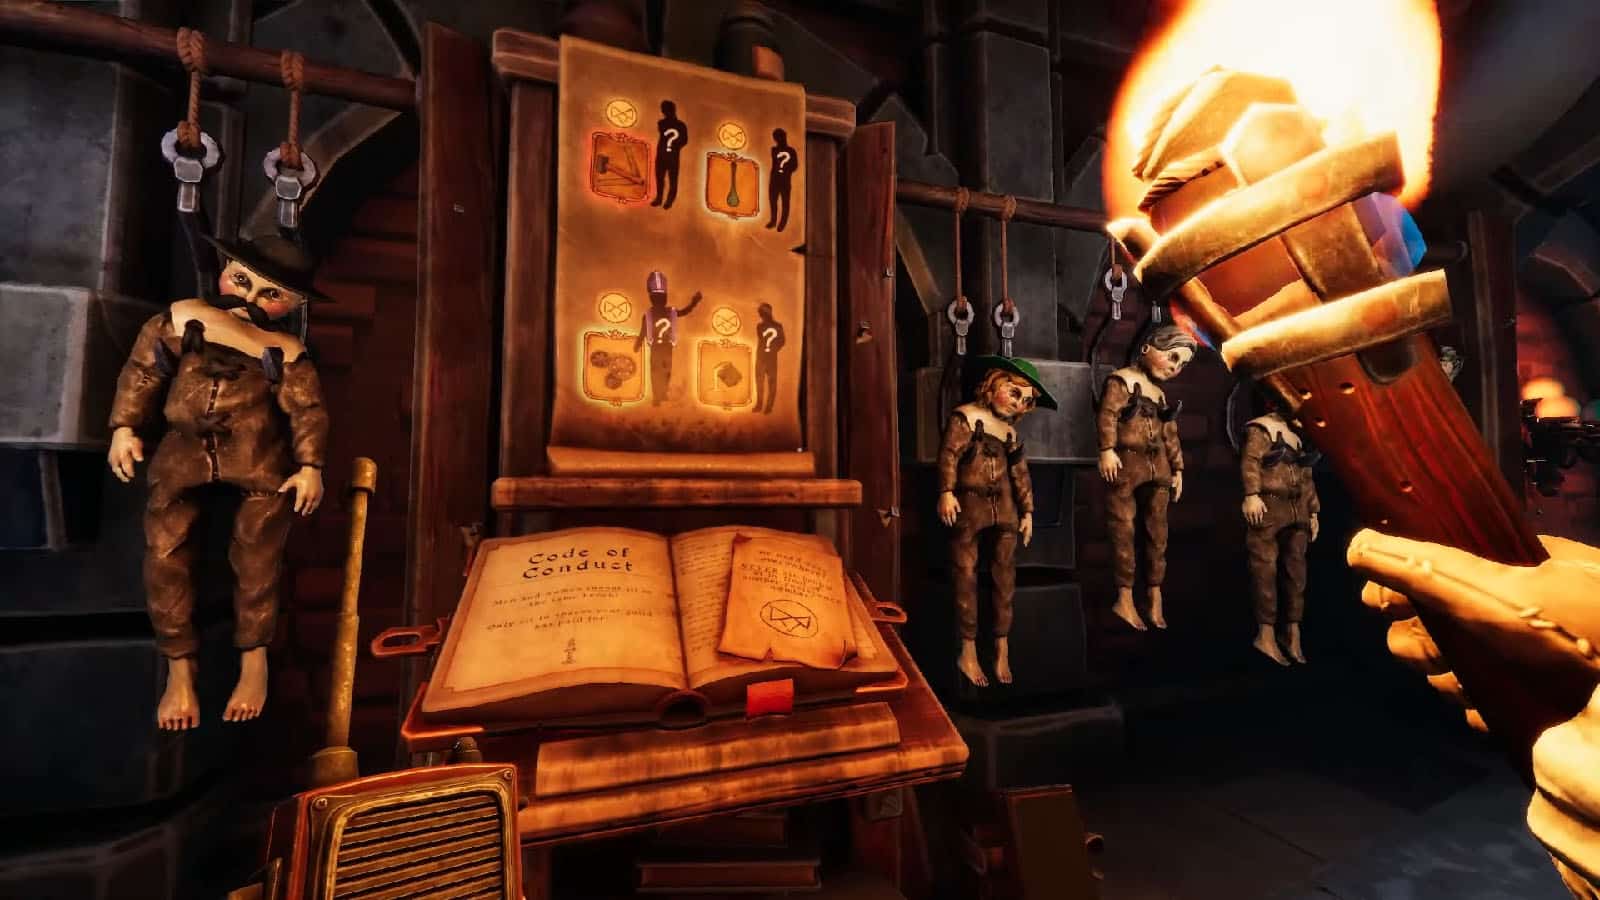
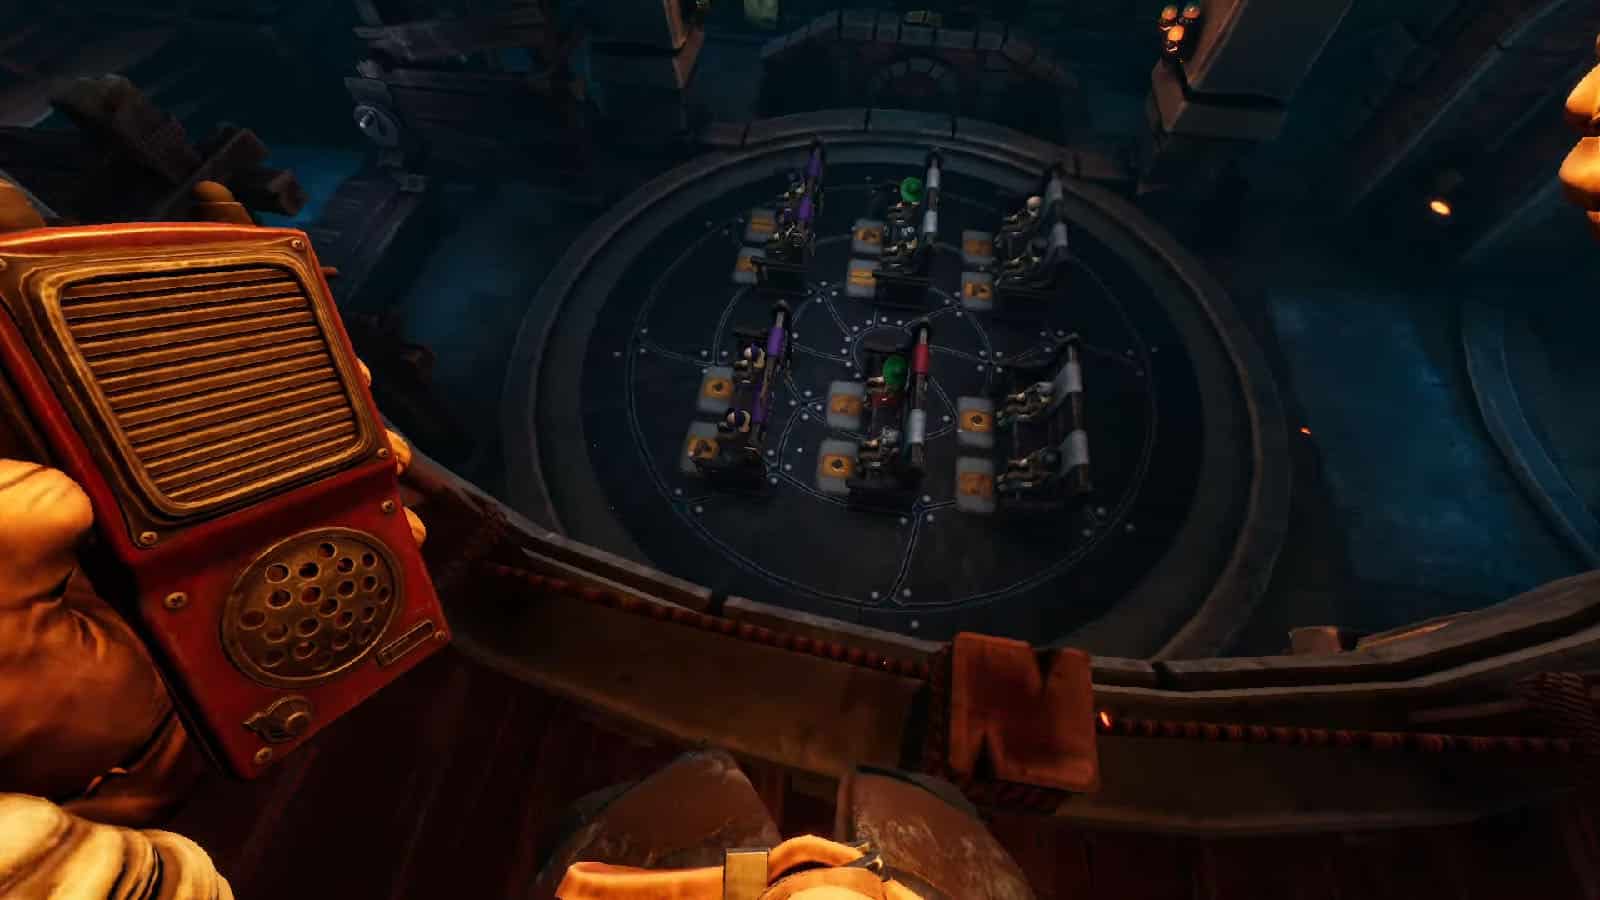
How this works: You and your partner need to figure out who sits on what spot using the help of the clues in the book found in the doll room, the icons shown below the pews, as well as the banners that hand on top of the display cases. There are six pews, each have color-coded drapes on them and rugs on the floor in front of them, and each pew can only accommodate two people.
There are also specific rules that govern the seating arrangement of everyone written on the book in the doll room, such as:
- Men and women cannot sit on the same bench.
- Resistance members cannot sit in front or behind of each other.
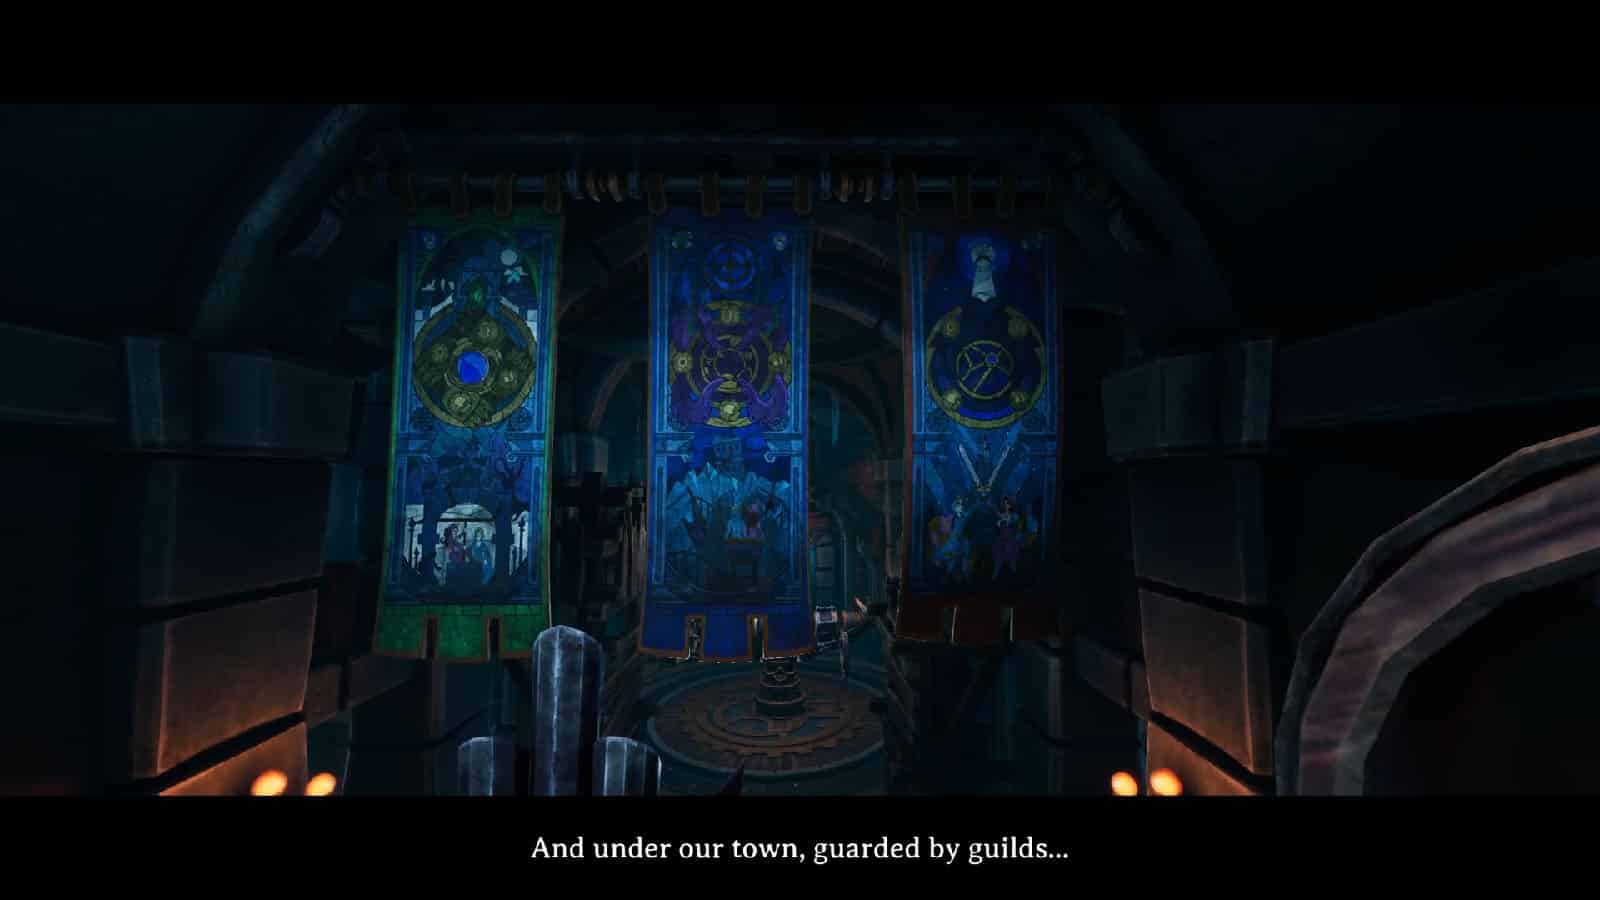
An additional clue on a scroll above the book tells that there are certain resistance members within each faction of the kingdom. The factions are the masons (hammer, ruler, wearing a mitre hat and a stole), the glassblowers (thin flask), the clockmakers (gears), and the bronze heaters (pouring bucket).
Here’s the solution:
First row: (from left to right when facing the pews from the altar) We have the Mason (two-layer curls), Glassblower (curly hair), Bronze heater (beard), Clockmaker (mustache). These are all the dolls with the purple mitre cap and the same ones from the previous puzzle. Also, based from the scroll, the Clockmaker is part of the resistance.
Second row: Green hat blonde girl, Woman with a hair bun, Green hat red hair girl, Woman with white hair and green bowtie.
Third row: Balding man with a monocle, Bearded man with a top hat, White hair man with a monocle, Man with bowler hat and monocle.
Once all dolls are placed in the right positions, the gate that blocks the wall of portraits in the upper room will be opened.
Revealing the Resistance
At this point, you need to suss out who are the people that are part of the resistance based on the note on the book and the scroll on the wall. The Clockmaker is already tagged as one, so his portrait on the wall can be interacted with to place a resistance marker on it, as well as raise the resistance marker behind where he’s sitting.
The other resistance members are:
- Woman with a hair bun
- Balding man with a monocle
- White hair man with a monocle
Once all four people has been marked on the portrait wall, the wall will open up into another room.

The People’s Hymn
The new room has a couple of tables with music sheets on them, and a place on the wall to the right where they should be hung. There is also a part of the scroll to the right that show the “musical notes” and the note that they represent. The other half is on the right side near the organ, which is now operational, down at the altar.
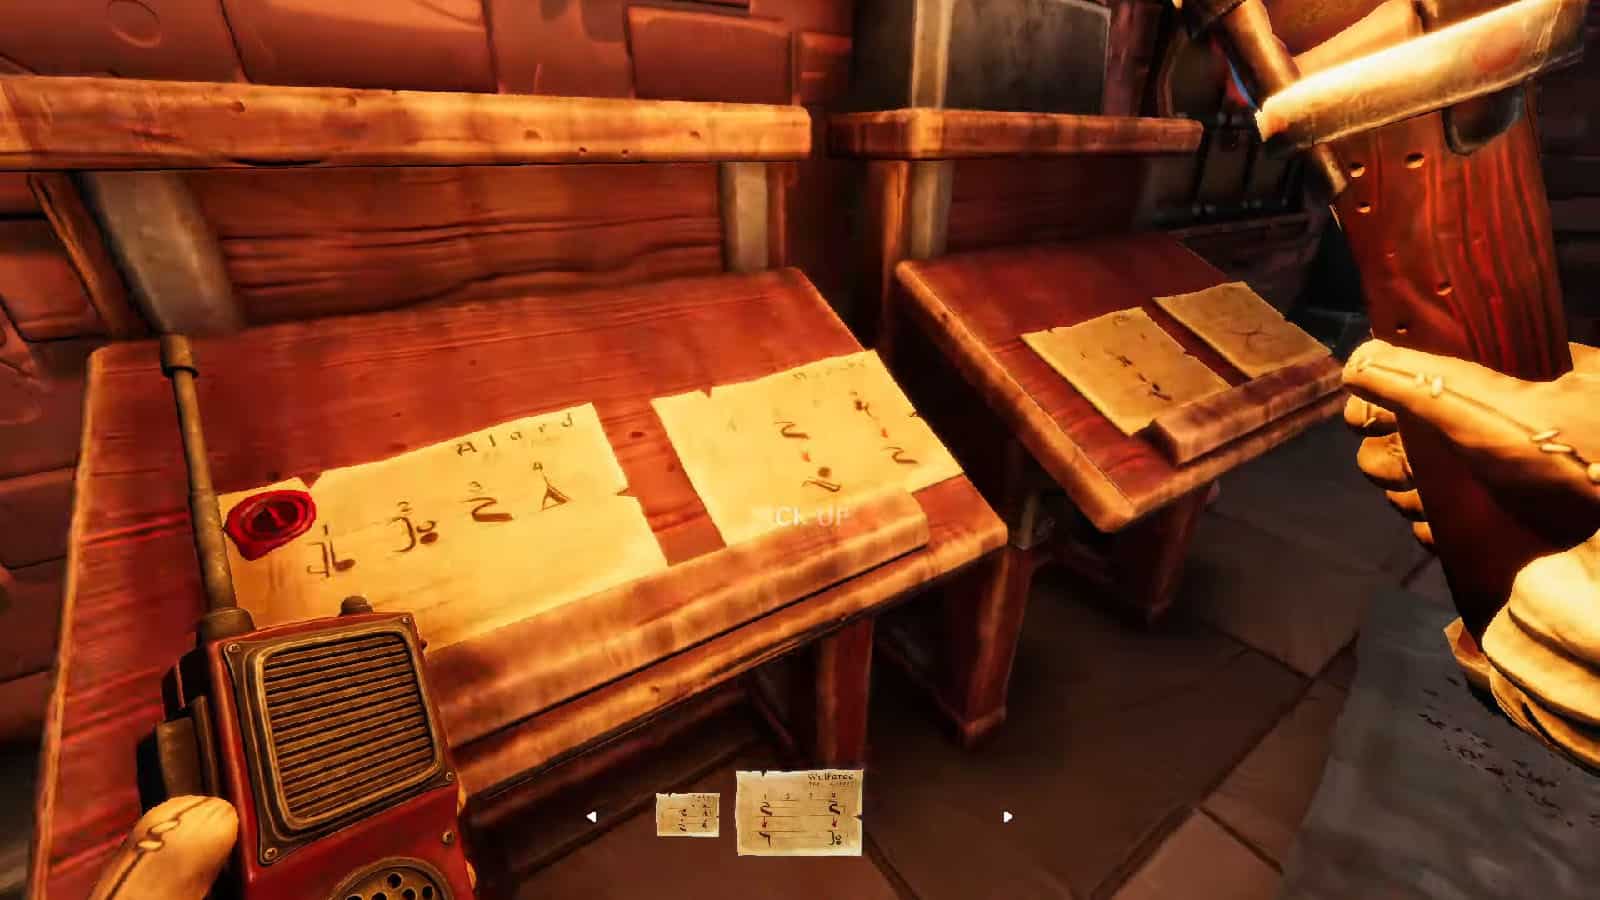
Another poster on the right side of the organ tells the story of the People’s Hymn which serves as a clue how the notes should be arranged, however it is also ripped.
How this works: One person will be at the music room while the other will be playing the notes on the organ. From the musical sheets on the table, one of them has a #1 stamp which is Alard the Clear’s. The History of the People’s Hymn also gives a clue that Yde followed Alard and made changes to the hymn as well, but there are two Ydes. Since the succession of musical changes follows chronological order, then Yde the Elder’s sheet should be next.
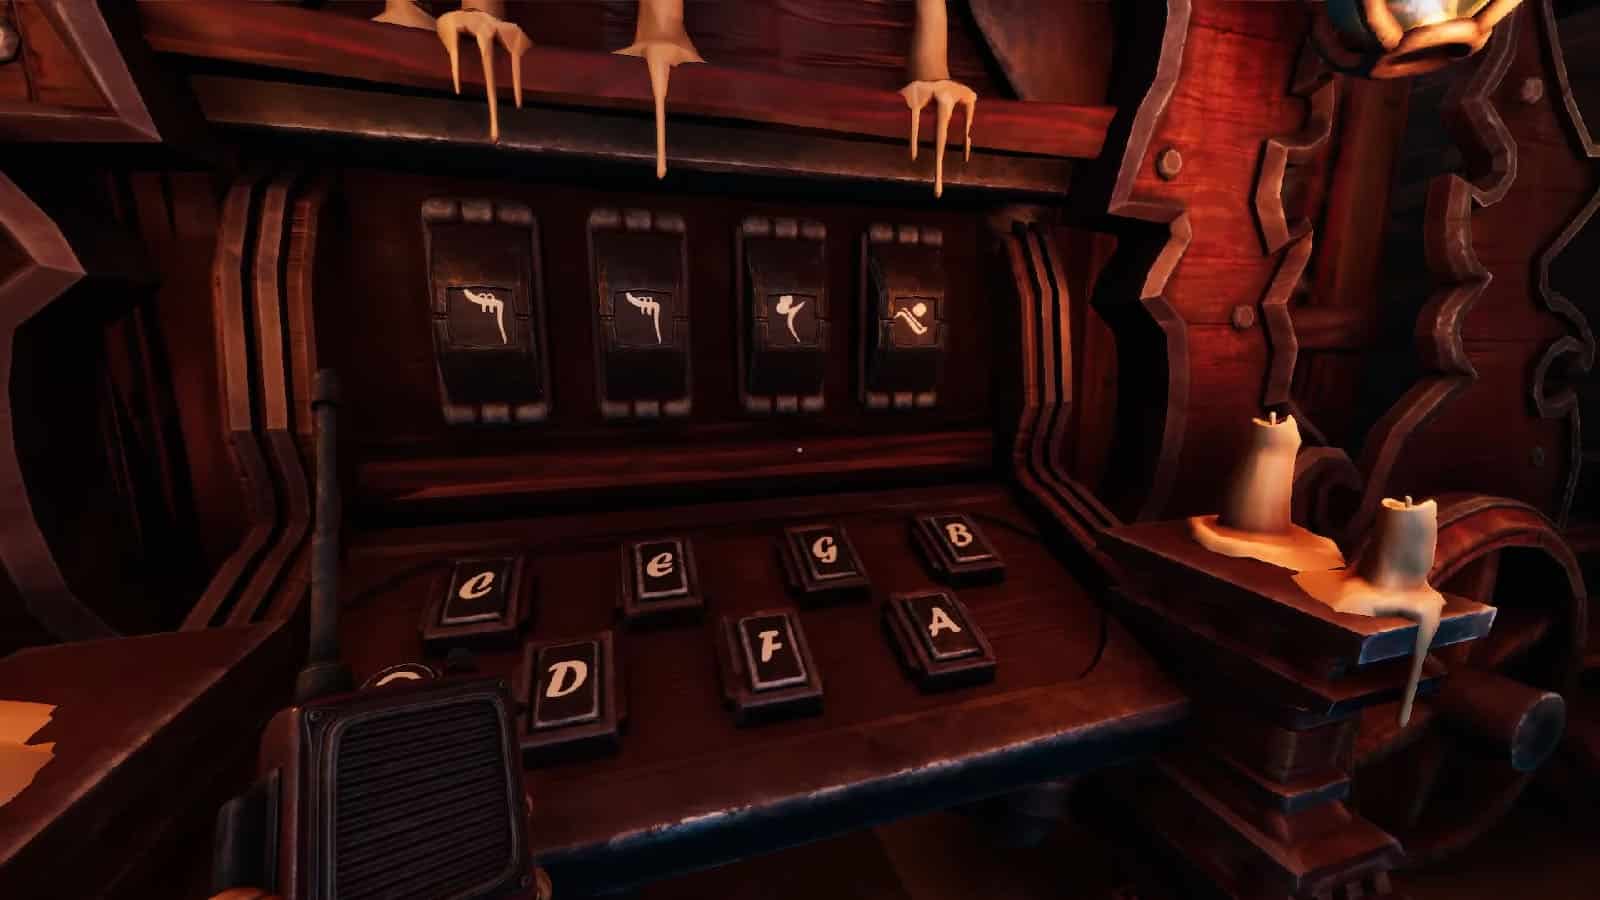
There are no other info as to who comes next, but the way the sheets work is that, starting from Yde the Elder’s, they will show the previous note/s on the upper staff, and the new notes on the lower staff. Arrows will also show in the middle of the staves telling if some notes are swapped. By that logic, here’s the solution showing the order and the notes to be played:
- Alard the Clear: G A C B
- Yde the Elder: G F C B
- Falco the Modern: G C C D
- Nancke the Critic: G F C C
- Yde the Younger: C F G C
- Wulfarde the Talented: E F G A
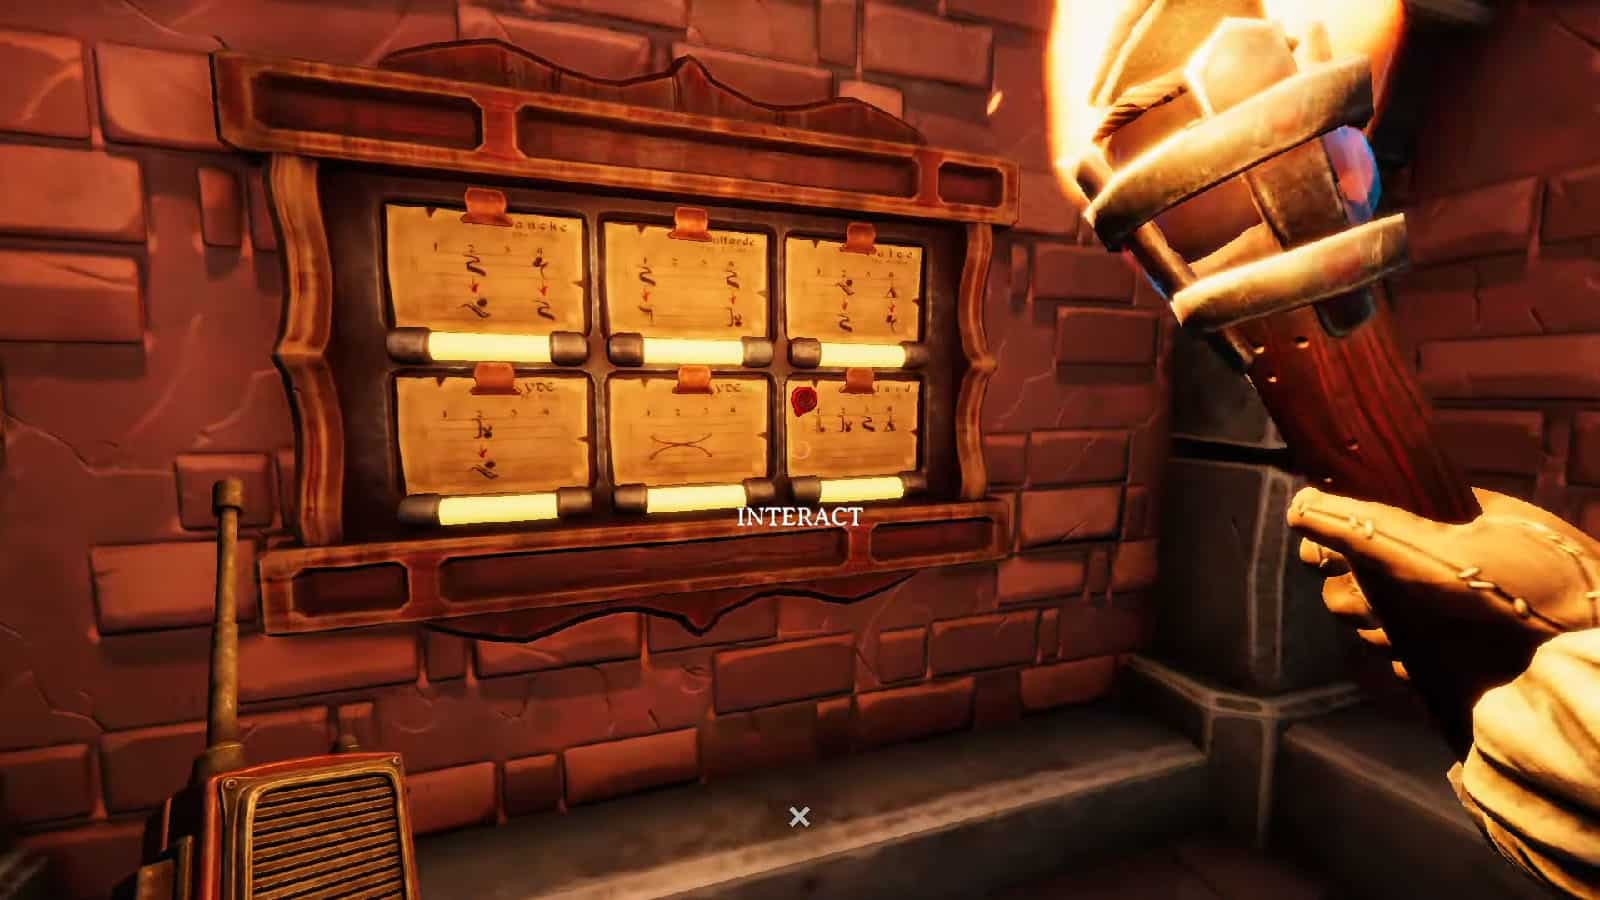
The player at the organ can play the sheets in segments and not necessarily all sheets have to be played in one go. Once a sheet is placed on the right slot and is played correctly, the light below it turns from yellow to green, indicating that it has been solved.
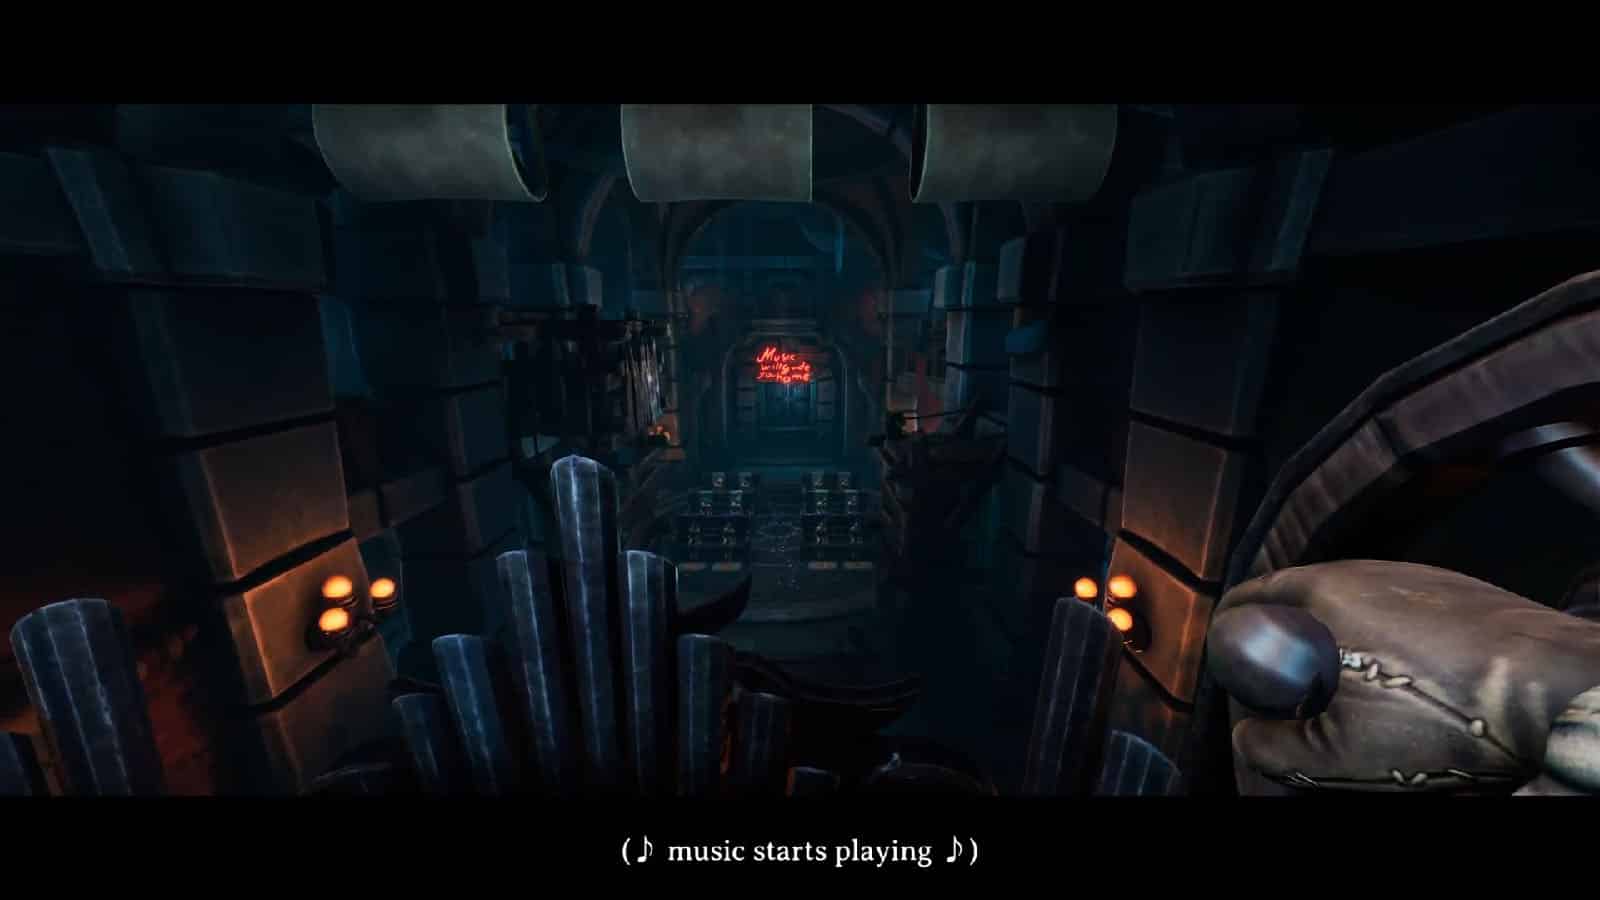
Once all sheets have been played correctly, the entire hymn will play and stairs will show up on the sides of the organ. On top of the organ, two cranks will also appear and you and your partner should use them together to reveal a telescope-like astrolabe machine from under the floor of the chapel.
Pay attention to the dialogue that is playing as it tells that three components will be needed to fully assemble the astrolabe machine.
After the dialogue, you and your partner can go outside the chapel and ride the hanging cart down into the ruins of the village. This will serve as the hub center from where you can choose which section to go to look for the missing components. From here on, you can choose to go to the Ruins of Rockbury, The Royal Cemetery, or The Nautilus.
This concludes Chapter 2 of We Were Here Forever. In case you need help in the next areas, here are our guides for them:
- We Were Here Forever Walkthrough Ruins of Rockbury
- We Were Here Forever Walkthrough The Nautilus (Part 1)
- We Were Here Forever Walkthrough The Nautilus (Part 2)
- We Were Here Forever Walkthrough Royal Cemetery
For easier navigation, check our complete We Were Here Forever Walkthrough – All Puzzle Solutions:
- Chapter 1
- Chapter 2
- Chapter 3 – Ruins of Rockbury
- Chapter 4
- Chapter 5 – Royal Cemetery
- Chapter 6 – Final Chapter
If you like this Guide, be sure to check out our other We Were Here Forever articles:
Check out this video by Retromation with his friend Orbital Potato as they continue trying to escape in We Were Here Forever:
