")
We Were Here Forever is the fourth installment of the We Were Here series. It is a co-op puzzle game where two players have to help each other out in solving puzzles while navigating through mazes and obstacles within a castle.
This guide will cover the puzzles in the second half of The Nautilus, one of the three locations where you and your partner need to go to search for a missing part for the astrolabe machine in the chapel. Check out our other We Were Here Forever guides for the previous challenges:
- We Were Here Forever Walkthrough Chapter 1 (Part 1)
- We Were Here Forever Walkthrough Chapter 1 (Part 2)
- We Were Here Forever Walkthrough Chapter 2
- We Were Here Forever Walkthrough The Nautilus (Part 1)
How to Solve We Were Here Forever The Nautilus Puzzles
We pick things up right after you submerge back into the underwater depths as a huge creature latches on to the Nautilus that you are in.
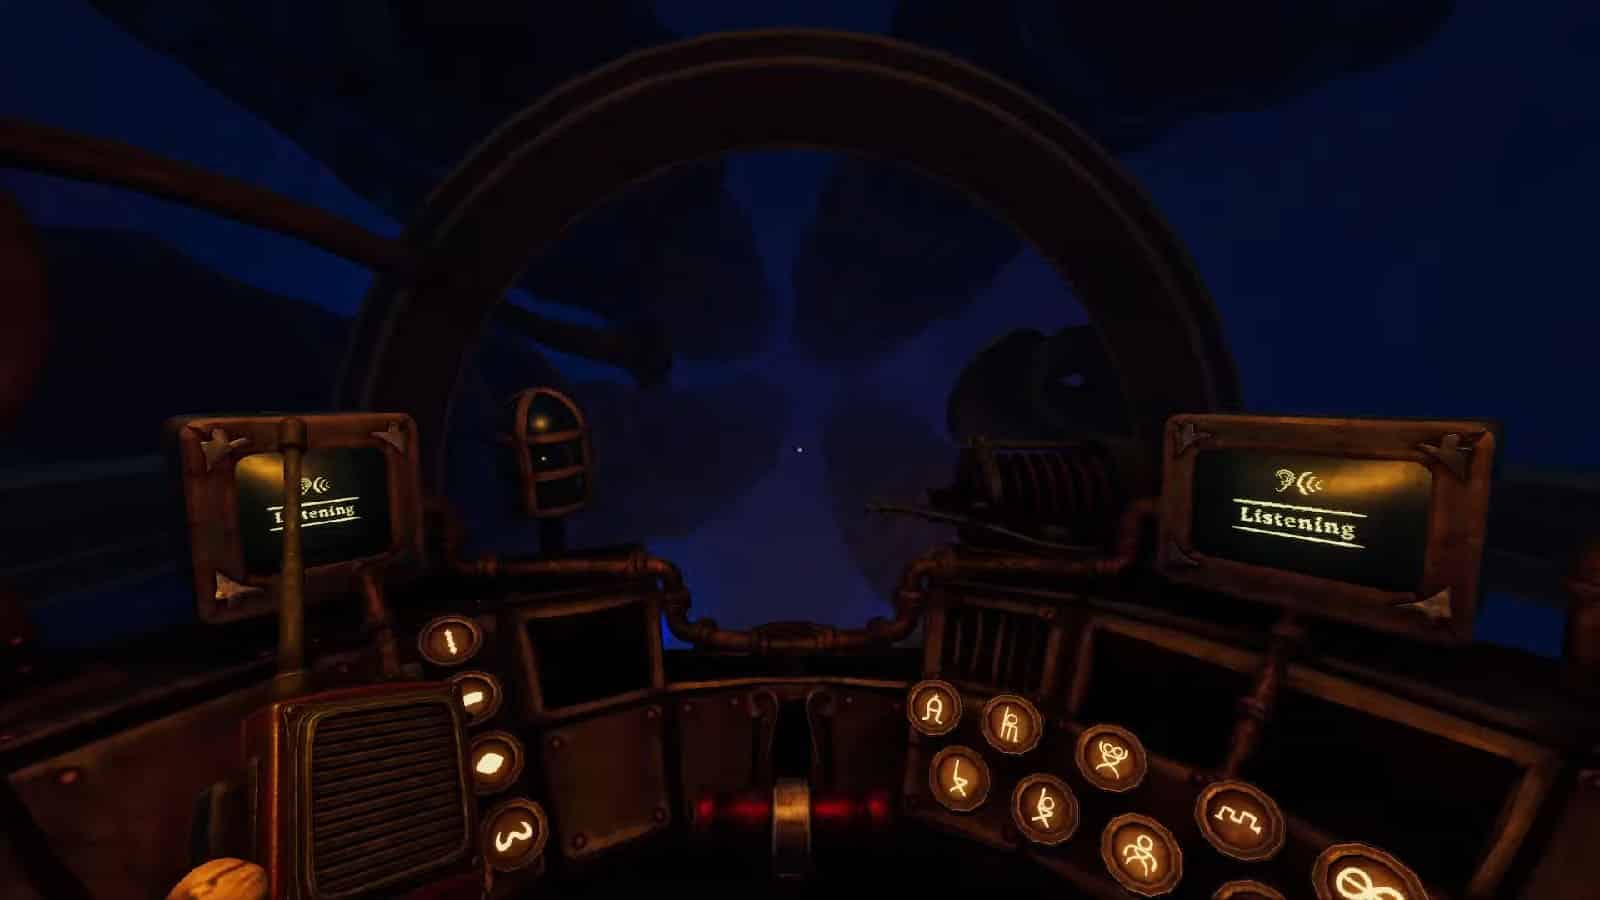
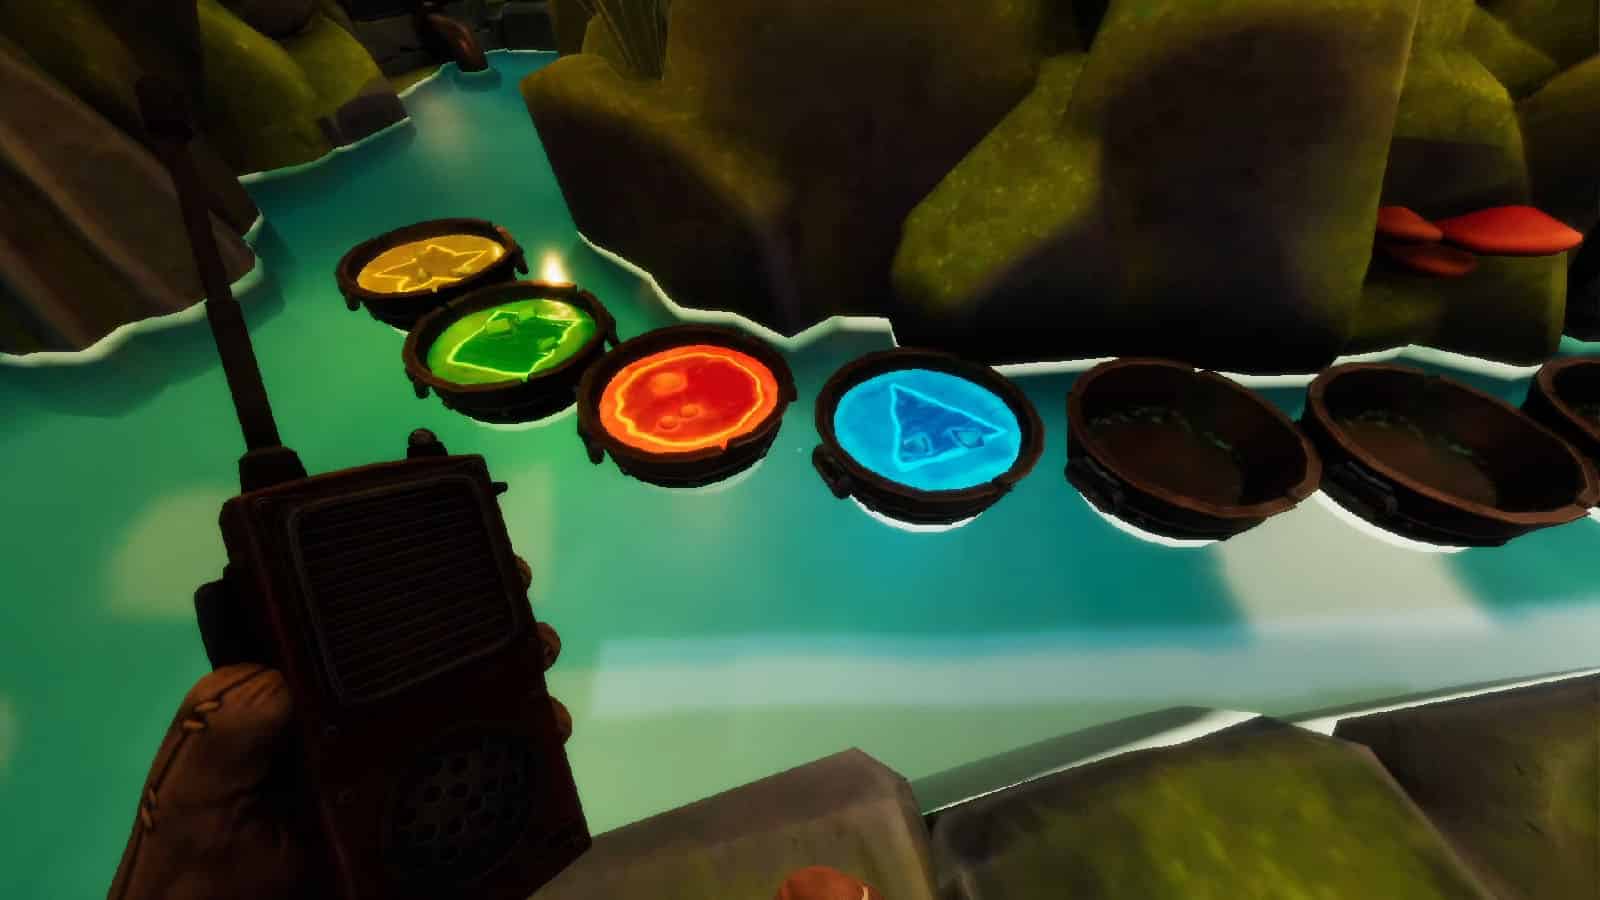
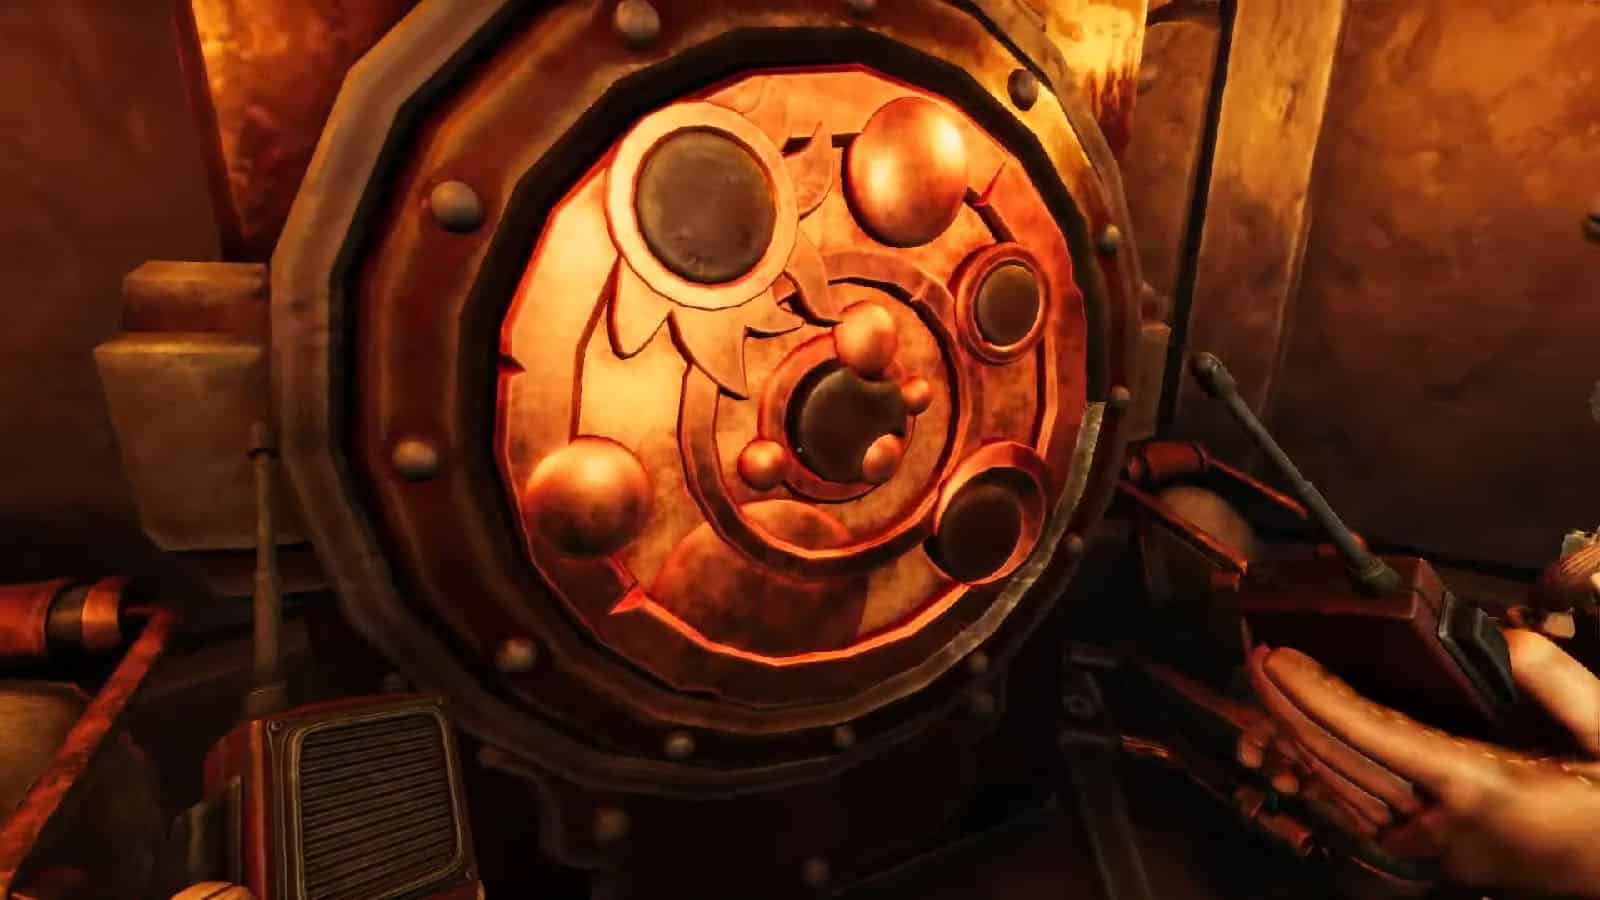
Guardian Translation
As the Nautilus goes down into the depths, huge tentacles will grab it. A cockpit will open up on one side of the Nautilus, while a console will rise up in the middle of it. A huge eye will soon come into view at the cockpit.
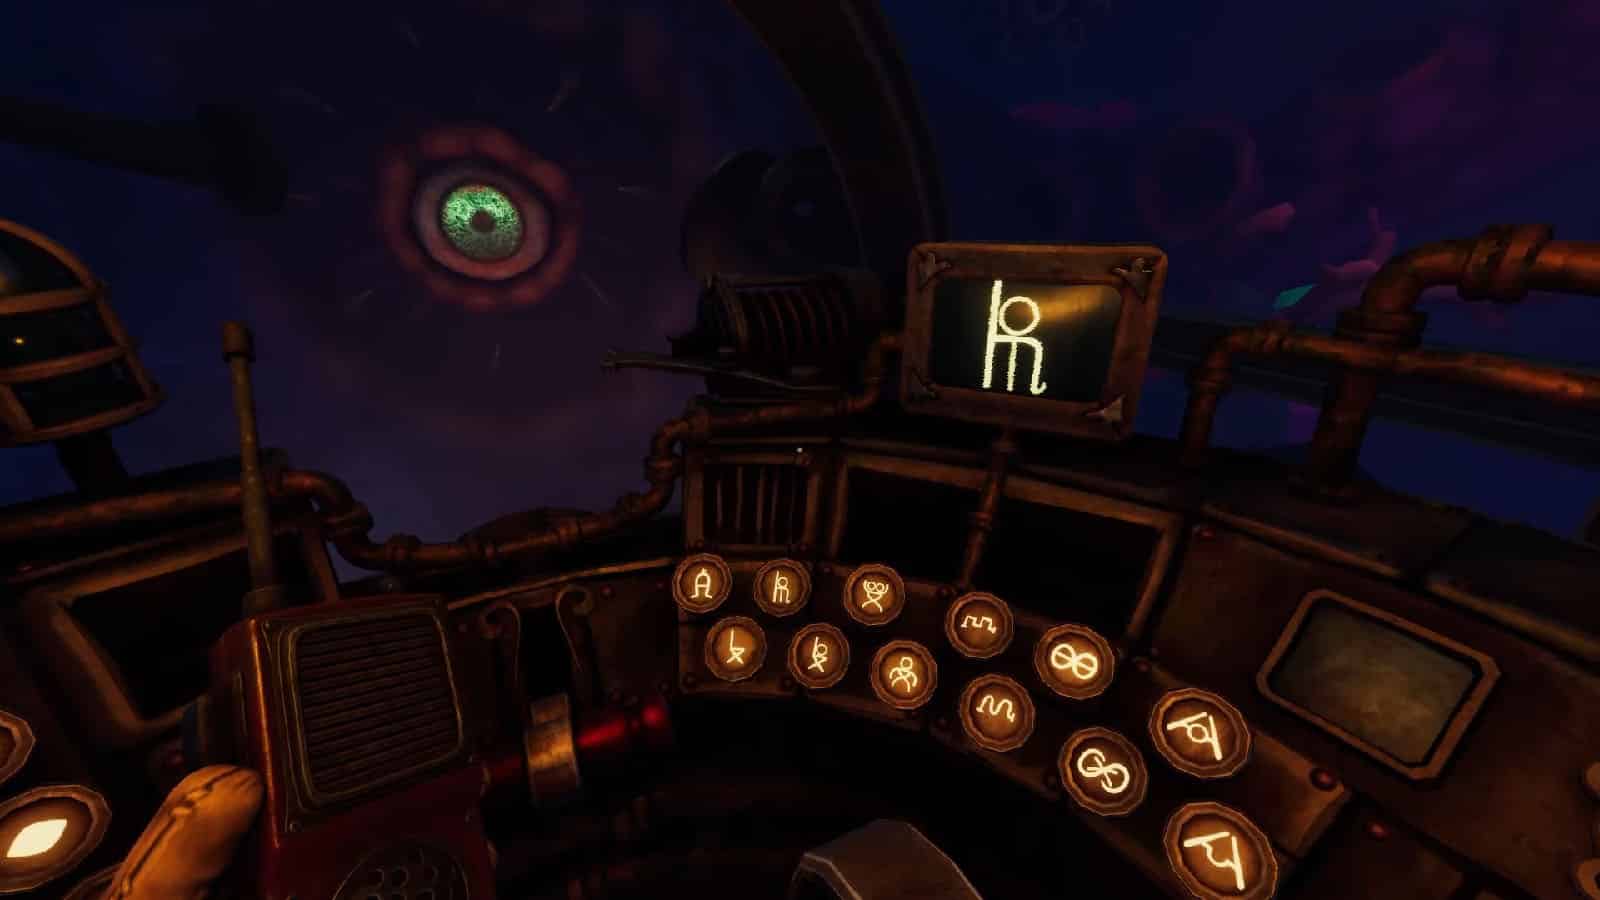
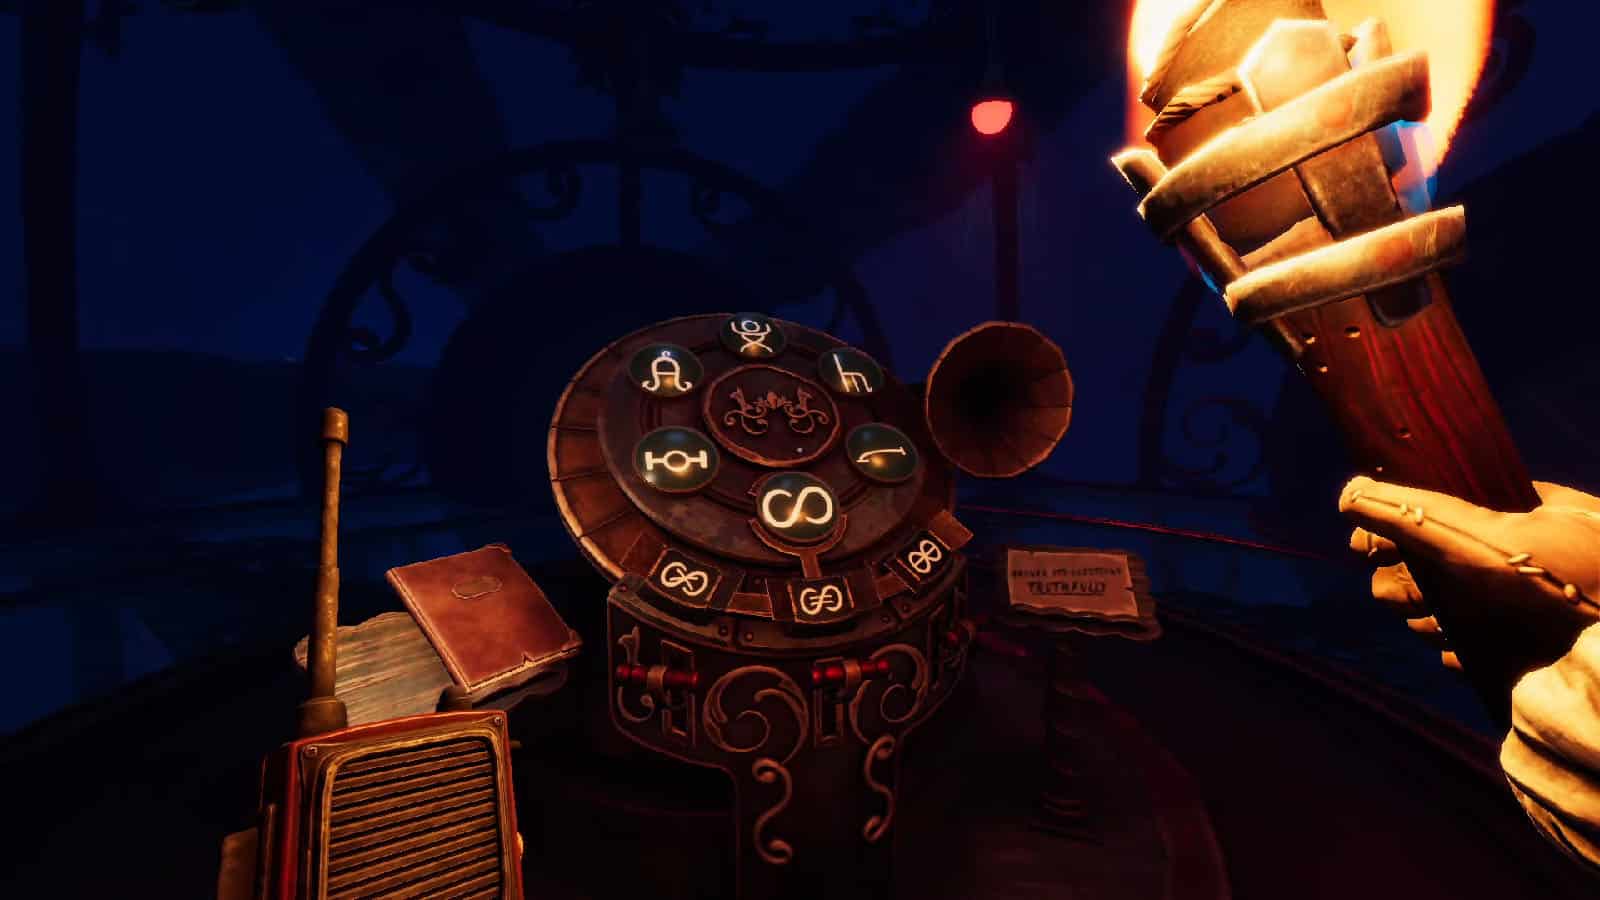
How this works: This puzzle requires you to listen to the sounds that the Guardian makes and reply to it using the controls on the cockpit. The catch is that the person in the cockpit can hear it better than the person on the console, so the sound has to be described by the player in any way possible, even by mimicking it. The player in the cockpit should also pay attention to the shape of the Guardian’s pupil as it also gives out certain patterns.
The person on the console can use the buttons, dial, and the translation notes to try and decipher what the Guardian said. Once it has been translated, you will then have to reply to it by telling the person in the cockpit what symbol combinations to press before pulling the lever to transmit the reply back to the Guardian. If the reply is correct, the Guardian will remove its tentacles from the Nautilus one by one.
Here’s the solution:
- The Guardian says “Greetings.”, reply with “Hello.” using the Curvy A with a Cross and the Almond symbols.
- The Guardian says “Who. Be. You.”, reply with “Explorers.” using the Pointed A with the Bowl and the Mustache symbols.
- The Guardian says “King. Be. Hurt.”, reply with “Yes.” using the Closed Eyes and Almond symbols.
- The Guardian says “What. Explorers. Desire.”, reply with “Escape.” using the Curvy M and Thick Dash symbols.
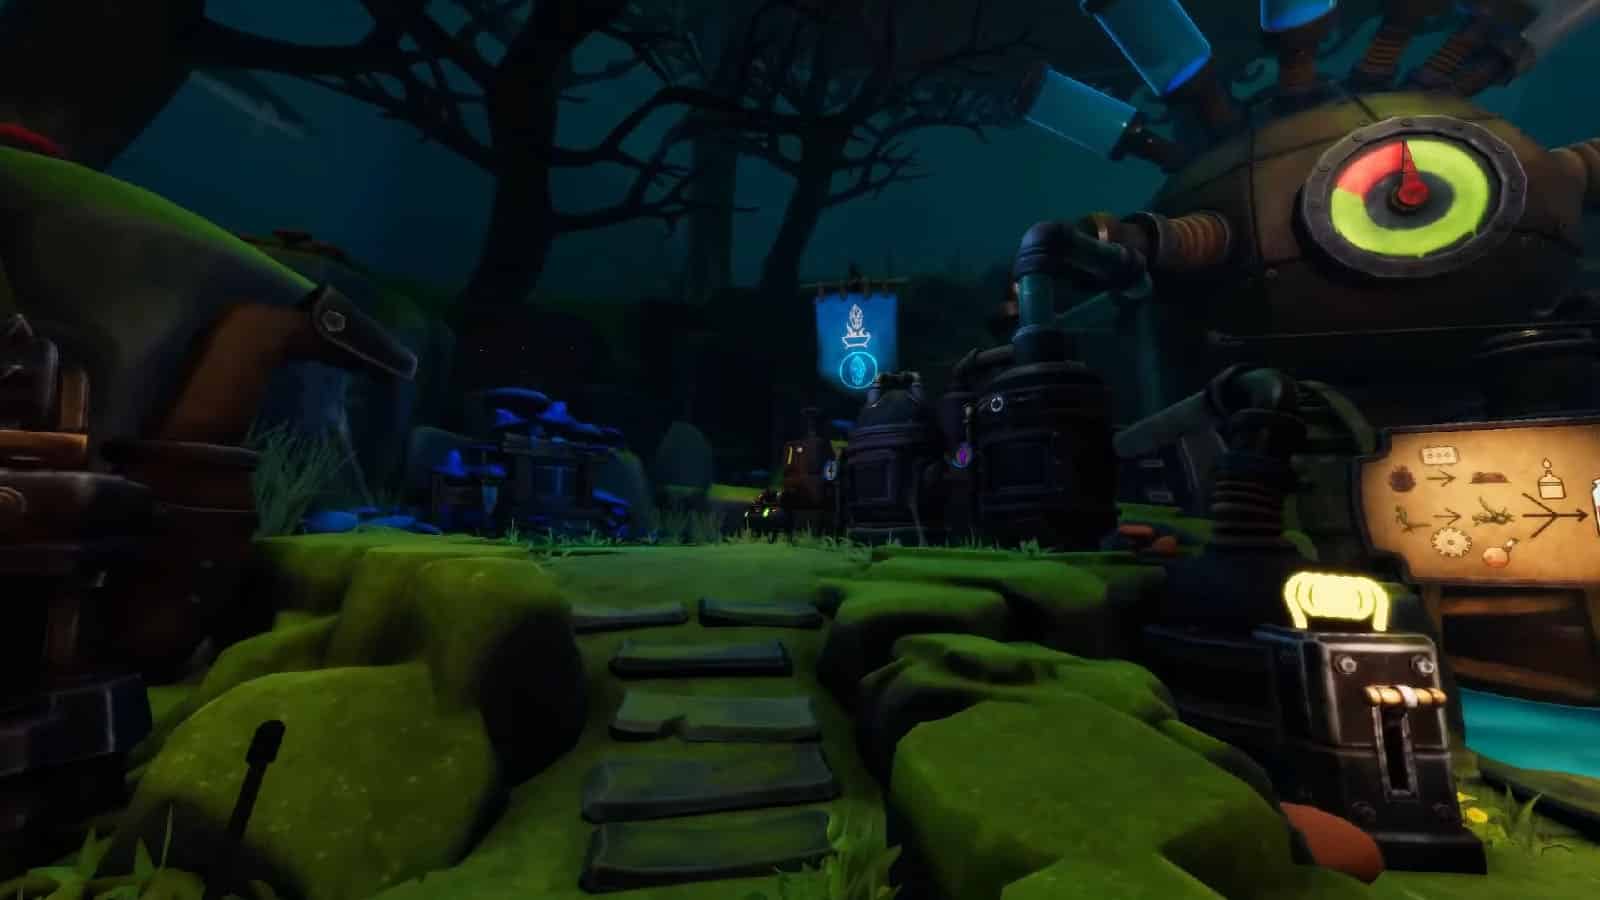
After completing your dialogue with the Guardian, it will let go of the Nautilus and you can continue going deeper into the depths. You’ll then find yourself in an underwater dome that is full of machinery.
Dome of Creation
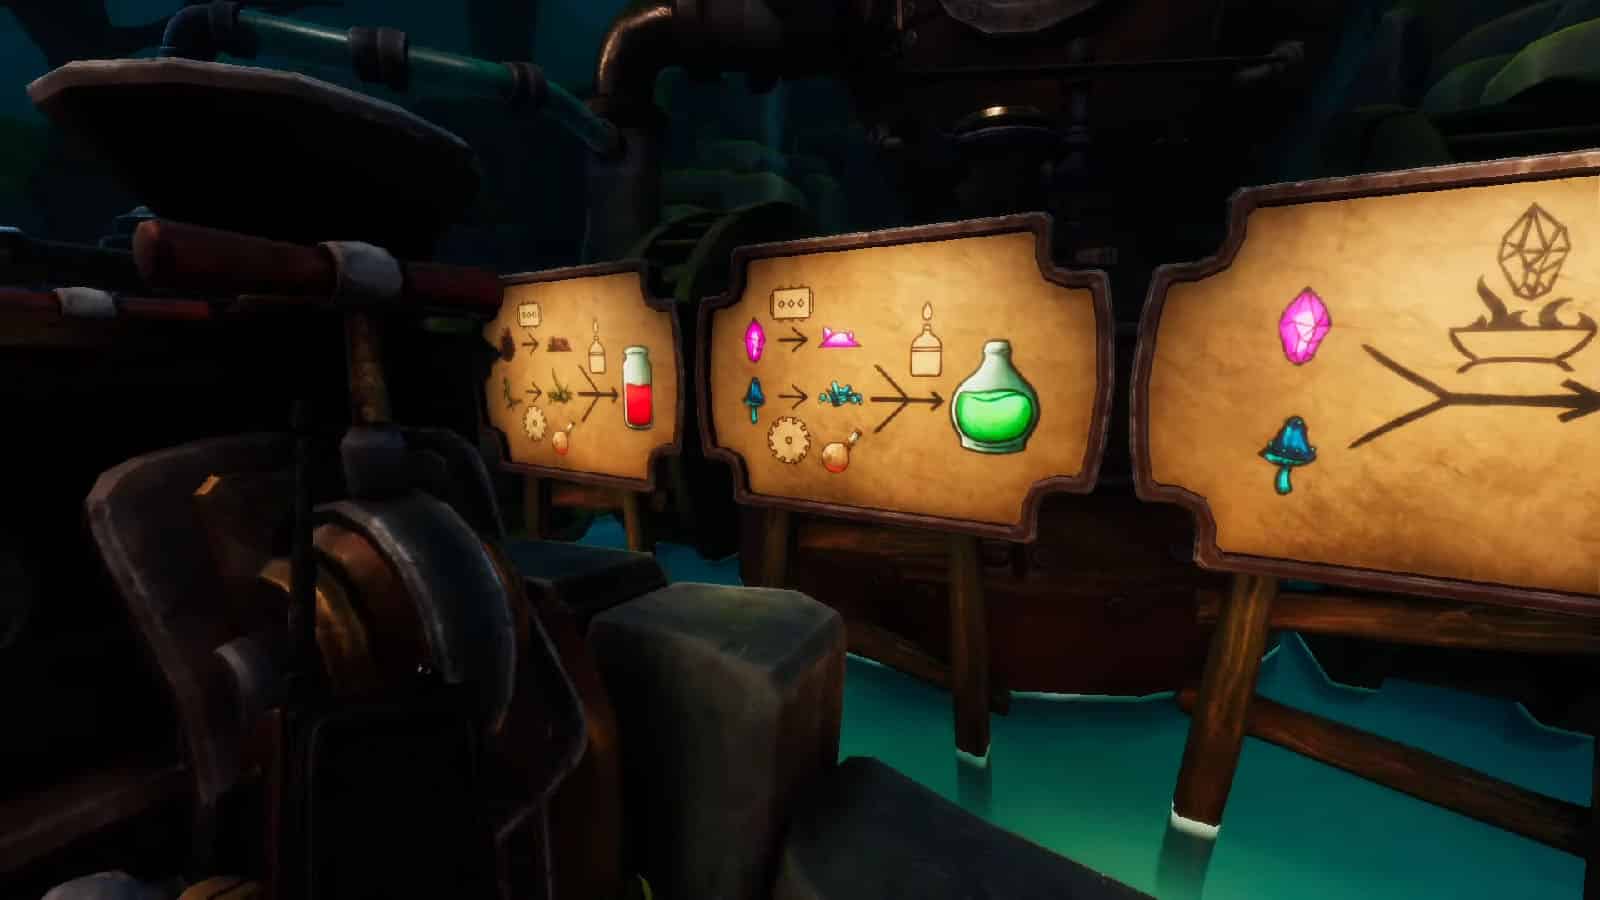
You and your partner will find yourselves at the opposite sides of the Dome of Creation. All around you are different kinds of machinery that create different kinds of potions and reagents which also require specific ingredients. There are also a couple of recipe boards that show how to create the stuff you need. In the middle is a mold of an astrolabe piece surrounded by a small moat with a transport system made out of bowls.
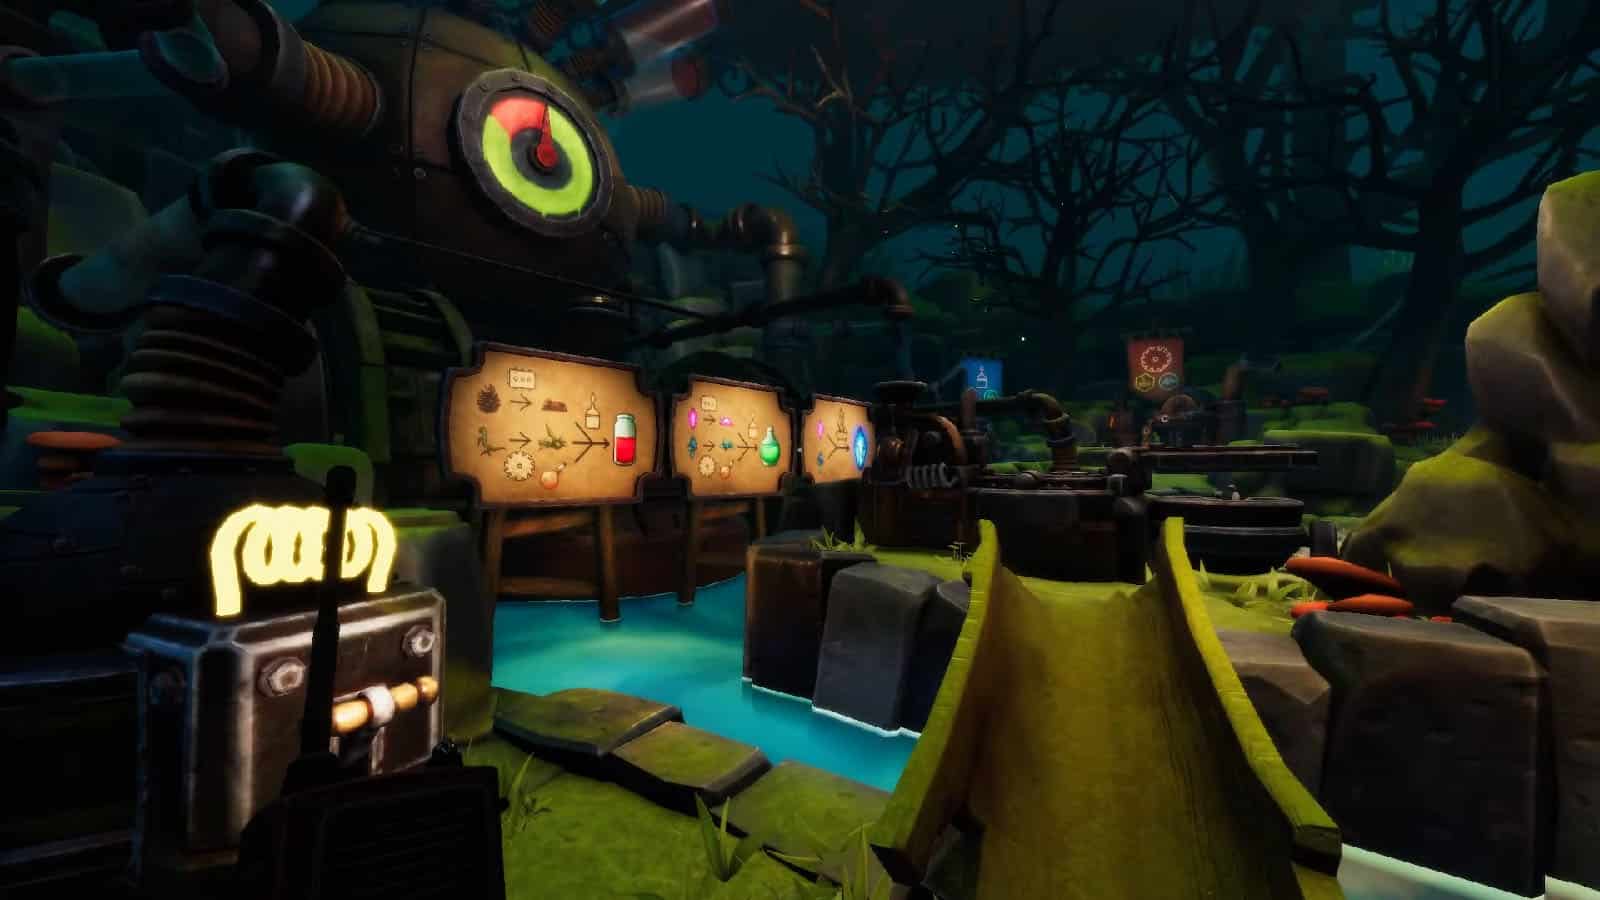
How this works: You and your partner will have to work together to create the astrolabe piece based from its recipe. The ingredients of the piece will also have to be crafted from different ingredients through different processes with the help of the machineries. Every recipe should be followed perfectly so that you’ll end up with an astrolabe piece that does not crumble.
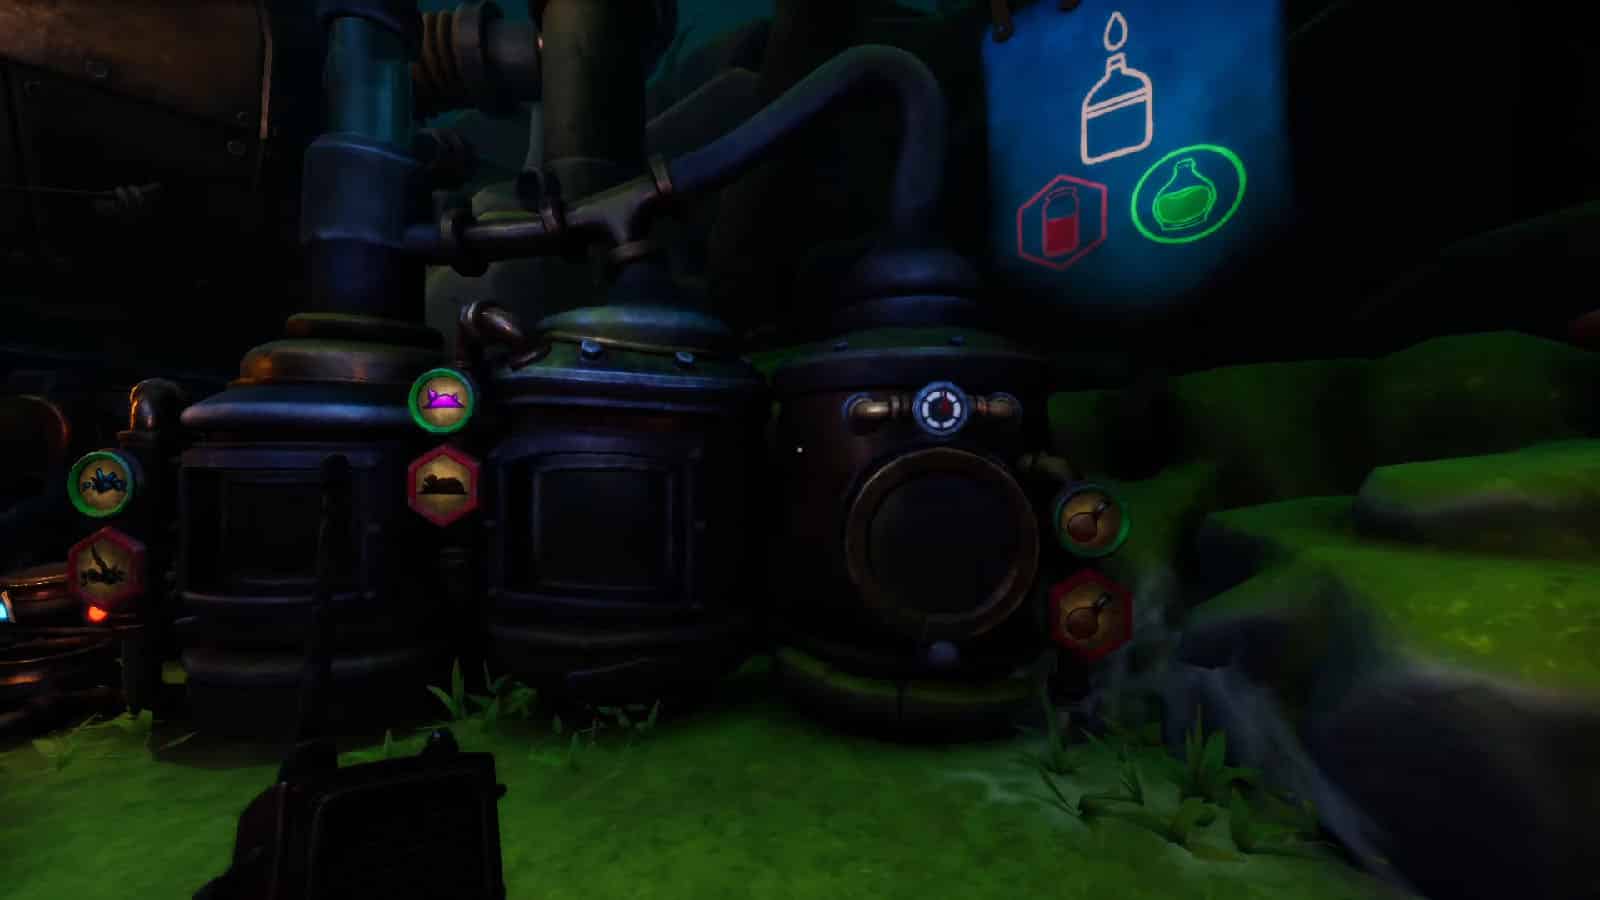
In the middle of the dome is the large melting pot which has two levers for its spout in the middle, and two other levers, one on each side. The side levers will make all the other machineries operational, allowing you to get materials from the dispensers and use the processors to get them processed.
To get materials, you can grab a bowl from the middle and place it inside a dispenser. Some of the bowls also have special liquids in them needed for processing; there are only one of each kind of liquid, however they do not get used up and can be picked up again with a bowl if needed.
The levers will also start an 8-minute timer in which you and your partner should be able to create and put all the main reagents in the huge melting pot.
If all the main reagents for the astrolabe piece has been placed into the melting pot before the timer runs out, both of you should pull the middle levers to pour the melted materials into the mold and get the astrolabe piece, otherwise, the piece that you’ll get will be crumbly. The middle levers can be pulled before the timer runs out if you finish early or if you want to reset if a mistake has been made.
How to solve this puzzle:
The main technique of solving this puzzle is to familiarize the machineries and dispensers available on your sides, then coordinate with your partner to sort out the ingredients that you’ll need. Some of the ingredients, such as the pink crystal, can only be made by the right side. But then, pink crystals are needed to create the blue crystals which can only be created by the left side.
The bowl conveyor in the middle has a fixed speed, but if you want to send something to the other side, it’s best to put it to where the other person can get it sooner: for the left side, place it farthest away from the melting pot; for the right side, place it close to the melting pot.
Make sure to create the exact amount of ingredients to not waste time. You can also try to multi task by creating several different kinds of materials, if permitted. Here are the list of materials that are needed to be prepared:
- x4 pink crystals
- x3 whole
- x1 pulverized
- x4 blue mushrooms
- x3 whole
- x1 chopped
- x2 pulverized pinecones
- x2 chopped roots
- x3 vials
Go for the pink crystals, the blue mushrooms, and the roots first as they only need to be dispensed. Then, coordinate with your partner when it comes to the liquids and make sure to always take out the liquids from the output and place them back into the input if you are creating another batch of ingredients.
Once every reagent has been made and placed into the melting pot, pull both middle levers down and you will get an astrolabe piece. Take the astrolabe piece back into the Nautilus and insert it in the slot on the wall to head back up to the village. Then, travel back to the chapel to place the piece on the astrolabe. You will have a short cutscene with the jester as you climb back to the chapel, but you’ll still be able to proceed.
Do not forget to place the astrolabe piece in the astrolabe first in order to proceed to the next sections.
If you have completed all three astrolabe pieces and installed them on to the astrolabe, then you can check out our We Were Here Forever Walkthrough Final Chapter if you need help with the last puzzle of the game.
For easier navigation, check our complete We Were Here Forever Walkthrough – All Puzzle Solutions:
- Chapter 1
- Chapter 2
- Chapter 3 – Ruins of Rockbury
- Chapter 4
- Chapter 5 – Royal Cemetery
- Chapter 6 – Final Chapter
If you like this Guide, be sure to check out our other We Were Here Forever articles:
- Castle Rock Doors Are Open, We Were Here Forever is Available Now on PC
- We Were Here Forever Walkthrough Chapter 1 (Part 1)
- We Were Here Forever Walkthrough Chapter 1 (Part 2)
- We Were Here Forever Walkthrough Chapter 2
- We Were Here Forever Walkthrough Ruins of Rockbury
- We Were Here Forever Walkthrough Royal Cemetery
Check out this video by Orbital Potato with his friend Retromation as they take on The Nautilus puzzles:
