")
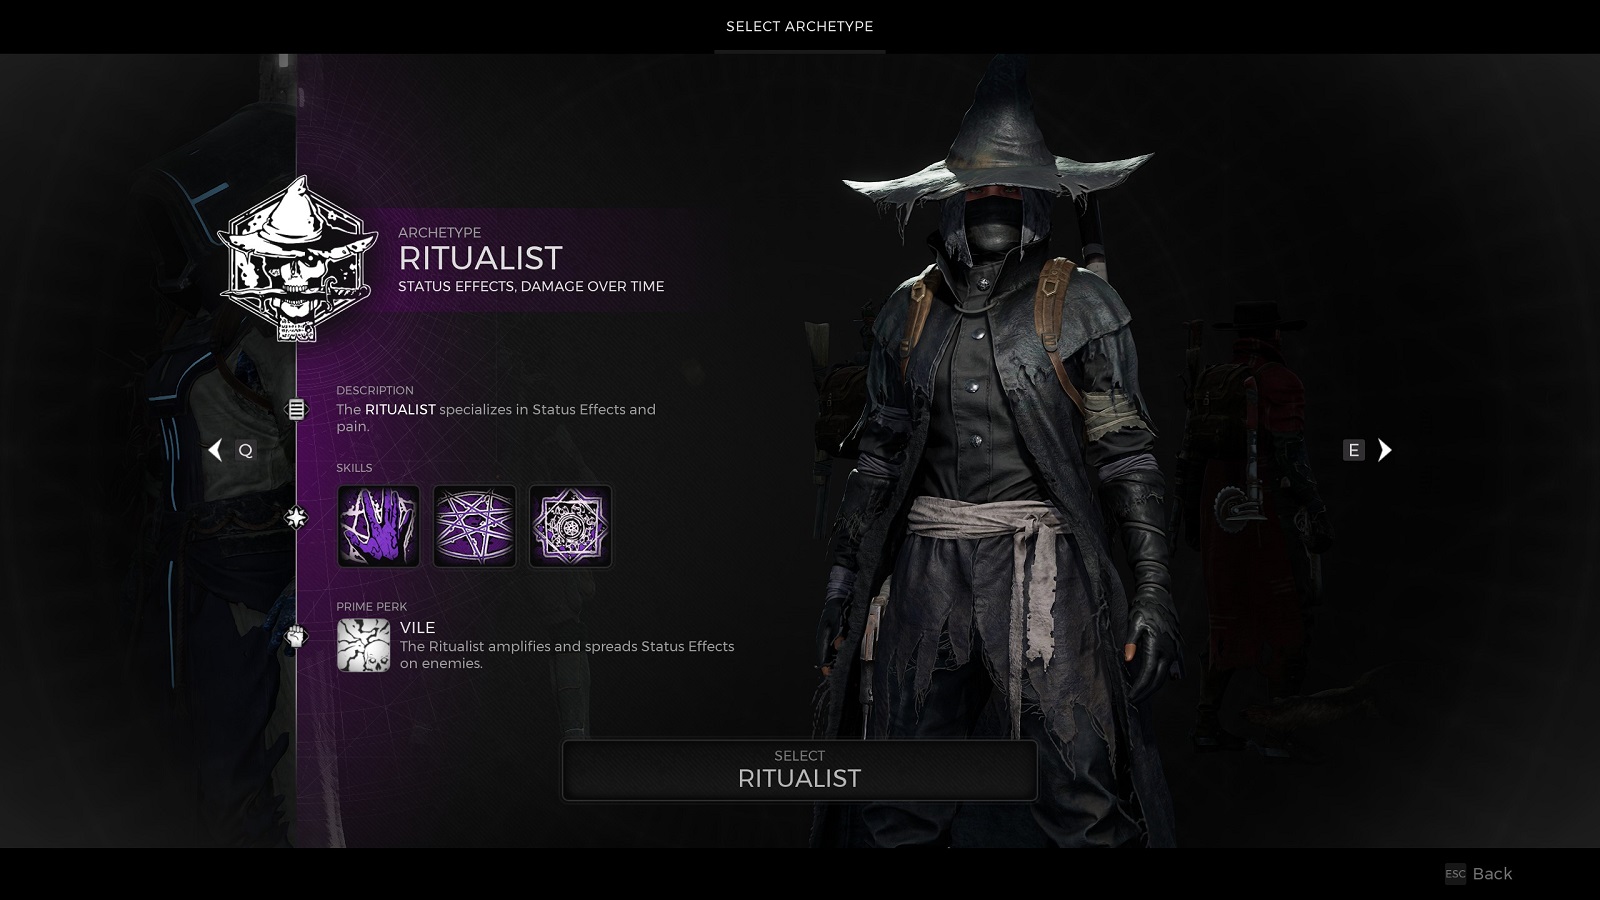
Remnant 2’s Awakened King DLC is finally here and with it comes the new Ritualist Archetype. And I don’t know about you guys but I’m really excited about tapping into this Archetype’s fullest potential. The idea of stacking status debuffs is nothing new in Remnant 2. It’s usually a matter of how much more damage you can inflict on a bleeding or burning enemy. But this is the first time we actually get a class that gets more powerful the more status effects are stacked on an enemy. Talk about S&M distilled into a Remnant class.
This guide will tell you how you can unlock the brand new Archetype and what you need to know to start working towards to max level. Fortunately for us, it doesn’t take much to find the crafting material needed to make it. (As opposed to the Archon Archetype and its laundry list of requirements.)
How to Get the Ritualist Archetype in Remnant 2
To unlock the Ritualist archetype, you’ll first need to get the Ragged Poppet material. This is what you’ll need to unlock the Archetype itself. The thing you need to know about the doll is that it is very easy to miss its location if haven’t already looked everywhere on the map.

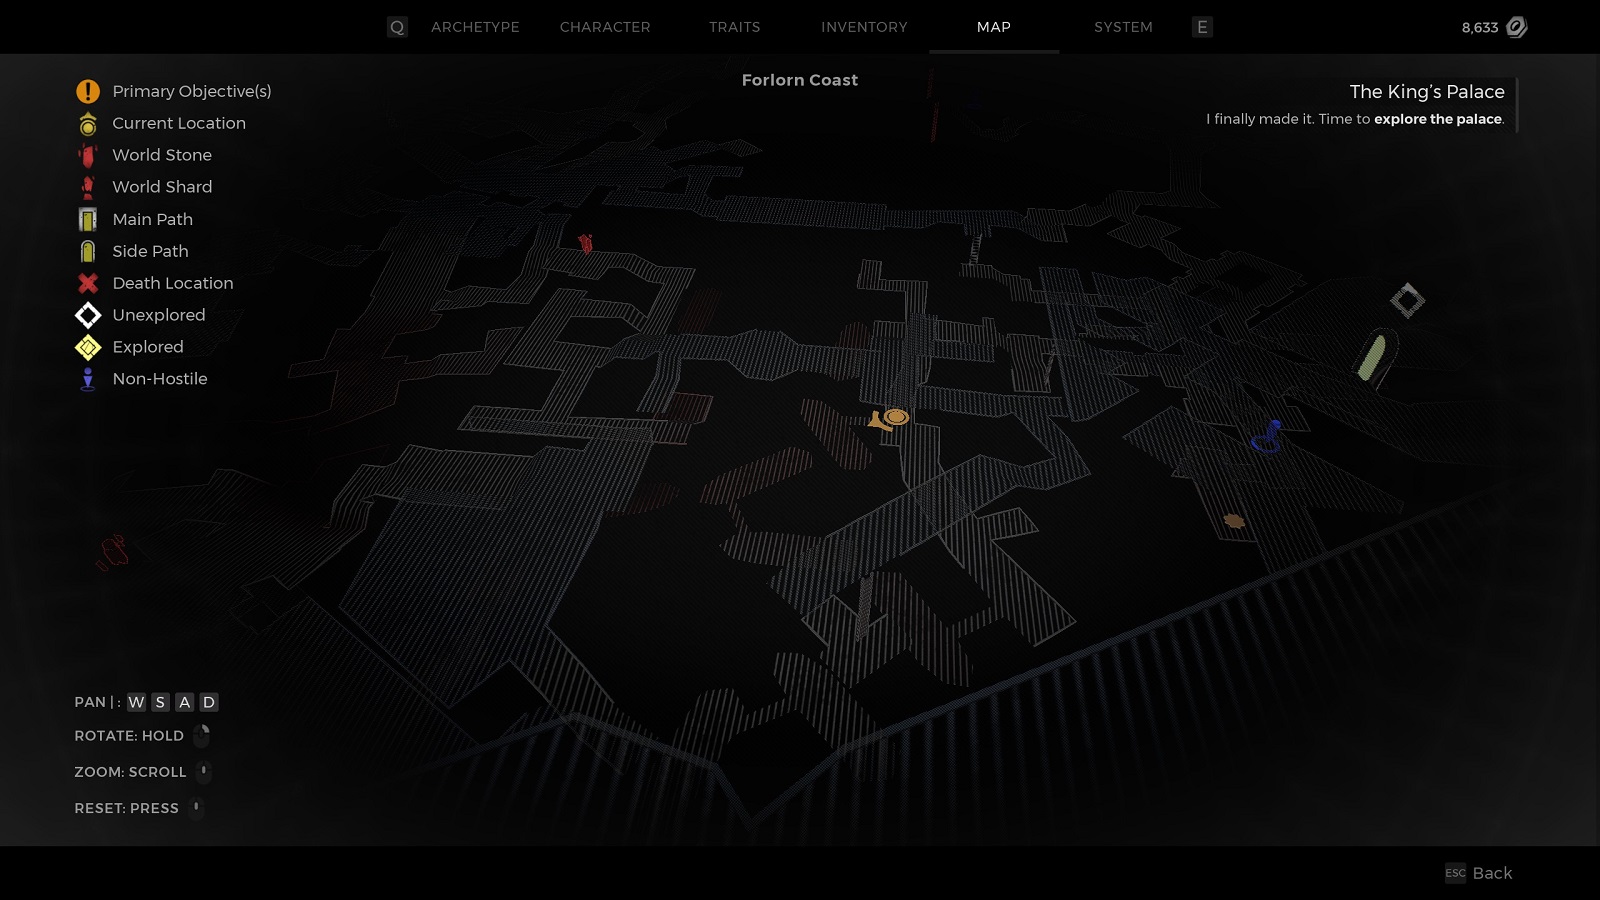
The doll can be found in the DLC’s first major area, the Forlorn Coast. Specifically, inside a cave near the wharf nearest to the sea at the bottom of the map.
The reason why I say it is very missable is because the cave is well hidden and put in a place where you’ll need to do a bit of platforming to get to. Additionally, it is directly in the opposite direction of where the main objective is: the stately castle in the distance. It is also very likely that you may just overlook the area entirely as it is always crawling with enemies most of the time.
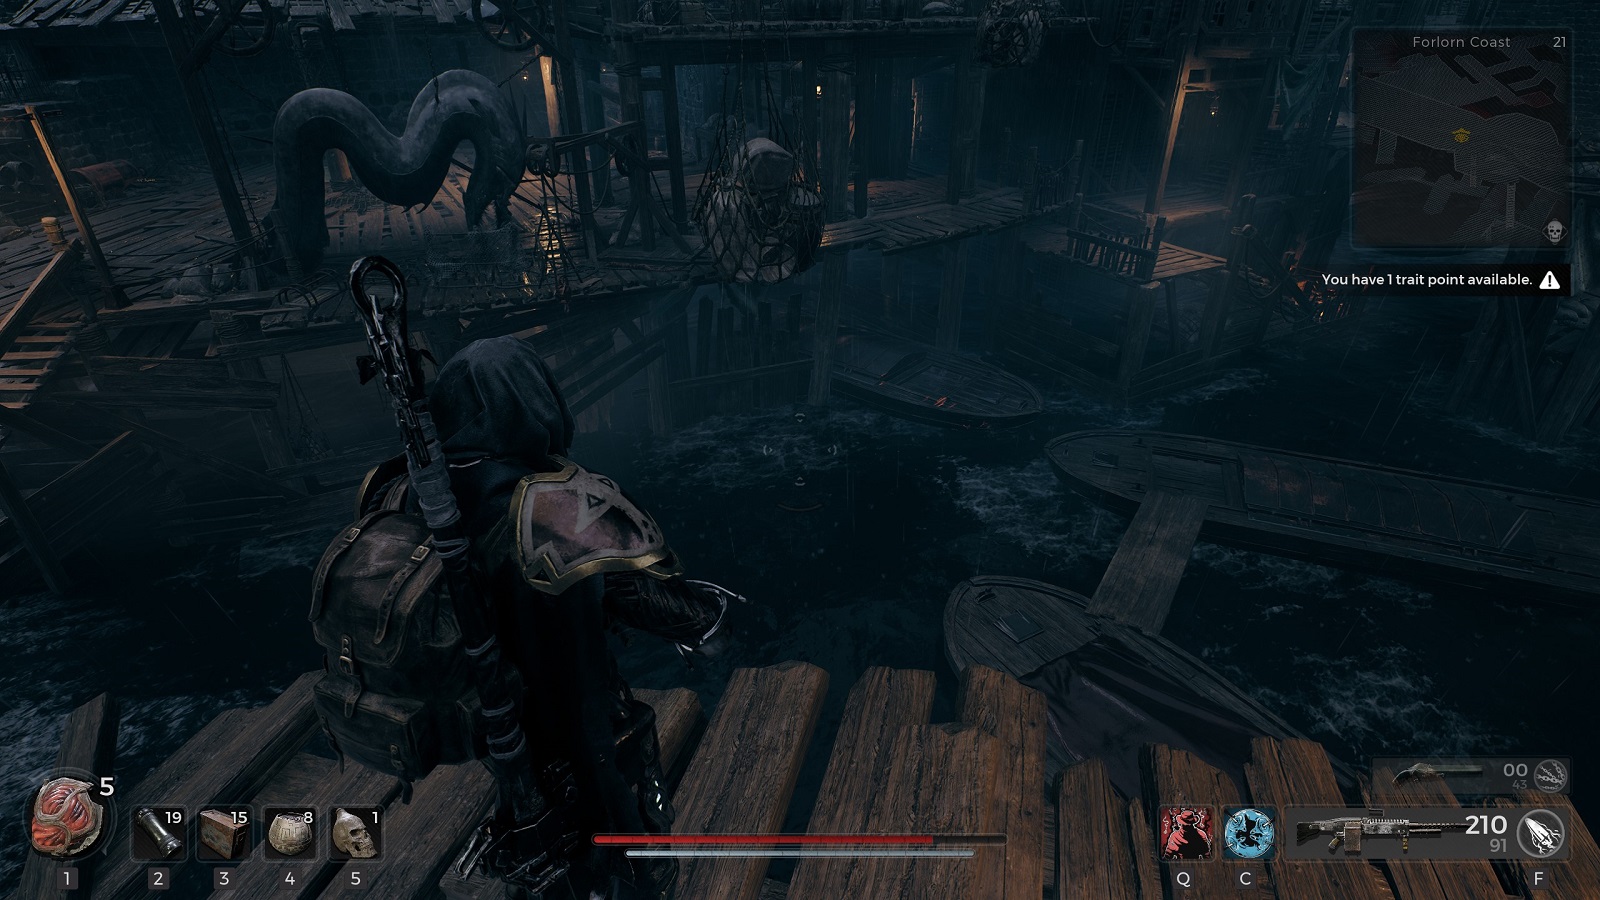
You are going to need to look for this place pictured above. If you see this giant eel on display then you are in the right place. Fight your way to the bottom of the wharf until you get the row of boats that chain together to form the platforming section.
You’ll usually see a good number of Dran down here with some of the mutated creatures messing around on top of the water. You can possibly kill them on approach from the high ground but that can get so far before you actually need to go down via ladder.
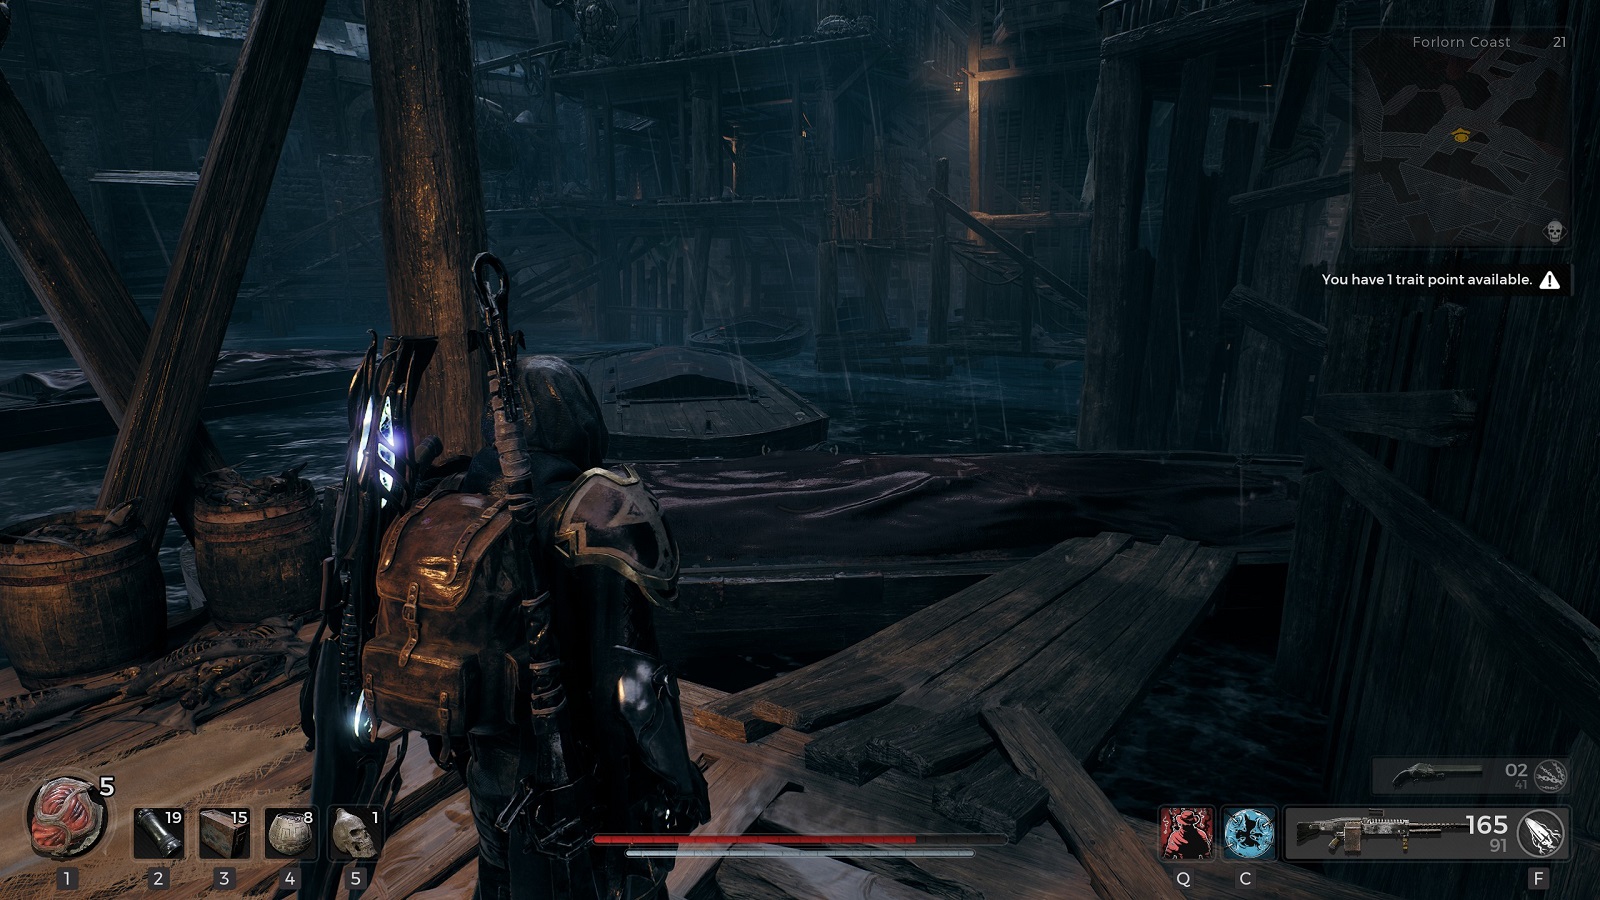
Complete the slight jumping section and you’ll find yourself on the other side of the dock. Stick to the rock wall and to the left and you’ll see this cave pictured above. This is where you’ll find the ragged poppet.
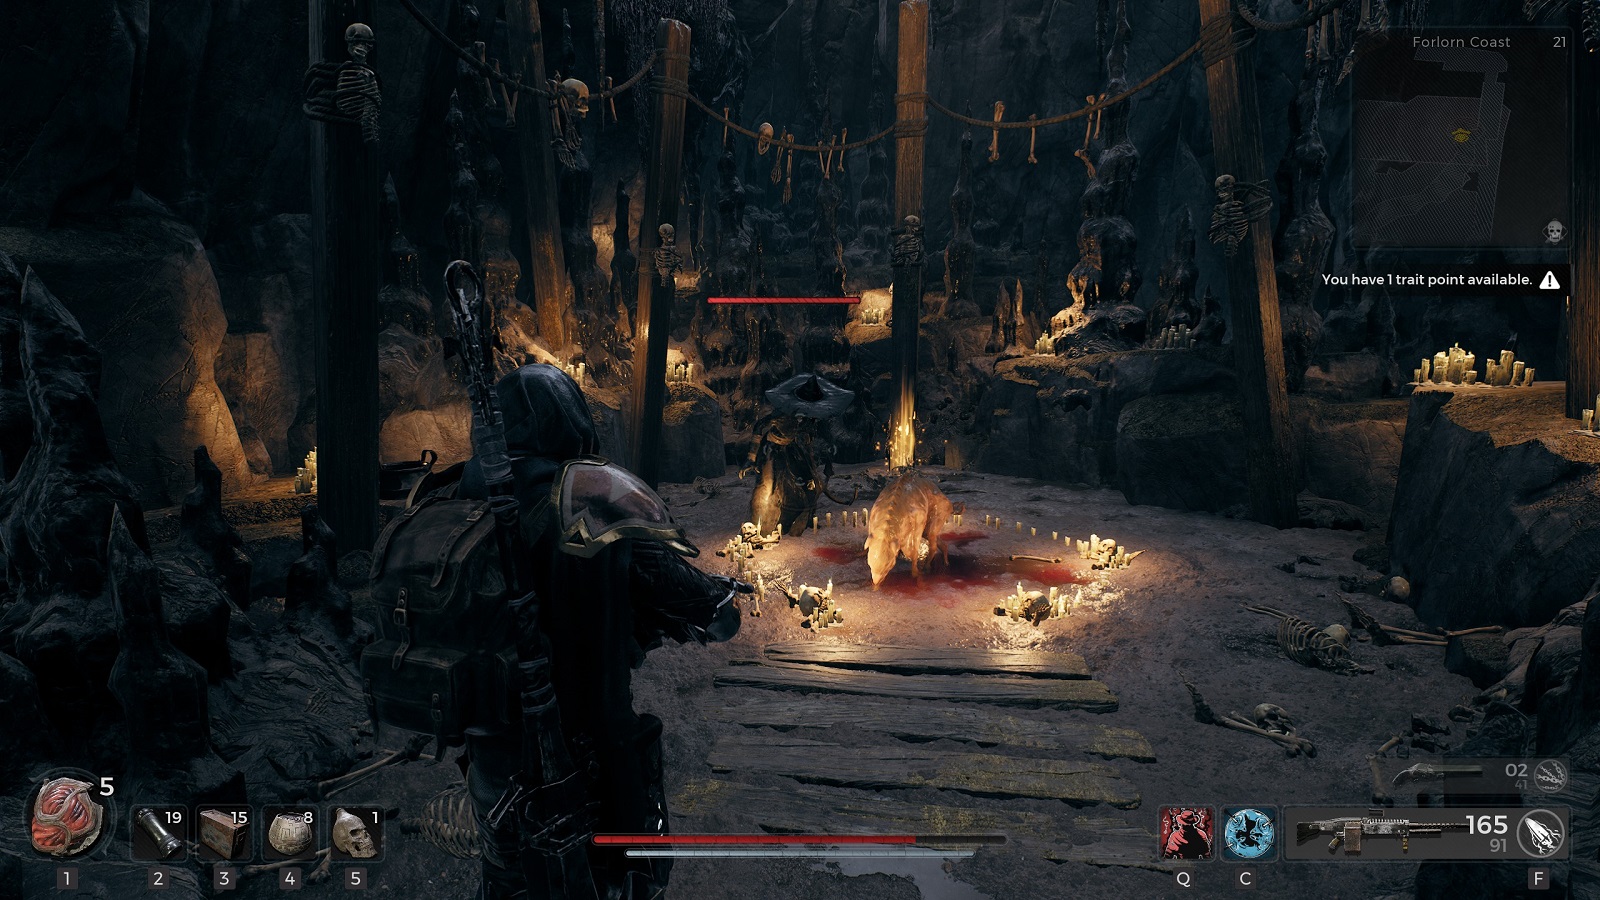
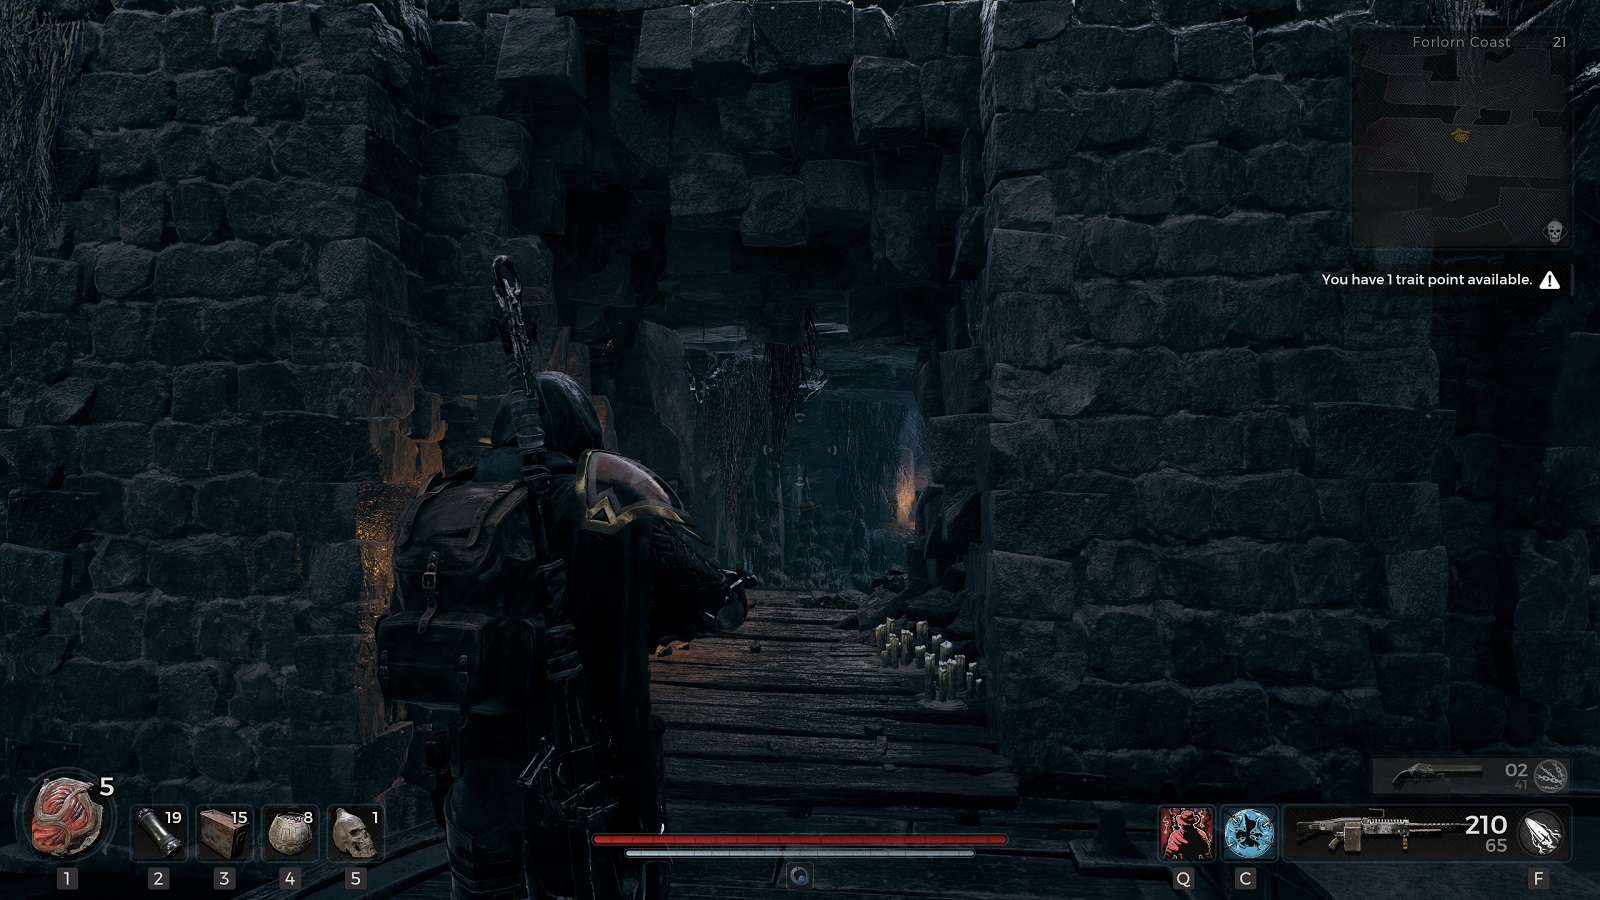
At the end of the cave, you’ll find this Ritualist trying to perform magic on the pig creature in the middle of a summoning circle. Needless to say, I didn’t dare allow them to finish for fear of that single pig turning into something troublesome. Besides the Ritualist, there aren’t any other enemies in the cave. But you can’t afford to let your guard down in close quarters.

After you’ve dealt with the threats, you are free to look around the cave. It is simple save for the copious amount of candles and bones lying around. The doll is found on the floor next to a foundational support and a pile of bones.
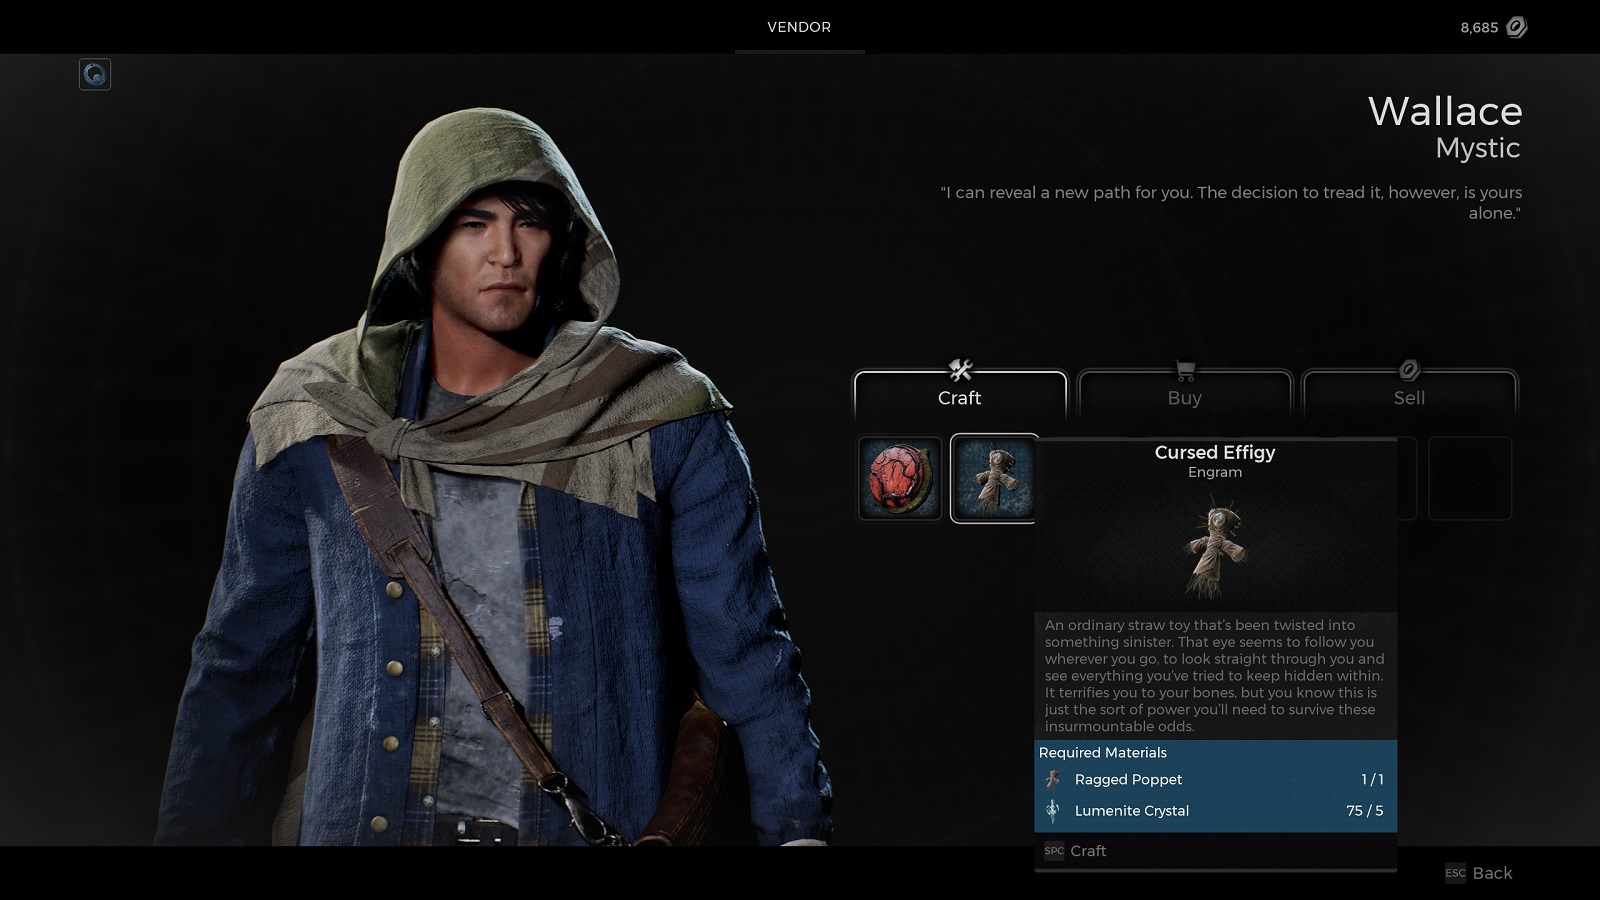
You know the drill by now. Doll in hand, return to Ward 13 and talk to Wallace about turning the ragged poppet into the Cursed Effigy Engram at the cost of:
- 1 Ragged Poppet
- 5 Lumenite Crystals
And that’s how you can get the Ritualist Archetype in Remnant 2.
Ritualist Archetype Associated Gear
Note: We now have guides on how to get the complete set of armor and weapons. Unlike other Archetypes, you can get the full set of armor and weapons by progressing to different points in the DLC map. Your best bet is to do all of this in the One Shot map where all the items can be acquired before RNG takes over in subsequent runs.
In the meantime, the only other way to get the full Ritualist armor set is to make an entirely new character from scratch and select the Ritualist Archetype as your starting archetype.
Ritualist Armor Set
- Zealot’s Hat
- Armor: 11.3
- Weight: 4.7
- Resistances
- Shock: 1
- Blight: 1
- Zealot’s Overcoat
- Armor: 45.2
- Weight: 18.8
- Resistances
- Bleed: 3
- Burn: 2
- Shock: 3
- Blight: 4
- Zealot’s Seaboots
- Armor: 22.6
- Weight: 9.4
- Resistances
- Bleed: 2
- Burn: 1
- Shock: 2
- Blight: 3
- Zealot’s Wraps
- Armor: 11.3
- Weight: 4.7
- Resistances
- Burn: 1
- Shock: 1
- Blight: 1
Ritualist Archetype Details
The Ritualist Archetype has a lot of potential. But it will mostly depend on the weapons and accessories that you have equipped. That’s the thing about this class. Usually, an archetype can hold its own no matter what kind of equipment you have on before swapping to it. But the Ritualist is such a Specialist that the only way to get any value out of it is to equip weapons that inflict a status effect and rings that improve the potency of those debuffs.
You can still wear rings that improve your weapon’s general effectiveness but once you get into the flow, you will find that the Skills of this class do all the heavy lifting. All you have to do is inflict as many negative status effects as possible.
It is also worth noting that all three skills play vastly different from one another. Eruption relies on you to add the status effects before dealing burst damage. Miasma applies the status effects and then relies on you for follow-up damage. It’s more of a supporting Skill if anything else. Deathwish is not for the faint of heart. When you use that skill, you have no choice but to be aggressive to even have a hope of surviving. But the damage increase is remarkable and a sight to behold.
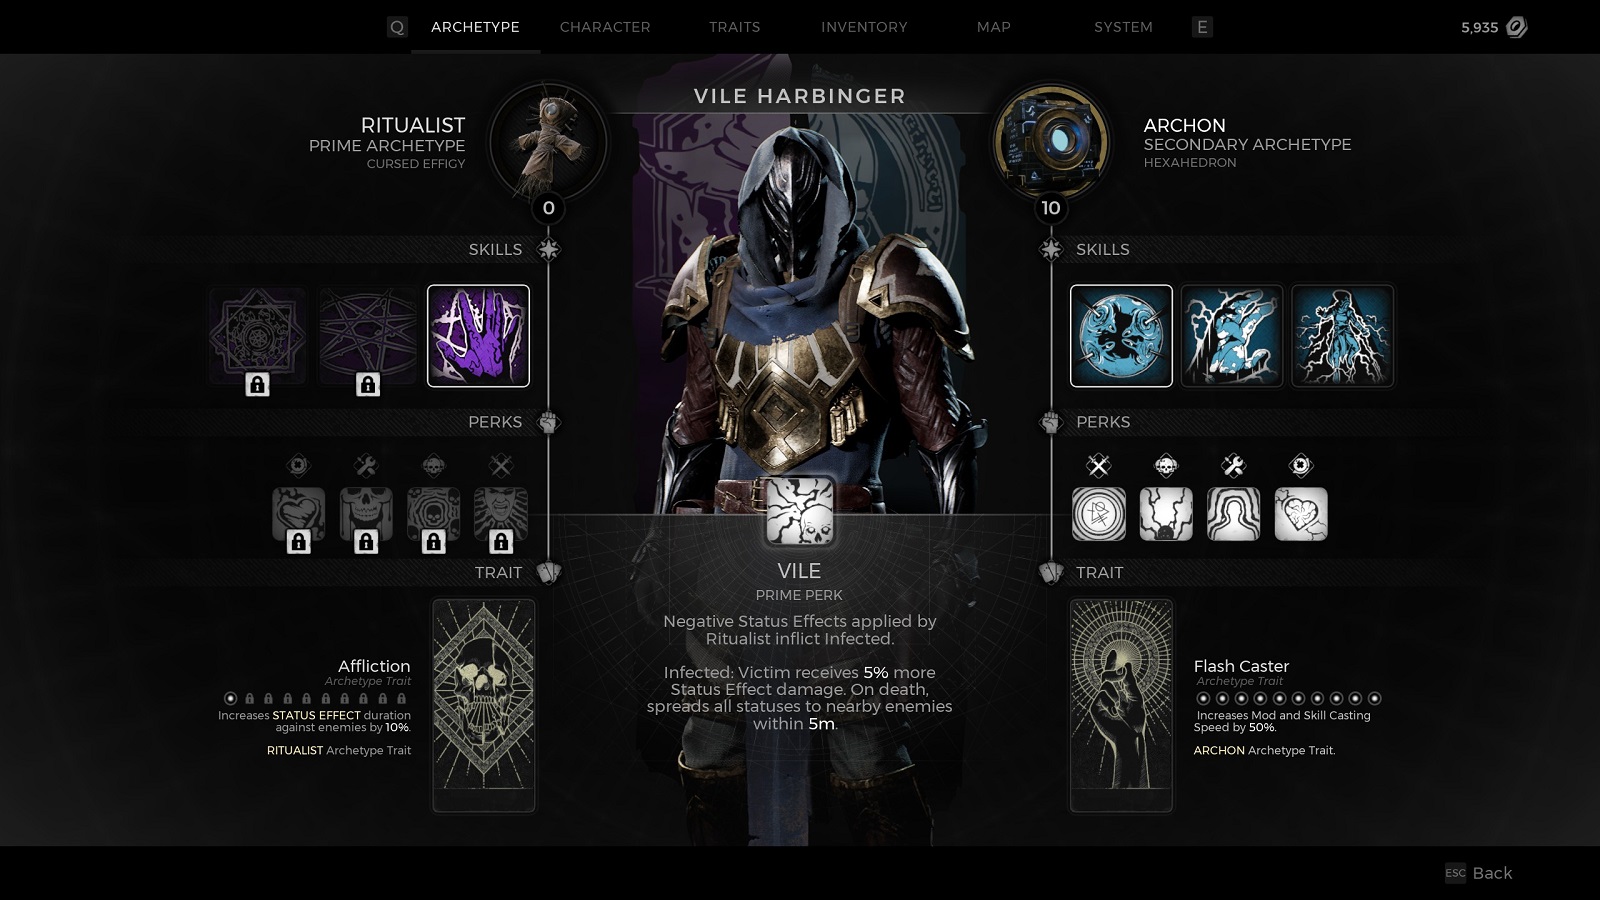
Prime Perk:
- Vile: Negative Status Effects applied by Ritualist inflict Infected.
- Infected: Victim receives 5% more Status Effect damage. On death, spreads all statuses to nearby enemies within 5m.
Archetype Trait:
- Affliction: Increases STATUS EFFECT duration against enemies by x%.
Skills:
- Eruption: Creates 1m explosion for 50 damage on all enemies within 15m. Explosion Radius and Damage increases 100% for each unique Status Effect on the target. Refreshes all current Status Effects on the target. Cooldown: 28.8s.
- Miasma: Casts an AOE burst that applies BLEEDING, BURNING, OVERLOADED, and CORRODED to all enemies within 15m, and dealing a total 500 base damage. Lasts 11s. Cooldown 43.2s.
- Deathwish: Negates all healing to self. Drain 300% Health over 20s. Increases all Damage by 35% and grants 10% Base Damage dealt as Lifesteal. Cooldown 86.4s.
Perks:
- Wrath: Increases all damage to enemies affected by a Negative Status Effect by 2%. Damage increases with Ritualist Level.
- Terrify: Killing an entity applies TERRIFIED to all enemies within 5m of killed entity for 20s. TERRIFIED enemies deal 5% less damage.
- Dark Blood: Reduces damage received from Negative Status Effects by 25%.
- Purge: On Relice Use, cleanses all Negative Status Effects.
And that’s everything you need to know about the Ritualist in Remnant 2 The Awakened King. As the first DLC archetype post-launch, the Ritualist is an interesting class, to say the least. It’s not on the same level as a self-damage build but the benefits that come with applying as many Status Effects on enemies are undeniably good. I can’t wait to see what a fully leveled-up archetype can do with the right build and support items.
Check out our other Remnant 2 Archetype guides:


