
Leywise the Scribe is one of the first characters you will encounter in the Awakened King DLC. He was once the royal scribe until the King’s madness forced him into hiding under threat of death. He first presents himself as a crafter but the only thing he does is put quill on paper.
This guide will tell you everything you need to know about all the secret items you can get from Leywise the Scribe. I’ll tell you what you need to do to get them and how they can help you in your builds.
Leywise the Scribe Rewards List
Where to find Leywise the Scribe
Leywise can be found in the sewer tunnel outlet along the sea wall. He has taken up the disguise of a Ritualist after looting the body of everything the poor fellow had. It’s not hard to find considering the entrance of the sewer dungeon is right next to him. What he lacks in food and comfort, he makes up for it with the knowledge that he yet lives a day longer.
When you first talk to him, he will first be dismissive of you. Bother him a couple of times and he’ll be forced to acknowledge your existence.
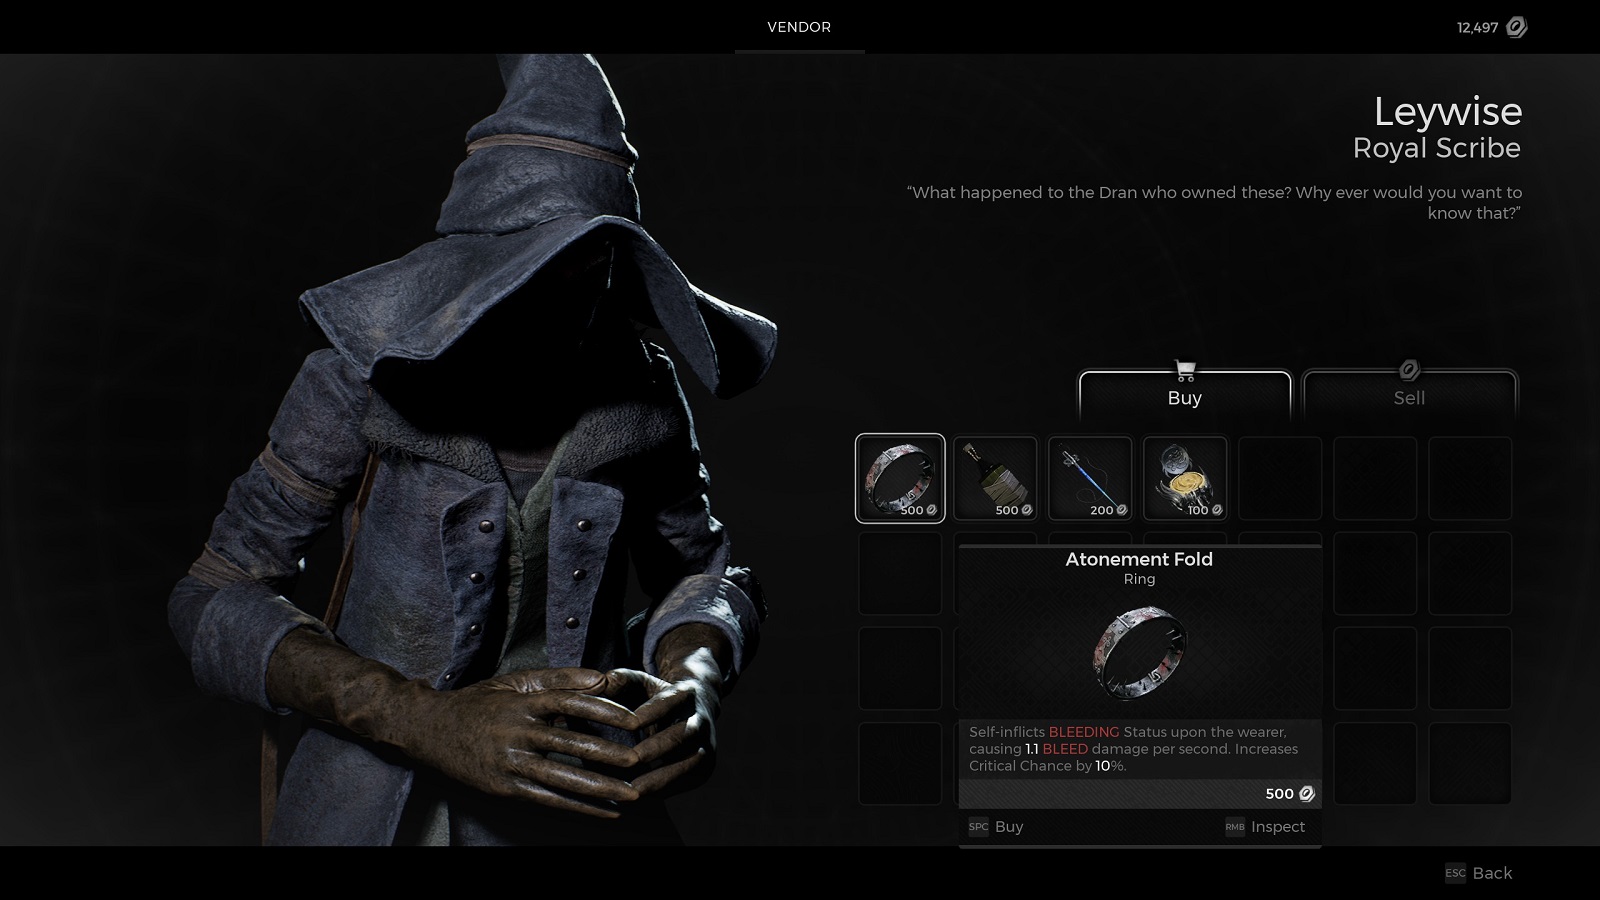
Atonement Fold
The only object of value he sells is the Atonement Fold. You can buy it for 500 Scrap. The ring self-inflicts BLEEDING Status upon the wearer, causing 1.1 BLEED damage per second. However, it will increase Critical Chance by 10% for all attacks.
When paired with a ring like the Hardcore Metal Band, you can get 5 stacks of BULWARK at all times just because you are taking damage ever so slightly. The amulet that suits it perfectly well is the Neckbone Necklace since it increases your damage by 25% when suffering from a Status Effect, and that’s on top of the 50% reduction of damage you get from the Status Effect applied on the wearer. Which in this case, is the BLEED effect.
You can get all 10 stacks of the Wrathbringer active almost instantly. The negligible damage you take from the Atonement Fold is enough to activate a Damage stack. And because you are being constantly damaged, you have full stacks all the time.
Leywise Secret Rewards
Leywise has more than a few secret items on his person and he’s more than willing to part with them depending on how you handle the Quest Item called the Misplaced Memoir.
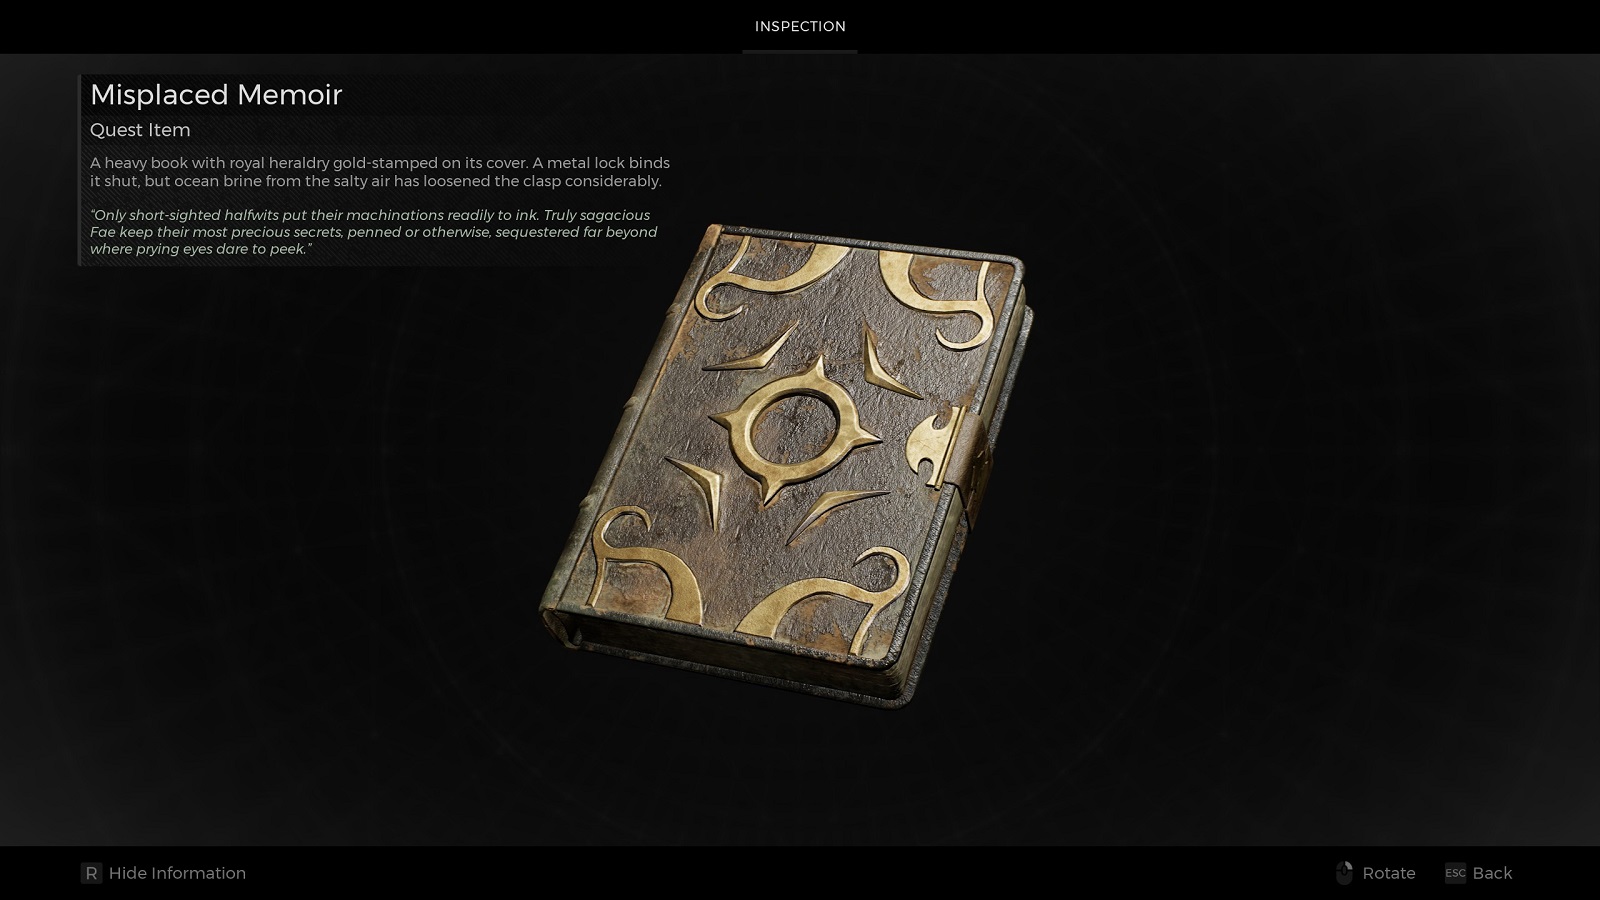
The memoir can be found in two locations around the Palace of the One True King. It can either be found near the shortcut door to the docks or at the end of the far street, next to the destroyed cart. I don’t know if they spawn in any other location. From the 5 or so times I’ve found it, it was in either of these locations.
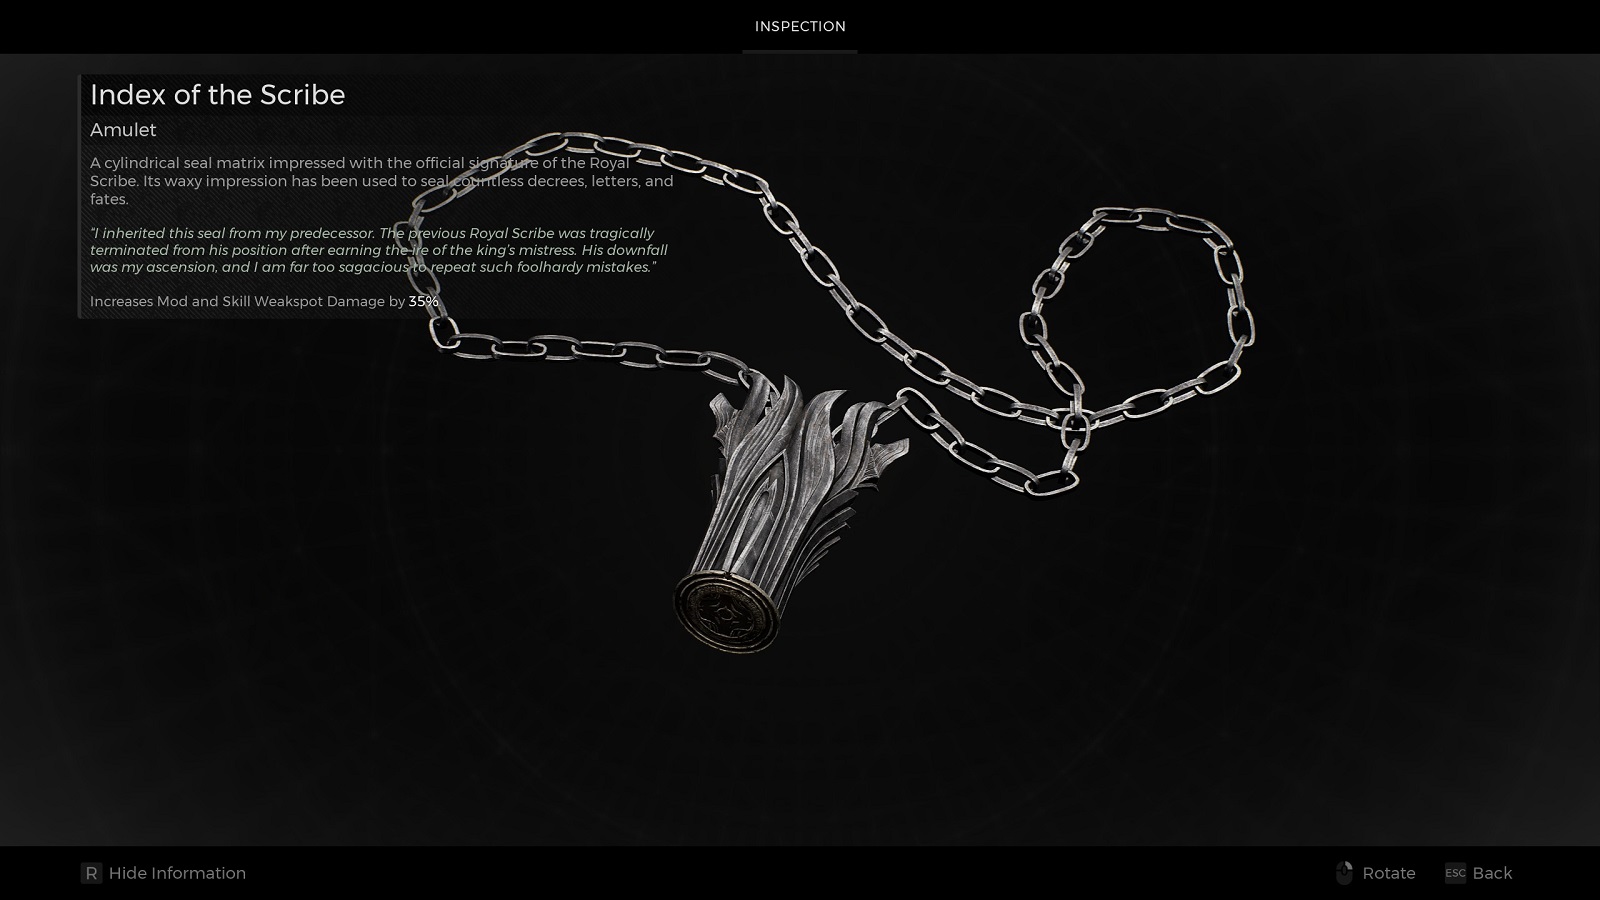
Index of the Scribe Amulet
The first reward I’m going to talk about is the Index of the Scribe Amulet. You get this after returning the book to Leywise without inspecting and opening the book. If you simply hand it over to him, he’ll thank you and give the Amulet as a sign of appreciation.
The amulet increases Mod and Skill Weakspot Damage by 35%. This item will be incredibly useful in Summon Builds as there are mods and skills that summon entities to fight in your name.
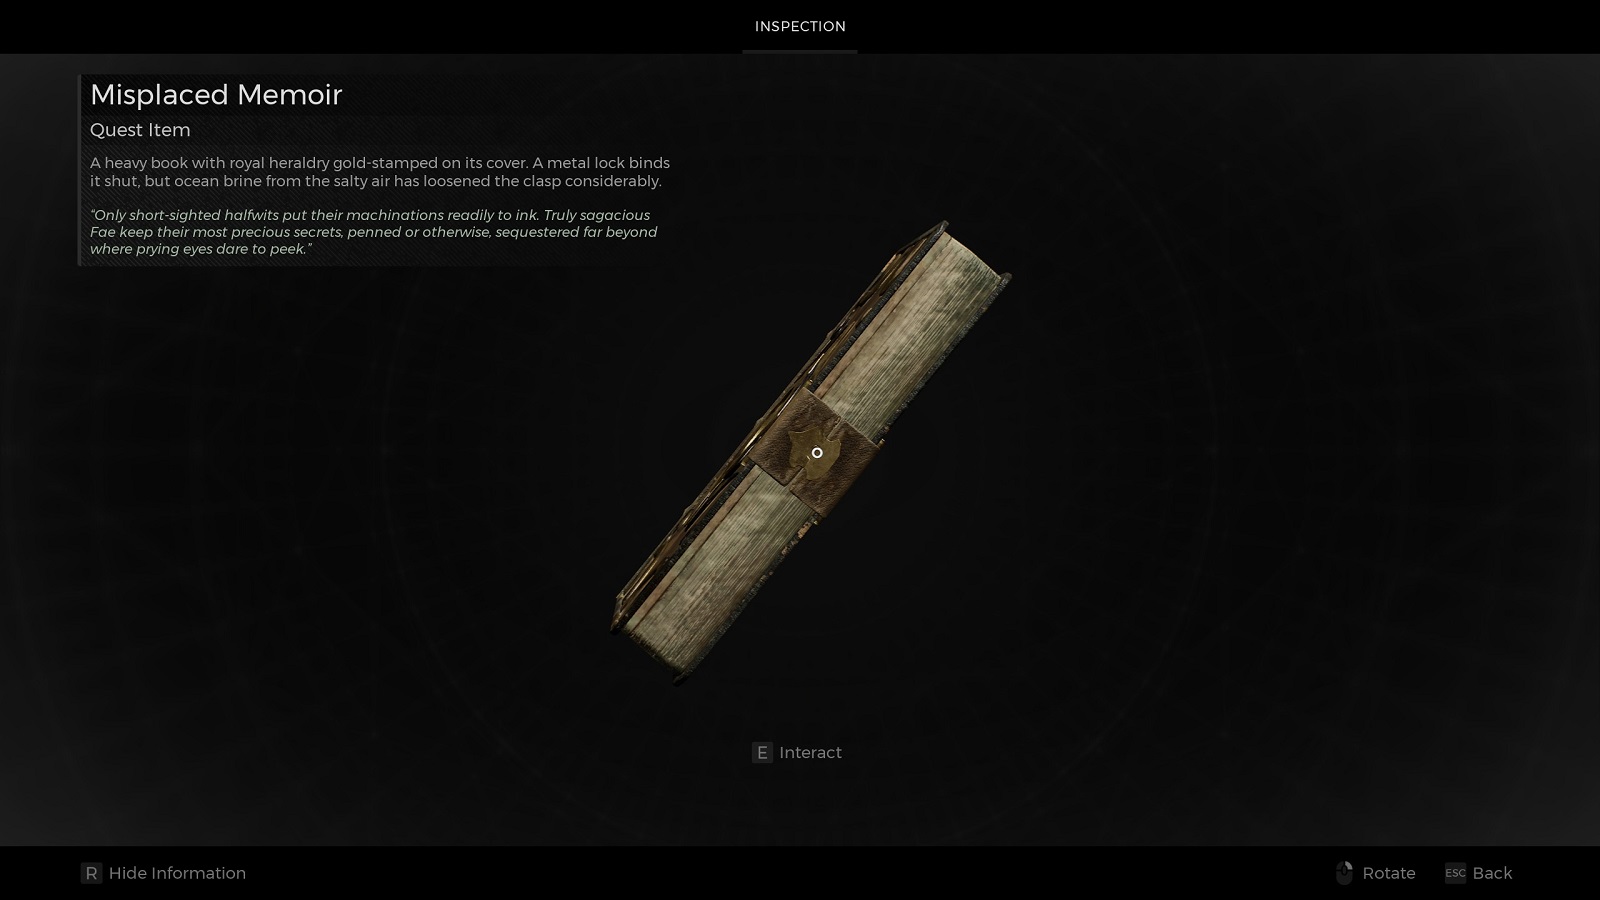
Alternatively, you can inspect the grimoire and rotate it around until you see the Interact circle on top of the latch. From there, you have the option to undo the latch and look at the contents inside. Inside the book, you’ll find a curious item called the Bookbound Medallion. It is an item of great value that Leywise would like to have back as soon as possible.
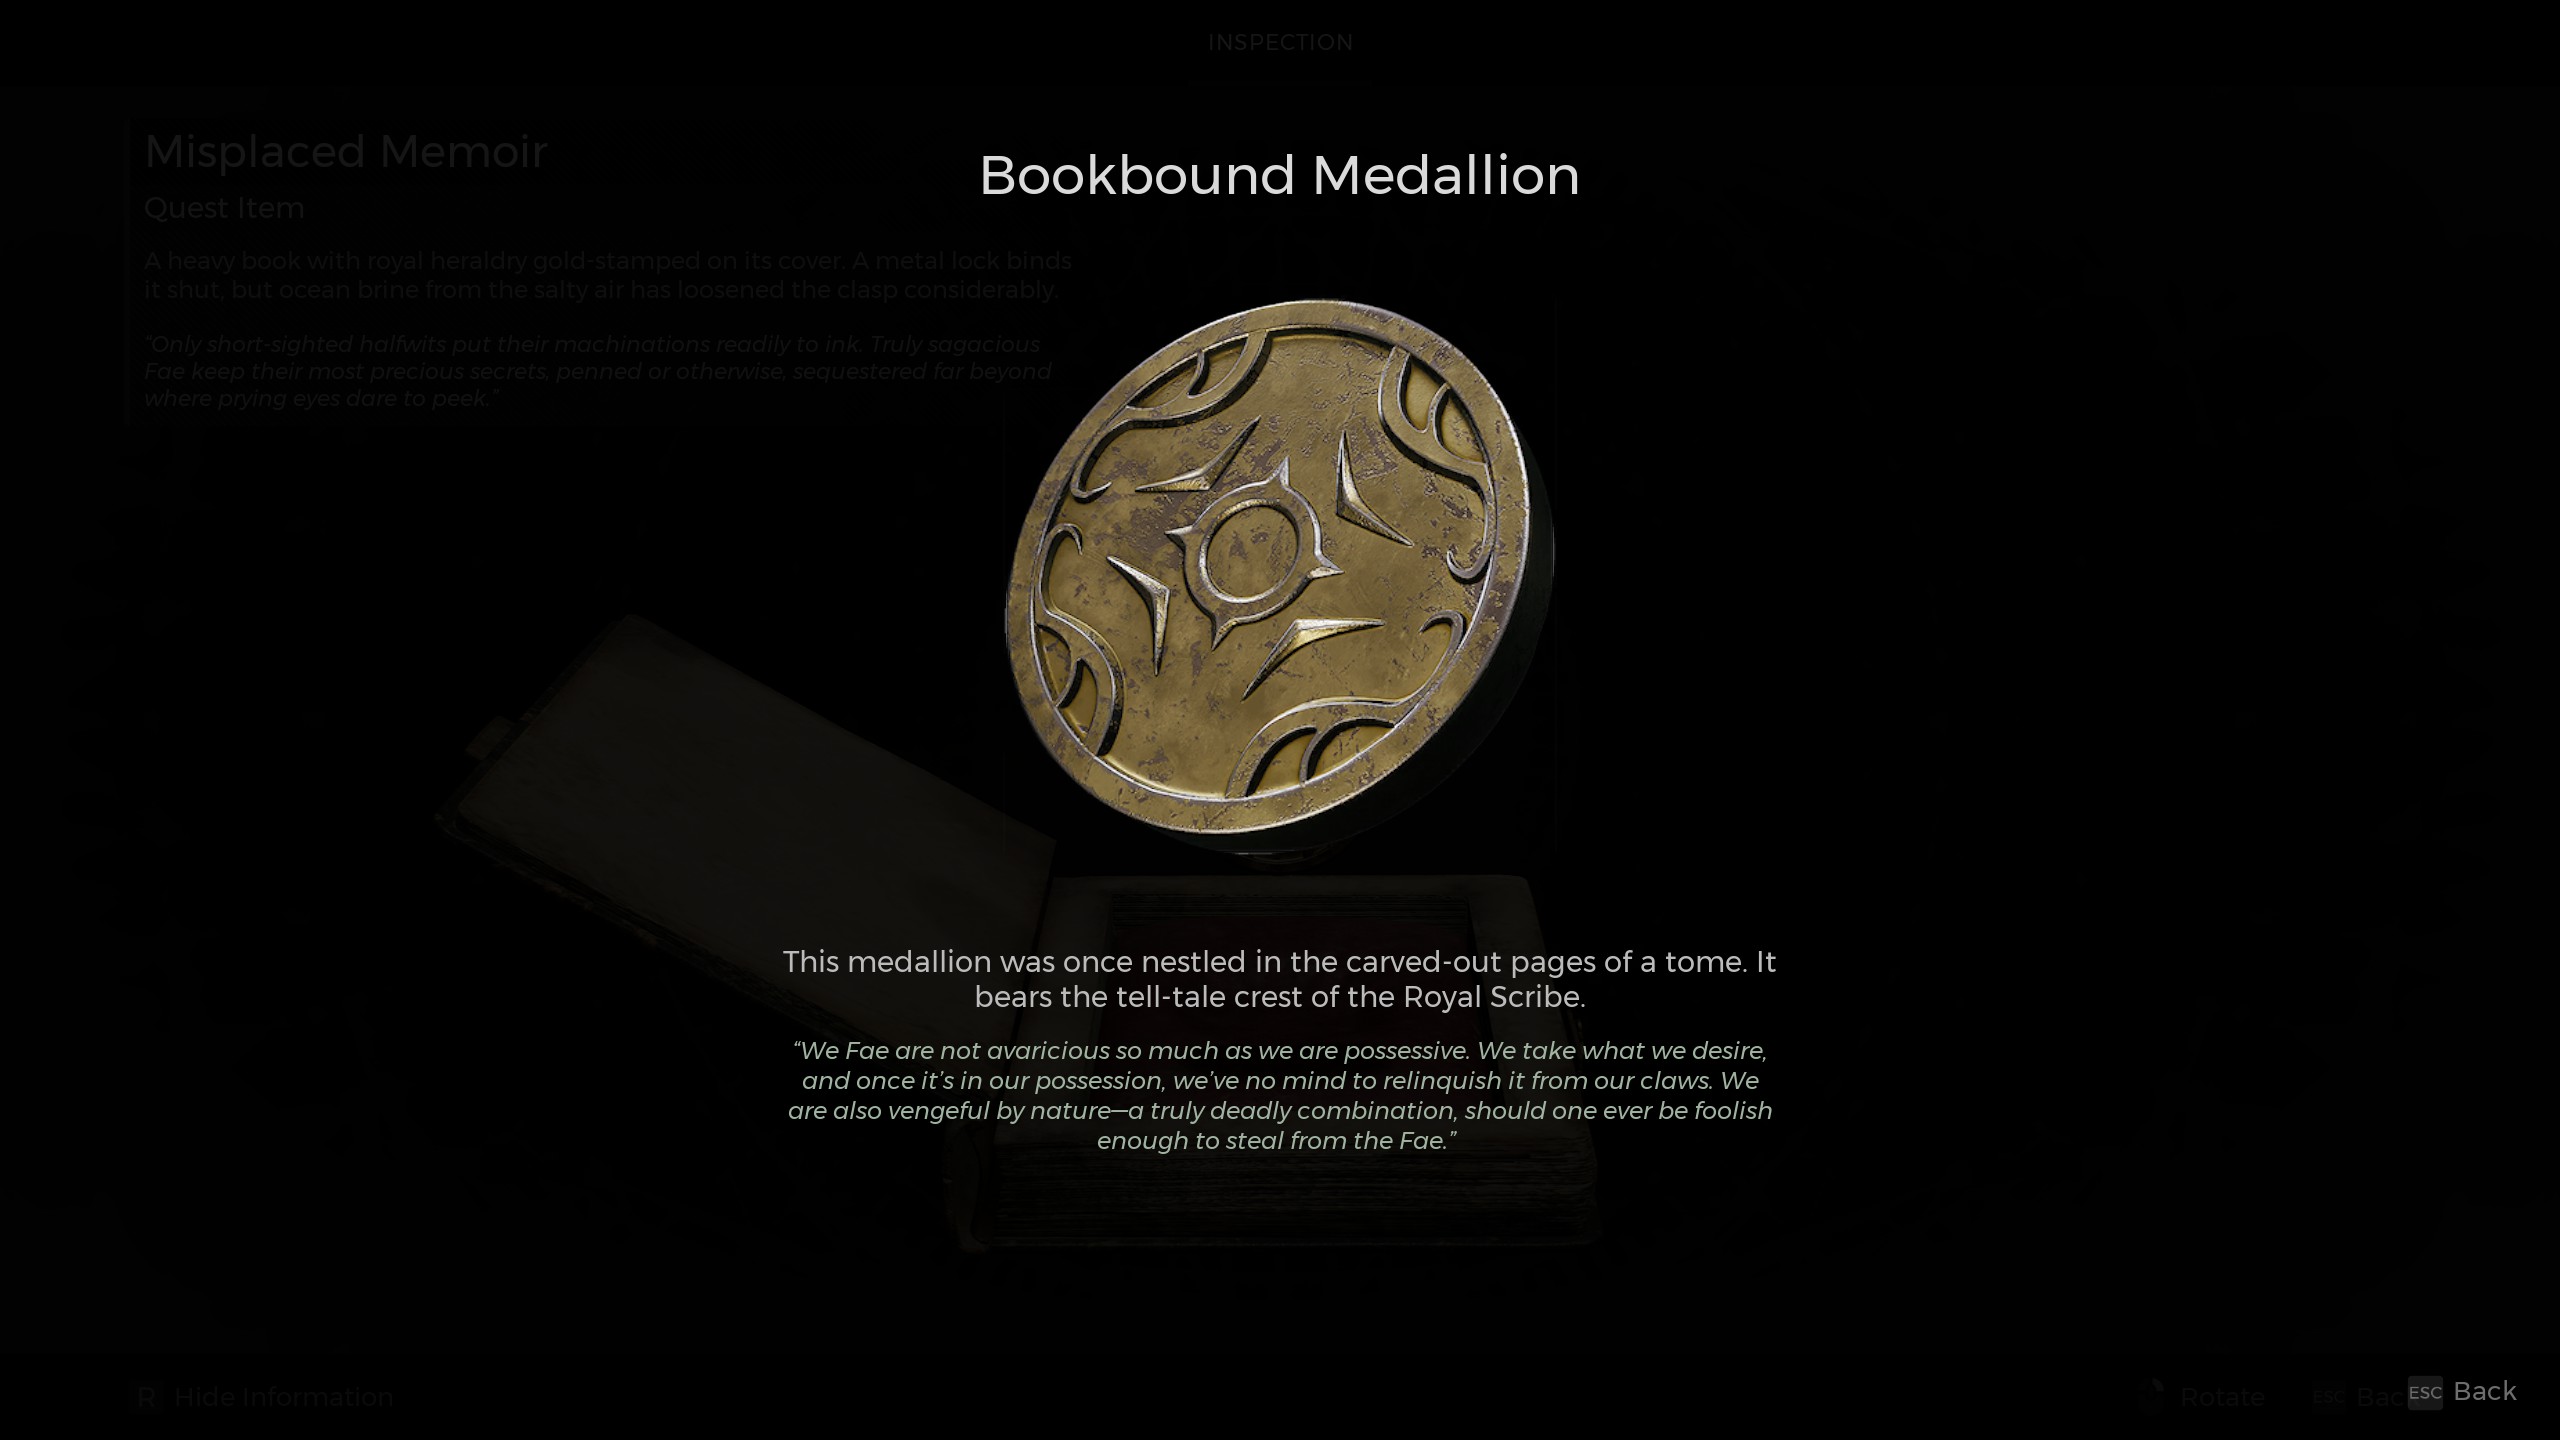
The next two rewards are acquired through your negotiation skills with the Bookbound Medallion. You will need multiple runs to get the other items but that applies to practically all the items on this list.
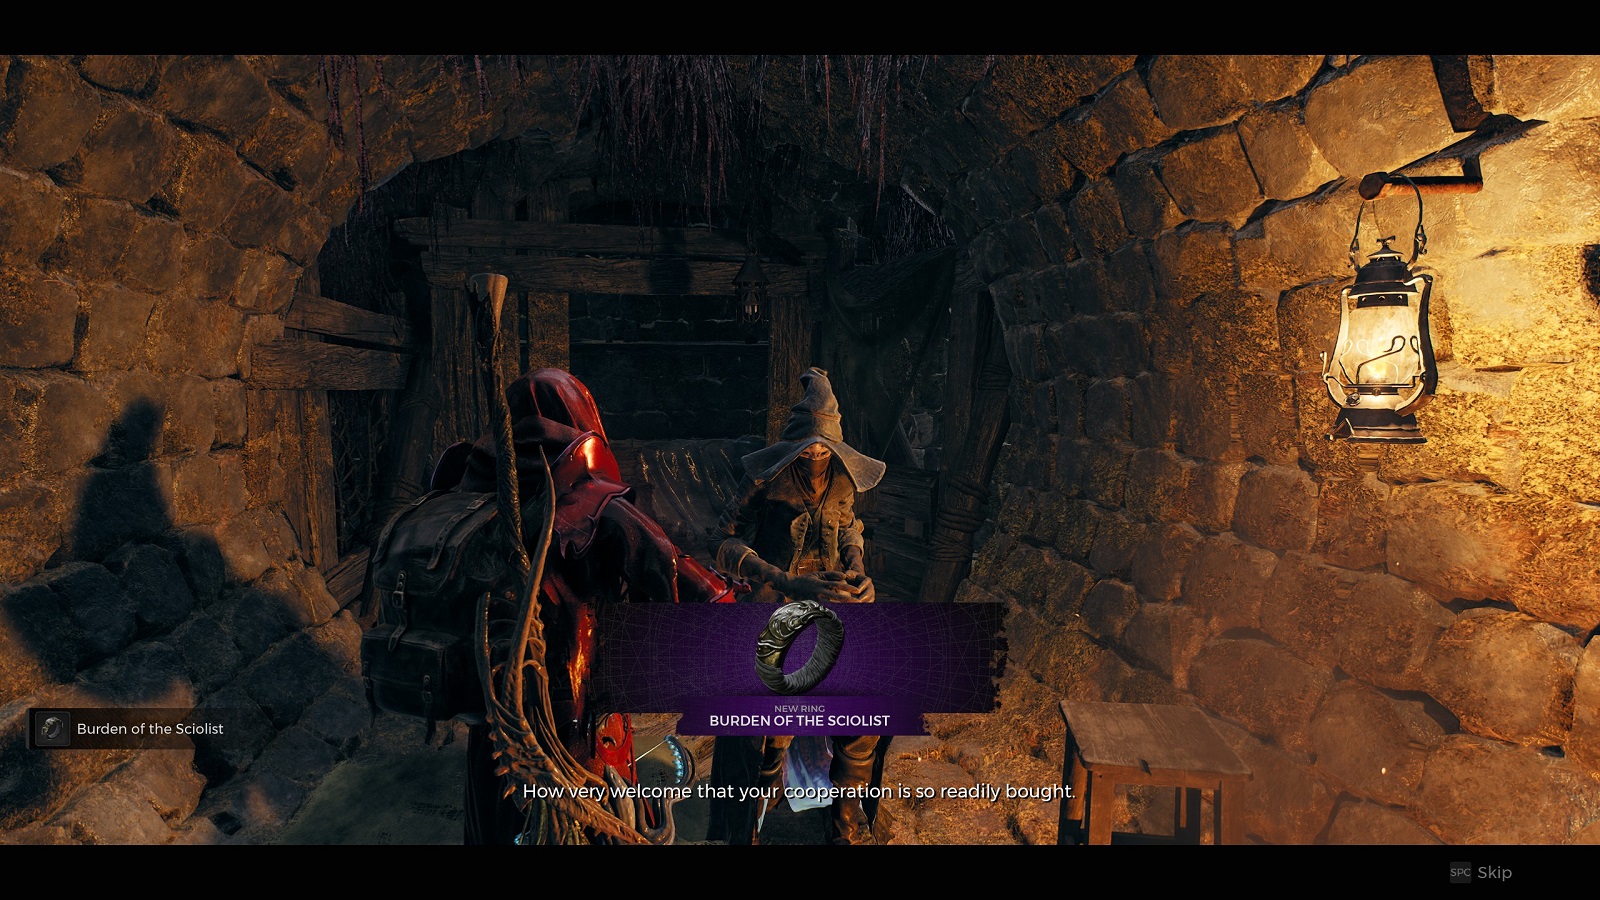
Burden of the Sciolist
Giving the medallion to Leywise the instant he asks for it, will reward with the Burden of the Sciolist. There’s nothing too complicated with this one. In fact, Leywise is surprised that you willingly gave the medallion to him so quickly.
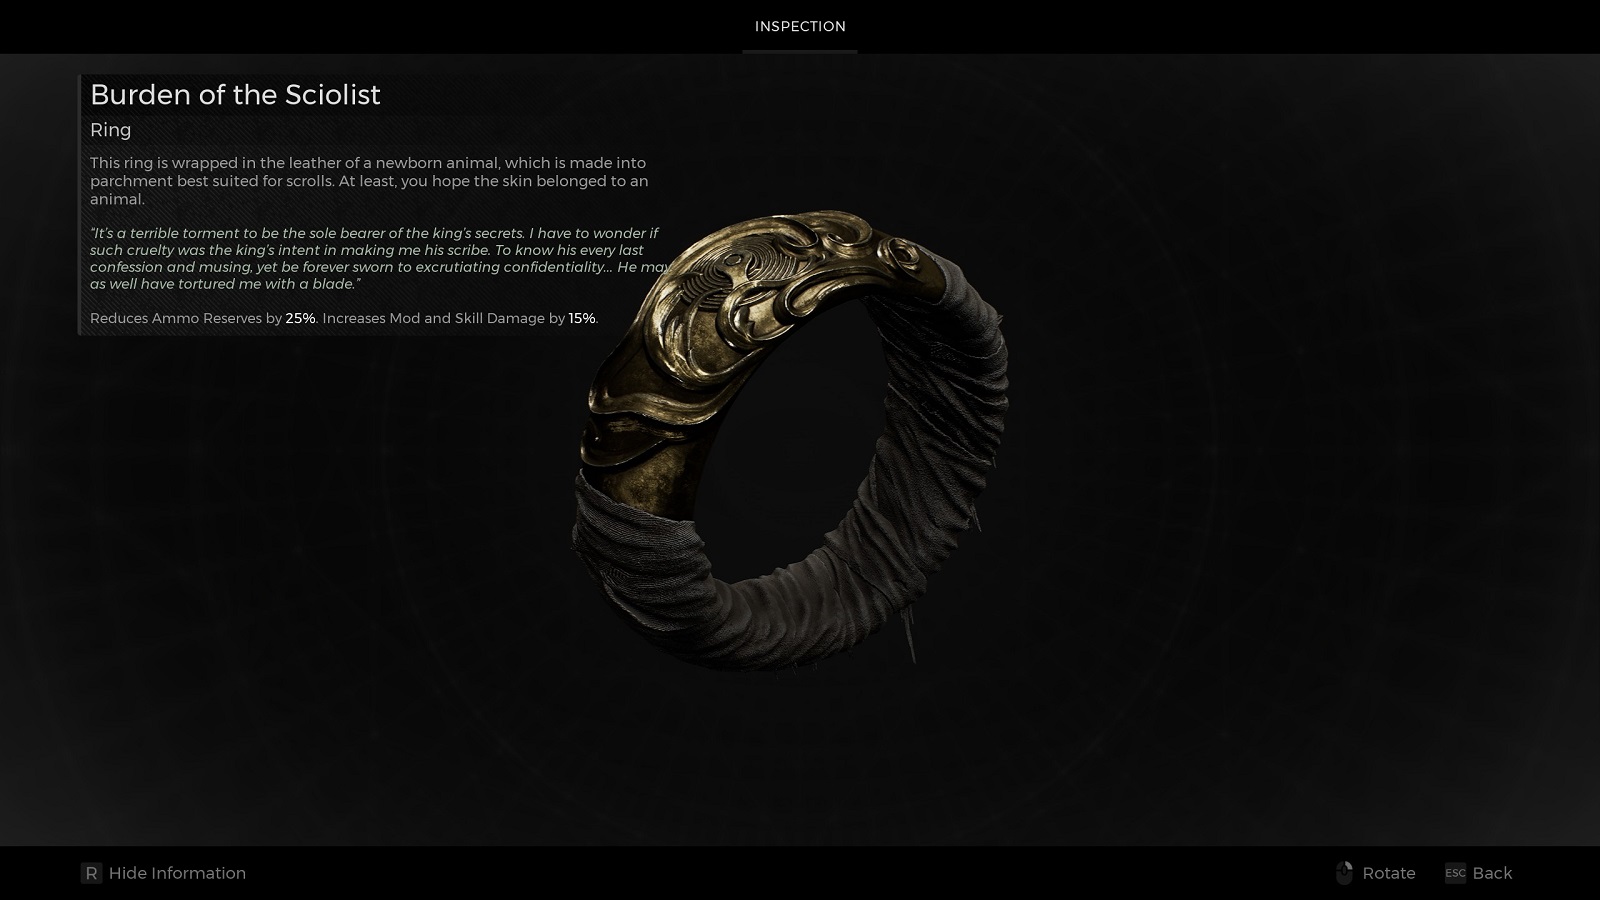
The ring reduces Ammo Reserves by 25% but increases Mod and Skill Damage by 15%. This goes well with the Index of the Scribe Amulet as the base damage increase magnifies weakspot damage on hit. You may want to pair this up with a melee build unless you have lots of ammo refills in your inventory. You will be amazed at how fast you drain your ammo when fighting against tanky enemies or bosses. A problem that is made more complicated at higher difficulties.
Ring of Infinite Damage
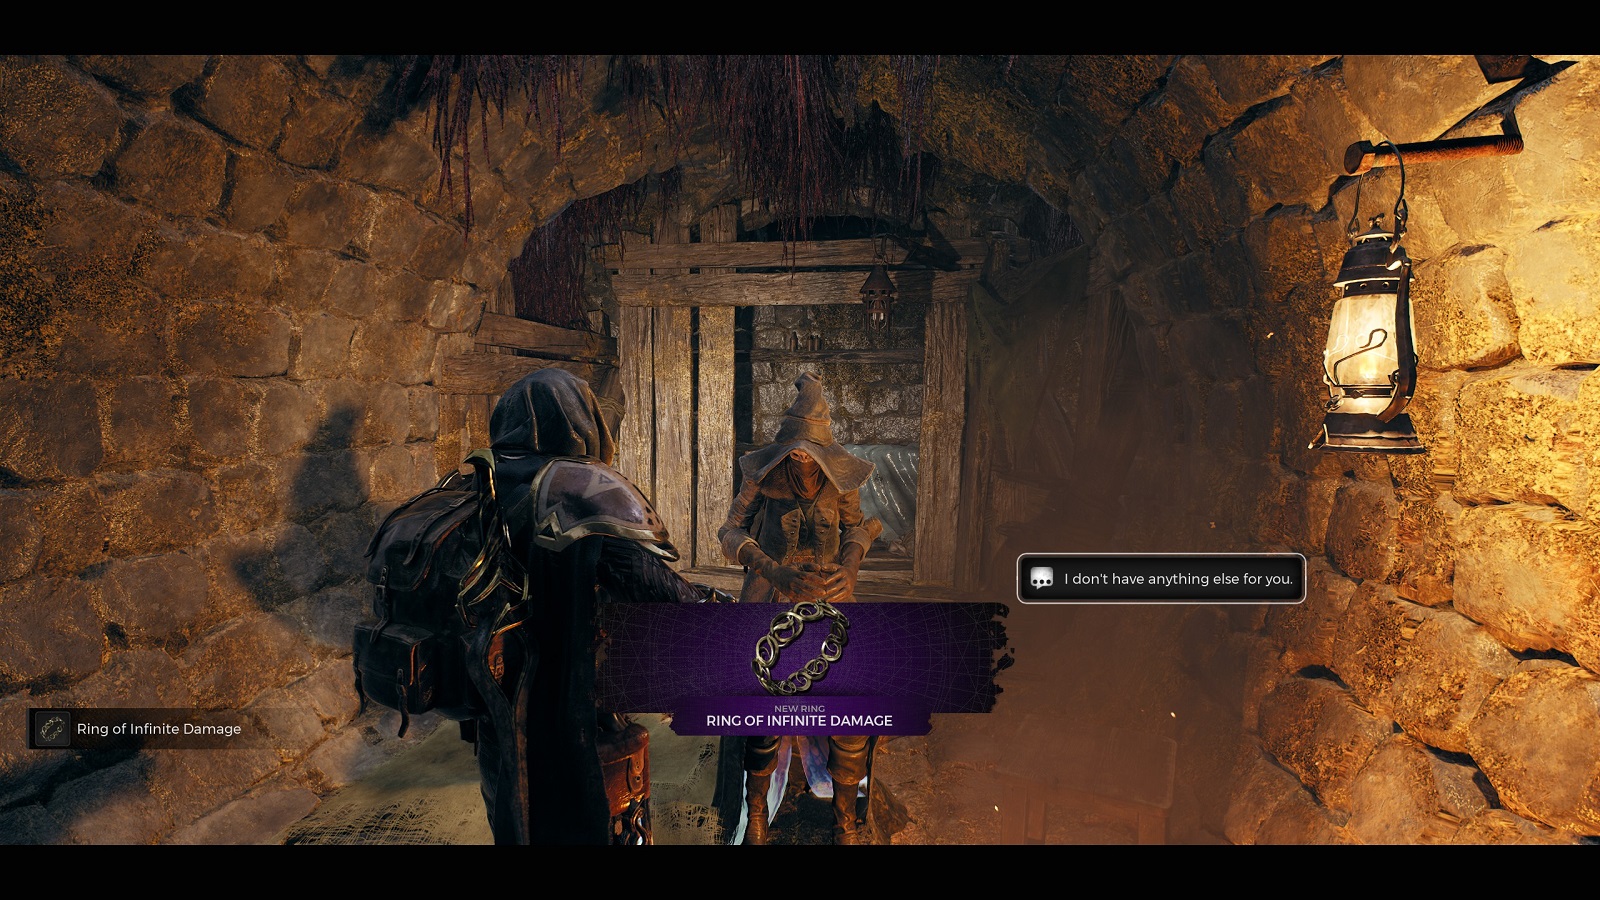
The alternate reward, the Ring of Infinite Damage, requires you to play hardball and make him sweat a little. To do this, you’ll need to back off for a bit and let him rethink his offer. When asked if you want to give the medallion back to him, answer with: “Actually. It sounds important. I’m keeping it.”
Leywise will let off a defeated sigh and will now up the ante the next time you bring up the topic. The condition is now set for you to receive the alternate reward. You can keep repeating the same line of offering and taking it back multiple times. But he’s not going to say different lines or offer a better reward. From here on out, it’s either going to be the alternate reward or nothing else.
Talk to him again and offer to return the medallion. He will thank you all the same way but the reward will not be the Burden of Sciolist. Instead, he will give you the Ring of Infinite Damage.
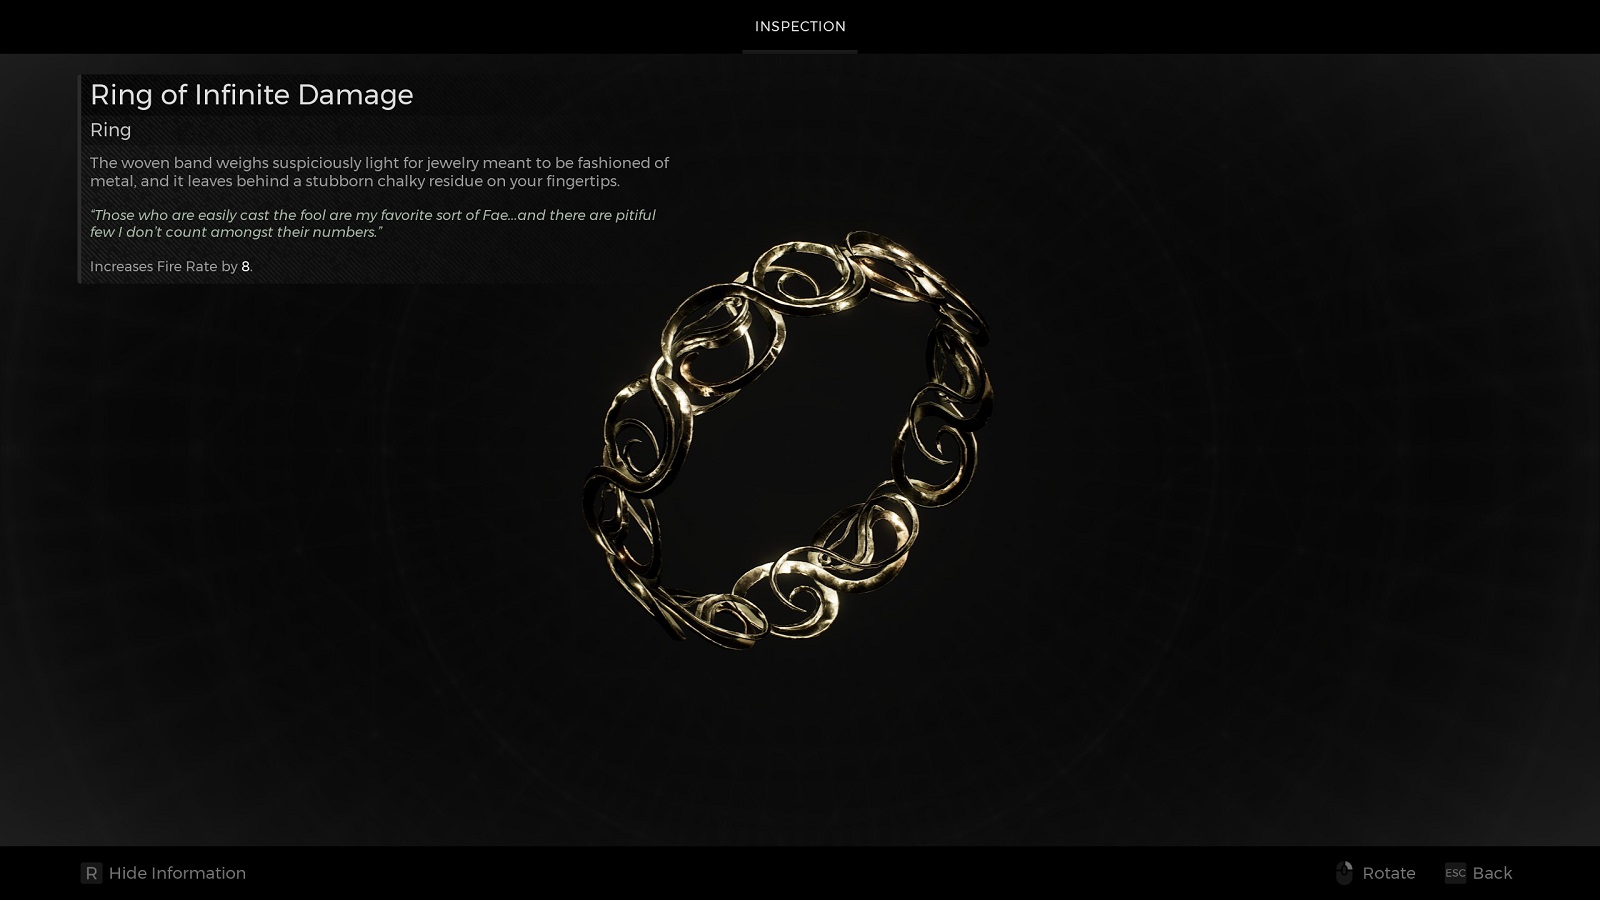
The Ring of Infinite Damage is a simple yet effective ring. It increases the Fire Rate of both weapons by 8. If you guys don’t know, DPS is a major factor in build crafting and with this, you can squeeze out a little more performance from your guns. The effects will be most evident on weapons with high fire rates.
Paper Heart Relic
There is another function to the medallion that Leywise doesn’t want anyone to know. If you go to the Chamber of the Faithless, instead of going ahead to the throne room, you can take a side passage that leads to an archivist library. At the back of the library, you’ll find a locked room behind double doors. Insert the Bookbound Medallion in the hollow and the doors will open.
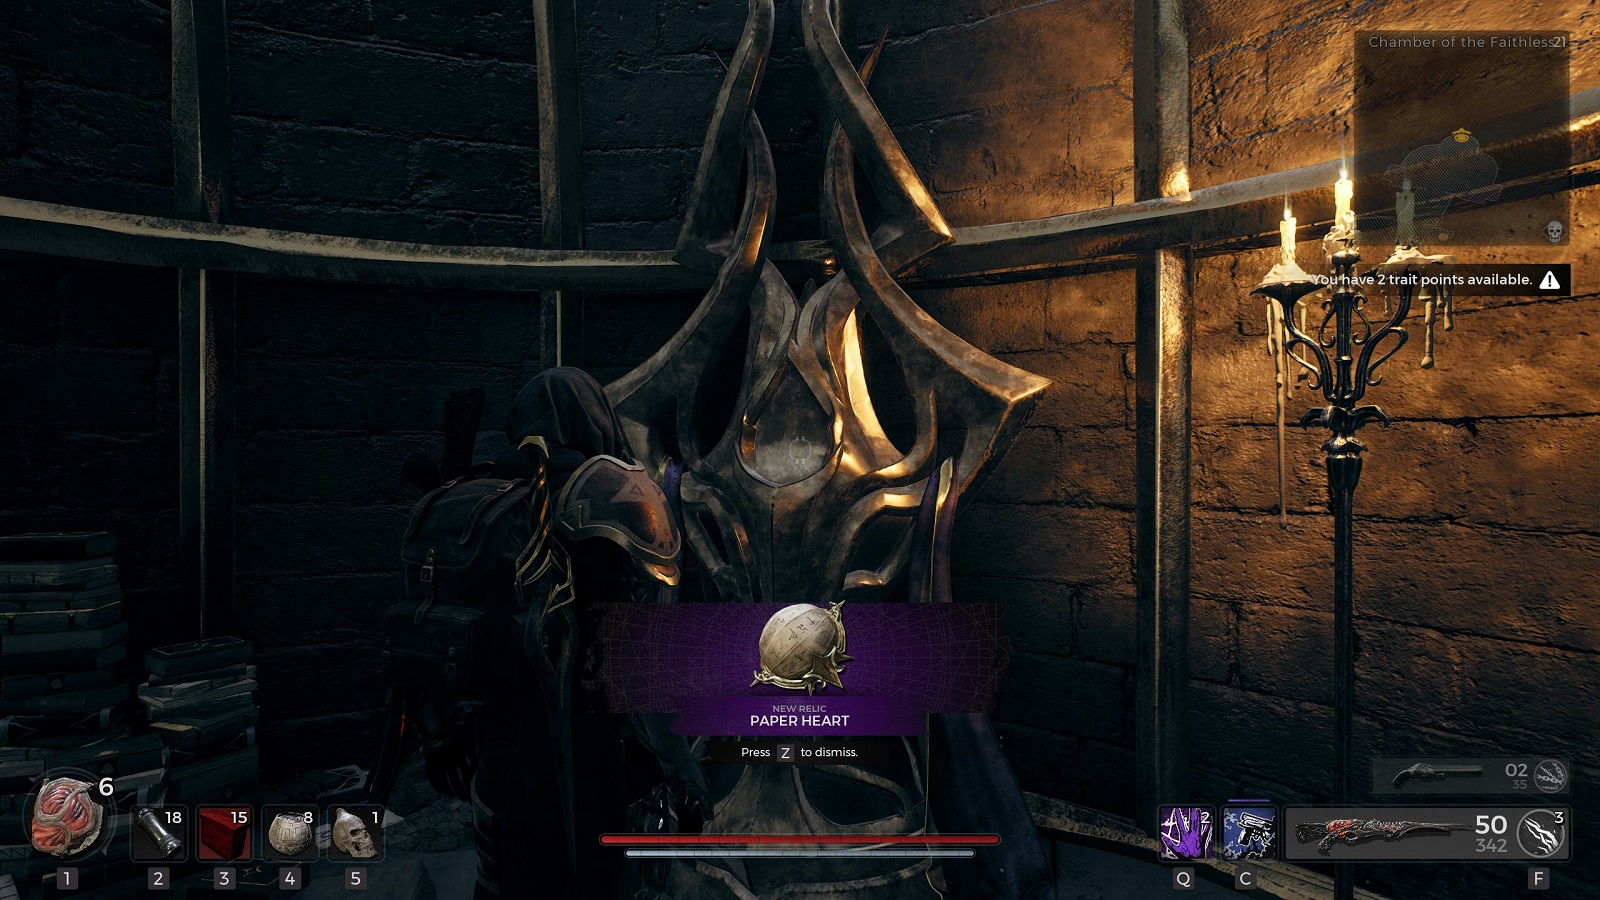
There you can pick up the Paper Heart Relic from the display case behind the scribe’s table. Unfortunately, there is nothing much else to find in the locked room.
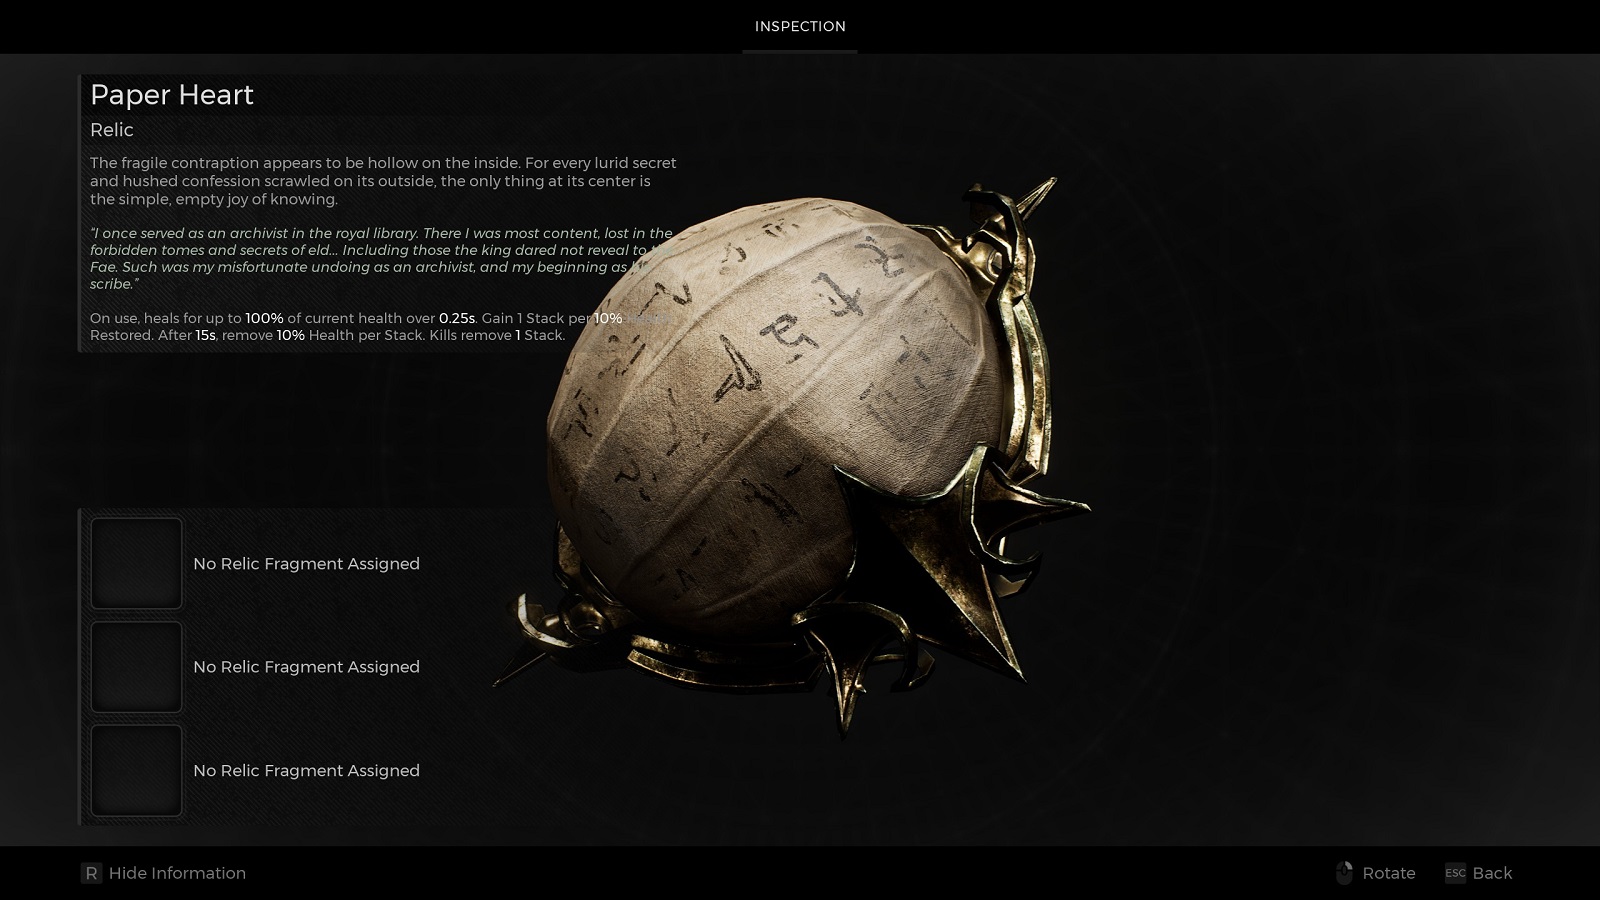
On use, the relic heals for up to 100% of current health over 0.25 seconds. You gain 1 Stack per 10% Health Restored. After 15 seconds, remove 10% of Health per Stack. Kills remove 1 Stack. This is the kind of relic that is made for crowd control. It allows you to quickly heal to full health as long as you heal close to 50% of your health. The stacks will most definitely won’t help you in a boss fight. But in a horde-like situation and with the Ritualist abilities, you can practically negate all the negative effects of the relic.
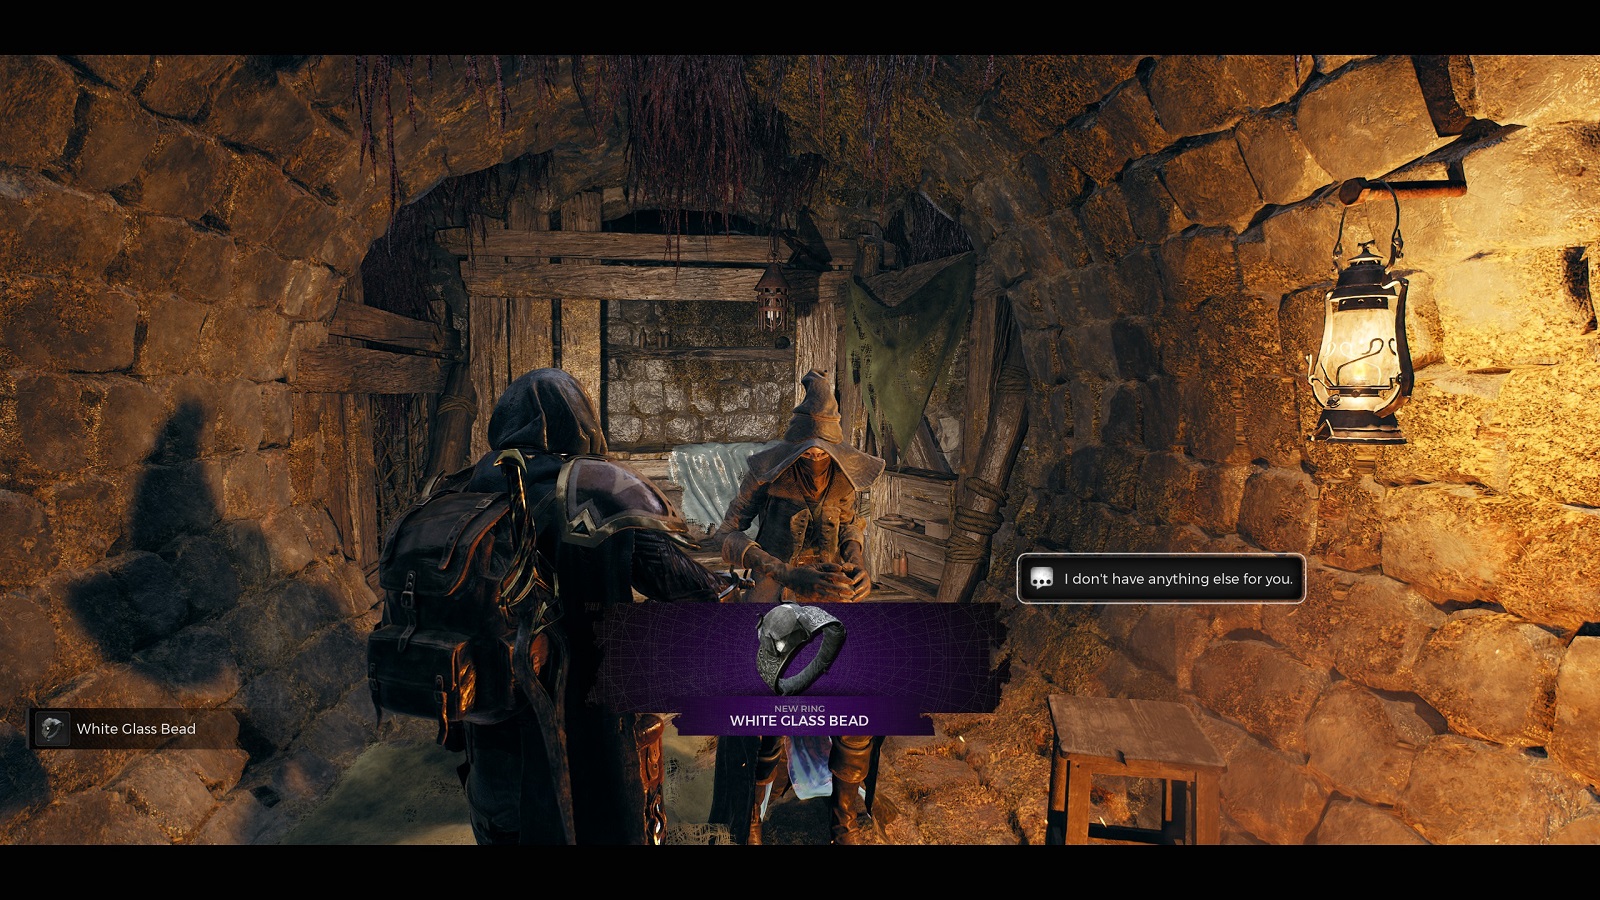
White Glass Bead
The last reward you’ll get from Leywise comes from a special interaction with the Feast Master over at the Great Hall. The Great Hall is one of the random dungeons you’ll get after rerolling an Adventure Mode once you’re done with the One Shot Adventure.
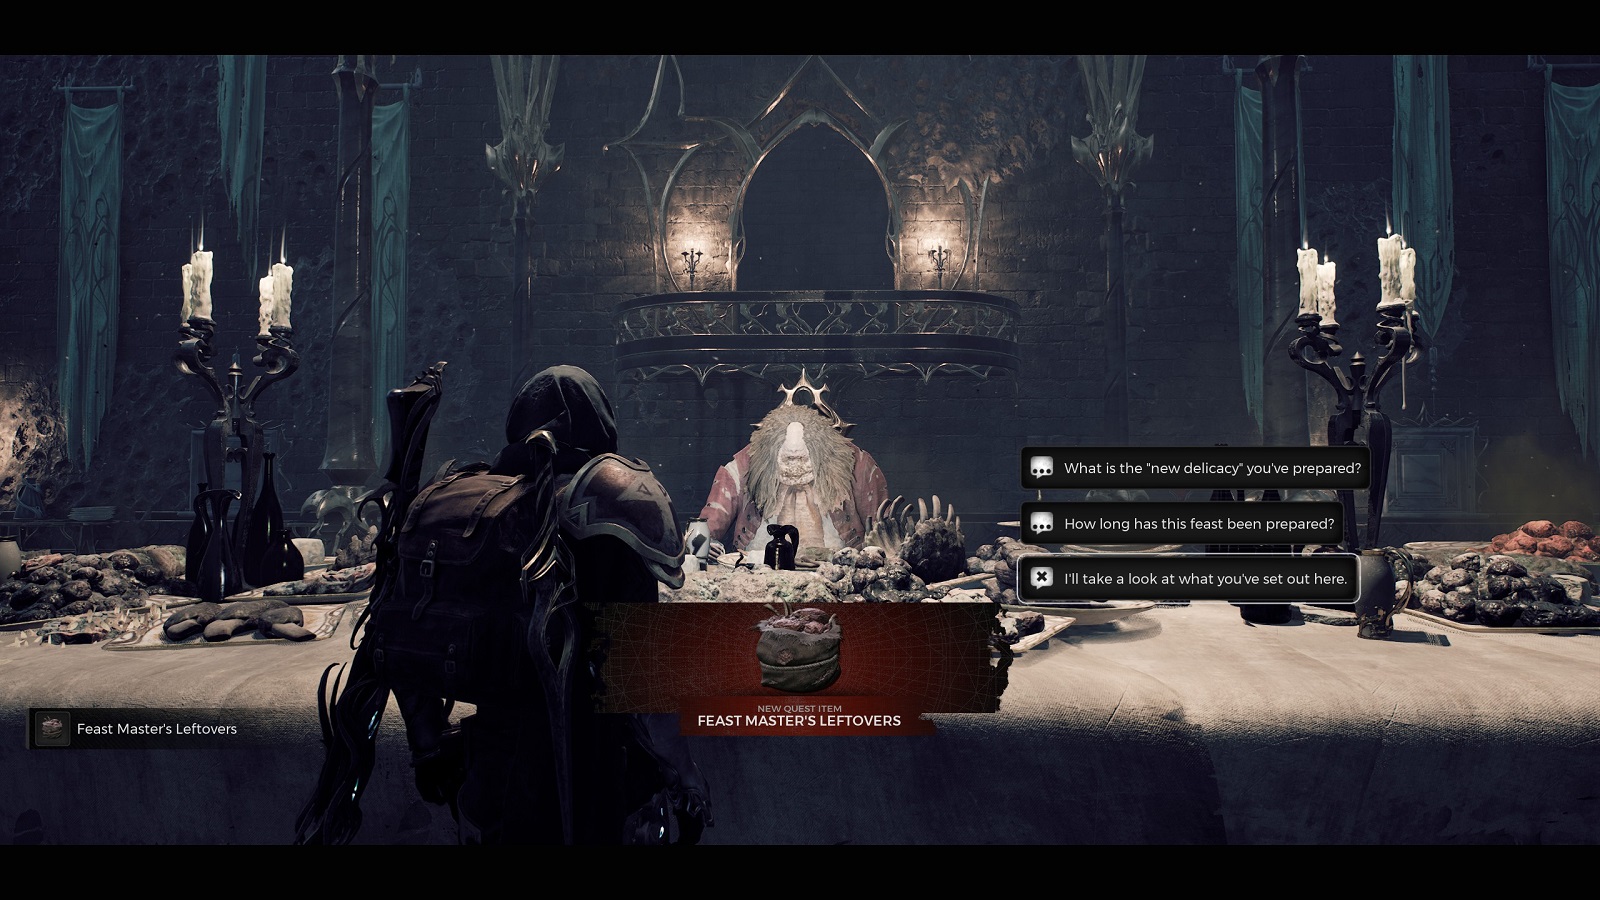
When talking to the Feast Master, ask him about the other invited guests. He will then start rambling about the King. Asking about the king will bring up the lost scribe. You will then get the option of saying that you know about Leywise. (Make sure you talk to Leywise beforehand.)
After name-dropping him, the Feast Master will insist on you delivering a bag of questionable meat with the intent of adding some meat to his bones.
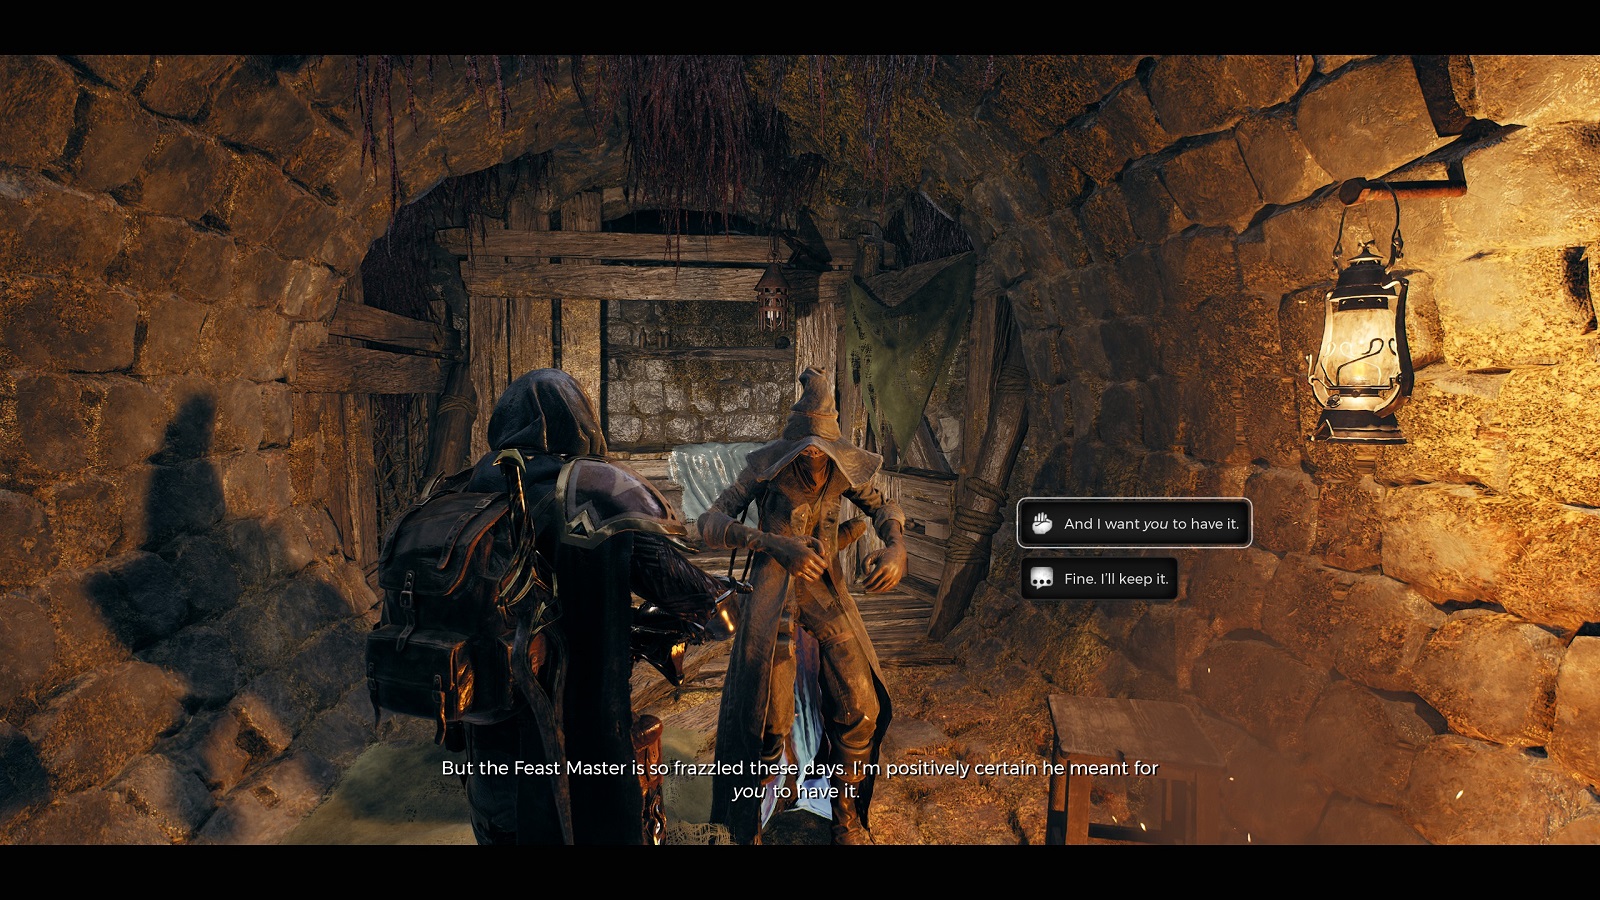
When you return to the sewer entrance, you will have to try and convince Leywise to take the rotten food. He will reject it at first, and then again a second time. But when pushed again for a third time, he will reluctantly accept the bag of questionable meat.
You will also unlock the ‘A Foul Feast’ Achievement/Trophy upon giving Leywise the bag. The conversation ends with him commenting on the bag. At this point, you will be rewarded with the White Glass Bead ring.
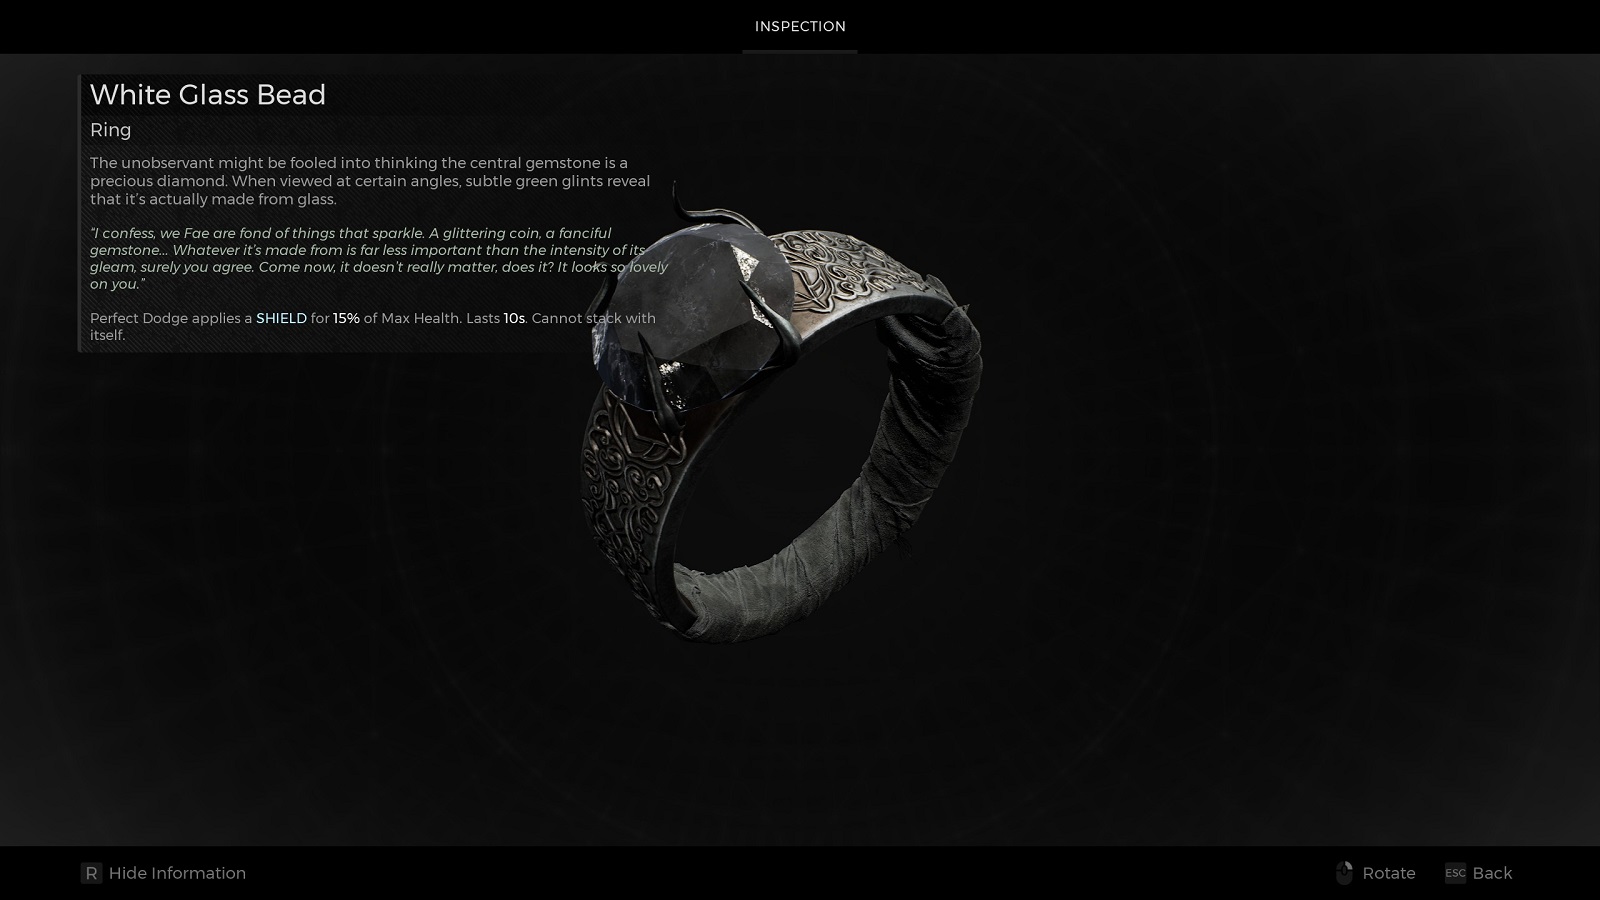
The ring activates a shield of 15% of Max Health on Perfect Dodge. Interestingly enough, Perfect Flops are also considered as a perfect dodge, so they fit right in any builds that also have the new Bridge Warden’s Crest that can get by talking to the Bridge Warden.
And that’s everything I have for this Leywise the Scribe secret reward guide. Don’t worry too much about getting all the rewards over multiple runs. Once you’ve completed a single run of the new DLC, the subsequent runs will take you no time at all.
If you’re interested, check out our other guides for stuff you can find in the Awakened King DLC:


