
Metamorphosis is a Lost Sector that can be found in Savathun’s Throne World. It is a short and straightforward Lost Sector and therefore is a great place to farm for exotics really quickly, provided that Guardians are well-equipped.
In this guide, we will be talking about the Metamorphosis Lost Sector, what enemies to expect, and how to clear them efficiently.
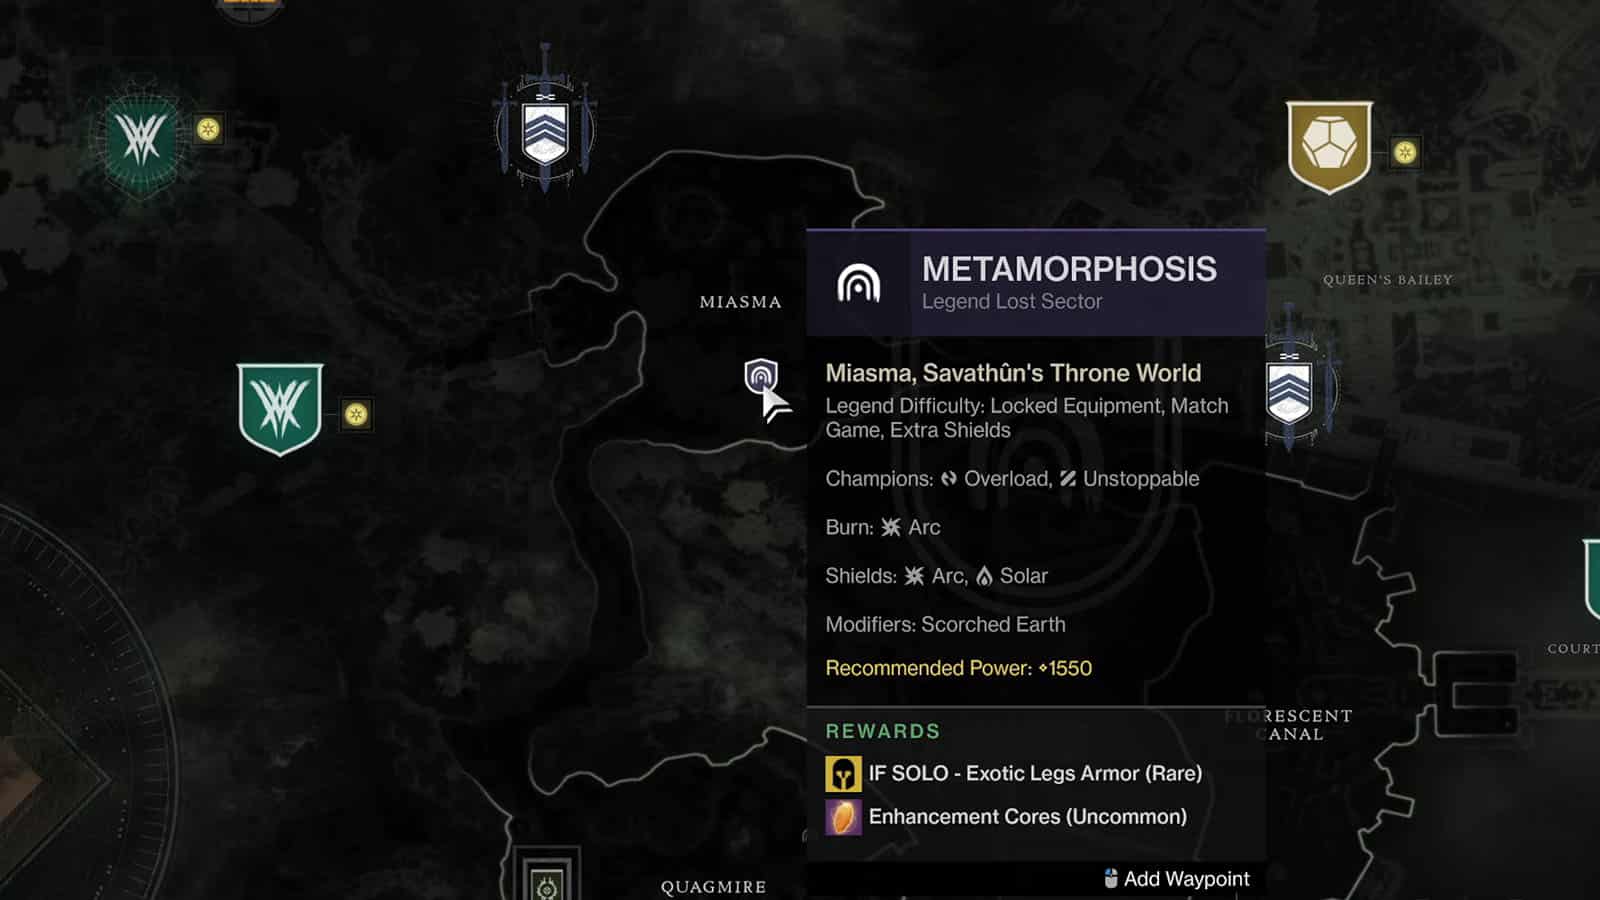
Metamorphosis Lost Sector Location
The Metamorphosis Lost Sector can be found in the Miasma area of Savathun’s Throne World.
How to prepare for the Metamorphosis Lost Sector
Guardians who would like to attempt to clear Metamorphosis should have these minimum power levels per difficulty:
- Legend: 1560 Power
- Master: 1590 Power
Arc will have a 50% burn boost on either side, so be careful about getting hit by Arc attacks. On the other hand, look out for enemies that are weak against Arc damage.
There are a couple of Overload and Unstoppable Champions throughout the run, with more of them at the Master Difficulty. Make sure to gear up with Overload Grenades to easily disrupt Overload Champions, while consider getting the Unstoppable Hand Cannon mod on The Gate Lord’s Eye to deal with Unstoppable Champions.
Finally, be aware that both difficulties have the Scorched Earth modifier which makes enemies throw grenades more often.
Metamorphosis Lost Sector Walkthrough
There are three main sections to a Metamorphosis run, with the first two sections having Revenant Knights as mini-bosses, and the final boss at the very end.
Metamorphosis First Section
In this first section, you will encounter your first Overload Chieftain which will be surrounded by these scorn mobs:
- Ravagers
- Lurkers
- Raiders
Make sure to deal with the champion/s right away and use grenades to control the mobs from storming your cover.
At the end of this section, the first Revenant Knight will appear. You’ll first have to destroy 3 floating crystals around the area to remove the knight’s shield before you are able to deal some damage on the mini-boss.
Metamorphosis Second Section
The second section is similar to how the first section goes. There will also be another Overload Chieftain accompanied by these scorn mobs:
- Stalker
- Screeb
There will also be an Unstoppable Abomination in this section. Stagger it as much as you can in order to deal damage on it.
You’ll end up facing against another Revenant Knight once more. Destroy the crystals first to take down its shield before dishing out your heavy attacks on the mini-boss. Once done, fall down into the hole to reach the boss chamber.
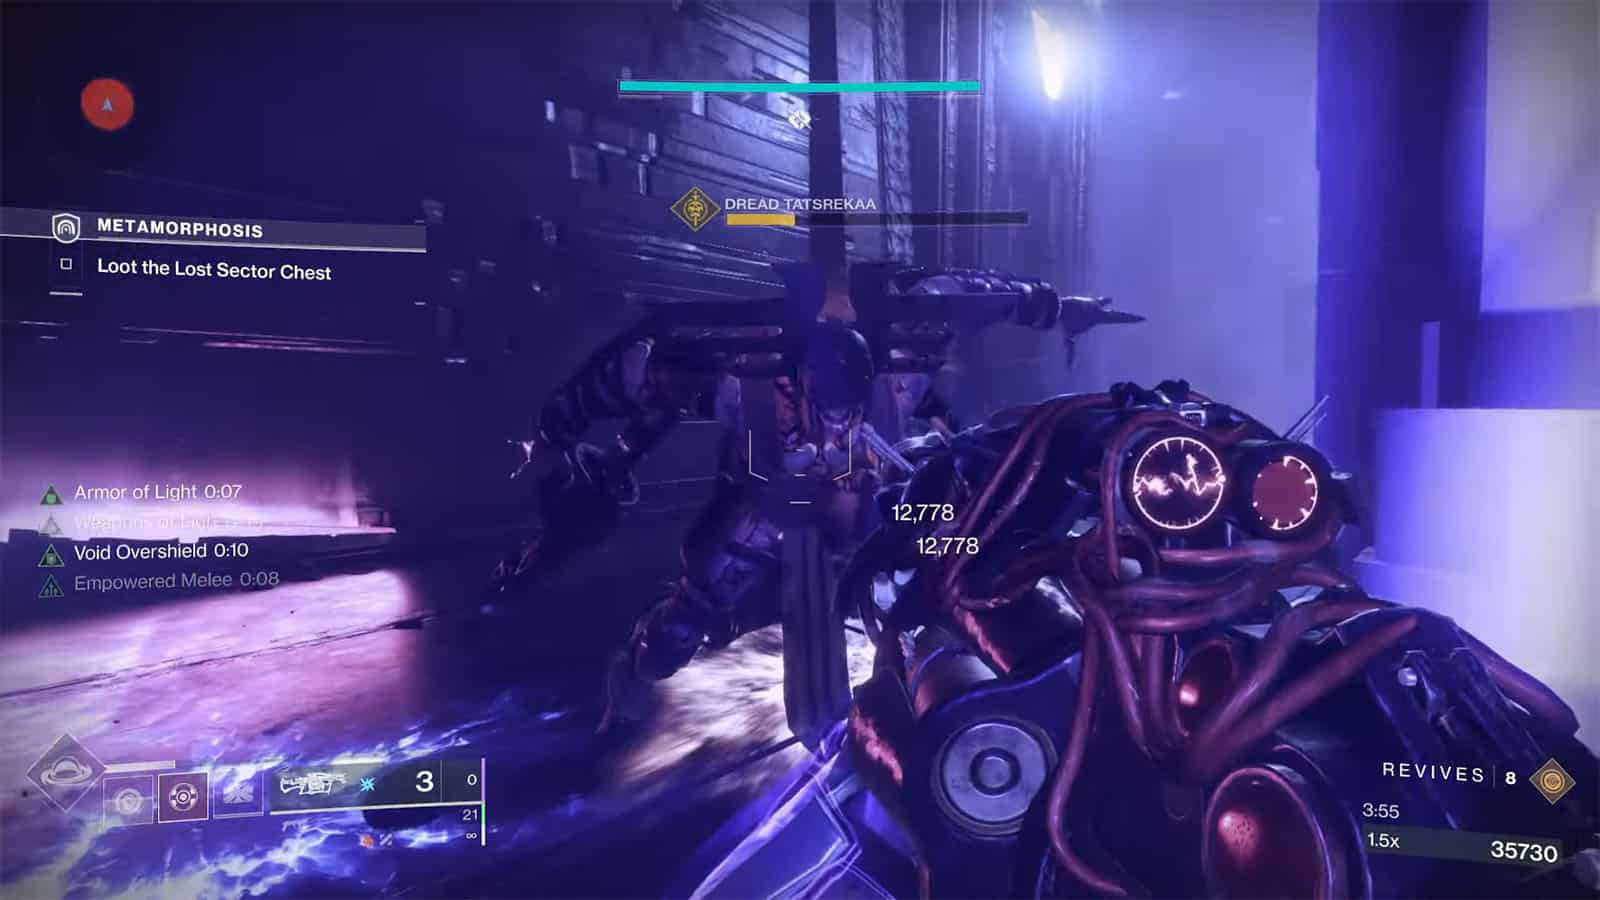
Final Boss Chamber
In this chamber, you will face against Dread Tatsrekaa who is the final boss of the run. It will also spawn another Unstoppable Abomination by its side, along with some minor scorn mobs. The boss will be shielded at first, so you’ll have to destroy the 3 crystals as soon as they appear. And then, deal with the champion to make things easier in dealing with the boss.
Once the boss is no longer shielded, unload all your heavy ammo on it and it should fall down quickly. You’ll then be able to access another chamber at the back where the chest for the Lost Sector will spawn. Running this sector on Legend difficulty will drop exotics on rare chance, while the Master difficulty has a common chance for dropping exotics.
If you like this Guide, be sure to check out our other Destiny 2 articles:
- Destiny 2 The Leviathan Returns Guide
- Destiny 2 Duality Dungeon Guide & Walkthrough
- Destiny 2 How to Get to Pleasure Gardens in Derelict Leviathan
- How to get the Season of the Haunted Seasonal Artifact in Destiny 2
- Destiny 2 Duality Dungeon: Release Date, Rewards, & More
- Destiny 2 Solar 3.0 Warlock Best Build
- Destiny 2 Solar 3.0 Titan Best Build
- Destiny 2 Solar 3.0 Hunter Best Build
Check out this video by PvShifty showing different classes through the Metamorphosis Lost Sector:


