
Leysha has it in her mind to confront Dr. Richard. She goes to the Red Salon in order to find him. When she gets there, she finds that everyone is in a hurry to evacuate. They know the Second Inquisition is on their way and have little time left to get to safety.
Check the rest of this guide to know which points to invest in before starting the level. And remember, just cause there is a solution that saves you Willpower in the end, it doesn’t mean it’s the best solution. You WANT to use your Willpower to improve your mastery of talents.
And with that out of the way, let’s start the level.
The meeting with Berel Underwood is short and rather dismissive. Berel guesses Richard is downstairs in the basement, probably destroying evidence like everyone else. This is now your optional objective. To go throughout the place and destroy anything that might be of value to the SI.
But before doing that, you’re going to want to do is to get the badge for the basement. It’s located at the bar before heading to the next room.

Just the Right Amount of Trajax
If you talk to the staff who are preparing the vessels for evacuation, you find out that the manager is having trouble with one of their valuable ‘Vintage’ vessels. Apparently, the stress of current events has caused her great distress and she has decided to lock herself in the medical room. To coax her out, you’ll need to deliver her a specific blend of Trajax to calm her down and make her more manageable.
You can follow this guide for a more detailed explanation of the process. This part of the guide will point you to where you need to go and what you need to do without the legwork that comes with figuring this stuff out yourself.

When you get to the basement, head straight to the last room on the floor. It’s a freezer where they store the Trajax. Inside, you’re going to want to find the container with Trajax MG. You’re going to send 2 of those containers up the tubes to the manager’s office located on the same floor as the medical room.
Take the Trajax MG and send them both to the medical room through the pneumatic tube system. When you’ve done that, talk to her through the security camera to finally send her off her way.

Don’t forget the pick-up Halsey’s teddy bear from the medical room. It’ll come in handy later on.
Destroying Evidence
Now that we’ve cleared that up, we don’t need the Trajax anymore. It’s a waste but better if it is destroyed than fall into the hands of the SI. Head back down to the basement and go to the storage room opposite the freezer. There you will find an infrared scanner that you can use on the containers near the sewer entrance.

So the QR codes on the containers are addresses to vampire hideouts. But you won’t know that unless you’ve had the infrared scanner. The option to remove the QR codes becomes available.
After you’ve done that, you’ll want to turn off refrigeration on the boxes to destroy their contents.
The third box is interesting because it doesn’t hold any Trajax. If you have Security(2), you can lock pick the box to discover that it actually contains vials of blood. ‘QKIII’. Or Quentin King’s blood specifically.

After you’re done with that, head back to the freezer. It’s time to destroy the rest of the Trajax. Simply change the temperature to whatever extreme you wish and the wild change in temperature should be enough to render the stock unless to the humans.
Piecing Yourself Back Together
For this part of the walkthrough, we’re going to have to unlock a few things to help us out in a Confrontation later.
When you get to Dr. Richard’s office, you’ll a few notable things. Medical records that you need to collect on the coffee table and on the shelf behind the desk and a few items for later use. But it’s a locked drawer on his table that will draw your interest the most. If you have enough Security, you can lock it to reveal a file pertaining to a person called Julliette. It’s going to come into play later on so bear with me.

To get to the next part of the level, you’ll need to solve a couple of puzzles starting with a book-pulling puzzle. You can find the hint on Dr. Richard’s computer.
So, the order goes like this;
V – III – IV
Here’s the solution to the second puzzle:

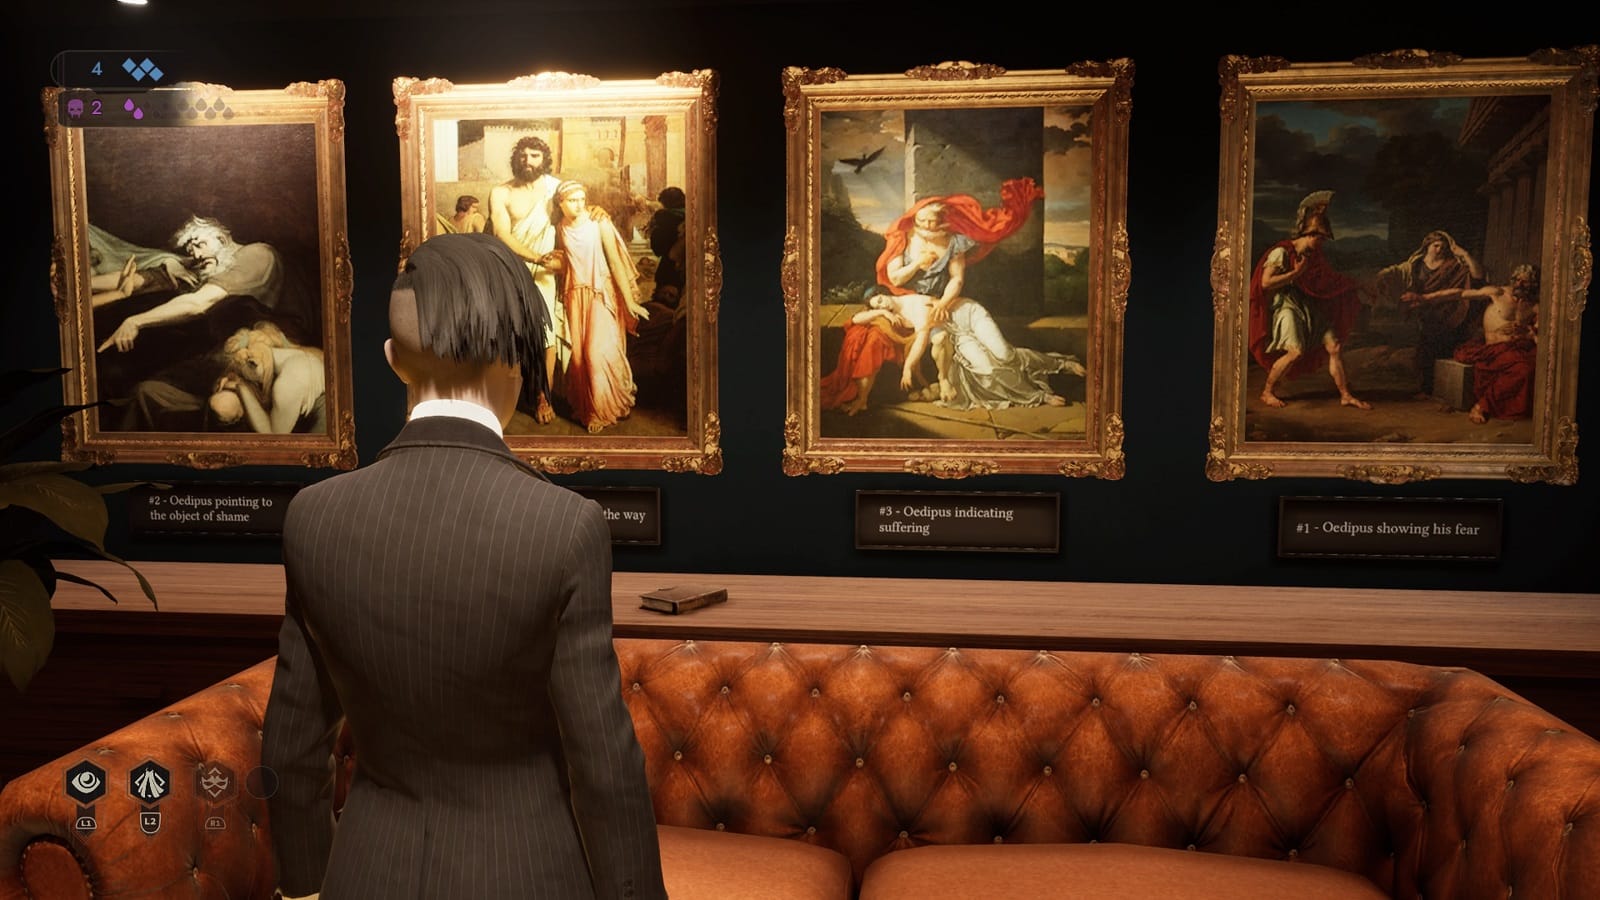
The hint for solving that one lies in the four pictures of Oedipus and the directions he is pointing in each of them.
Now, this is a point of no return. Once you’ve opened this door, there’s no going back. If you’ve been following this guide, there should be no more things to interact with.
Inside the lab, you’ll find a folder with a reference to someone named Marie. It is vaguely familiar to Leysha. After you’ve collected the folder, head down the corridor to progress to the next part of the level.
Confrontation with yourself
Leysha finds the real Halsey locked up in the secret lab. Upon seeing her though, Halsey becomes scared and runs away. That’s when the SI capture her.

Leysha doesn’t know what she’s doing anymore. This triggers another personality to come out. Through this intervention, Leysha must remember what’s truly important to her in order to find the resolve to do what needs to be done.
In the first stage, the only right answer is, ‘I don’t know’. Leysha admits she doesn’t know what she wants because she doesn’t even know who she is anymore.
If you’ve picked up the file in the laboratory, you can begin to remember that your real name is Marie. So, in the second stage, choose ‘Maybe my name is Marie?’.
For the third stage, choose ‘Halsey’s sire’. If you’ve read Juliette’s file, you’ll know that in order for the girl to survive the trip to America, she had to drink Richard’s blood. Which makes Halsey Richard’s Childe. But this came with an unfortunate side effect.

For the final stage, choose ‘Is she Juliette?’.
Leysha finally put the pieces together and remembered who she really was and all the awful stuff Richard put her through. And now that she regained what she lost, she can now focus on rescuing Halsey.
Fleeing the scene
In order to get the past without tipping them off that you are a vampire, you’ll need to go to the storeroom and change into one of the soldiers’ uniforms in order to interact with the environment. Once you’ve done that, get the valve on the shelf in the back.
Go to the freezer and move the containers until you see the pipe on the left. Interact with it to begin building up pressure.
Then you’ll want to go to Berel’s room and reattach the valve on the pipe there. If you have Auspex II, you’ll be able to discover the secret behind the value.
And finally, head back to the ritual room and start turning the wheels to build up pressure. You can use this guide within this guide in order to find out the right sequence and eliminate the guesswork.
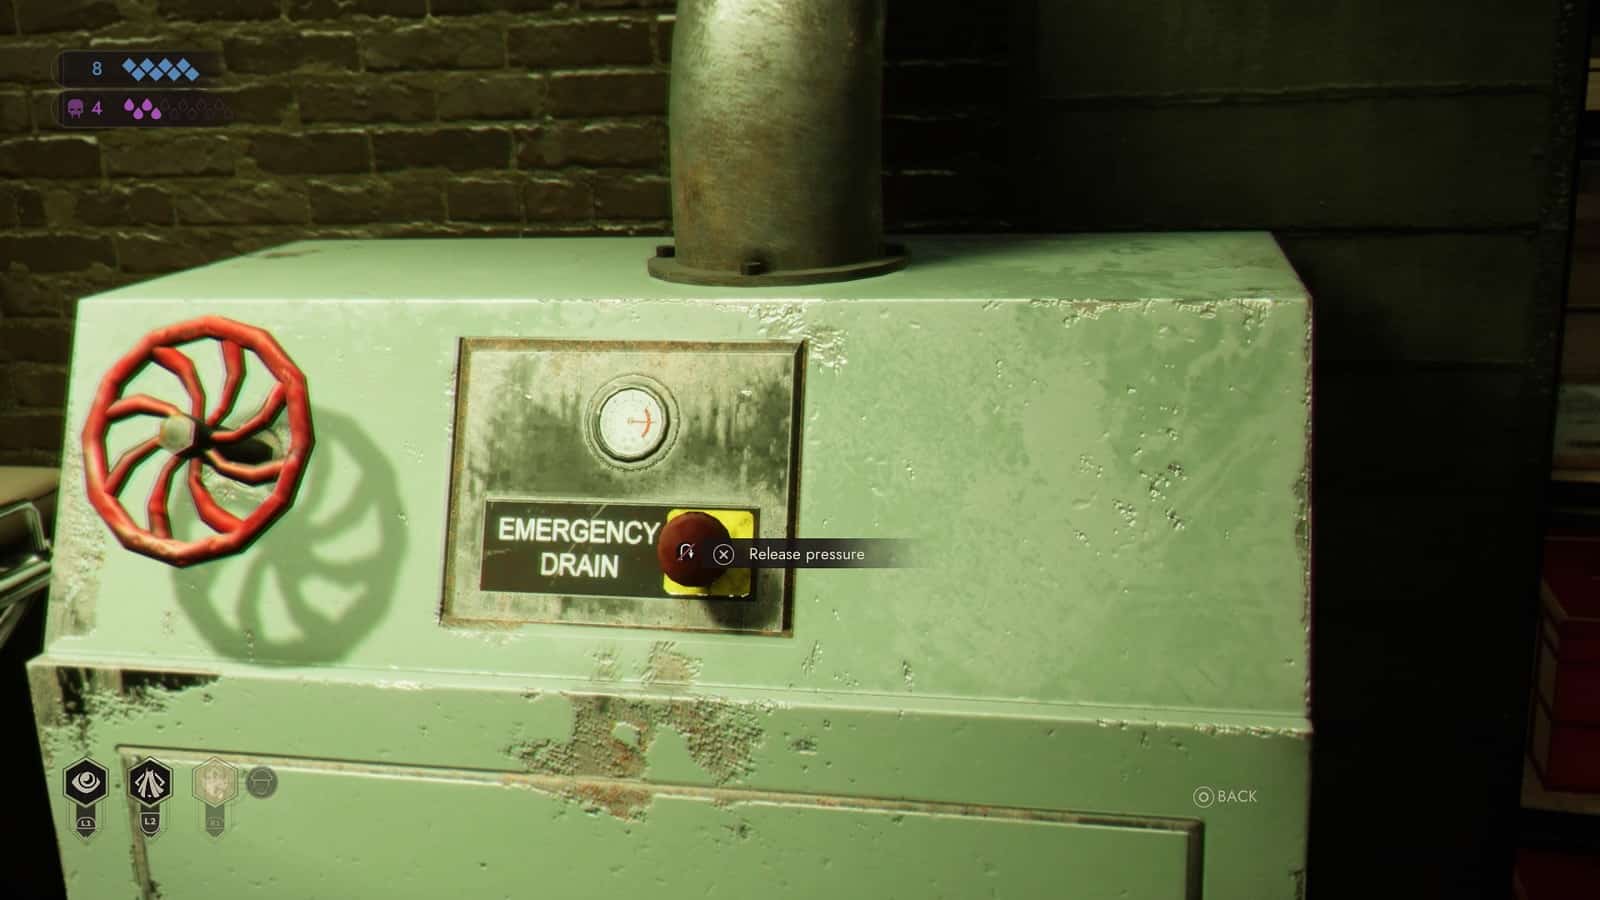
That should be enough to fully build pressure in the pipe. To finish the level, simply push the button on the console to release the pressure, giving you a window to make a run for the nearest boat.
Alternatively, if you were stumped by the pipe puzzle, you can exit the level all the same by talking to the guard manning the computer and talking your way out. Unfortunately, they immediately catch on to the fact that you are not one of their own and that choice will result in Leysha’s capture.

All Vampire the Masquerade Walkthrough guides:
- Vampire the Masquerade Swansong Walkthrough Part 1 – Prince’s Quarters
- Vampire the Masquerade Swansong Walkthrough Part 2 – Loft
- Vampire the Masquerade Swansong Walkthrough Part 3 – Moore’s Apartment
- Vampire the Masquerade Swansong Walkthrough Part 4 – Unknown
- Vampire the Masquerade Swansong Walkthrough Part 5 – Prince’s Quarters
- Vampire the Masquerade Swansong Walkthrough Part 6 – Long Island
- Vampire the Masquerade Swansong Walkthrough Part 7 – Anarch’s Domain
- Vampire the Masquerade Swansong Walkthrough Part 8 – Red Salon
- Vampire the Masquerade Swansong Walkthrough Part 9 – SAD Base (Leysha)
- Vampire the Masquerade Swansong Walkthrough Part 10 – SAD Base (Emem)
- Vampire the Masquerade Swansong Walkthrough Part 11 – SAD Base (Galeb)
- Vampire the Masquerade Swansong Walkthrough Part 12 – Intelligence Elevator
- Vampire the Masquerade Swansong Walkthrough Part 13 – Basement 3
- Vampire the Masquerade Swansong Walkthrough Part 14 – Server Room
- Vampire the Masquerade Swansong Walkthrough Part 15 – Basement 4 Labs
- Vampire the Masquerade Swansong Walkthrough Part 16 – Hospital Chapel
Check out our other Vampire the Masquerade: Swansong content:
- Vampire the Masquerade Swansong – Deeper Look into the Mechanics
- Vampire The Masquerade Swansong – Best Starting Profile For Each Character
- Vampire The Masquerade Swansong – Removing the Red Salon Guard
- Vampire The Masquerade Swansong – QR Code ARG
- Vampire The Masquerade Swansong – Which Coffin for Miley
- Vampire The Masquerade Swansong – The Right Dose of Trajax
- Vampire The Masquerade Swansong Secret Endings
- All Vampire The Masquerade Swansong Endings
Also, watch this video by 100% Guides on Vampire The Masquerade Swansong How To Discover Berel’s Secret In Red Salon:


