
Leysha walks into a bloodbath. Something caused the humans to go mad and start killing each other. We bore witness to a single soldier going on a killing spree before taking his own life. Something terribly wrong is happening.
Check the rest of this guide to know which points to invest in before starting the level. And remember, just cause there is a solution that saves you Willpower in the end, it doesn’t mean it’s the best solution. You WANT to use your Willpower to improve your mastery of talents.
And with that out of the way, let’s start the level.

We find Halsey trapped in an incineration chamber with less than 10 minutes to go before the machine activates. Leysha must find a way to deactivate the machine. Let’s start with turning off the timer.
There’s a scientist hiding in the far corner of the room. If you have Intimidation(3), you can force her to tell you how to deactivate the machine. But let’s assume you don’t have enough points in that skill.
Deactivating the Countdown

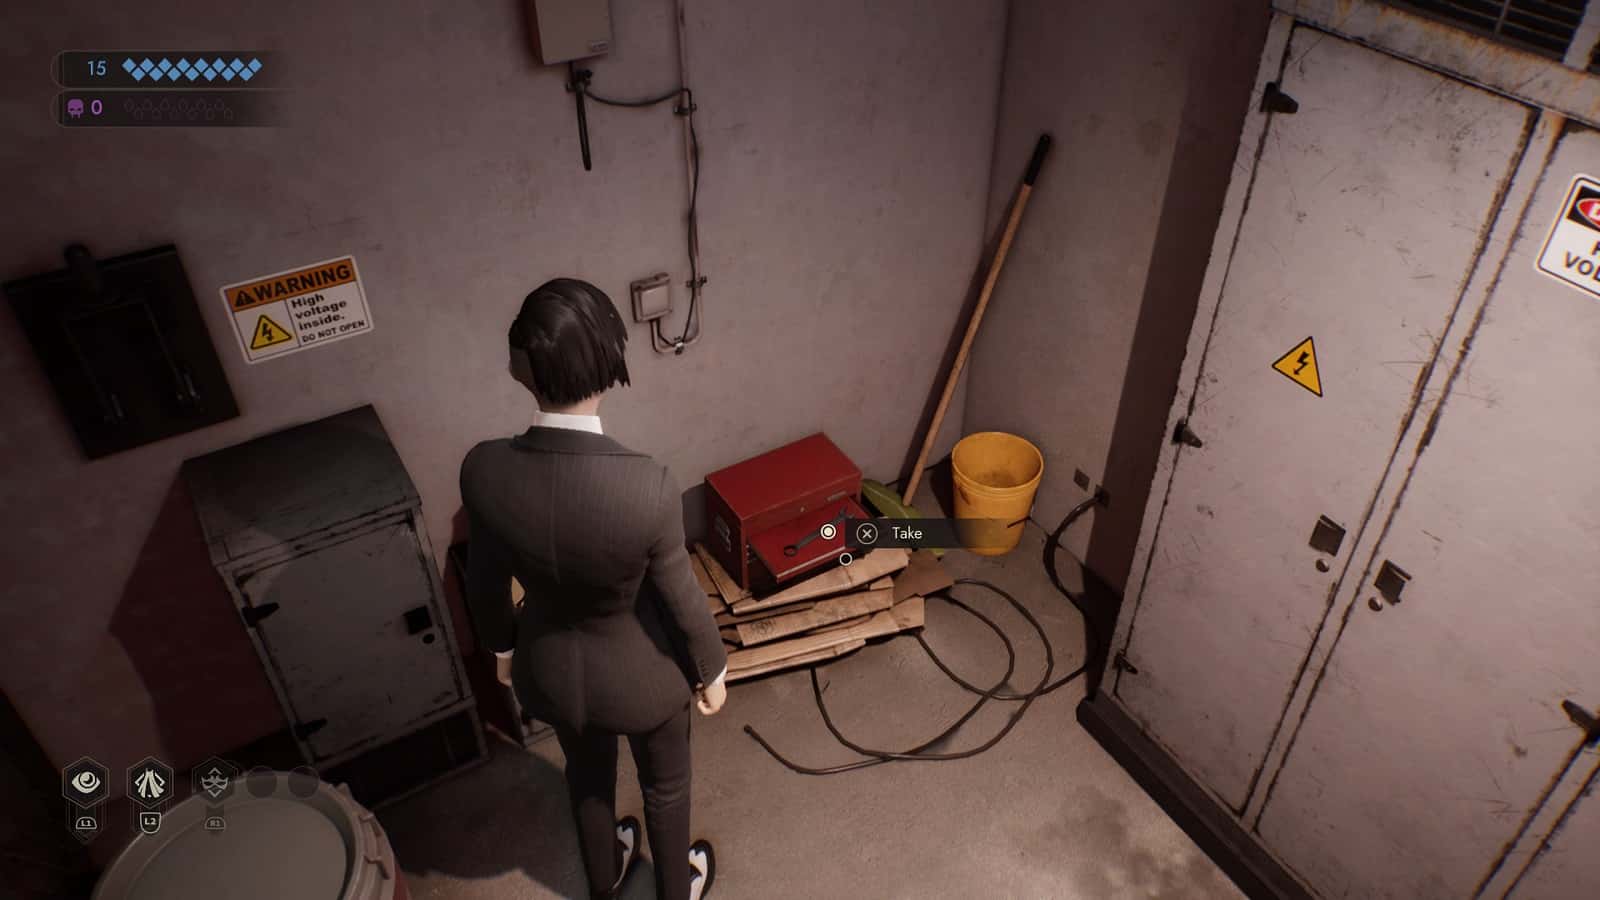
To deactivate the countdown, you need to first interact with the dual feed system to be able to pick up tools. Then you know that you have to use a monkey wrench to block the flow of gas into the chamber. You can find one on the right side of the room, in the middle section of a row of shelves. You can also find one in the open space underneath the stairs. There, you will find a toolbox that contains another monkey wrench.
The dual feed system has a left and right part to it. If you choose the left pipe, the wrench will break. Good thing there are two wrenches in the room. You will want to interact with the pipe on the right side. Turning that will turn off the system, giving you some breathing room. For a couple of minutes before the system resets.
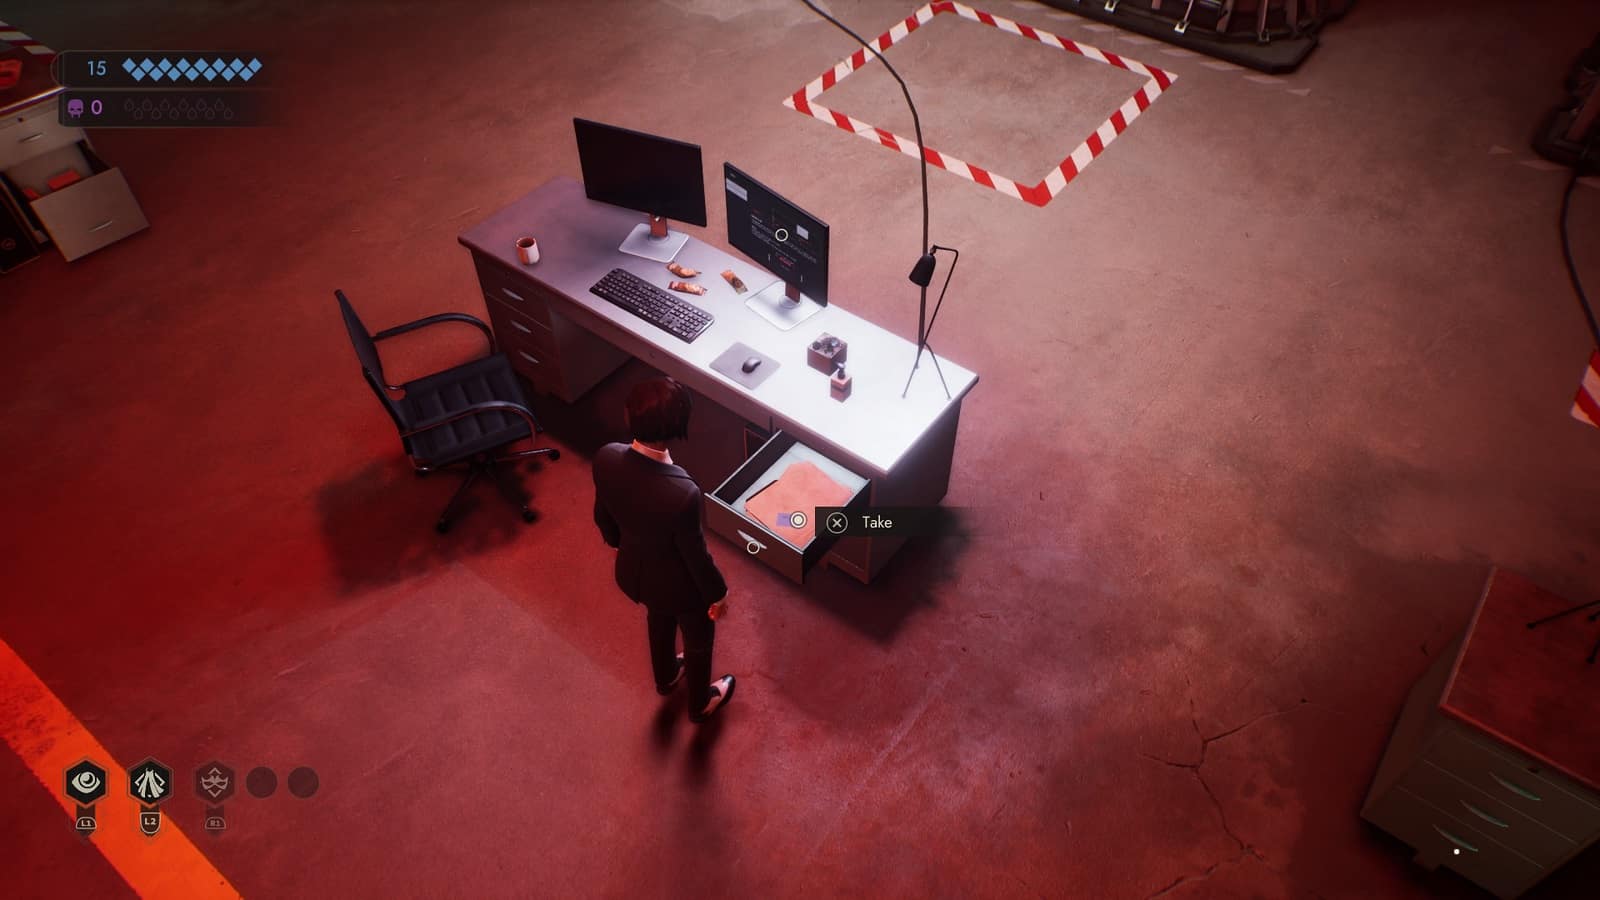
Next, you’ll need to pick up the blue security card. You can find it inside the desk facing Halsey’s chamber. You’ll need that to open the chamber.
Use the security card to open the security panel. The moment you do, an illusion of Halsey will appear before you.
In this short Confrontation, you’ll need to convince this Halsey that you are real despite what Richard told her about her mother. If you have Persuasion(4), you can use that on the illusion. Otherwise, choose ‘Richard lied to us’.
After the confrontation, you’ll need to the back to the stairs and in a hidden corner behind a few barricades, you’ll find a dead body with a key on them. Pick up the key and head to the desk on the opposite side of the room. Open the right side of the drawer to find a manual with a list of models for override codes.

- What you know so far, from precious interactions is that the container is a T6 Model. That helps narrow down the list.
- You can check the back of Halsey’s chamber to see ‘CLA 90’ across the back. Of course, you should have seen the rest of the code but there’s blood all over, hiding the exact model.
- This narrows the list to 5 models – T6 CLA 9000 to T6 CLA 9000S.

You can go through the list one by one… or enter the code below.
260296
After you’ve entered the code, another Confrontation with Halsey’s illusion with happen.
For this one, you can choose the option that has Rhetoric(3). Or, if you have it, ‘You’ve got to trust Mommy, Juliette…’.
Go back to the computer and initiate the final release sequence.
But before you had to press the button, Halsey’s illusion returns for one final Confrontation.
This Confrontation has 2 stages with 2 allowed mistakes.
If you have at least Psychology(6), you can tell her why you came back. But it’s a good thing we picked up the teddy bear earlier during the Red Salon level. If you do have the option, choose ‘To bring you Mr. Teddy’. Those are your options for the first stage.
The second stage runs on a timer. Quickly choose ‘They made me believe you’d been destroyed’. Otherwise, go for the option that has Persuasion(4).

If you follow all the steps, Leysha and Halsey escape the facility and run away together. Far away from the intrigues and the lies of the Court. Maybe we’ll see them again. That’s another story, for another time.
All Vampire the Masquerade Walkthrough guides:
- Vampire the Masquerade Swansong Walkthrough Part 1 – Prince’s Quarters
- Vampire the Masquerade Swansong Walkthrough Part 2 – Loft
- Vampire the Masquerade Swansong Walkthrough Part 3 – Moore’s Apartment
- Vampire the Masquerade Swansong Walkthrough Part 4 – Unknown
- Vampire the Masquerade Swansong Walkthrough Part 5 – Prince’s Quarters
- Vampire the Masquerade Swansong Walkthrough Part 6 – Long Island
- Vampire the Masquerade Swansong Walkthrough Part 7 – Anarch’s Domain
- Vampire the Masquerade Swansong Walkthrough Part 8 – Red Salon
- Vampire the Masquerade Swansong Walkthrough Part 9 – SAD Base (Leysha)
- Vampire the Masquerade Swansong Walkthrough Part 10 – SAD Base (Emem)
- Vampire the Masquerade Swansong Walkthrough Part 11 – SAD Base (Galeb)
- Vampire the Masquerade Swansong Walkthrough Part 12 – Intelligence Elevator
- Vampire the Masquerade Swansong Walkthrough Part 13 – Basement 3
- Vampire the Masquerade Swansong Walkthrough Part 14 – Server Room
- Vampire the Masquerade Swansong Walkthrough Part 15 – Basement 4 Labs
- Vampire the Masquerade Swansong Walkthrough Part 16 – Hospital Chapel
Check out our other Vampire the Masquerade: Swansong content:
- Vampire the Masquerade Swansong – Deeper Look into the Mechanics
- Vampire The Masquerade Swansong – Best Starting Profile For Each Character
- Vampire The Masquerade Swansong – Removing the Red Salon Guard
- Vampire The Masquerade Swansong – QR Code ARG
- Vampire The Masquerade Swansong – Which Coffin for Miley
- Vampire The Masquerade Swansong – The Right Dose of Trajax
- Vampire The Masquerade Swansong Secret Endings
- All Vampire The Masquerade Swansong Endings
Also, watch this video by VGS – Video Game Sophistry on Vampire The Masquerade Swansong All Endings + All Choices (Good, Bad + SECRET Ending):


