
Sails of the Shipstealer in Destiny 2 is a season long story quests in which players have to tackle a variety of objectives each week to see it through. You’ll have to complete a series of objectives which recycle every week to be able to complete this quest. If you’re confused on where to begin, this guide will teach you how to complete Sails of the Shipstealer in Destiny 2.
How to Complete Sails of the Shipstealer in Destiny 2?
To complete Sails of the Shipstealer you have to come back every weekly reset when you can take on its next task for you in Destiny 2. Due to its strong time gate, you cannot just rush through all 62 steps of this quest. Once you complete a single task, you’ll have to wait until the next weekly reset arrives to take on another one.
Go to your Star Chart at the H.E.L.M. to start Sails of the Shipstealer in Destiny 2. The vender in Season of Plunder will give you the Captain’s Atlas and some of the items needed to progress this quest. From there on, you’ll have to do a few things to proceed with Sails of the Shipstealer quest:
- How to Restore a Treasure Map in the Captain’s Atlas
- Expeditions: Loot Buried Treasure
- Upgrade Star Chart
- Pirate Hideout: Val’Aug the Brute
- Go to the Eliksni Quarter
- Wait for Mithrax and Eido to Finish Studying the Relic
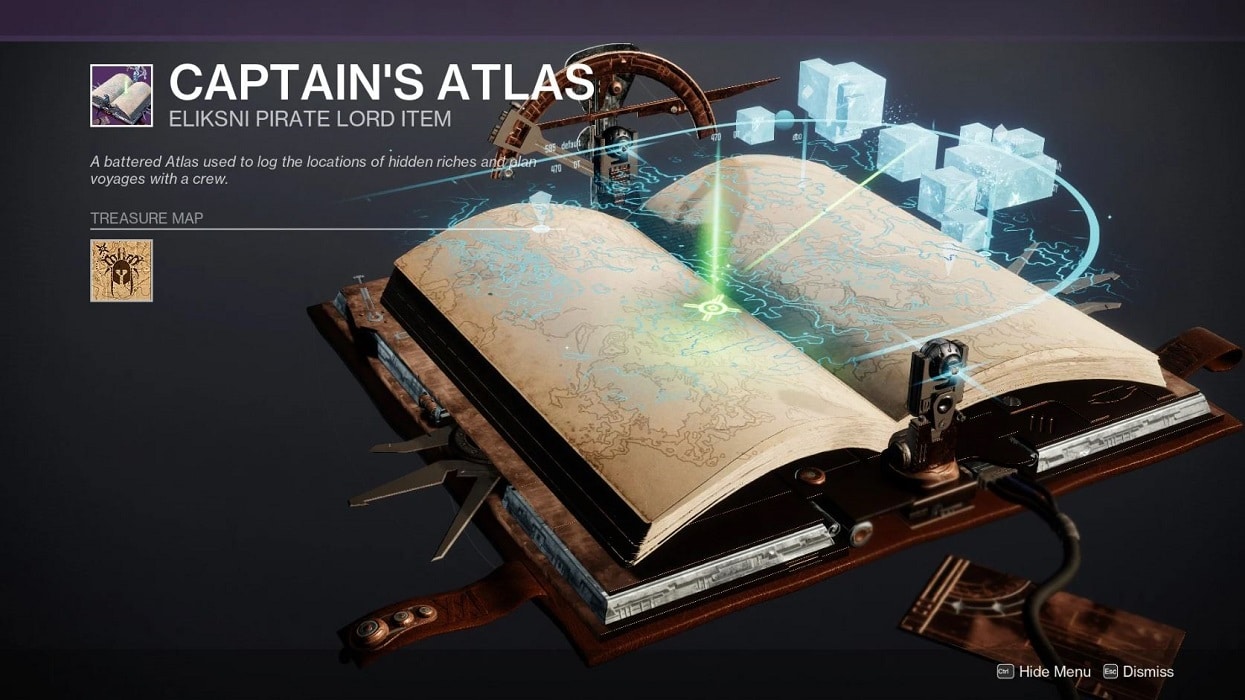
How to Restore a Treasure Map in the Captain’s Atlas
To restore a treasure map you first need to collect the materials needed before you can craft it in the Captain’s Atlas. You’ll need to acquire 50 Treasure Coordinates from any activity and at at least 5 Map Fragments which exclusively drop from Ketchcrash.
Once you’ve collected the materials above, you can head into the Captain’s Atlas to craft yourself a Basic Treasure Map. You can then use this map to loot buried treasures in Expedition activities.
Expeditions: Loot Buried Treasure
Thanks to the Treasure Map, you’ll know where to find some loot. Take on Expedition activities and progress until you reach near their ending. There should be green Eliksni symbols on the ground which indicate the location of buried treasure. There are three buried treasure that can be split for each player in your Fireteam.
Upgrade Star Chart
After looting treasure from Expeditions, you’ll get Repute which you can use to upgrade the Star Chart in your H.E.L.M. You can receive Repute after completing the Expedition seasonal challenge which was looting the buried treasure.
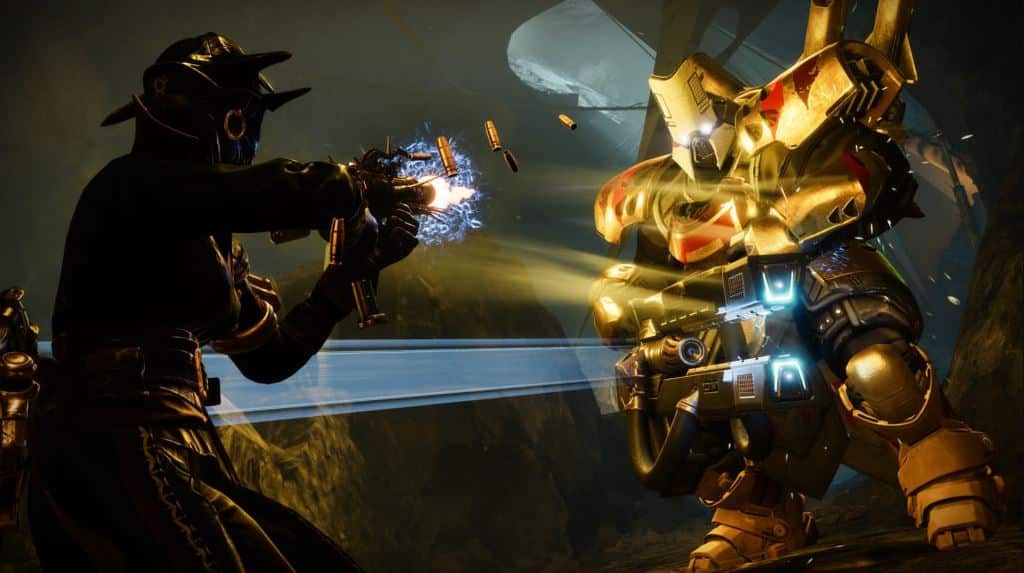
Pirate Hideout: Val’Aug the Brute
Once you’ve upgraded the Star Chart, the next step in Sails of the Shipstealer is to fight the weekly boss in Pirate Hideouts which are similar to Lost Sectors. You’ll be pitted off against a boss in a small area. After defeating these bosses, you’ll get a relic at the end of each hideout.
While the Val’Aug aren’t particularly difficult to beat, she does have immunity phases which can require that you put in more work to damage her. Thankfully there are plenty of ammo boxes surrounding the area which let you go on the offensive nonstop against Val’Aug and her crew.
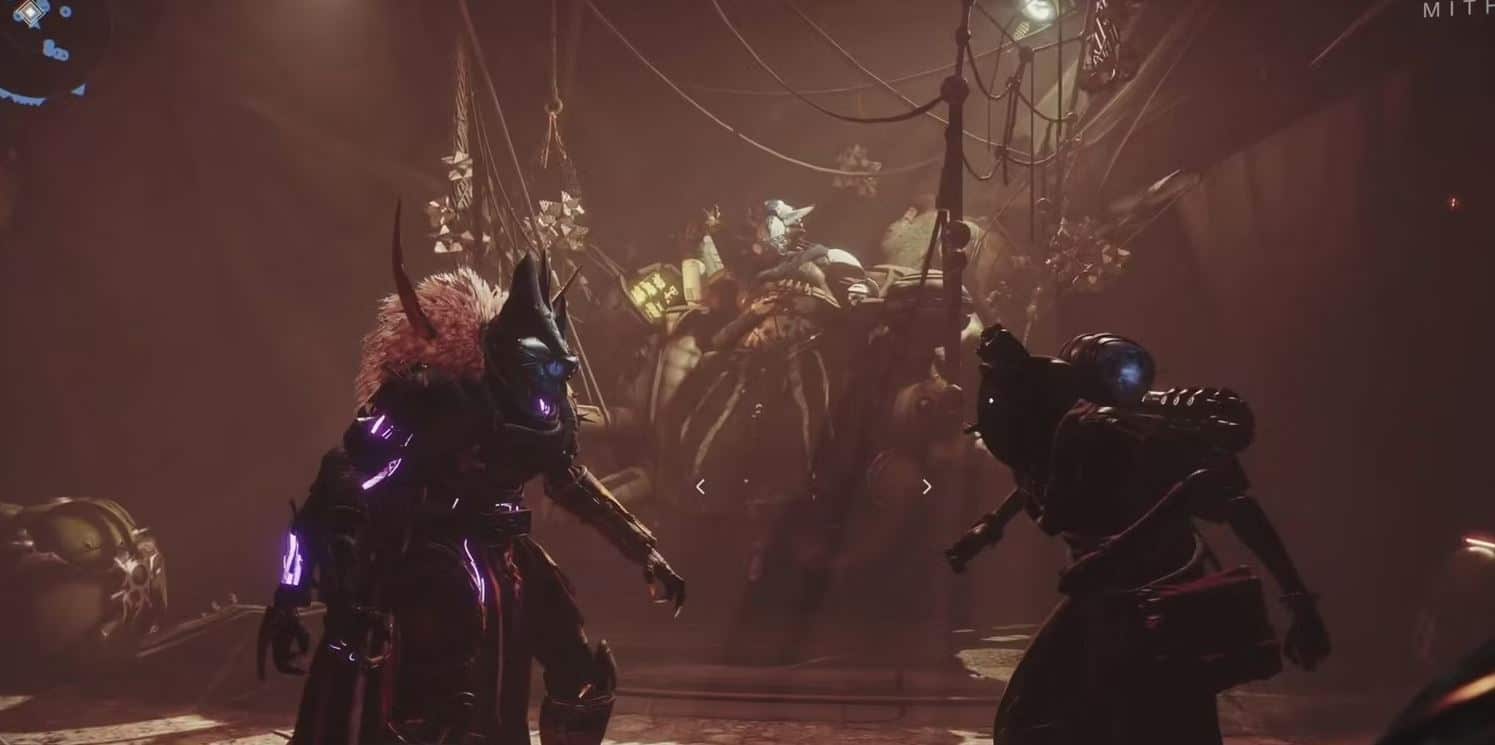
Go to the Eliksni Quarter
Once you received the relic from Val’Aug, you have to go to the Eliksni Quarter. You can access this location from your H.E.L.M.
You may remember the Eliksni from Season of the Splicer. They play a big role in the Sails of the Shipstealer quest. Right after you land, you’ll find a Holoprojector in front of you which leaves you with a message from Eido. You’ll then be given the task to speak to the Spider in the Ether Tank not too far from where you are. After speaking with the Spider, head back to the H.E.L.M. and deposit the relic on the table right across the Star Chart.
Wait for Mithrax and Eido to Finish Studying the Relic
You’ll have to wait for the next weekly reset before you can further progress the Sails of the Shipstealer quest. Once that reset arrives, you’ll have to follow some the steps again above to continue progressing the quest. This is standard in season long quests and Season of Plunder doesn’t seem to make it different for Sails of the Shipstealer.
That’s how to complete the Sails of the Shipstealer in Destiny 2. For a detailed step by step guide on this quest, check our our complete Destiny 2 Sails of the Shipstealer Complete Walkthrough. We hope you found this article to be informative. Also check out our other Destiny 2 content:
- Best Destiny 2 Arc 3.0 Warlock Build
- Best Destiny 2 Arc 3.0 Hunter Build
- Best Destiny 2 Arc 3.0 Titan Build
- Destiny 2 Incandescent Hunter Build Makes Everything Go Boom! Season 18 Onwards
- Top 20 Best PVE Weapons in Destiny 2 Season Of Plunder
Check out this Youtube video from Karpo Gaming showing a step-by-step guide for how to complete Sails of the Shipstealer in Destiny 2.


