
Gaismagorm is one of the new monsters introduced in Monster Hunter Rise: Sunbreak and is the game’s final boss monster. As the hunter and the team stationed in Elgado go through their investigation, they find out that the main source of it all is Gaismagorm’s awakening which has been told in ancient myths and texts.
In this guide, we will talk about Gaismagorm, how its hunt works, and how to survive the encounter.
Gaismagorm Characteristics
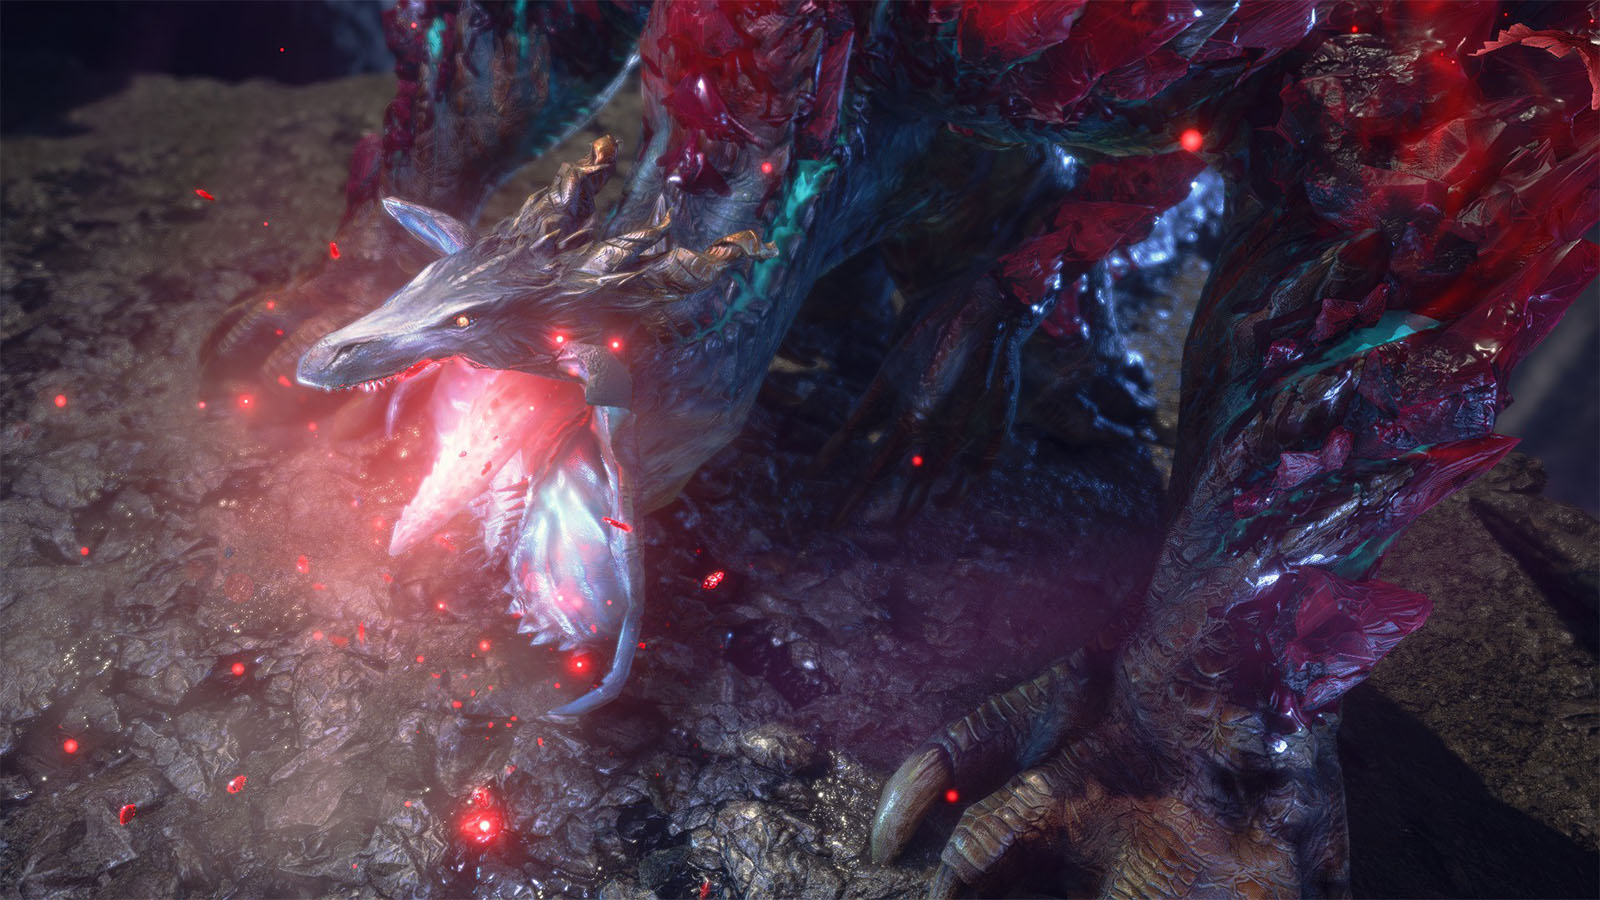
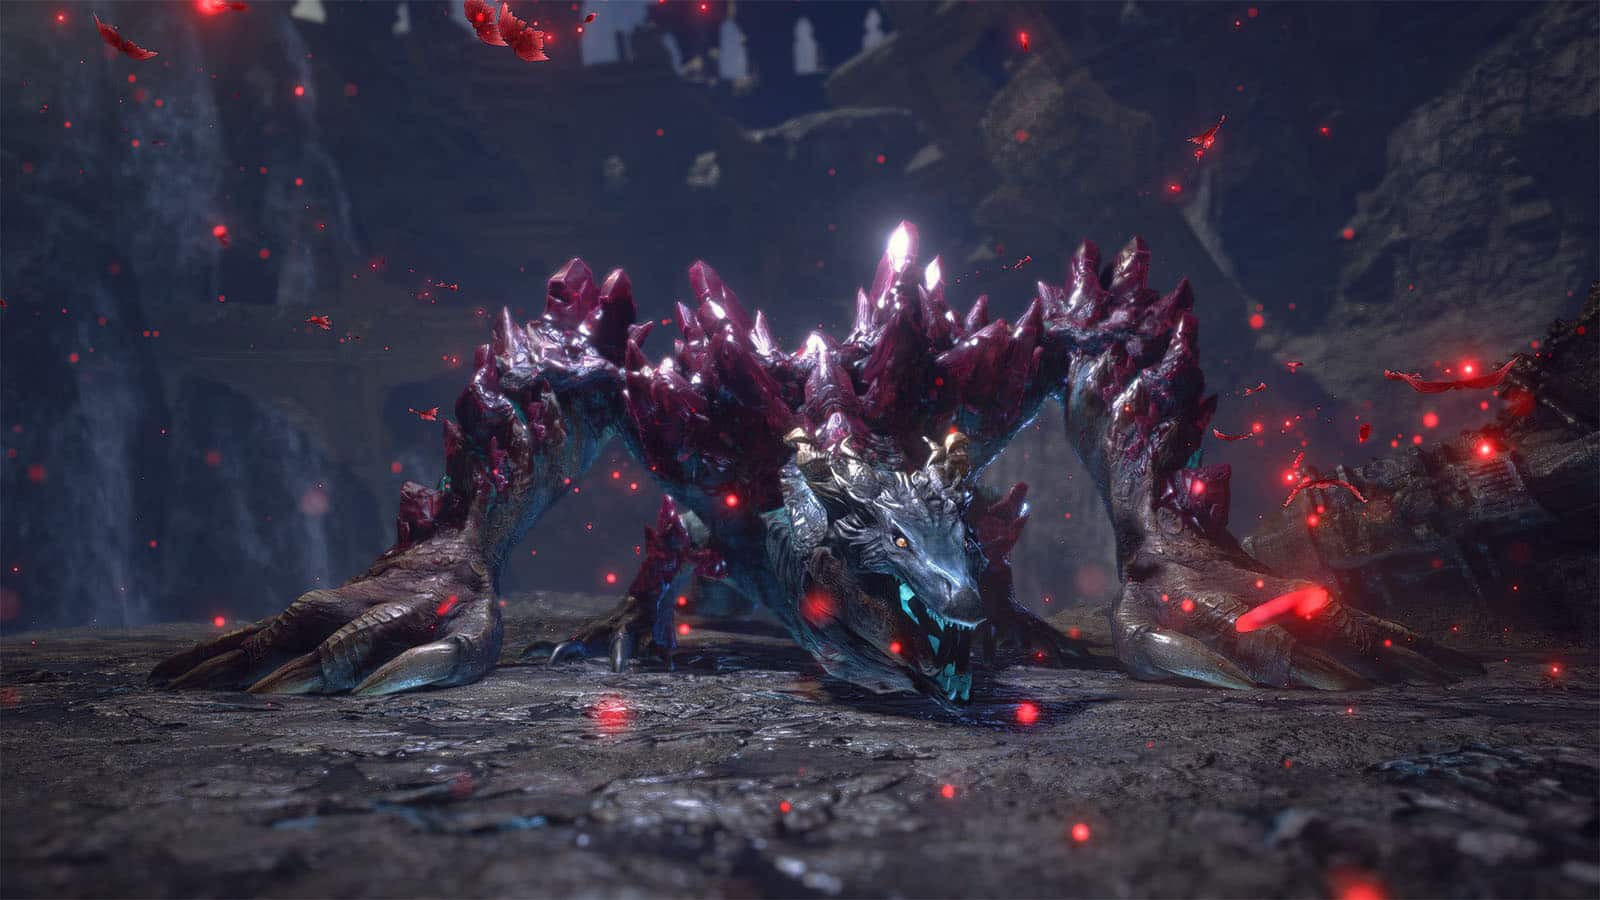
Gaismagorm is an Elder Dragon from old legends who has been living underneath the Elgado crater for hundreds of years. Its head and body structure is somewhat similar to Narwa and Ibushi, having six limbs and a double jaw although it is not capable of flight and is almost twice the size. Due to its living environment, it takes on a sickly and dull skin with crystal like scales on parts of its body that are actually made of crystallized Qurio.
The Qurio are the winged slug creatures that have a symbiotic relationship to both Malzeno and Gaismagorm. They suck the blood or the life of their victims and then brings it back to its host for their nourishment in exchange for their protection. With Malzeno, they share a somewhat symbiotic relationship. But with Gaismagorm, their relationship is also tagged as symbiotic even though Gaismagorm feeds on the Qurio’s lifeforce, but it is unclear what benefit the Qurio get from this host.
Because of Gaismagorm’s re-awakening, this made the Qurio active again in searching for nutrition to bring back to their host. Strong monsters like Malzeno can withstand the consequences of becoming a host to the Qurio, however weaker monsters succumb to its effects and become what is known as the afflicted monsters.
Gaismagorm Weaknesses
- Weak Points – Head, Wingarm
- Elemental/Ailment Weakness – Dragon, Thunder, Blast
- Elemental/Ailment Resistance – Water, Ice, Poison, Stun, Paralysis, Sleep, Exhaust
- Resistant Points – Back, Hindleg
- Tail severable?: Yes
Gaismagorm’s head and wingarms (biggest limbs) are its weak points, however they are also the most dangerous parts to target because of its attacks. Its head is also almost at a high level that most melee weapons cannot reach. Since it relies on its wingarms to stand more than its other limbs, doing enough damage to them will cause Gaismagorm to fall over, creating an opening to hit its head.
Gaismagorm is extremely weak against the dragon element, followed by thunder. There will also be parts in the hunt where hunters will be able to use a dragonator and the barrage ballistae to deal damage to Gaismagorm.
Gaismagorm Moves
Gaismagorm leverages the power of the Qurio plus its sheer body size to inflict damage to hunters. Listed below are the most notable moves in its move set.
- Stomp: Gaismagorm uses its wingarm to stomp on its target, causing an explosion upon impact to the ground.
- Blast: It shoots out an explosive energy ball from its mouth towards the ground.
- Charge: It digs its head towards the ground and charges forward in a straight line.
- 360 Sweep: It turns its body around in a full circle while dragging its tail and moving its arms. Under its belly or away from its body are the safe spots to not get hit by this attack.
- Energy Balls: It shoots out multiple balls of energy from side to side which explode after a split second.
- Energy Ball Smash: It shoots out an energy ball and smashes it with both its arms to cause an explosion.
- 180 Jump: It lowers its body and jumps while turning in the air, crashing down to create a huge shockwave. This attack spawns huge boulders that hunters should hide behind to prepare for the next attack.
- Inhale: Gaismagorm inhales deeply as it tries to ingest all the Qurio crystals on the ground. This pulls hunters who are not standing behind a boulder into its mouth, along with some debris that deal damage to Gaismagorm. It is possible for these debris to stagger Gaismagorm mid inhalation if a damage threshold is reached. Otherwise, it will conjure an energy ball which it then smashes with its arms, causing a huge explosion that destroys the boulders and deals massive damage to exposed hunters.
- Blood Shower: Gaismagorm shoots out a beam of blood energy on the ground and moves the beam around. Hit spots remain glowing red which will then explode after a few seconds.
- Multi Stomp: It uses its wingarms and forearms to stomp its target several times.
- Inhale and Swing: It faces its head to one side and inhales deeply. It will then swing its entire body towards that side to deal damage.
- Crystal Rain: It shoots out blood energy up to the sky which then rains down as blood crystals, causing explosions upon impact. Spots where the crystals will land glow bright.
- Charged Blood Shower: If Gaismagorm manages to scale the wall and eat all the Qurio on it, it will shoot out a massive blood shower down which charges the ground, ending with a huge explosion. The explosion radius is up until where the ground glows. This attack is an insta-kill attack.
- Rocket Arms: It stomps one of its wingarms to the ground and uses the Qurio’s energy to propel itself while sliding across the arena.
- Stomp Blast: It uses both of its wingarms to stomp the ground which causes it to glow red and explode.
- Energy Ball Rampage: It runs around the arena, leaving energy balls in its path which explode simultaneously at the end of its rampage.
How to Beat Gaismagorm in Monster Hunter Rise Sunbreak
- It’s recommended to have a high defense set when challenging Gaismagorm as its hits in the latter phases can cart a hunter within 1 to 2 hits.
- Concentrate your attacks on its wingarm or its tail. Once it topples down, you can head over to the head to land some hits.
- Try to pick up the beetles in the area which can cause blights on Gaismagorm when thrown.
- Once the Dragonator Signal is ready, use it right away.
- In the first phase of the fight, look out for the 180 Jump. As soon as you see this attack, stop attacking and head behind the nearest boulder to hide.
- During the ballista shootdown phase, try to aim at one blood orb first, especially when working with a party. Shooting down the other falling blood orbs should not be prioritized as they usually fall down within your line of sight and can easily be blown up.
- During the Energy Ball Rampage, try to stay out of the center of the arena and get on top of the wall to keep safe from explosions.
Gaismagorm has three phases: pale, energized, and bloodied.
Gaismagorm Pale First Phase
During the first phase of the fight, Gaismagorm will do its body attacks and shoot out some energy balls. The attack to look out for is the 180 Jump which will always precede the Inhale and Energy Ball Smash. The suction is way too strong to counter even when using wirebugs that it is important to stop attacking and prioritize hiding behind a boulder. The suction will not do damage, but the Energy Ball Smash will.
Look out for the Dragonator Signal and once it becomes available, use it right away. Once enough damage has been dealt to Gaismagorm, a dragonator cutscene will initiate (skippable) which will do massive damage to it and send it to the lower level for the next phase.
Gaismagorm Energized Second Phase
In this second phase, Gaismagorm will do more attacks. You need to look out for the Blood Showers and the Swings as these do significant damage.
Gaismagorm will do several attempts to scale a high wall to eat the Qurio that are on the wall’s side. During this time, look out for the circle shadows on the ground where the barrage ballistae will drop. Use the ballista to shoot down the blood orbs that appear on Gaismagorm’s back to dispel them. Dispelling all three blood orbs before Gaismagorm reaches the top will cause it to drop on the ground and become open for hits.
If Gaismagorm manages to eat all Qurio on the wall, it will blast a beam of blood energy on the ground. Immediately leave the ballista and get to a safe area where the ground does not glow red. After the beam ends, a huge explosion will happen which will destroy the ballistae and any hunter that gets caught in the blast.
This ballista shootdown will happen twice in the second phase. If Gaismagorm is successful at the second attempt, it will enter the final phase of the fight.
Gaismagorm Bloodied Third Phase
In the final phase, Gaismagorm will shoot out blood energy from its back which will resemble wings. The sky will also turn red because of it. It will then start doing the Rocket Arms and Energy Ball Rampage attacks.
This is the most dangerous phase of the hunt as the attacks will hit so hard and they happen almost immediately after each other. Gaismagorm will still try to make an attempt to scale the wall and get more Qurio, but the ballistae will not be ready on time. This will initiate another cutscene where Fiorayne will throw herself at Gaismagorm’s back to land a massive blow, which will cause it to fall down.
If this blow manages to slay Gaismagorm, then it will complete the fight. Otherwise, the fight continues until it is slain.
Gaismagorm Drops
Gaismagorm drops these items:
- Abyssal Dragonscale
- Archdemon Backshell
- Archdemon Piercetalon
- Archdemon Wingtalon
- Consumption Parasite
- Archdemon Tailhook
- Abyssal Dragonsphire
- Archdemon Doomhorn
- Old Dragon Treasure
Gaismagorm Armor Set
The Monster Hunter Rise Sunbreak Archfiend Armor Set is a Rarity Level 10 Master Rank Armor Set.
The Archfiend Armor Set can be crafted with the following:
- 120,000 zenny
- Abyssal Dragonscale x13
- Archdemon Piercetalon x5
- Archdemon Wingtalon x4
- Archdemon Tailhook x1
- Archdemon Backshell x11
- Archdemon Doomhorn x3
- Abyssal Dragonsphire x1
- Consumption Parasite x3
- Malzeno Fellwing x2
- Garangolm Fist x2
- Lunagaron Bluecore x2
Archfiend Armor Set Skills
- Archfiend Armor Cerato
- Weakness Exploit Lv1
- Resentment Lv2
- Archfiend Armor Baulo
- Weakness Exploit Lv1
- Resentment Lv1
- Chain Crit Lv1
- Archfiend Armor Epine
- Dereliction Lv2
- Resentment Lv1
- Archfiend Armor Ura
- Weakness Exploit Lv1
- Chain Crit Lv2
- Archfiend Armor Sceros
- Dereliction Lv1
- Resentment Lv1
Gaismagorm Layered Armor
The Gaismagorm Layered Armor Set can be crafted with the following:
- 24,000 zenny
- Outfix Voucher+ x15
- Abyssal Dragonscale x2
- Archdemon Backshell x2
- Archdemon Doomhorn x1
- Magma Almudron Points 25 pts
If you like this Guide, be sure to check out our other Monster Hunter Rise: Sunbreak articles:
- Monster Hunter Rise Sunbreak Follower AI Built from Scratch
- Monster Hunter Rise Sunbreak Follower Quests Introduced
- Monster Hunter Rise Sunbreak Introduces Three New Subspecies of Monsters
- Monster Hunter Rise Final Event Before Sunbreak Release to Add Blossom Armor
- Monster Hunter Rise Sunbreak Amiibo (New)
- Monster Hunter Rise Sunbreak editions and pre-order bonuses
- Monster Hunter Rise: Sunbreak New Silkbind Attacks and Switch Skill Swap
- Monster Hunter Rise Sunbreak Follower Collab Quests
- Monster Hunter Rise Sunbreak Latest Trailers Features More Returning Monsters
- Monster Hunter Rise Sunbreak Local Co-Op Guide
- Garangolm Guide – Monster Hunter Rise Sunbreak
- Astalos Guide – Monster Hunter Rise Sunbreak
- Seregios Guide – Monster Hunter Rise Sunbreak
- Lunagaron Guide – Monster Hunter Rise Sunbreak
- Daimyo Hermitaur Guide – Monster Hunter Rise Sunbreak
- Shogun Ceanataur Guide – Monster Hunter Rise Sunbreak
Check out this video by Boss Fight Database showing a hunt against a Gaismagorm:

